So we had a mold problem in our house and enlisted the help of my father-in-law who came and helped us out in replacing the moldy wall. We used this as an opportunity to build a beautiful hearth for our stove, too.
I thought I'd share what I learned because it actually wasn't as intimidating to tear apart and replace wall as I thought it would be and hopefully I'll provide some information from the perspective of a beginner that some of the experts may not explain because they think it's obvious. If you are an expert, please let me know if any of my information is incorrect or incomplete! There were probably also more components to this project that I am forgetting, it was a lot of work for five days.
So I was rearranging furniture in the living room and found this mold on the wall.

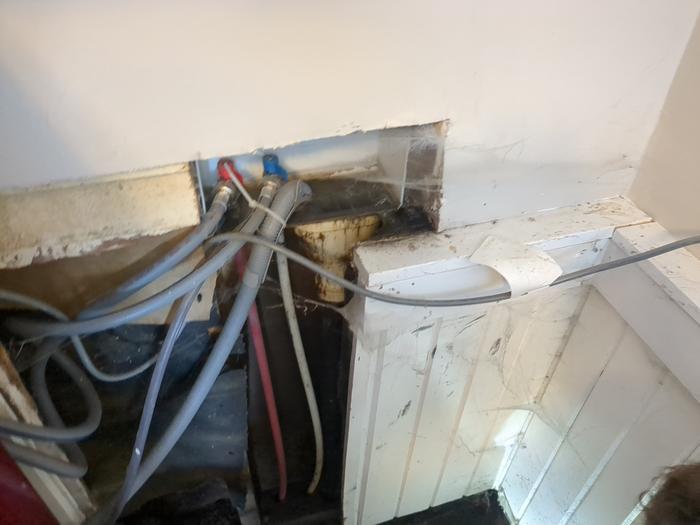
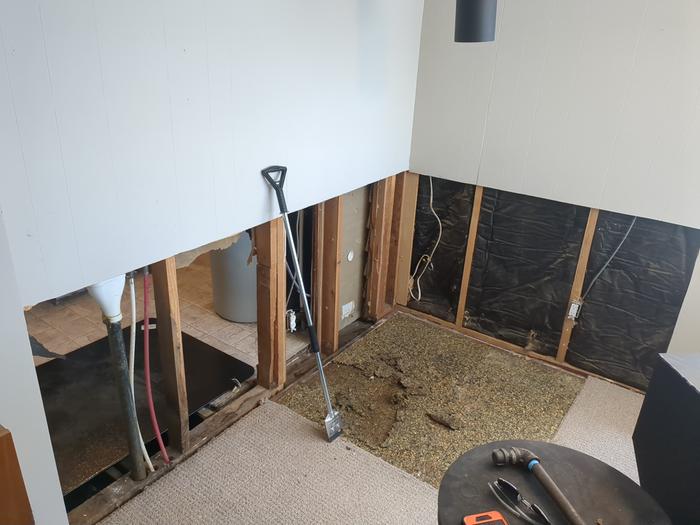
The other side of the wall was behind the washer and dryer and the washing machine hose and the water softener hose both went into this tiny basin that was clogged and backing up. We called the plumber and they had three sets of plumbers come out to try and unclog it with their special unclogging tools and they finally ended up replacing the clogged line. But we still wanted to replace the gross wall.
Pulling the dryer out was a bit tough because the hose was too short and it just ripped off but we eventually got another hose and it clamps on to the dryer and the outlet in the wall with these clamps called a "hose clamp" that you just need a screwdriver to install. Sorry I don't have a picture of this.
My father-in-law cut off the chunk of wall as best he could with a saw. He made it the same size as a piece of sheetrock. Sheetrock apparently comes in sheets. And sheetrock is apparently a brand of drywall, so they're pretty much the same thing. When you're cutting out the wall, it's okay if it's not absolutely perfect because you're going to cover over the gap later. Just get it as close as you can, it's not as scary as it seems.
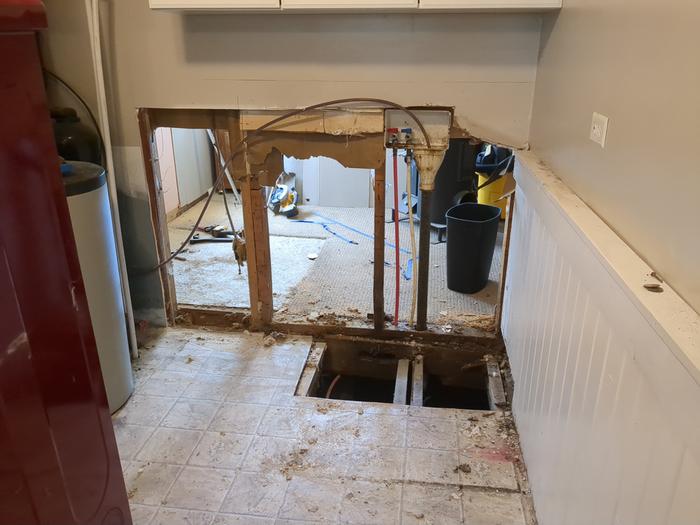
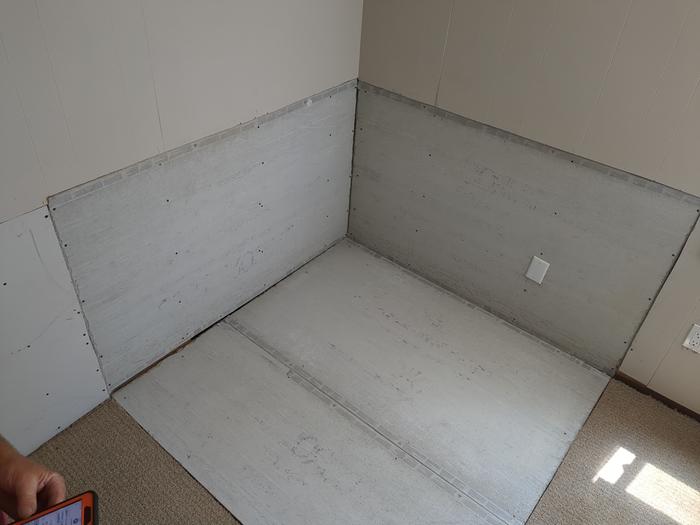
Here's the other side of the wall. We decided to use this as an opportunity to put in a nice hearth for the rocket heater so in order to give us extra protection against the heat we put rock board in, which is like sheetrock but more rocky, I guess. It also comes in sheets. This picture also shows the gross padding that was under the old hearth. This stuff is under the carpet and this little section was a different color than the rest of it, possibly due to the weight and heat from the old propane stove we took out. I'll show another picture of this stuff later. We used a tile scraper to get it off because it was stuck to the old hardwood floor (that is actually beautiful I don't know why they would cover over it).
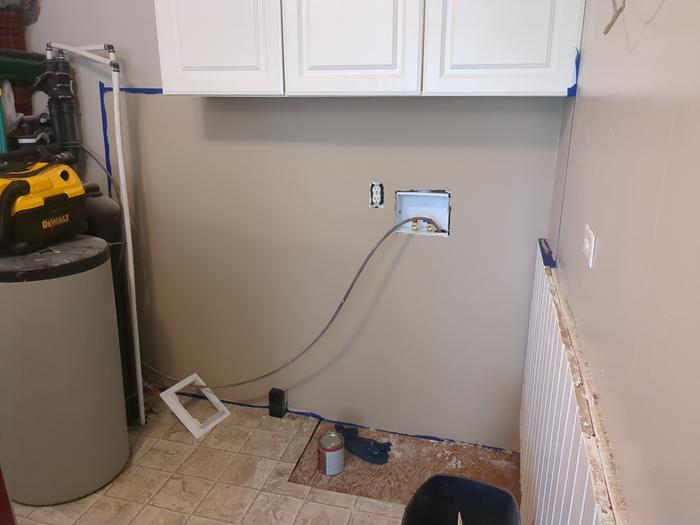
So the sheets of sheetrock and rockboard we just fit into the gaps and screwed to the studs. Some of the rockboard had to be cut, so it's good to have something like a table saw for this. The gaps between the sheetrock and the existing wall get covered up by this special kind of tape and then smoothed over with spackle, which is just spread on with a plastic spreader. After the spackle dried there's a special kind of sponge that you rub over it to smooth it out even more so once you paint it it's almost invisible. I think the hardest part for a beginner is just knowing what tools and supplies you need for this but it was mostly helpful to see that when you cut into the wall, it's okay if it's not perfect because this is where you cover it up.
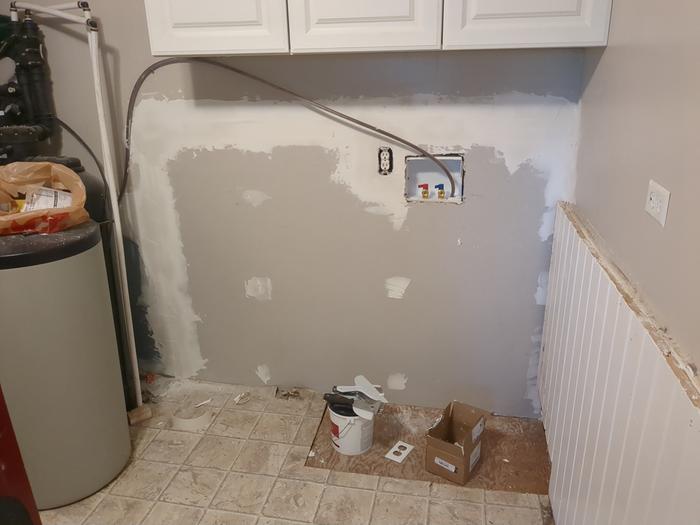
After installing this and letting everything dry and then smoothing out the spackle, I painted the wall. If you take a paint sample to the hardware store they can match the color. I took the wrong sample and ended up with a color that was slightly off, but it's barely noticeable.
Here's the rockboard in the living room, we ended up cutting back the carpet further to make a bigger hearth space. You can just cut carpet with a utility knife and if you use a utility knife, you can replace the blade. You can buy a large container of a hundred replacement blades and if it gets dull (which it will), you can replace the blade so it's sharp again.
The next step for the hearth was to lay down tile. All the tiles come in the same shape and size and you will need a tile saw for this. You can get nice tile saws or cheap ones for your single project. You will need some kind of water source to use this.

When you lay down the tile, there are these little spacers you can buy that are shaped like an 'x' and you put them between the tiles to space them out eavenly.
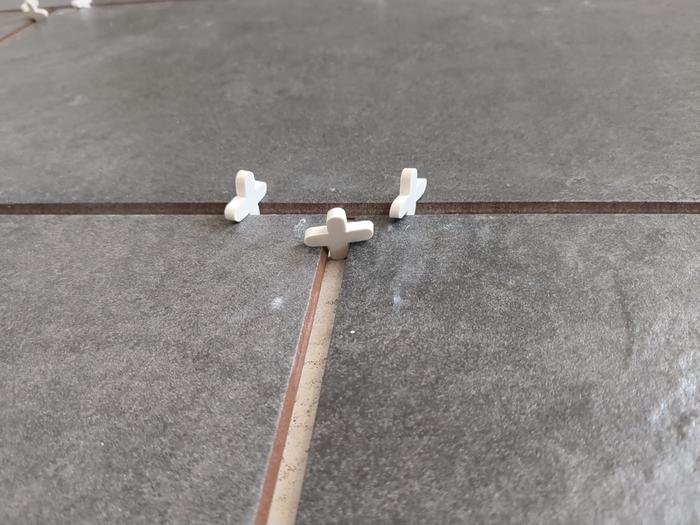
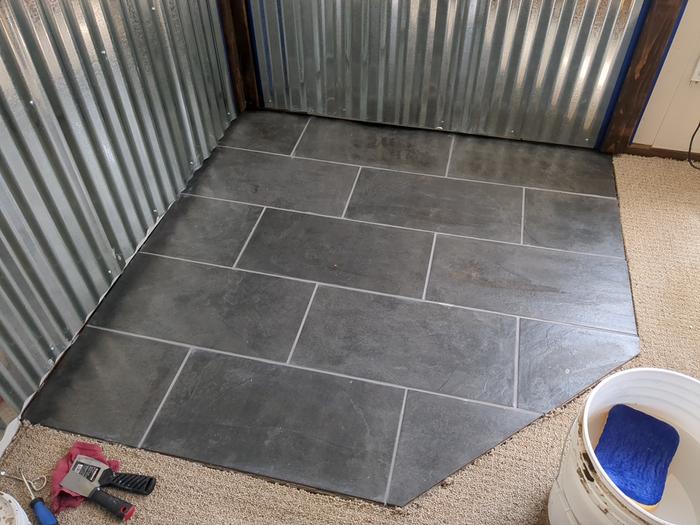
To lay down the tile, you need some tile mortar and a special spreading tool for it. It will dry quick so you need to have all the tiles cut and ready to be placed. After you cement all the tile, let it sit for a while (look at the instructions). Try and pack the tile down and keep it level as best you can and try and keep the space between the tile clear because you are going to grout it later. When you do the grout, just spread it in the cracks with a metal scraper and then try and wipe all the excess off the tile with a sponge and a rag (and try not to get everything too wet). Here's the tiling after my husband and I did the grout, which was our first big task we did ourselves and was actually super empowering to know that we can do things ourselves and have it turn out good.
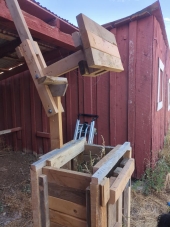
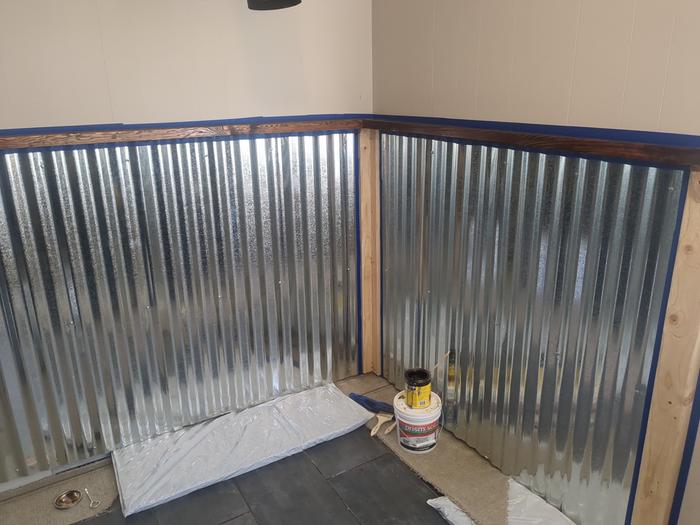
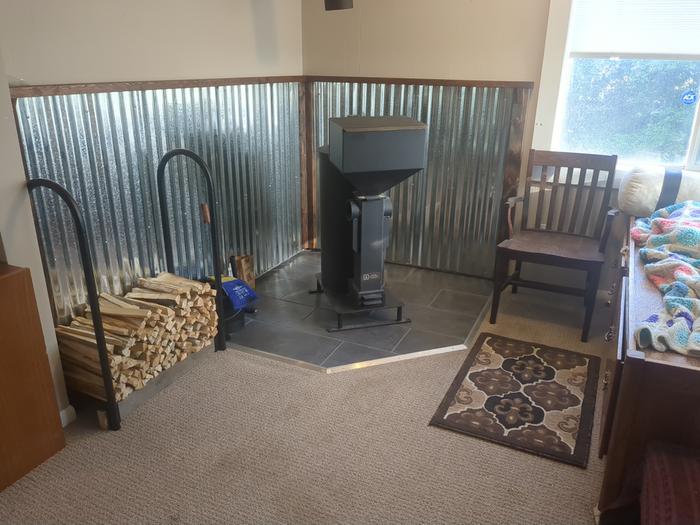
My father-in-law put in this metal sheeting and lumber behind the stove to cover over the rockboard in a style called "wainscoting," which is a weird word. We had some white wainscoting in the laundry room, which we cut out of the wall and did not replace because it's behind the washer and dryer and doesn't need to look fancy. I ended up staining it to make it look pretty and found out that stain is not like paint. It drips and spreads out but you can wipe it off with some nail polish remover before it gets too dry.
Under the carpet is the weird foam stuff and there is also a hard piece of wood with nails sticking up on both sides like some sort of torture device (this is called carpet tack strip). I had to buy some new tack strips and we put them under the carpet right at the transition and you just nail this in.
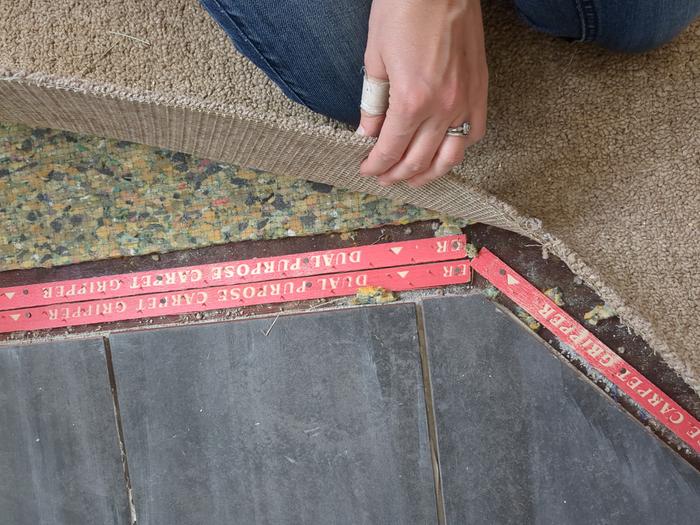
On top of the carpet I put some metal carpet trim, which I cut with a hacksaw (and took a bit of trial and error to get it to be the right shape) and you just nail that in with the nails it came with.

After getting the carpet trim on we put the stove back in place and now we just need to get to the hardware store to get some stovepipe.


 9
9


Skill verified by gir bot")

Skill verified by Opalyn Rose")

Skill verified by Jeremy VanGelder")

Skill verified by Jeremy VanGelder")

Skill verified by Jeremy VanGelder")

Skill verified by Alexandra Malecki")

Skill verified by Alexandra Malecki")

Skill verified by Mike Haasl")