• Post Reply Bookmark Topic Watch Topic
  • New Topic
permaculture forums growies critters building homesteading energy monies kitchen purity ungarbage community wilderness fiber arts art permaculture artisans regional education skip experiences global resources cider press projects digital market permies.com pie forums private forums all forums
this forum made possible by our volunteer staff, including ...
master stewards:
  • Nancy Reading
  • Carla Burke
  • r ranson
  • John F Dean
  • paul wheaton
  • Pearl Sutton
stewards:
  • Jay Angler
  • Liv Smith
  • Leigh Tate
master gardeners:
  • Christopher Weeks
  • Timothy Norton
gardeners:
  • thomas rubino
  • Jeremy VanGelder
  • Maieshe Ljin

Greetings from spanish beginner... and questions about first RMH try

 
Posts: 44
2
  • Mark post as helpful
  • send pies
    Number of slices to send:
    Optional 'thank-you' note:
  • Quote
  • Report post to moderator
Hello all.

I'm Manuel, from Spain. Guitar-maker and wood artisan, but getting each day less into guitars and more into permaculture (much more a need for the world, I think)

I've been reading about RMH for a while (Ianto's book first and now Erika & Ernie's "Art of Fire", RMH manteinence booklet, plans and the DVDs) and finaly I feel confidence to put my hands on bricks and cob. Last winter I've been using a pocket rocket with a 55 gal. drum and as soon as I got used to it it worked great and kept my house (about 480 s.f.) pretty warm. Now I'd like to bennefit from cob thermal mass, and to have a safer space in the corridor in order to be used (not possible with the red-hot barrel roaring).

I was thinking about a 6" system because of my narrow corridor (the only space available to put the barrel) but after reading, and thinking, and reading again, I do think it wouldn't be strong enough to keep the rooms rasonabily warm, so I've switched to the 8" one. I do have a traditional old wood-coal cooking stove on my kitchen that can be fired to help warming. Kitchen is the principal place to be at our litle home. Winter nights here usually range from 23 to 41F and the stone-walled house Is not well sealed at all. I've improved it a bit by installing a double door on the corridor from the aluminium-cristal leaky entrance door. It works great. On windows (aluminium single cristal panel) I've tried the buble-plastic trick and it worked quite nice.

Interior walls are made from adobe bricks. Floor is tiles over cement over ground, not empty spaces below. Not pictured yet are the bench flues and the horizontal (I wasn't able to make it with my easy-design program) flue to the chimmney (I'll use the previous channel but I'll replace the old 5" one with an issolated 8" one).
It is a rented house, and I'll pay for all I'll need for the RMH, even the isolated chimney. I don't know how long I'll stay here but, since housekeepers do not mind me to make it my way, I'll consider all this as an improvement for my daylife and an learning hope-well-worth-the pay. AH, and here where I do live ( a small village about 100 inhabitants) nobody will ask me for building codes... I'll just care for safety, not law, here.

Here you have the sketches I've worked so far before making the dry-runs on the courtyard so I'll know width and other measurements and how they work.


https://plus.google.com/photos/113169066508197706594/albums/5933425295475954673/5933425317778426834?pid=5933425317778426834&oid=113169066508197706594

So, while more thinking and looking for some materialas I still don't got, here are some questions:

- Would you think such a small multiple-bench could be enough for the house or shoud I make another bench in the workshop room? This latter option would force me to make changes in my yet small working space. Thought I'll maybe stop working (as an artisan) at home and this space will be used just on free time weekends, I'd prefer not to have this extra bench...
I could anyway add some "T"'s on the bench in order to make it possible to extend it here in some future.

-To have such narrow benches I should have the flues pretty close to each other, so I've thought It would be nice to put some insulation between adjacent sides, so much of the gasses heat would be forced to go to the cob mass and wouldn't radiate to the closer-to-the-exit tubes.

That's enough untill I make some more measurements and drawings so I'll be able to know better what I don't know.

Thank you all in advance:

Manuel

P.S. I would write a long post for expressing my gratitude to all you who share this knowledge... but I don't have more time for no:, I don't have internet connection at home and I have to left te bar right now and go for the barrels! So, thanks Ernie & Erika and all you guys, THANKS, THANKS A LOT!
 
gardener
Posts: 3471
Location: Southern alps, on the French side of the french /italian border 5000ft elevation
194
  • Mark post as helpful
  • send pies
    Number of slices to send:
    Optional 'thank-you' note:
  • Quote
  • Report post to moderator
Que tal Manuel!

You are not alone


gardener
Posts: 912
Location: North Georgia / Appalachian mountains , Zone 7B/8A
57
  • Mark post as helpful
  • send pies
    Number of slices to send:
    Optional 'thank-you' note:
  • Quote
  • Report post to moderator
Bienvenido a los foros de la permacultura.

I know nothing about RMH, but have tried building some guitars.


saludos / salutations!
 
pollinator
Posts: 4154
Location: Northern New York Zone4-5 the OUTER 'RONDACs percip 36''
67
hugelkultur fungi books wofati solar woodworking
  • Mark post as helpful
  • send pies
    Number of slices to send:
    Optional 'thank-you' note:
  • Quote
  • Report post to moderator
Jose Manuel Bonilla : The world needs Artisans like yourself to bring some joy into this world, let us just say that you are working in a new medium that feeds more than
just the Soul.

It would be very helpful to know more about your location, summer and winter climate and altitude above sea level, I expect that it is mostly Mediterranean, and that you
need most of your heat in the morning, but that is merely a guess on my part ! If that guess is close, I think that you would do well with a 6'' system, an 8'' is really for a
place closer to 3-4 times your houses size ! There are smaller units, but I would not want to try to build a smaller unit as a first Attempt at building a Rocket Mass Heater
R.M.H.

Working with as few elbows as possible because they slow the flow of your hot exhaust gases, you should have close to 20 feet of bench, with good placement of 'T's for
Clean outs even the inside vertical chimney can be Cobb'd in and you can have a warm place even a built-in closet to hang your outside things.

In very cold climates Ernie sometimes brings the horizontal stove pipe back very close by the R.M.H.s burner to warm things up a bit before the inside vertical chimney,
I dont see the need for insulating your pipe even if you were to end it in the Work space, with the final vertical chimney on the opposite side of the wall from where
you sketched it !

A bench in your work space can be covered with heavily padded quilts to trap the heat for when you are not working in that space and uncovered as needed.

I think that I understand that your interior walls are adobe, if so, then you can consider your Walls as being the all-ready built part of your Thermal Mass, on days when
you run your R.M.H. a lot you should have very warm backrests, your existing walls. Perhaps some body fitting sculpting is in your future !

Every time I look at your sketch I lose what I have typed, (my fault I am sure) so I will send this of to you now and look at your next message ! For the Good of the Craft!

Think like Fire, flow like a Gas, Don't be the Marshmallow, As always, your comments and questions are solicited and are Welcome ! PYRO - Logically Big AL
 
Jose Manuel Bonilla
Posts: 44
2
  • Mark post as helpful
  • send pies
    Number of slices to send:
    Optional 'thank-you' note:
  • Quote
  • Report post to moderator
¡Gracias Satamax y Cris!

Ahora ya tenéis un "guitarrero" más en el grupo, si os puedo ayudar en algo no dudéis en consultarme.

Now you know there is another guitar-maker in the group, should I can help you just let me know. Thought I do live in Spain is not spanish style guita what I'm involved into, I'm more into electric guitars, steel stringed acoustics and some other kind of stringed instruments. Here you can have a look at some of my work (I'm sorry it's only in spanish) www.ebanoyacero.com

Hello Allen, thanks a lot for your kind repply.

The world needs Artisans like yourself to bring some joy into this world, let us just say that you are working in a new medium that feeds more than just the Soul.


That's the point, Allen. I do love making beautyfull things out of wood and other natural materials, but I actually feel a big inner (and outter, from what's happening in Earth) push towards natural building, permaculture, efficient use of energy and stuff and so on... Guitars rules, but you can't live neither by them nor IN them and ecology, houses, energy and resoruces are a serious matter nowadays. I do love the way I'm walking now and I won't miss too much guitarmaking.

It would be very helpful to know more about your location, summer and winter climate and altitude above sea level, I expect that it is mostly Mediterranean, and that you
need most of your heat in the morning, but that is merely a guess on my part !


I'm in the north-west inner side of Spain, 2953 ft alttitude, continental climate, with winter minnimal temperatures rangin from 5 to -5ºC (23 to 45F) at night.
Inside house's daily temperature uses to be between 46 to 55ºF if stove is unfired (going down at nights)
We use to need to feed some fire from October to April-May.

Here you have two graphs about temperatures here:


February 2013 máx. and min. temperatures graph.


Medium temperatures along the past year.

I think that you would do well with a 6'' system, an 8'' is really for a place closer to 3-4 times your houses size !


Well, I'll wait for your advices about it, but maybe, if it's bigger than needed I could fire it shorter, but If I do it smaller than optimun... there would be no way to warm the house...
Not pictured on the plan is another room (194 ft2) with no ceiling, cold as outside. I've pictured the not-insulated-at-al door that opens to that space up on the plan, from the wokshop.


I think that I understand that your interior walls are adobe, if so, then you can consider your Walls as being the all-ready built part of your Thermal Mass, on days when
you run your R.M.H. a lot you should have very warm backrests, your existing walls


Well, I hope so! but I should care about inner wooden beams on the wall. I should issolate them from flues, but I suppose 2" perlite or a piece of rockwool would do the job.

I'll think about the workshop bench because, even I should not use a lot, we have to cross it every once we go to the bathroom or the store.

Another more question:

Wich option do you consider would be the best: having just a single flue going through the benches (adding the workshop one) or the equivalent lenght of tube on double-passes (come and go in the kitchen one, I hope you'll understand my english :p ).
Would a single flue warm the bench enough?

I hope today I'll have some time to draw some flue options to share with you.

Thank you all again for your kind repplies.

P.S. should any of you want to know how my village looks like and some works I've done you can do it here: Picasa gallery
 
allen lumley
pollinator
Posts: 4154
Location: Northern New York Zone4-5 the OUTER 'RONDACs percip 36''
67
hugelkultur fungi books wofati solar woodworking
  • Mark post as helpful
  • send pies
    Number of slices to send:
    Optional 'thank-you' note:
  • Quote
  • Report post to moderator
Jose Manuel Bonilla : This will be your build, any advice you get from here at Permies should be to help you do this smoother, easier, and safer. I for one will try to make
it happen that way. After looking at your sketch of your houses layout I think I finally have an idea of what you are Starting With !

1)You say that your Interior walls are Adobe, how thick in the middle of the wall, I am assuming that where 1 wall meets another, they get progressively thicker
with Rounded corners "so that the Devil has no Place to Hide " !

What EXACTLY do you mean by Inner wooden beams ON (?) the Wall? If we are going to dodge beams/protect them from exposure, we will want to locate them precisely!

It is very important that we run our Hot exhaust Gases through a long enough horizontal chimney to extract the maximum amount of heat, HOWEVER it is just as important
to keep the number of elbows down to an absolute minimum !

We need to calculate that 1 stove pipe elbow retards or slows the flow of the hot exhaust gases the same as 5 feet of horizontal pipe ! I am now leaning toward an 8 inch
system in your house !

Please respond back here with your answers, I am sure that there is a R.M.H., in your future, We just need to make sure it is beautiful ! For the Good of The Craft !

Think like Fire, flow like a Gas, Don't be the Marshmallow ! As always, your comments and questions are solicited and are Welcome PYRO - Magically BIG AL !
 
Posts: 2413
48
  • Mark post as helpful
  • send pies
    Number of slices to send:
    Optional 'thank-you' note:
  • Quote
  • Report post to moderator
Hi Allen,

Per your invite, I am here to do what I can...

Hola Manuel!

I will follow along and do what I can to aid you, along with Allen's good assistance, I will defer to Allen guidance on RMH as I believe he knows more than I do on that matter...

Is the space we are discussing based on Baraccata architecture. Can you go into more detail about the wall matrix of the structure? Also, I work in metric so it that is more comfortable please use it. Is there a way to post some photos of your structure on your "Picasa Page"? I would like to see inside each room, exterior view elevations shots, and location of planned RMH. What is the pitch of the roof? Is the roof insulated and by what? What is the circa date of the space. If it is a rental, do you have "ad arbitrium" to modify structure with an RMH? You are located South West of León, correct?

Regards,

jay
 
Jose Manuel Bonilla
Posts: 44
2
  • Mark post as helpful
  • send pies
    Number of slices to send:
    Optional 'thank-you' note:
  • Quote
  • Report post to moderator
Hello Allen and Jay, happy to have your kind support here!

Allen asks:

1)You say that your Interior walls are Adobe, how thick in the middle of the wall, I am assuming that where 1 wall meets another, they get progressively thicker
with Rounded corners "so that the Devil has no Place to Hide "


What EXACTLY do you mean by Inner wooden beams ON (?) the Wall? If we are going to dodge beams/protect them from exposure, we will want to locate them precisely!


And Jay goes deeper into it:

Is the space we are discussing based on Baraccata architecture. Can you go into more detail about the wall matrix of the structure?


Is there a way to post some photos of your structure on your "Picasa Page"? I would like to see inside each room, exterior view elevations shots, and location of planned RMH. What is the pitch of the roof? Is the roof insulated and by what? What is the circa date of the space


The house is a traditional (not Baraccata here) stoned wall 1 story house, made about 80 years ago. Walls are about 70cm depth, round stones, mortared with clay and straw. Inner rooms are made like "boxes" inside de house, with walls made of single layers of adobe (flat, same widht all along, I'll measure it later), with some wooden beans supporting the "box". I'll look for a photo of some wall here to share with you along the day.
I'll carefully look for the beams in the spots where I should break the wall in order to pass the flues by (I need 3 holes). I think some insulation here won't we bad.
Above the ceiling (top of the "boxes", made with wood and adobe) there's a gable roof, with tiles over wood. About 1,5m high in the central edge.

I'll change the 5" DIY isolated steel chimney with a new (I'll buy it soon) isolated 8" one, from the ceiling to up outside and above the central edge.

Floor is tiled over cement, just over ground, no empty spaces beneath.

This morning I'll take some time to make soom drawings. I'm not good at all at computer drawing, and I don't have an scanner here to scan pencil-drawn sketches.
Along with the drawings I'll attach some photos of the house: inside and outside.


It is very important that we run our Hot exhaust Gases through a long enough horizontal chimney to extract the maximum amount of heat, HOWEVER it is just as important
to keep the number of elbows down to an absolute minimum !


Yes, I know by the books and DVD both from Ianto's and E & E Wisner. I've been redrawing again and I ended up with about 6m runnig flue lenght (same as the 8" system E & E plan) and 5 elbows (6 + (1,5x5) = 13m draft) , so I don't reach the 15m máximum lenght's limit. (Thanks a lot for letting me use metric measurements, it's easier for me)

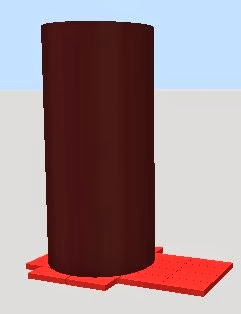
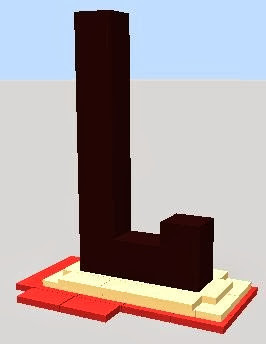
Here you have the last drawing with what I do think is the better option in order to have enough mass with the minimal draft:


so, as you can see (I hope you can understand these drawings) the exhaust go from the burner straight to the workshop, then kitchen and then back to the corridor, here it goes up in a kind of"pillar" and then, uncovered to the chimney.


If it is a rental, do you have "ad arbitrium" to modify structure with an RMH?


I've said the owners, in situ, what I'm planning to do and they agree. House is rented, but as friends, not wroten contract. Only concerns are safety (and that's far safer than what I'm using now) and should I left the home they could ask me (if they don't like it and I want make it beautifull so I hope they'll do) to take it back to how it was before. For that purpose I'll build the thermal mass (and burner, If you think it's not a bad idea) over a layer of non-mortared red brick, and then cob (with stones, no straw) for the benches and (no stones, and straw added) for column. The holes for the flues pass-by could be easily refilled with more cob later. The day I should left te house they think about throwing all it down but walls to renew it, that's the reason they don't care much about it.

You are located South West of León, correct?


Right, here you have a map:
google map

Ops, about my drawing program, it doesn't let me do some things I'd like, but it's easy to use and lets me have a look at how would it look with the 3d previews. Here you have the link if you want to try it (or if you want to look to my plans and make some changes, I can post them too) it's free, open source and I can run it with linux!

Sweet Home 3d

I think it's enough for now, let me know what you think about it. I'd like to make dry test before week-end.

 
Cris Bessette
gardener
Posts: 912
Location: North Georgia / Appalachian mountains , Zone 7B/8A
57
  • Mark post as helpful
  • send pies
    Number of slices to send:
    Optional 'thank-you' note:
  • Quote
  • Report post to moderator

Jose Manuel Bonilla wrote:
... Guitars rules, but you can't live neither by them nor IN them .....


Sure you can! Here is one near where I live

http://www.atlasobscura.com/places/the-guitar-house


Jose Manuel Bonilla
Posts: 44
2
  • Mark post as helpful
  • send pies
    Number of slices to send:
    Optional 'thank-you' note:
  • Quote
  • Report post to moderator
Hahaha, Cris, that wasn't the kind of guitar I was thinking of but.. ok, you can live in some of them

Here you have an example of adobe inside walls, in a house near mine:


You can see the wooden beams I have to look for, since mine is gypsum plastered.

And here you have two pictures of my house:


and the 3d plan, some aestetichal improvements for closer-to-actual look.


Inside house pictures:

KITCHEN


WORKSHOP

I'll have to remove everything here to make the bench, let's see how could I put it again...

CORRIDOR


Here you can see the pocket rocket I used last winter to keep mi house warm. It worked great, but quite dangerous and once fire is extinct temperature drops almost as fast as It went up on firing. It was nice anyway because I used far less wood, made no smoke and I get used to a different kind of fire-caring.

I'd like to ask you one more question or two:

- The only available bricks so far are refractory heavy ones and another, red colored, heavy too, that people uses here for hearths, it seems nobody knows about light bricks, neither "soft-fired". I'll post some photos tomorrow. How can I know if the bricks will support temperatures?

- Do you finally agree about the plan and the 8" system? I do still have time enough to make changes, but I'd must to ask for the flues as soos as possible.

-It's supposed I should dry assemble the entire thing outdoors in order to test how it works, but... will the leaks on dry stacking and the lack of mass let me have a good idea about how will it work when well sealed and cobbed?

Thank you in advance for your attention, have a nice day:

Manuel
 
allen lumley
pollinator
Posts: 4154
Location: Northern New York Zone4-5 the OUTER 'RONDACs percip 36''
67
hugelkultur fungi books wofati solar woodworking
  • Mark post as helpful
  • send pies
    Number of slices to send:
    Optional 'thank-you' note:
  • Quote
  • Report post to moderator
Jose Manuel Bonella : It is time for you my young friend to reach out into your community and make friends with a young Female Potter, with say 30 years of experience !

Seriously, a local potter will be able to tell you about fire brick, Teach you all that you need to know about the clay slip that you are going to use like paint/glue to seal every
thing together, and make sure that the layer where you stopped working yesterday mates with todays Work ! This is also a good place to learn more about local clays !

Regardless of the type of brick that you use to dry stack and make up your test RMH, you will want to dip them in water and then into your clay slip, that and a little amount
of Cob, 5 -10 liters, certainly no more will seal all of the brick and heat passages before the barrel !

With my duct work as tightly sealed as possible and a layer of clay slip to show any cracks, I would try my RMH without the barrel, then when I hear the dragons friendly deep
throated roar, I would hook up all my horizontal ductwork, and about 2 meters of vertical chimney and try that, only if this gives me problems would I consider unhooking the
horizontal piping and going straight to an elbow and the vertical pipe!

This last test would only be necessary if your rocket with the barrel on did not draw as well as before, and is the best way on determining if the problem (which we
already have proved is not in the brick work section) is in the RMH from the barrel out through the transitional zone to the horizontal pipe, because we have eliminated ALL of
the horizontal pipe from the test !

My best advice is to follow up with that Potter who will know about fire brick, and be prepared to make a large Transitional area and figure out how many 'T's and Clean Out caps
you are going to need ! For the Good of the Crafts, and their international reach ! Big AL!

Late note ! Beautiful tile floors ! A. L.
 
allen lumley
pollinator
Posts: 4154
Location: Northern New York Zone4-5 the OUTER 'RONDACs percip 36''
67
hugelkultur fungi books wofati solar woodworking
  • Mark post as helpful
  • send pies
    Number of slices to send:
    Optional 'thank-you' note:
  • Quote
  • Report post to moderator
Jose : I see that I did not give you a specific answer to size, It bothers me that I too could not find any way to get you more horizontal ducting than you created for yourself,
Once this system gets drafting, a 6 '' system is almost Ideal, but this is a first build, and must be a success, the last thing we want is to create problems in our build.

The 8'' system will certainly give you fast heat, and will cut back on the amount of time in a 24 hr period that you are tending it to heat your house, after the Burn Tunnel /
Combustion Chamber is up to temperature with a visible Red glow, and a new chunk of dry wood seems to Spontaneously Burst into flame, you can regulate your amount of
air that you are feeding to a now smaller amount of wood, this will prevent an excess of air from Cooling your Burn Tunnel / Combustion Chamber and hold your heat at good
combustion temps with the smaller fire. The problem here is that the smaller fire for an 8'' system is still larger than the smallest fire of a 6'' system. Only you can learn what
is right for you, and what will keep your house dragon happy !

Your last sketch seems to show a slight pinching of the gap between the Heat Riser and the Barrel on the side closest to your vertical chimney and that would certainly be a
good idea, we do not want radiated heat from the barrel warming the chimney prior to its exiting though the roof!

However, we also want the widest gap over top of the Transitional Area where the Hot exhaust gasses change direction from falling Vertically down the inside of the barrel and
flow horizontally out past the first Clean Out 'T' and ash pit, we want to be very generous here, even increasing the constant cross sectional area to 2 times, or 3 times the rest
of the areas, and here it is very important to finish the inside walls as smooth as the gypsum walls in your house !

You will probably want to have reflective barriers with an air gap behind them mounted to the chimney, and to the wall directly between the Corridor / Hallway and your Work
Shop, possibly changing the door way into a wider arch as you live with your system a while !

I had to type this out, to allow me to gather my thoughts, having reviewed everything, I think it is finally your choice, but you will be guaranteed a good build and a Happy House
Dragon with an 8'' system ! Good luck, and let us know what is happening to you. Big AL
 
Posts: 106
Location: Sandpoint, Idaho
1
  • Mark post as helpful
  • send pies
    Number of slices to send:
    Optional 'thank-you' note:
  • Quote
  • Report post to moderator
Since we are talking about instrument builders I will add myself as another luthier, I have made 2 steel strings, a mountain dulcimer, a uke, an electric, and a 36 string lever harp that is for sale. Alan
 
Jose Manuel Bonilla
Posts: 44
2
  • Mark post as helpful
  • send pies
    Number of slices to send:
    Optional 'thank-you' note:
  • Quote
  • Report post to moderator

Seriously, a local potter will be able to tell you about fire brick, Teach you all that you need to know about the clay slip that you are going to use like paint/glue to seal every
thing together, and make sure that the layer where you stopped working yesterday mates with todays Work ! This is also a good place to learn more about local clays !


Yes, I know a female potter with years of experience! I told my girlfriend she can talk with the potter's husband while we talk about clay
Well, I'll try visit her (she's a ceramic artist-artisan) and I'll ask for her advice. I'll ask to a traditional potter who lives 30km near me too. By now, I've bought some red and some refractary bricks and I'm dry stacking them trying to arrange them somehow as I'd it's supposed to for a good burn chamber.

Regardless of the type of brick that you use to dry stack and make up your test RMH, you will want to dip them in water and then into your clay slip, that and a little amount
of Cob, 5 -10 liters, certainly no more will seal all of the brick and heat passages before the barrel !


So, there's no "dry run" but a "real" one, everything equal but just outside home and without cob-mass, if I've not missunderstood...

Late note ! Beautiful tile floors !


Well... I don't like them very much, it makes you crazy if look at them for a while but it's a traditional work now somewhat difficult to find. I hope some day I'll be able to make my own cob house with earthen floor!

Your last sketch seems to show a slight pinching of the gap between the Heat Riser and the Barrel on the side closest to your vertical chimney and that would certainly be a
good idea, we do not want radiated heat from the barrel warming the chimney prior to its exiting though the roof!


I was thinking about off-setting the barrel both from vertical column and the wall, but I'm not sure about how it will work... and it bothers me abot the manifold space if I do it that way...
About manifold, It's far the most difficult part of the system to "visualize". I'd like to make it with half a barrel, as E & E make in the plan I bought, but making it that way there's something I couldn't fin in the instructions: should I connect the 8" flue to the barrel with any kind of funnel? or could I make directly connecting the 8" flue perpendicular to the barrel? I have to look for some photos and more info about manifolds, for sure!

Another doubt about this kind of barrel-manifold: could I just tape the two barrels with flue-tape and then getting the cob cover up pass the joint?

Well, I'll keep the sketch of flues (2 horizontal, one vertical) and go for the 8" system. For sure I'll have my mind full of doubts, ideas and bricks as soon as I go to bed in a few hours, I'll keep asking you if you let me to do. Thank you one more time.

Since we are talking about instrument builders I will add myself as another luthier, I have made 2 steel strings, a mountain dulcimer, a uke, an electric, and a 36 string lever harp that is for sale. Alan


Ey, one more wood shaving's influenced!!! Hello Alan!


Manuel
 
allen lumley
pollinator
Posts: 4154
Location: Northern New York Zone4-5 the OUTER 'RONDACs percip 36''
67
hugelkultur fungi books wofati solar woodworking
  • Mark post as helpful
  • send pies
    Number of slices to send:
    Optional 'thank-you' note:
  • Quote
  • Report post to moderator
Manuel : I certainly would never under any circumstances ever do anything but have the Barrel NOT PINCHED on the side Directly above where the Transitional Area starts !
This is where I show how being over here on this side of the atlantic ocean has spoiled me, because I can get anything here, Ernies barrel and a half works best with a certain
type of 55 gal barrel Fairly easily findable over here. I have only learned his way to do the 1.5 barrel arrangement, and I don't have a clue how he has explained how to do
it with regular barrels !

My kind of barrel comes with one end open, closed with a full sized lid held in place with a clamping band so that you can reseal it. When you have at least one end of an open
barrel to mate with the carefully trimmed end of a matching Barrel The cut end just mates with the open ended second barrel and can be reclaimed to lock them together, a
thin ribbon type gasket will sometimes be used to create additional surface area that the clamp bears down on, but the two sections will be protected by and sealed with Cob!

The lower barrel section does support the weight of the upper barrel, this gives you a chance to pack additional insulation, Perlite, Vermiculite the lighter weights of Pumice /
/Tuff (sp) around that section of the bottom 1/2 barrel. Be generous about saving a large area for the Funnel that First moves the gases horizontally through the transitional
area! Ernie should have explained this part ?

Using flue tape to seal the barrel edges against gas leakage is always a good idea, Remember to always have a batch of clay slip ready and paint everything with it, it helps
to assure that all your surfaces seal well on a particle to particle level. It also helps with sealing an older layer of Cob to a new one, pump squirt bottles that are used for
misting plants, is also useful for joining Old Cob to New ! Hope this helps, For the good of the craft !

Think like Fire, Flow like a Gas, Don't be the Marshmallow ! As always your comments and questions are solicited, and are Welcome! PYRO - Logically Big AL

Late Note : Did you understand about the part of needing reflective barriers with an air gap behind them, to keep your exposures cool ! These can look a little institutional,
but dressed up with an artists touch, and a little paint you can have the ' I don't know what you've done, but this space seems larger effect ! This combination will always work
better then trying to wrap insulation around something you are trying to protect from too much heat ! A. L.
 
Jose Manuel Bonilla
Posts: 44
2
  • Mark post as helpful
  • send pies
    Number of slices to send:
    Optional 'thank-you' note:
  • Quote
  • Report post to moderator

Manuel : I certainly would never under any circumstances ever do anything but have the Barrel NOT PINCHED on the side Directly above where the Transitional Area starts !


OK Allen, I got it. I've been reading the plans and instructions again, looked (once more) to "The Book" and finally I think I understand (a bit) how the manifold should be. The E & E plans do have the flue right to the same c.s.a. when meeting the manifold, si the manifold itself what should be big and deep enough. And that's why I shouldn' pinch the barrel over it. I'm slow at learning and understanding, but finally I use to get things

Did you understand about the part of needing reflective barriers with an air gap behind them, to keep your exposures cool...
...This combination will always work better then trying to wrap insulation around something you are trying to protect from too much heat ! A. L.

You will probably want to have reflective barriers with an air gap behind them mounted to the chimney, and to the wall directly between the Corridor / Hallway and your Work
Shop, possibly changing the door way into a wider arch as you live with your system a while !


I think I've understood, Allen... almost. I've got it about isolating between the stove and the wall, but about the chimney... you're talking about the cob "column", right? OK. I'm thinking about some kind of sheet metal "sandwich" (with rock whool inside) bended around the barrel on that area, and then some air gap to the barrel itself and to the wall and column... I hope today (I'll have to make some workshop orders so no much tinkering with bricks and plans today) I'll ve able to draw it so I'll share it here.

...Ernies barrel and a half works best with a certain type of 55 gal barrel Fairly easily findable over here. I have only learned his way to do the 1.5 barrel arrangement, and I don't have a clue how he has explained how to do it with regular barrels !

My kind of barrel comes with one end open, closed with a full sized lid held in place with a clamping band so that you can reseal it. When you have at least one end of an open
barrel to mate with the carefully trimmed end of a matching Barrel The cut end just mates with the open ended second barrel and can be reclaimed to lock them together, a
thin ribbon type gasket will sometimes be used to create additional surface area that the clamp bears down on, but the two sections will be protected by and sealed with Cob!

The lower barrel section does support the weight of the upper barrel, this gives you a chance to pack additional insulation, Perlite, Vermiculite the lighter weights of Pumice /
/Tuff (sp) around that section of the bottom 1/2 barrel. Be generous about saving a large area for the Funnel that First moves the gases horizontally through the transitional
area!


I do think the barrel I bought yesterdey is the same kind, it has an openable lid with clamping band. Do you use another's barrel lid clamping band or another kind of band? Maybe I should buy another equal barrel to make it easier to join. But I'd prefer to let the joint uncovered so I could open it for cleaning, as E & E make on their own RMH.
I'll take a barrel's photo later to show you how it is.

Ernie should have explained this part


For sure he did, it's just me trying not to get lost in traslation and understanding on "imagine 3D" something on "written 2D"


I'm writing from the village's bar, where I can use wifi to look on the internet. Now I'll look for some (more) vídeos and photos about manifolds and these things

One more time: thanks a lot, Allen!

P.S. I'm following E & E & Paul advices about asking a lot on the forum before asking just to E & E. Should I have the sketch "feeling right" on mi mind I'll send them an e-mail asking for their approval and further advices. But you guys of the forum will be in the "credits" of my RMH, for sure!
 
allen lumley
pollinator
Posts: 4154
Location: Northern New York Zone4-5 the OUTER 'RONDACs percip 36''
67
hugelkultur fungi books wofati solar woodworking
  • Mark post as helpful
  • send pies
    Number of slices to send:
    Optional 'thank-you' note:
  • Quote
  • Report post to moderator
Jose Manuel Bonnilla : We have still one more friend looking in on your project from her abode on the Canary Islands, and everything that comes into there must be specially
ordered, not like here in the States where we 'know the price of everything and the value of nothing' ! She is working in on using her floor to run her horizontal piping through
to make her thermal mass, her project has drifted on for almost 2 years with some breaks to gather materials, and especially to persuade local craftsmen to attempt to do it
her way !

If you do have an opertunity to get two identical Barrels with clamping ends, Then I THINK that you should make it a priority to get two of them that are identical As
Soon As Possible.

You do understand about burning off the paint on the outside of the barrels prior to doing your test fire out-of-doors ? Everything you do is advancing yourself closer and closer
to that magic moment when your own house dragon moves in and you first hear its deep throated purrs of contentment ! for the Good of the Craft ! BIG AL !
 
Jose Manuel Bonilla
Posts: 44
2
  • Mark post as helpful
  • send pies
    Number of slices to send:
    Optional 'thank-you' note:
  • Quote
  • Report post to moderator

We have still one more friend looking in on your project from her abode on the Canary Islands, and everything that comes into there must be specially
ordered, not like here in the States where we 'know the price of everything and the value of nothing' ! She is working in on using her floor to run her horizontal piping through
to make her thermal mass, her project has drifted on for almost 2 years with some breaks to gather materials, and especially to persuade local craftsmen to attempt to do it
her way !


Nice to know about more spanish people getting into RMH!

Getting materials can be hard but maybe getting local craftsmen to make the things the way you'd like to is the hardest part! I'm counting on some young people who are more open-minded and like this kind of stuff.

If you do have an opertunity to get two identical Barrels with clamping ends, Then I THINK that you should make it a priority to get two of them that are identical As
Soon As Possible.


Yes I have! there's a junkyard in the near city where they do have some of them. Maybe I shoul buy some more for the friends waiting for my RMH to be made to begin their's!

Here's a photo, I think it should be easy to fit them just face to face (open lid side to open lid side) and then clamp with the same band they do have. Isn't it??


And here I go with the stacking I've found the most simmilar to the plans:


I thought It wouldn't work so "well" without sealing and isolating, but it drafts! ohhhh, I do feel like a child playing with new toys


Tomorrow I'll go for another equal barrel and I hope soon somebody could help me with the try.

You do understand about burning off the paint on the outside of the barrels prior to doing your test fire out-of-doors ?


Yes, I did it previously for my pocket rockett and I plan to do it maybe next Sunday with the two barrels. I made it somewhat similar to the paper-clay technique, but I covered it with aluminim foil, shinny side in, and it worked great.


Thaaaaanksssss again for your support!

Manuel
 
allen lumley
pollinator
Posts: 4154
Location: Northern New York Zone4-5 the OUTER 'RONDACs percip 36''
67
hugelkultur fungi books wofati solar woodworking
  • Mark post as helpful
  • send pies
    Number of slices to send:
    Optional 'thank-you' note:
  • Quote
  • Report post to moderator
Manuel : Thank you I learned something, I talked to my friend who did at the metal cuts for the R.M.H. we built with Ernie and Erica Wisner, My friend Miles reports that the two
barrels were trimmed leayeing their barrel end flanges intact, and that Ernie gently pounded on the clamping band to slightly flatten it to distribute the clamping forces over the
flanged ends of both barrels, I expect that that is what your instructions from Ernie and Erica Wisner told you to do ! 4 the crafts BIG AL !
 
pollinator
Posts: 1981
Location: La Palma (Canary island) Zone 11
9
purity forest garden tiny house wofati bike solar
  • Mark post as helpful
  • send pies
    Number of slices to send:
    Optional 'thank-you' note:
  • Quote
  • Report post to moderator
¡Hola Manuel desde La Palma!
Well, not 2 years Al, only 1! I am still more into waterproofing and planning windows than into heating...
Manuel, you are doing fine, I could not even burn the paint properly and will go for an iron cylinder. Don't have those barrels here, they do not open, they are from REPSOL. Their painted name resisted a whole day burning jaja!
 
Jose Manuel Bonilla
Posts: 44
2
  • Mark post as helpful
  • send pies
    Number of slices to send:
    Optional 'thank-you' note:
  • Quote
  • Report post to moderator

Thank you I learned something, I talked to my friend who did at the metal cuts for the R.M.H. we built with Ernie and Erica Wisner, My friend Miles reports that the two
barrels were trimmed leayeing their barrel end flanges intact, and that Ernie gently pounded on the clamping band to slightly flatten it to distribute the clamping forces over the
flanged ends of both barrels, I expect that that is what your instructions from Ernie and Erica Wisner told you to do !


OK, I see. In the E & E plan's booklet they just say they joined both barrels and clamped, no instruction on how to do it. I'll do it as you say. Thanks again, Allen.

I've bought refractary bricks, brand new, two different sizes, and It has been easy to redesign the combustion chamber again with the 3d program copying and pasting bricks to get the numbers I was looking for. Here's the brick "computer laid":


Bottom's layer is 30mm thick red brick. Everything else is 30mm thick refractary brick (with some 40mm ones on burn-chamber sides-bottom).

Should you want to have a look at the different level layers (plan and 3d) I uploaded them here:
RMH computer-laid bricks- Picasa Gallery

It's rainy here in León this weekend. I hope on Monday I'll be able to begin leveling bacyard's floor and building it temporarily. I still do have to buy the flues...

¡Hola Manuel desde La Palma!
Well, not 2 years Al, only 1! I am still more into waterproofing and planning windows than into heating...
Manuel, you are doing fine, I could not even burn the paint properly and will go for an iron cylinder. Don't have those barrels here, they do not open, they are from REPSOL. Their painted name resisted a whole day burning jaja!


Hola Xisca!

the previous barrel I used for my rocket pocket was a truck's motor-oil 55 gal drum, maybe very like your's. How have you tried to burn it out? just making two round holes for the flue (feed and chimney) in a pocket rockett style, covering it with foil and burning... was hot enough for me!

You live in a beautiful place! it looks great! Abrazos desde tierras leonesas

 
allen lumley
pollinator
Posts: 4154
Location: Northern New York Zone4-5 the OUTER 'RONDACs percip 36''
67
hugelkultur fungi books wofati solar woodworking
  • Mark post as helpful
  • send pies
    Number of slices to send:
    Optional 'thank-you' note:
  • Quote
  • Report post to moderator
Jose Manuel: Today is not a good day for deep-thinking for me, I see that you have quickly grasped the idea of using the 1/2 thick bricks for the walls of your combustion
chamber, and am gratified to see an insulation channel under it! I assume that you are going the insulate the outside of your 1/2 bricks and cap it with Cob in a Arch or arc
possibly adding a flying Buttress element for structural strength, like on the sides of Early Churches.

As the weight of the top barrel will be supported by the lower 1/2 barrel you have very little to constrain,or hold you back from using lots of insulation anywhere around your
combustion area, as this will make for reaching the high temperatures, and clean burn you seek much quicker! Good luck my friend ! BIG AL !
 
Jose Manuel Bonilla
Posts: 44
2
  • Mark post as helpful
  • send pies
    Number of slices to send:
    Optional 'thank-you' note:
  • Quote
  • Report post to moderator
Not so rainny yesterday, so I was able to burn the paint of the drums. Today (softly raining) I hope I'll can sand the rest out and make a flat surface on the courtyard for the bricks laying.

I assume that you are going the insulate the outside of your 1/2 bricks and cap it with Cob in a Arch or arc
possibly adding a flying Buttress element for structural strength, like on the sides of Early Churches.


Well... yet I thought about adding 2" of perlite-clay insulation and then covering it all with cob, but didn't about archs or buttress. Should I???
I've never seen this on RMH before, maybe you do have any image or link?

Bytheway, I won't be able to pinch the drum on the column-side because the cilinder border would reach the feed chamber. So I'll stay centered.

have to look for some rock whool for the insulation today.

Have a nice day!
 
allen lumley
pollinator
Posts: 4154
Location: Northern New York Zone4-5 the OUTER 'RONDACs percip 36''
67
hugelkultur fungi books wofati solar woodworking
  • Likes 1
  • Mark post as helpful
  • send pies
    Number of slices to send:
    Optional 'thank-you' note:
  • Quote
  • Report post to moderator
Jose Manuel : On the long run I expect that you and your project will be fine!

You have a plan, it is coming along nicely, and you can have several 2nd opinions simply by coming here, This is your build, enjoy !

Your rocket mass heater will have to stick out into the corridor/hallway a little more ? than your pocket rocket did?

If you can't pinch towards the interior vertical chimney, and you don't want any pinch directly over your transitional area leading towards your work room,
than you must protect those exposures, I Think that a highly reflective J shaped ( the curve of the 'J' directly around and behind the barrel, and the
long side finishing up at your work rooms door should protect the chimney and the corridor/work room wall with about 5-8 cm air space behind the J shaped
Reflector

In my mind I have an Image of a rather large curved mirror of stainless steel , its mirrored surface would make the newly more confined area of the Corridor
/hallway 'look a little more roomy' !

Again let me say that this is your build, and at the end it will be you who decide how minimalist or 'BLING' you choose for your home and when !

For the Craft, Think like fire, flow like a gas, Don't be the Marshmallow! Your questions and comments are solicited and are Welcome! PYRO-Logically BIG AL !
 
Jose Manuel Bonilla
Posts: 44
2
  • Mark post as helpful
  • send pies
    Number of slices to send:
    Optional 'thank-you' note:
  • Quote
  • Report post to moderator
Yesterday I had no much time to spend on my project, but I went city for ordering some ceramic blanket for the riser insulation and bought some cement to use on the courtyard and made a flat and level surface for the try.

If you can't pinch towards the interior vertical chimney, and you don't want any pinch directly over your transitional area leading towards your work room,
than you must protect those exposures, I Think that a highly reflective J shaped ( the curve of the 'J' directly around and behind the barrel, and the
long side finishing up at your work rooms door should protect the chimney and the corridor/work room wall with about 5-8 cm air space behind the J shaped
Reflector

In my mind I have an Image of a rather large curved mirror of stainless steel , its mirrored surface would make the newly more confined area of the Corridor
/hallway 'look a little more roomy' !


Yep, that's what I think I'll do. I'll look for some scrap thin metal surface on the junkyard. If they have not a good one I could buy a piece of steel (or maybe aluminium?) on the store. But that will be one of the final steps. I don't worry about it by now.

Again about the bricks: yesterday I've received an e-mail from the store where I bought the refractory bricks. They thought the bricks should stand at 2200ºF (1200ºC) but after consulting with the manufacturer (as I asked them to please do) they say nominal temp. máximum should be about 1650ºF (900ºC).
Ernie & Erika sometimes use red common brick for burn chamber and riser (as in their 6" system plan) so I suppose this better brick should suffice on my RMH.
I don't need my dragon to live for a lot of years, just I'd like it to work well for a few of them (I'm looking for a better place to live on and don't know for how long I'll stay here, anyway I could remake the stove part in a future if needed).

Anyway I still do have to contact the local potters and ask them about this stuff.

And thinking again about isolation and chamber design I do have some doubts:

· I suposse the bottom bricks on the combustion chamber (even when isolating just the pad beneath the tunnel with perlite) would loss heat by conduction. So I think it would be better to keep the chamber's walls down to the less widht as possible (same as 1/2 brick standing on side), so maybe I could cut the bottom two layers to meet the 1/2-sideways width. Do it make sense?


that 2 layers (3d and 4th) just begining the chamber's walls.


· What about (instead of an insulated pad under the tunnel) making a bed of perlite-clay just under ALL combustion chamber??


The bricks around the combustion chamber just on top of the around - "perlite bed" would give, from their bottom, lots of heat to them by conduction, wouldn't they? (hope my english writting is "understable", sorry if not much clear)


Here you have my today's doubts. I hope I'll be able to keep working a bit today.

Have a nice day!

Manuel
 
allen lumley
pollinator
Posts: 4154
Location: Northern New York Zone4-5 the OUTER 'RONDACs percip 36''
67
hugelkultur fungi books wofati solar woodworking
  • Mark post as helpful
  • send pies
    Number of slices to send:
    Optional 'thank-you' note:
  • Quote
  • Report post to moderator
Jose Manuel : About Ernies use off red brick as as fire brick, I might do that very thing myself, for myself, but I would/can not do that for a friend. The way you are show
-ing using them as an additional layer to protect your tile floors I have no problem with !

I think I understand you and your plans clearly, Yes ! I agree that you should have ample insulation under the bricks making up the floor of your Burn Tunnel, Because we
are trying to use the brick to withstand the shock of high temperatures and for Damage and wear protection of our more insulative/reflective materials, we need to make
trade offs for our use of 1/2 Thickness bricks !

Looking at your sketch of the Clay Slip And Perlite bed, I see you using full bricks to line the trough of Clay Slip and Perlite (C.S. & P.) and trying to imagine the next layer
up, the bricks that actually make up the floor of the Burn Tunnel, here 1/2 bricks would seem to make perfect sense, But, every time you drop your chunks of wood into the
mouth of your feed tube you jar the First Two bricks at the bottom of the burn tunnel !

Here I only make a suggestion for you to decide what you want to do, you could have a full thickness fire brick to absorb the blows and jars directly under the feed tube,
your far right in that sketch, and then you could layer several 1/2 bricks to line the sides of your C.S.&P trough to raise the rest of the C.S. & P. bed up the thickness of a
1/2 brick and then finish filling the 'Deep end' of your clay slip and perlite trough with more CS & P and then finish building the floor of your burn tunnel with 1/2 thickness
bricks!

I actually worked hard to make sure that when I read the above part it made sense to me, if it does not make sense to you pass right over it !

I need you to look up a running bond under brick laying, your sketch up does not show it as part of your plans and the ' running bond ' will make for a stronger build, even
dry stacking. we are jumping ahead a little, I have often recommended just clay slipping and dry stacking bricks for the Rocket Burner base, but we will have to use mortar
for the full bricks of the Hear Riser, but we can stack them on their sides to get maximum height ! For the Craft Big Al !
 
Jose Manuel Bonilla
Posts: 44
2
  • Mark post as helpful
  • send pies
    Number of slices to send:
    Optional 'thank-you' note:
  • Quote
  • Report post to moderator
Hello, Allen.

I'm on a hurry right now, having a coffe-cup at the bar just to upload the new photos and vídeo about the dry-run I've tried on the bacyard. Now I have to go to the next village to take my car to the workshop I hope it will be fixed soon so I could go again to buy the flues and the rest of the stuff.

Here you have them:

An example:


the step-by-step (or layer by layer) Picasa Gallery

and the video I took when test-firing it


Tonight I'll take some time to carefully read your last post.

Thanks again:

Manuel


allen lumley
pollinator
Posts: 4154
Location: Northern New York Zone4-5 the OUTER 'RONDACs percip 36''
67
hugelkultur fungi books wofati solar woodworking
  • Mark post as helpful
  • send pies
    Number of slices to send:
    Optional 'thank-you' note:
  • Quote
  • Report post to moderator
Jose Manuel : O.K. what i thought were full and 1/2 thickness bricks are one size fits all ? At what I would call 1/2 thickness your depth of your Clay Slip and Perlite, C.S. & P
may not be able to protect your tile floors.

I am now thinking about your plans to reuse common soft brick

Also laying up your Heat Riser will be a different deal than I was thinking, definitely we want good mortar, your build just got more interesting ! Big AL !

Are the same bricks that I saw set up new to the blue barrel the same ones you had on your picasso File ! Speaking of that great man, color me plaid,
i be confused
 
Jose Manuel Bonilla
Posts: 44
2
  • Mark post as helpful
  • send pies
    Number of slices to send:
    Optional 'thank-you' note:
  • Quote
  • Report post to moderator
here we go, in order to be not missunderstood and make things easier, I'll try to do my besto to explain how is it so far, step by step

I do actually have 2 sizes of bricks, but now I realize I didn't explain it wel: Normal bricks are 4cm thicness (1,57") and what I mistakely said "medium" are just 3cm (1,18").

Yes my plan was to lay a base-preparation surface with the red common bricks. I thought about having over the tiles, in this order:


0) - aluminium foil (not pictured)


1) - red brick (only this layer, next all refractary ones)


on the backyard the concrete surface makes the rol of the red bricks.


2) - isolation and bricks frame (1,18" high, but it would be easy to change to 1,57)


(not C.S.+P. addet still)


3) - laid bricks for the J-stove floor (here is where I thought about the thinner 1,18" and now after reading your post understand it would be far better to use thicker bricks, so I'll just have to change this layer to 1,57" bricks so they would stand better for the hitting of logs onto the feed floor.


4) and 5) - 2 layers of laid bricks, one size for each, making chamber walls so I'll en up with the channel height I'm looking for.


6) -1 layer sideways bricks (from here to top, every one 1,18") to complete chamber height.


7) -1 layer sideways for the tunnel and so.. (bridge are 4cm, rest 3cm)


to 16) - 8 layers sideways for the riser.

 
Jose Manuel Bonilla
Posts: 44
2
  • Mark post as helpful
  • send pies
    Number of slices to send:
    Optional 'thank-you' note:
  • Quote
  • Report post to moderator
With the previous images and comments I do think I've answered some of your questions yet, Allen, but just in case..

Are the same bricks that I saw set up new to the blue barrel the same ones you had on your picasso File !


Nop, red bricks next to the barrel I've refused for the "J", I'll use them (on the very first layer over aluminium foil) to guard the tiles.


Speaking of that great man, color me plaid,
i be confused


Maybe it's not important, but sometimes your english is difficult for me to understand, I'm not so good at it

Here I only make a suggestion for you to decide what you want to do, you could have a full thickness fire brick to absorb the blows and jars directly under the feed tube,


Makes sense! I'll take it! Thicker bricks for the burn floor, easy to change.


I need you to look up a running bond under brick laying, your sketch up does not show it as part of your plans and the ' running bond ' will make for a stronger build, even
dry stacking.


I'm sorry I don't understand what do "runnig bond" means. I suppose you are talking about making a good well leveled surface in wich I should mortar the first layer of bricks?? I was thinking about having maybe some clay-sand over the foil, then mortar the red bricks and have again a thinner as possible layer of clay-sand well leveled over them, and let it dry for some days, just ready to receive the next layers for the stove itself. Would it be OK??

I do think everything answered yet... but one thing:

I still don't know if these kind of bricks would be OK for the heat. What do you think??

Well, enough for now. This afternoon I peeled the barrels off. Now It's time to relax.

Have a nice day (night, here, actually)

Manuel
 
allen lumley
pollinator
Posts: 4154
Location: Northern New York Zone4-5 the OUTER 'RONDACs percip 36''
67
hugelkultur fungi books wofati solar woodworking
  • Mark post as helpful
  • send pies
    Number of slices to send:
    Optional 'thank-you' note:
  • Quote
  • Report post to moderator
Jose Manuel : I have no idea how 'good' the bricks you have are, I have never seen anything like them ! You will have to ask the person who sold them to you how suitable they
are !

A running bond in bricks is where after you finish a course/level of bricks, instead of laying one brick directly on top of the next you off set the next layer,usually by 1/2 of the
length of the brick ! This means there are no two layers of bricks that have there ends lined up one on top of the other, a good running bonds both simple and strong !

The sketch up system that you were using did not show the stagger of the bricks, the stagger or offset you have on your bricks is fine! together and repeated they make
a running bond.

Each layer of aluminum foil acts like a reflector of heat, it always works better if there is an air gap on bot sides of it but it will help a little , so we should use lots ! I was making
a very small joke, color me plaid, no-one not even s. Picasso can get a can of plaid paint, it would have made more sense if I had said paint me plaid - I am confused.

I notice often that when I become confused the people around me get confused too ! Also this computer is set up with an Automatic Spell Check, some times it turns my deathless
prose into something else, if i am tired I often miss it when i proof read as I already know what it should say ! Do you have a list of questions for the potteress !? A.L.
 
Jose Manuel Bonilla
Posts: 44
2
  • Mark post as helpful
  • send pies
    Number of slices to send:
    Optional 'thank-you' note:
  • Quote
  • Report post to moderator

A running bond in bricks is where after you finish a course/level of bricks, instead of laying one brick directly on top of the next you off set the next layer,usually by 1/2 of the
length of the brick ! This means there are no two layers of bricks that have there ends lined up one on top of the other, a good running bonds both simple and strong !

The sketch up system that you were using did not show the stagger of the bricks, the stagger or offset you have on your bricks is fine! together and repeated they make
a running bond.


Oh, I see, then it's ok about the running bond, that's how I'm laying them.

I have no idea how 'good' the bricks you have are, I have never seen anything like them ! You will have to ask the person who sold them to you how suitable they
are !


Firebricks I do have seem to support about 900ºC or 1650ºF, not too much, but red brick are supposed to support far less temperature and Ernie & Erica uses them on some RMH, so... I suppose they will last at least this winter while I keep looking for better matterials and learning doing more RMH with friends.
Wouldn't mind to remake the J again next summer if needed.


Do you have a list of questions for the potteress !?


Well... not yet. I'll ask about bricks, that's the only thing really bothers me now about the stove making process
About clay slip, I've used it yet a bit, cob I've been mixing and aplying on a cob house. I'll ask them about clay+perlite insulation, but not sure if they should have used it ever before...

About floor insulation: here you have a picture about the insulation around the J. (red = cob, to be rounded later, grey = CS+P)


Would you think it would be a good Idea to have a complete layer with, say 1" of P+C.S. between the red bricks and the stove instead of just a pad behind the burn tunnel?? It makes sense to me, but not sure about if this would be a good and strong base for the bricks...

now let's keep cleaning the drums... have a nice day!
 
allen lumley
pollinator
Posts: 4154
Location: Northern New York Zone4-5 the OUTER 'RONDACs percip 36''
67
hugelkultur fungi books wofati solar woodworking
  • Mark post as helpful
  • send pies
    Number of slices to send:
    Optional 'thank-you' note:
  • Quote
  • Report post to moderator
Jose Manuel : With insulation we only have to make sure that it is weight bearing which we get from mixing it with Clay Slip, and there is enough of it !

When you place it around the hottest parts of the 'Rocket Burner' ( Here, anything that is not Thermal Mass Bench or Vertical exhaust chimney, i. e.
everything before the Thermal mass bench, I am calling the "Rocket Burner' ) You want your insulation to have nice flowing lines, and allow the C S & P
time to slump a little, and then firm up, sharp right angles are where you can get cracks, I am sure that you know this from handling Cob, again I am
only making a note of caution here because you sketch shows it being placed with ridged right angles, some time latter when you are tired or someone
else is helping you, the straight right angles in the sketch could cause confusion and problems !

Stated another way, when we want to place regular cob on top of our dry-ish, firmed up C S & P ,we want to make the Cob arch over to use this strong
geometrical shape to build strength into even the most simple parts, buried away deep in your mass!

When we get to the Cob bench and strengthening those parts of the'Rocket Burner' that might get a good whack, blow or jar, while say moving furniture
you will need to build in a 5cm-ish layer of Structural Cob and have lines that are pleasing to you for your finish Cob, we have time yet and that gives
me time to do a little reading on the subject myself. Here in the North Eastern U.S., we have no tradition of Cob use to fall back on, but you do, and we
can ask for more help as needed ! For the Craft ! BIG AL!
 
Jose Manuel Bonilla
Posts: 44
2
  • Mark post as helpful
  • send pies
    Number of slices to send:
    Optional 'thank-you' note:
  • Quote
  • Report post to moderator

You want your insulation to have nice flowing lines, and allow the C S & P
time to slump a little, and then firm up, sharp right angles are where you can get cracks


Yes I knew they should be rounded, I made the sketch that way just because the design program I'm using doesn't allow me to do it in another way.
I thought about making a cob-wall, a frame around the perimeter, and while building it up it would serve me to contain the CS+P. I'll give it an arch-likely shape to help support the weight. I hope the words I use make sense...

the straight right angles in the sketch could cause confusion and problems


But I had not thought about that! You are right, Allen, thanks for the ad. I'll change the sketch if I found the way of doing (I'll havwe to look for another design program) or add some captions in order to avoid confusion.

Meanwhile, yesterday I cleaned the drums out of paint and opened the bottom to make just two cilinders that fit one over the other making use of the two band clamps (one for the lid, other for joining the drums). Finally, connecting them with both lid-ends upways the band clamp fits loose enough for not need further manipulation, just adding the isolative band fabric.


more photos at the Picasa Gallery
 
Jose Manuel Bonilla
Posts: 44
2
  • Mark post as helpful
  • send pies
    Number of slices to send:
    Optional 'thank-you' note:
  • Quote
  • Report post to moderator

Do you have a list of questions for the potteress !?


Today it's rainning and rainning more... so me and my girlfriend went to the ceramist's house. Yes, it has been great! lots of usefull information about clay, bricks, isolation and temperatures. They didn't ever heard about RMH but for sure now they are looking for vídeos on youtube
They want to come home the day we begin joining the RMH pieces together and yet are thinking about making their own!

Things I've learned today: clay will probably melt at this temperatures, but it will be fine for the bricks-bonding.
The bricks I do have will much likely not support the heat, but I can try for a while and inspect day by day how they work (openable lid and upper barrel)
They gave me an address to look for better bricks, anyway, so hopefully we could find the good ones.
Clay-slip: finally I do know the spanish word for it: "barbotina" and the red clay I can find on my village soil is good enough for the mortar.
Silicone, when not exposed to direct fire and oxigen, can support really well high temperatures. They even use it to bond firebricks in their hearth. I suppose I won't have to use it but anyway that's kind of interesting piece of information.

They couldn't barely belive the RMH reach so hihg temperatures! And they showed me how different kinds of refractary brick and clay-based mixtures endure the heats we were talking about. Some of the examples were really amazing.

So, one more time: thanks Allen for your advices. I's been great to have this conversation with them

Yours:

Manuel

P.S. I've added this comment on the isolation+cob arround "j" scheme Gallery's photo:

MPORTANT: you can see in the sketch that the clay slip + perlite insulative shield (grey) is made with squared corners following the bricks layout. It's so because of the 3d design program limitations. In fact IT MUST BE, and so it will be, rounded, like it will be the cob coberture (red) around it.

Hope it will help not to generate confussion...

 
allen lumley
pollinator
Posts: 4154
Location: Northern New York Zone4-5 the OUTER 'RONDACs percip 36''
67
hugelkultur fungi books wofati solar woodworking
  • Mark post as helpful
  • send pies
    Number of slices to send:
    Optional 'thank-you' note:
  • Quote
  • Report post to moderator
Jose Manuel : Good, I am glad everything seems to be under control, and you made new friends with the Ceramist. If you have been following my comments, you know
that because of the Crap content videos to be found there, like 10 videos showing people trying to make RMHs out of ALL STEEL , next month there will be 100 people
posting pictures of crap ALL STEEL Stoves of flaming death !! Please pass on to our new friends the Permies.com and our sister site richsoil.com, with a
Warning about crap on You Tube ! BIG AL !
 
Jose Manuel Bonilla
Posts: 44
2
  • Mark post as helpful
  • send pies
    Number of slices to send:
    Optional 'thank-you' note:
  • Quote
  • Report post to moderator

because of the Crap content videos to be found there, like 10 videos showing people trying to make RMHs out of ALL STEEL , next month there will be 100 people
posting pictures of crap ALL STEEL Stoves of flaming death !! Please pass on to our new friends the Permies.com and our sister site richsoil.com, with a
Warning about crap on You Tube


For sure I'll do. We had not much time this morning and some things kept missing, but I promised to send them to the good places con the web. Unfortunately they don't understand much english... but I'll try to help them as far as I could and we'll have time enough to speak about RMH, the good books and forums. Don't worry about that.
 
allen lumley
pollinator
Posts: 4154
Location: Northern New York Zone4-5 the OUTER 'RONDACs percip 36''
67
hugelkultur fungi books wofati solar woodworking
  • Mark post as helpful
  • send pies
    Number of slices to send:
    Optional 'thank-you' note:
  • Quote
  • Report post to moderator
Jose Manuel : I looked at the picture of you geared up to work on your barrel, and I thought the caption should be, ''O.K., Tell me Again how this will help the people in
Fuko Shima ?" hope that translates clearly ! Big AL
 
Jose Manuel Bonilla
Posts: 44
2
  • Mark post as helpful
  • send pies
    Number of slices to send:
    Optional 'thank-you' note:
  • Quote
  • Report post to moderator

hope that translates clearly !


Think I've catch it

Here I am again, I've bought new firebricks, 2552ºF (1390C) rated, two sizes (6cm and 3cm thickness) and remade the chamber again to see how it goes. Today I'll cut some more bricks in order to have the manifold clear enough (the grinder's wheel got dull after 4 cuts!) I hope tomorrow I'll have the flues at home.

Please, there's one question never answered to me abut the test-run: I suppose I should make it with isolation, clay and mortar as needed in order to see how it works before making it inside, shouldn't I?
I'm a bit afraid about the clay slip getting hard with flames and being it difficult to remove after testing...

Here you have the new brick layers configuration and the manifold being shaped:

Gallery


And just dry-laid J test:


Have a nice day:

Mauel

 
Jose Manuel Bonilla
Posts: 44
2
  • Mark post as helpful
  • send pies
    Number of slices to send:
    Optional 'thank-you' note:
  • Quote
  • Report post to moderator
I said:

Please, there's one question never answered to me abut the test-run:


Opss, yes you answered me, Allen, thanks again

Regardless of the type of brick that you use to dry stack and make up your test RMH, you will want to dip them in water and then into your clay slip, that and a little amount
of Cob, 5 -10 liters, certainly no more will seal all of the brick and heat passages before the barrel !

With my duct work as tightly sealed as possible and a layer of clay slip to show any cracks, I would try my RMH without the barrel, then when I hear the dragons friendly deep
throated roar, I would hook up all my horizontal ductwork, and about 2 meters of vertical chimney and try that, only if this gives me problems would I consider unhooking the
horizontal piping and going straight to an elbow and the vertical pipe!

This last test would only be necessary if your rocket with the barrel on did not draw as well as before, and is the best way on determining if the problem (which we
already have proved is not in the brick work section) is in the RMH from the barrel out through the transitional zone to the horizontal pipe, because we have eliminated ALL of
the horizontal pipe from the test !


Today's afternoon I've tried to lay the bricks with clay slip but, hell, It was difficult for me!
I suppose slip was maybe a bit thick and I should have dip the bricks in water a few minutes before dipping them on the slip, because it got really sticky and glued bricks faster than I could manage.
Dark night came and, somewhat frustrated, I stopped working for now. Tomorrow I'll try it again. It all came easy untill now
I'll have a look on the web for some clay slip and bricks vídeos.

Greetings:

Manuel
 
When evil is afoot and you don't have any arms you gotta be hip and do the legwork, but always kick some ... tiny ad:
the permaculture bootcamp in winter (plus half-assed holidays)
https://permies.com/t/149839/permaculture-projects/permaculture-bootcamp-winter-assed-holidays
reply
    Bookmark Topic Watch Topic
  • New Topic