

|

|
|
|
|

|

|

|

|

|


Living today because no other time exists.

God of procrastination https://www.youtube.com/watch?v=q1EoT9sedqY
Living today because no other time exists.
I am not talking about your weather, but about your mass? How long has it been drying?Lua Sage wrote:I am in Colrado. It is dry.
God of procrastination https://www.youtube.com/watch?v=q1EoT9sedqY
Living today because no other time exists.
God of procrastination https://www.youtube.com/watch?v=q1EoT9sedqY


Lua Sage wrote:I built a rocket stove last summer. That was the RMH minus the 40 ft. of pipe, but with a vent stove pipe. It has worked like a charm for the past year.
I built an RMH this fall. It is the exact same dimensions and materials of the stove that I built last summer, plus 40ft. of pipe. Only difference was the height of the firebox (feed). That was much deeper than the one on the working rocket stove. But, this RMH doesn't work.
I checked for draft at every stage. It had draft. In fact, it still has draft, just not enough.
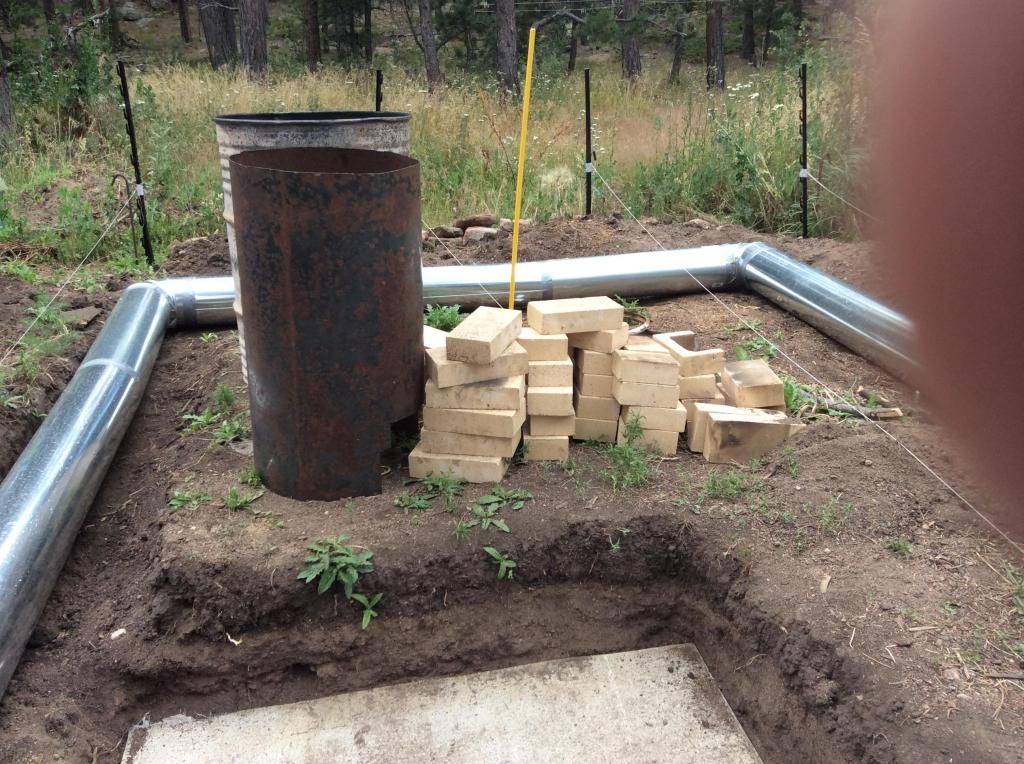
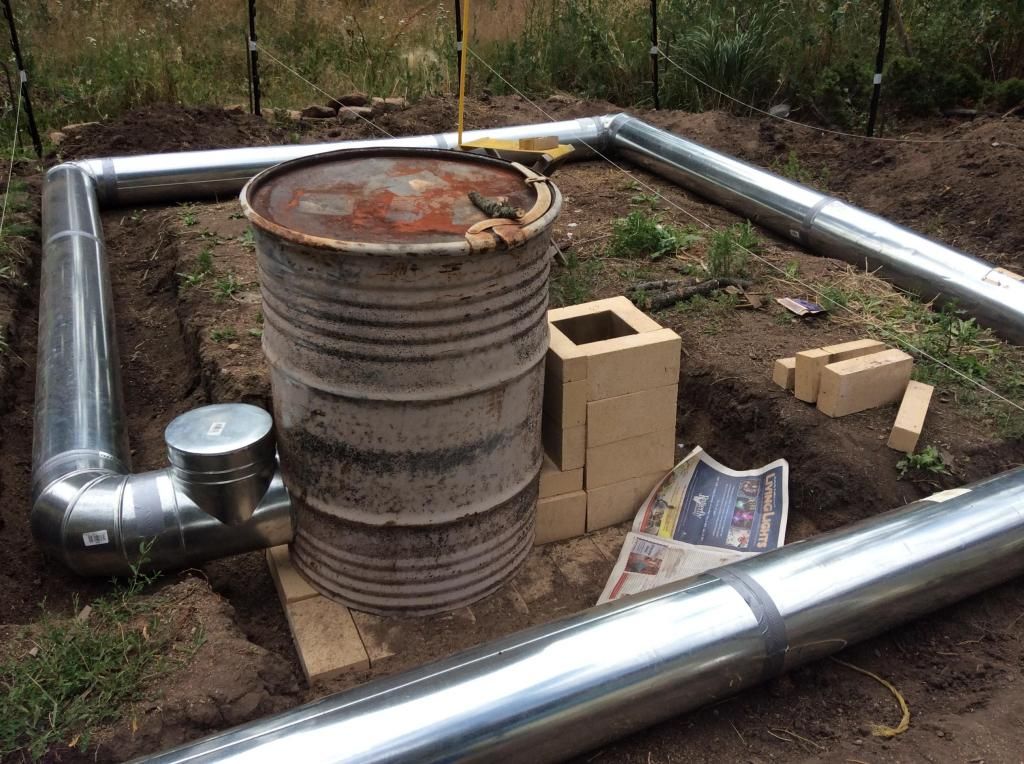
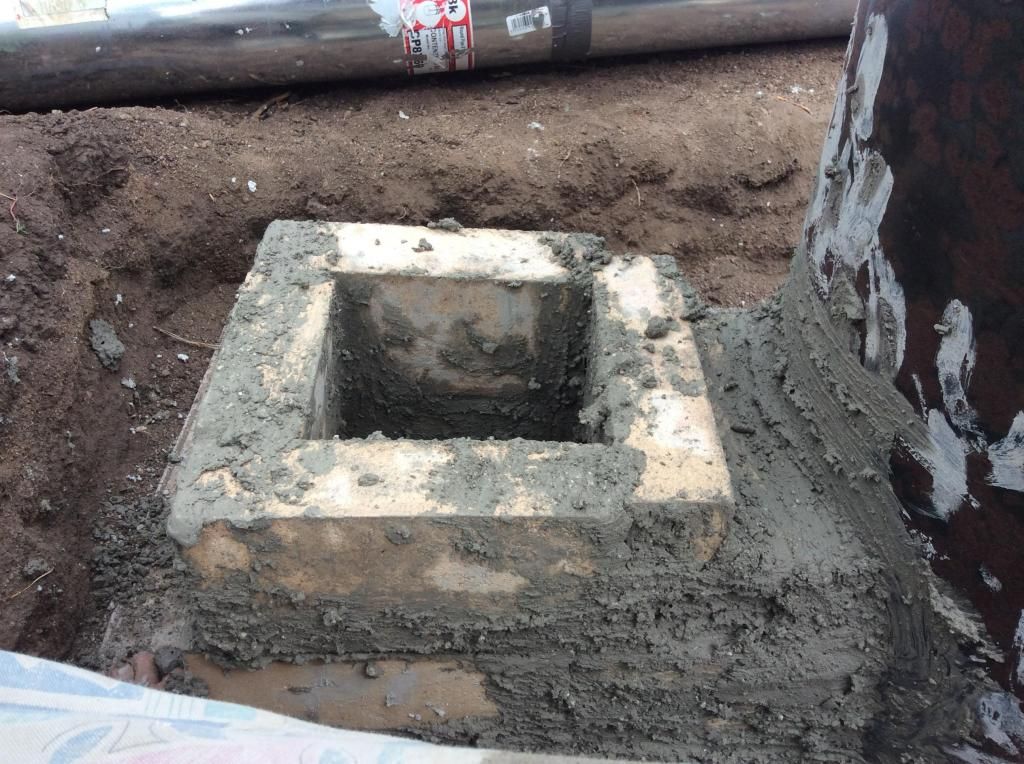
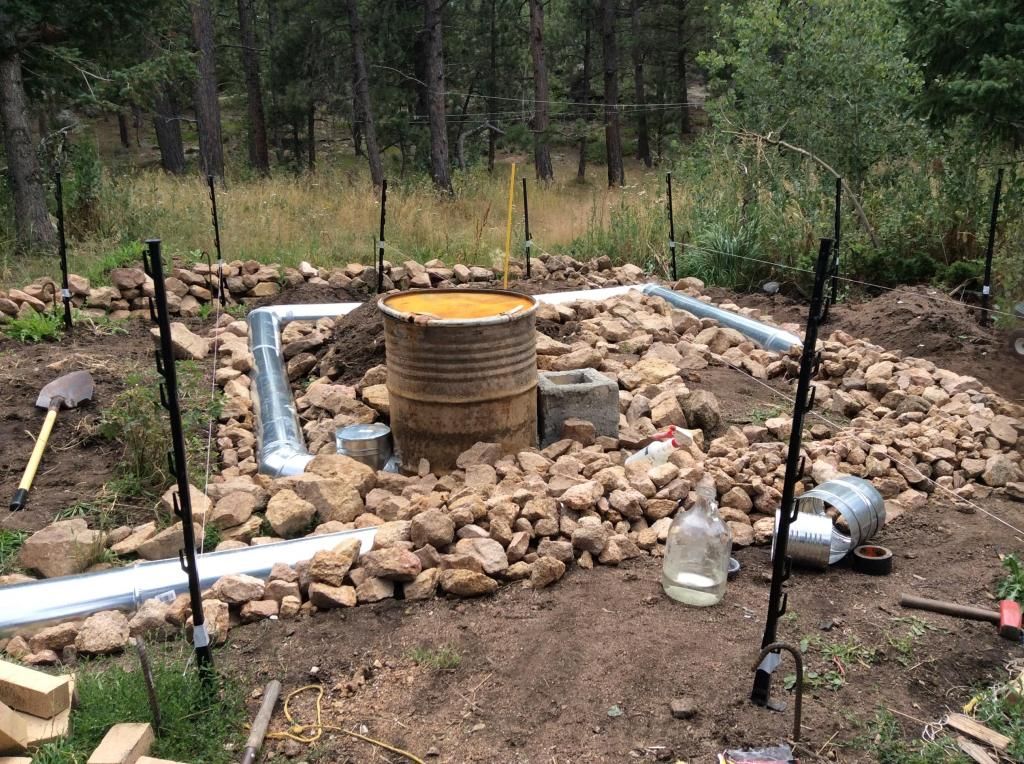
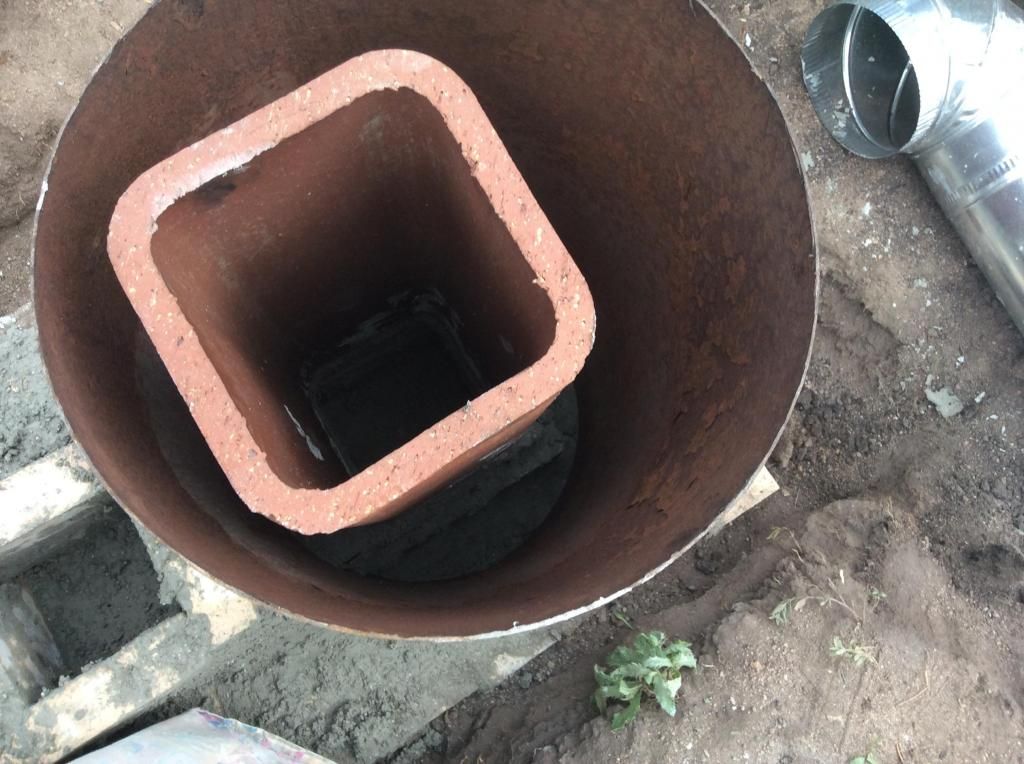
We started by digging a ditch partially into the ground, partially elevating the level for the pipe. There was a slight incline where I wanted to put my tipi, so we first decided where floor level would be, then adjusted the level of the ground to determine the height of the 8” pipe. The stove was built into the ground. I started with a cement board, then mortared firebricks to make a base, then built the firebox, the burn tunnel, the heat riser, added the water heater around the heat riser, filled with perlite, put on 55 gallon barrel, fit into 40ft. of pipe, covered pipe with rocks, covered all with dirt to floor level.
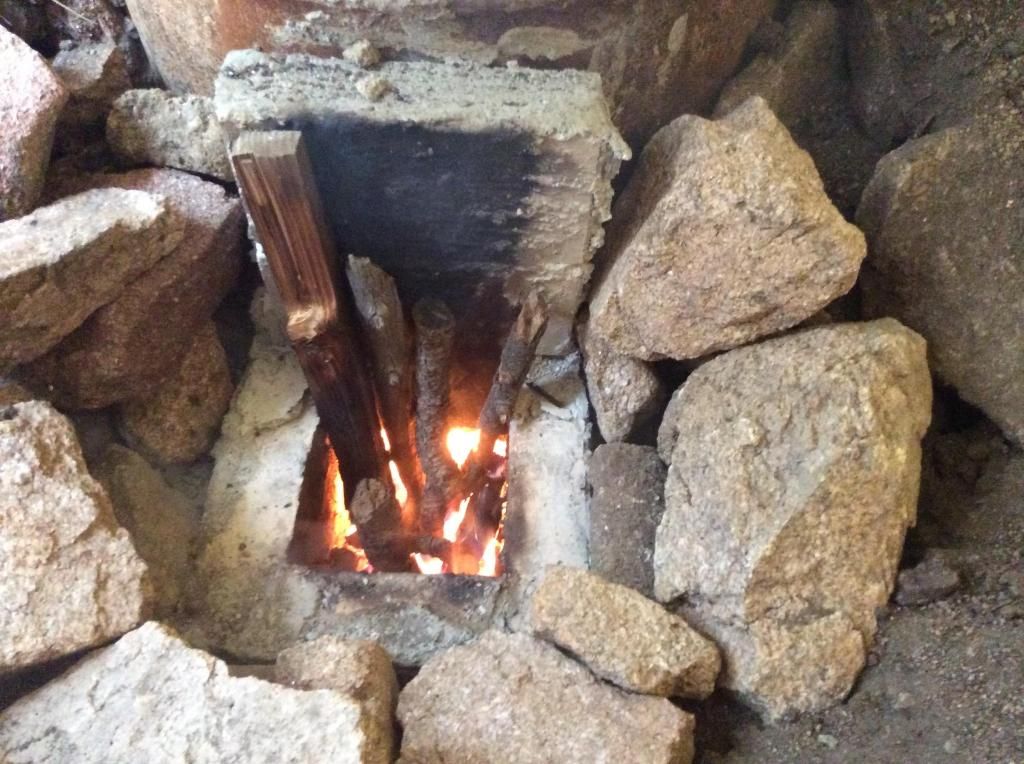
First trial: Built a fire in the fire box. Drafted through burn tunnel, but not with force, for a few minutes, then fire snuffed out like it had been deprived of oxygen. Multiple attempts, same result.
First solution attempt: Knocked off half the fire bricks from the firebox (feed.) Made it the same height as the working rocket stove. Then the fire burned fine, without being snuffed out for lack of oxygen. But, the draft through the burn tunnel worked more like an ordinary stove would – a draft, but not with any force. The result of this is that the fire would burn UP the sticks, and once the flames were higher than the burn tunnel, the fire drafted in two directions. I could look to the bottom and see that the flames lower than the top of the burn tunnel were drafting through the stove, but the flames higher than the burn tunnel were drafting out the fire box – therefore filling the tipi with smoke.
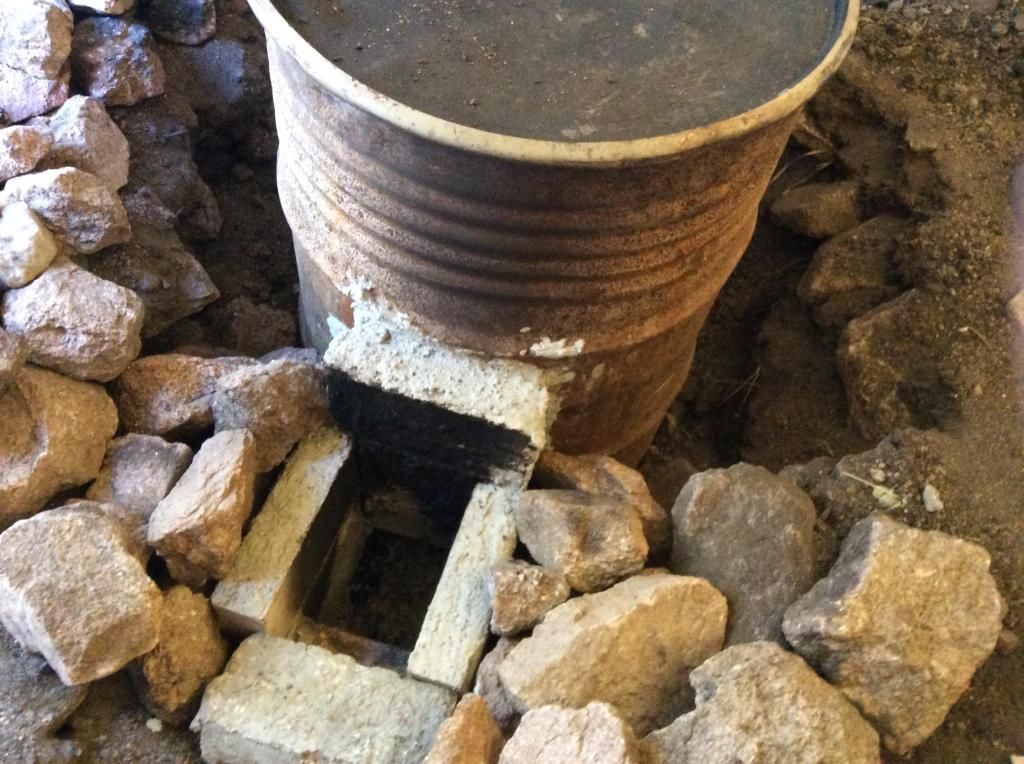
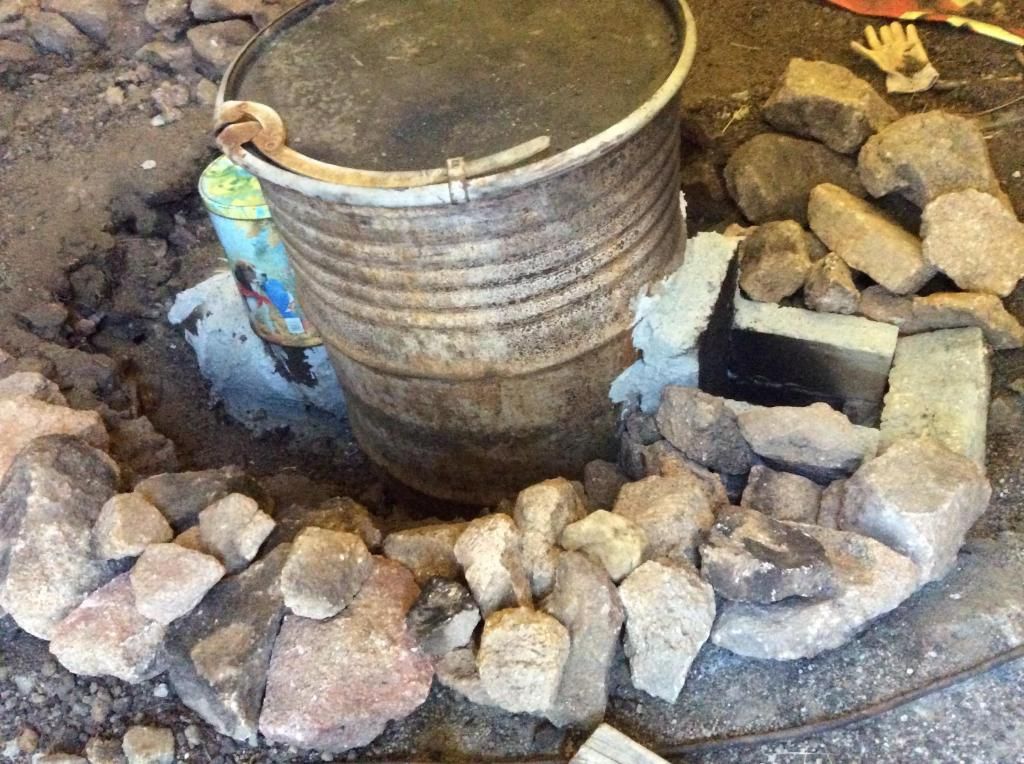
Then I found online the idea that the heat in the heat riser needed to be way higher than the heat in the barrel, after it went over the top and started down. Well, we had buried the barrel half way up, so that the top of the firebox was at floor level. We figured maybe the differential in the temps was not great enough. So, I unburied the barrel, made an air space all the way around the barrel. Same result: fire goes through the pipes fine until the height of the fire is higher than the top of the burn tunnel, then those flames draft into the tipi, straight up.
Now, here’s what I ‘m dealing with. I cannot rebuild from scratch. I had a massive amount of help collecting rocks, hauling dirt, cutting the barrel and water heater. It can’t be done over. If the problem cannot be fixed at the stove, I’m going to have to call it a huge money waste and dream killer.
To restate the problem: the fire burns and drafts through the burn tunnel, but not with the “rocket” force sufficient to prevent the fire from burning up the sticks and therefore taking the easier exit out the top.
I am wondering if there is any reason not to simply add on an “oven” style firebox in front of or as part of the firebox (feed.) It would open from the side, act like a wood stove, draft out the burn tunnel, go through the system of pipes, exit out the outside. Thoughts?
Success has a Thousand Fathers , Failure is an Orphan
LOOK AT THE " SIMILAR THREADS " BELOW !
Living today because no other time exists.
Living today because no other time exists.
Living today because no other time exists.
Living today because no other time exists.

Living today because no other time exists.
God of procrastination https://www.youtube.com/watch?v=q1EoT9sedqY
Living today because no other time exists.
Success has a Thousand Fathers , Failure is an Orphan
LOOK AT THE " SIMILAR THREADS " BELOW !
God of procrastination https://www.youtube.com/watch?v=q1EoT9sedqY
Living today because no other time exists.
Glenn Herbert wrote:We haven't heard from the OP in two years.

|
There will be plenty of time to discuss your objections when and if you return. The cargo is this tiny ad:
a humble home and a large garden will erase stress from the rat race
https://wheaton-labs.com/bootcamp
|


