posted 8 years ago
It is easier to start your vegetable garden by planting directly into the garden and transplanting. However some vegetables take several months to mature from seed, so it is not practical to direct sow them in the garden where the growing season is short. That is why when it comes to long season plants like tomatoes, peppers, and eggplant, many gardeners either start their own plants indoors or purchase seedlings from a nursery or big box store. If you can buy transplants for 6 plants for $3 or $4, then this might not be a bad idea. If you have to pay $4 for a single plant then this might get expensive.
These vegetables are usually direct seeded: Beans, beets, carrots, corn, cucumbers, garlic, lettuce, micro greens, muskmelons, okra, parsnips, peas, pumpkins, radishes, rutabaga, salsify, squash, turnips, and watermelon.
These are some vegetables that are transplants: Basil, broccoli, Brussels sprouts, cabbage, Chinese cabbage, cauliflower, celery, chard, chives, collards, eggplant, endive, escarole, kale, kohlrabi, leeks, mustard, okra, onions, parsley, peppers, tomatoes and watermelon.
Then there are a handful of vegetables that aren't usually grown from seed at all. Plants started from other than seed: Artichokes by root divisions, Asparagus by 1-year old roots, Garlic/Shallots by cloves, Horseradish by root cuttings, Onions by sets, Potatoes by using seed potatoes, Rhubarb by root crowns, and Sweet Potatoes by slips.
My DH and I are trying real hard to learn seed starting. Here are some things we have learned and researched. What are your best methods?
Keep it simple
Because each plant has unique seed starting requirements, it helps to start small by growing just a few varieties. If you're a beginner, choose easy to grow plants first, and then move on to more harder to grow seeds. Some suggestions for beginner gardeners: Tomatoes, peppers, lettuce, peas and beans or flowers like zinnias, nasturtiums, and cosmos. The seed packets explain how to plant the seeds. Annuals generally are buried to a depth equal to the size of the seed in moist well drained soil. Some, like tomatoes and peppers, require warm soil or a heat mat to germinate.
Methods we have used: Plant outdoors after the last sign of frost; plant in pots indoors; paper towel method; soaking in water.
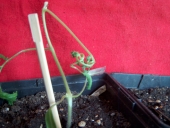
The first part of the seedling to emerge from the seed is the root . The emergence of the root is typically used as the first indication that a seed is viable. Eventually the shoot will also expand and emerge from the seed.
If germination occurs in darkness, root growth slows after the shoot emerges and shoot elongation accelerates. This behavior increases the chance that the seedling will emerge from soil into the light where it will be able to obtain energy from sunlight by photosynthesis. Once a seedling emerges into the light, the plant undergoes dramatic changes such as turning green and producing leaves.
Perennial Seeds Need a Winter
Long lived perennial plant seeds have mechanisms to prevent germination until conditions are right for successful growing. Perennial seeds go dormant over the winter and then need their dormancy broken in the spring. The techniques below are for perennial seeds only, do not use these techniques on annual or bi-annual vegetable, herb or flower seeds.
In the wild, dormancy is broken by spending time in the ground through the winter so that its hard seed coat is softened by frost and weathering. This cold moist period triggers the seed’s embryo to grow and eventually break though the softened seed coat in its search for the sun and nutrients.
The seed needed special treatment: Did the seed packet mention per-chilling, chipping, scarifying or soaking? Some treatments may sound a bit strange but they are essential to help the seed germinate. This is why many wildflower seed are spread outdoors in October and if planted indoors will need stratification.
Find the right containers
You can start seeds in almost any type of container, as long as it's at least 2 or 3 " deep and has some drainage holes. Either purchased pots, flats or containers you've saved. Your used pots should be cleaned and disinfected by soaking in 1 part bleach to 10 parts water. You might want to grow seedlings in yogurt cups, milk cartons, egg cartons or paper cups. Some folks like using the cardboard rolls from paper towels of toilet paper. Also available are special trays for seed starting, some have a clear plastic lid or dome to make it like a mini greenhouse..
You will also want labels or some markers so when you plant your seeds you will know what is what. These can be as simple as tooth pick with masking tape flags.
If planting indoors you will want plastic bags or plastic wrap to cover the pots. These will trap warmth and humidity where the seeds need it.
Prepare the potting soil
If you are starting your seeds indoors, choose potting soil that's made for growing seedlings, it is called "Seed Starter Mix". If possible look for a "Forest Free" product. Do not use soil from your garden or re-use potting soil from your houseplants. Start with a fresh, sterile mix that will ensure healthy, disease-free seedlings and no unknown seedlings. For beginner gardeners this advise helps you not know which is a plant and which is a weed.
Before filling your containers, use a bucket or tub to moisten the planting mix. The goal is to get it moist but not sopping wet; crumbly, not gloppy. Fill the containers and pack the soil firmly to eliminate gaps.
Make sure you have lots of light
All seedlings require a considerable amount of light, so make sure you have a sunny, south facing window. If seedlings don't get enough light, they will be leggy and weak.
If you don't have a sunny, south facing window, you can use a single light bulb or invest in florescent, high density plant light, grow lights and/or a timer. It's the best way to ensure consistent, abundant light. Set the timer for 15 hours a day, water regularly and you're sure to get great results. There are other method that you can use to add more sunlight by adding mirror or cardboard with aluminum foil attached. Anything to reflect sunlight.
Plant at the right time
The goal with seed starting is to have your seedlings ready to go outside when the weather is favorable. Start by looking at the seed packet, which should tell you when to start seeds inside. Usually, it will say something like, "Plant inside six to eight weeks before last frost."
Some types of vegetables, such as beans and squash, are best started outdoors. There is little benefit to growing them indoors because they germinate and grow quickly. Some flowers, such as poppies, are best planted outdoors, too. These seeds are usually marked "direct sow" on the seed packet.
Water
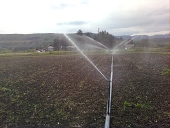
When it comes to watering, there are no hard or fast rules. It is a judgment call that depends on the type of plant, the soil, if you are planting indoors or outdoors, the weather, the time of year and other variables. Ii is easy to figure out what to do, you just need to check the soil. Slower watering is usually more effective. The key is to ensure that water gets to the root zone, whether you are tending seedlings, watering houseplants, watering a row of tomatoes or soaking thirsty shrubs and trees.
Water only when needed, when you touch the soil it will be just damp not dry or soggy. just make sure to watch the weather, and reduce frequency when rainfall is abundant. Too much water can be just as damaging to plants as too little.
Move seedlings outdoors gradually
It is not a good idea to move your seedlings directly from the protected environment of your home into the garden. You've been coddling these seedlings for weeks, so they need a gradual transition to the great outdoors. The process is called hardening off. About a week before you plan to set the seedlings into the garden, place them in a protected spot outdoors (partly shaded, out of the wind) for a few hours, bringing them in at night. Gradually, over the course of a week or 10 days, expose them to more and more sunshine and wind. A cold frame is a great place to harden off plants.
I hope some of my research will help you get off to a great start.
Invasive plants are Earth's way of insisting we notice her medicines. Stephen Herrod Buhner
Everyone learns what works by learning what doesn't work. Stephen Herrod Buhner

 6
6


 2
2


 1
1


 2
2


 1
1


 1
1


 1
1


