posted 9 years ago
It's good that you are not super ambitious with your planting, as it will take some work to get your plot started but should be fine to expand production in the future. It's going to be a bit of work, but it's work done once, and you feel very rewarded for it.
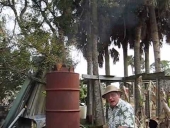
Basic general design tips: When looking at the photo, with your tap and your basement window well, I'd say to build your bed so that there is a two foot path starting where that potted plant is by the deck that goes to the window well. This give you reaching access to your tap. I'm not sure if that is a dryer vent to the right of the tap, but that could cause problems if it is. The dryer exhaust can be quite harsh on plants, so you might need a flexible pipe to move that hot caustic air to the right. At any rate, that reduces the size of your plot, and thus the amount of work you are doing!
The rest, which would be 4' X 6' is still a difficult reach for weeding, particularly against the back wall. So in the center of your pavers side (opposite the wall) put a keyhole of 2' X 2' which gives you are comfy access reach to all parts of the bed from the accessible sides to the wall. That is your basic design, in my opinion.
Hugulkultur, and other tips on planting out this beast.
If I was you and I had access to old wood lying around (no paint, creosote, treatments), and preferably rotten (there's bound to be some laying around in the neighborhood), I'd do some work with a spade, making the soil the sort of texture that you might think plants would grow well in, which is loose, but not powdery. It should crumble in little self contained moist balls when it is full of fertility (but that will come later) for the meantime try to get it to roughly a texture of a bunch of pea sized dirt balls, which will allow drainage, and good root penetration. If you have access to sand (which you probably do if you ask around your neighborhood), that might be a good additive to mix with your soil to boost your soil's drainage, and volume. At any rate, If you have the old wood, I would put a tarp on your pavers and dig a pit in the soil of the whole area out onto the tarp. Then I would deeply work the subsoil so that it is loose and better draining. Unless your soil is already full of rocks and sand, adding sand here for drainage, might be a good idea if you have access to lots. Now lay in the wood in the bed shape I described, then wet the wood. Mix enough of your soil and sand together rich in sand (50%) that you can fill the cracks/gaps in the wood, then moisten this mound without soaking it (you want an aerobic-oxygen rich-system, too much water will make it anaerobic). That's the basic core of the hugulkultur.
If you have some fresh grass clippings or fresh food scrap, or any green organic matter, or even wood chips, lay them in with your wood and/or on top of it (if you don't have much, just put it on top as this will work it's way downward). This will add nitrogen to the wood, so the wood breaks down faster. Any wet organic green or wet material can go here. If you have access to some finished compost, wait. Don't add it yet, unless you have a lot. If you have a lot then add a quarter or less of it now; this adds nitrogen and micro organisms to the woody layer. Conserve your urine for a week, or just pee on the woody mix for a few days for more nitrogen and moisture. At any rate, everything should be moistened as you add layers. Next add your soil and sand mixture (50% sand is probably too much here, but it can be pretty rich in sand to improve drainage). Moisten. Finally finish the soil with compost; if you have to buy this the first year, it will be worth it in the end for the years to come. If you don't have much and are wanting to skimp, then dress only where you are planting your choice crops. I would go the extra yard and buy some if you don't have it. Compost is pretty amazing stuff. You don't need to work it into the soil, but if you want and you have a lot, work some of it a bit into the top couple inches.
A single bale of straw goes a long way for mulch and is a relatively cheap investment considering the time saved on weeding. Put the squash at the back by the wall, you only need to harvest later in the season. If you have access to manure or lots of compost, make a hole under your squash planting spot, and put manure or compost in it. Water the manure or compost. Put the soil back with a shallow well on top of the resulting mound, put your squash transplant or seeds there. Put the tomato where it will get lots of sun, and where you can easily pick it. Put larger herbs further back and shorter herbs in the front of them. I would also go to a seed shop and buy a package of peas and a package of lettuce and a package of kale or chard plant peas between your plants and plant the seeds of the others around them too. As the peas grow, you can train them to wander where you like, or chop them out. They are mostly there to boost nitrogen (which is formed by nitrogen fixing bacteria on roots of pea family plants) in your soil. If you want peas, then let some of them go to flower and beyond; if you want to get the most nitrogen out of the peas into the soil, then chop them when they just begin to flower and let the whole plants rot in place. The greens are cut and come again plants, that you can thin out so that your desired plants are not too crowded. These extra plantings take up the space of weeds, and will add life to your soil as microbes will interact with the roots, and form the little moist balls and pore structure I mentioned before.
If you are really ambitious and like the sound of having peas you could put a trellis or netting against the backing wall and plant a line of peas there. You'll have to train them to send their tendrils to cling to the structure. Peas are super easy to grow, and as mentioned, are great for the soil.
After planting, put straw on the bed, to cover the soil 50%. This gives your soil surface structure and some protection, but allows the seeds to germinate. After your seeds are up, cover the soil around the plants with a bit more mulch. After you can recognize your plantings from weeds, weed it and mulch heavily.
Throughout the garden season, keep your soil moist, but not wet.
Lay cardboard on the paths, and put wood chips on that this will kill off any germinating weeds, and add a base layer for your chips that is also biodegradable. Sawdust is more friendly on the knees but it sometimes gets tracked into the house. Wood chips aren't bad though. The deeper they are, the less weeds you have, and the easier the weeds are to pull when they sprout up. Deeply mulched paths also will boost your soils fertility later on, give habitat to beneficial insects, and will stop the sides of your bed from drying out too much on hot days. As your mulched paths breaks down, add them to the edges of your beds and between plants, and add more rough mulch to your paths. Continue to add compost with future plantings and leave as much of a plant's roots in the soil as you can to keep the soil fertility (microbial population) intact. You will not need to till or shovel in the beds again. The plant roots and the soil microbes will do all that for your, creating that crumb and pore structure that I mentioned.
"Never doubt that a small group of thoughtful, committed citizens can change the world; indeed, it's the only thing that ever has."-Margaret Mead "The only thing worse than being blind, is having sight but no vision."-Helen Keller


![[Thumbnail for IMG_1130.JPG]](/t/64575/a/49228/IMG_1130.JPG "Filename: IMG_1130.JPG
Description: future raised garden I hope!!!")

 1
1