• Post Reply Bookmark Topic Watch Topic
  • New Topic
permaculture forums growies critters building homesteading energy monies kitchen purity ungarbage community wilderness fiber arts art permaculture artisans regional education skip experiences global resources cider press projects digital market permies.com pie forums private forums all forums
this forum made possible by our volunteer staff, including ...
master stewards:
  • Carla Burke
  • Nancy Reading
  • r ranson
  • Jay Angler
  • John F Dean
  • Pearl Sutton
stewards:
  • Nicole Alderman
  • paul wheaton
  • Anne Miller
master gardeners:
  • Christopher Weeks
  • Timothy Norton
gardeners:
  • thomas rubino
  • Jeremy VanGelder
  • Matt McSpadden

Processing clay soil

 
Posts: 2
  • Mark post as helpful
  • send pies
    Number of slices to send:
    Optional 'thank-you' note:
  • Quote
  • Report post to moderator
Hello all,
Ok, so I'm building an earthen oven for experience and eventually will be building some sort of natural home most likely a super adobe cob hybrid. That being said I have done my shake tests all they did was give me more questions than answers.  I know I have clay and sand but cannot tell the silt amount so moving on to the test bricks and my question I have already dug my clay soil and it's super chunky and super hard. So I understand that it can be screened and all but I do not see how screening alone will break up the chunks. The small amount that I'm using for the test bricks I am just beating the chunks in a bucket with a tamper like tool and its already a pain so I can't imagine how one would deal with an earth oven let alone a cob house. Please tell me what I am missing
Thanks for any help!!
 
Posts: 525
Location: Northern Germany (Zone 8a)
27
  • Mark post as helpful
  • send pies
    Number of slices to send:
    Optional 'thank-you' note:
  • Quote
  • Report post to moderator
hey levi...

welcome to the forums and good luck, best wishes and blessings on your project.

did you try soaking the chunks in lots of water?

or making a heap and slightly wetting it? a tarp over it might help to keep the moisture in for some time.

EDIT: did you look into rammed earth building?
 
pollinator
Posts: 146
Location: Courtrai Area, Flanders Region, Belgium Europe
31
  • Likes 1
  • Mark post as helpful
  • send pies
    Number of slices to send:
    Optional 'thank-you' note:
  • Quote
  • Report post to moderator
Hey Levi

To process clay you can either go the wet route or the dry.


Dry has the advantage that your clay mix is dry and thus lighter to transport and store in big bags or such.

Wet has the advantage of less dust and immediately usability but it is heavy work mixing in ingredients especially if you do everything manually.


I have not worked clay in big quantities as you will need but i would use the dry method untill i have the correct mix of materials. You will get a far more homogenous material in the end.


To loosen up hard dry clay you could use a (rented ? or homebuild) 'stone crusher' - Stone crusher is a word that i use here because i don't know the exact english translation. In dutch we use the word 'kaakbreker' - which translater literally means 'yaw' breaker. If the link works you'll see lots of those machines. You have them in sizes ranging from table top models to the size of a appartment block.

https://www.google.be/search?q=kaakbreker&rlz=1C1GGGE_enBE462&tbm=isch&imgil=fZ1vx6zVsuINbM%253A%253BZAhiKhXpsAmiwM%253Bhttp%25253A%25252F%25252Fwww.fritsch-malen-zeven.nl%25252Ftheorie%25252Fkaakbrekers%25252F&source=iu&pf=m&fir=fZ1vx6zVsuINbM%253A%252CZAhiKhXpsAmiwM%252C_&usg=__5GAVeTYOb5Wcqiz7OyMlvsTK3EA%3D&biw=1365&bih=908&ved=0ahUKEwitjPyYhqTVAhXByRoKHRPUC6AQyjcIMg&ei=uQV3We3LM8GTa5Oor4AK#imgrc=fZ1vx6zVsuINbM:

Depending on your circumstances you can also use a rotating drum with heavy steels rods or balls to do the crushing.


I would recommend you to consult a local pottery (or as local as you can gett). Potters usually know what clay they have around and what/how you could use it (for) or what to add to obtain different colours etc...

You will probably extract the clay and other materials on site so it might be worth thinking that trough. Heavy materials are easier to move downhill but if you want to use the extraction pitts. I.e. to hold used water - it is difficult to move water uphill.


You might also find interesting information on your local soil and geological maps.


gardener
Posts: 6814
Location: Arkansas - Zone 7B/8A stoney, sandy loam soil pH 6.5
1650
hugelkultur dog forest garden duck fish fungi hunting books chicken writing homestead
  • Mark post as helpful
  • send pies
    Number of slices to send:
    Optional 'thank-you' note:
  • Quote
  • Report post to moderator
the traditional machine for working clay is called a pug mill and they can be found online, local potters ( as mentioned by Erwin) should know where to get one or they might even help you out with their own pug mill.

If your clay is so hard that you have trouble breaking it up, wet the clay, filling a bucket and adding water is the best method to quickly soften rock hard clays.

Do you have a photo of your test jar(s) that you could post here so others can be better help?

Redhawk
 
Levi sbottom
Posts: 2
  • Mark post as helpful
  • send pies
    Number of slices to send:
    Optional 'thank-you' note:
  • Quote
  • Report post to moderator
Wow. Sorry to all for not checking back earlier I did't expect to receive responses so fast this was my first post to a forum ever. 
Anyways. I am currently slaking the clay soil. Does anyone know if it matters if the clay soil is placed in a bucket and then water added or should I have done the opposite?
Yes to the question about rammed earth I have studied up on it a bit and think it produces a beautiful wall system. 
Ok let me add a bit more info. I am doing the earthen oven in Northern California at my mothers property where I am visiting the actual natural building that this is all leading up to will be done in Ecuador so as of this second don't have test samples of soils for there. But for the oven I do have some photos I can add of shake tests it just might take a bit because I'm traveling while in the states. 
Thanks everyone for having me.
 
Bryant RedHawk
gardener
Posts: 6814
Location: Arkansas - Zone 7B/8A stoney, sandy loam soil pH 6.5
1650
hugelkultur dog forest garden duck fish fungi hunting books chicken writing homestead
  • Mark post as helpful
  • send pies
    Number of slices to send:
    Optional 'thank-you' note:
  • Quote
  • Report post to moderator
hau Levi,  it actually doesn't matter if you start dry and add water or have the water in the bucket and add clay, either way works the same.
 
pollinator
Posts: 1603
Location: Root, New York
322
forest garden foraging trees fiber arts building medical herbs
  • Likes 1
  • Mark post as helpful
  • send pies
    Number of slices to send:
    Optional 'thank-you' note:
  • Quote
  • Report post to moderator
a simple way to break up all the clay and get it through a screen is to use a water hose with a sprayer that does a jet stream or other high pressure setting.
just put the chunks on the screen and then pressure wash them into a container under a screen.

then your clay will be too wet to work with immediately, but letting it settle you can keep pouring off the water that will go to the top.
 
Posts: 9
7
  • Likes 2
  • Mark post as helpful
  • send pies
    Number of slices to send:
    Optional 'thank-you' note:
  • Quote
  • Report post to moderator
Having just finished my first cob building I have screened a quite a lot of clay by hand (for the plaster/stucco, floors etc) . It's hot here and my mound of clay is rock hard (has to be broken apart with a pickaxe).
I found this system to be very easy, at least with my clay. You need many buckets.
I break up lots of clay in the evening and put it in buckets. Big chunks, small chunks, doesn't matter.
I pour water on them until the water is 1 inch or so above the clay.
I go to bed.
In the morning I add some water (because the big chunks will have absorbed a lot during the night) until again there is about an inch of water over the "average" surface of the lumpy clay.
I go doing my morning chores.
In the early afternoon I go and put my hands in the buckets, kneeding the lumps until it's all soft and mushy.
Then I pour the clay "batter" through the bottom of a plastic fruit crate (my "sieve") into a clean bucket. I generally have to pour it batches and push it with my palms through the sieve. If it so liquid that it runs through on its own, it will be too liquid to use it directly.
The stones, twigs, pine needles and sundry impurities that collect in the crate get consigned back to the forest floor.
Using different fruit crates with different size of holes I can get finer or coarser mixes. After this first sieving, you can sift again for a really fine slip (for clay paint, say).
If the slip is to liquid, I let it stand in the bucket overnight, and in the morning the clay is at the bottom and a layer of clear water is on top, easily poured off by tipping the bucket very gently.

If you need a lot more clay you could use sturdy tubs and break it apart with your feet, I suppose.
My clay has a lot of sand in it already, but if I need to add some dry materials I do it by kneading by hand (for small amounts) or by feet (for larger batches).
I never used a power tool.
 
Tobias Ber
Posts: 525
Location: Northern Germany (Zone 8a)
27
  • Likes 1
  • Mark post as helpful
  • send pies
    Number of slices to send:
    Optional 'thank-you' note:
  • Quote
  • Report post to moderator
hey kate... thank you for your post and welcome to the forums. the idea with the crates is awesome. it made me thinking.

what about using these things?


https://www.ebay-kleinanzeigen.de/s-anzeige/gartensieb-kompostsieb/702267643-89-1384

(image might be gone soon, because it s from and advert. it s a sturdy frame of dimensional wood that has hardwarecloth/mesh as its bottom. the frame is made to sit on a rectangular mortar-tub)


Kate Vin
Posts: 9
7
  • Likes 2
  • Mark post as helpful
  • send pies
    Number of slices to send:
    Optional 'thank-you' note:
  • Quote
  • Report post to moderator
Brilliant!
If you are prcessing lots and lots of clay it is worth investing the time and material to make sturdy proper screens of course, building them to the size that fits your need.
I ended up using the fruit crates because I had them around and they seemed to work fine. It's how I screen compost and old manure for my potted plants, so it was my first thought... the idea WAS to build proper screens (exactly like the one in the picture, maybe to the size of my smallest weelbarrow), but in the end, I just didn't feel the need for them

But I am ok with working slowly in small-ish batches... it might not be ideal for everyone.
It also depends on the clay, and the way you worked it previously... I mean, I dug it up myself, and pulled most of the larger stones out while shovelling, so I am not likely to dump a small boulder in my fragile plastic screen 
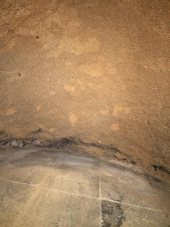
Most of the stuff that I need to screen is just smaller stones, twigs and pine needles (and, the horror, the occasional glass shard, because poeple used to live here decades ago! So I always have to be careful with every batch, when I first knead it, by hand or foot).


What I noticed is, that working with your tools every day, you come to know them and do things that you never thought of.
You develop processes in very unexpected ways. . Like, I noticed, for drying up over-liquid clay slurry, I can pour it in some slightly damaged buckets. I have two or three buckets that have split at the bottom but are still "whole". The thin split lets out the water but not the clay. It's not something you can plan ahead, they must be split just right, lol.
So my advice is to experiment with what you have at hand, and then improve as needed. It's amazing how little you might actually need if you are ok with working slowly.

Here https://www.flickr.com/photos/mihara-kokonoe-tama/36029933563/in/dateposted-public/  you can see how my clay looks when it is wetted "just right" for screening and working. I will try to upload more pics of my project.
 
pollinator
Posts: 4715
Location: Zones 2-4 Wyoming and 4-5 Colorado
492
3
hugelkultur forest garden fungi books bee greening the desert
  • Likes 1
  • Mark post as helpful
  • send pies
    Number of slices to send:
    Optional 'thank-you' note:
  • Quote
  • Report post to moderator
Howdy Kate, welcome to permies! It is good to have folks with your experience here at the forums and I would love to see you start a projects thread to show and tell us more about what you are doing !
 
Kate Vin
Posts: 9
7
  • Likes 1
  • Mark post as helpful
  • send pies
    Number of slices to send:
    Optional 'thank-you' note:
  • Quote
  • Report post to moderator
Thank you Miles, I will try to put together a post about my first little cob building!
For now you can see pictures of it here:
https://www.flickr.com/photos/mihara-kokonoe-tama/albums/72157685657647094
I will upload more work-in-progress pictures in the next days.
gift
 
The Humble Soapnut - A Guide to the Laundry Detergent that Grows on Trees ebook by Kathryn Ossing
will be released to subscribers in: 11 : 17 : 50
reply
    Bookmark Topic Watch Topic
  • New Topic