|

|
|
|
|

|

|

|

|

|


![[Thumbnail for 20171106_183627.jpg]](/t/72276/a/55792/20171106_183627.jpg "Filename: 20171106_183627.jpg
Description:")
 2
2
Denny Romero wrote:
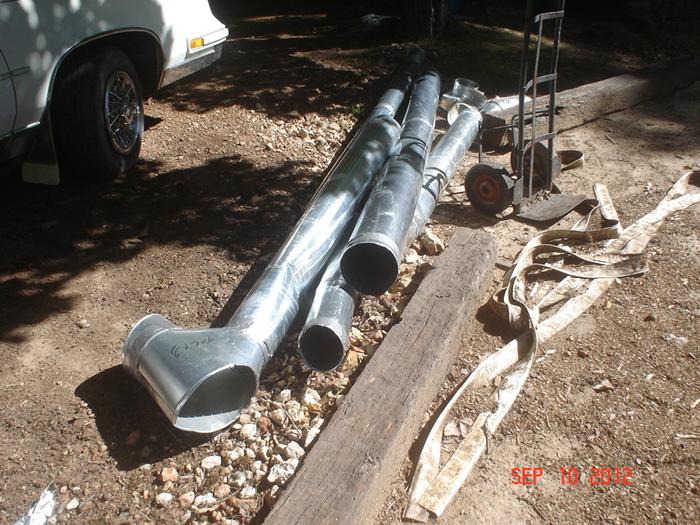
Other than weight does anyone see a problem with this?
How permies.com works
What is a Mother Tree ?

Skill verified by gir bot") 1
1
Burra Maluca wrote:
Denny Romero wrote:
Other than weight does anyone see a problem with this?
Yes. The steel is going to burn out at the sort of temperatures reached in a rocket mass heater.
Check out this thread - using metal in the burn tunnel and heat riser


 2
2
![[Thumbnail for R-76_01.JPG]](/t/72276/a/55808/R-76_01.JPG "Filename: R-76_01.JPG
Description: fireclay/perlite chimney after burnout")
![[Thumbnail for R-77_01.JPG]](/t/72276/a/55809/R-77_01.JPG "Filename: R-77_01.JPG
Description: after burnout")
![[Thumbnail for RMH-rebuild_6_01.JPG]](/t/72276/a/55810/RMH-rebuild_6_01.JPG "Filename: RMH-rebuild_6_01.JPG
Description: after several years use")
For all your Montana Masonry Heater parts (also known as) Rocket Mass heater parts.
Visit me at
dragontechrmh.com Once you go brick you will never go back!
thomas rubino wrote:Yes Denny, no steel or concrete until you move away from the core. Also having your horizontal pipe rise is not necessary. A 6" core should be 5.5" x 5.5" square all the way thru. Some people will make them 5.5 wide and 6.5 deep to allow for an inch of fly ash to settle. If you don't have one you should buy the "builders guide" by Ernie & Erica Wisner all of the specs and the reasons behind them are explained. Consider a riser made with fire clay and perlite using a 16 gal grease barrel as an outer form and a piece of round concrete form (sonitube) as a burnout inner form. This works great ! I have been using this method since my first build... reused my original on 3 cores before the outer grease barrel failed. Buy the book... Read it cover to cover ... ask any questions here! Build your RMH and ENJOY the warmth!
![[Thumbnail for 20171107_143646.jpg]](/t/72276/a/55830/20171107_143646.jpg "Filename: 20171107_143646.jpg
Description:")
![[Thumbnail for 20171107_144645.jpg]](/t/72276/a/55832/20171107_144645.jpg "Filename: 20171107_144645.jpg
Description:")
![[Thumbnail for 20171107_144659.jpg]](/t/72276/a/55833/20171107_144659.jpg "Filename: 20171107_144659.jpg
Description:")
![[Thumbnail for 20171107_144734.jpg]](/t/72276/a/55834/20171107_144734.jpg "Filename: 20171107_144734.jpg
Description:")
For all your Montana Masonry Heater parts (also known as) Rocket Mass heater parts.
Visit me at
dragontechrmh.com Once you go brick you will never go back!
thomas rubino wrote:Free fire bricks are always good ... I replaced a Victorian era coal/wood burner ... what a wood hog / creosote maker it was. The temp of that pipe after the mass will be apx. 130 F hot but not hot enough to hurt. Just right to teach about hot things to little people.
For all your Montana Masonry Heater parts (also known as) Rocket Mass heater parts.
Visit me at
dragontechrmh.com Once you go brick you will never go back!
thomas rubino wrote:With firebrick it matters where you are looking for them. If you look in main stream box stores they are horribly expensive! Sold as wood stove insert replacements. If you look at a masonry supply you may find that the heavy bricks are apx 2.00-3.00 each split bricks are a little more and the insulated bricks are more yet.
1
![[Thumbnail for 20171111_164245.jpg]](/t/72276/a/55942/20171111_164245.jpg "Filename: 20171111_164245.jpg
Description:")
![[Thumbnail for 20171111_140054.jpg]](/t/72276/a/55943/20171111_140054.jpg "Filename: 20171111_140054.jpg
Description:")
For all your Montana Masonry Heater parts (also known as) Rocket Mass heater parts.
Visit me at
dragontechrmh.com Once you go brick you will never go back!
thomas rubino wrote:Yes, busted concrete is called "urbanite". There should be NO air pockets in your mass so each piece of urbanite must be placed and covered by cob before the next piece. Consider getting some of the insulated bricks for your burn tunnel and riser.
1
For all your Montana Masonry Heater parts (also known as) Rocket Mass heater parts.
Visit me at
dragontechrmh.com Once you go brick you will never go back!
thomas rubino wrote:Yes , The lite ones from your potter are insulated firebrick . Ideally your entire core and riser , excepting the feed tube would be build with these . The heavy bricks steal heat away from your burn until they are thoroughly hot... the lite insulated bricks do not get hot so they allow the heat to travel thru the system, for a better burn. The feed tube is built with heavy brick to resist wear while putting in firewood.
thomas rubino wrote:Yes , The lite ones from your potter are insulated firebrick . Ideally your entire core and riser , excepting the feed tube would be build with these . The heavy bricks steal heat away from your burn until they are thoroughly hot... the lite insulated bricks do not get hot so they allow the heat to travel thru the system, for a better burn. The feed tube is built with heavy brick to resist wear while putting in firewood.
1
Glenn Herbert wrote:Insulating firebrick are ideal for the job, but very pricy as you found. Perhaps the labor of building a perlite-fireclay riser makes more sense now...
For all your Montana Masonry Heater parts (also known as) Rocket Mass heater parts.
Visit me at
dragontechrmh.com Once you go brick you will never go back!
thomas rubino wrote:N.C. has clay, you just need to find it. To start with you may be able to purchase 50# sacks of powdered fireclay... in Spokane it is $10 a bag. Ask your potter or a masonry supply house for it. As for regular clay there are two easy places to check . First is your county road crew may have a good idea where you might be able to dig clay. Next ask any building contractor who is "digging" they will no doubt have free bucket loads of clay... Or just go out in the woods near a creek, chances are you will find clay. Heck some back roads have mud holes that are not only clay but clay and sand with the proper consistency for cob... If you have good pure clay you will need as much as 3 times the amount of sand to clay ... So bring home sand, lots of sand (not from the ocean its too fine) as well as clay. If you choose to purchase sand it should be builders sand .
![[Thumbnail for 20171112_163501.jpg]](/t/72276/a/56016/20171112_163501.jpg "Filename: 20171112_163501.jpg
Description:")
![[Thumbnail for 20171112_163507.jpg]](/t/72276/a/56017/20171112_163507.jpg "Filename: 20171112_163507.jpg
Description:")
![[Thumbnail for 20171112_163518.jpg]](/t/72276/a/56018/20171112_163518.jpg "Filename: 20171112_163518.jpg
Description:")
![[Thumbnail for 20171112_163529.jpg]](/t/72276/a/56019/20171112_163529.jpg "Filename: 20171112_163529.jpg
Description:")
![[Thumbnail for 20171112_141913.jpg]](/t/72276/a/56020/20171112_141913.jpg "Filename: 20171112_141913.jpg
Description:")
![[Thumbnail for 20171112_135613.jpg]](/t/72276/a/56021/20171112_135613.jpg "Filename: 20171112_135613.jpg
Description:")
For all your Montana Masonry Heater parts (also known as) Rocket Mass heater parts.
Visit me at
dragontechrmh.com Once you go brick you will never go back!
thomas rubino wrote:Denny, that's very nicely built ... looks really good... Sadly the heat generated at the bottom of the feed tube is going to warp it in no time
1
Glenn Herbert wrote:What is your plan for permanent installation? What kind of floor structure is there? With the core so high in the air, it would be more difficut to connect it to a bench for mass and seating, and also possibly less convenient to reach down in for cleaning.
A big steel box like you have on the front will leak a lot of heat from the core right where it should be insulated. My experience with a J-tube only slightly larger than yours is that it is easy to scoop ashes with a sardine can mounted on a short handle, no need at all for a cleanout. I only clean ashes once a week or so, everything is reduced to mineral ash, no coals. I think the idea that long logs put in the front will burn well is misplaced... the steel box part may not keep heat well enough for that end of a log to burn completely, and flames from the part sticking all the way down the burn tunnel may not have time and turbulence enough for complete combustion. Logs sitting flat on the floor will get less than ideal air contact for complete combustion, just like a conventional woodstove.
1
For all your Montana Masonry Heater parts (also known as) Rocket Mass heater parts.
Visit me at
dragontechrmh.com Once you go brick you will never go back!
3
Glenn Herbert wrote:In a J-tube, the feed tube and floor of the burn tunnel get the most abrasion and impact, and benefit the most from being hard firebrick. Everything else is better being insulating material.
It would be beneficial to make a layer of perlite-clay a couple of inches thick on your base plate before setting the floor bricks, both to protect the base and to insulate the core. At least 2" of perlite-clay all around the core will help it get hot enough for excellent combustion.
![[Thumbnail for 20171117_191417.jpg]](/t/72276/a/56175/20171117_191417.jpg "Filename: 20171117_191417.jpg
Description:")
![[Thumbnail for 20171117_191231.jpg]](/t/72276/a/56176/20171117_191231.jpg "Filename: 20171117_191231.jpg
Description:")
![[Thumbnail for 20171117_191354.jpg]](/t/72276/a/56177/20171117_191354.jpg "Filename: 20171117_191354.jpg
Description:")
![[Thumbnail for 20171118_113138.jpg]](/t/72276/a/56191/20171118_113138.jpg "Filename: 20171118_113138.jpg
Description:")
![[Thumbnail for 20171118_140123.jpg]](/t/72276/a/56192/20171118_140123.jpg "Filename: 20171118_140123.jpg
Description:")
![[Thumbnail for 20171118_140149.jpg]](/t/72276/a/56193/20171118_140149.jpg "Filename: 20171118_140149.jpg
Description:")
![[Thumbnail for 20171118_140207.jpg]](/t/72276/a/56194/20171118_140207.jpg "Filename: 20171118_140207.jpg
Description:")
![[Thumbnail for 20171118_140127.jpg]](/t/72276/a/56195/20171118_140127.jpg "Filename: 20171118_140127.jpg
Description:")
![[Thumbnail for 20171119_112156.jpg]](/t/72276/a/56206/20171119_112156.jpg "Filename: 20171119_112156.jpg
Description:")
![[Thumbnail for 20171119_112201.jpg]](/t/72276/a/56207/20171119_112201.jpg "Filename: 20171119_112201.jpg
Description:")
![[Thumbnail for 20171119_112748.jpg]](/t/72276/a/56208/20171119_112748.jpg "Filename: 20171119_112748.jpg
Description:")
![[Thumbnail for 20171119_114128.jpg]](/t/72276/a/56209/20171119_114128.jpg "Filename: 20171119_114128.jpg
Description:")
![[Thumbnail for 20171119_163904.jpg]](/t/72276/a/56210/20171119_163904.jpg "Filename: 20171119_163904.jpg
Description:")
![[Thumbnail for 20171119_163912.jpg]](/t/72276/a/56211/20171119_163912.jpg "Filename: 20171119_163912.jpg
Description:")
![[Thumbnail for 20171119_163921.jpg]](/t/72276/a/56212/20171119_163921.jpg "Filename: 20171119_163921.jpg
Description:")
![[Thumbnail for 20171121_192329.jpg]](/t/72276/a/56305/20171121_192329.jpg "Filename: 20171121_192329.jpg
Description:")
![[Thumbnail for 20171121_192321.jpg]](/t/72276/a/56306/20171121_192321.jpg "Filename: 20171121_192321.jpg
Description:")
![[Thumbnail for 20171121_192343.jpg]](/t/72276/a/56307/20171121_192343.jpg "Filename: 20171121_192343.jpg
Description:")
![[Thumbnail for 20171121_192335.jpg]](/t/72276/a/56308/20171121_192335.jpg "Filename: 20171121_192335.jpg
Description:") 2
2
Denny Romero wrote:Ok it's done other than cob. I'm going to test for a couple of weeks before I cob it in. Also gonna put durock on the ceiling slanted to the steps to send all the heat up stairs. The door is cut in two and I can open just the top and cold air drops down the two vents. What do you all think?
1
God of procrastination https://www.youtube.com/watch?v=q1EoT9sedqY
Satamax Antone wrote:Daniel, i would say, it's perfectly possible.
We need to know more about your fireplace and chimney.
Is the back of it against an outside wall? If yes, that's a bad point.
What is the section of your chimney at my be 4 ft above the fireplace floor, 10 ft? 20 ft? Just to see if it could be used as a bell. Single storrey house, or is there levels above?
Would you mind loosing some space in front?
Is that carpet on the floor? Wood underneath?
Are you able to lay firebricks?
Are you really willing to do this?
Have a read of this, and the links. https://permies.com/t/68801/Conversion-conventional-fireplace-rocket-mass
And tell us what you think.
![[Thumbnail for 20171120_194717.jpg]](/t/72276/a/56280/20171120_194717.jpg "Filename: 20171120_194717.jpg
Description:")
![[Thumbnail for 20171119_163921.jpg]](/t/72276/a/56281/20171119_163921.jpg "Filename: 20171119_163921.jpg
Description:")

| I agree. Here's the link: http://stoves2.com |