|

|
|
|
|

|

|

|

|

|
 9
9


Gerry Parent wrote:Seeing as how this shorty core does not have the need for a floor channel brings up the much higher risk of unintentionally plugging up the port with wood shoved too far back or from a falling piece of coal.
An idea came up....Perhaps an upside down U shaped piece of metal rod (approximately the width and height of the firebox port) could be mounted on a plate steel base and positioned about an inch or so before the port? The plate would be sized the same dimensions as the inside floor so it wouldn't move around and (if needed) a horizontal top spacer butting up against the top port brick to keep it from tilting.
Shouldn't interfere with gas flow any more than a stub would.
Yes, metal is going to spall, but still perhaps last long enough to warrant its advantages.
Any thoughts?
regards, Peter
8
Peter van den Berg wrote:Sorry to say, most of these type of ideas are solutions looking for a problem. These heaters are radically different from "normal" woodstoves. It's only logical to have a different set of do's and don't's for each type. It did took a lot of work to banish all steel from the firebox' innards, why introducing new steel in there?
Peter van den Berg wrote:My solution, which has been in use for 9 seasons now: the fuel is much shorter (about 4") as compared to the maximum capacity of the firebox. I developed the habit to lay the fuel about 2" behind the threshold, so there's a space of 2" between fuel and rear wall of the firebox.
Plus a second habit: In 99.99% of the burns I use the upside-down method to light the thing. For those that aren't familiar with this: the firebox is loaded with the largest pieces at the bottom, the higher up the thinner the pieces. On top of or between the last pieces some kindling and a single barbeque lighter. So there's time enough to adjust pieces before lighting without the risk of scorching hands, and no fuel will be in the port. Lighting on top means the fire is slower to develop, but that isn't a disadvantage per se.
For those whom are accustomed to a specific length of fuel, the solution could be to build their firebox 4" deeper than the fuel's length so there will be enough space. Between the logs or whatever you have, very little space is required. All fuel front to back, no log cabin, tipi or criss-crossing style. This way, the pile of fuel is relatively compact, plus the required space in front, back and top is easy to achieve.
Silence is Golden
For all your RMH needs:
dragontechrmh.com


 9
9
Peter van den Berg wrote:...Plus a second habit: In 99.99% of the burns I use the upside-down method to light the thing. For those that aren't familiar with this: the firebox is loaded with the largest pieces at the bottom, the higher up the thinner the pieces. On top of or between the last pieces some kindling and a single barbeque lighter. So there's time enough to adjust pieces before lighting without the risk of scorching hands, and no fuel will be in the port. Lighting on top means the fire is slower to develop, but that isn't a disadvantage per se.
Peter van den Berg wrote:...For those whom are accustomed to a specific length of fuel, the solution could be to build their firebox 4" deeper than the fuel's length so there will be enough space.
Rocket surgeon and soil builder... healthy plants are all about the soil.
- My 6" Batch Rocket specs and materials list: https://permies.com/t/248275/Batch-Rocket-Double-Skin-Bell
- Batch Rocket detailed build thread with Q&A: https://permies.com/t/238503/Batch-Rocket-Build
2
John Daley Bendigo, Australia The Enemy of progress is the hope of a perfect plan
Benefits of rainfall collection https://permies.com/t/88043/benefits-rainfall-collection
GOOD DEBT/ BAD DEBT https://permies.com/t/179218/mortgages-good-debt-bad-debt


 3
3
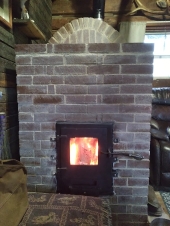
![[Thumbnail for 20250112_152914.jpg]](/t/254292/a/260555/20250112_152914.jpg "Filename: 20250112_152914.jpg
Description:")
For all your Montana Masonry Heater parts (also known as) Rocket Mass heater parts.
Visit me at
dragontechrmh.com Once you go brick you will never go back!
2
For all your Montana Masonry Heater parts (also known as) Rocket Mass heater parts.
Visit me at
dragontechrmh.com Once you go brick you will never go back!
2
2
For all your Montana Masonry Heater parts (also known as) Rocket Mass heater parts.
Visit me at
dragontechrmh.com Once you go brick you will never go back!
5
![[Thumbnail for IMG_2025-08-07-12-12-12-479.jpg]](/t/254292/a/271537/IMG_2025-08-07-12-12-12-479.jpg "Filename: IMG_2025-08-07-12-12-12-479.jpg
Description:")
![[Thumbnail for IMG_2025-08-07-12-17-36-558.jpg]](/t/254292/a/271538/IMG_2025-08-07-12-17-36-558.jpg "Filename: IMG_2025-08-07-12-17-36-558.jpg
Description:")
![[Thumbnail for IMG_2025-08-07-12-18-12-482.jpg]](/t/254292/a/271539/IMG_2025-08-07-12-18-12-482.jpg "Filename: IMG_2025-08-07-12-18-12-482.jpg
Description:")
![[Thumbnail for IMG_2025-08-07-13-16-06-087.jpg]](/t/254292/a/271540/IMG_2025-08-07-13-16-06-087.jpg "Filename: IMG_2025-08-07-13-16-06-087.jpg
Description:") 4
4
For all your Montana Masonry Heater parts (also known as) Rocket Mass heater parts.
Visit me at
dragontechrmh.com Once you go brick you will never go back!
5
5

|
Yeast devil! Back to the oven that baked you! And take this tiny ad too:
building a permaculture community with hands on permaculture
https://wheaton-labs.com/bootcamp
|