• Post Reply Bookmark Topic Watch Topic
  • New Topic
permaculture forums growies critters building homesteading energy monies kitchen purity ungarbage community wilderness fiber arts art permaculture artisans regional education skip experiences global resources cider press projects digital market permies.com pie forums private forums all forums
this forum made possible by our volunteer staff, including ...
master stewards:
  • paul wheaton
  • Anne Miller
  • Carla Burke
  • Nancy Reading
  • John F Dean
  • Timothy Norton
  • Jay Angler
stewards:
  • r ransom
  • Pearl Sutton
  • Tereza Okava
master gardeners:
  • Christopher Weeks
gardeners:
  • M Ljin
  • Megan Palmer
  • Kate Downham

Seed starting back to the basics with a twist

 
gardener
Posts: 2132
Location: N. California
1139
2
hugelkultur kids cat dog fungi trees books chicken cooking medical herbs ungarbage
  • Likes 11
  • Mark post as helpful
  • send pies
    Number of slices to send:
    Optional 'thank-you' note:
  • Quote
  • Report post to moderator
2026 has been a terrible year for seed starting for me. Before this year I felt very confident about growing seeds. I often wonder why so many people buy very over priced seedlings. This year I tried a new soil recipe for soil blocking. It made the best soil blocks, I was so proud. I just couldn't get the watering right. Think some of it was I wasn't used to peat. It holds water maybe to well. I experienced damping off like never before. In the past I may have had it here and there, but not most of the tray. If you don't water peat enough it's very hydrophobic! I did end up with enough to plant my garden, but it was a kick in the ego. Contrary to that I had great germination with direct sow.
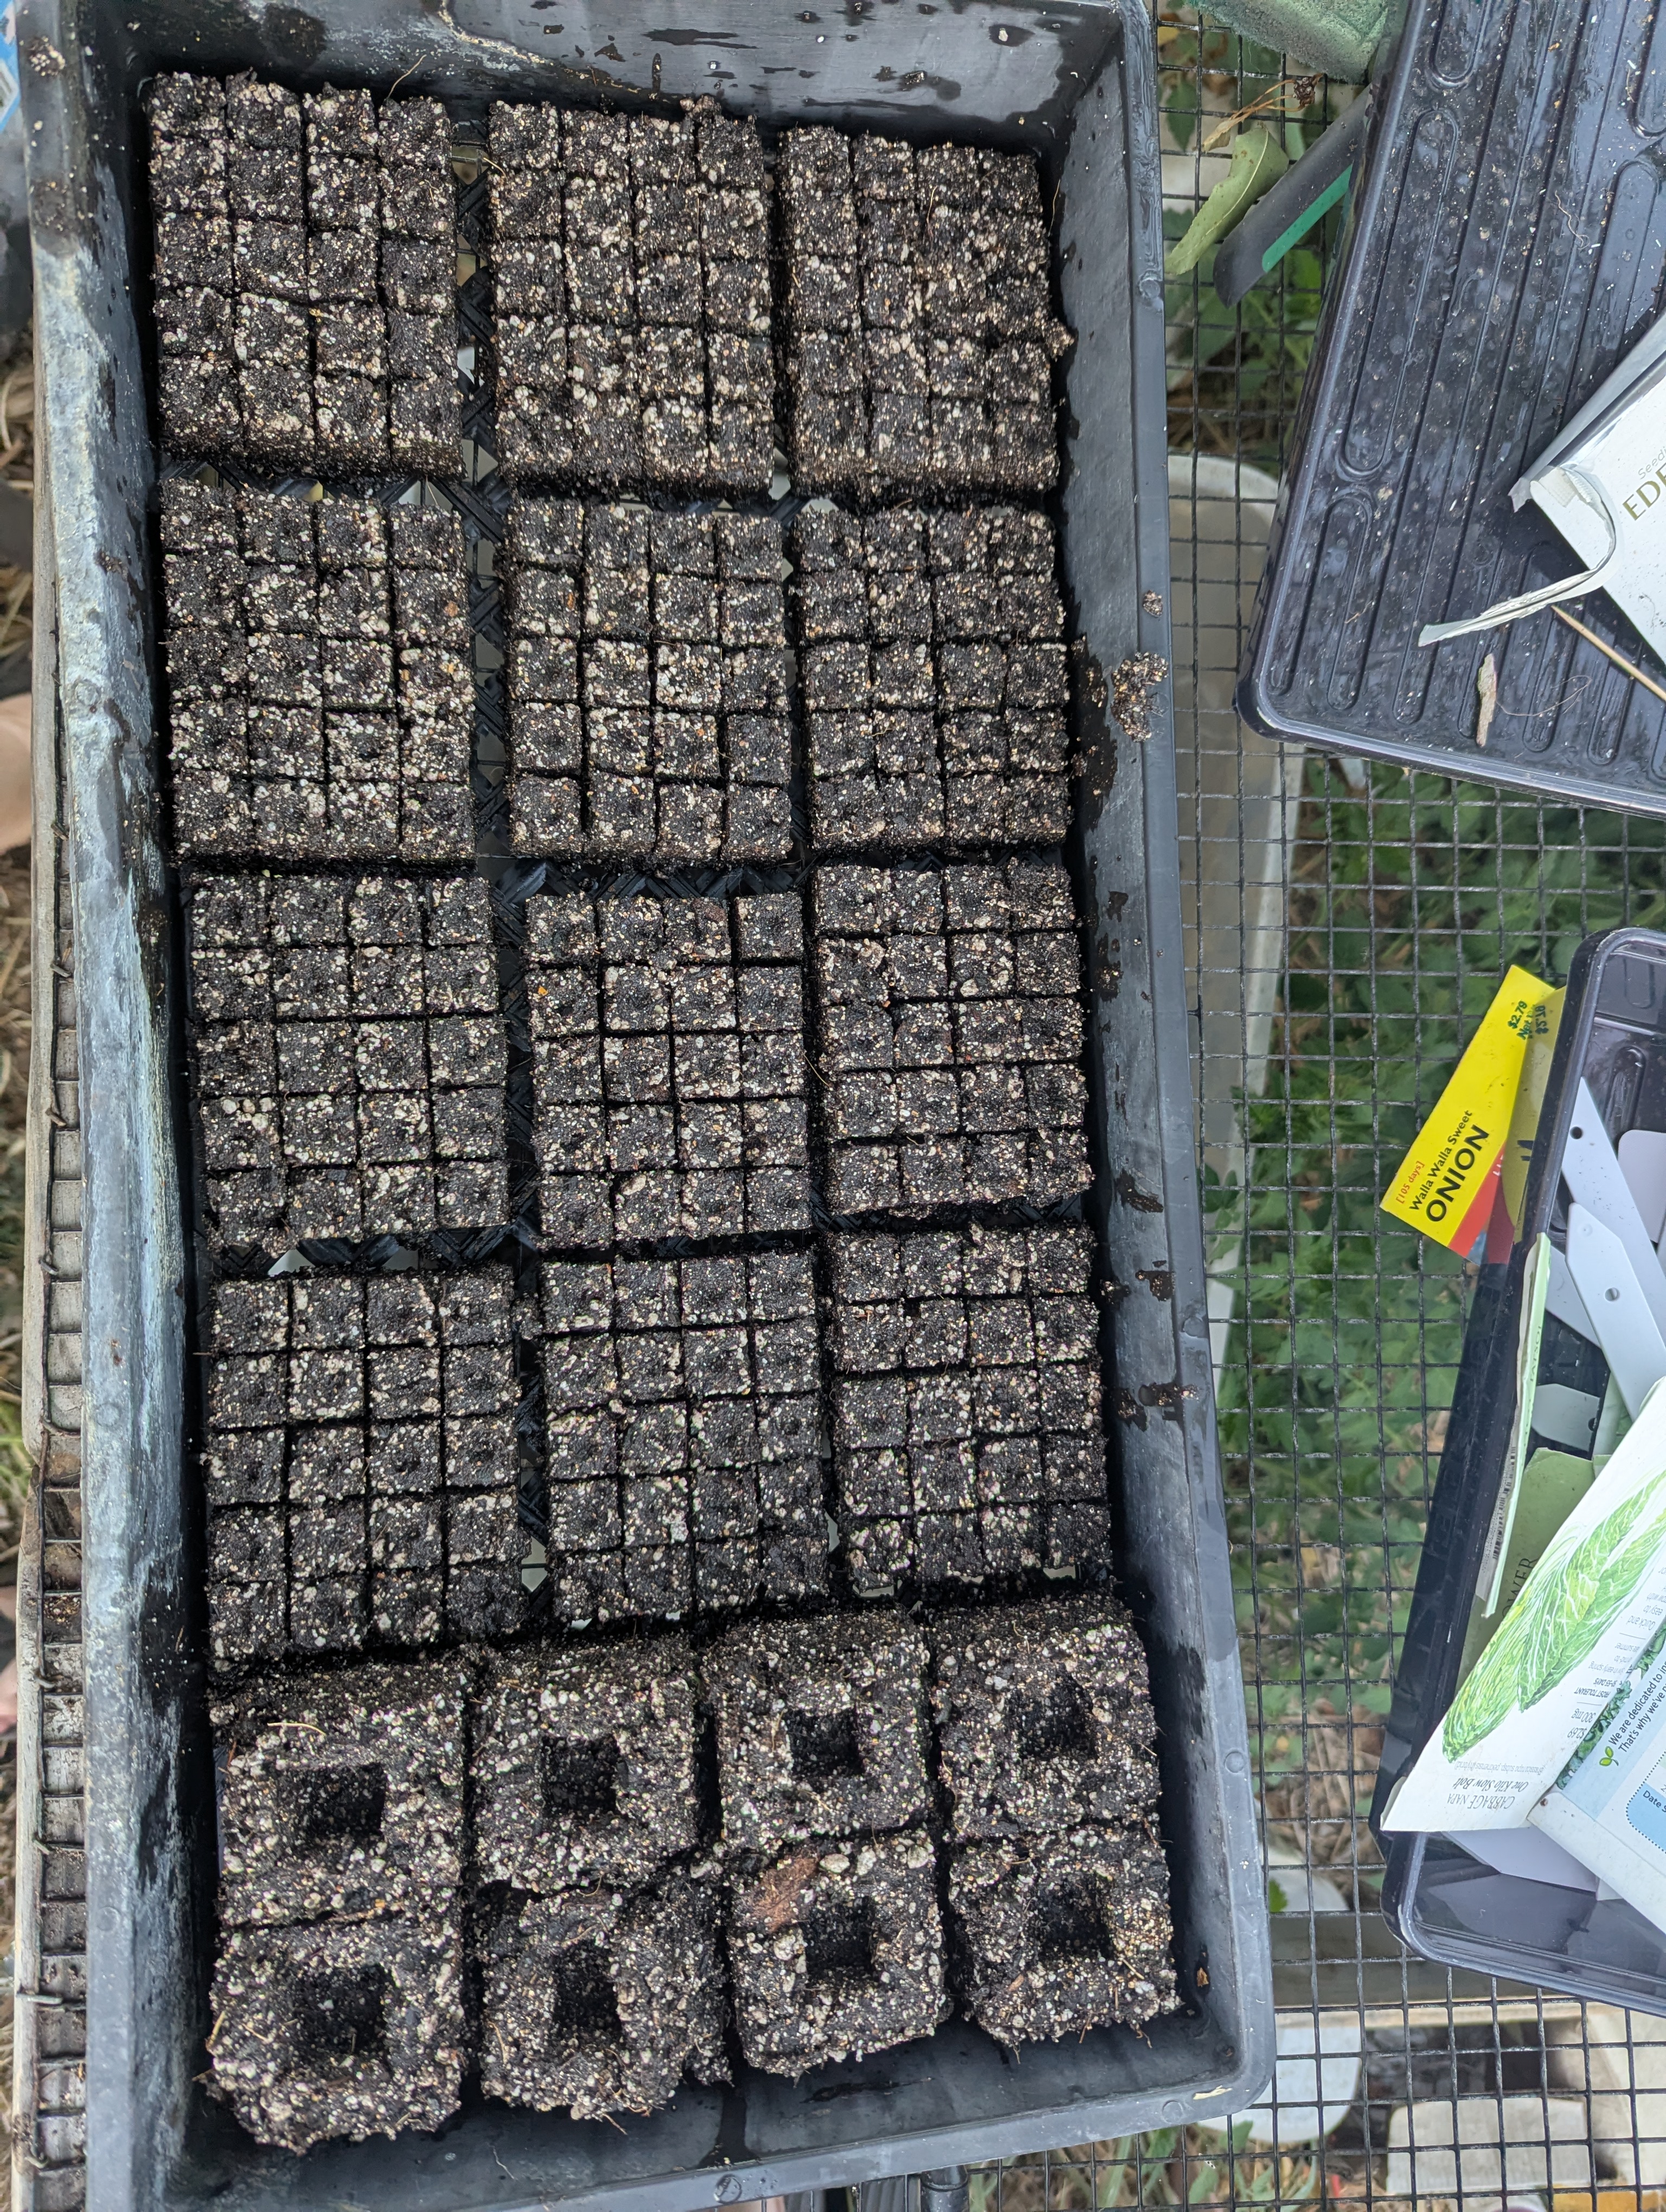
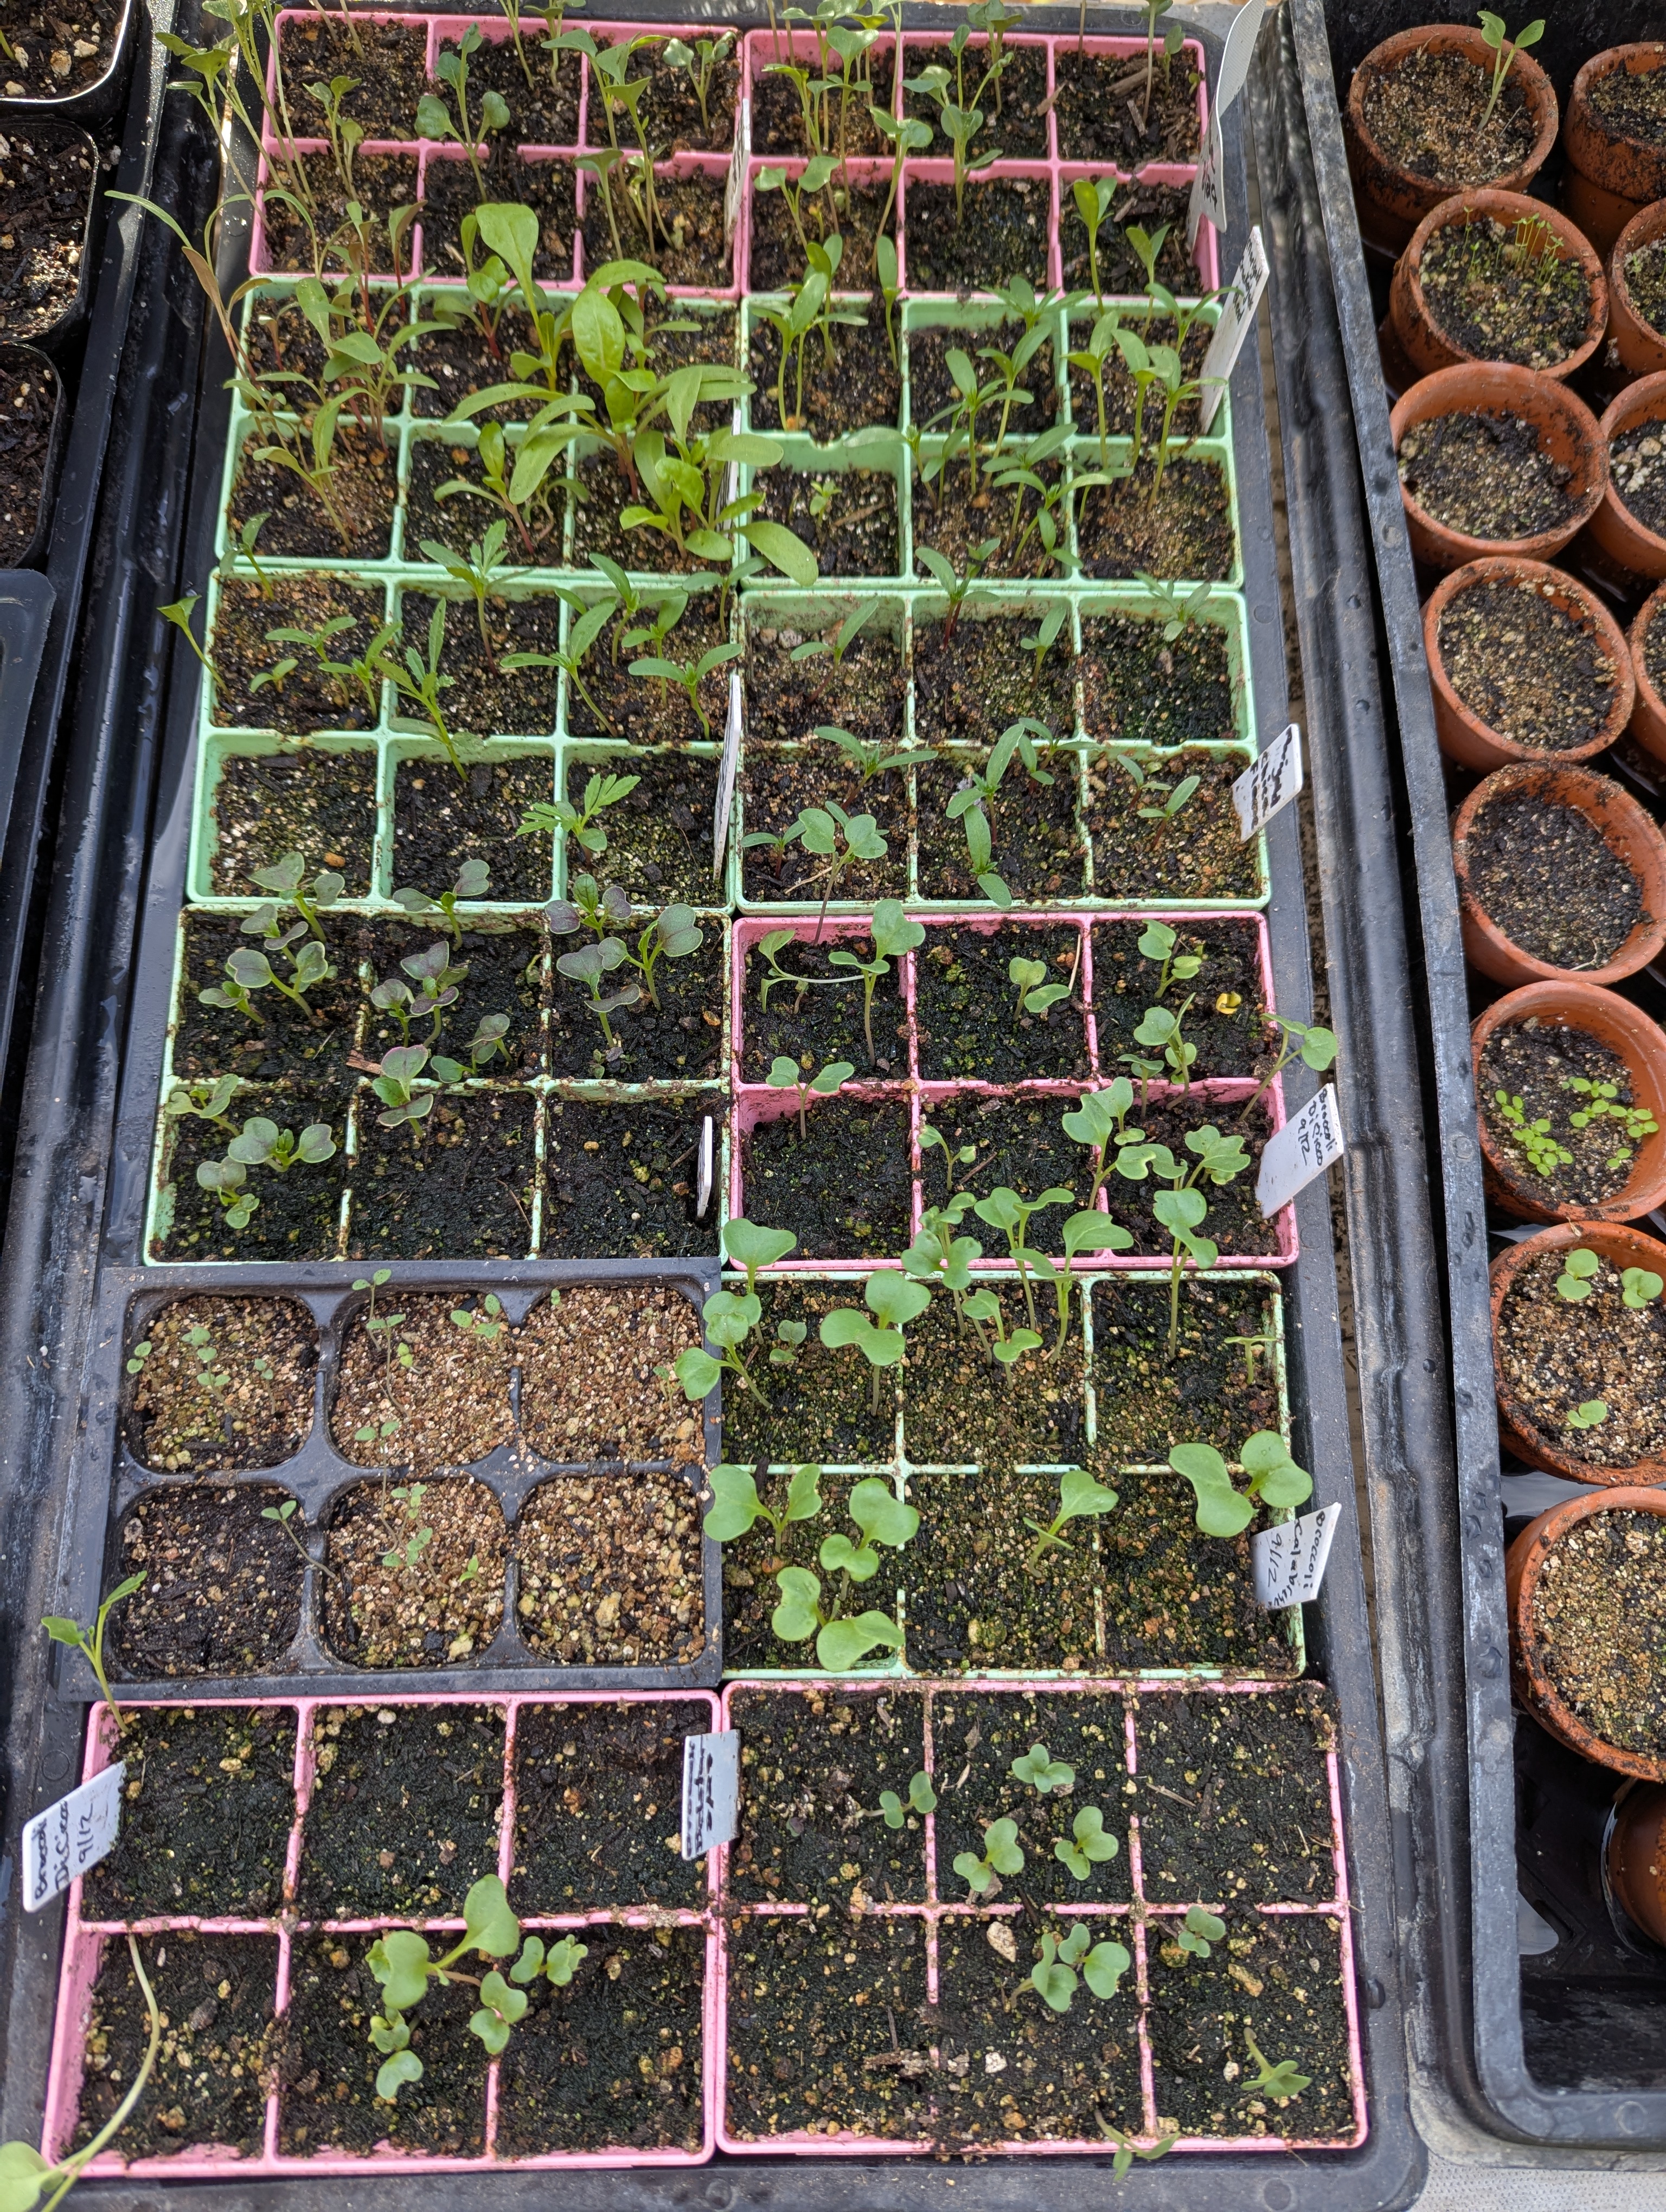
Now it's time to plant my fall/winter veggies. I decided to go back to the basics. small plastic multi cell trays (I didn't buy them, they are my old trays) I shifted bagged organic compost, and organic soil. I had very poor germination. Some of this may be because we jumped back to 100 degrees shortly after planting. The table is in dappled light, but still got very hot especially for brassica's. I try again this time with 1/2 seed starting mix, and 1/2 Coco loco. Some in the same trays, bought a new silicone tray. Even worse germination. I tried a tray of soil blocks, so far 1 seedling has emerged. I had given out hope anything in this try would germinate, but today there's 1. The weather a little better in the mid to high 90's.
Today I did another tray 1/2 of the cells only the seed starting mix, the other 1/2 The 50/50 mix from before. The weather is coming down to mid to high 80's dipping into the 70's a couple of days, but it's noticeably cooler at night, so I have high hopes, until I read the ingredients on the seed starting mix It's mostly peat and perlite. I really need to read the ingredients. I think I will get a different seed starting mix that doesn't have peat, and see if it helps. I'm trying very hard to keep the soil moist but not wet. The few seedlings that germinated like healthy, no dampening off.  This time is very poor germination.
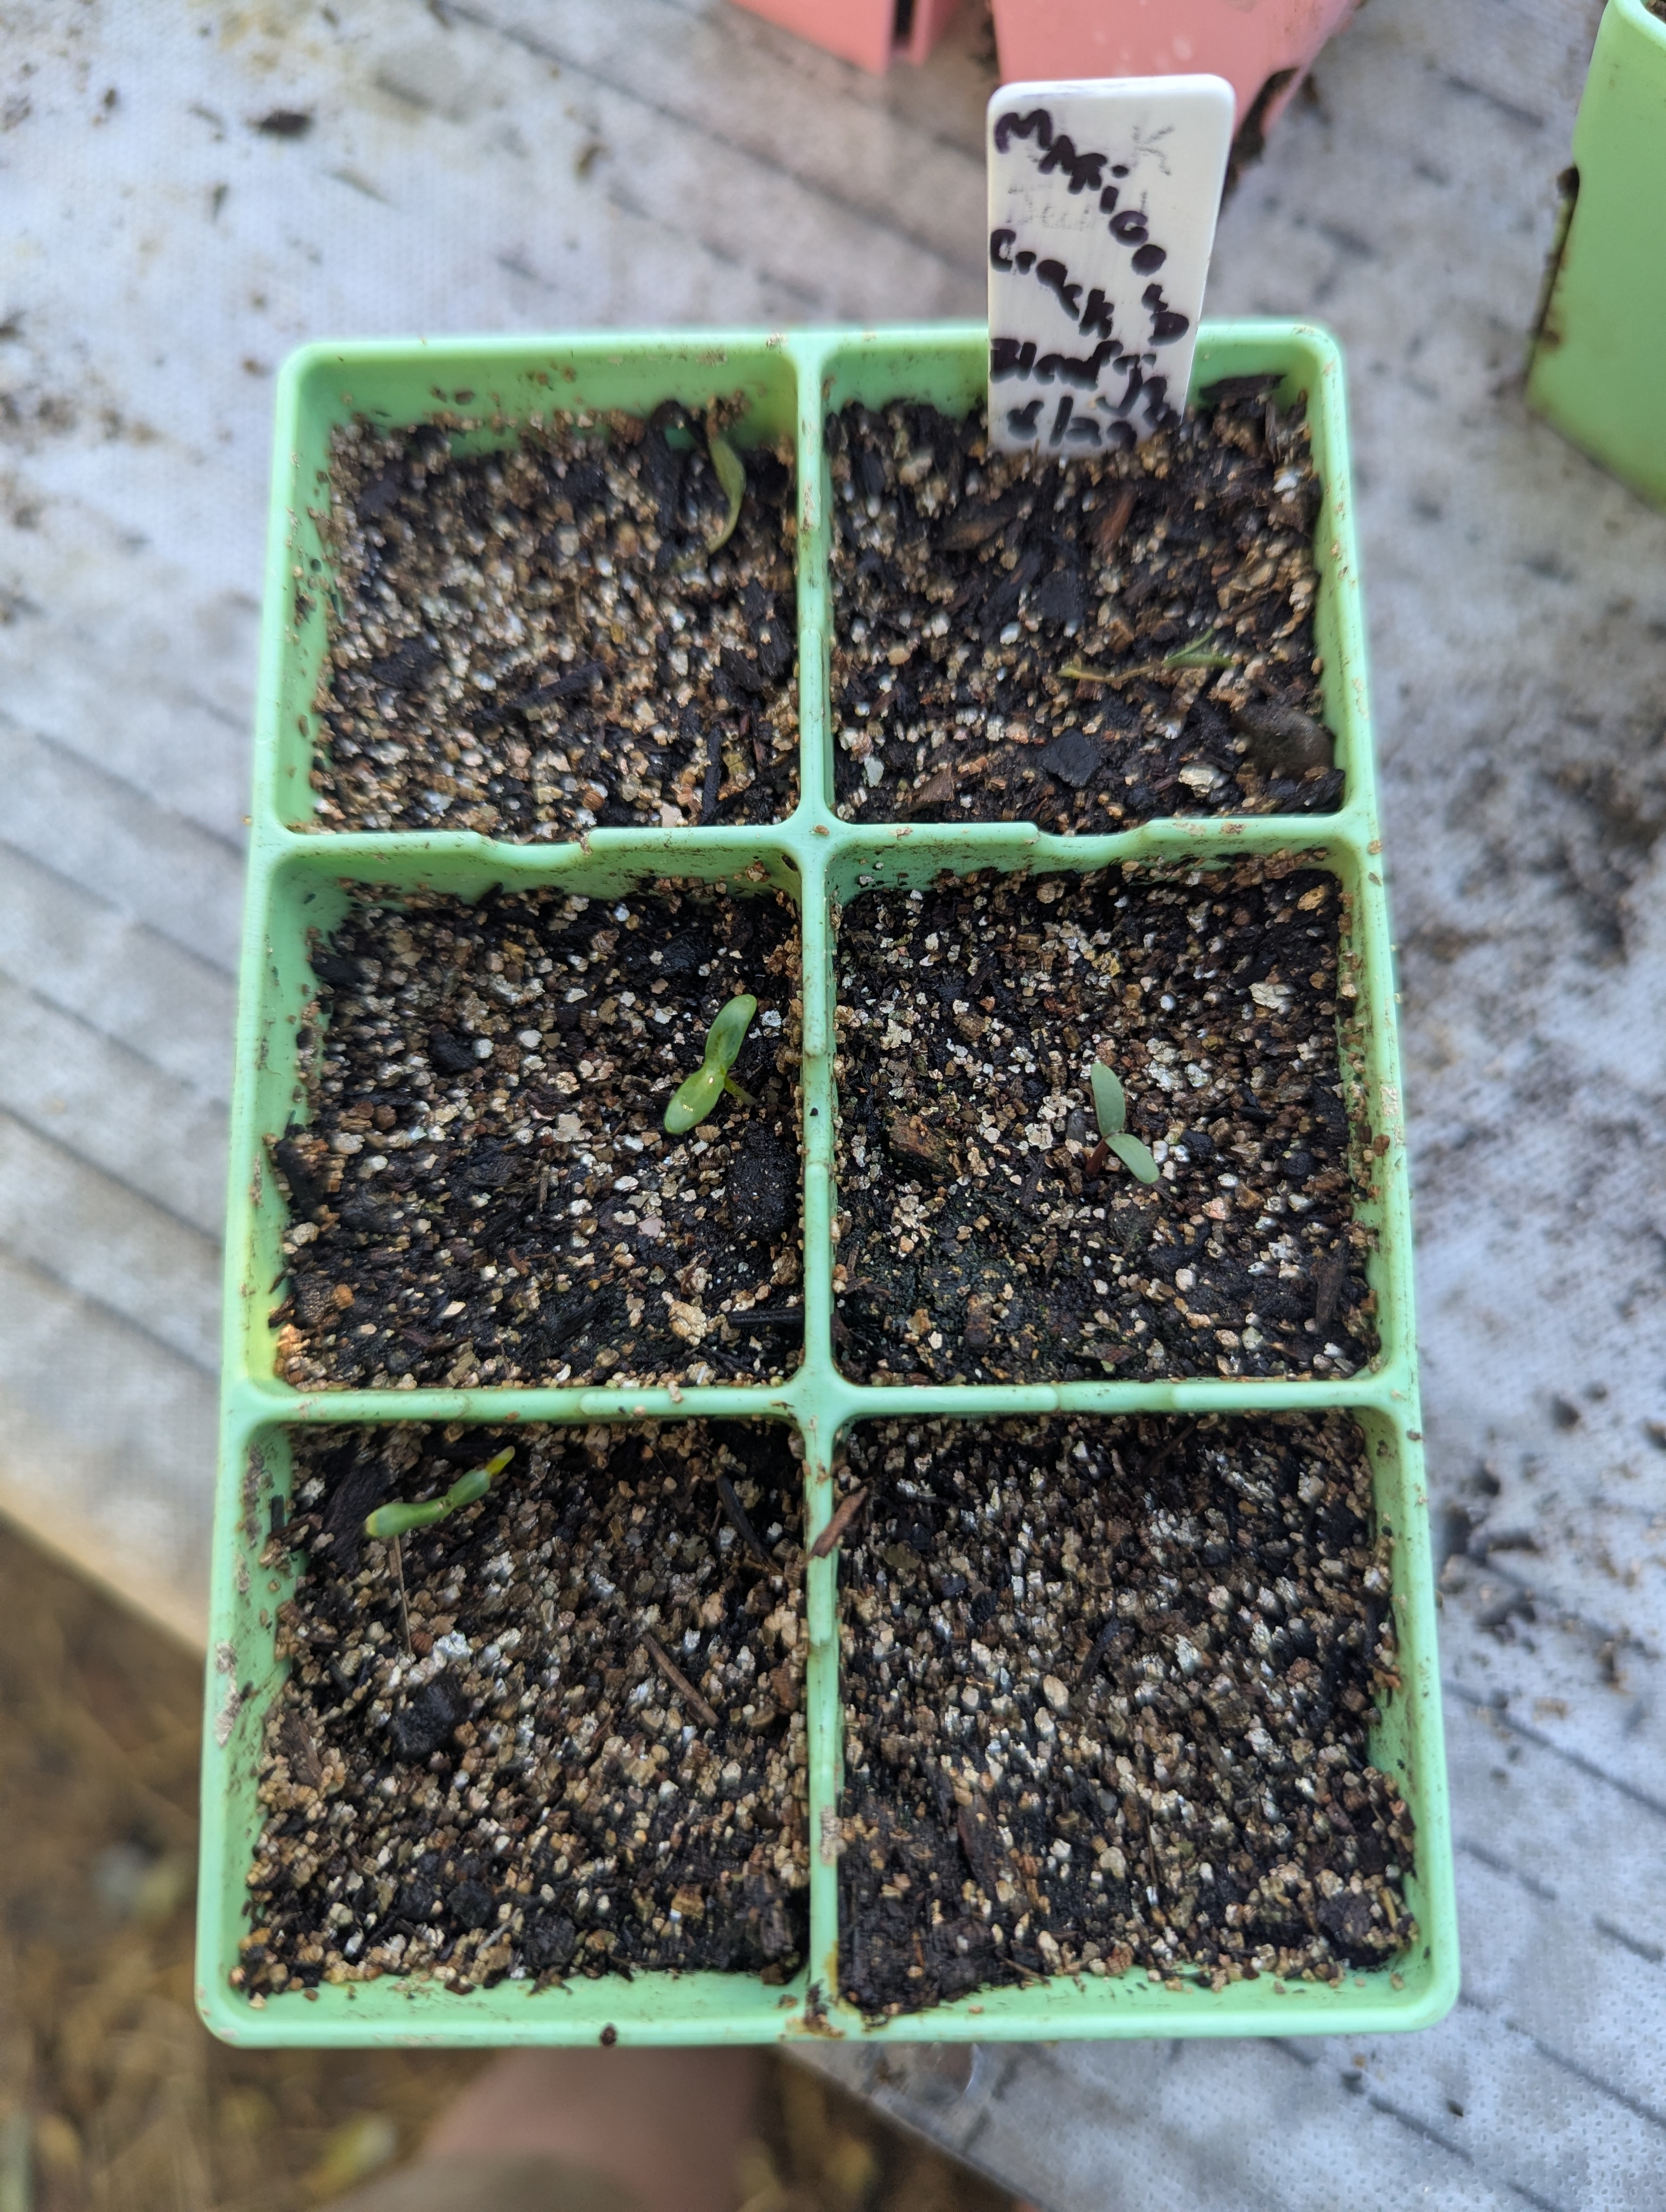
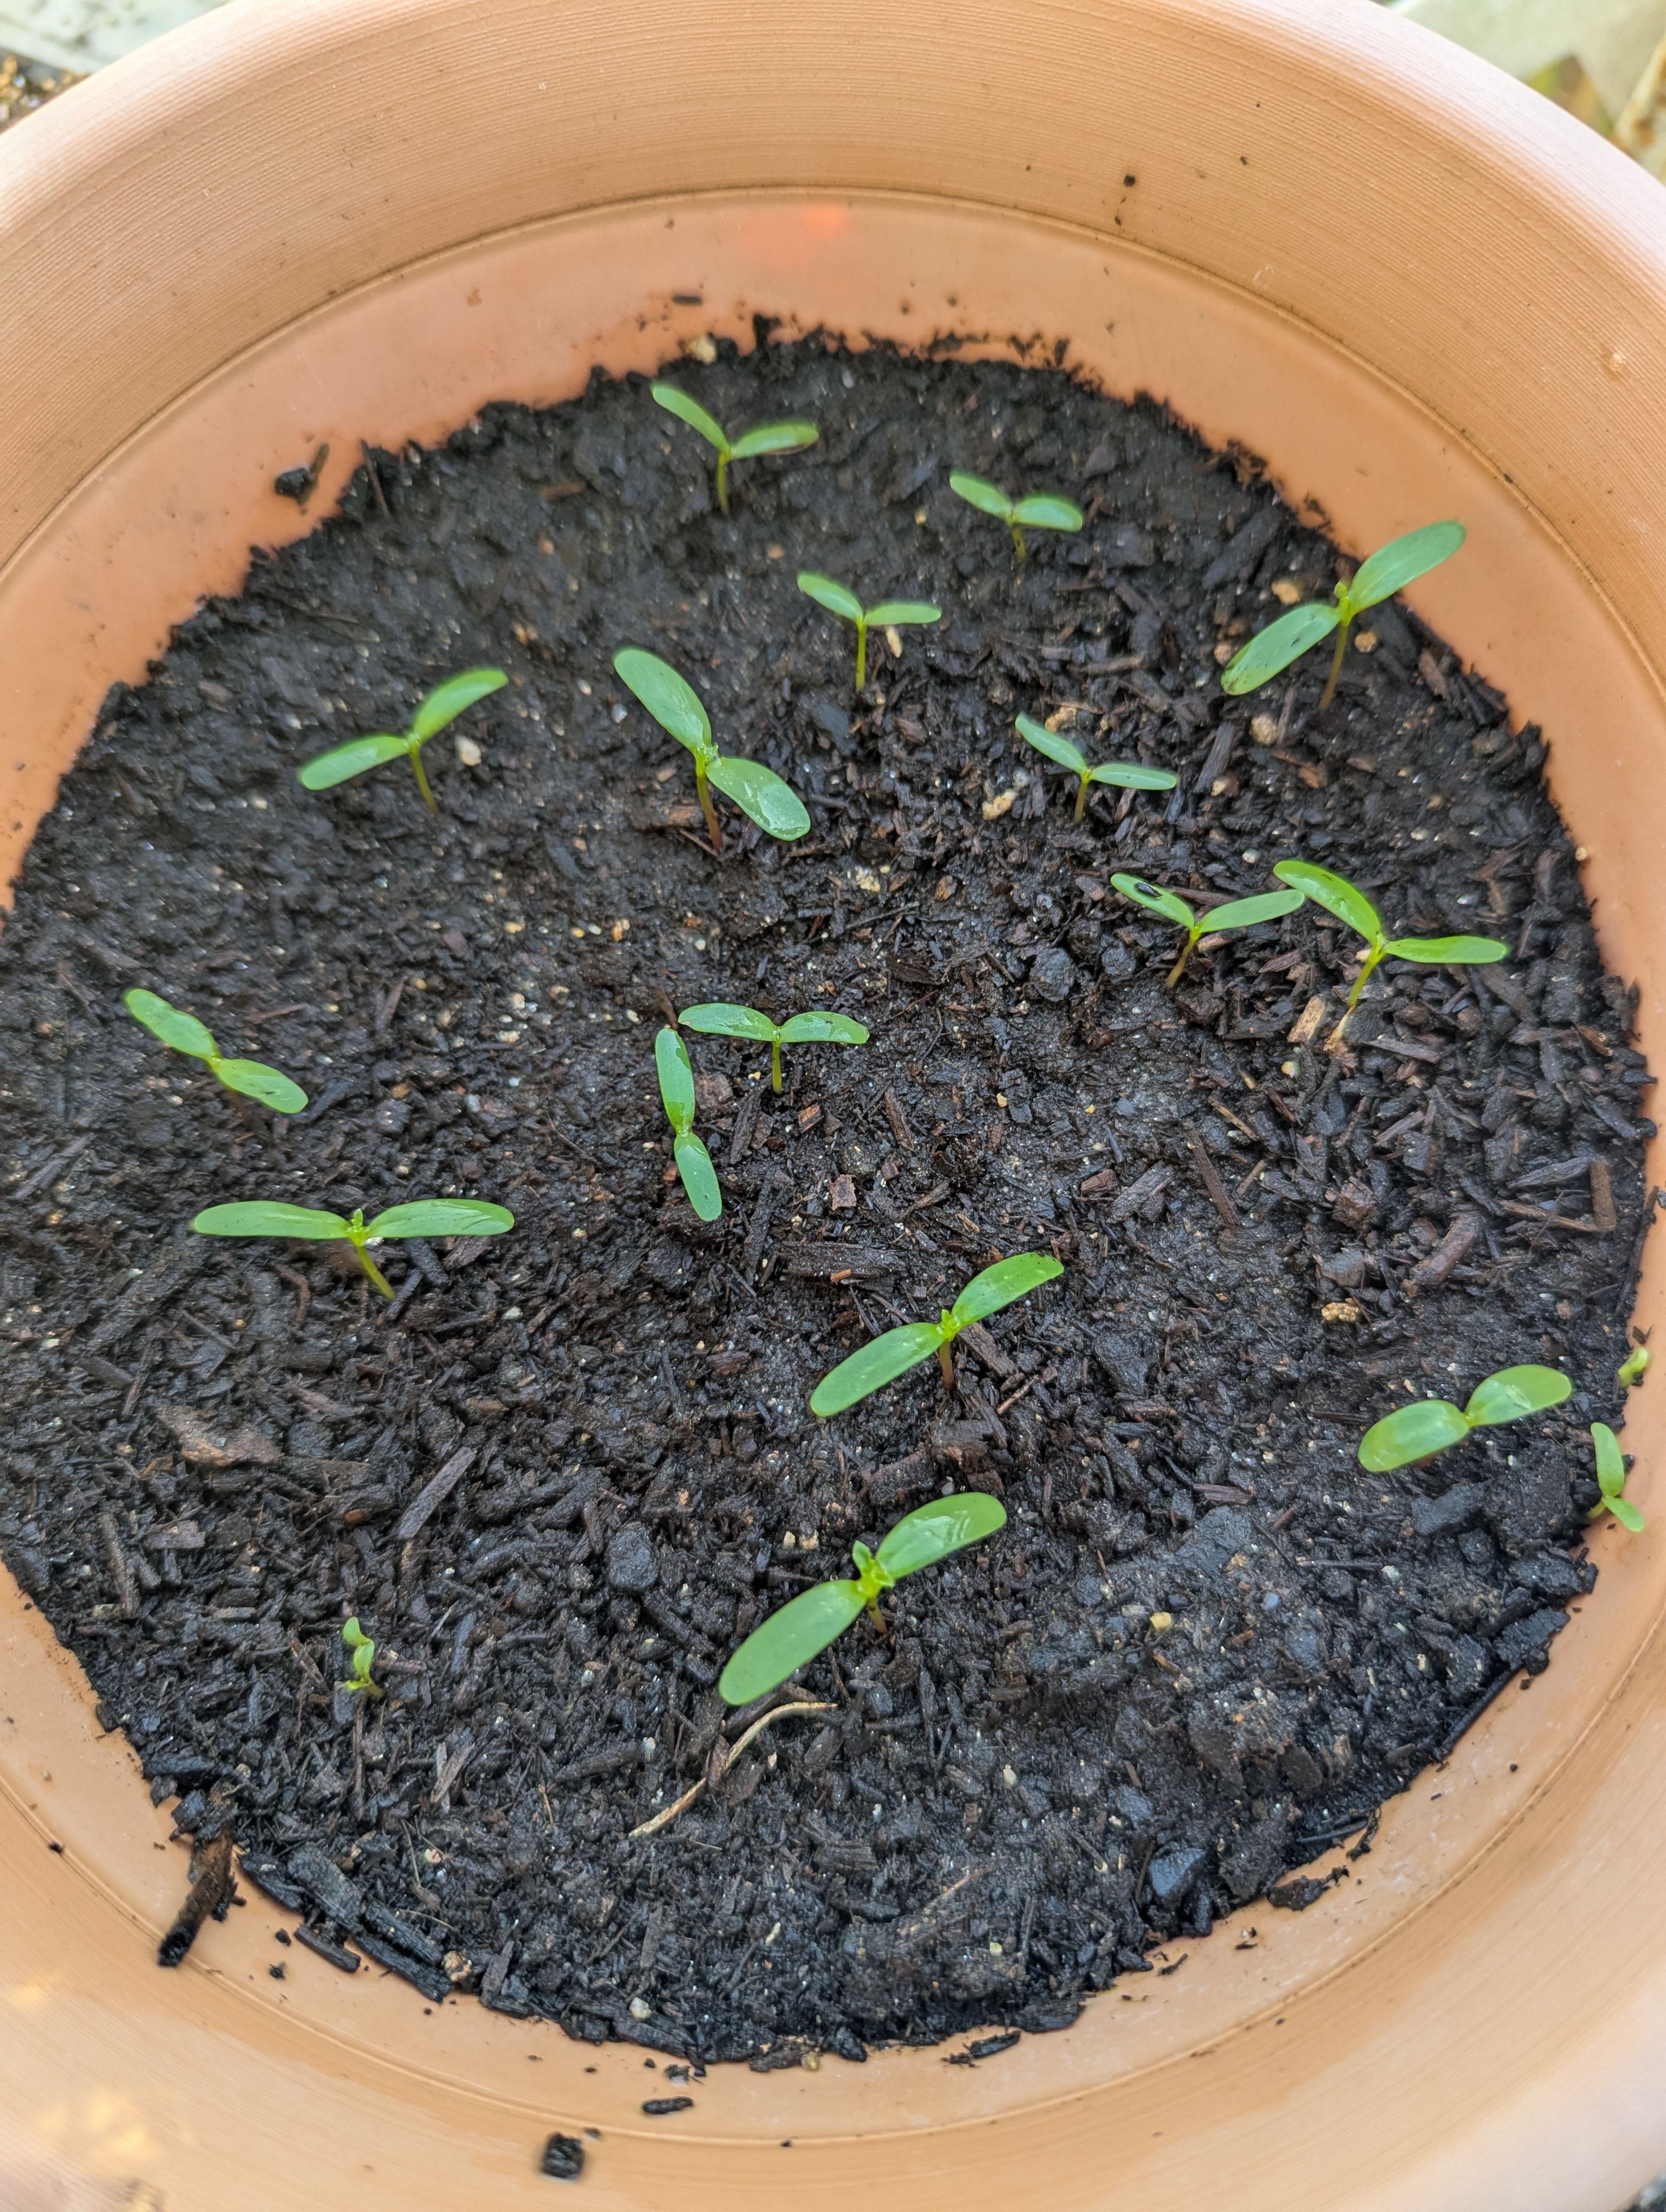
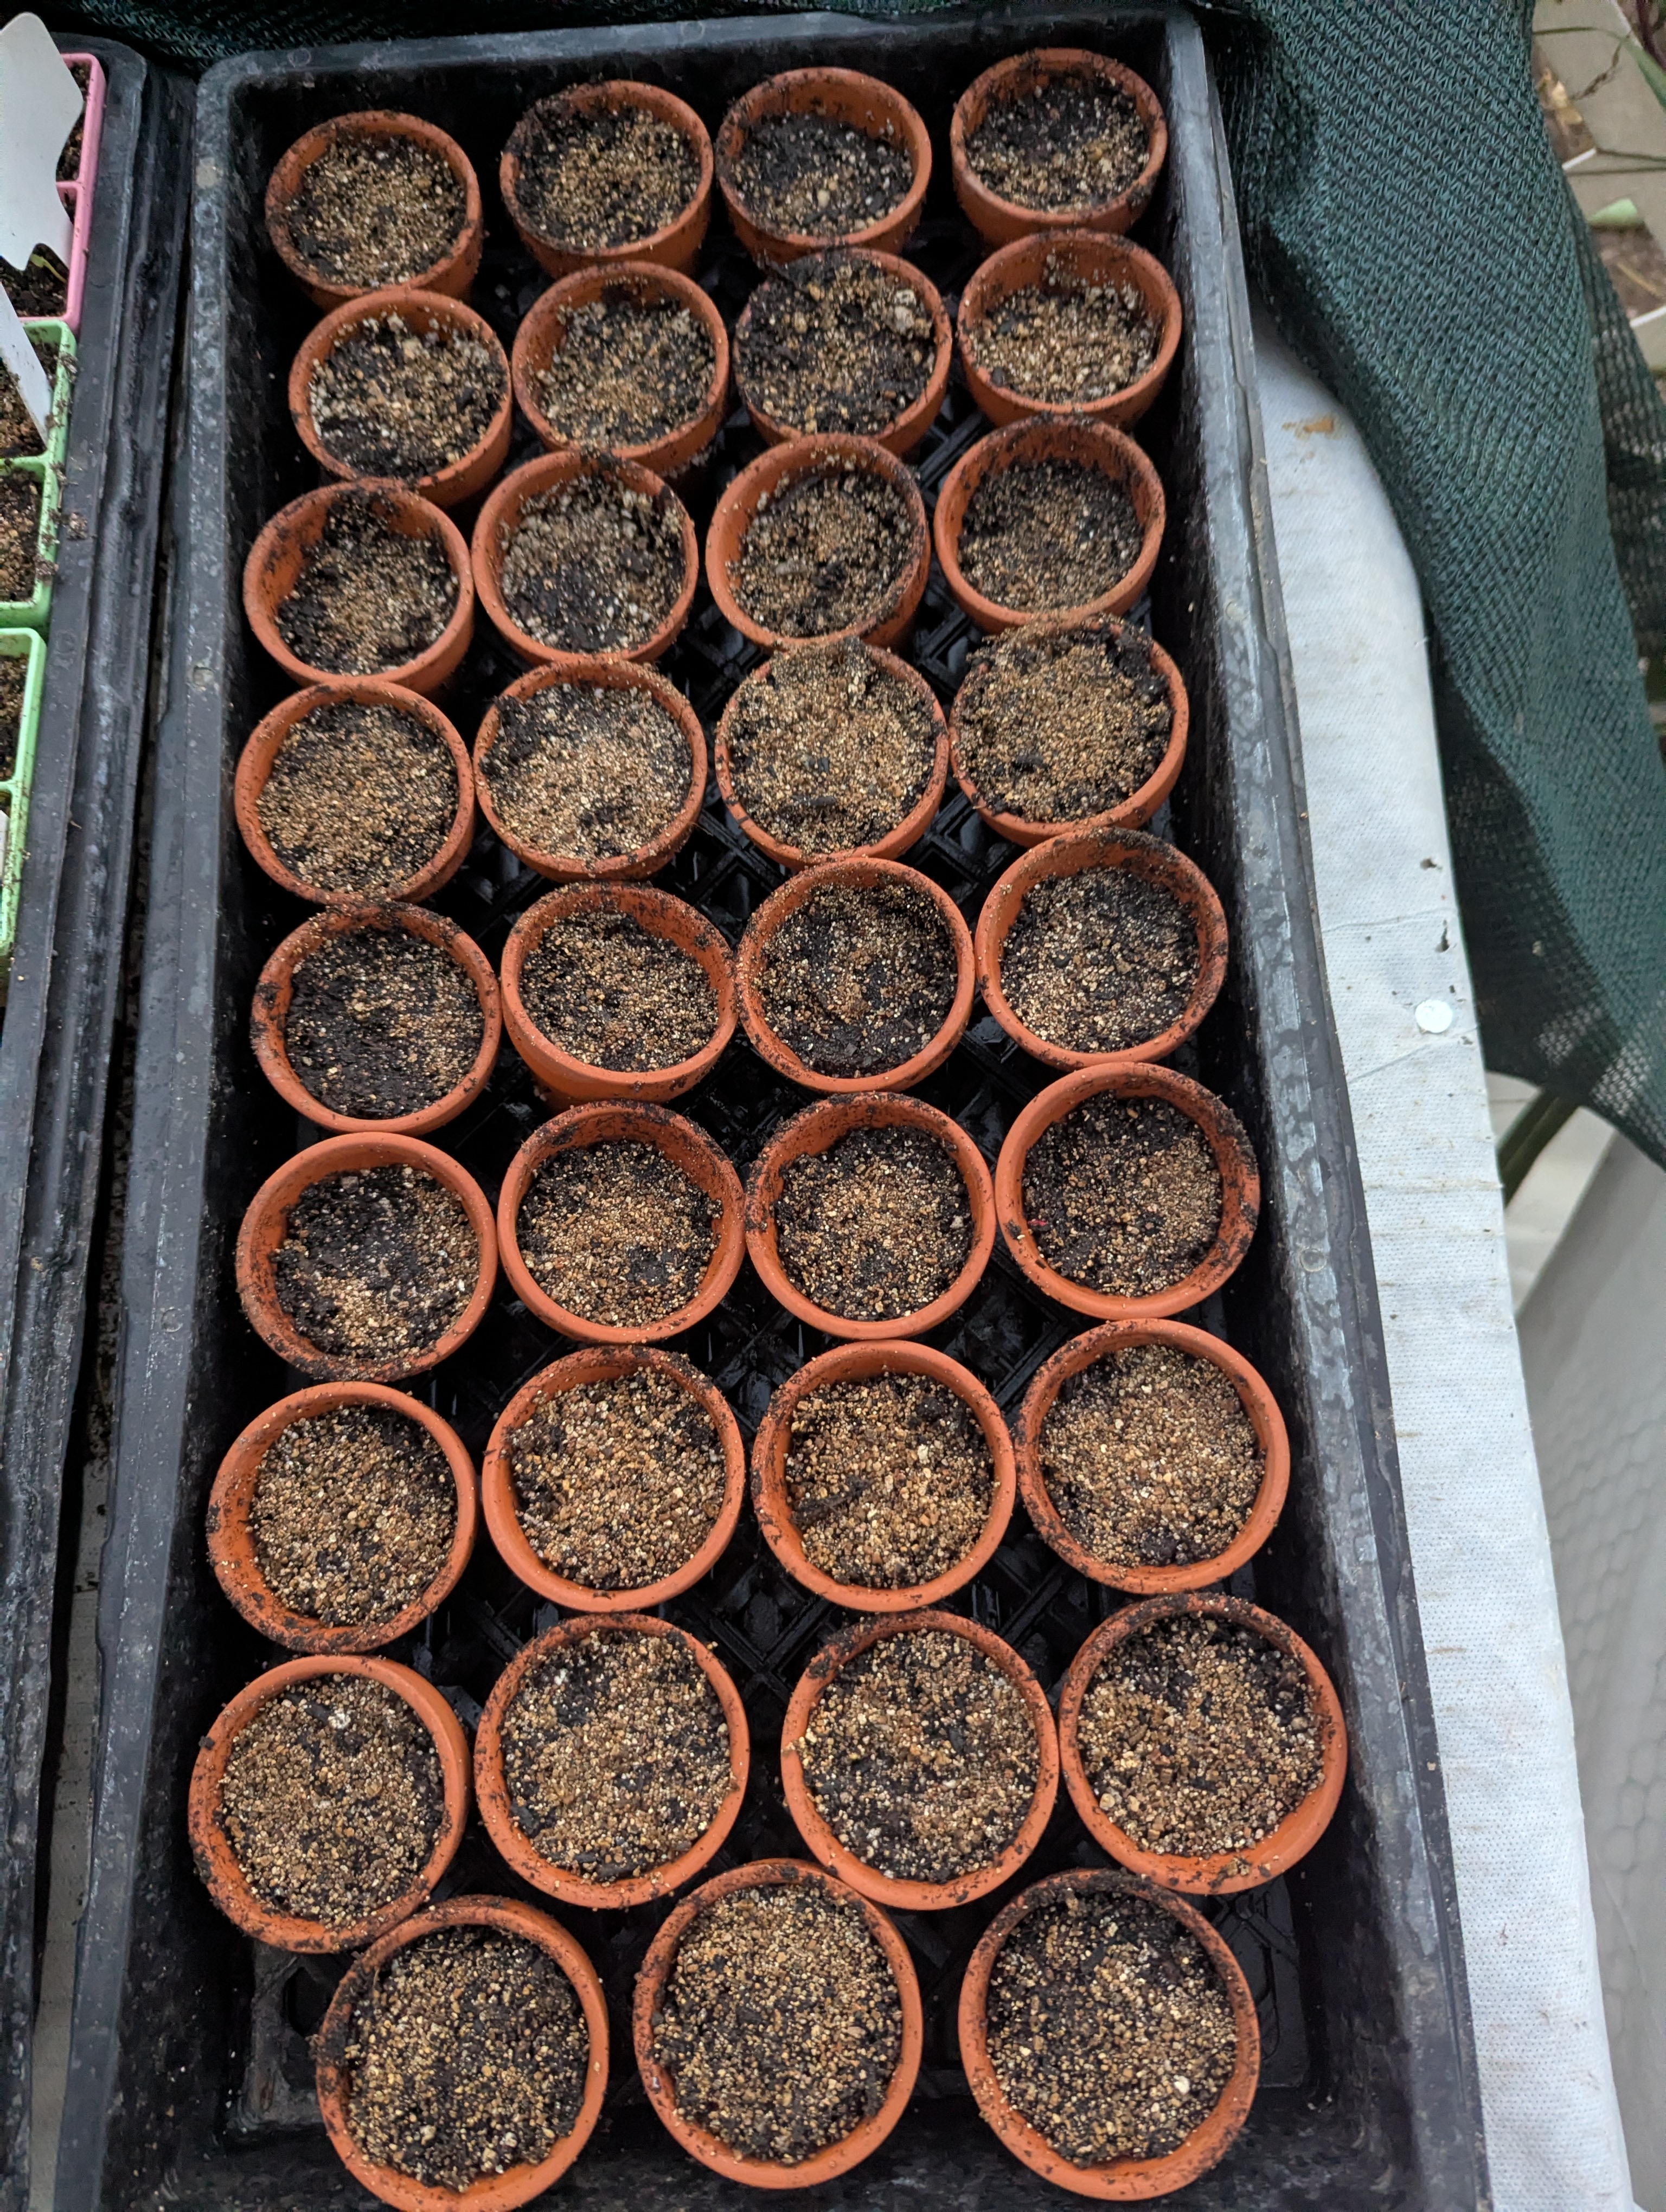
The strange thing is I put soil in some pots because I want fall color, and they had darn near 100% germination. The same marigold seeds in the small cells almost nothing came up. ??? Maybe because there's more soil it's cooler, and maintained a better moisture level? It's very strange . I decided to try tiny! terracotta pots. I'm watering from the bottom, the pots kind of tell me when they are drying out because they get lighter in color. I only planted them a few days ago, so I don't know if it will work. I don't know if it will be hard to get the seedlings out if they do grow, it's an experiment. The pots are 2",  and cost about 1.00 per pot. No super cheap, but if it works, I will be able to use them for a very long time, and no plastic.
I will keep trying. I like it plant certain veggies and flowers in pots because most of the summer garden is still going strong, so there's no room to direct sow into the garden. I will also buy a few seedlings to get a little earlier start.
PXL_20260905_022103397.jpg
soil blocks planted 9/3/26 1 seedling
PXL_20260913_012902890.jpg
marigolds planted a week before the pot
PXL_20260913_012700971.jpg
same marigold picture taken the same day but planted a week later
PXL_20260917_022624441.jpg
crummy germination
crummy germination
PXL_20260917_022602219.jpg
2" terracotta pots
2" terracotta pots
 
gardener
Posts: 1288
Location: France, Burgundy, parc naturel Morvan
667
forest garden trees food preservation medical herbs building woodworking
  • Likes 6
  • Mark post as helpful
  • send pies
    Number of slices to send:
    Optional 'thank-you' note:
  • Quote
  • Report post to moderator
It looks very professional. Very unlike me. I see sand in the mix. So water can also go down. It's not too stagnant. I can't see what's wrong. Maybe it's the peat, not seasoned enough, nitrogen robbing maybe. I've lost a season to bad compost i bought. Some offer, it was bio, nothing worked.
I only try big seeds in small containers like cucurbitacea or moschata. Most of the rest i start in balcony trays. They have a build in reservoir in the bottom. it's a hassle planting them out, but the roots are longer which offers possibility to plant deeper. Especially handy in spring, saves watering. And i recycle the compost because there's left overs from replanting so if the brand changes i add a bit to see what it does.
And i do quite some direct sowing if i got the seeds.
Good luck.
 
pollinator
Posts: 503
Location: UK
181
kids urban seed
  • Likes 10
  • Mark post as helpful
  • send pies
    Number of slices to send:
    Optional 'thank-you' note:
  • Quote
  • Report post to moderator
Peat soil blocks are tricky like that, they look dry on the surface but stay wet inside. I had the same thing happen when I switched to a peat-heavy mix. Bottom watering made a big difference once I stopped misting from the top.
 
gardener
Posts: 3331
Location: Central Maine (Zone 5a)
1917
homeschooling kids trees chicken food preservation building woodworking homestead
  • Likes 5
  • Mark post as helpful
  • send pies
    Number of slices to send:
    Optional 'thank-you' note:
  • Quote
  • Report post to moderator
I like soil blocks for seed starts as well. I am a second vote for bottom watering. In the past I had simply put water in the bottom of the tray and let it soak up. One of these years I would like to try a wicking mat. I found a source (can't find it now) for a pure organic cotton roll of batting. The reviews said it would wick well. I was thinking of having it on a table where it falls over the edge into a container of water that I keep topped off. Then I set the soil blocks on the wicking mat and let it do its thing. I have seen other people do similar things, but I have not had a chance to actually try this method yet.
 
master steward
Posts: 16356
Location: Pacific Wet Coast
10861
duck books chicken cooking food preservation ungarbage
  • Likes 4
  • Mark post as helpful
  • send pies
    Number of slices to send:
    Optional 'thank-you' note:
  • Quote
  • Report post to moderator
Jen Fulkerson wrote:

If you don't water peat enough it's very hydrophobic!  

Yes! This is a hard learned characteristic. I have a bag of peat that's decades old that I use for acid loving plants, but mix it well with dirt and compost to help with that phobia! (Blueberries do like peat!)

Despite the fact that it's mostly imported, I recommend that you try coir which is made from coconut husks. It has good water holding qualities, but is *much* less hydrophobic. Where I live I can get it from a farm supply store as a 'block' about 1 foot by 1 foot by 4 inches. I break off a chunk using a sturdy garden tool and soak it in a bucket. Even then, I always mix it with other goodies like dirt, compost, perlite and a tiny bit of greensand.

Since I'm only using it to start seeds, or to refresh planters, the things I'm buying last 5 years to several decades. Anything I have to buy, has been processed and shipped and removed from its own environment. I treat it like gold - use it when it will really help me produce my own food or plants/food for others, but I try to use the minimal.

And wrote:

...so I have high hopes, until I read the ingredients on the seed starting mix It's mostly peat and perlite. I really need to read the ingredients.


This! And there's always a risk of ingredients that aren't on the label, like residual toxic gick. I understand that soil blocks work better with a consistent recipe (something I'm notoriously bad at... sigh...). Hopefully, you can come up with a "home made from purchased materials" recipe that will work and includes actual nutrition for the seedlings, which a mix of peat and perlite doesn't!
 
Jen Fulkerson
gardener
Posts: 2132
Location: N. California
1139
2
hugelkultur kids cat dog fungi trees books chicken cooking medical herbs ungarbage
  • Likes 4
  • Mark post as helpful
  • send pies
    Number of slices to send:
    Optional 'thank-you' note:
  • Quote
  • Report post to moderator
Thanks everyone, lots of great useful information.
Hugo what you see is actually vermiculite. I bunch of the seeds I'm starting are flowers that need light to germinate, so the vermiculite lets light through, but helps keep the seed moist.
 
Jen Fulkerson
gardener
Posts: 2132
Location: N. California
1139
2
hugelkultur kids cat dog fungi trees books chicken cooking medical herbs ungarbage
  • Likes 4
  • Mark post as helpful
  • send pies
    Number of slices to send:
    Optional 'thank-you' note:
  • Quote
  • Report post to moderator
Matt, I have heard of wicking mats, but haven't considered trying it. Now I want to. I wonder if I could use a thick cotton, like a couple layers of flannel or something. Definitely something to think about.
I am trying to bottom water. I hope that helps. Thanks
 
Jen Fulkerson
gardener
Posts: 2132
Location: N. California
1139
2
hugelkultur kids cat dog fungi trees books chicken cooking medical herbs ungarbage
  • Likes 4
  • Mark post as helpful
  • send pies
    Number of slices to send:
    Optional 'thank-you' note:
  • Quote
  • Report post to moderator
Jay I have used coco coir in the past, I didn't love the longer strands, but maybe I need to try it again.
It's a blessing and a curse to be super curious, and always searching for a better way.
Thanks for the great info.
sorry about the 3 post. I'm on my lunch break, and I keep getting interrupted, and had to go back and reread the post to remember what I wanted to say.
Thanks
 
Jay Angler
master steward
Posts: 16356
Location: Pacific Wet Coast
10861
duck books chicken cooking food preservation ungarbage
  • Likes 6
  • Mark post as helpful
  • send pies
    Number of slices to send:
    Optional 'thank-you' note:
  • Quote
  • Report post to moderator

Jen Fulkerson wrote:Jay I have used coco coir in the past, I didn't love the longer strands, but maybe I need to try it again.


Interesting. The stuff we buy locally has very close to the same consistency as the dry peat moss. If you're getting a version that's intended for hydroponics rather than farming, that could be the difference. I know it comes as "mats" as my friend bought me a coir hanging basket liner that has quite long strands.

Oh my - yes - I haven't read all this article:
https://www.pthorticulture.com/en-ca/training-center/coir-component-growing-media

"Coir is the term given to a range of natural products manufactured from the Cocos nucifera mesocarp or coconut husks. The main horticultural products marketed are: coir fiber, coir pith and coir chips/chunks."
So what I'm getting I'd describe as "coir pith".

"Coir fiber is stringy and often used to make hanging basket liners, brooms, mats, etc. and has limited applications in growing media. Coir pith is short fibered, resembling coffee grounds, and is used in combination with sphagnum peat moss for growing media applications."

I am not aware of mine having sphagnum peat moss in it, but that's possible, as being from the farm store, it doesn't actually come with a label, and it's Hubby who picks it up when he gets chicken feed. Sigh... I hold my breath. A couple of years back they sold him white shade cloth when I'd asked for wide row cover, and then he put the roll where I couldn't reach it, so by the time I discovered the mistake, it was too late to return it! I'm sure I'll find a use for it some day!
 
Jen Fulkerson
gardener
Posts: 2132
Location: N. California
1139
2
hugelkultur kids cat dog fungi trees books chicken cooking medical herbs ungarbage
  • Likes 7
  • Mark post as helpful
  • send pies
    Number of slices to send:
    Optional 'thank-you' note:
  • Quote
  • Report post to moderator
Thanks Jay. I'll have to read it more carefully. the stuff I used came like a brick, and was in the garden section, so I just assumed that's what it was for. I imagine, considering all the varieties that even different brands may also be a little different. Definitely something to think about.
Thanks
 
Jen Fulkerson
gardener
Posts: 2132
Location: N. California
1139
2
hugelkultur kids cat dog fungi trees books chicken cooking medical herbs ungarbage
  • Likes 7
  • Mark post as helpful
  • send pies
    Number of slices to send:
    Optional 'thank-you' note:
  • Quote
  • Report post to moderator
Do you ever feel like mother nature is laughing at you?
I have been struggling to start broccoli, one of our favorite cool weather veggies and having  a difficult time of it. What do I find in the very weedy pathway?  A volunteer broccoli. Since I didn't plant it I'm not 100% sure it's broccoli, but I did have a broccoli go to seed not far from there, and it looks like broccoli to me. Something has been munching on it, but it looks pretty healthy considering it's growing in the path. I can't start it in a seed cell doing all I can to get it to grow, but a weedy pathway You bet.
PXL_20260918_021308429.jpg
[Thumbnail for PXL_20260918_021308429.jpg]
 
Jen Fulkerson
gardener
Posts: 2132
Location: N. California
1139
2
hugelkultur kids cat dog fungi trees books chicken cooking medical herbs ungarbage
  • Likes 7
  • Mark post as helpful
  • send pies
    Number of slices to send:
    Optional 'thank-you' note:
  • Quote
  • Report post to moderator
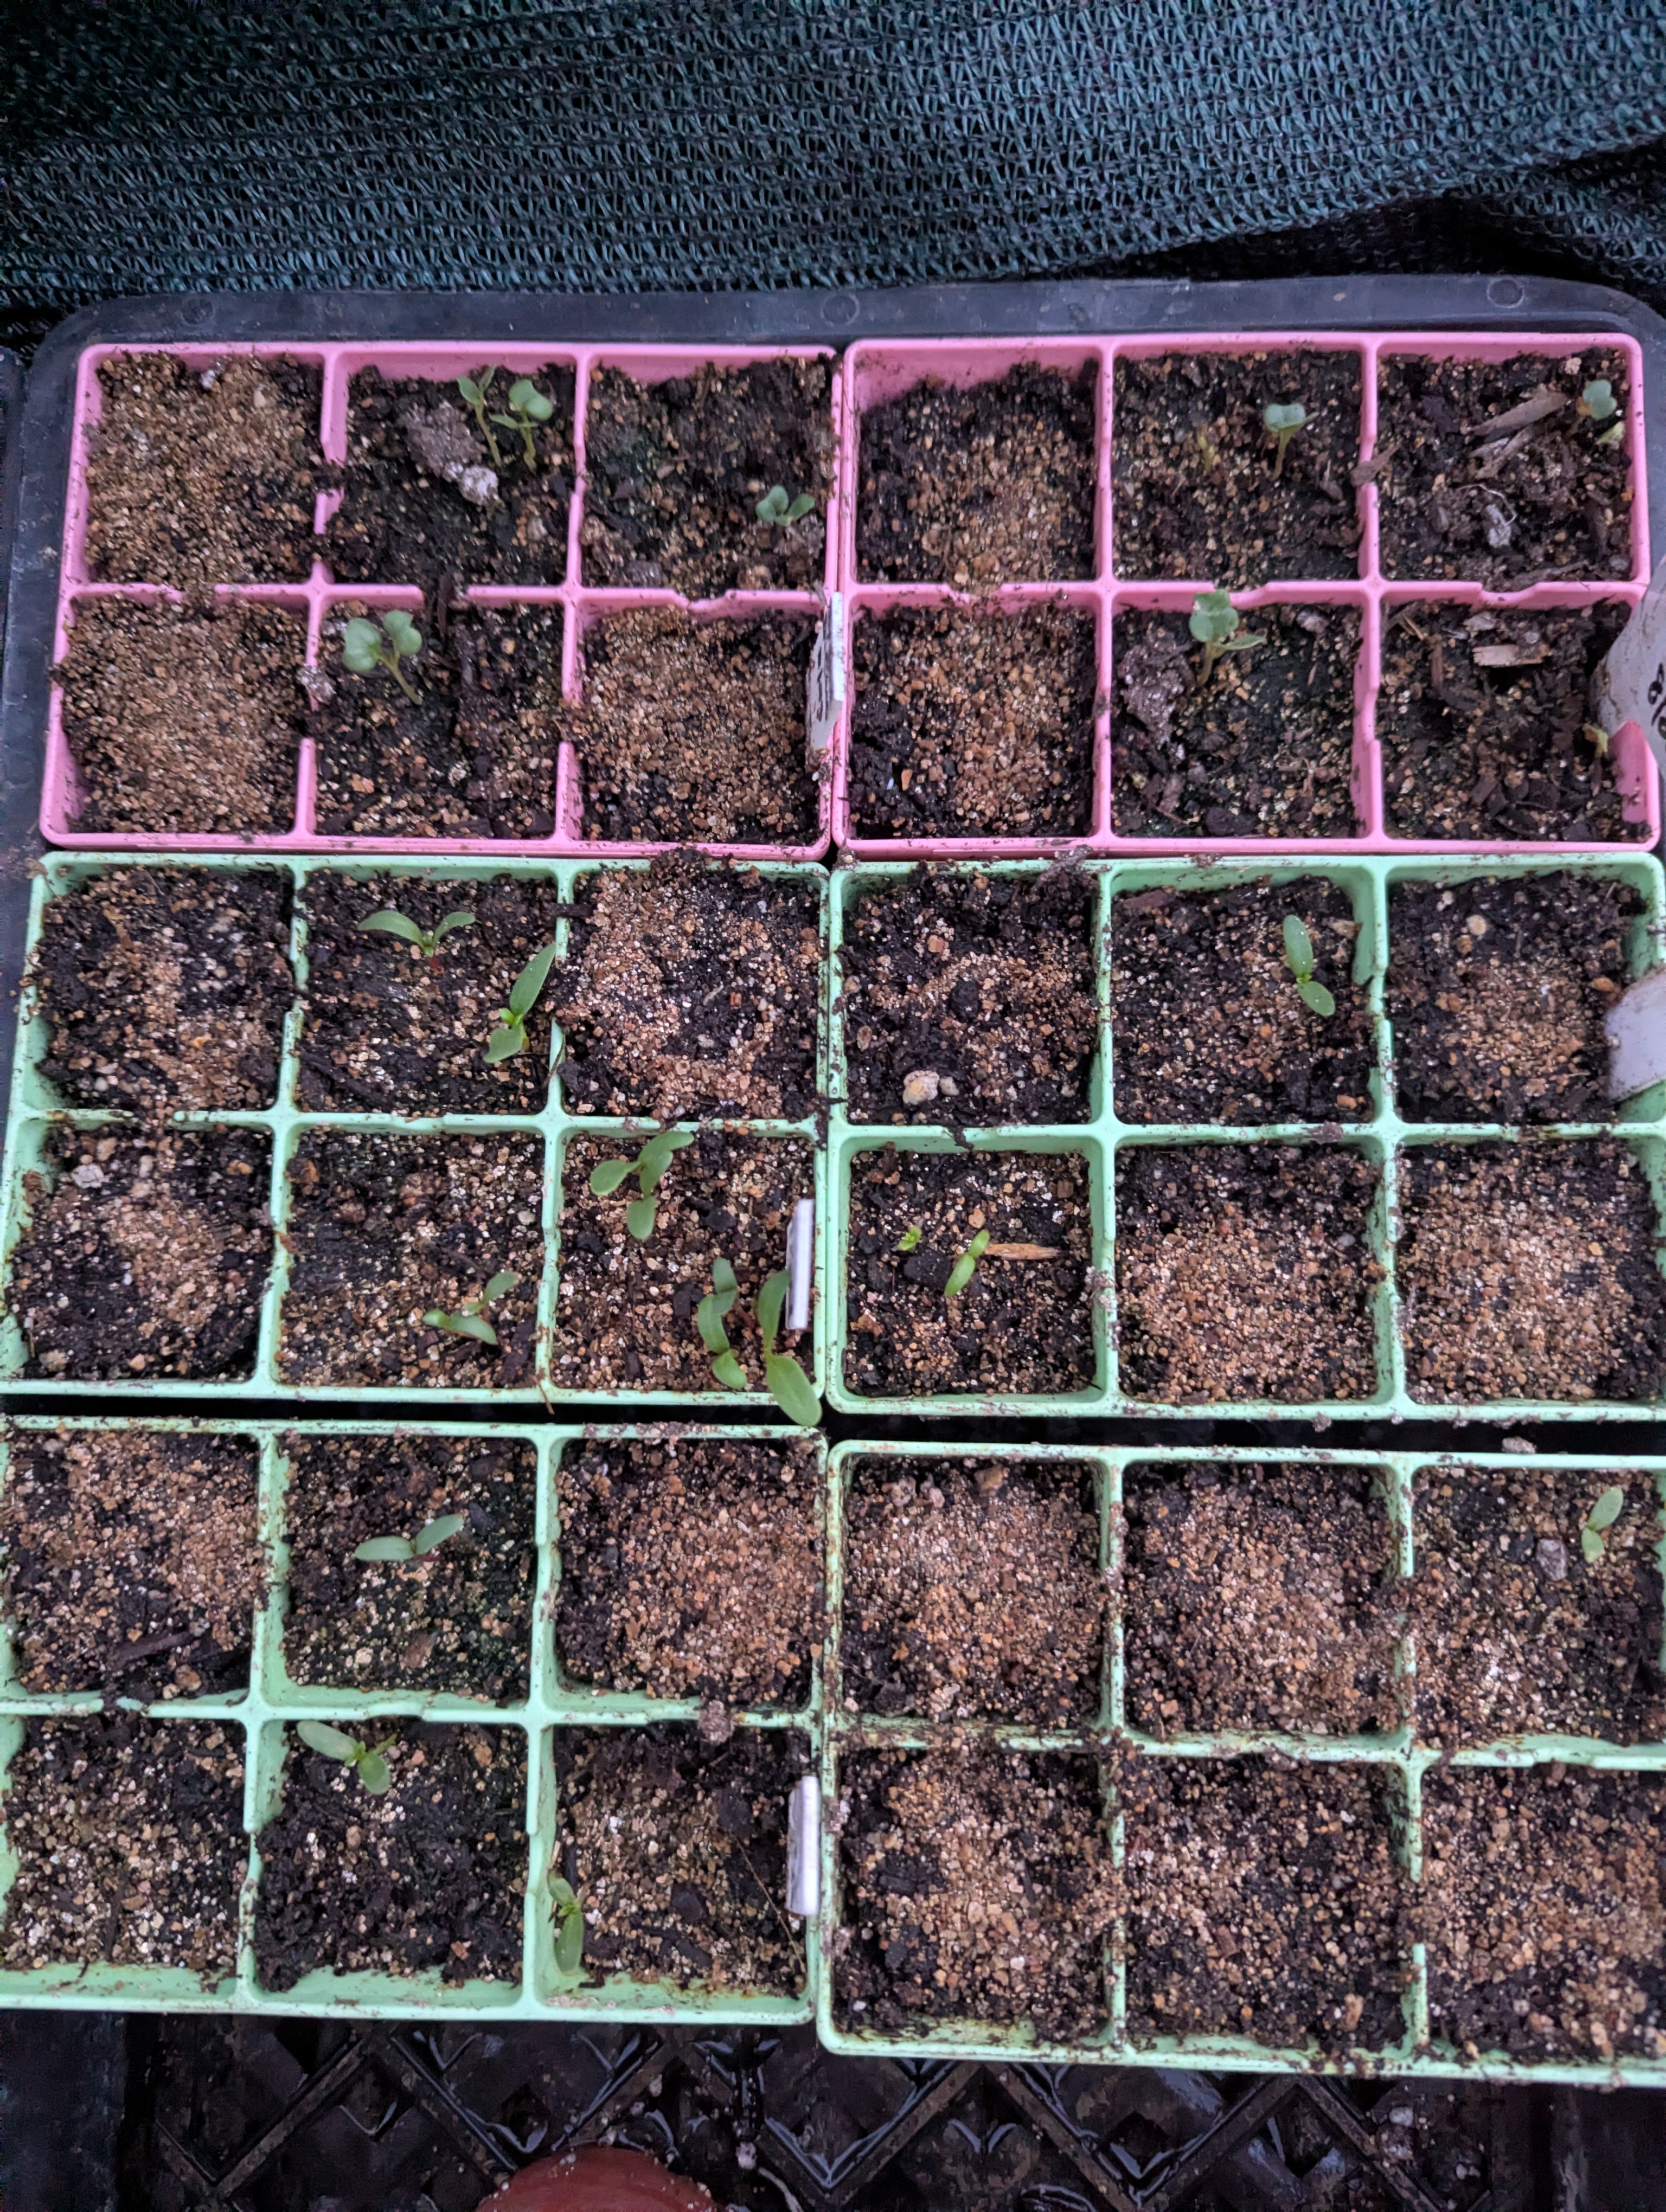
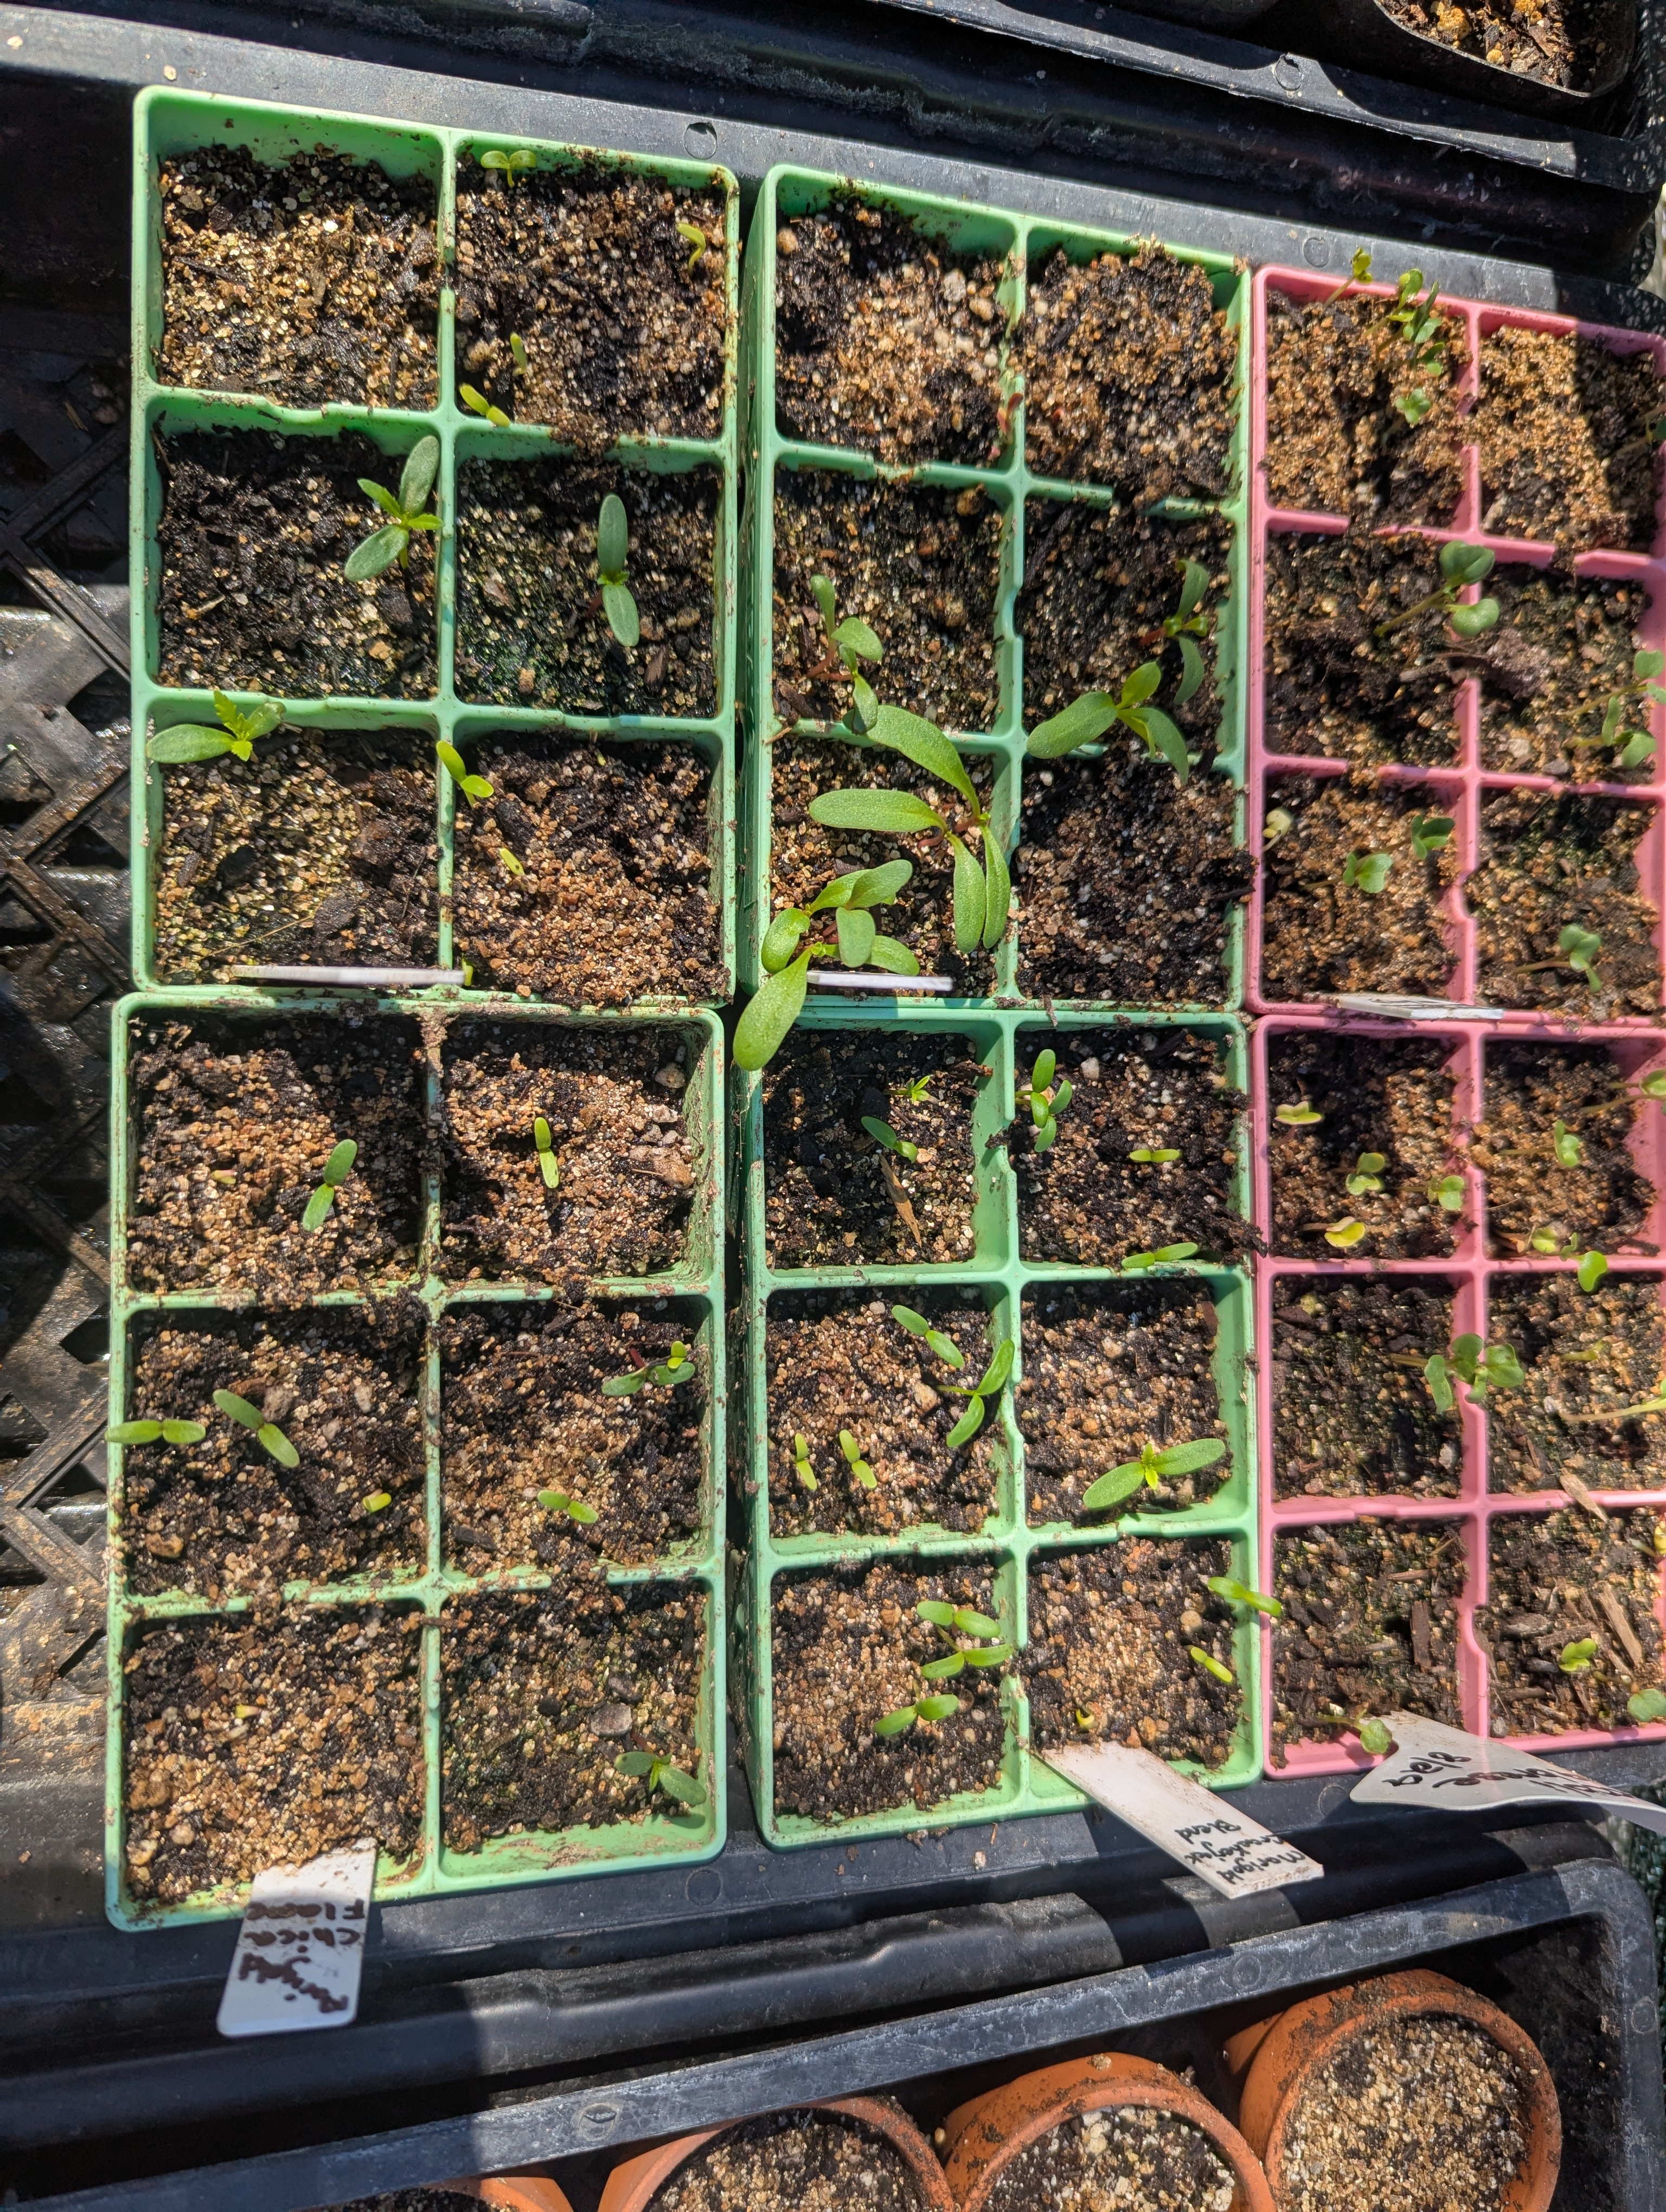
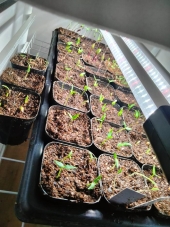
I'm so happy to report progress. I have seedlings popping up after only a few days. 4 rows out of 9 in the terracotta pots have seedlings., and lots of seedlings in the small cells. Also in the trays that had spotty germination I added seeds to all the empty cells, and lots of those have new seedlings.

I think my problem was more heat related than soil, or water. The reason I think this is because although I did sow seeds in 6 of the trays with seed starting mix only, 6 more were the mix I used before (I ran out of seed mix) I used new soil in the cells that didn't germinate, but it was the mix I had been using. I have been more careful with watering, so that may contribute, but since it was lack of germination, and not dampening off, I don't think it was all a watering issue.
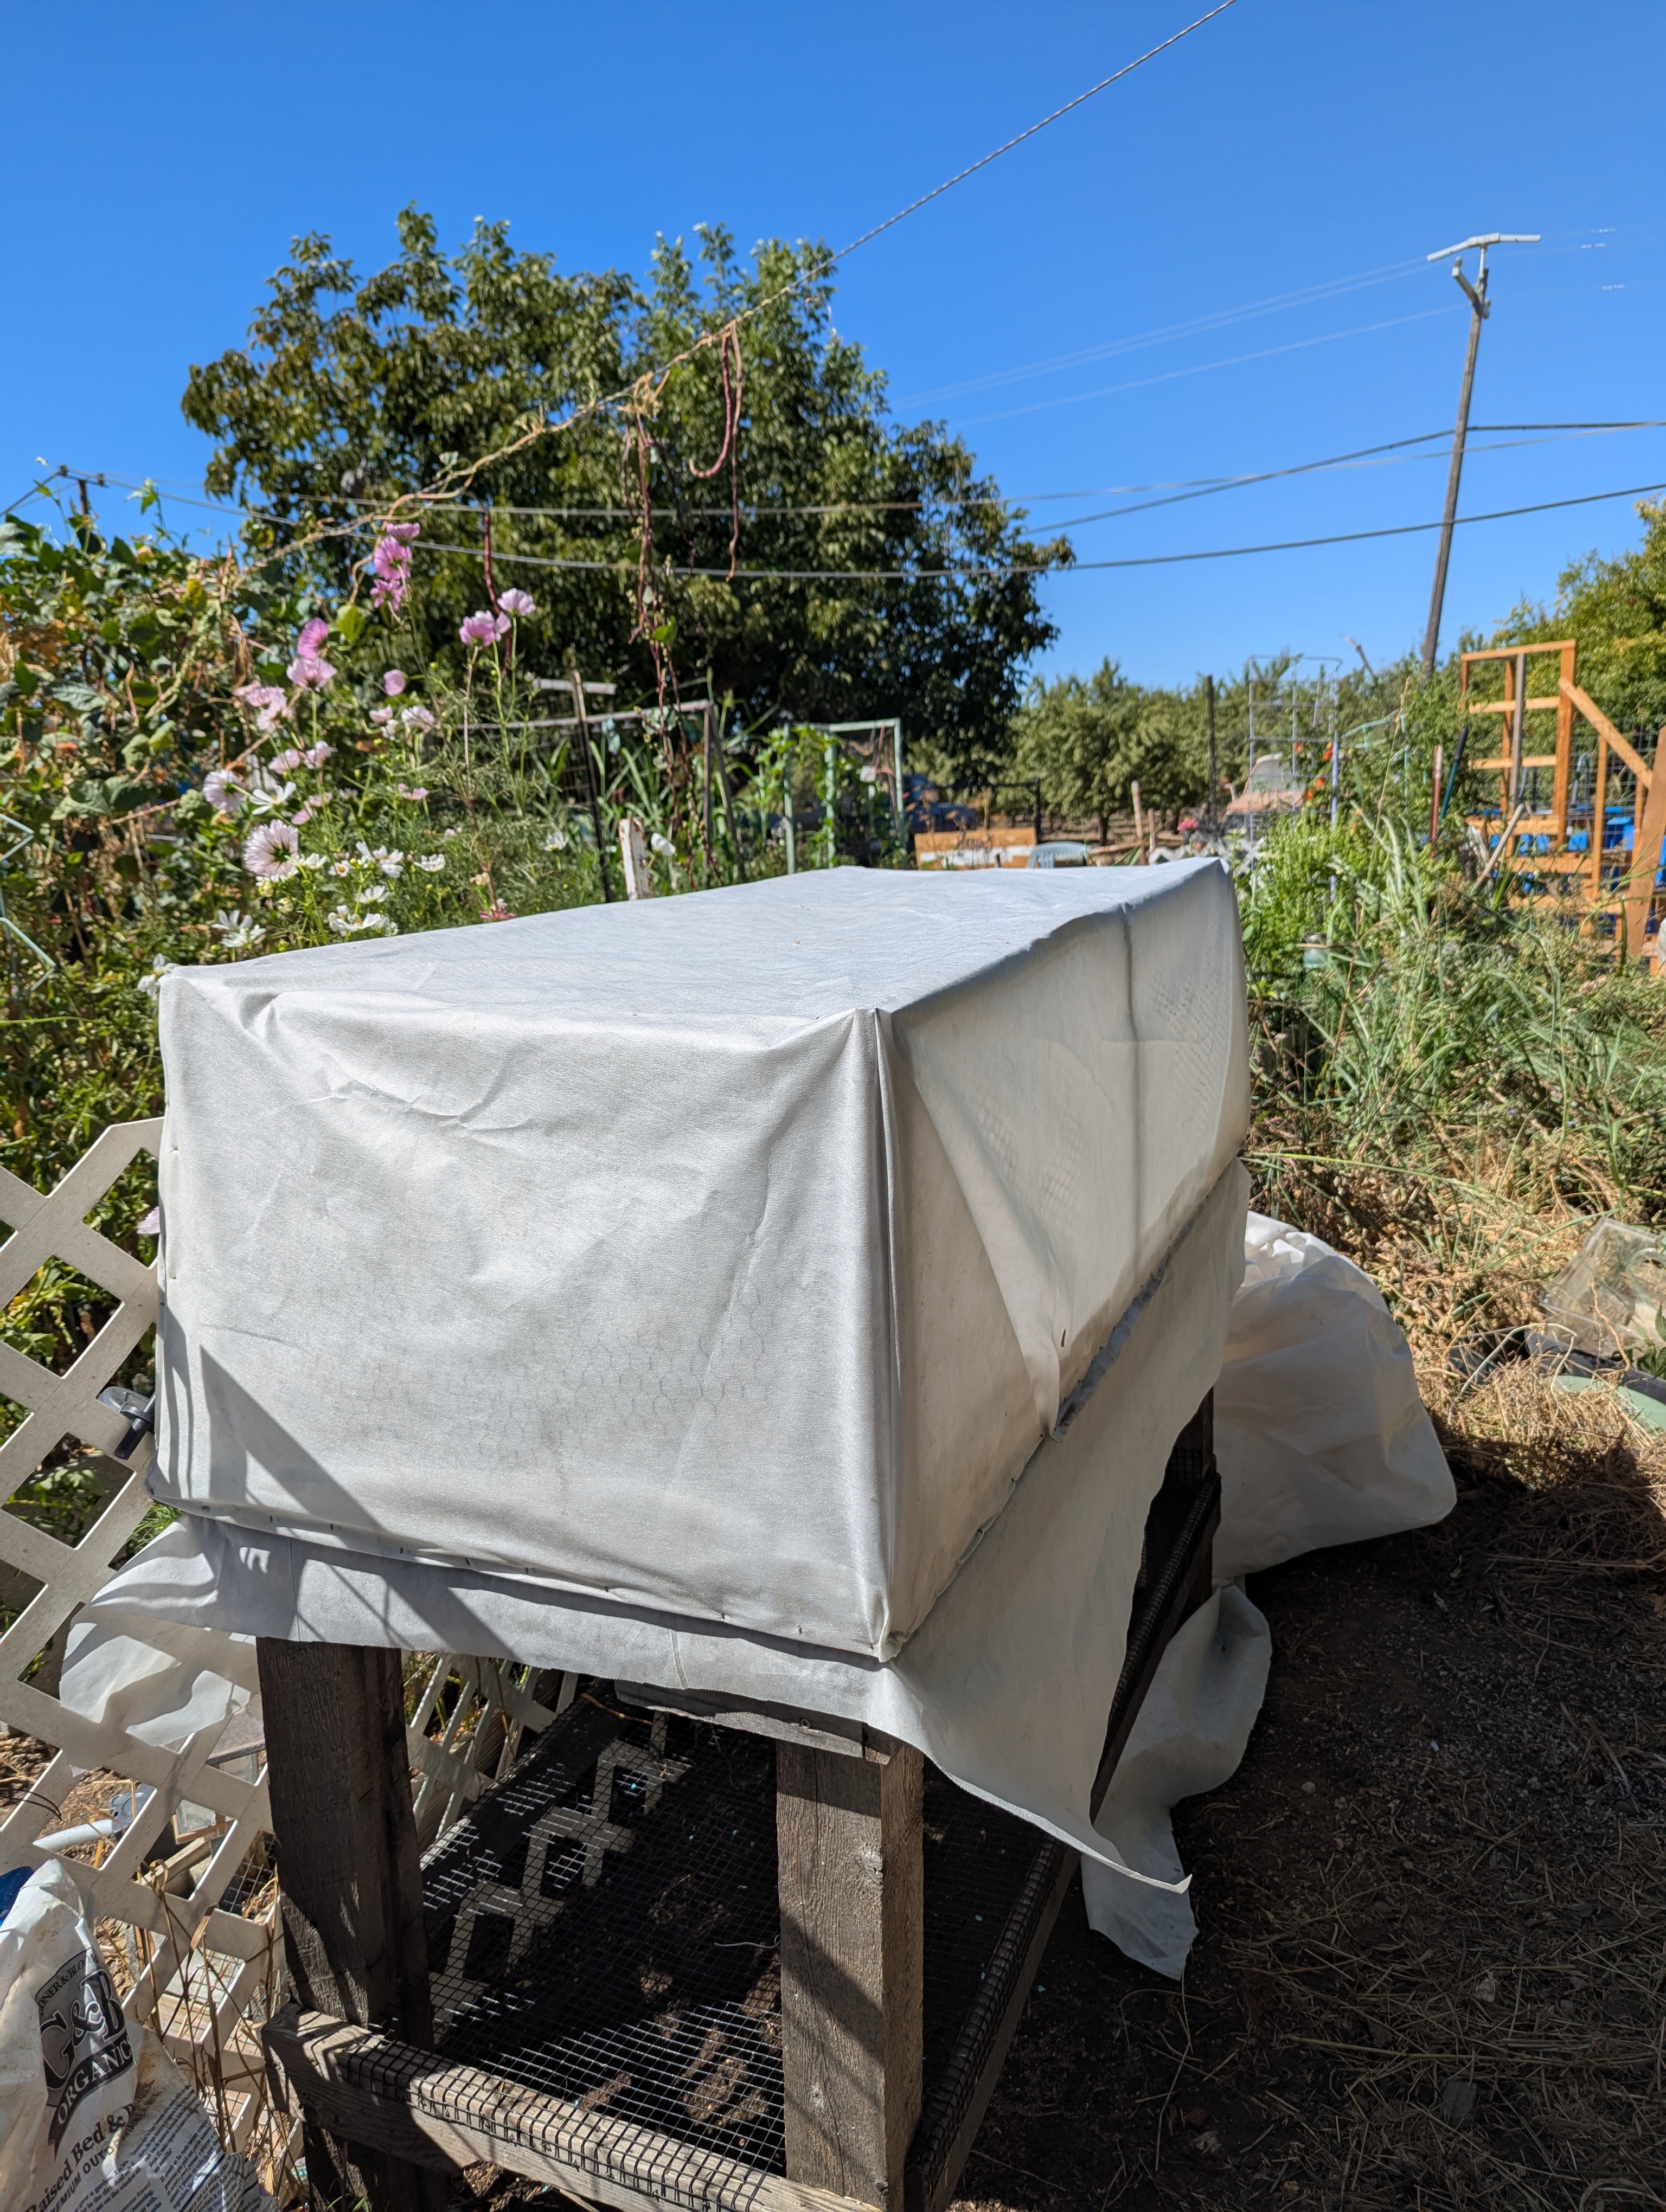
I'm very annoyed with myself. I know I need to use shade cloth in the fall. I started out using my cover that I covered in row cover to keep the Harlequin bugs out.  When I wasn't getting any seedlings, I stopped using it thinking maybe it wasn't letting enough light through, or not enough airflow. I should have put the shade cloth on at that time, but I didn't.  My guess is it was just to hot for my cool weather veggies. I could be wrong, but nothing else really adds up. I bought a little solar fan (it was what I could afford) Maybe next year with shade cloth and the fan I can get a more successful earlier start.
Most important is if nothing else goes wrong I should have lots of veggies, flowers, and herbs to plant.
PXL_20260919_190911123.jpg
old tray, with empty cells replanted
PXL_20260919_190813155.jpg
[Thumbnail for PXL_20260919_190813155.jpg]
PXL_20260829_215313282.jpg
cover used in the start
 
Jay Angler
master steward
Posts: 16356
Location: Pacific Wet Coast
10861
duck books chicken cooking food preservation ungarbage
  • Likes 6
  • Mark post as helpful
  • send pies
    Number of slices to send:
    Optional 'thank-you' note:
  • Quote
  • Report post to moderator
Yes, row cover actually  holds heat in, as well as keeping bugs out.

How well does your shade cloth keep the bugs out?

Adding a bunch of bottles of water that you can swap out as they get hot, might help the area stay cooler without power?
 
Jen Fulkerson
gardener
Posts: 2132
Location: N. California
1139
2
hugelkultur kids cat dog fungi trees books chicken cooking medical herbs ungarbage
  • Likes 6
  • Mark post as helpful
  • send pies
    Number of slices to send:
    Optional 'thank-you' note:
  • Quote
  • Report post to moderator
The shade cloth has small holes, I imagine quite small bugs can get through. I have no idea what  bugs can squeeze through, but I'm going to find out. because I'm going to switch the row cover for shade cloth. I haven't seen any Harlequin bugs for a bit (every time I even think that I find a bunch) I did see 2 different praying! mantis.  This is very exciting because I used to have a lot of praying mantis. At that time I didn't know any better and used a systemic rose 3 in 1 rose fertilizer., and no surprise no more mantis. I haven't used that, or anything organic or synthetic since early 2018. I saw a couple very small ones last year. This year I have seen one small, and 2 large.  It's taken a very long time to balance out my little ecosystem. I I have read Harlequin bugs have no natural predators, but I have also heard praying mantis will kill everything, so who knows.  I'm just happy to be seeing a few.
I hadn't thought about the bottles of water. I do the opposite with black bottles of water in the winter in my greenhouse.  It's something to think about.
Thanks everyone for all your help, and support. Happy gardening
PXL_20260911_211627031.MP.jpg
[Thumbnail for PXL_20260911_211627031.MP.jpg]
 
Jen Fulkerson
gardener
Posts: 2132
Location: N. California
1139
2
hugelkultur kids cat dog fungi trees books chicken cooking medical herbs ungarbage
  • Likes 8
  • Mark post as helpful
  • send pies
    Number of slices to send:
    Optional 'thank-you' note:
  • Quote
  • Report post to moderator
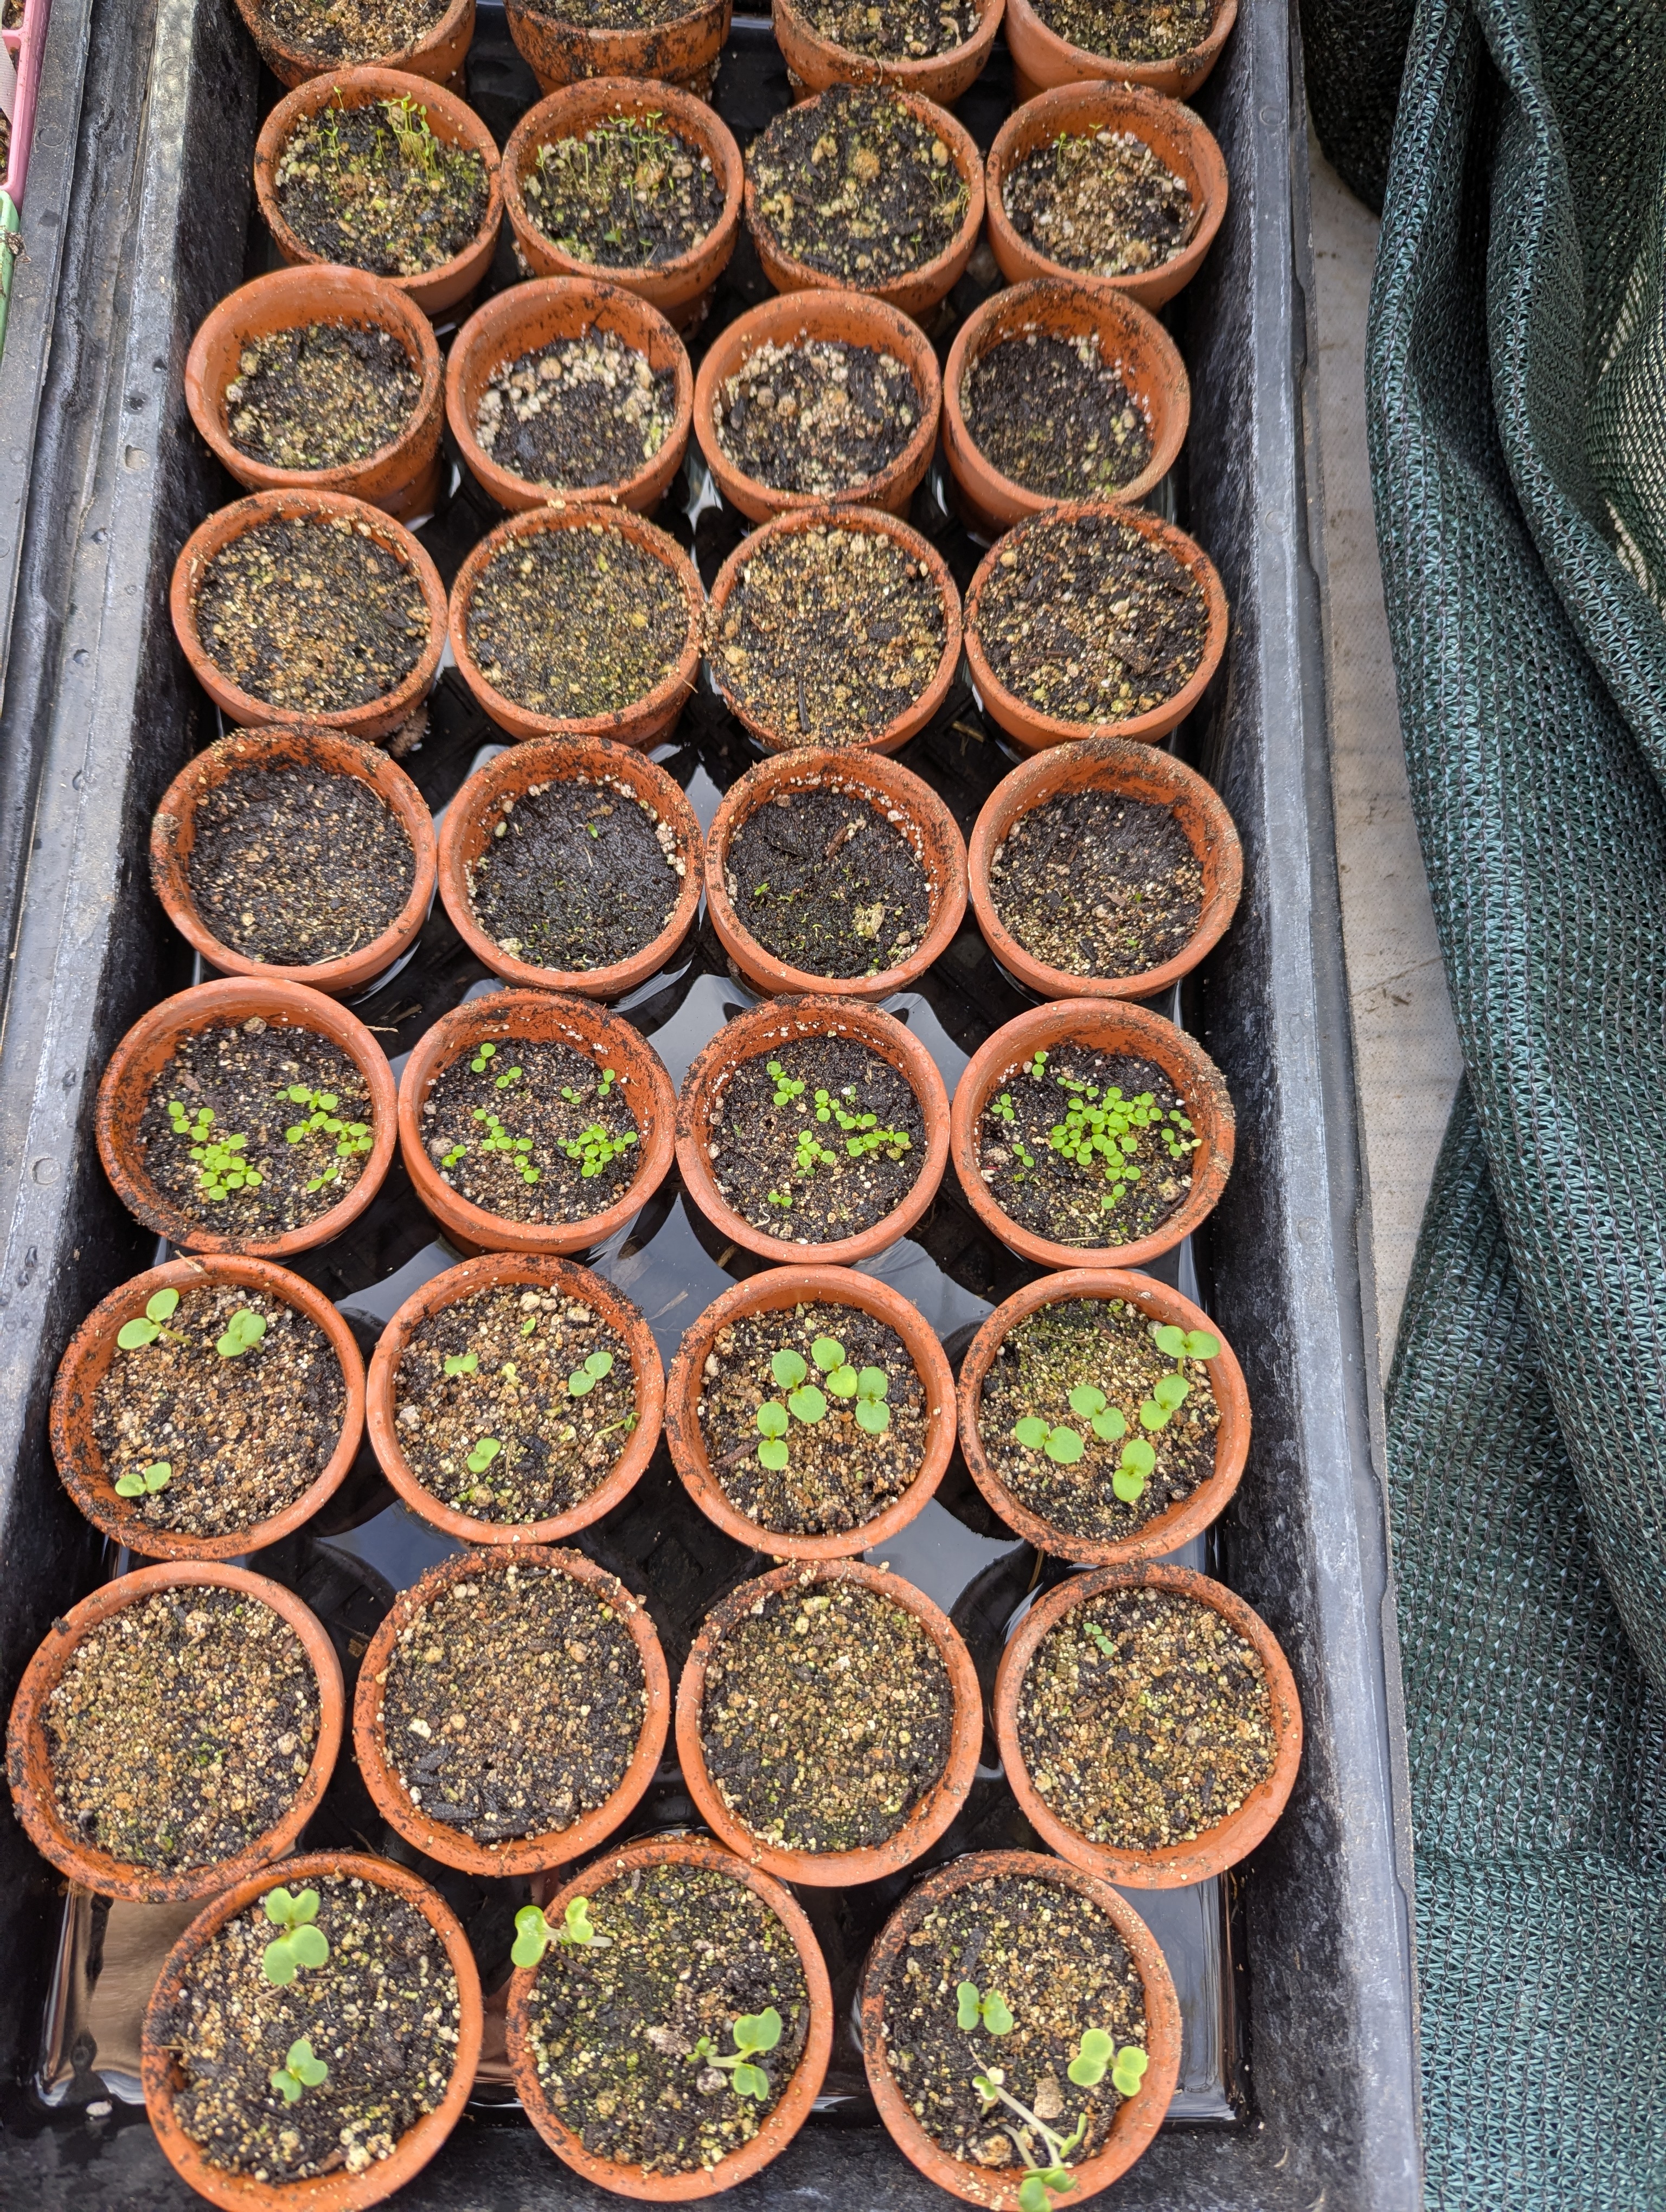
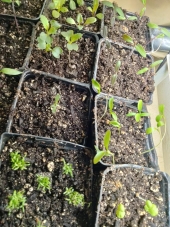
We are still getting highs in the low 90's, but the nights are a lot cooler. Thank goodness the forecast is calling for high 80's, woohoo. The lower temperature, shade cloth, and maybe better watering has made a huge difference. I'm so happy. All the trays I started, or replanted are looking great. So far I like the terracotta pots. They charge color when they dry, so it's quite easy to know when to water. I may change my mind about them when it's time to pot up. I hope if I wait until it's a bit dry, and maybe it will pop out ok, fingers crosse, all goes well.
Things are growing well enough I need to start potting up. Not my favorite garden chore, but a must for fall gardening for me. A lot of the summer veggies are still growing strong. I want to keep those little seedlings growing strong while waiting for a space in the garden
I feel better. It's frustrating, and a bit depressing to epically fail at something I felt I was pretty good at. I think the use of row cover was a bad idea in the heat. My thought was it would keep the Harlequin bugs out. It never occurred to me it would keep the heat in, which is pretty dumb because well duh that's what it is for. I guess I can give myself a break because I never really need to use row cover. Anyway it's shade cloth from now on. I really wanted to get a lot of the plants started in August. I guess if I want to start seeds in August I need to start them in the house.
Thanks for sharing my sad seed starting journey with me, I  will let you know how the terracotta pots do. I hope if you are starting seeds your results are positive. Good luck, thanks
PXL_20260925_000328929.jpg
9/24/26
9/24/26
PXL_20260925_000336653.jpg
9/24/26
9/24/26
 
Jay Angler
master steward
Posts: 16356
Location: Pacific Wet Coast
10861
duck books chicken cooking food preservation ungarbage
  • Likes 2
  • Mark post as helpful
  • send pies
    Number of slices to send:
    Optional 'thank-you' note:
  • Quote
  • Report post to moderator

Jen Fulkerson wrote: ... So far I like the terracotta pots. They charge color when they dry, so it's quite easy to know when to water. I may change my mind about them when it's time to pot up. I hope if I wait until it's a bit dry, and maybe it will pop out ok, fingers crossed, all goes well...


If it was me, I'd start looking now for a thin, slightly flexible tool that you could use around the edge of the pot - think of how you loosen a muffin from a muffin cup after baking. If you don't find something better, a cutlery knife might do the job.
 
Posts: 10825
Location: a temperate, clay/loam spot on planet earth, the universe
4056
4
  • Likes 4
  • Mark post as helpful
  • send pies
    Number of slices to send:
    Optional 'thank-you' note:
  • Quote
  • Report post to moderator
You might be able to easily pop the plants out of those clay pots for transplanting or maybe lift them carefully with a fork?

My potting soil is always on the sandy side so maybe that helps with my method.
I seed wooden flats that are about 3.5" deep.
I let the soil dry out a bit before transplanting and then lift clumps with a kitchen fork, lay them on the potting table, separate gently and fill a transplant pot about halfway but at a slant so I'm just laying the roots on the soil, then while holding the stem add soil to cover the roots...tap the upright pot on the table a couple times to settle the soil then set in a vat of water until the soil is soaked.

I guess in a sense I'm planting 'bareroot' or close....works well for most everything for me but again my potting soil is pretty sandy....the trick seems to be letting it dry out some rather than being wet heavy clumps attatched to the roots.
 
Jen Fulkerson
gardener
Posts: 2132
Location: N. California
1139
2
hugelkultur kids cat dog fungi trees books chicken cooking medical herbs ungarbage
  • Likes 8
  • Mark post as helpful
  • send pies
    Number of slices to send:
    Optional 'thank-you' note:
  • Quote
  • Report post to moderator
Even though the seedlings are pretty small, so are the terracotta pots, so I decided to pot up some of them. One of my new favorite seed tools is a paint brush. The end makes a great dibbler, and the brush  gently pushes the delicate roots down the hole. Luckily it's also the perfect size to fit in the drainage hole and pop the soil & seedlings out of the pot. It was as easy as any other pot. I'm pretty happy with the terracotta pots. my only complaint is they want to fall over. If I continue to use them I have an idea to hold them into place. For now it's not enough of a problem to worry about.

I have gone from thinking I may have to buy all my veggies this fall, to wondering what the heck I'm going to do with all these seedlings. When things weren't germinating I kept starting new seeds. I have lost track of how many broccoli seedlings I have, but it's way more than I need. If they survive and grow into healthy plants I'm going to be giving some away. I enjoy sharing, but not a lot of people grow winter garden's. It baffles me, because in my opinion it's the best veggies, and so much more enjoyable to be outside.

Thank for all your kind words and support. Happy gardening
 
It's hard to fight evil. The little things, like a nice sandwich, really helps. Right tiny ad?
better than an outhouse, and can be indoors
https://www.richsoil.com/willow
reply
    Bookmark Topic Watch Topic
  • New Topic