
• Post Reply Bookmark Topic Watch Topic
  • New Topic
permaculture forums growies critters building homesteading energy monies kitchen purity ungarbage community wilderness fiber arts art permaculture artisans regional education skip experiences global resources cider press projects digital market permies.com pie forums private forums all forums
this forum made possible by our volunteer staff, including ...
master stewards:
  • Carla Burke
  • Anne Miller
  • Nancy Reading
  • John F Dean
  • r ransom
  • paul wheaton
  • Timothy Norton
stewards:
  • Jay Angler
  • Pearl Sutton
  • Andrés Bernal
master gardeners:
  • Christopher Weeks
gardeners:
  • M Ljin
  • Thekla McDaniels
  • May Lotito

Rocket Mass Heater Build

 
Posts: 11
7
  • Likes 8
  • Mark post as helpful
  • send pies
    Number of slices to send:
    Optional 'thank-you' note:
  • Quote
  • Report post to moderator
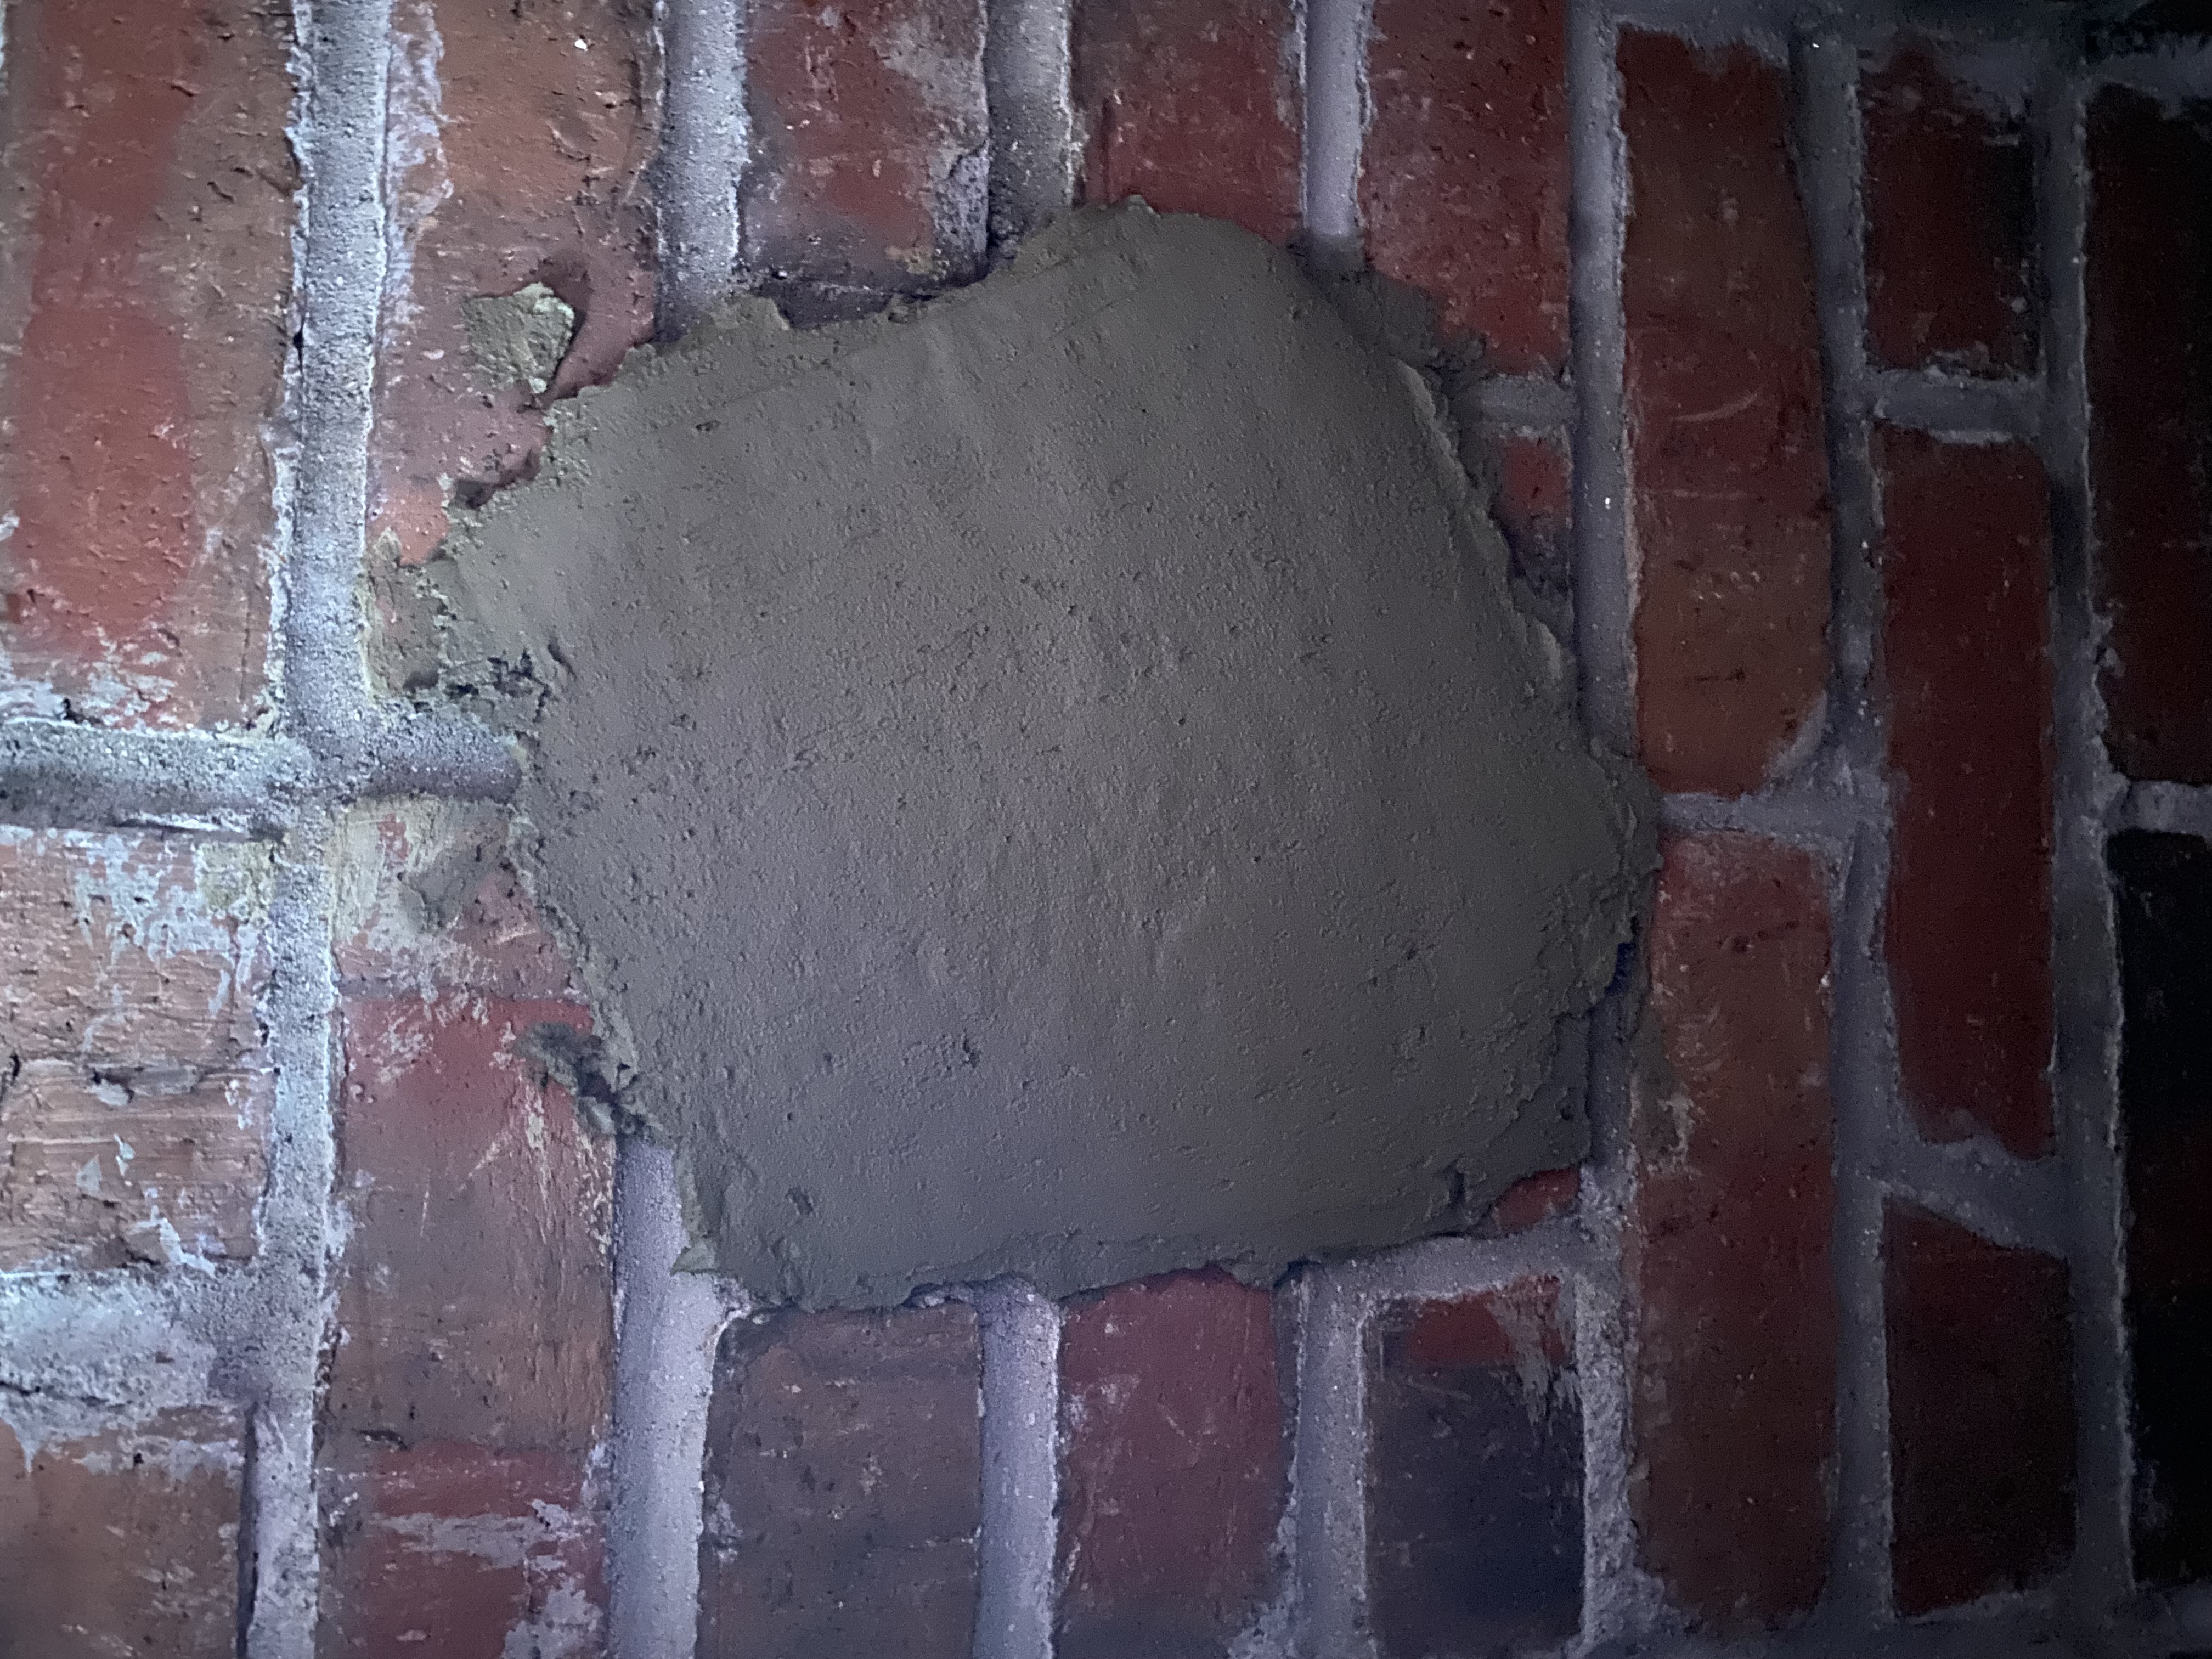
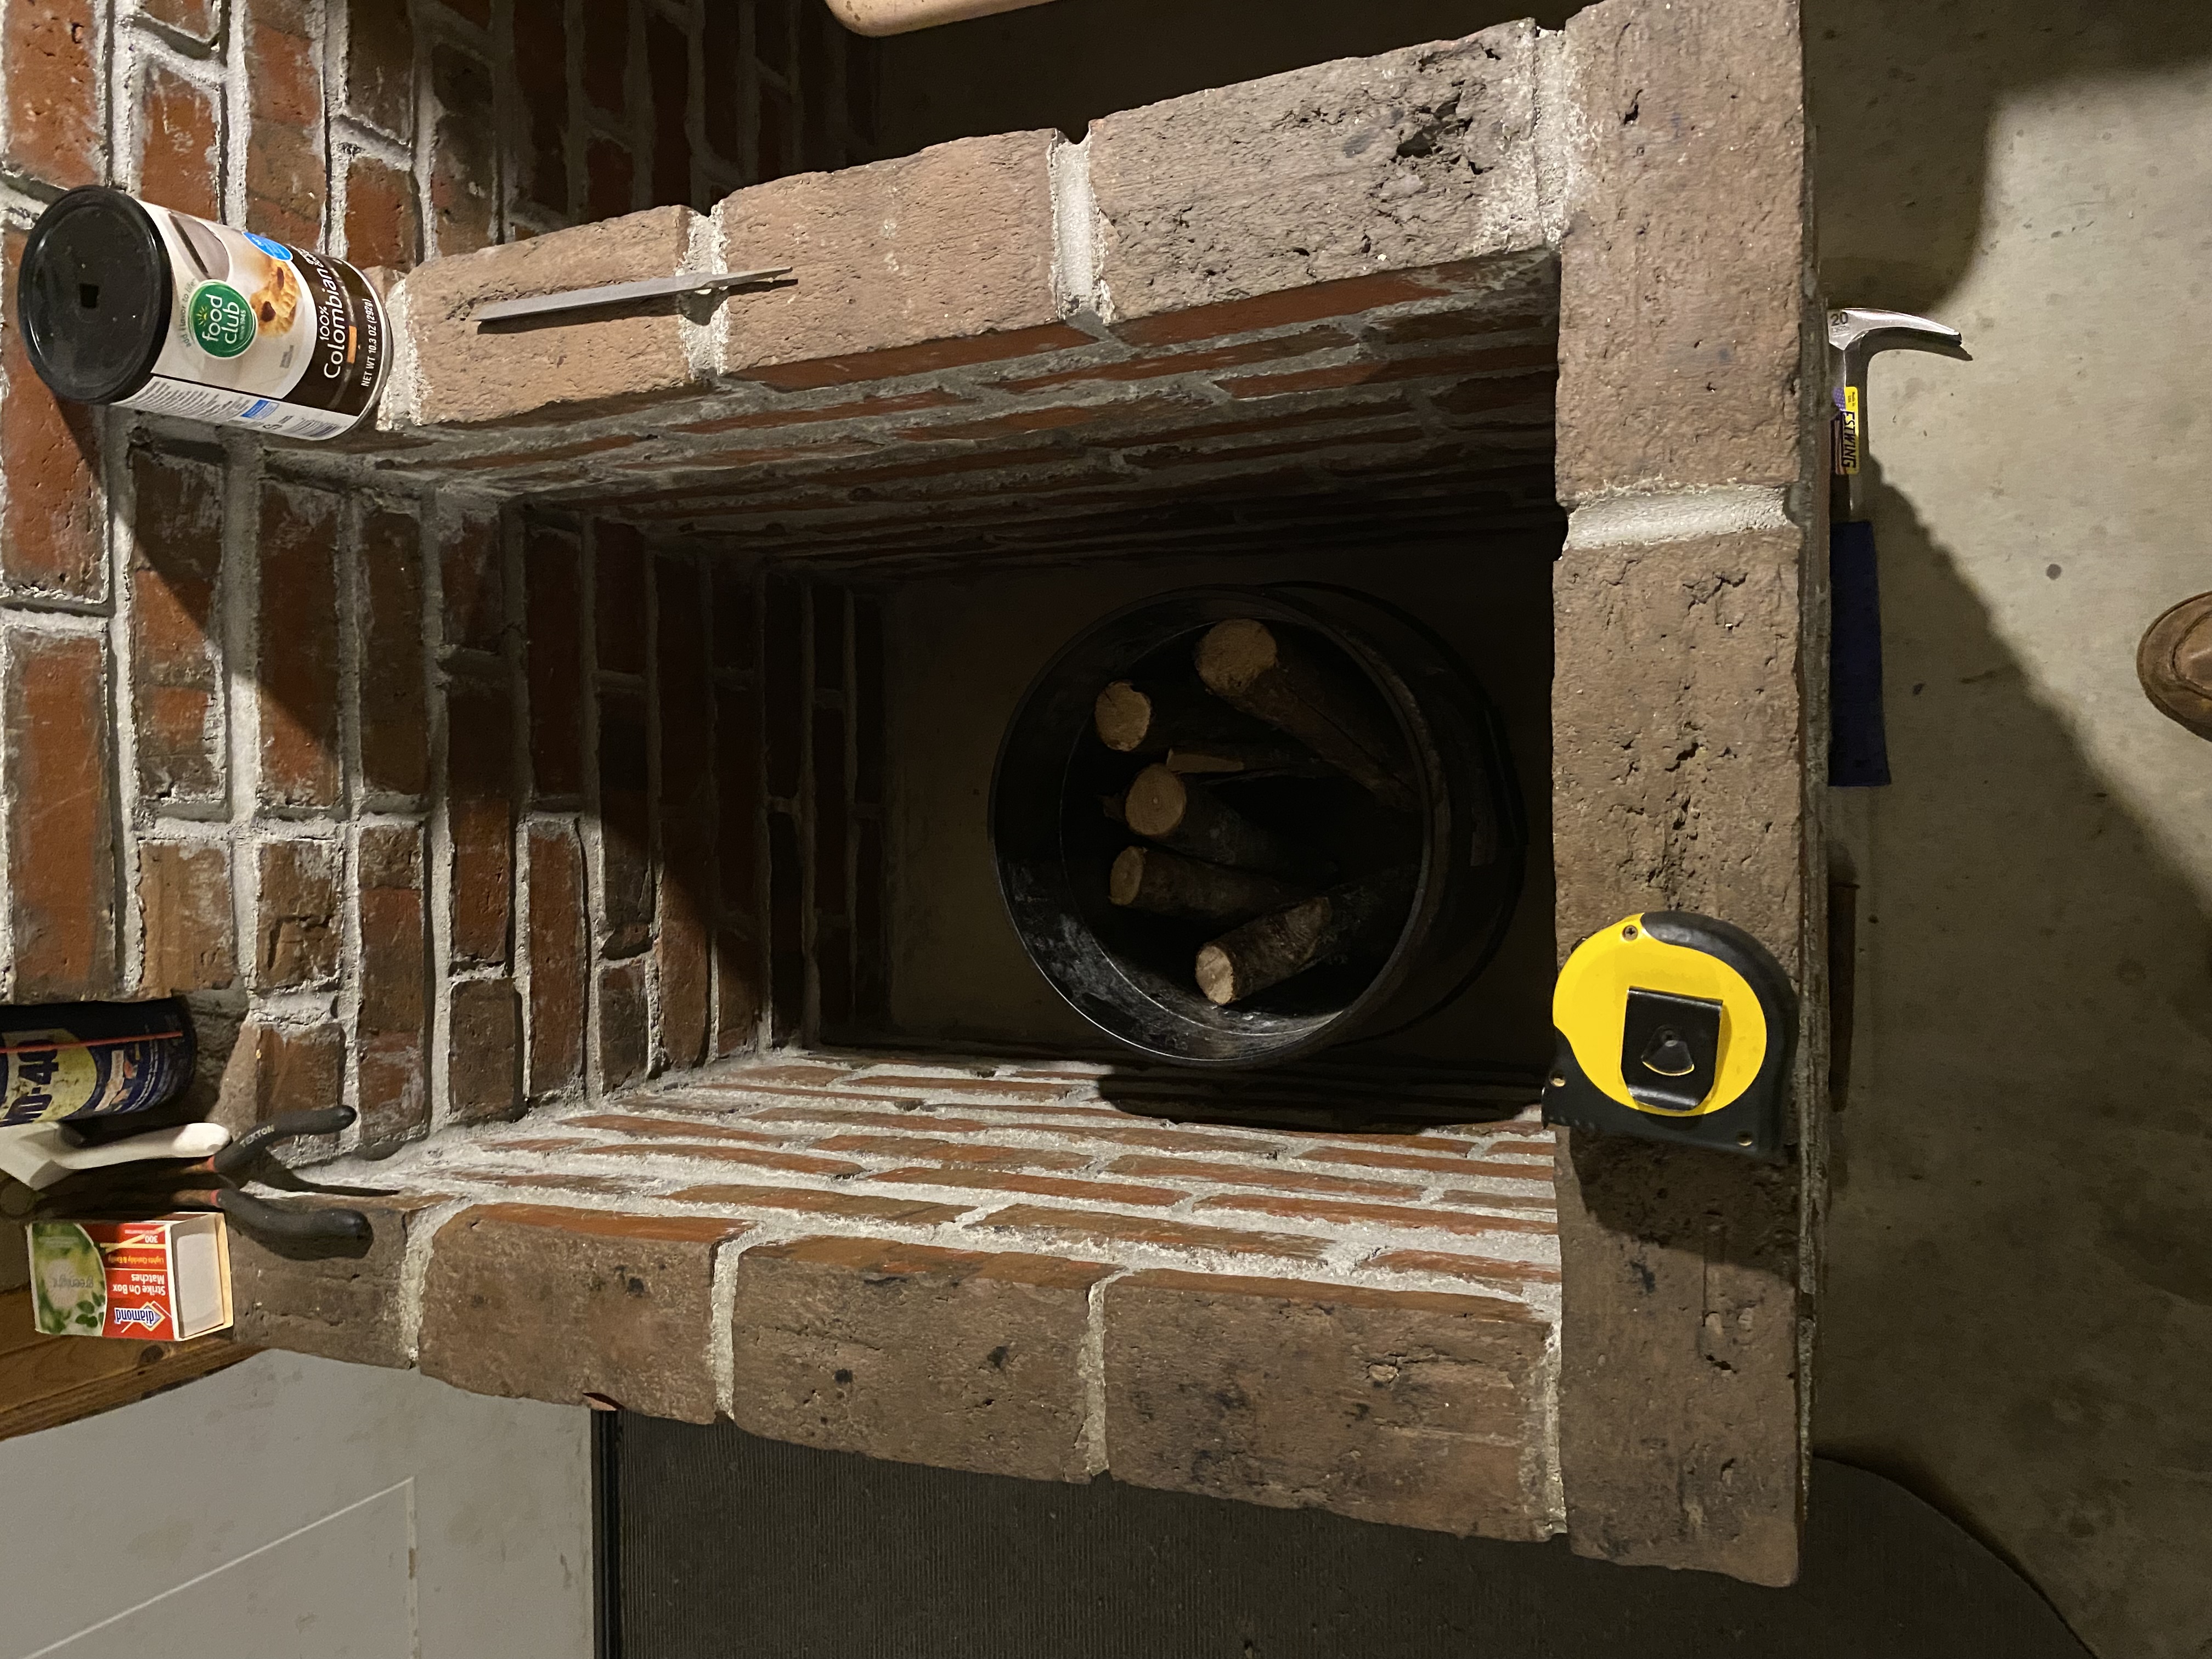
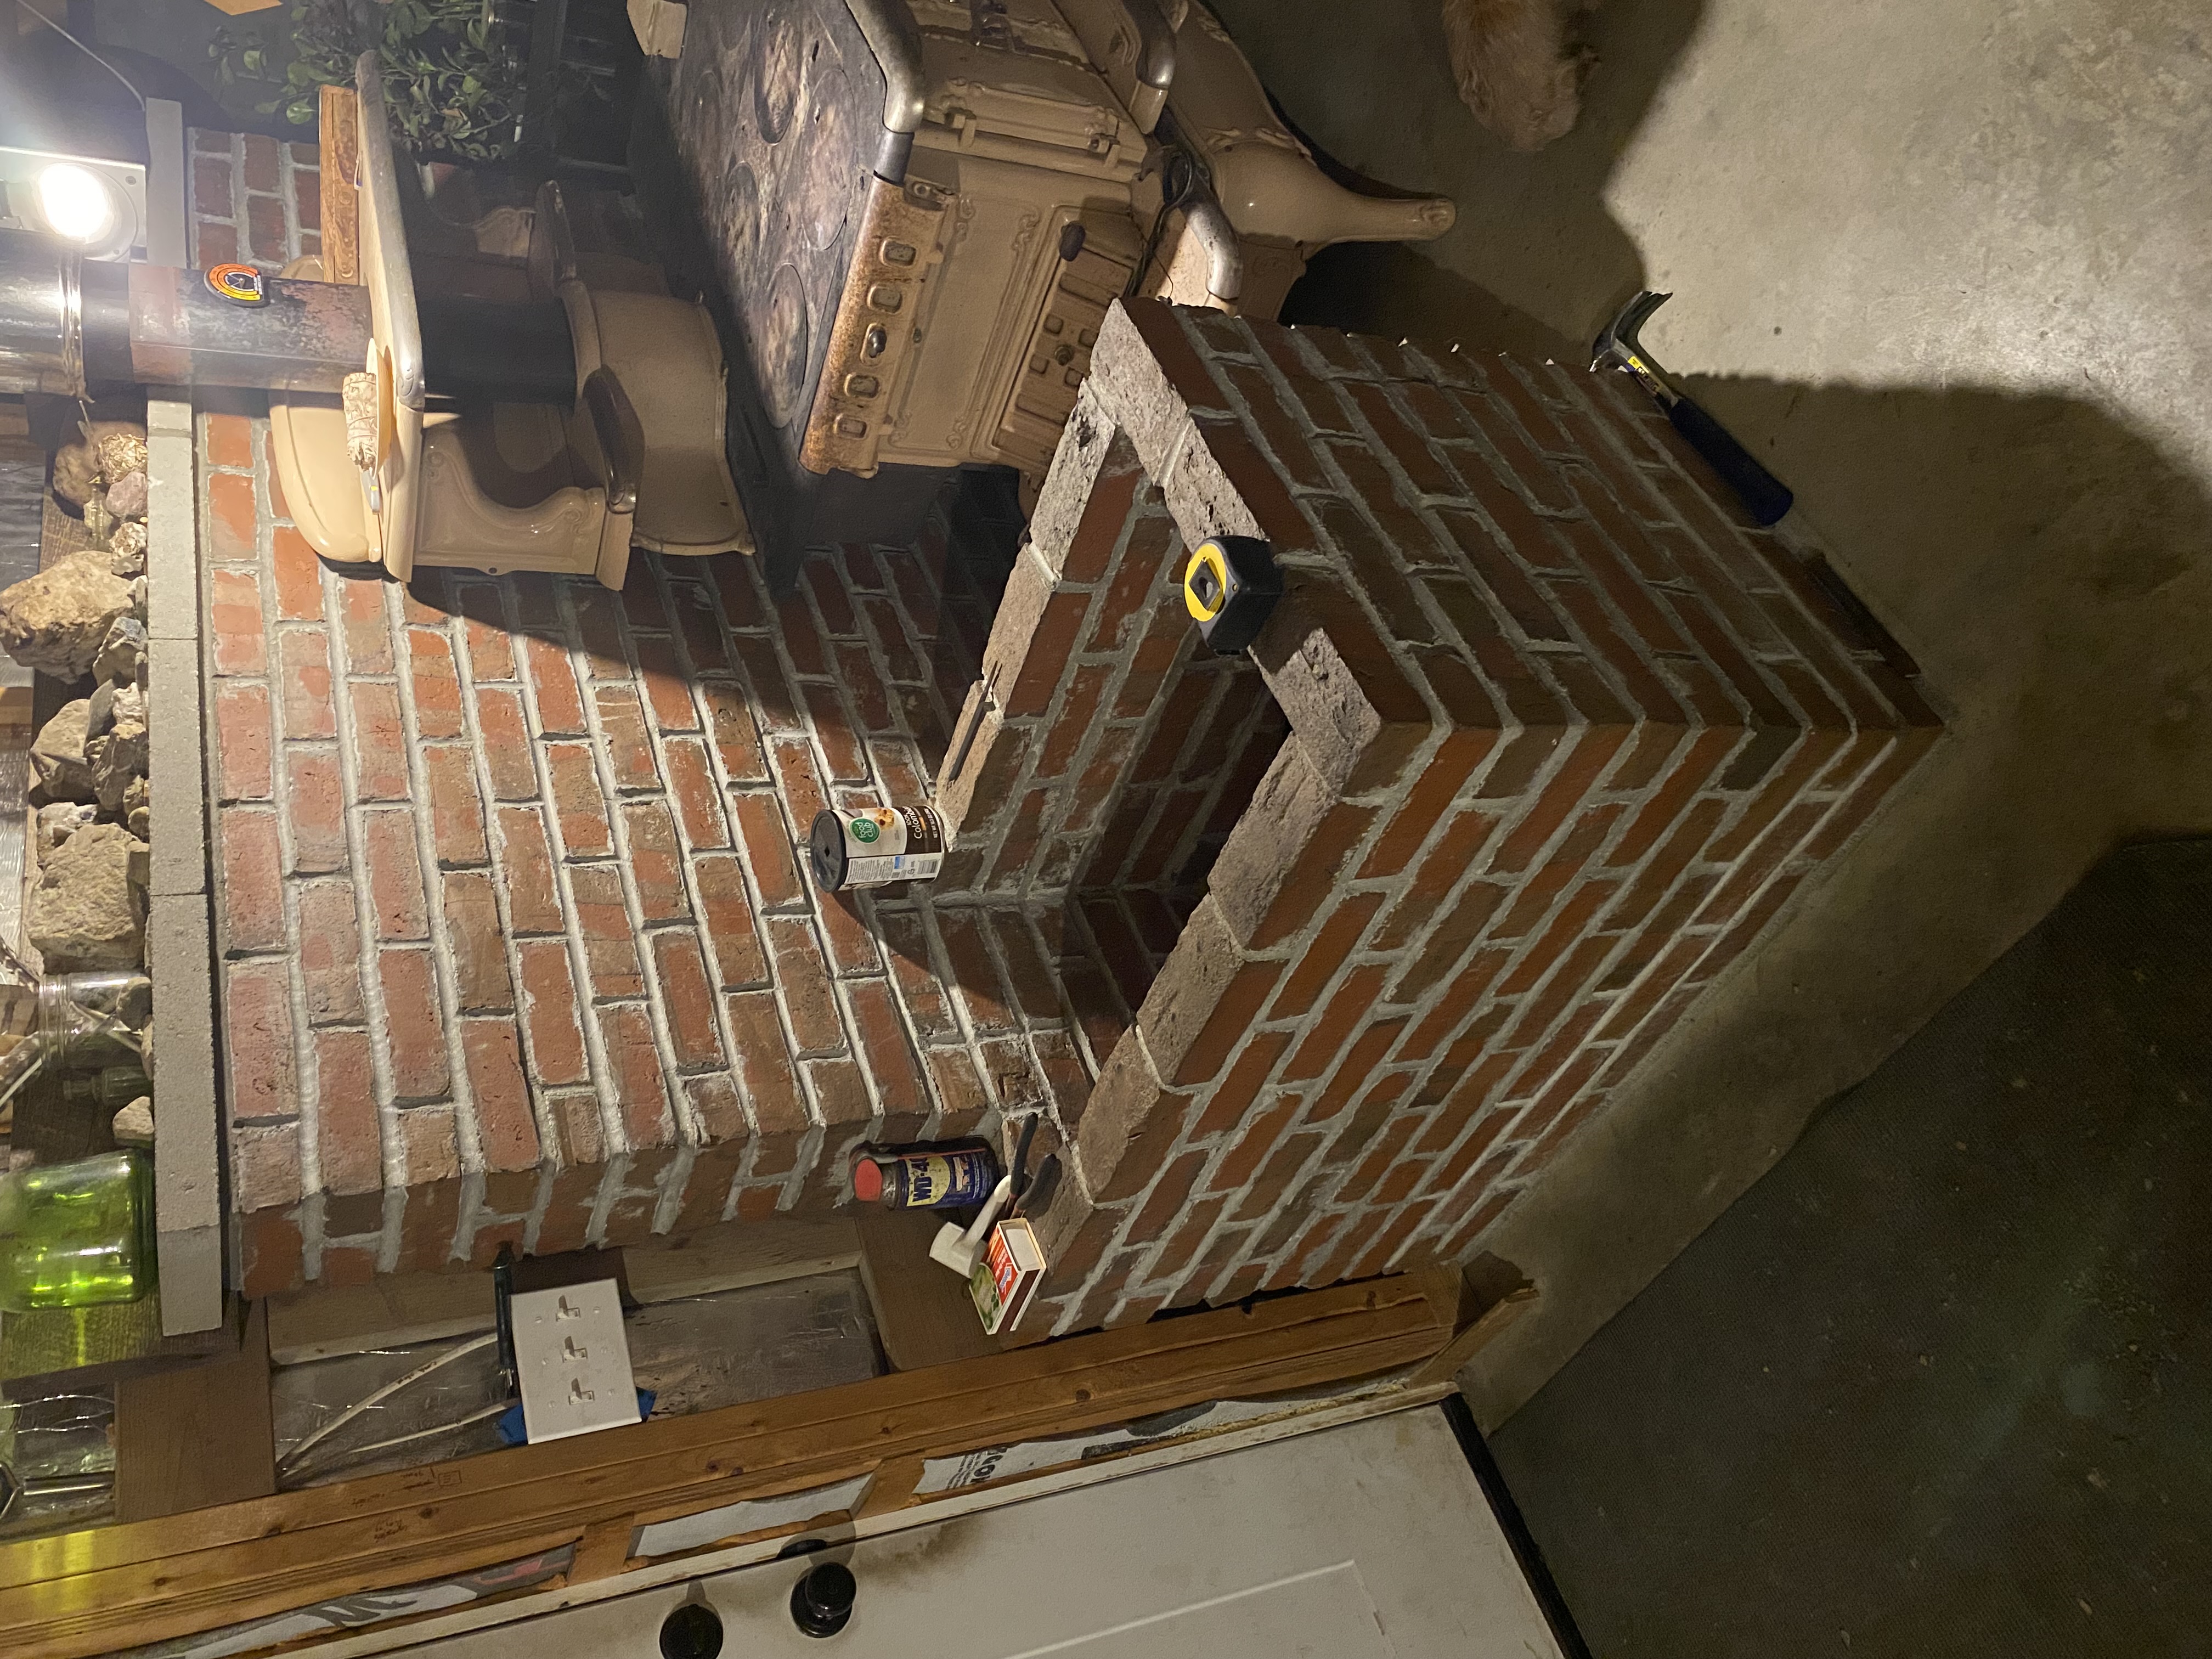
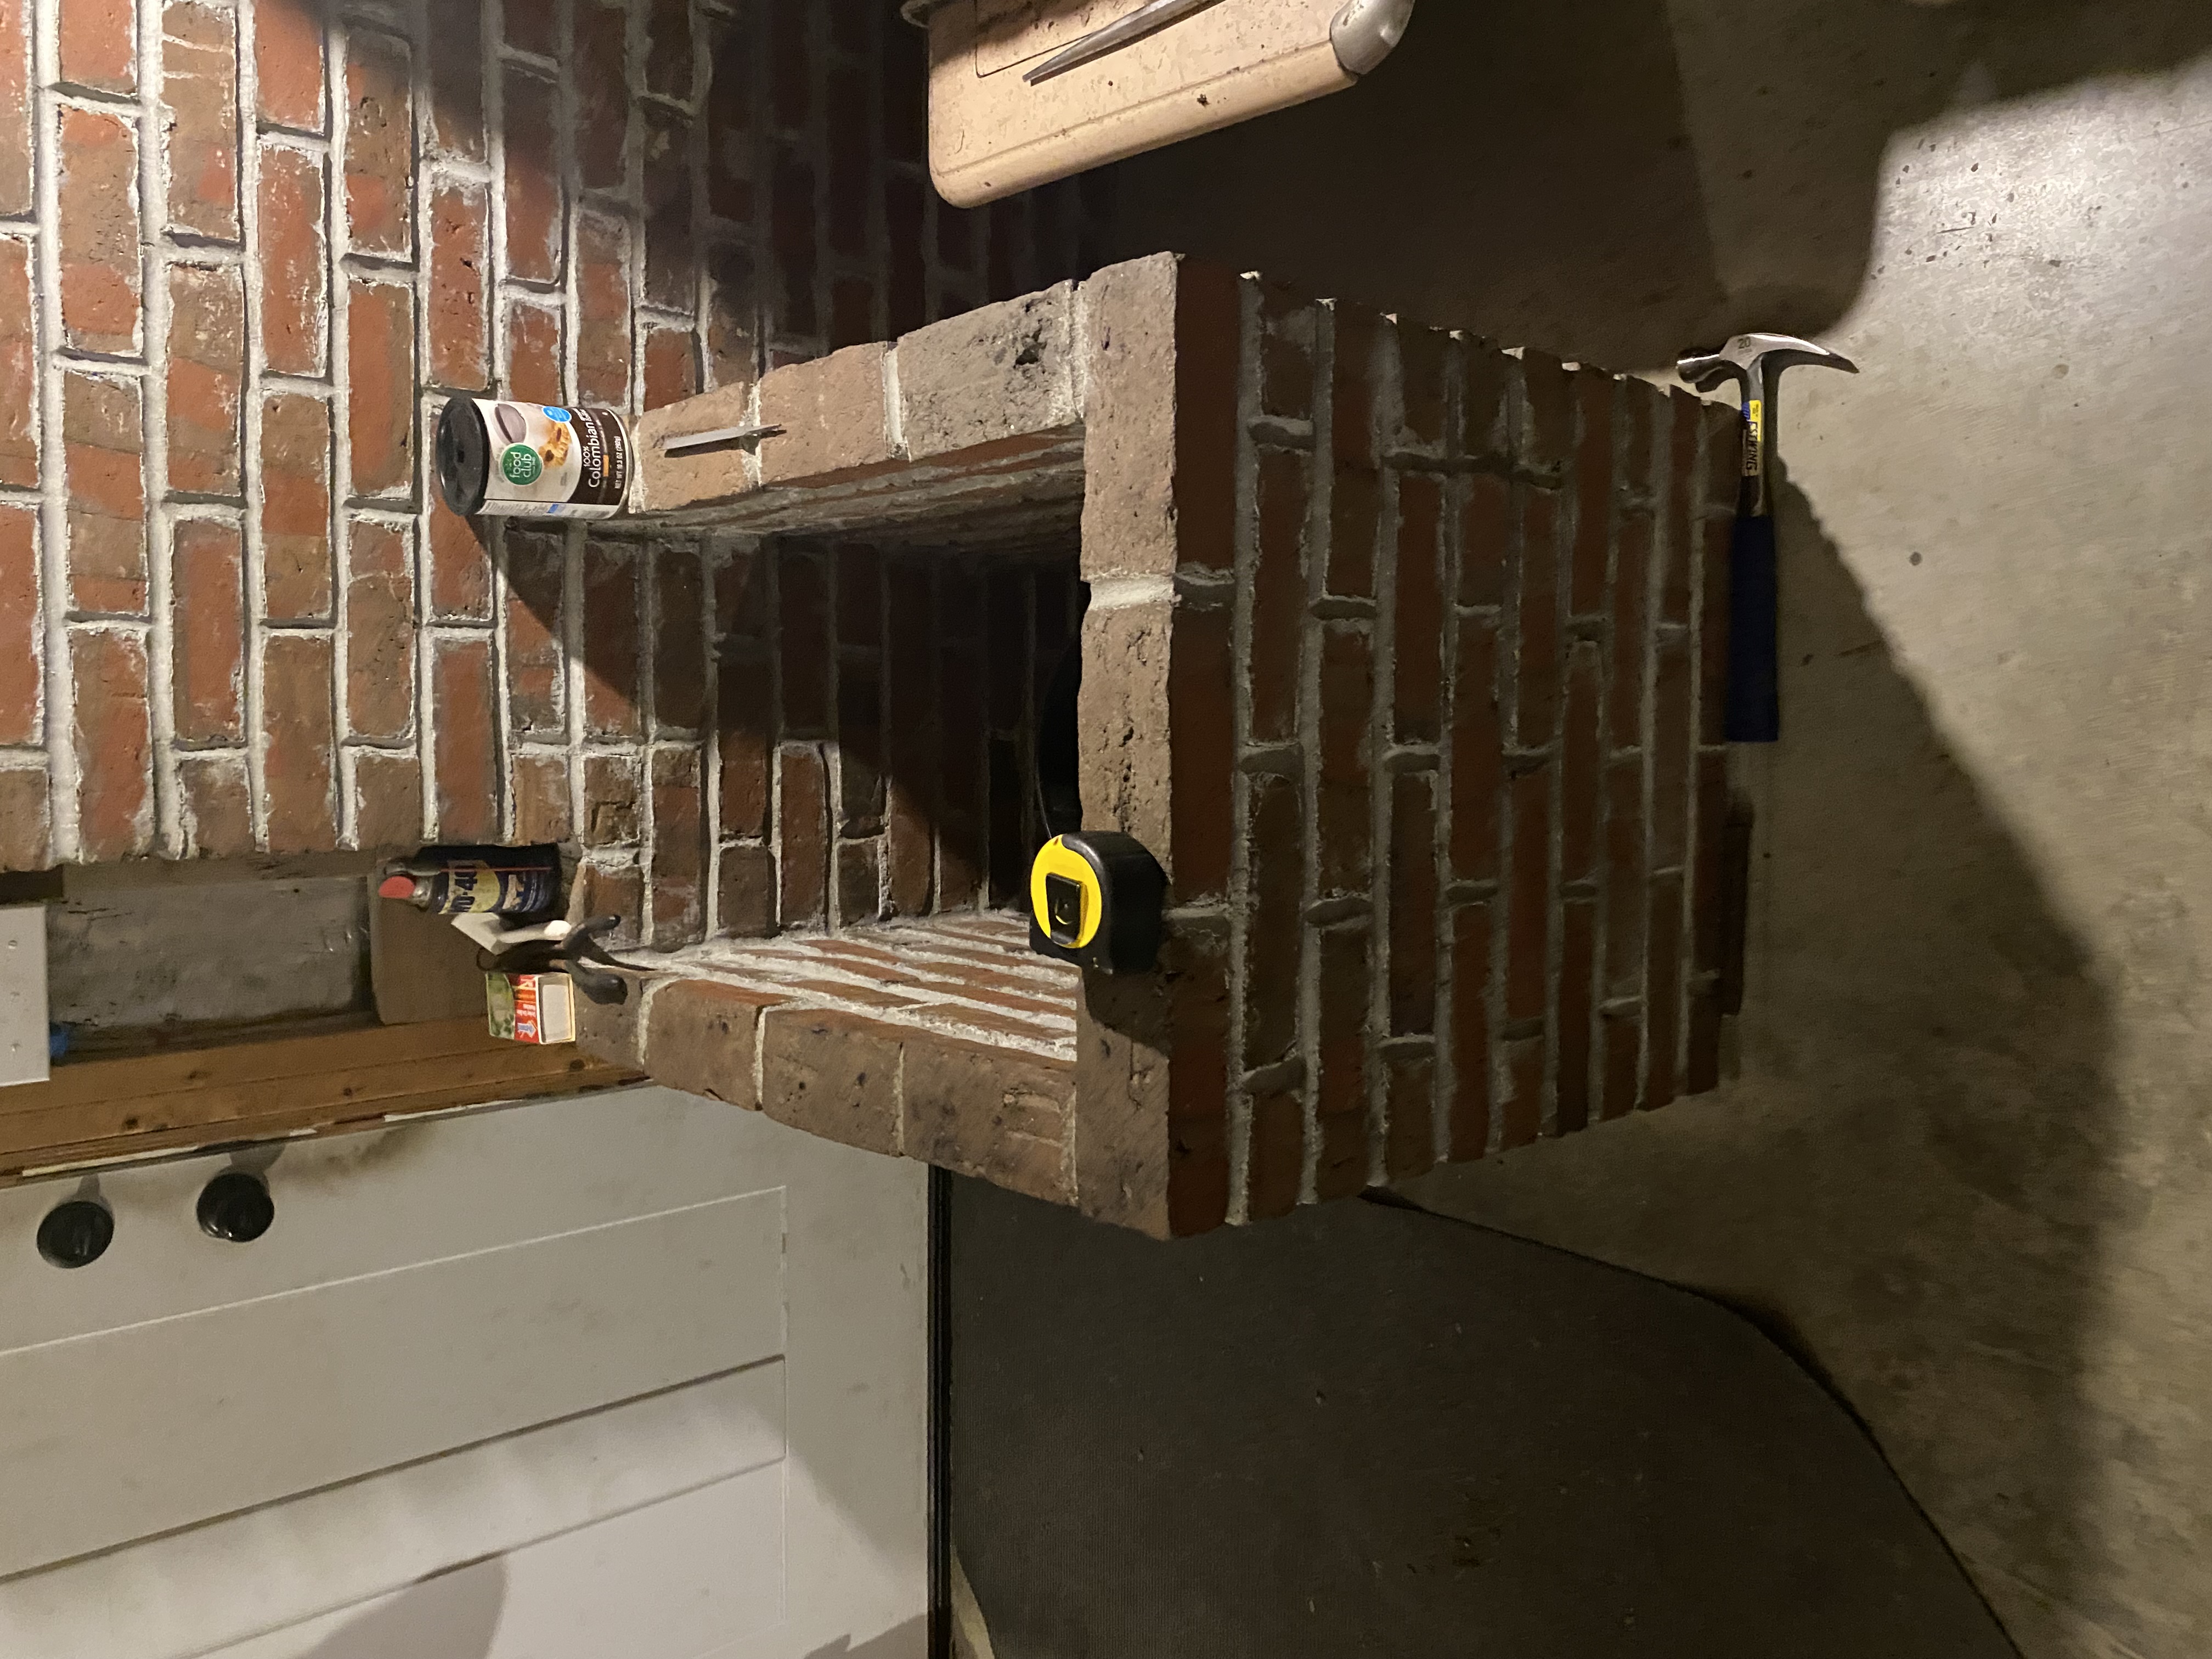
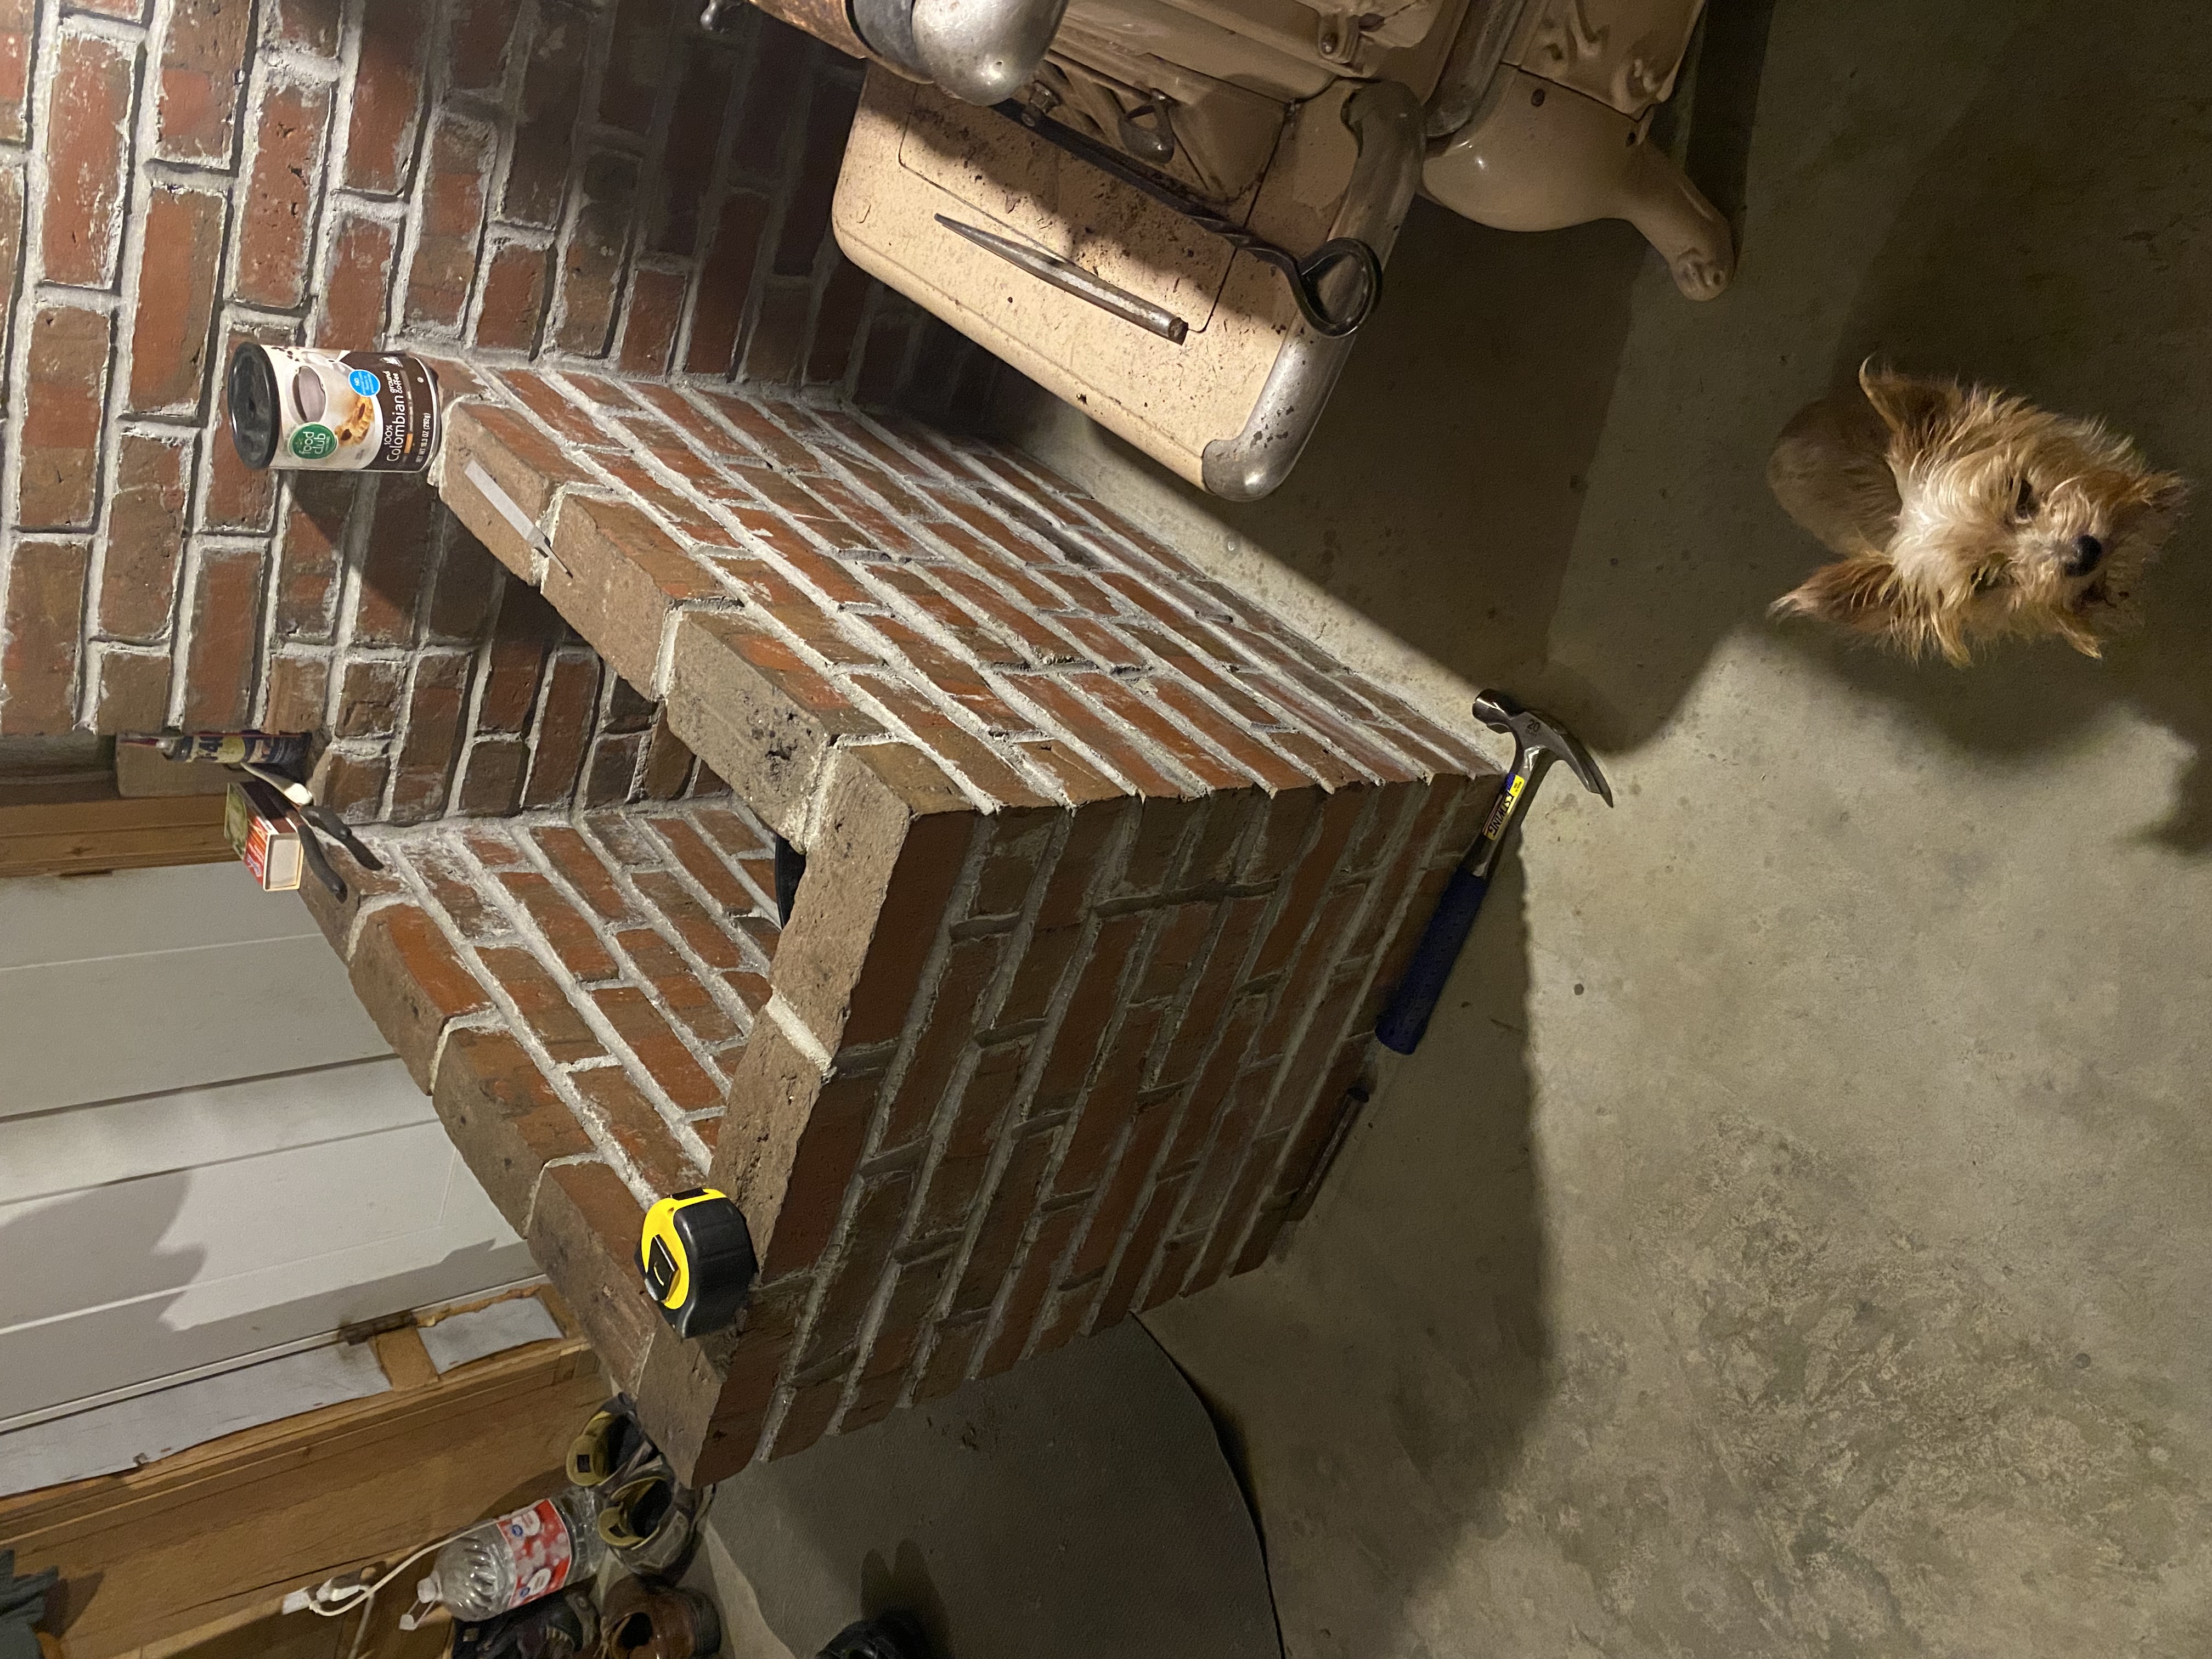
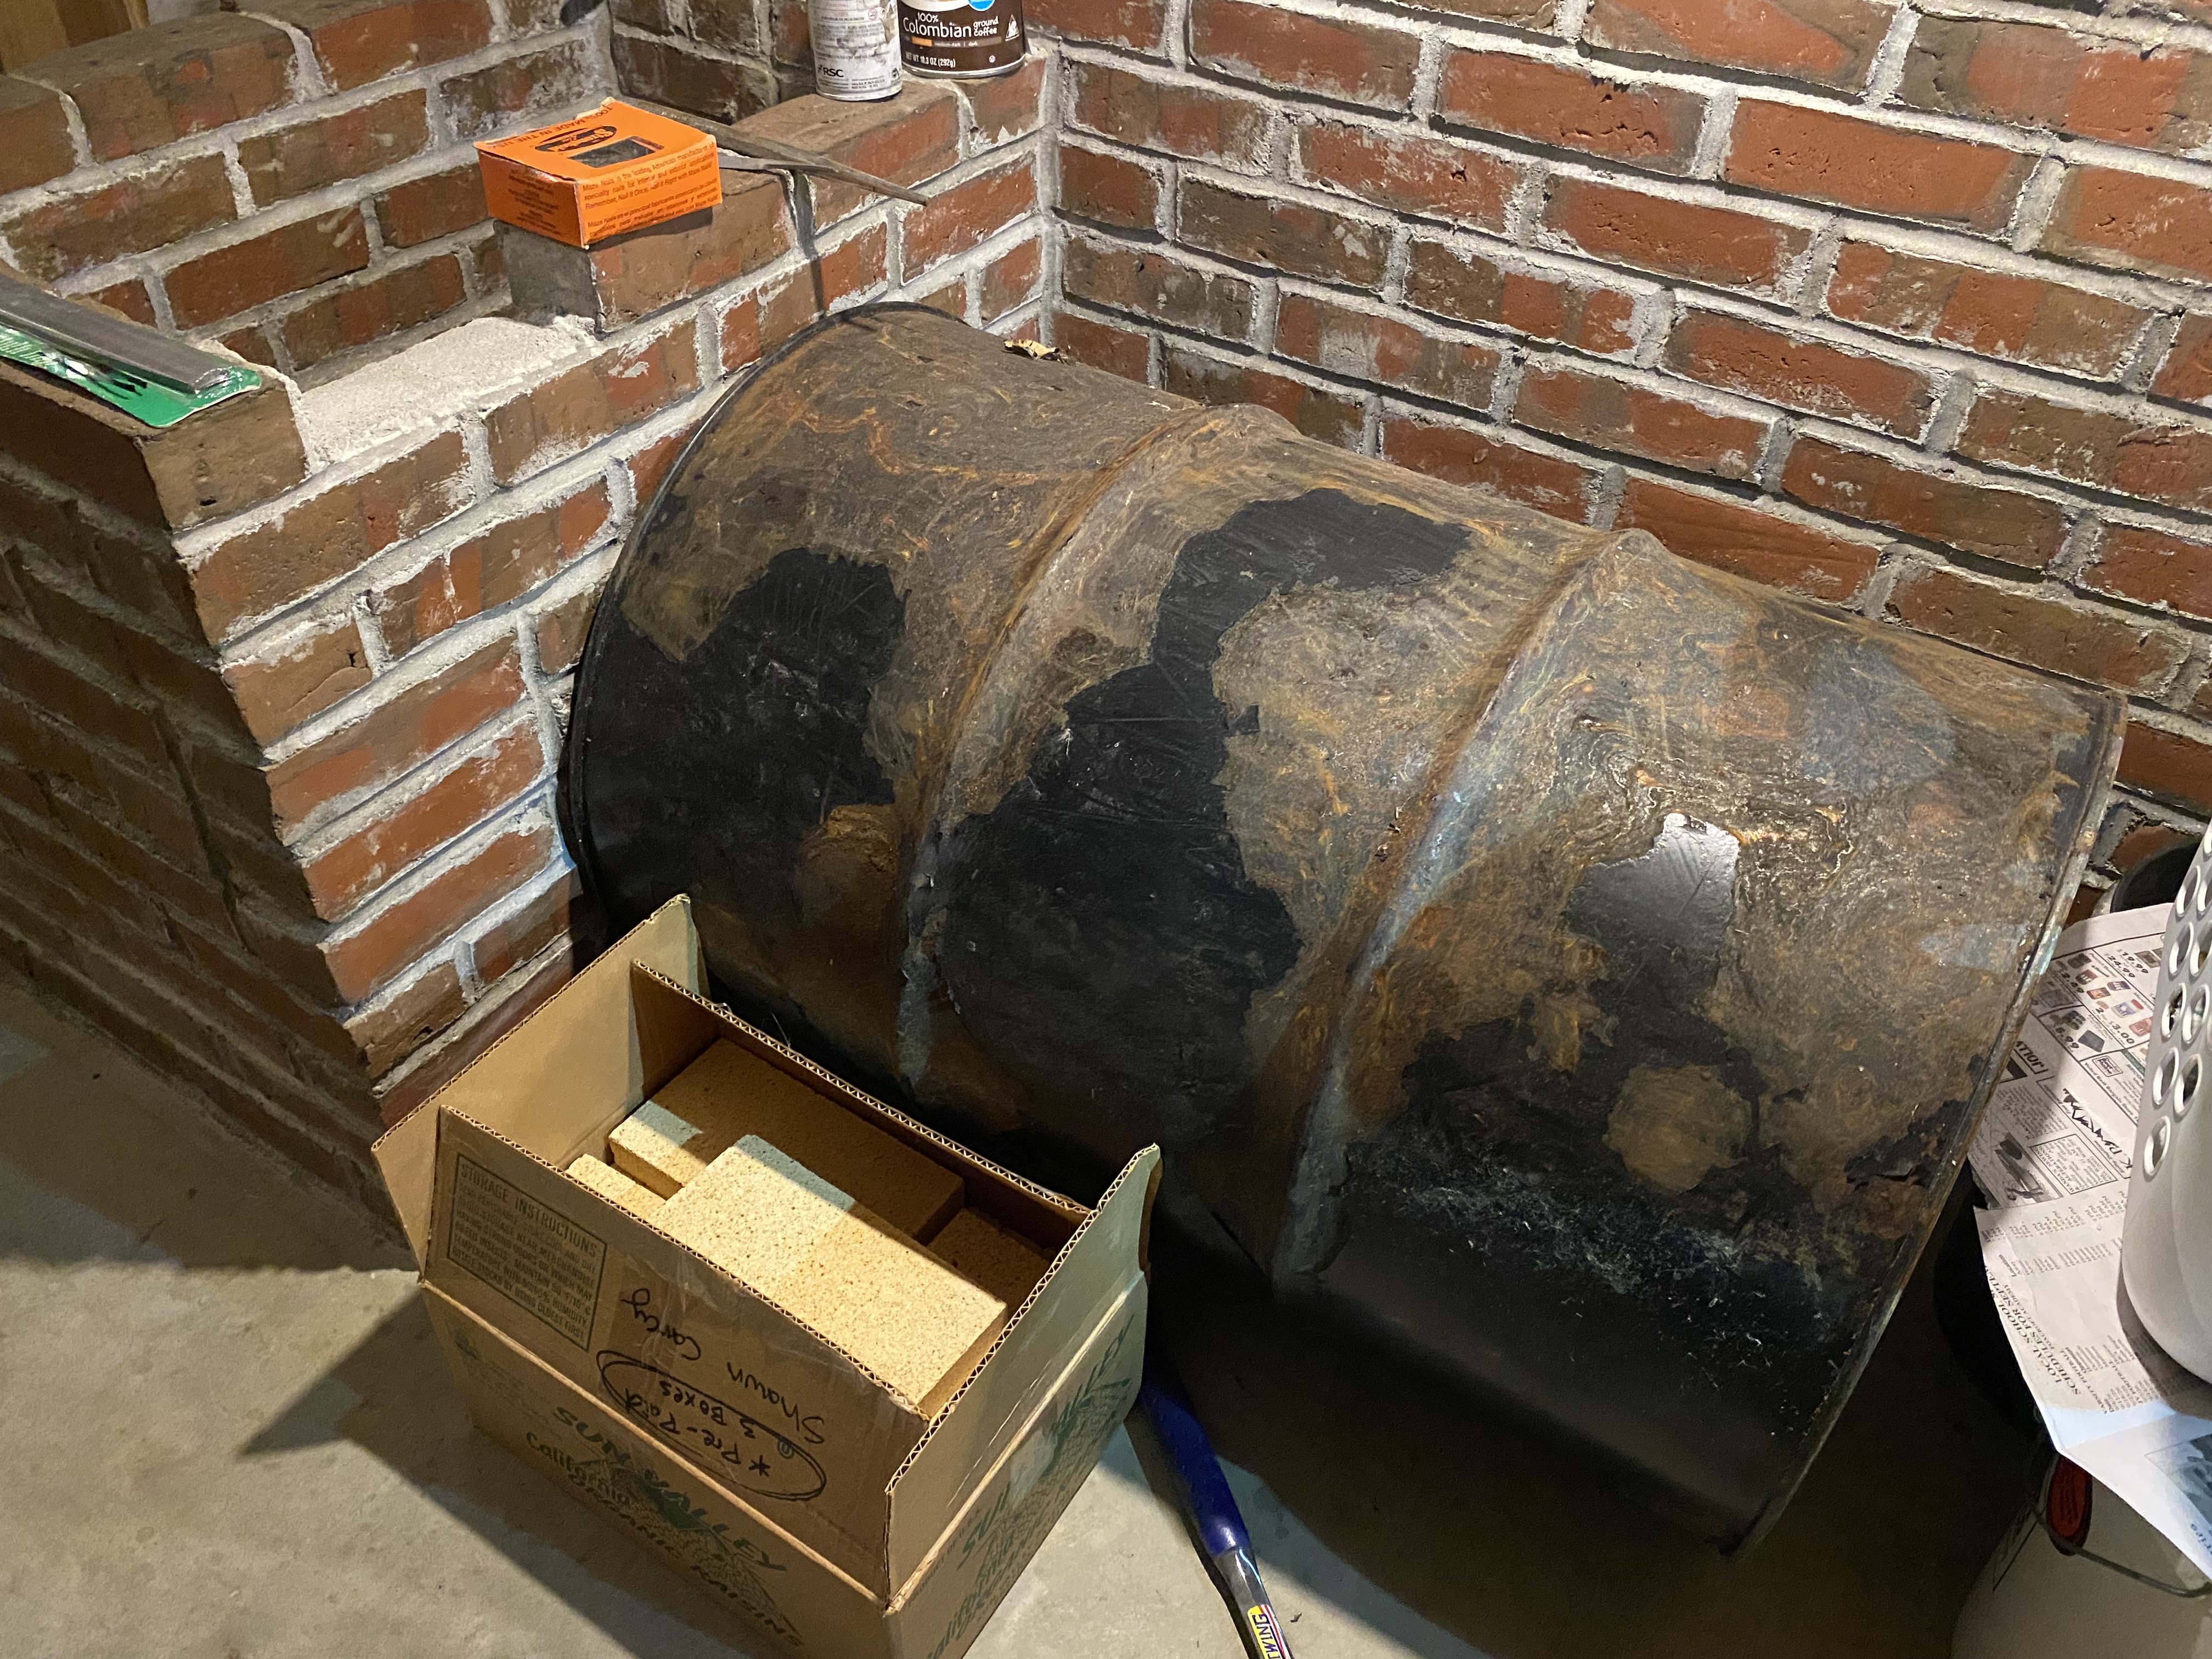
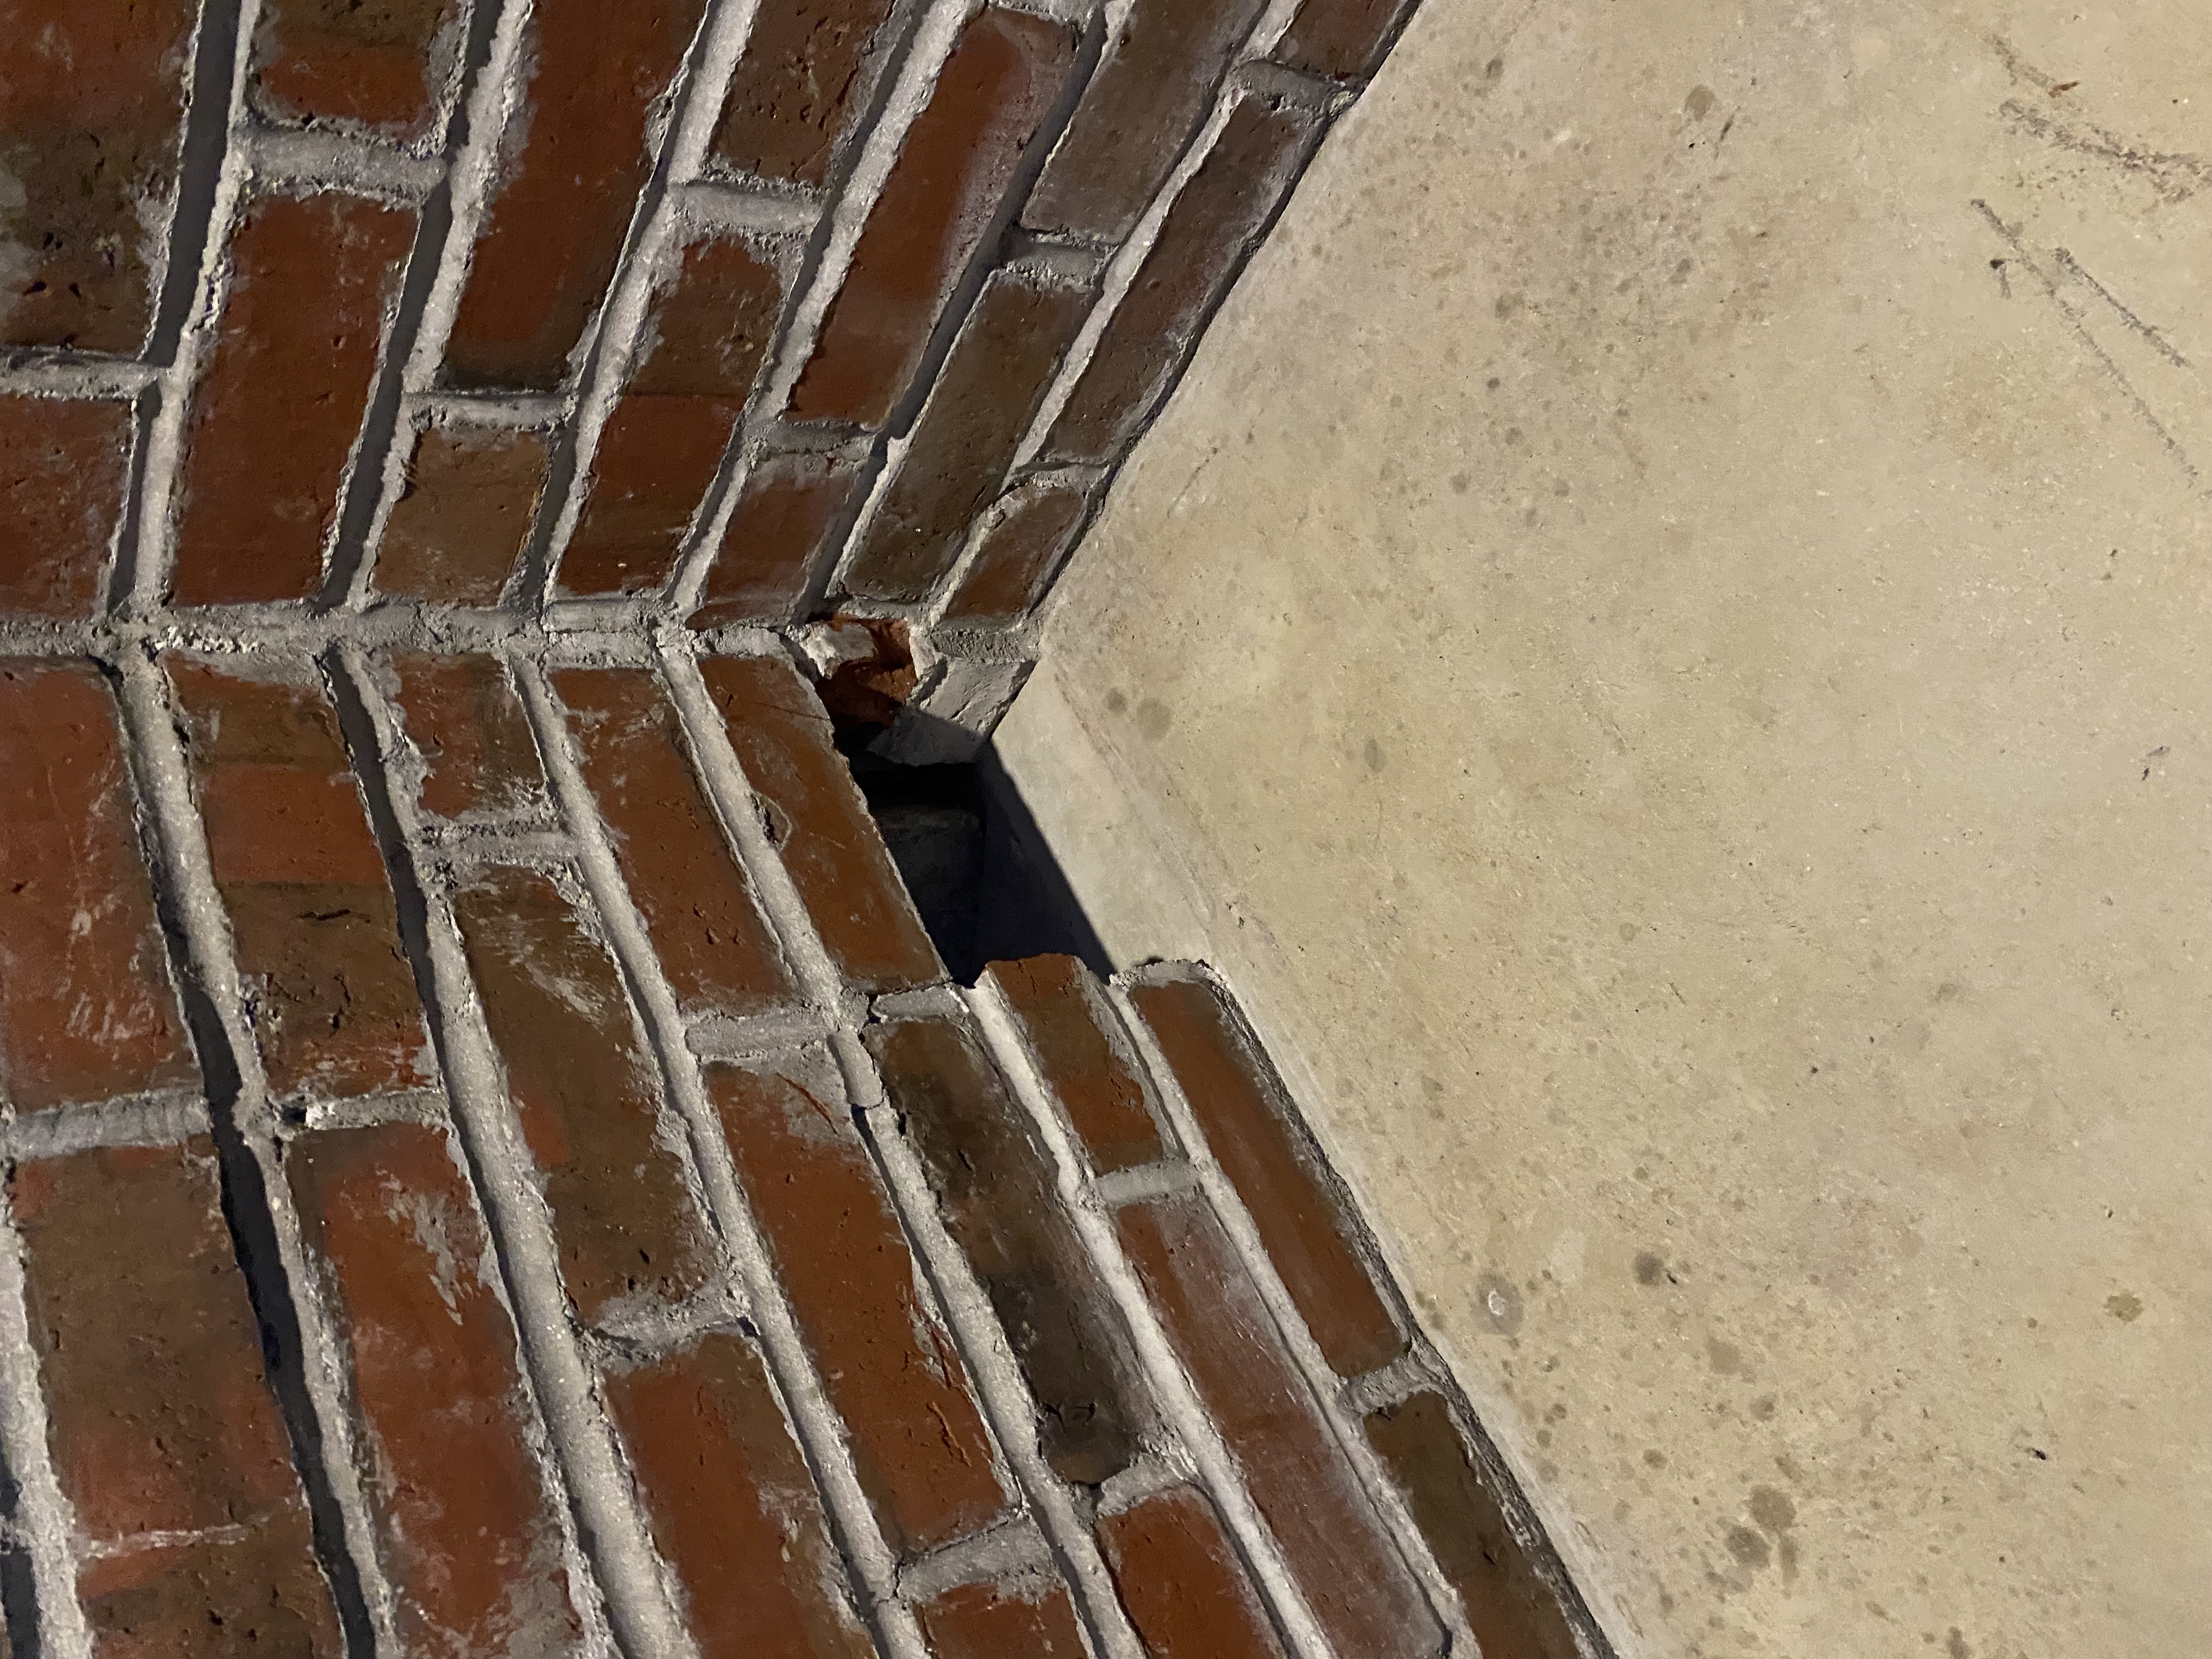
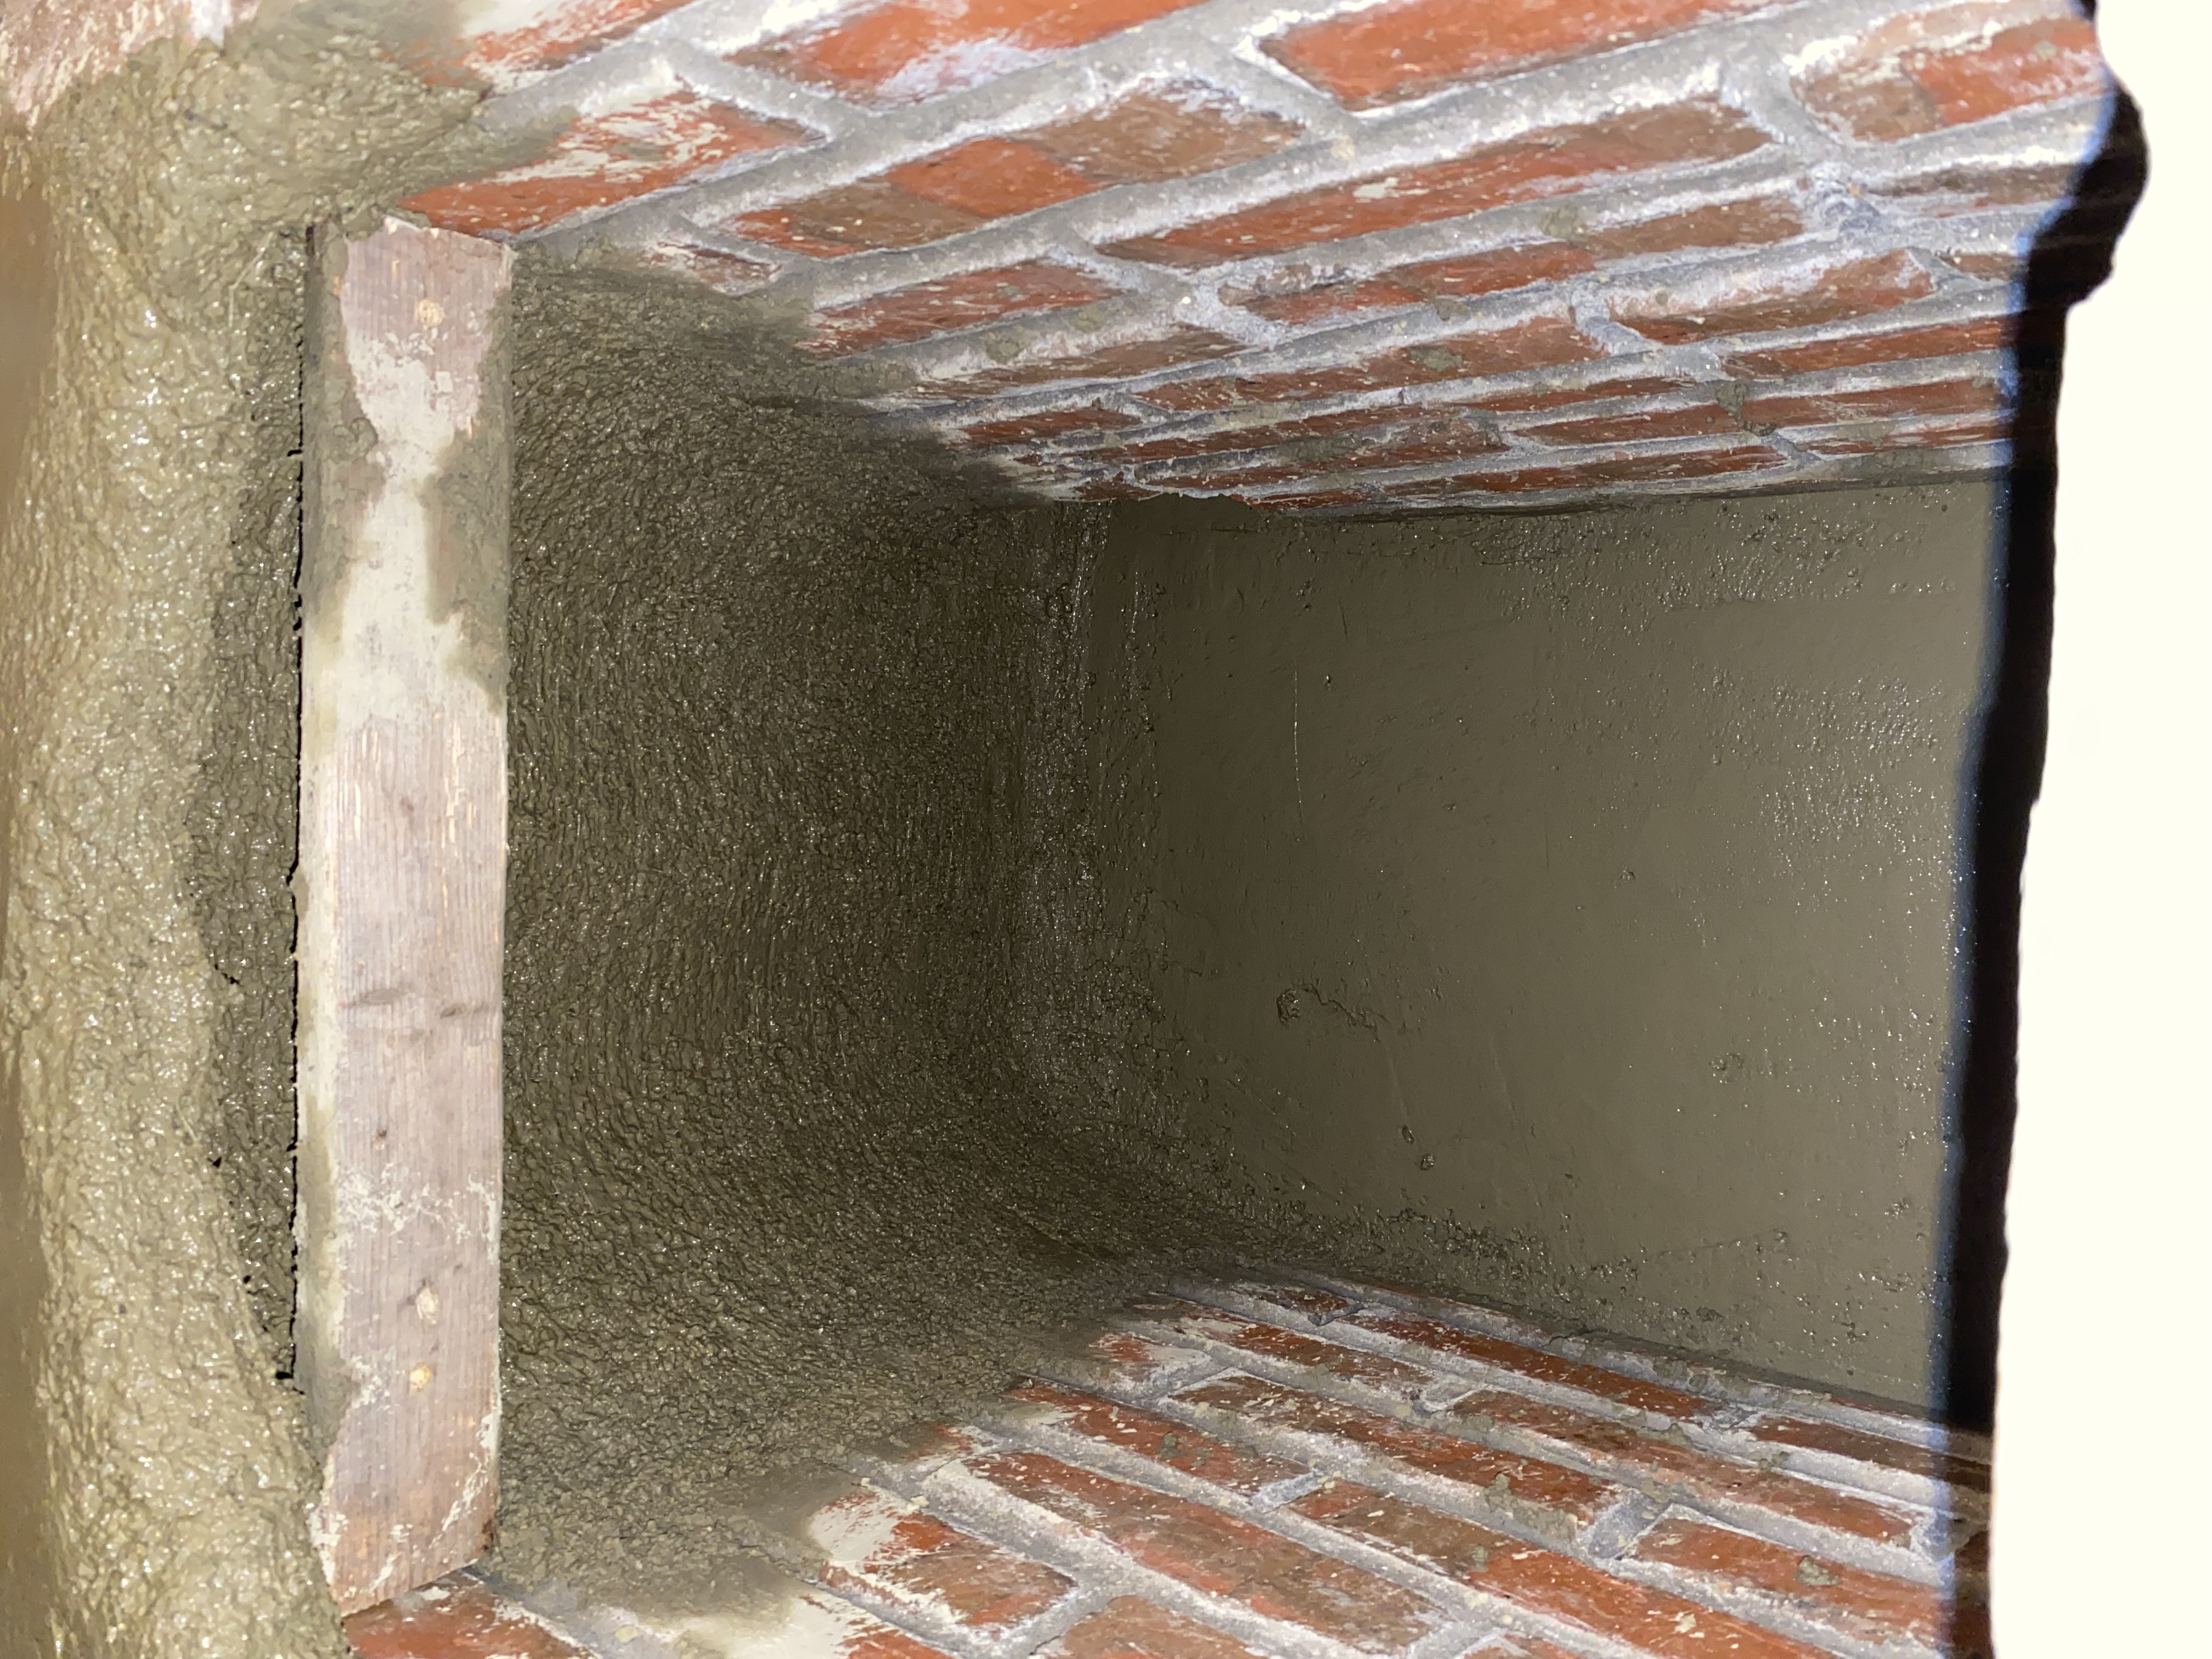
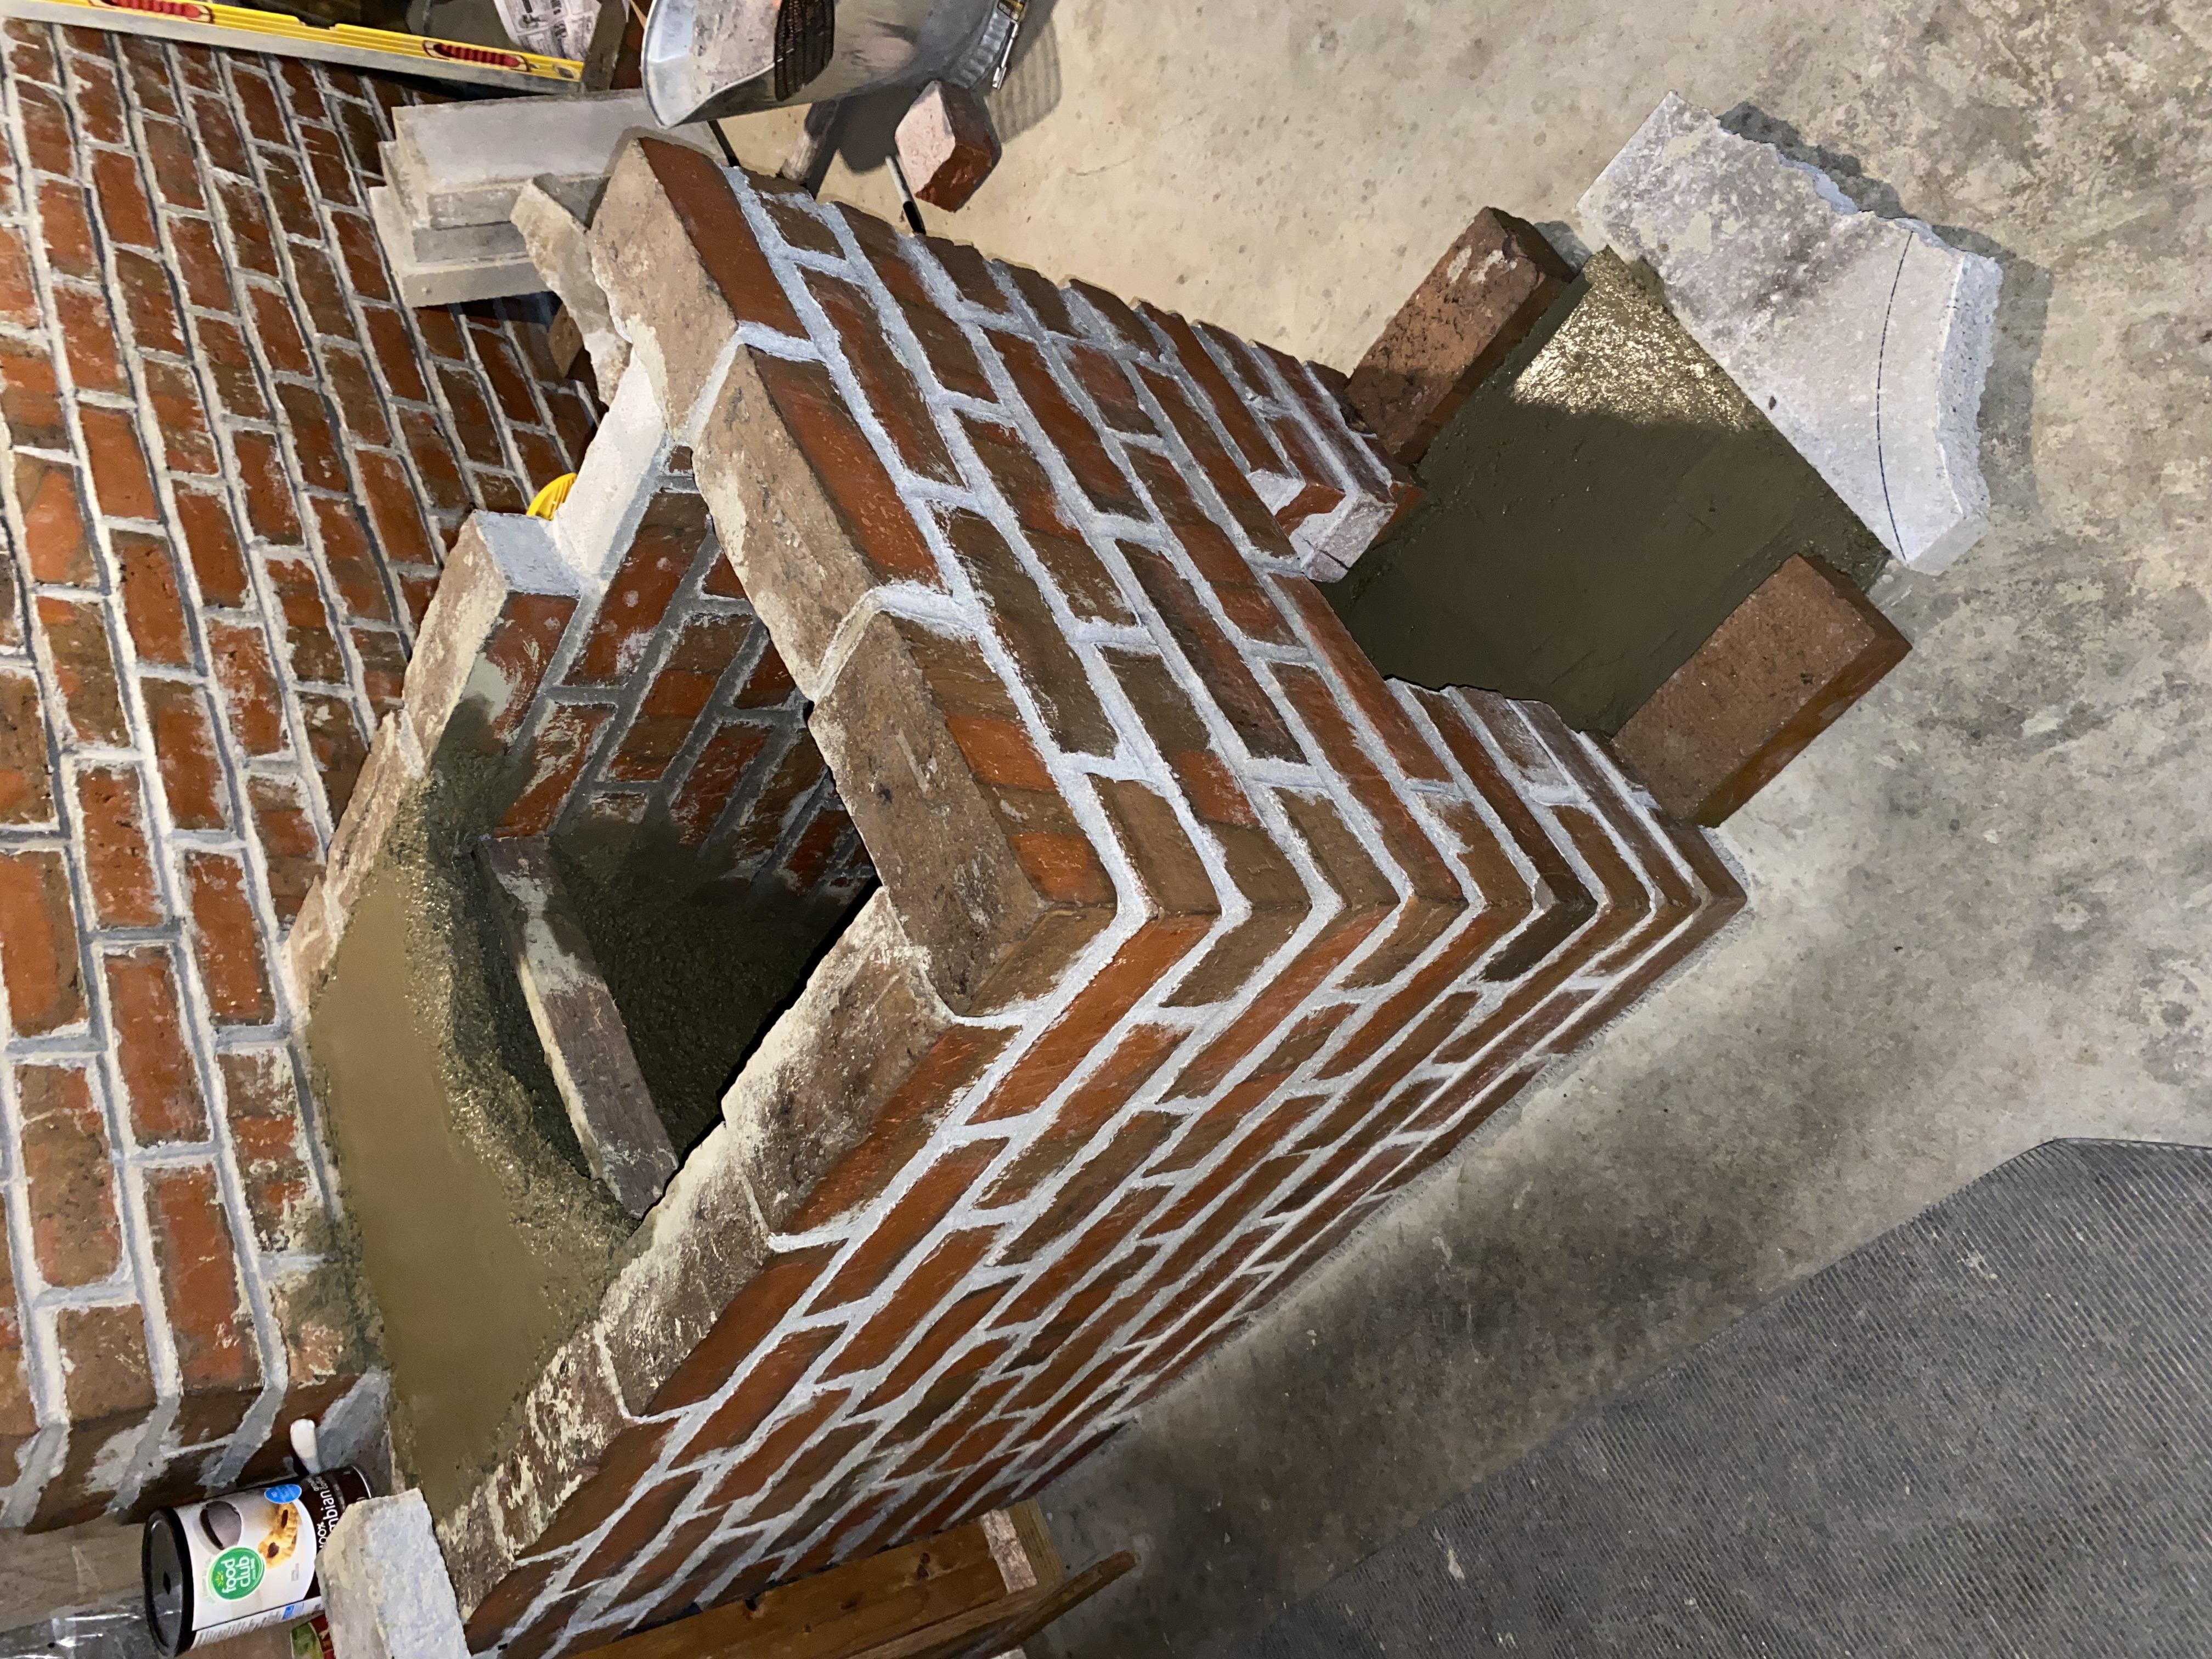
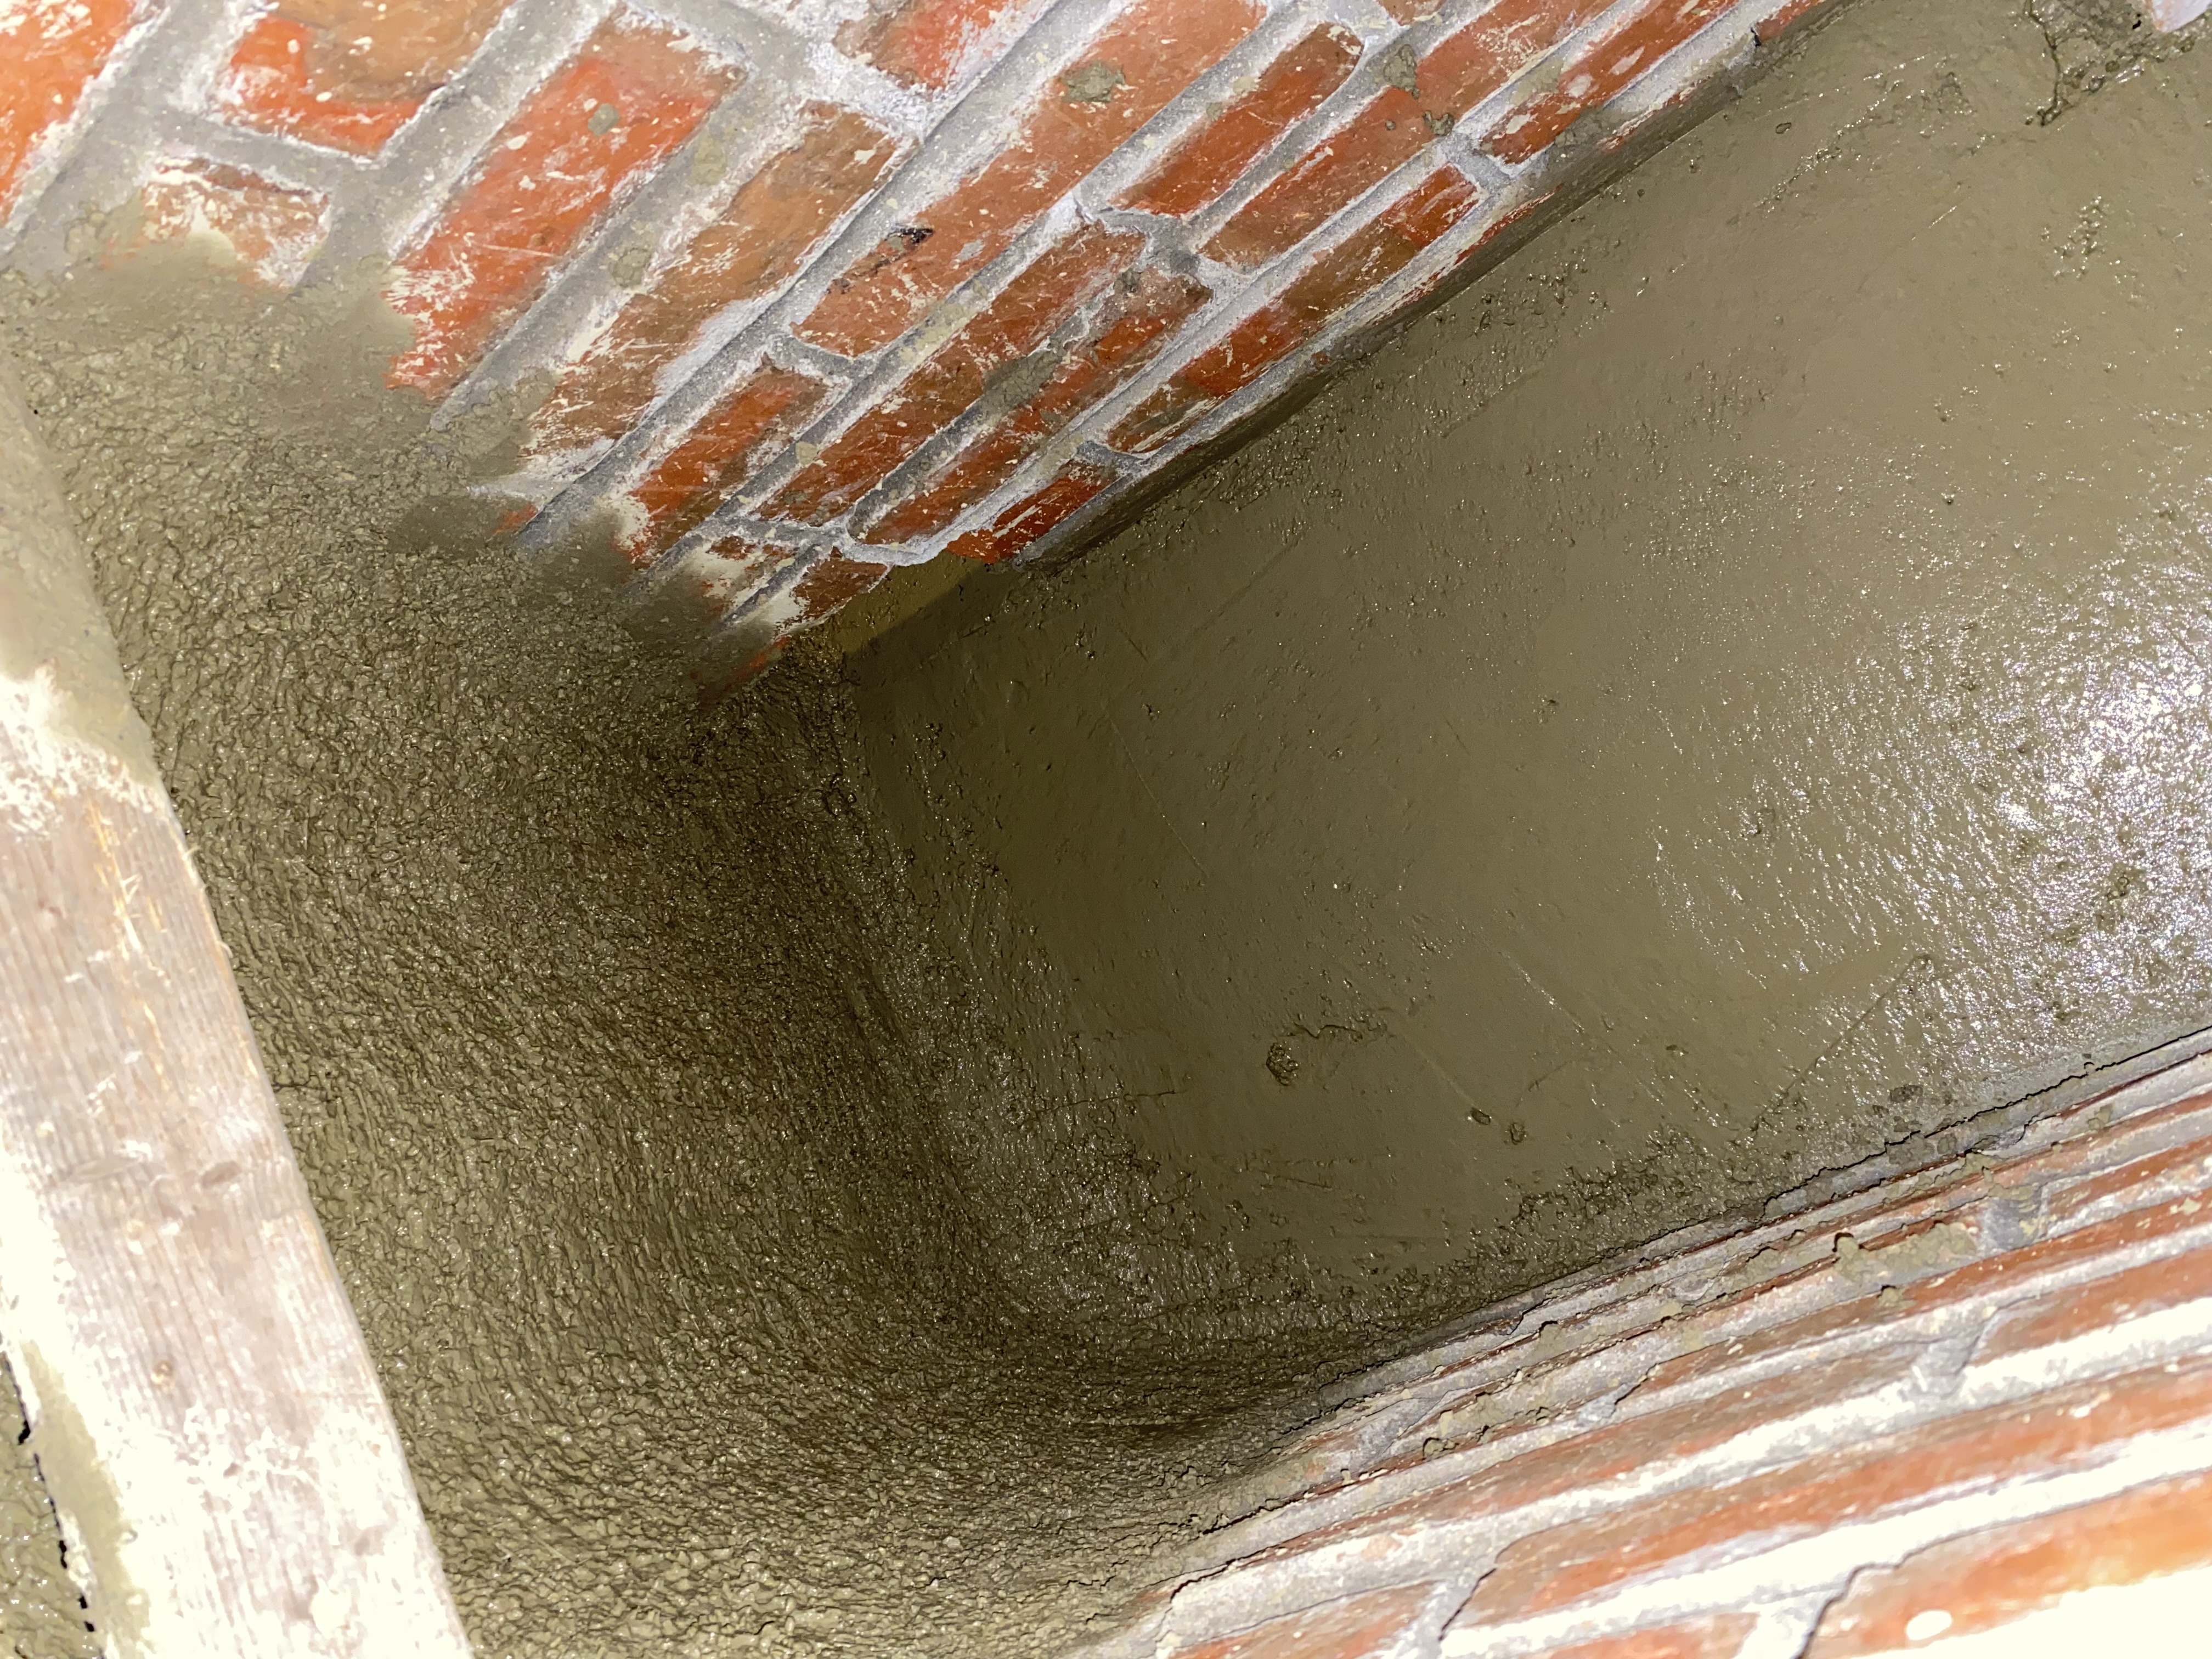
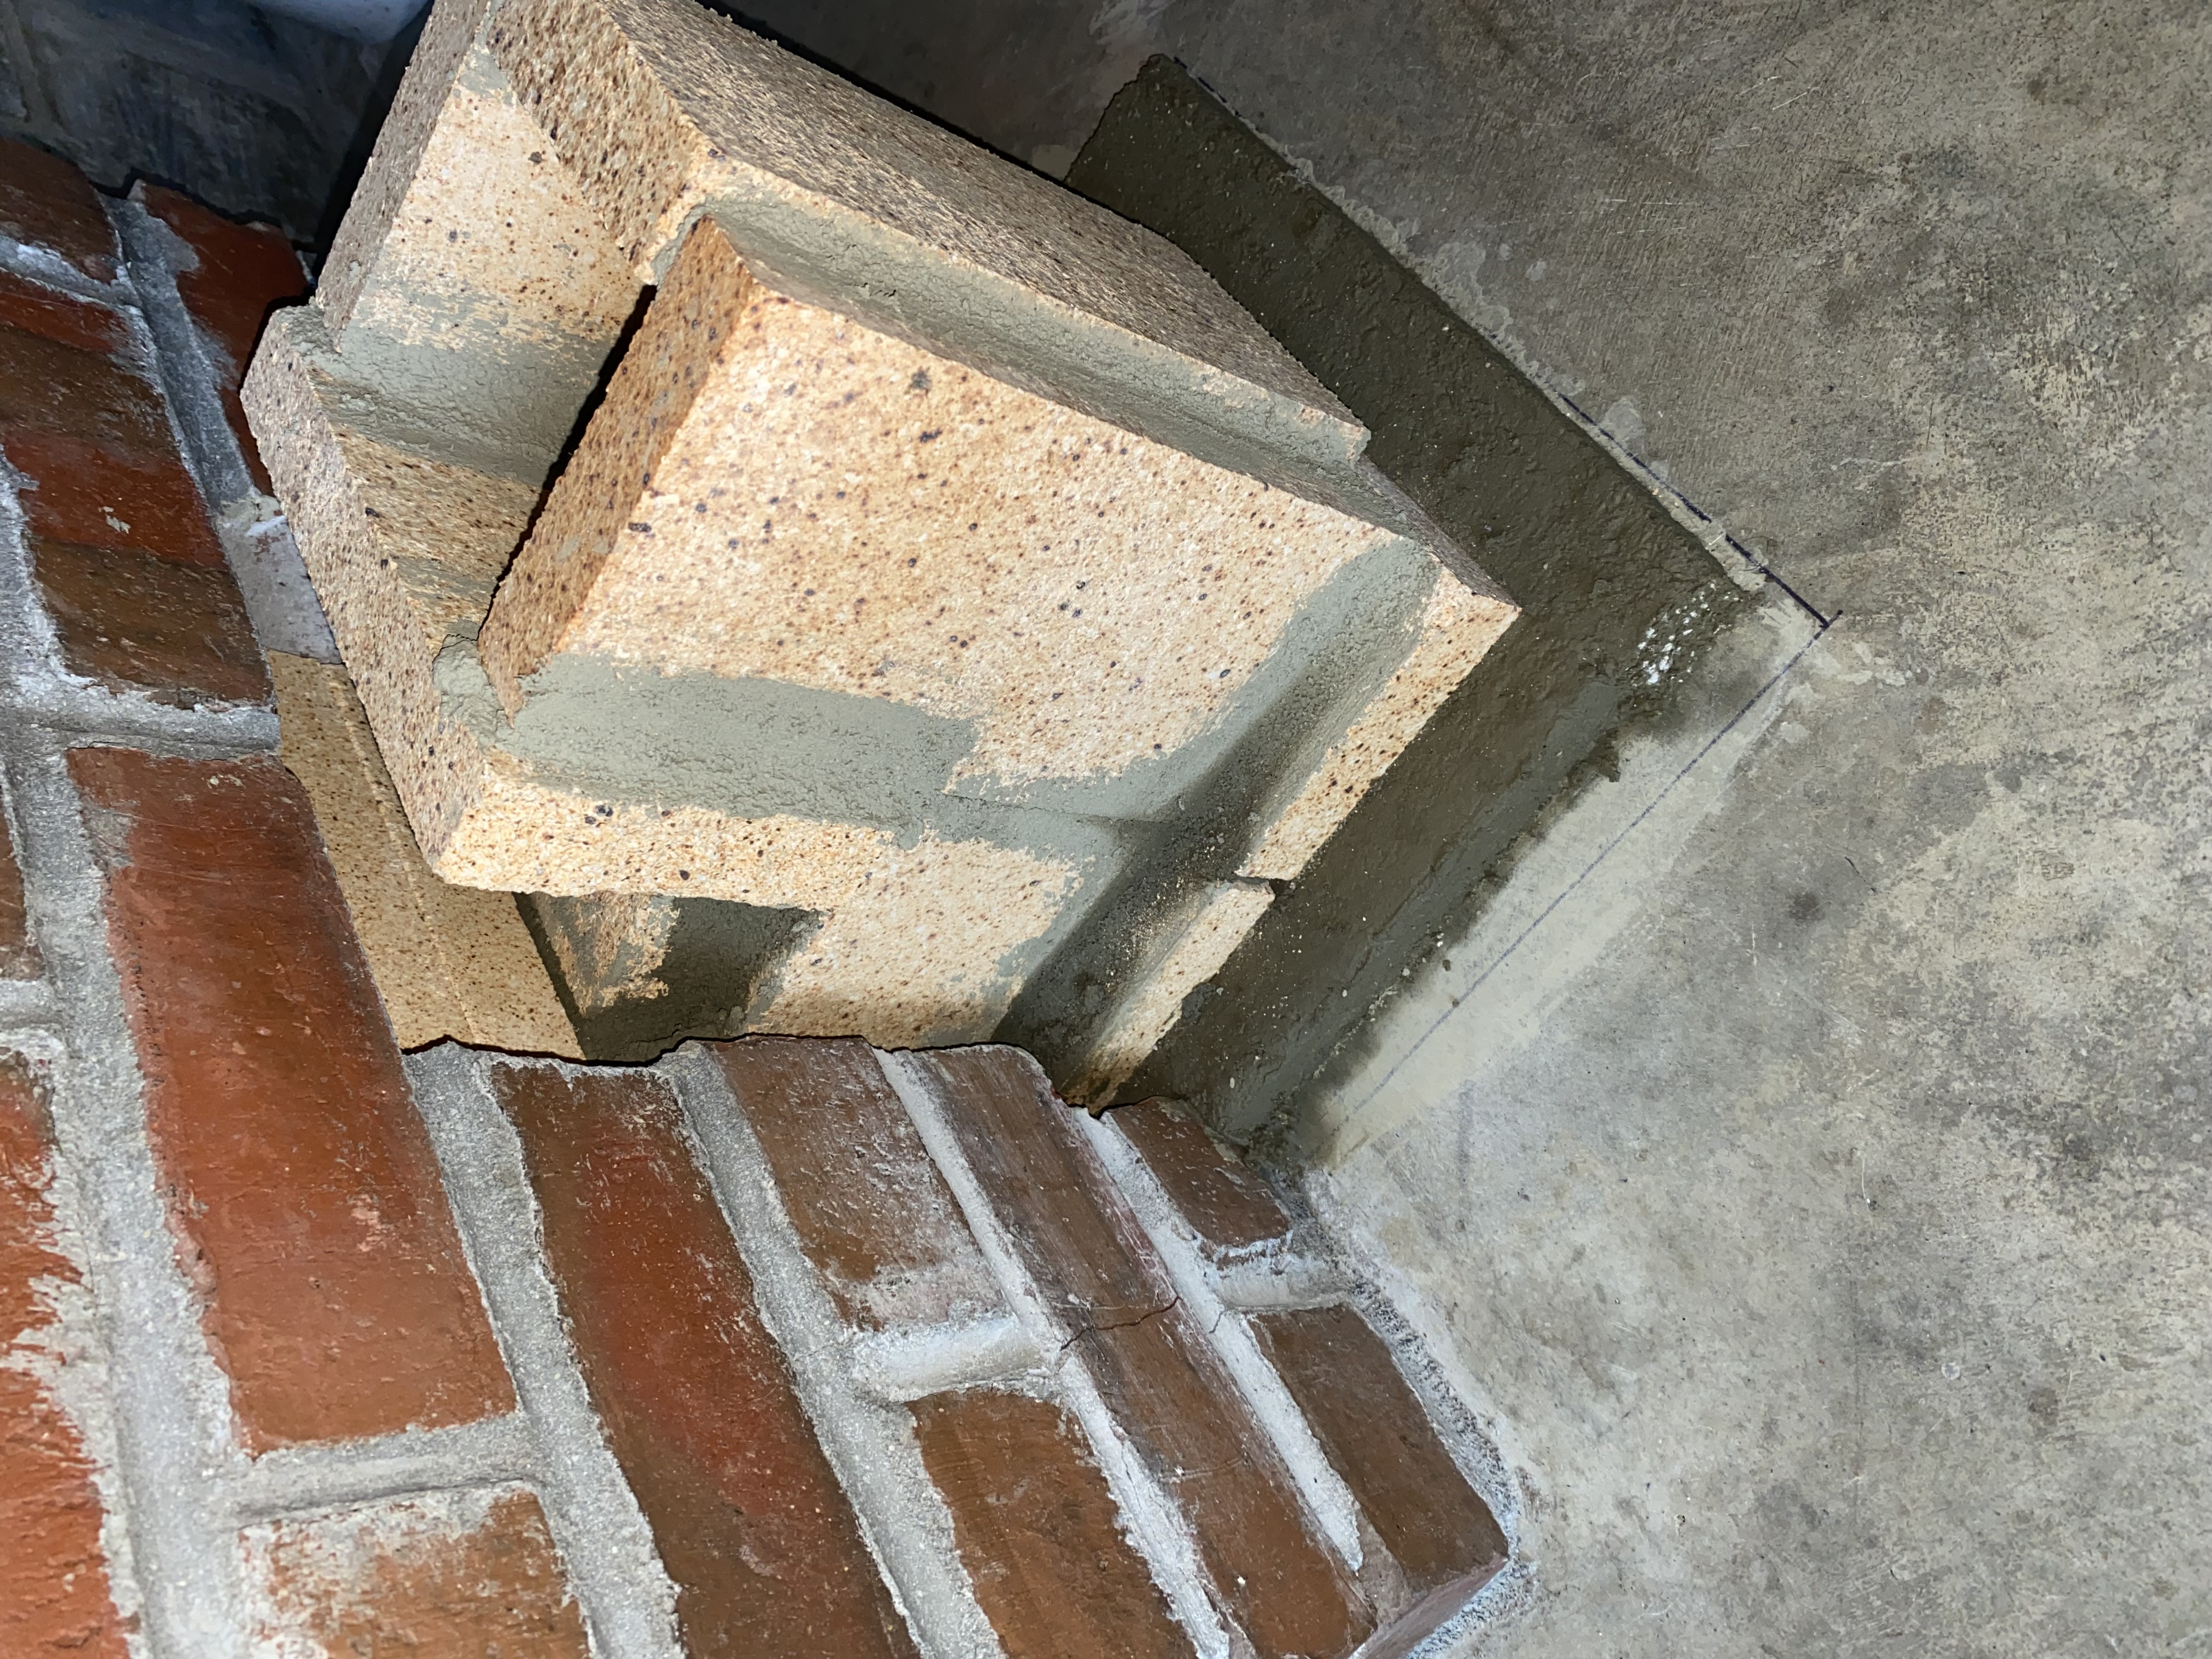
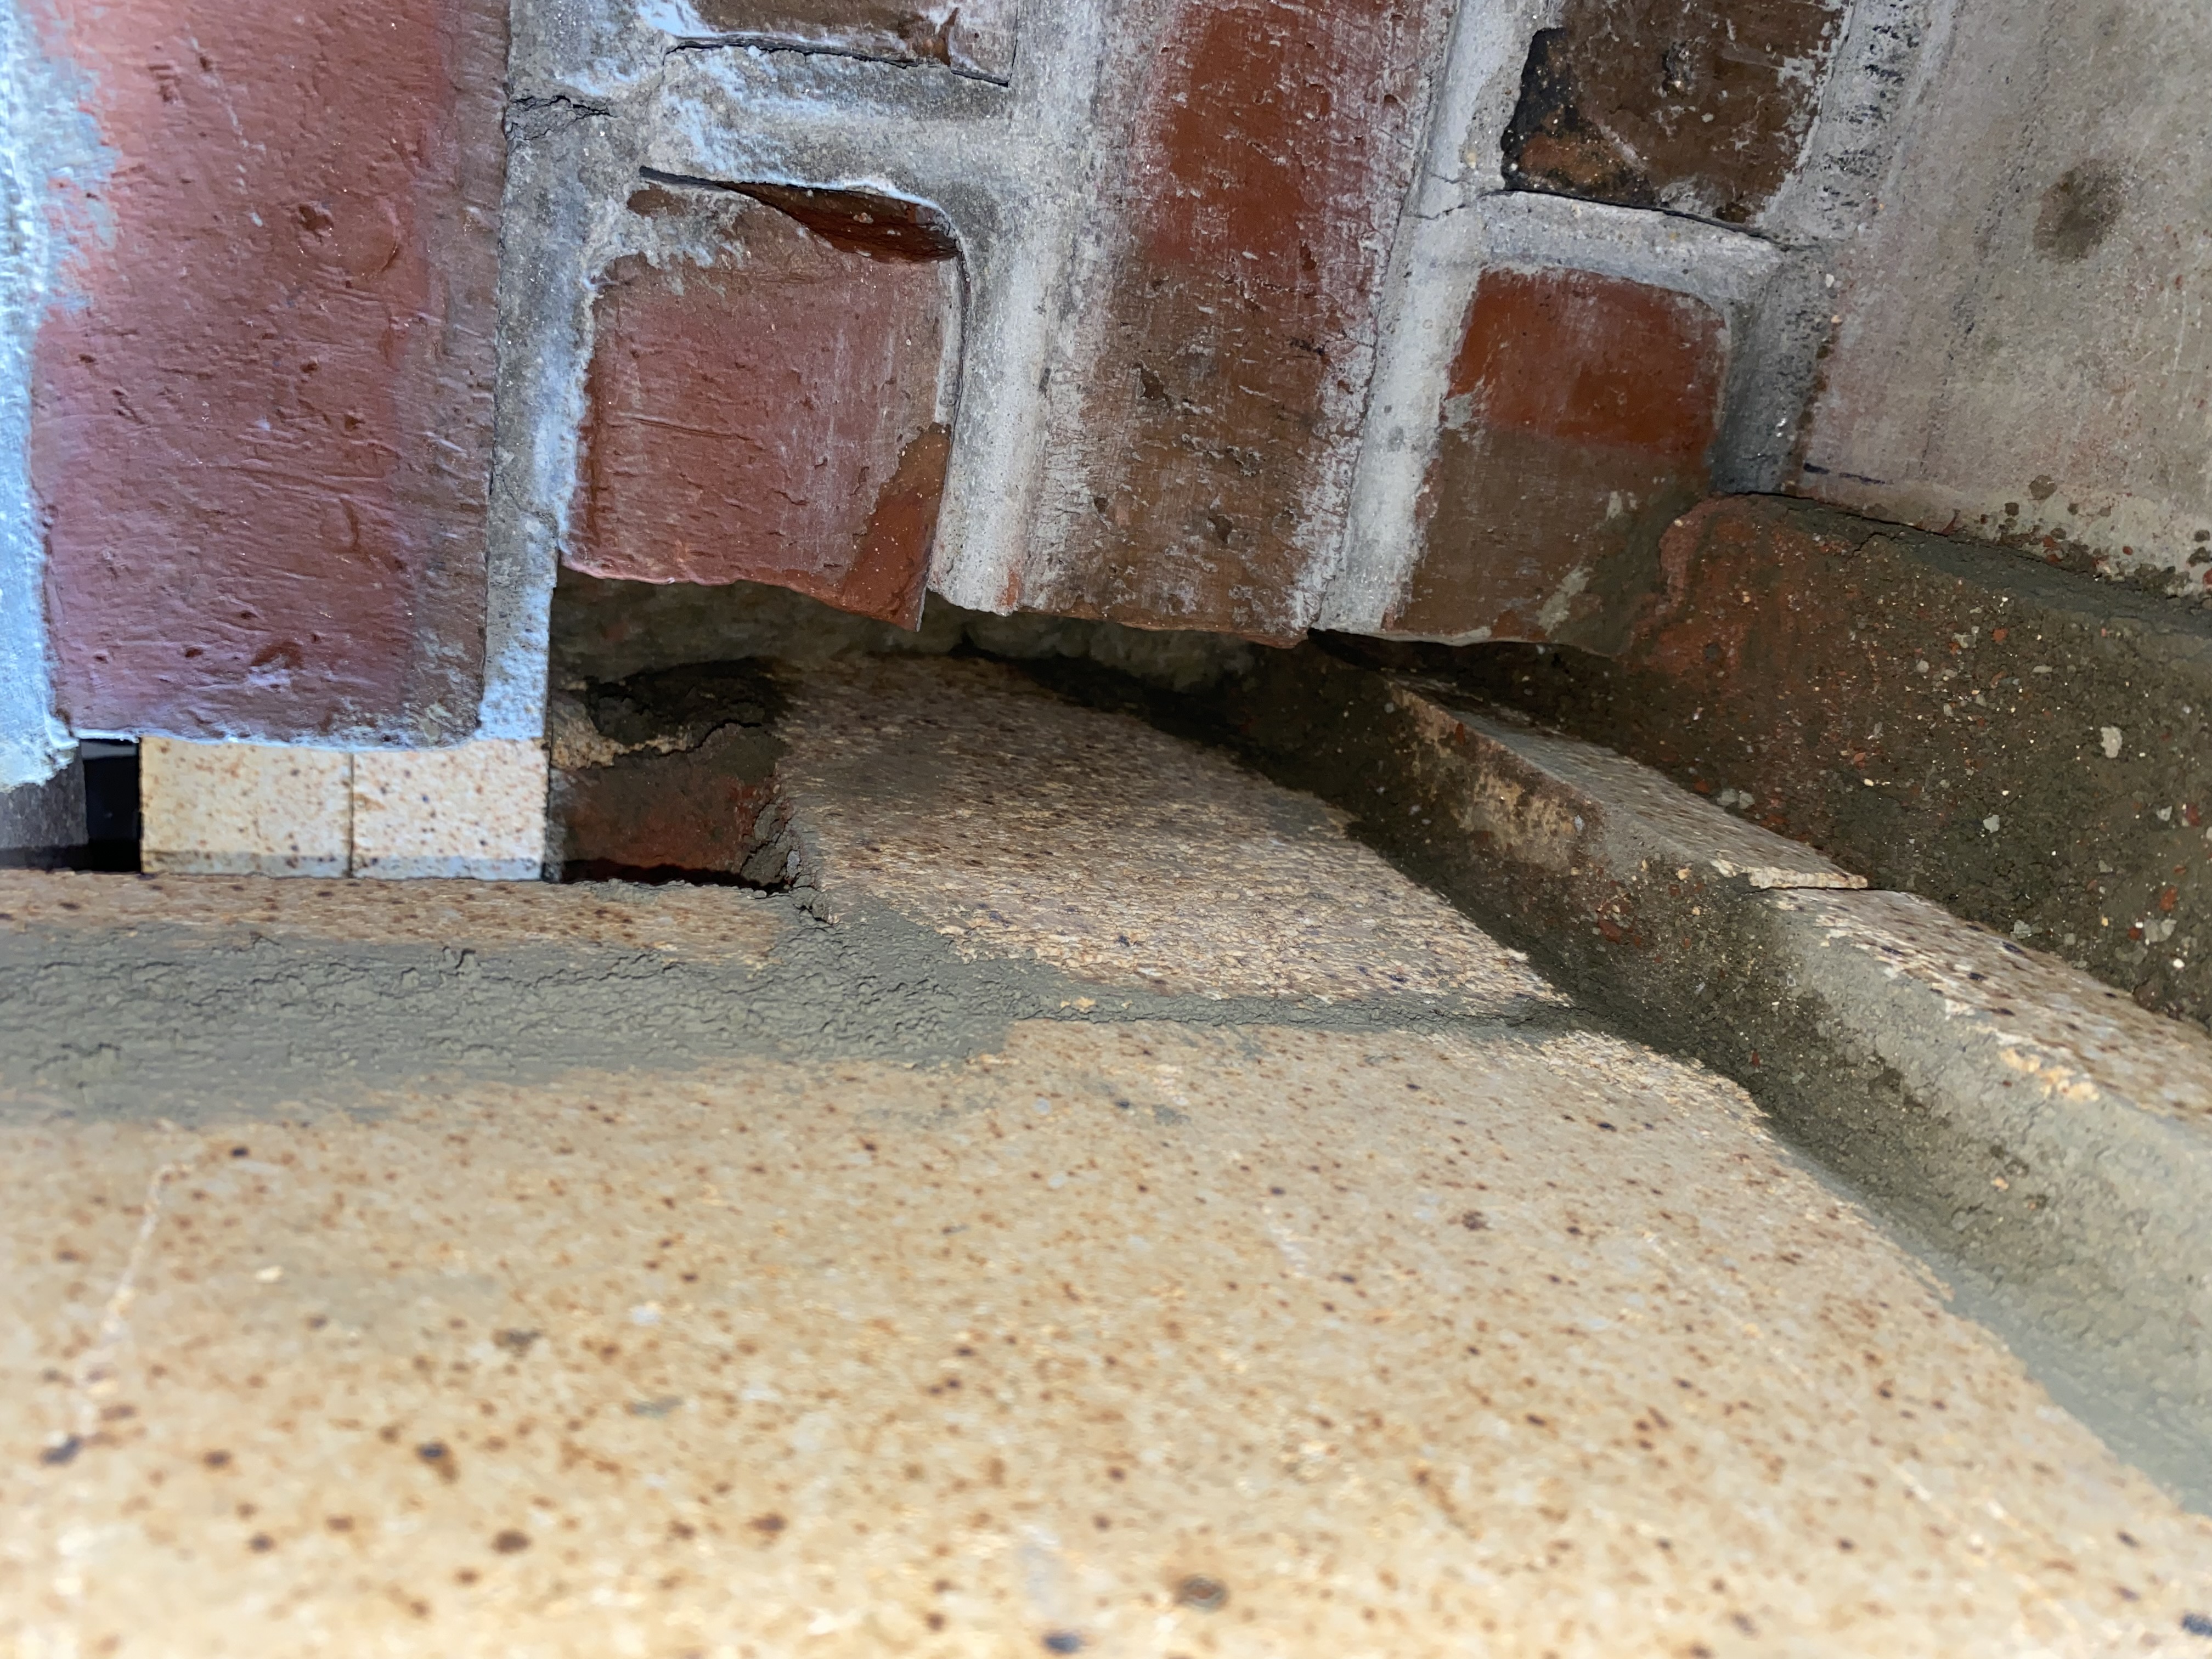
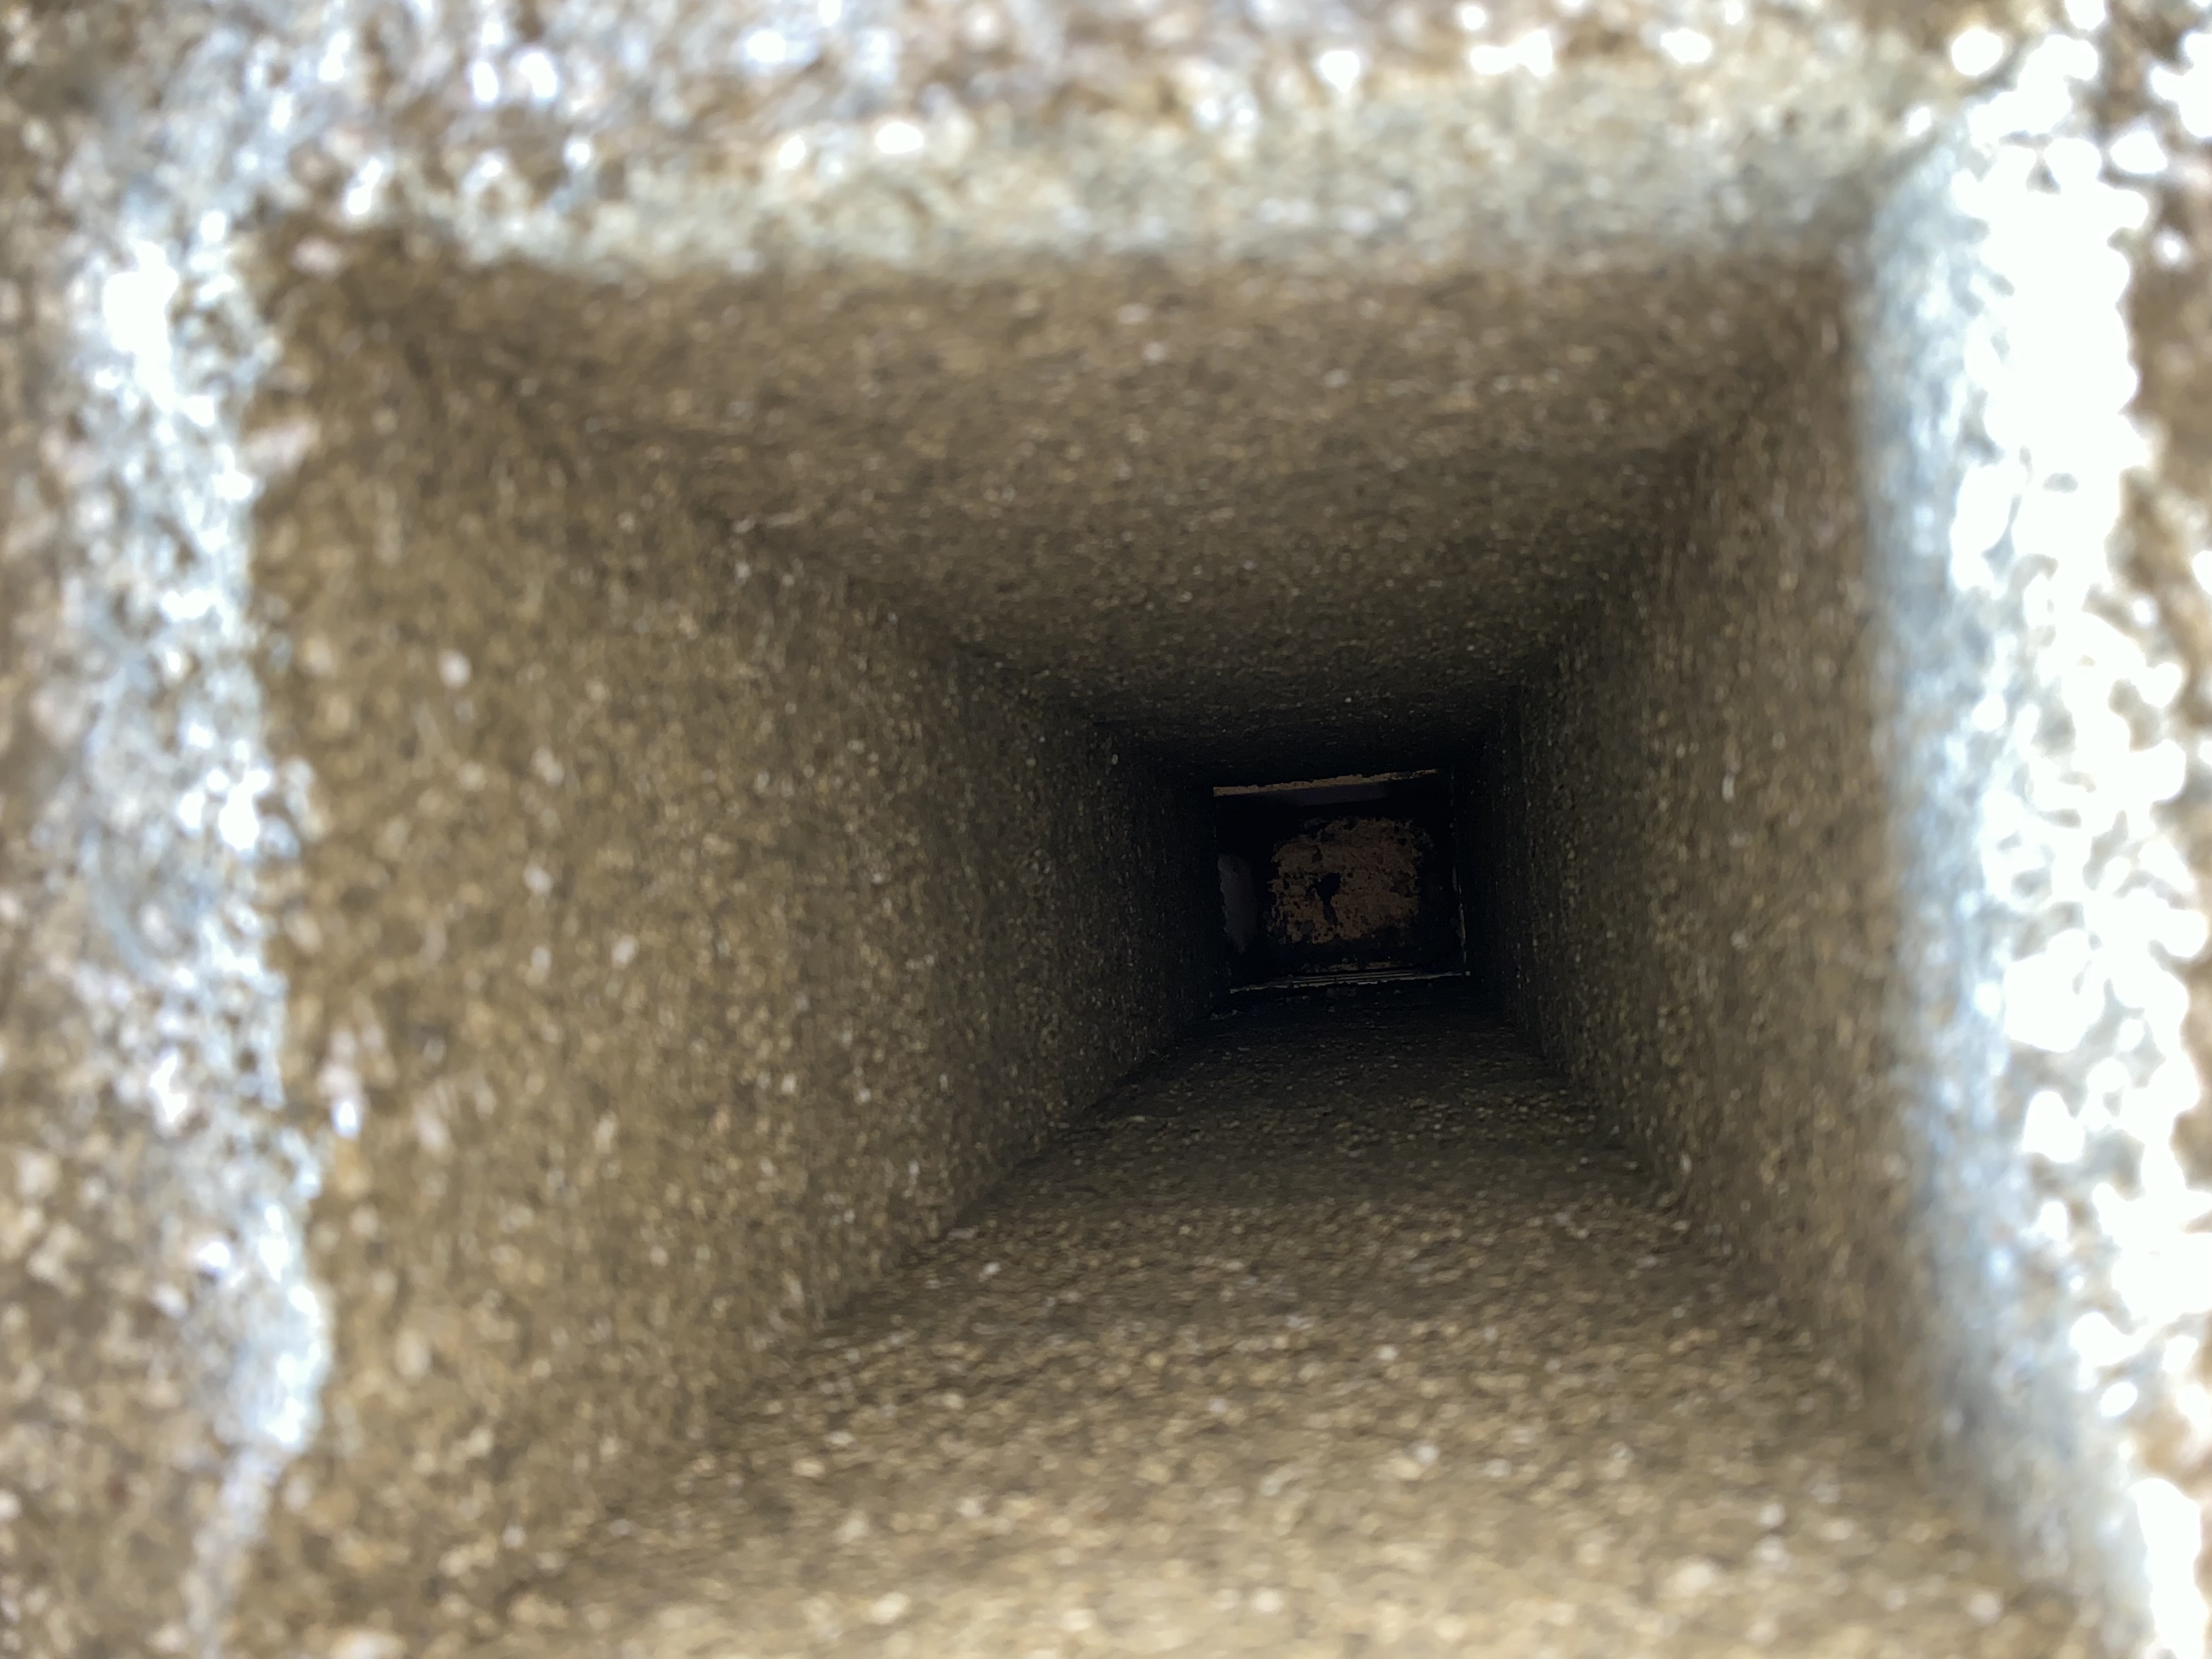
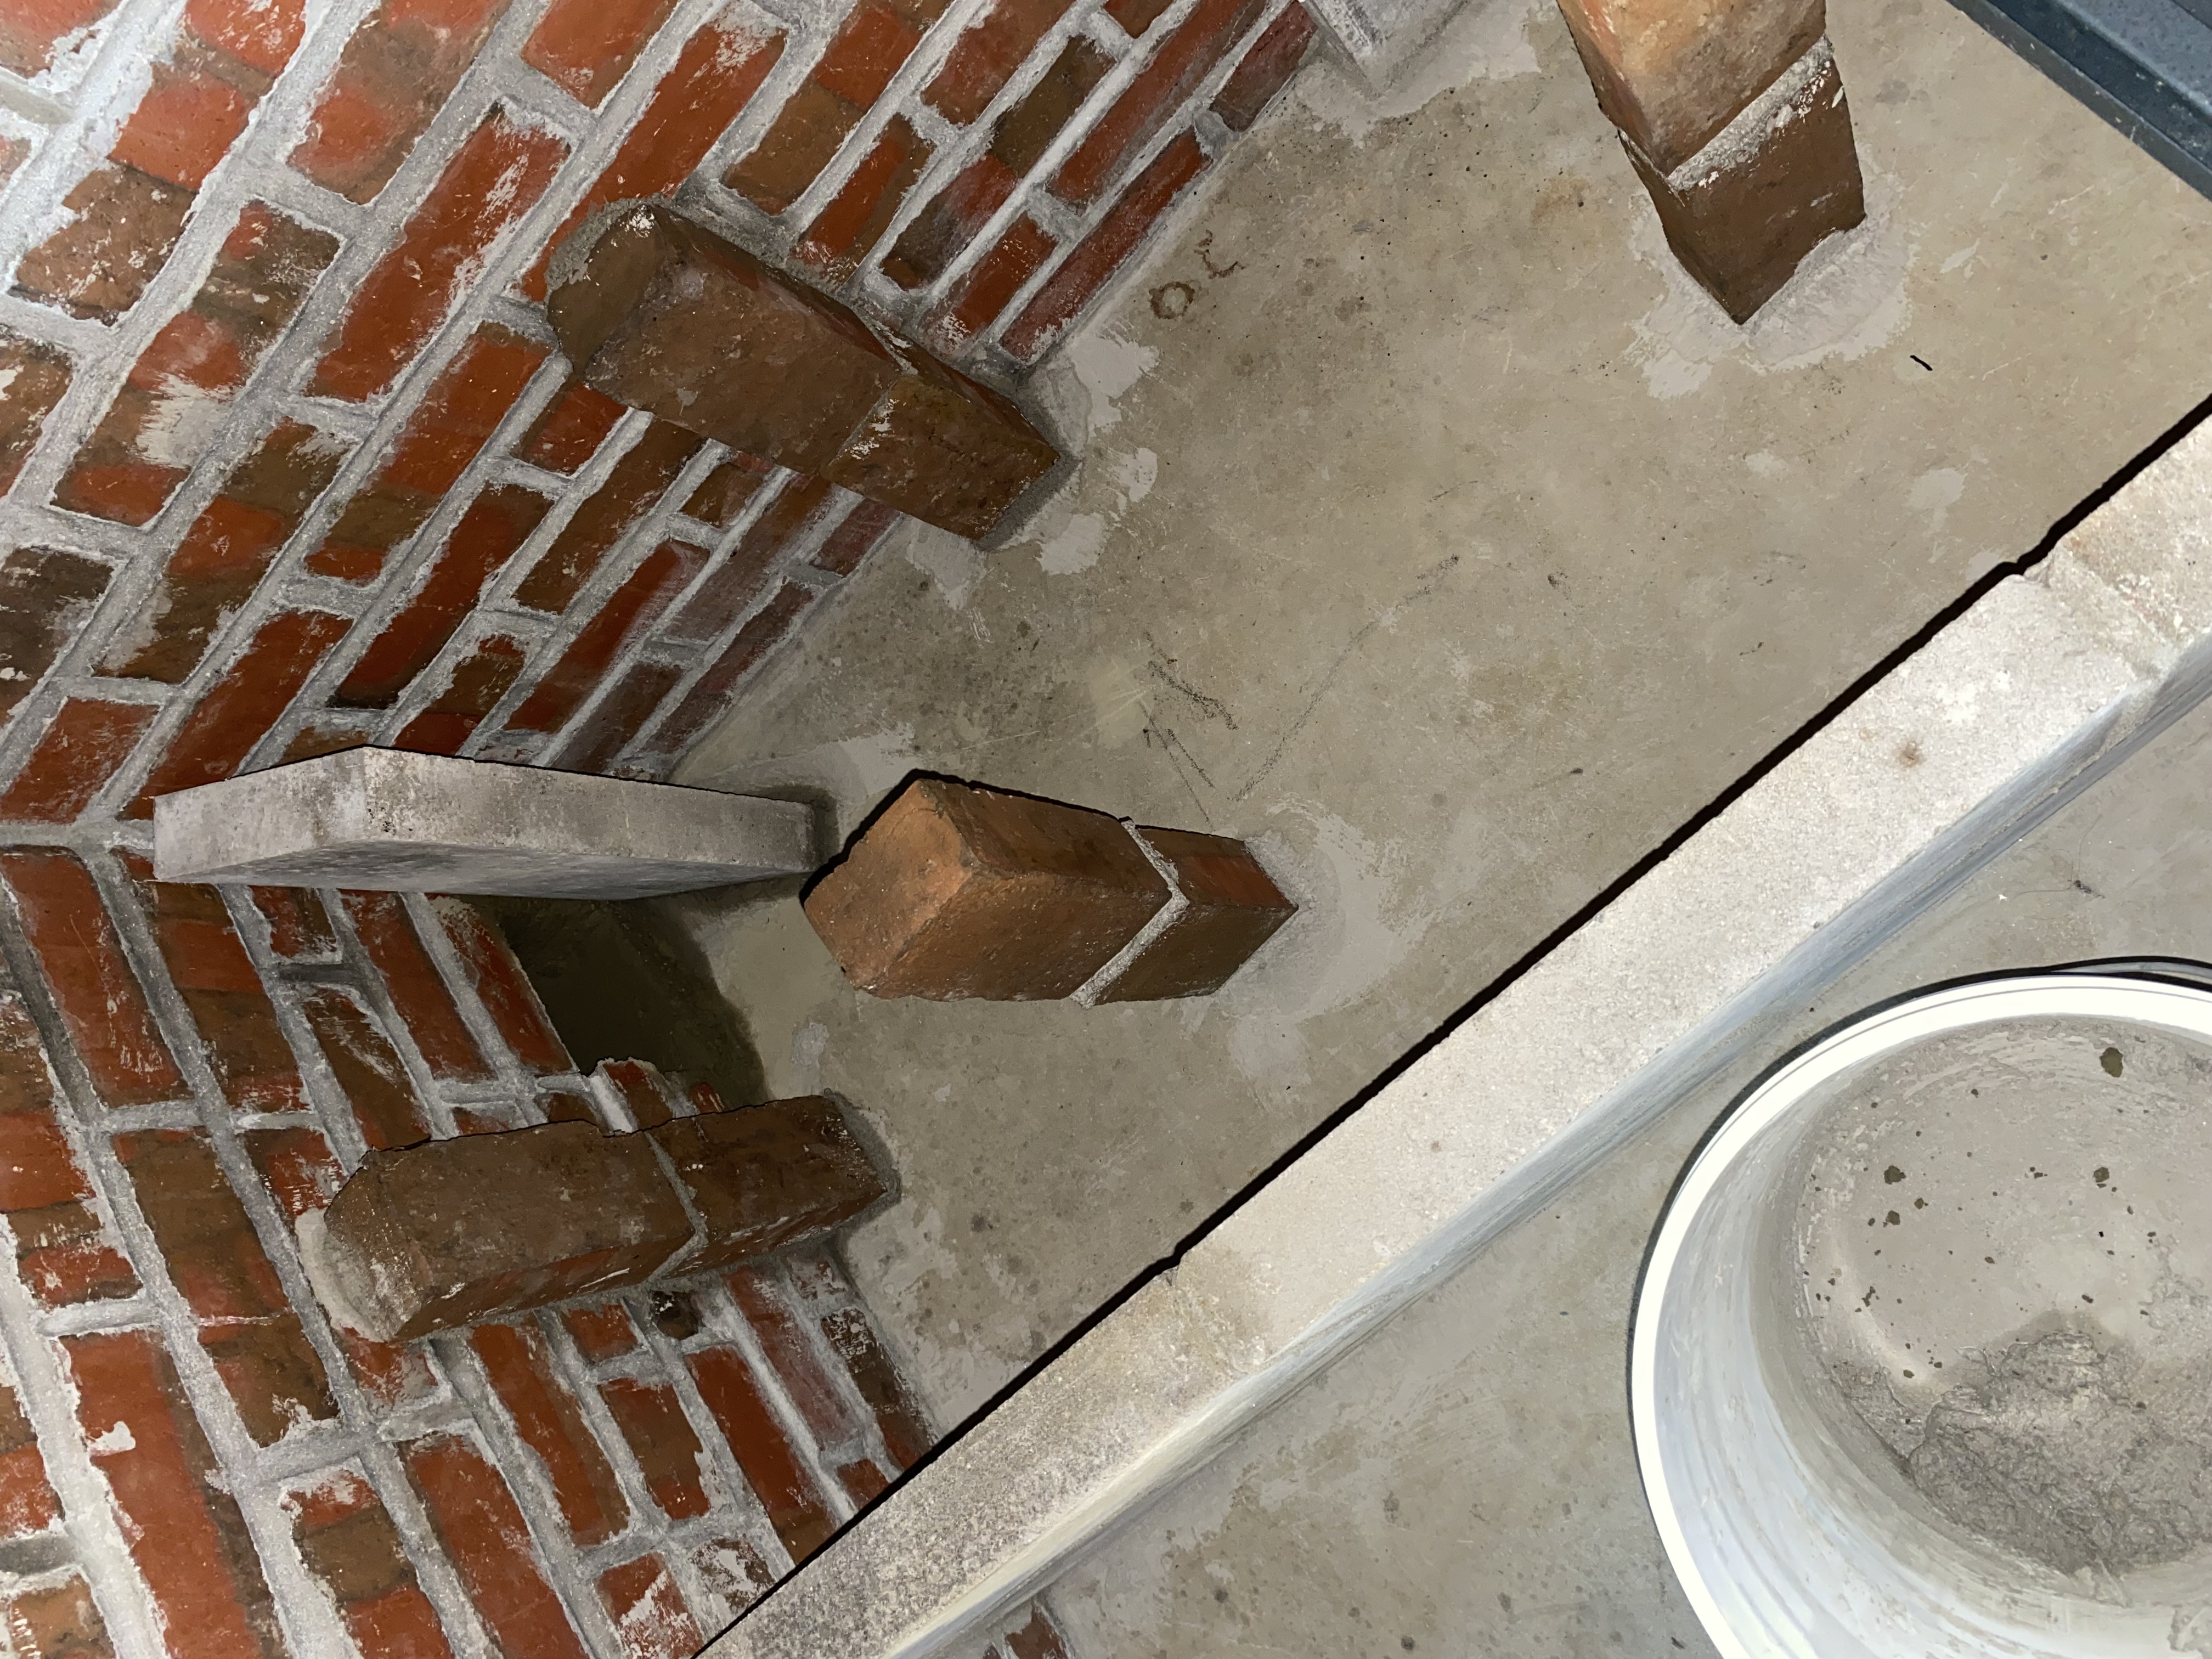
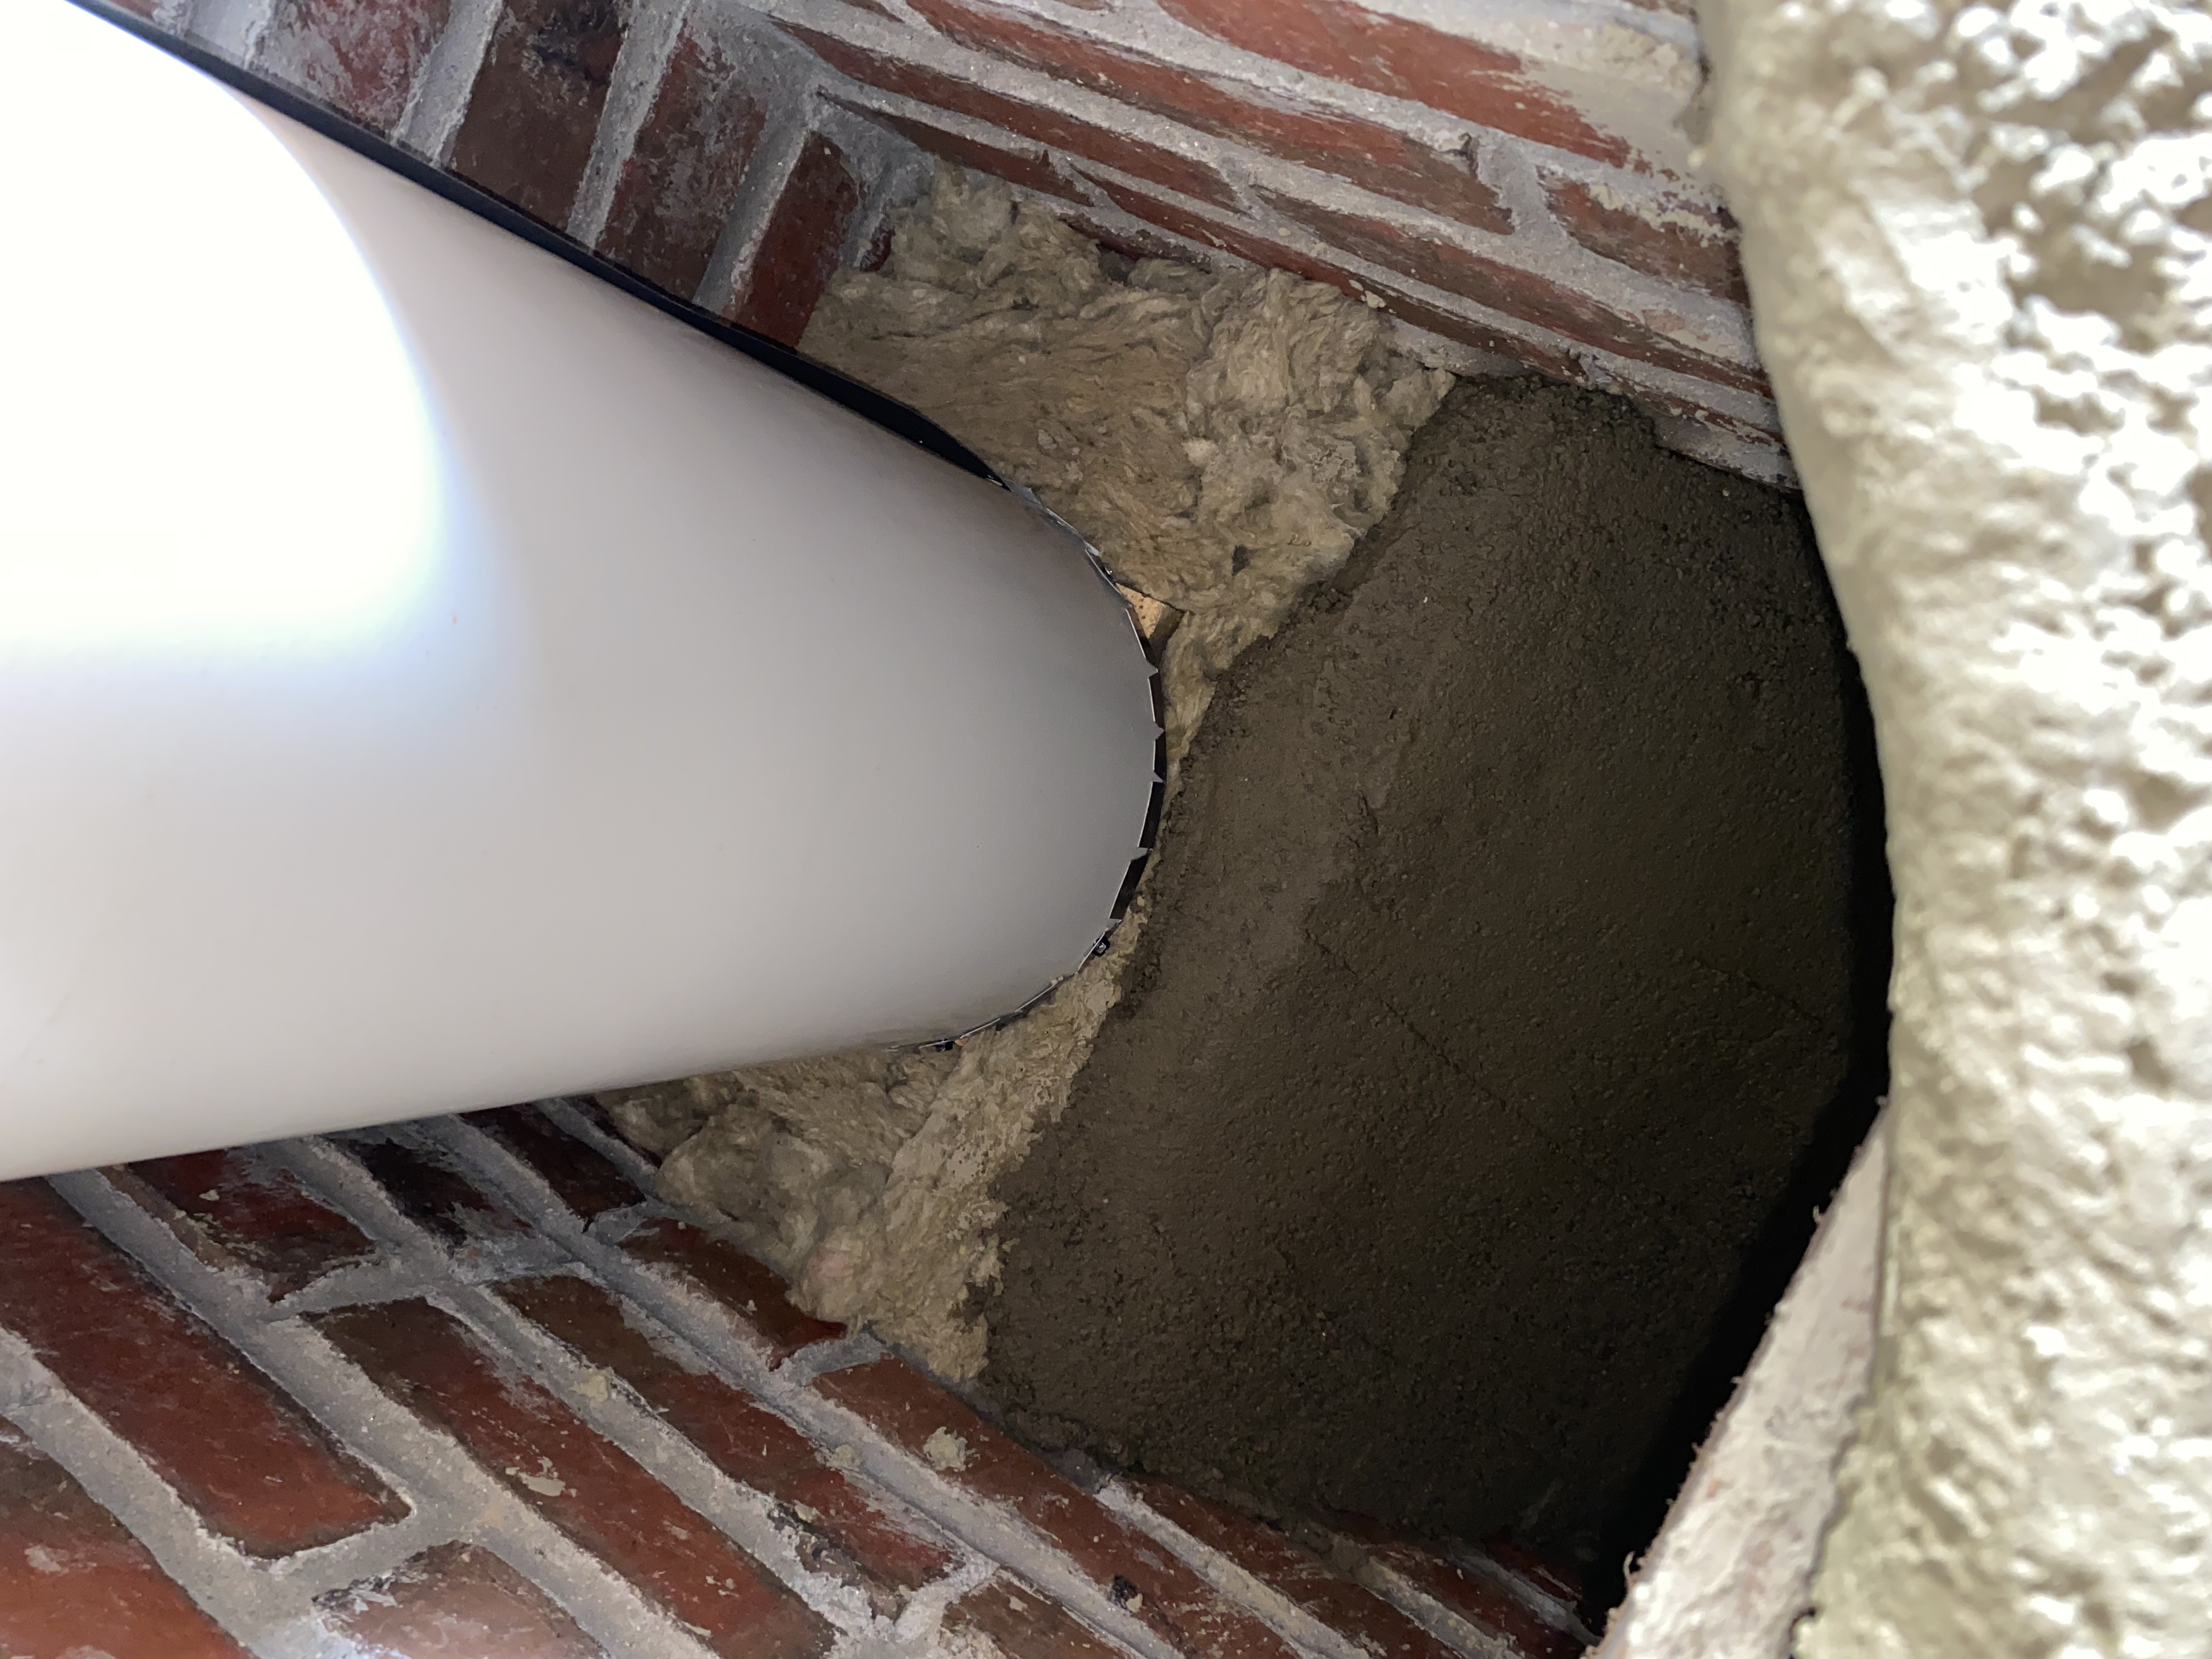
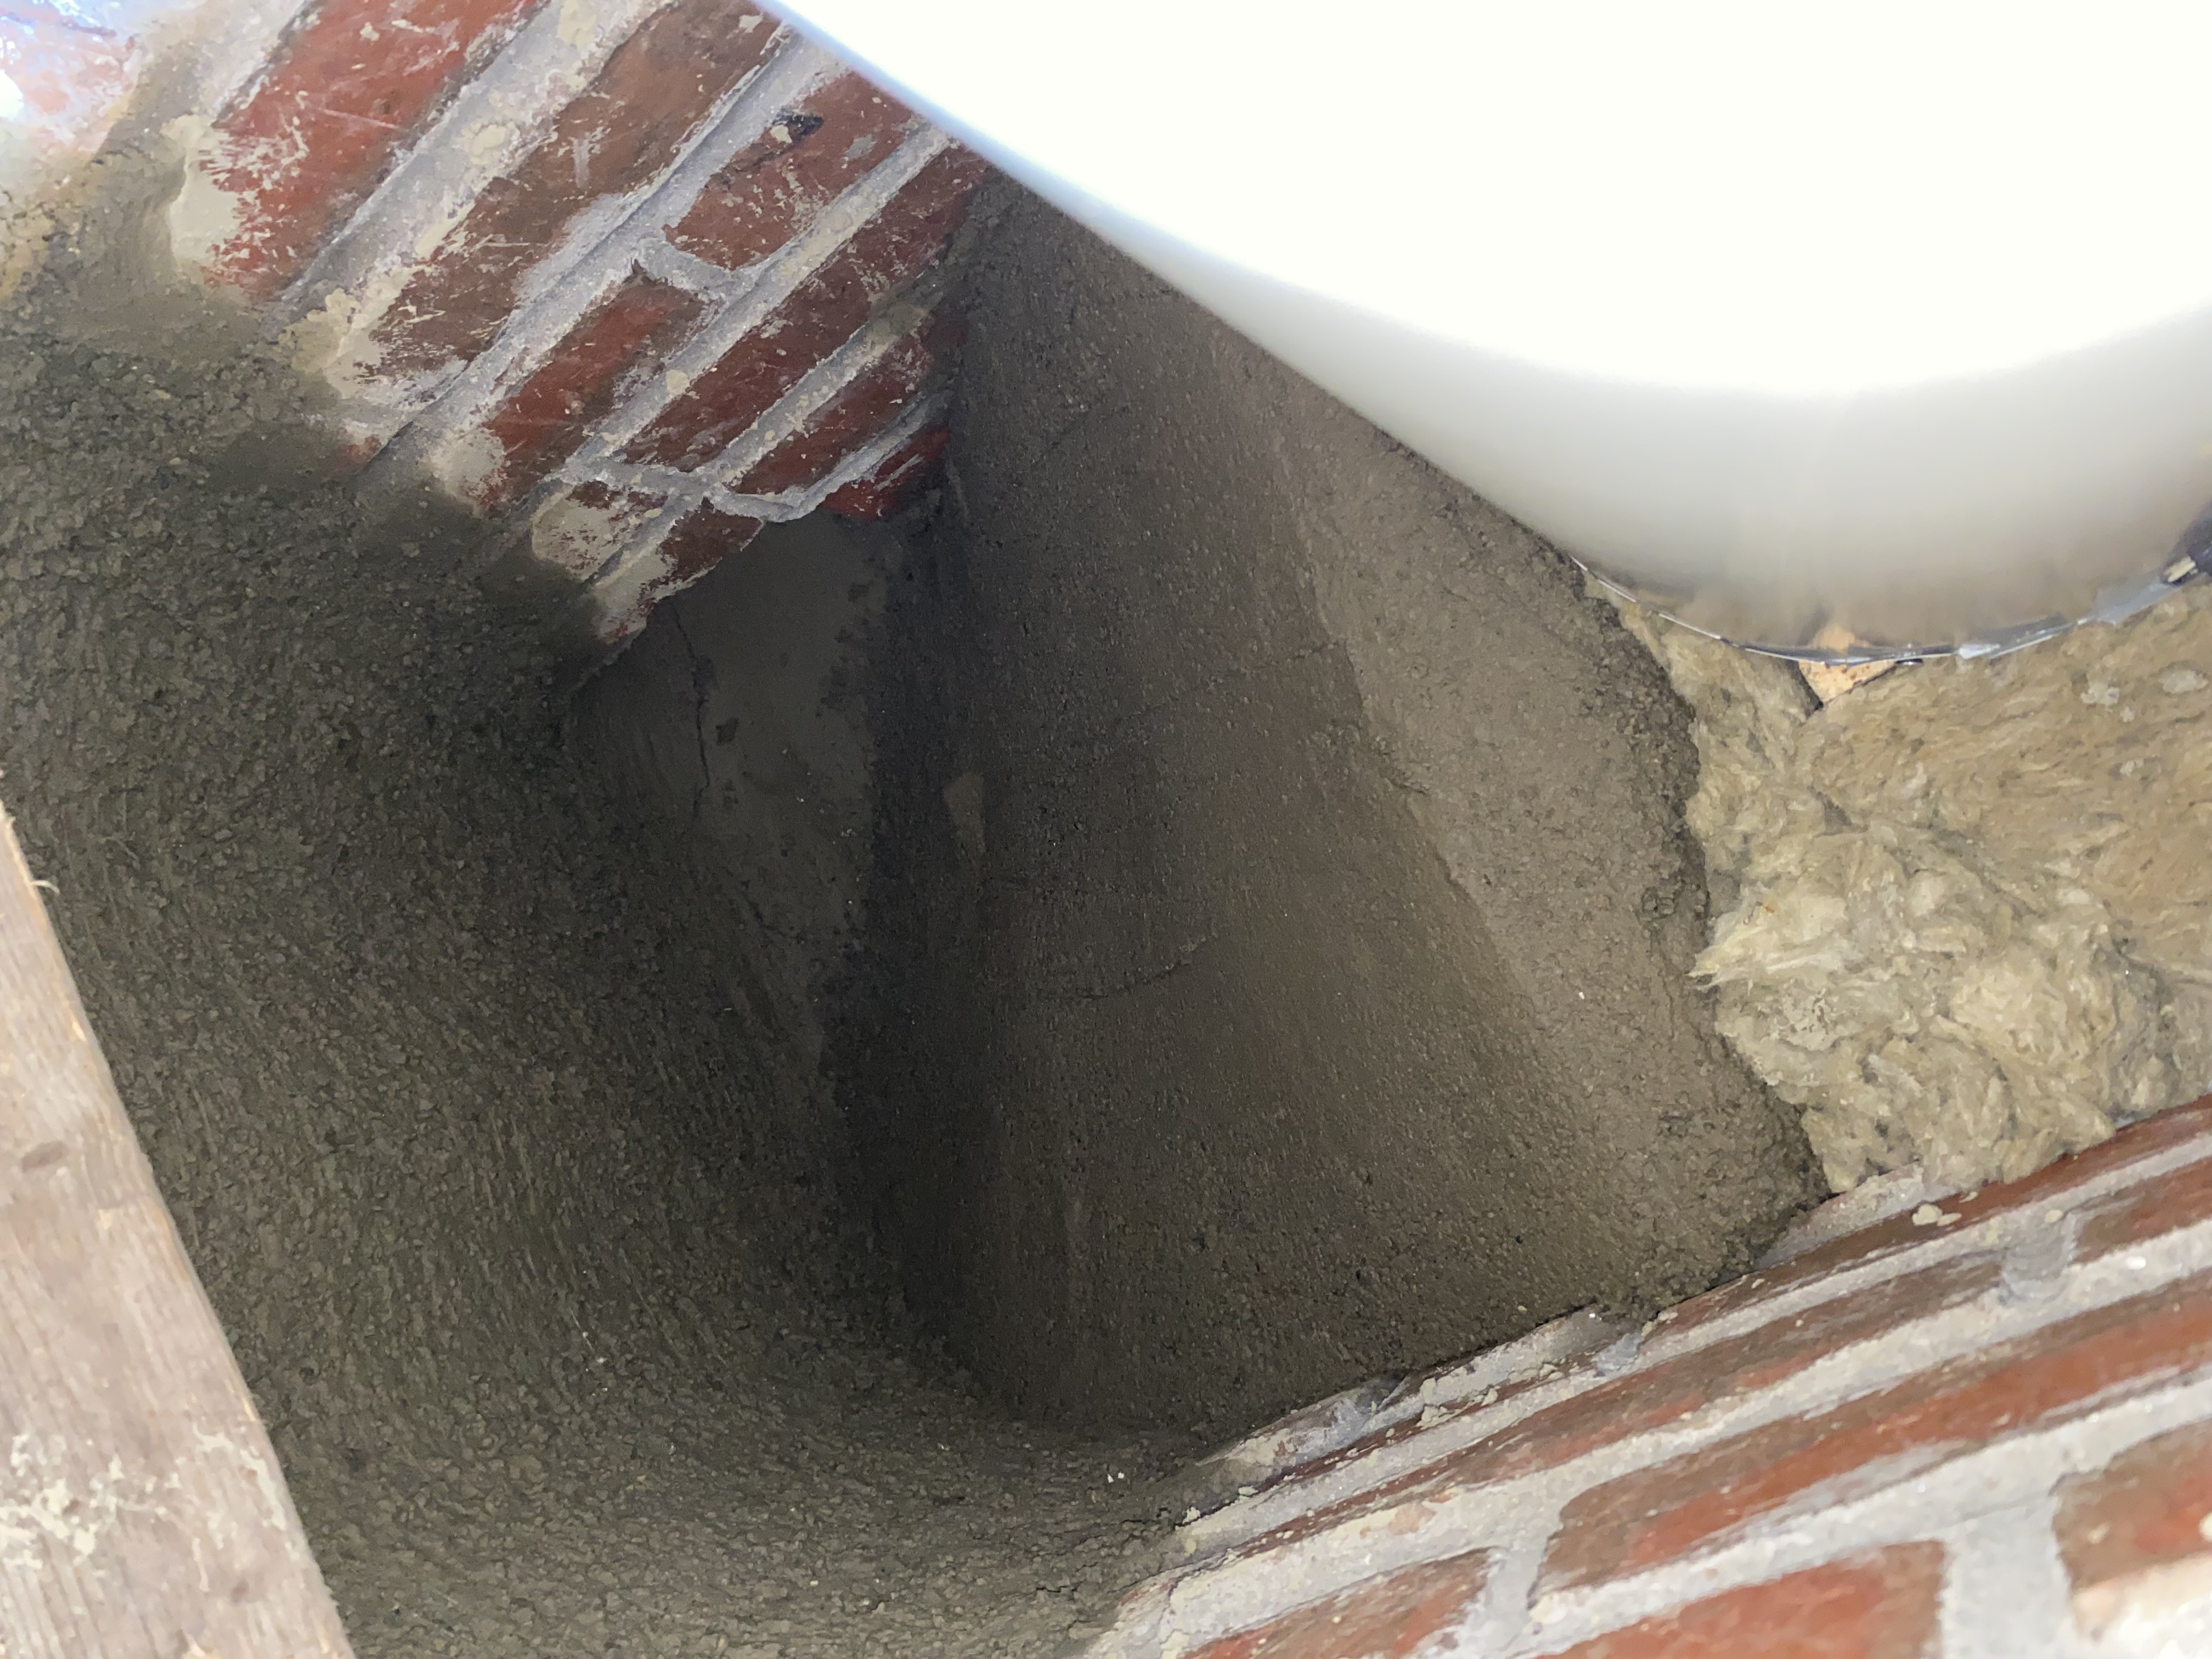
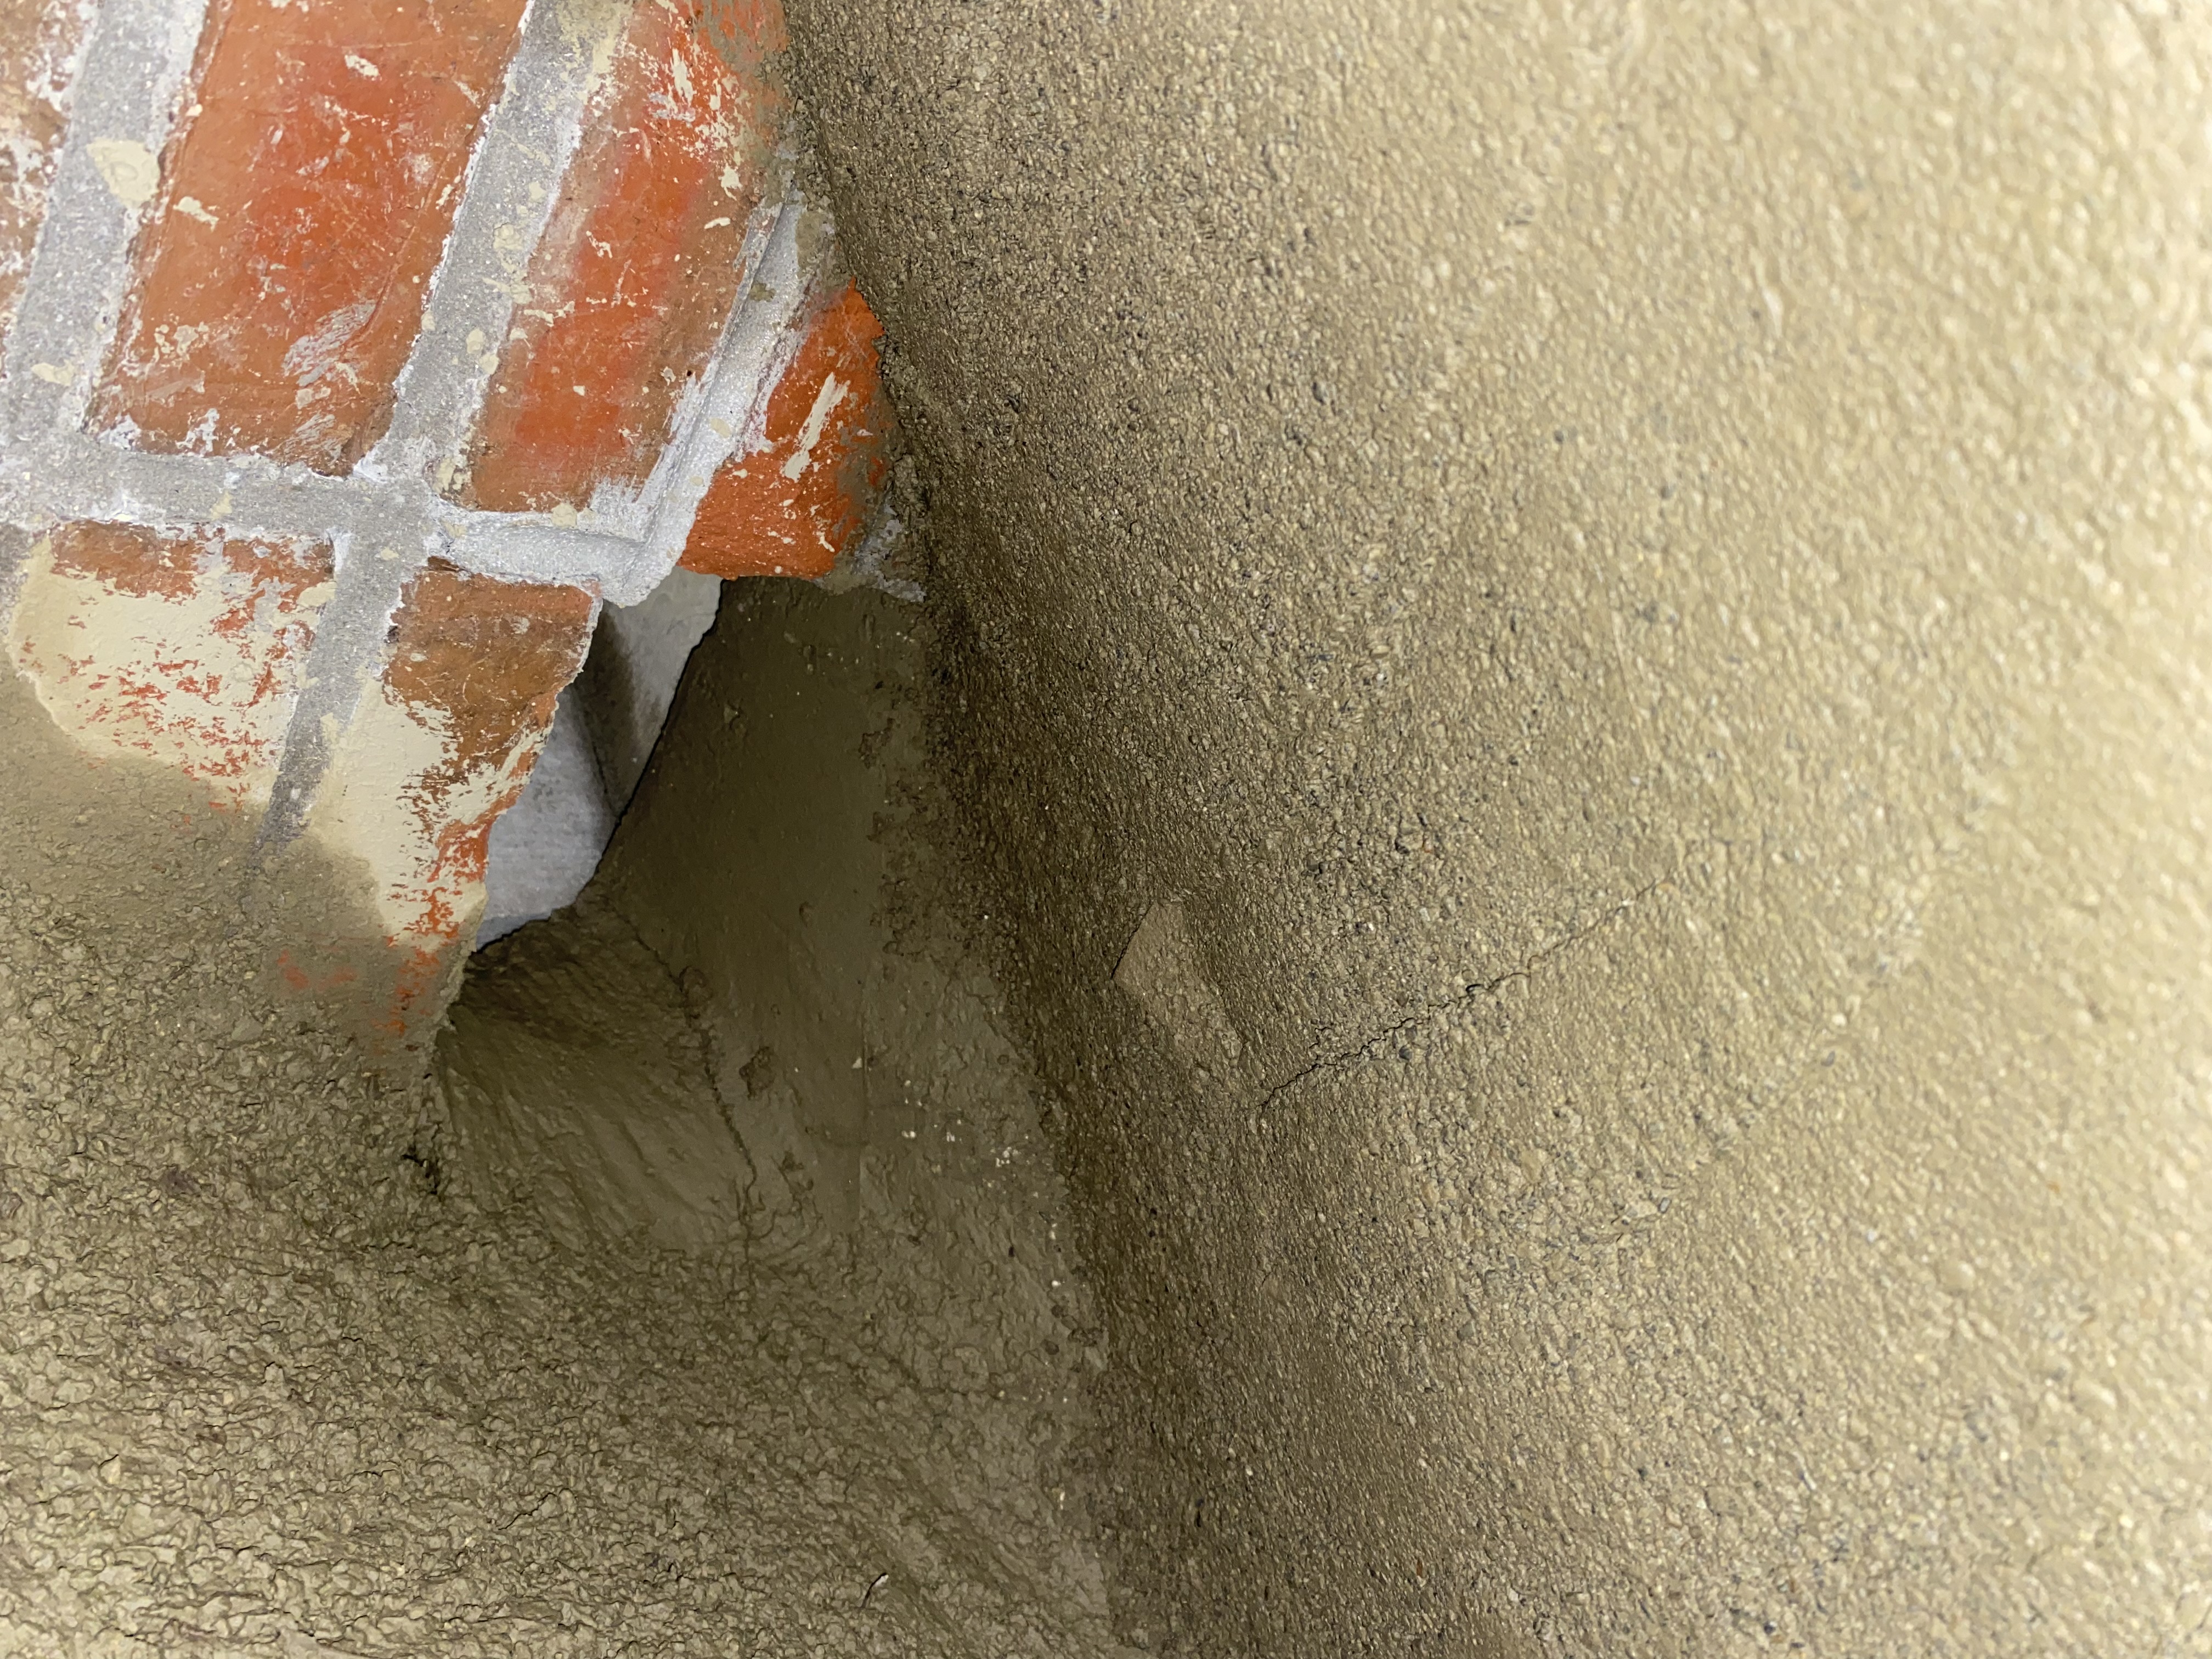
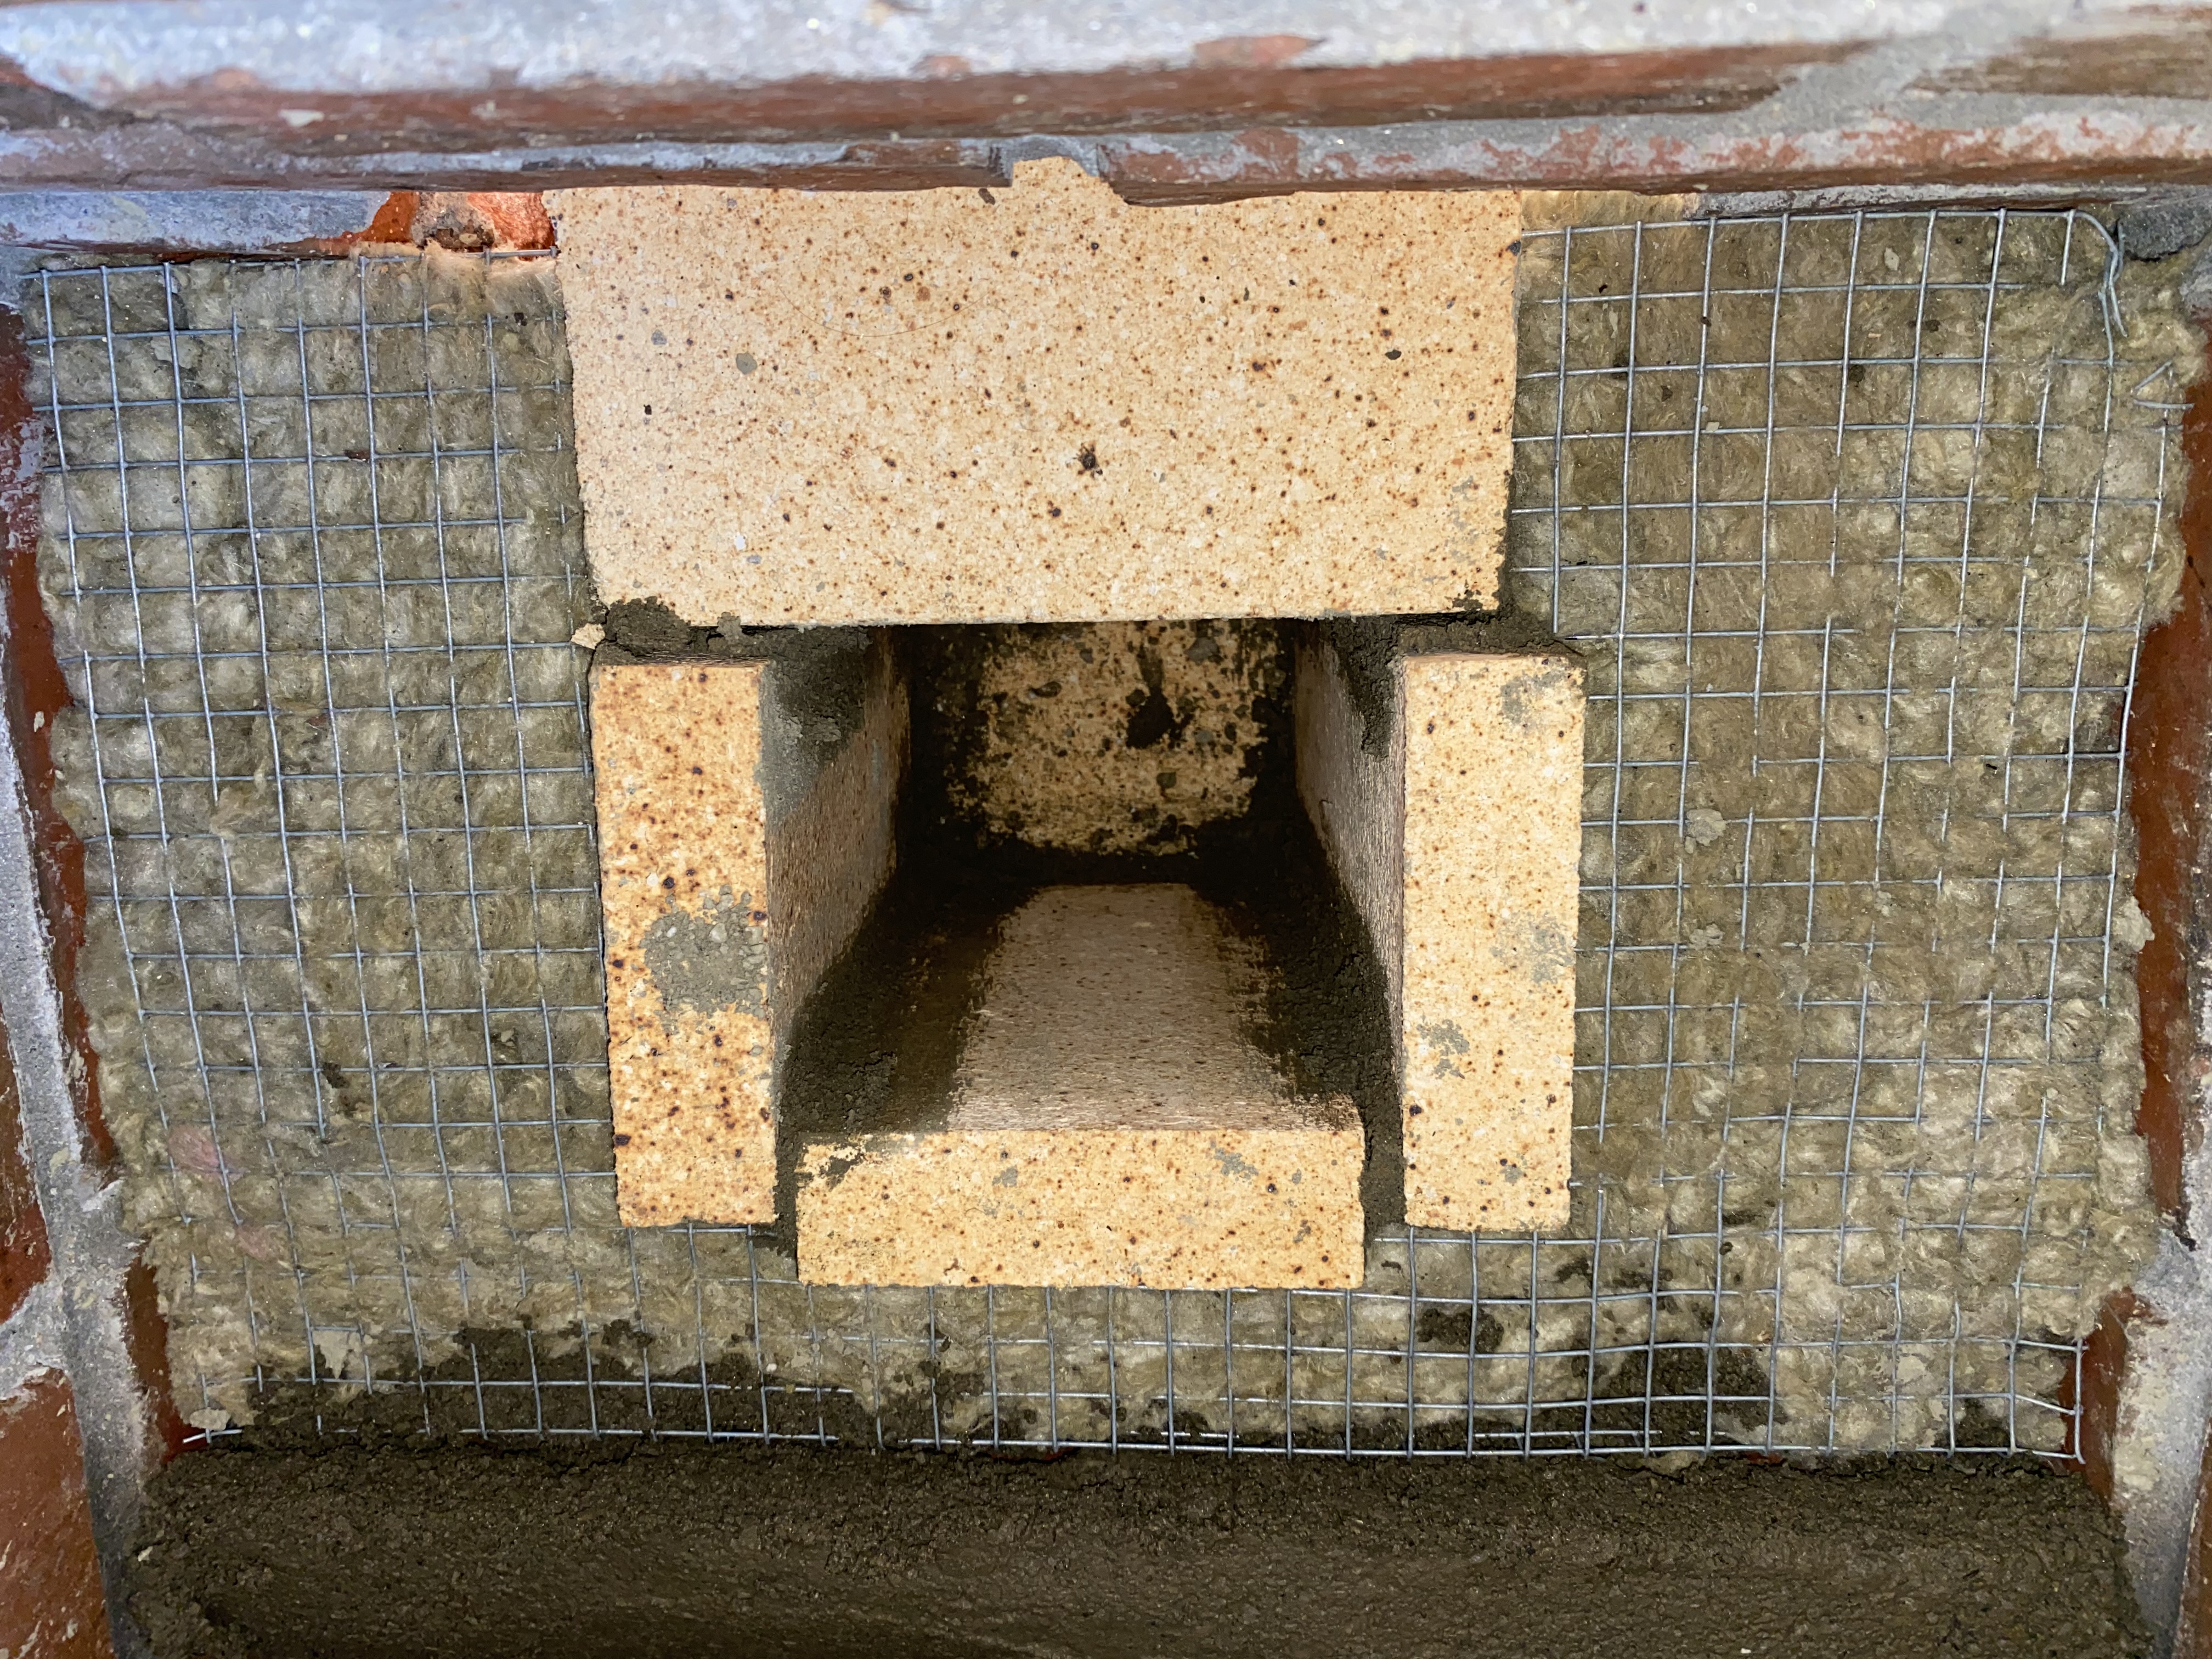
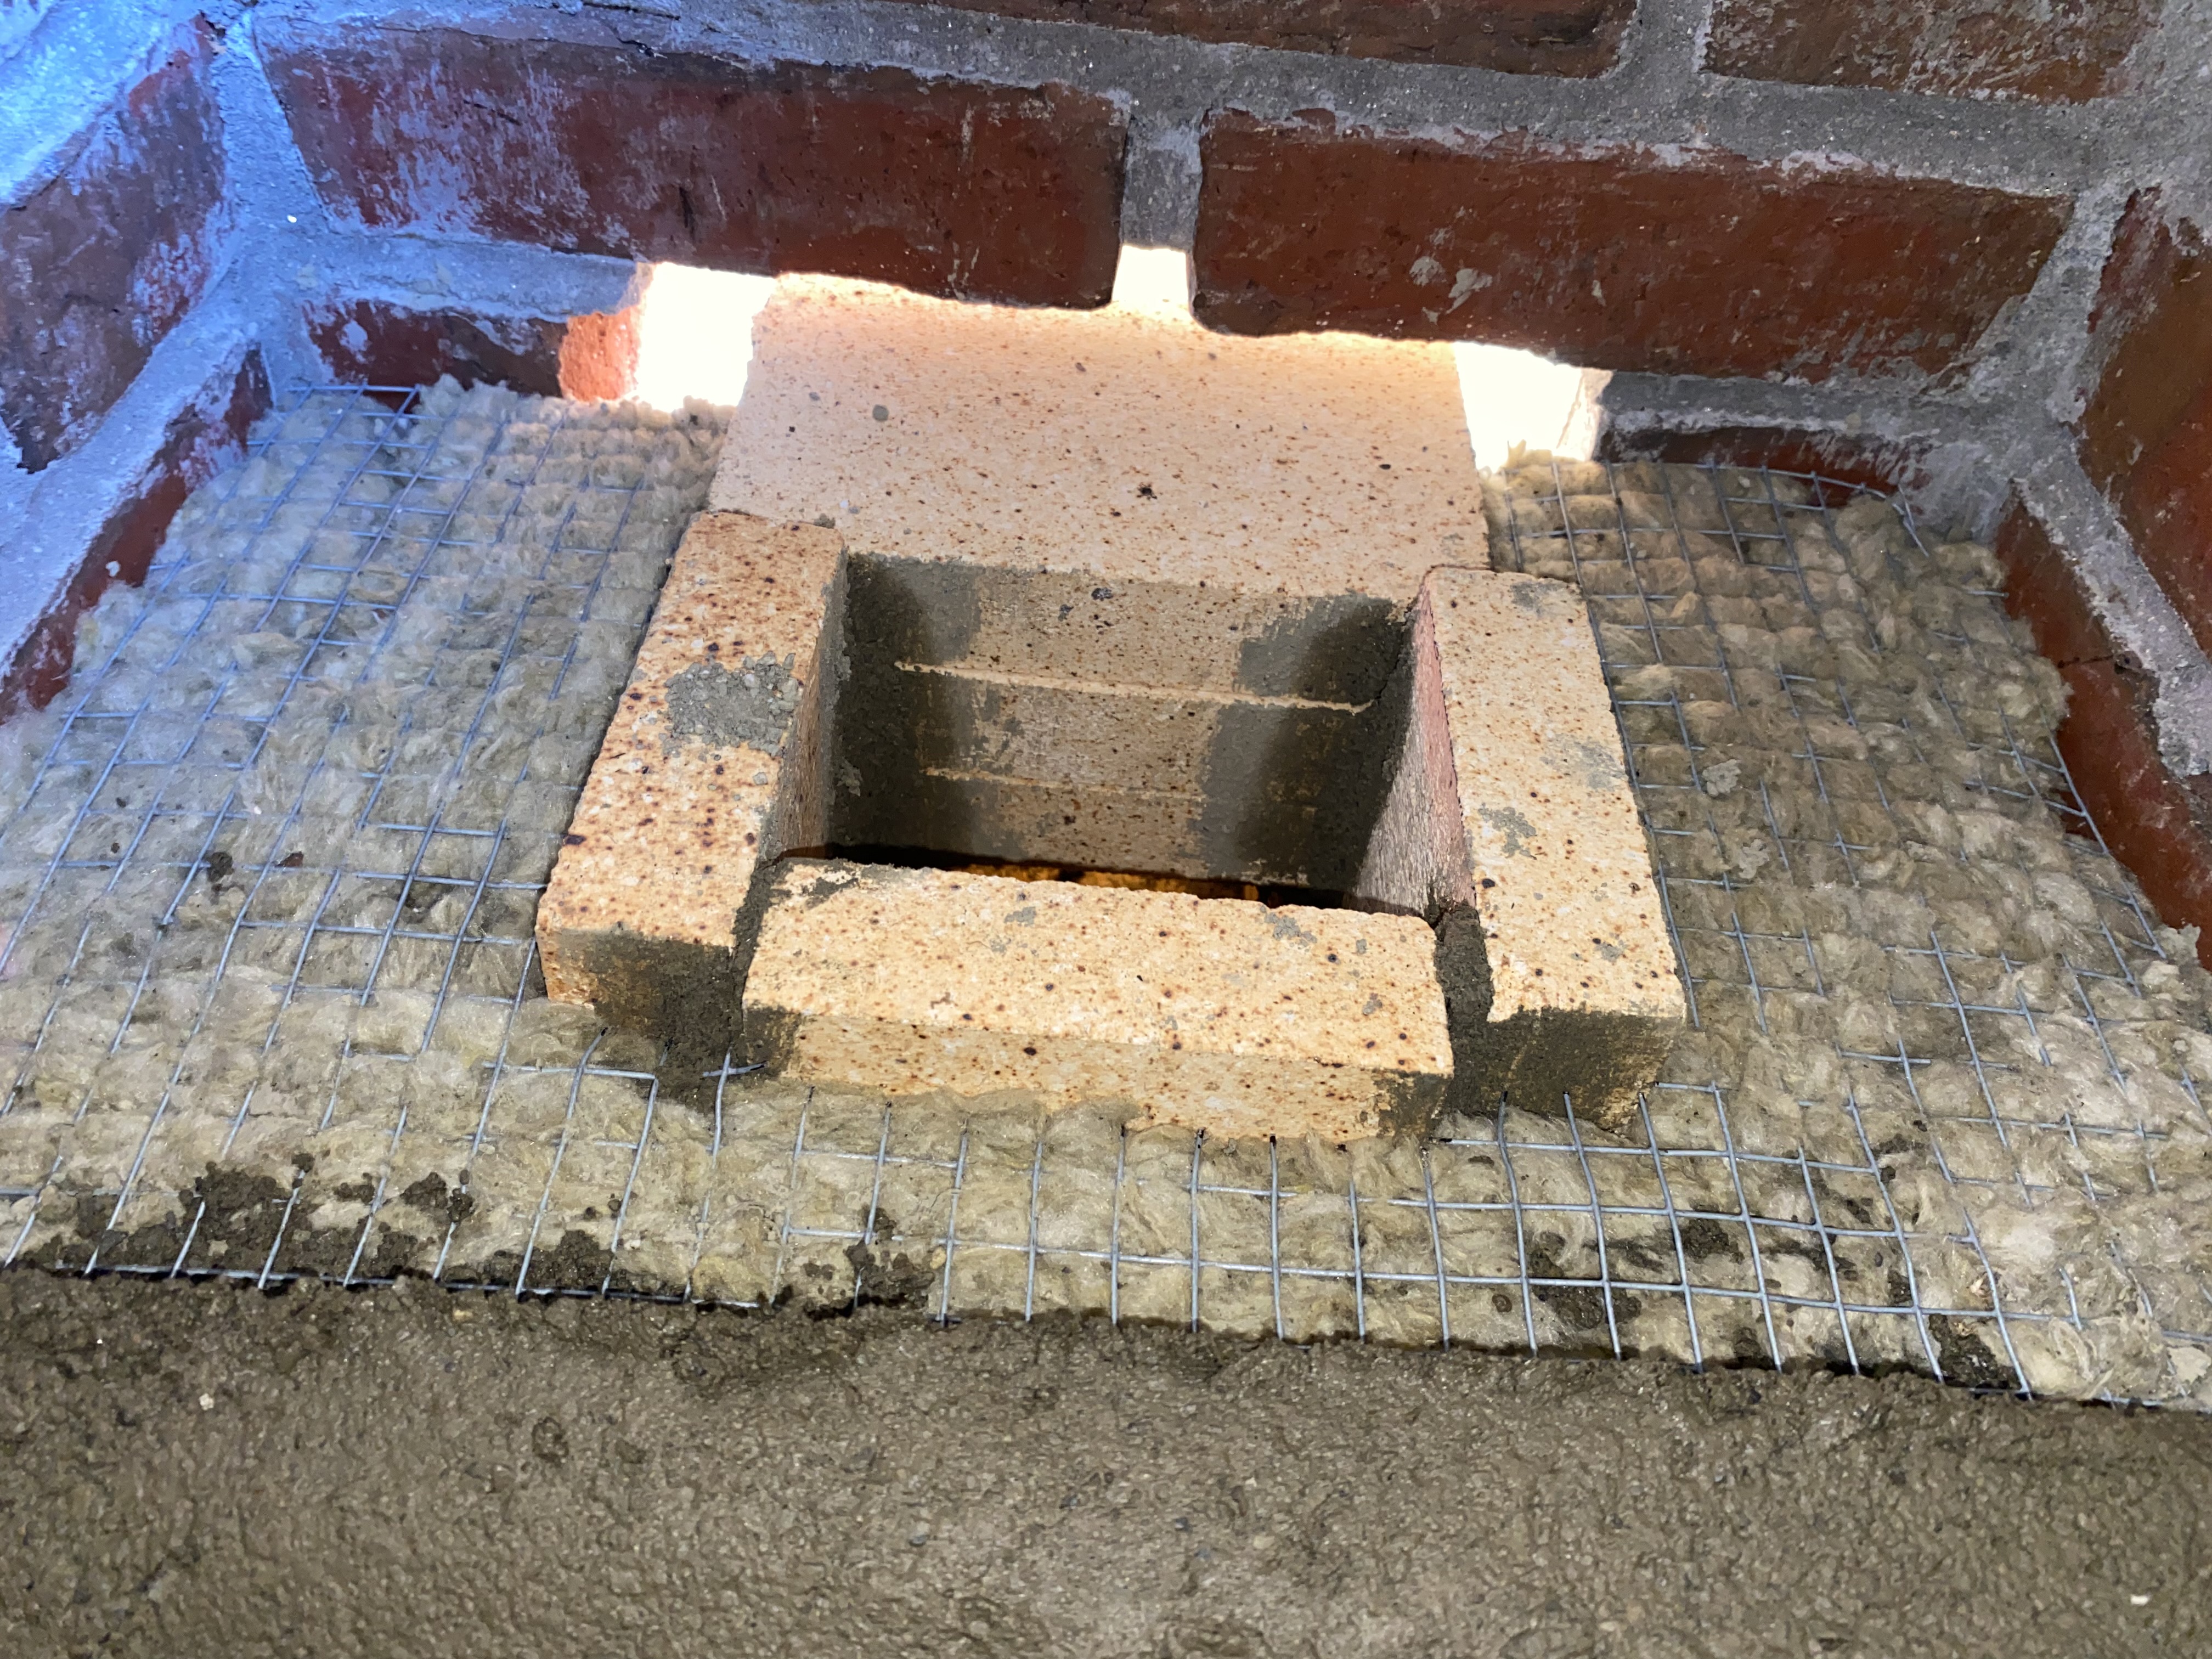
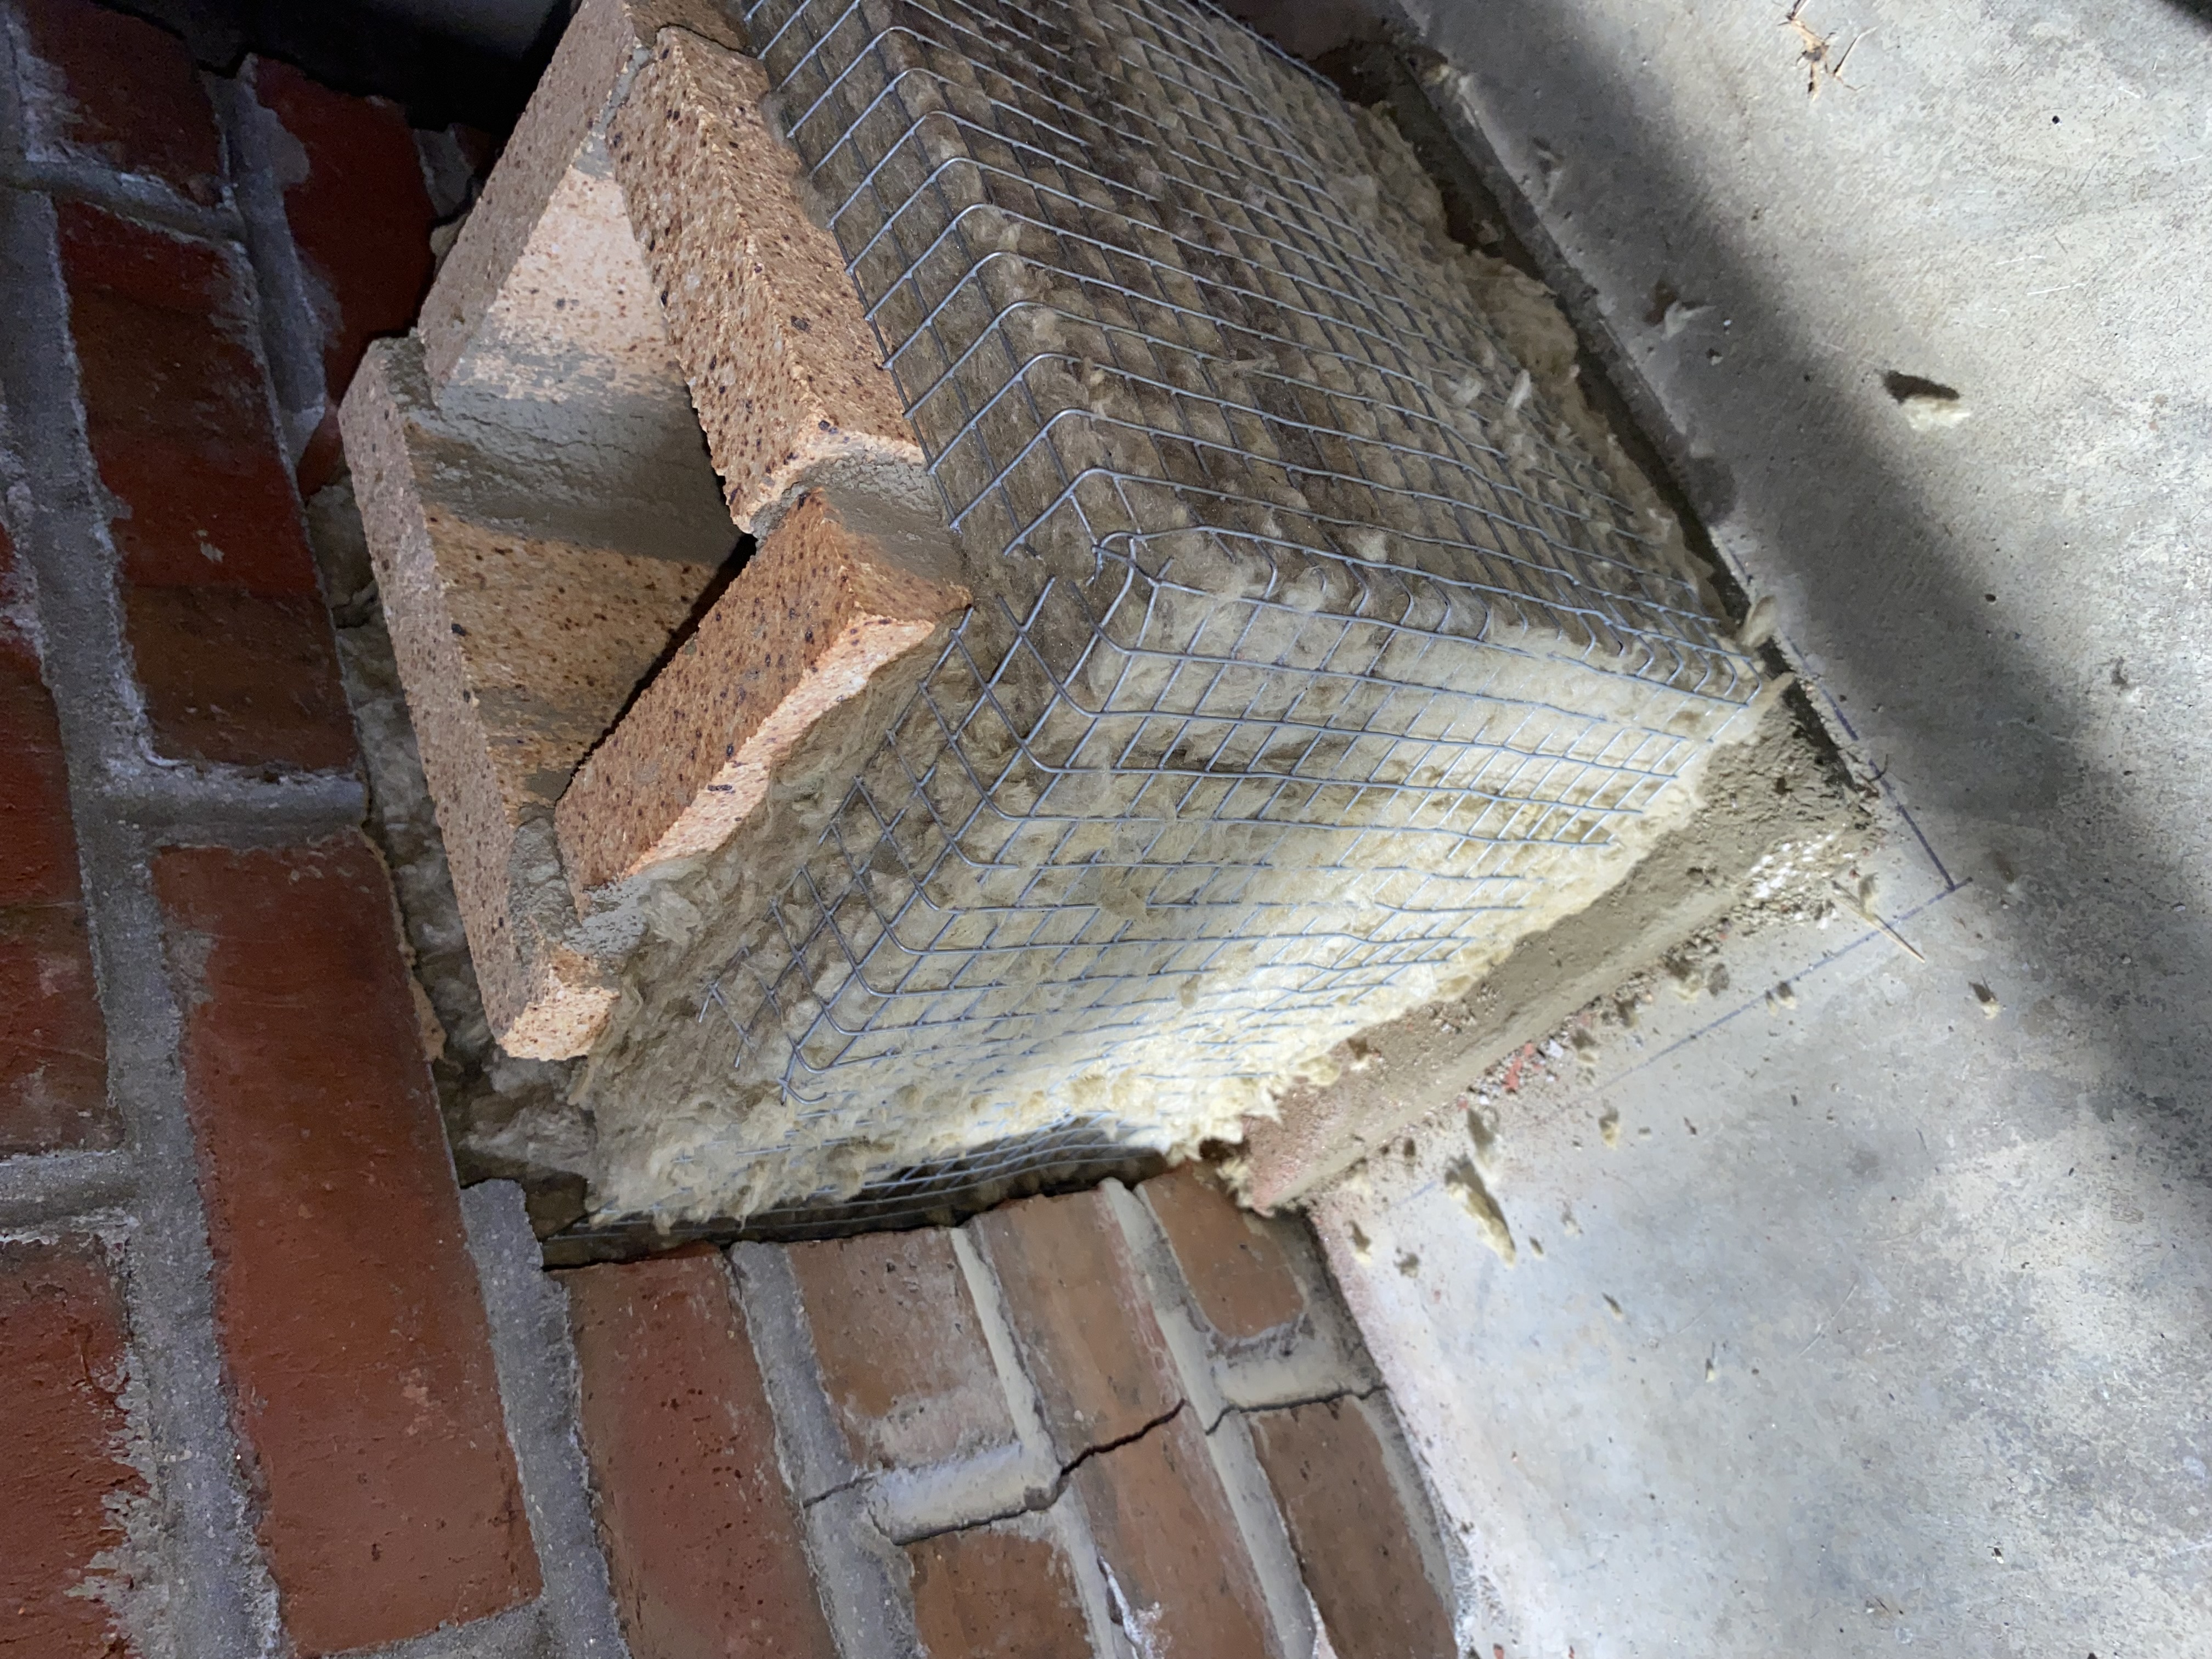
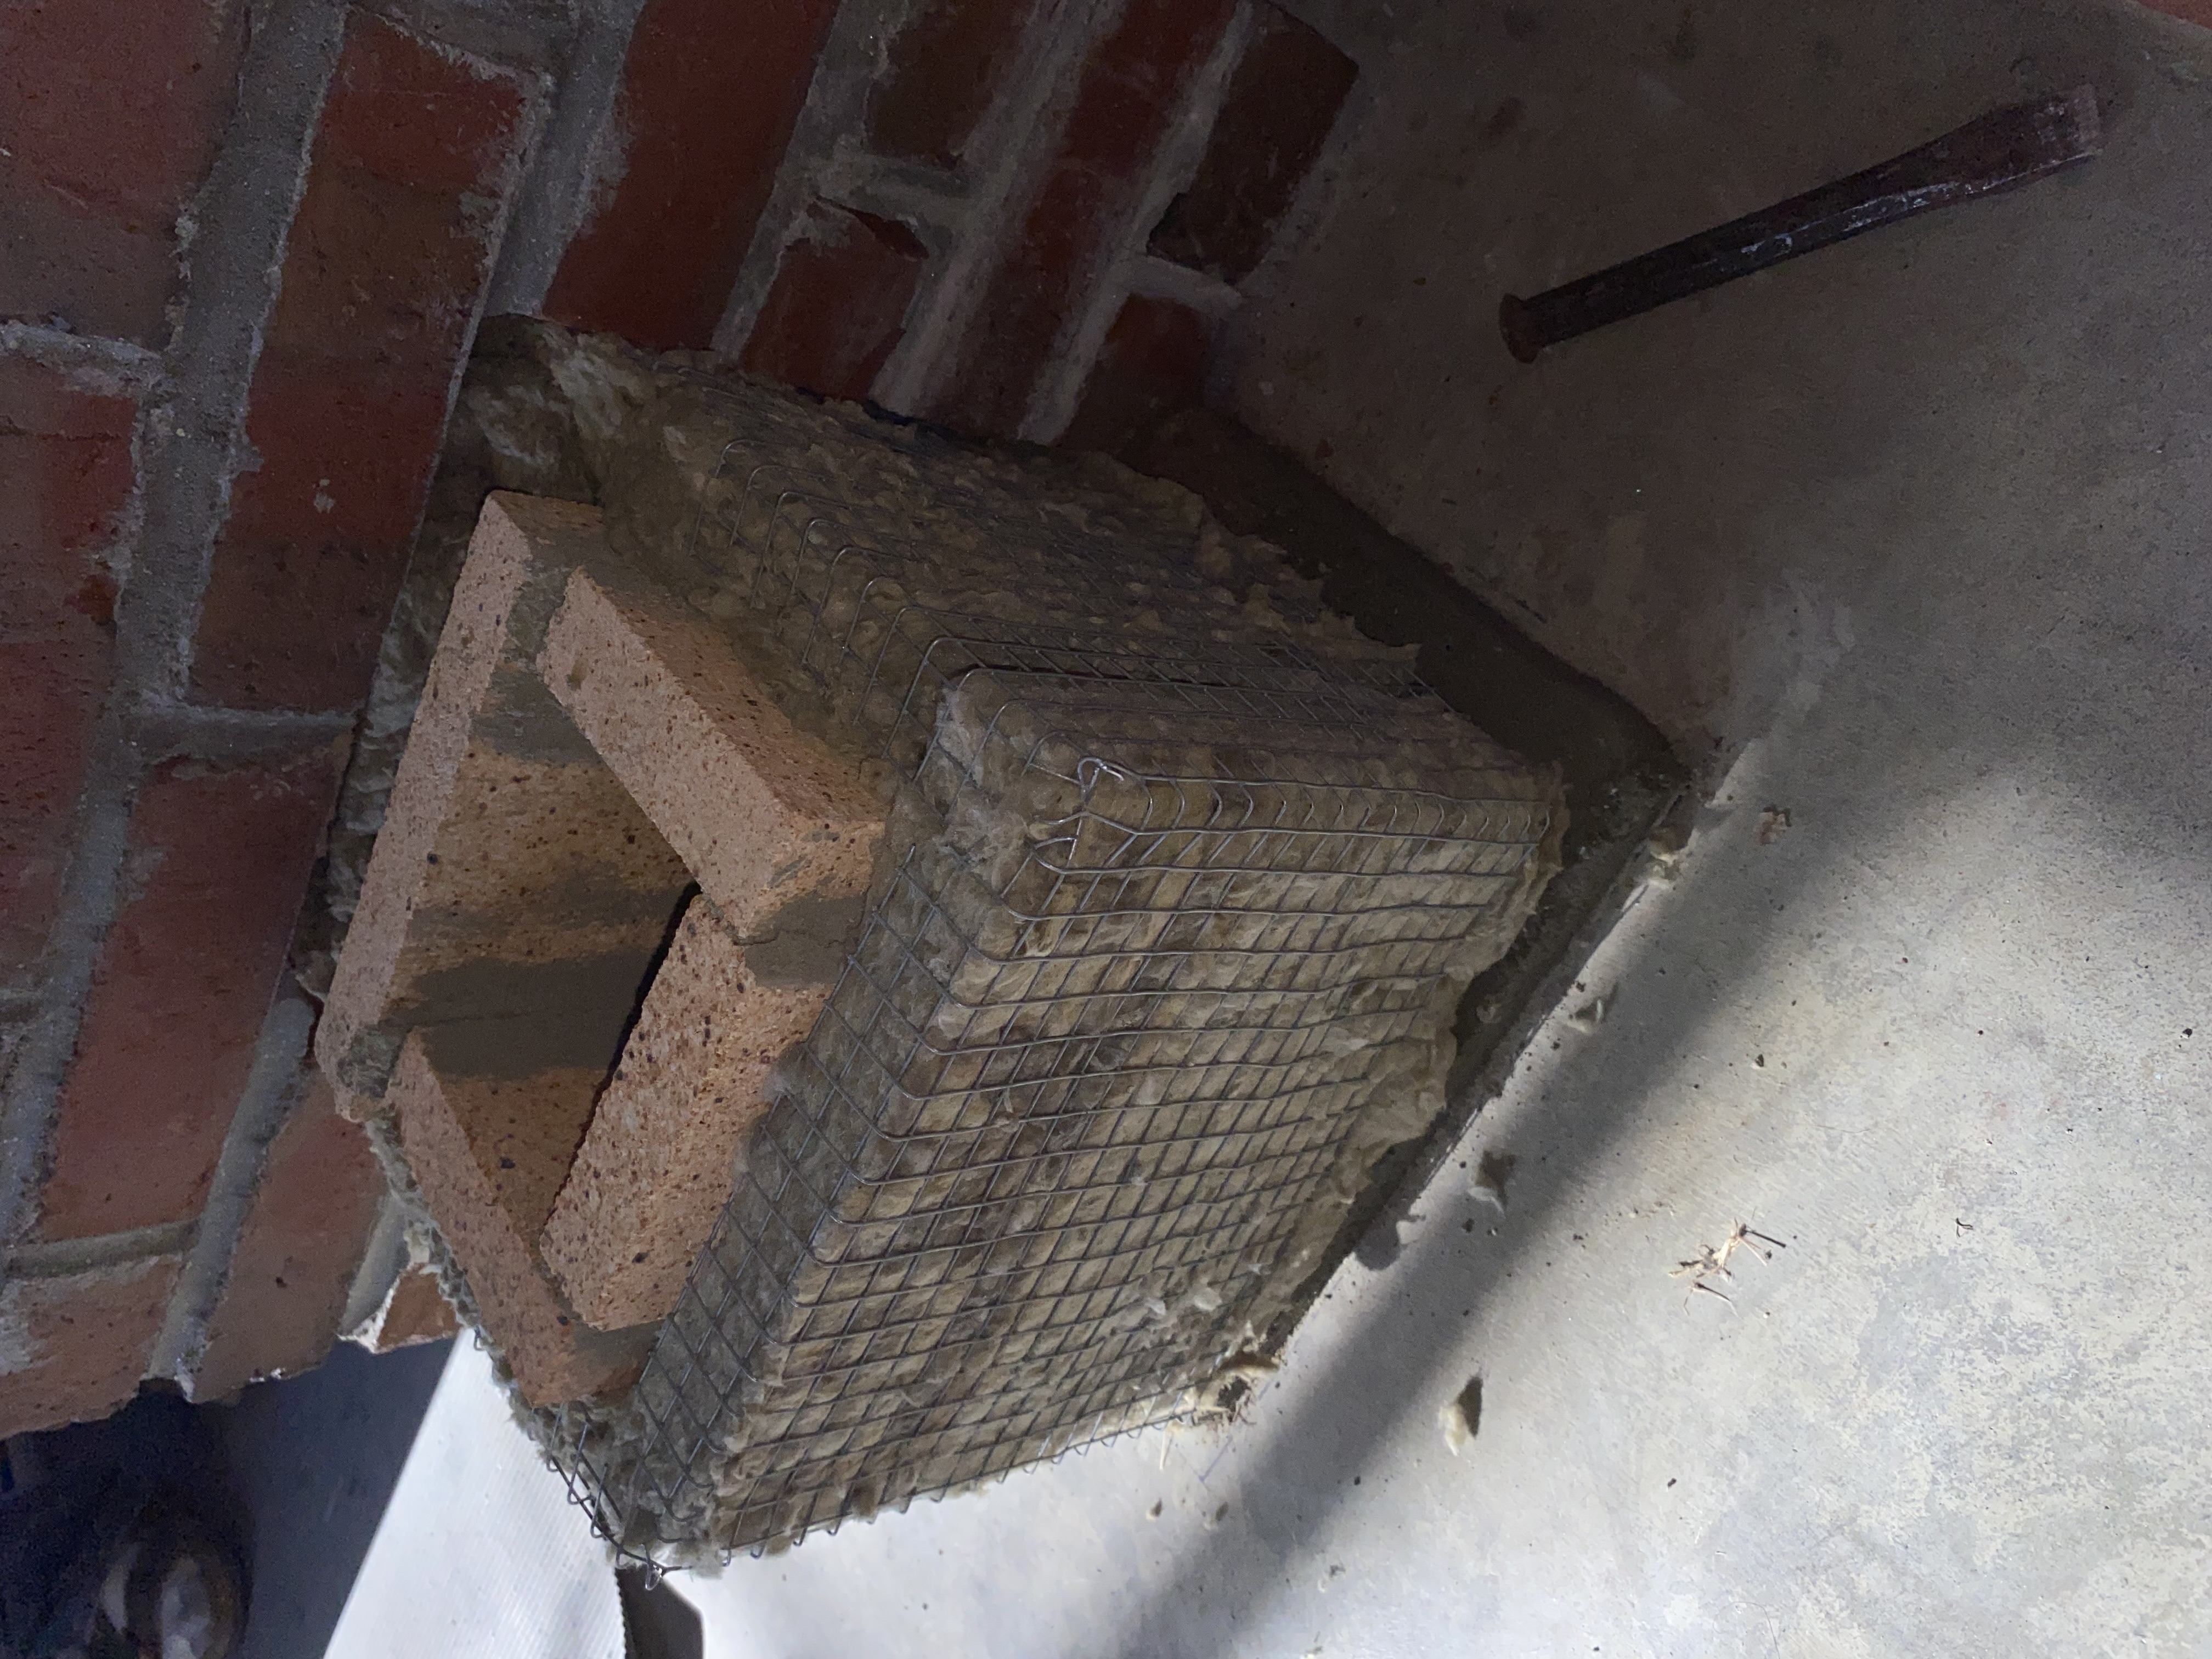
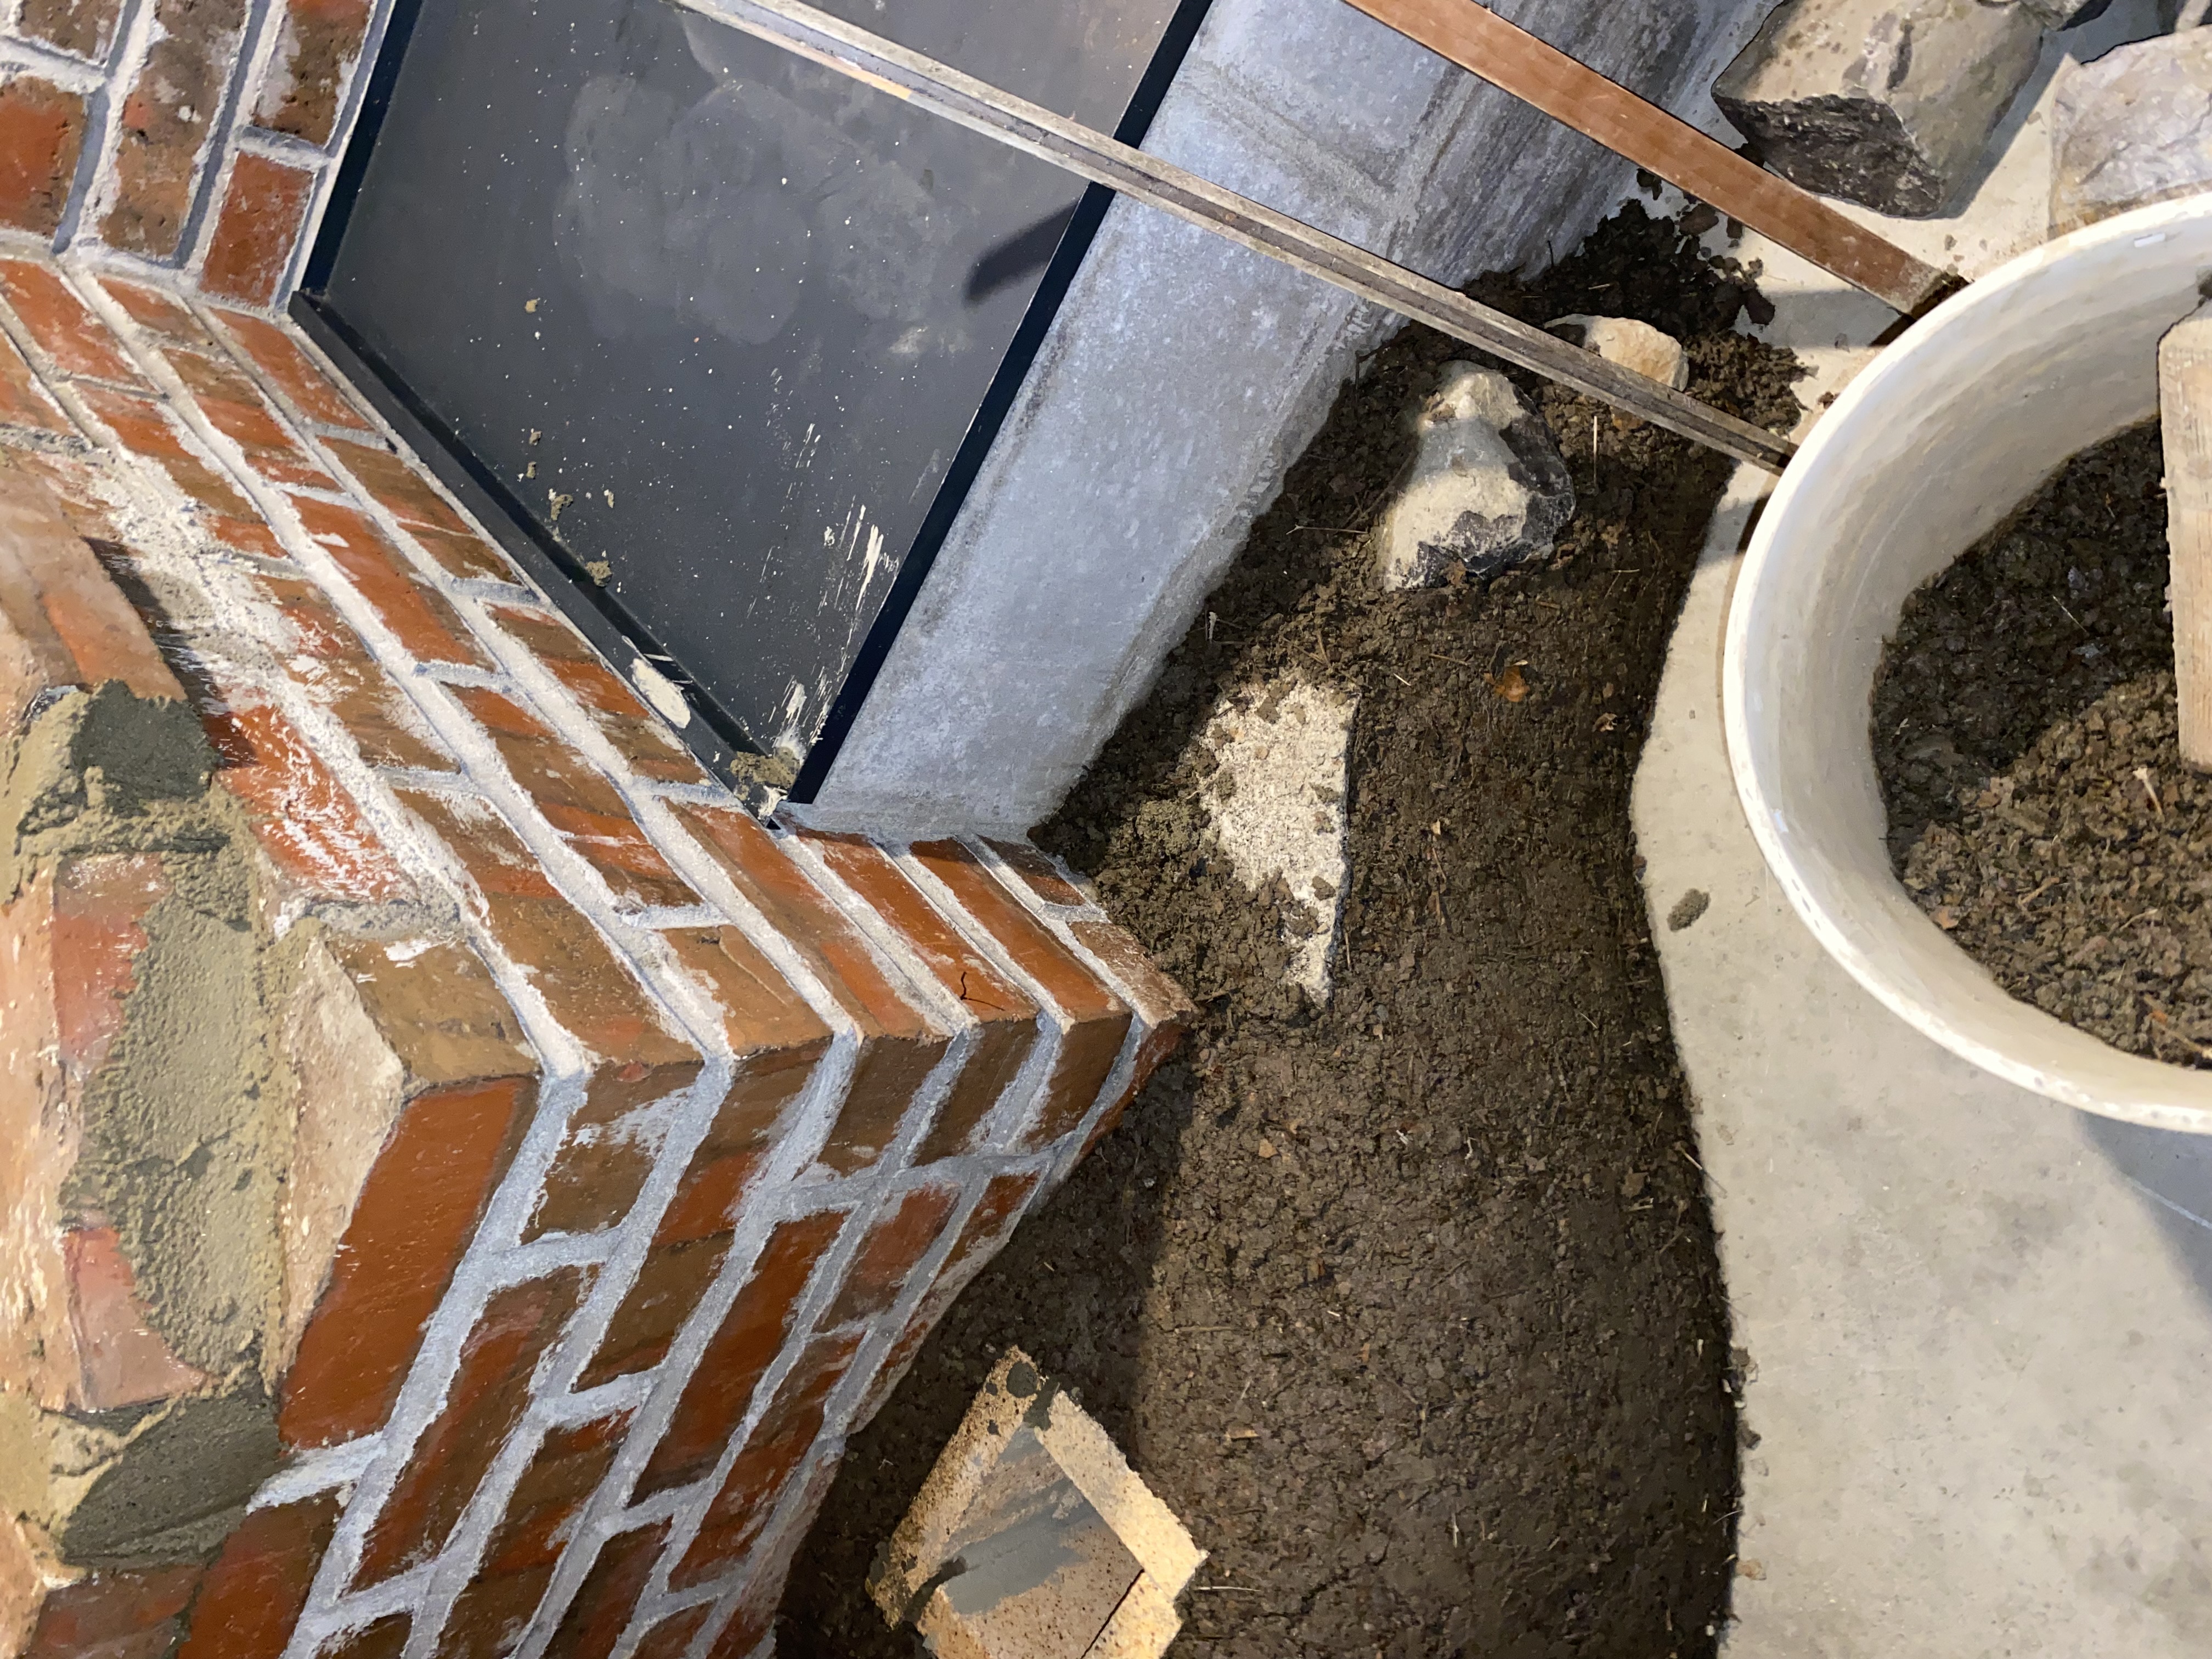
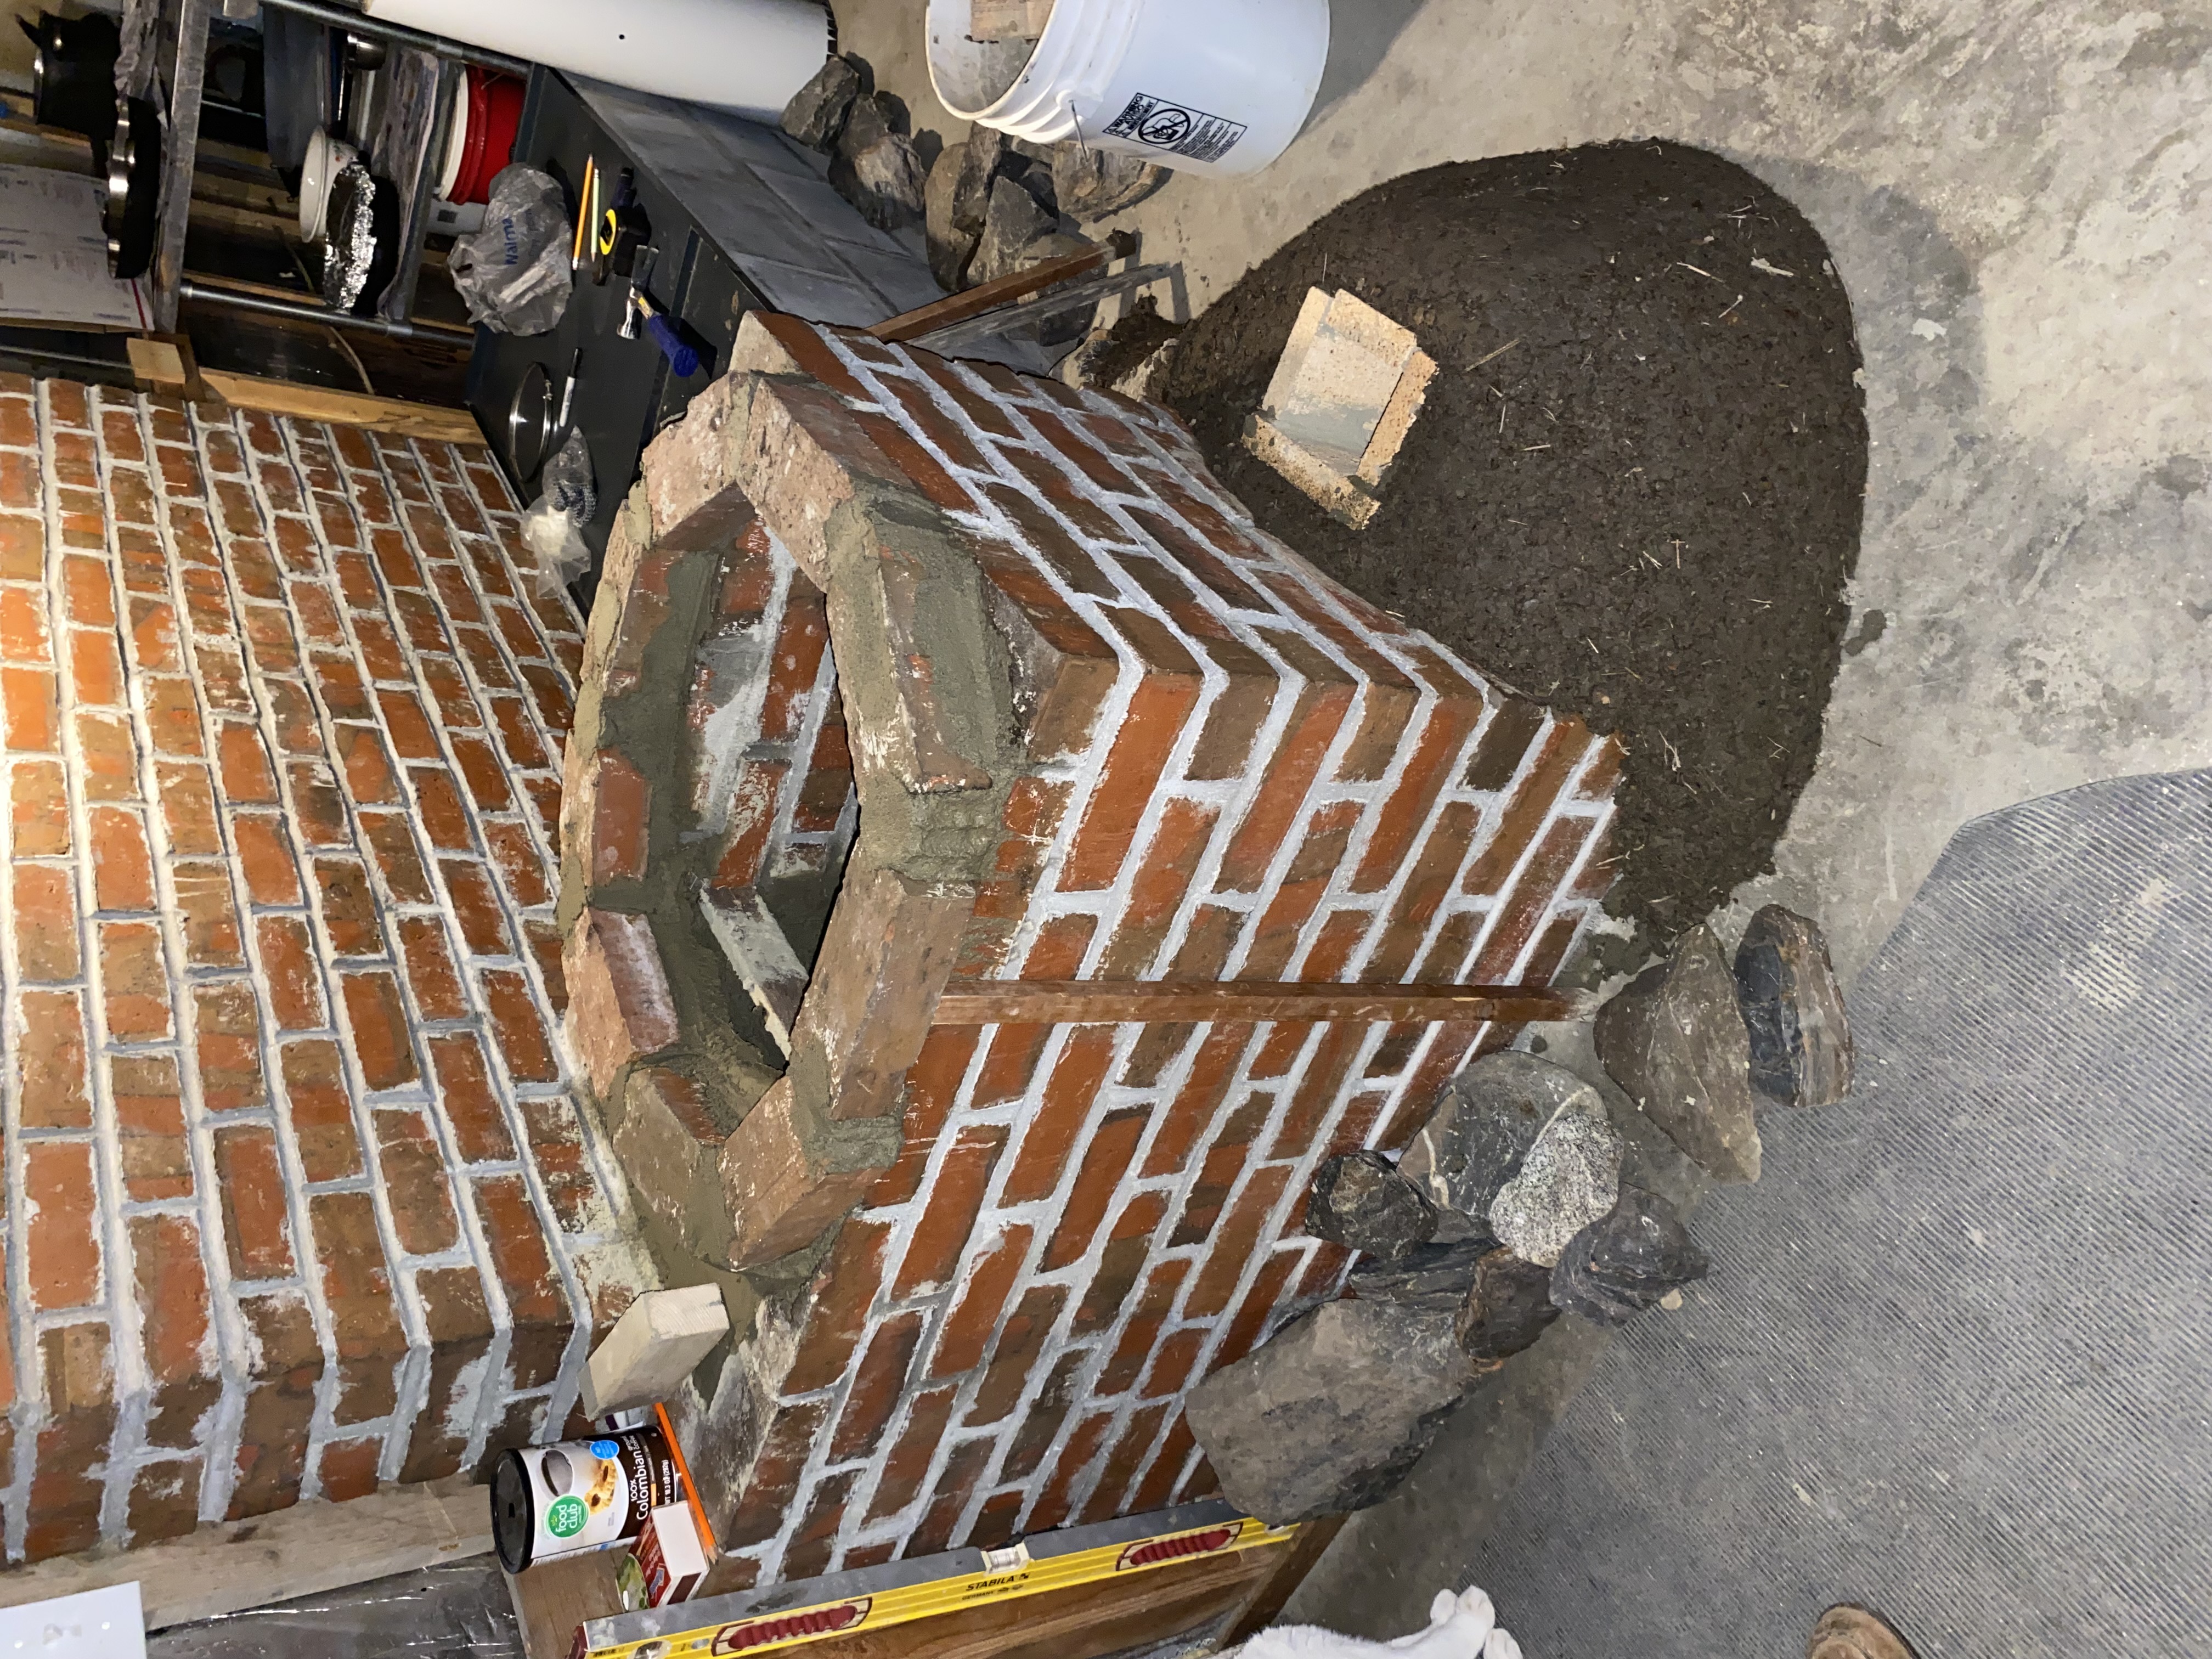
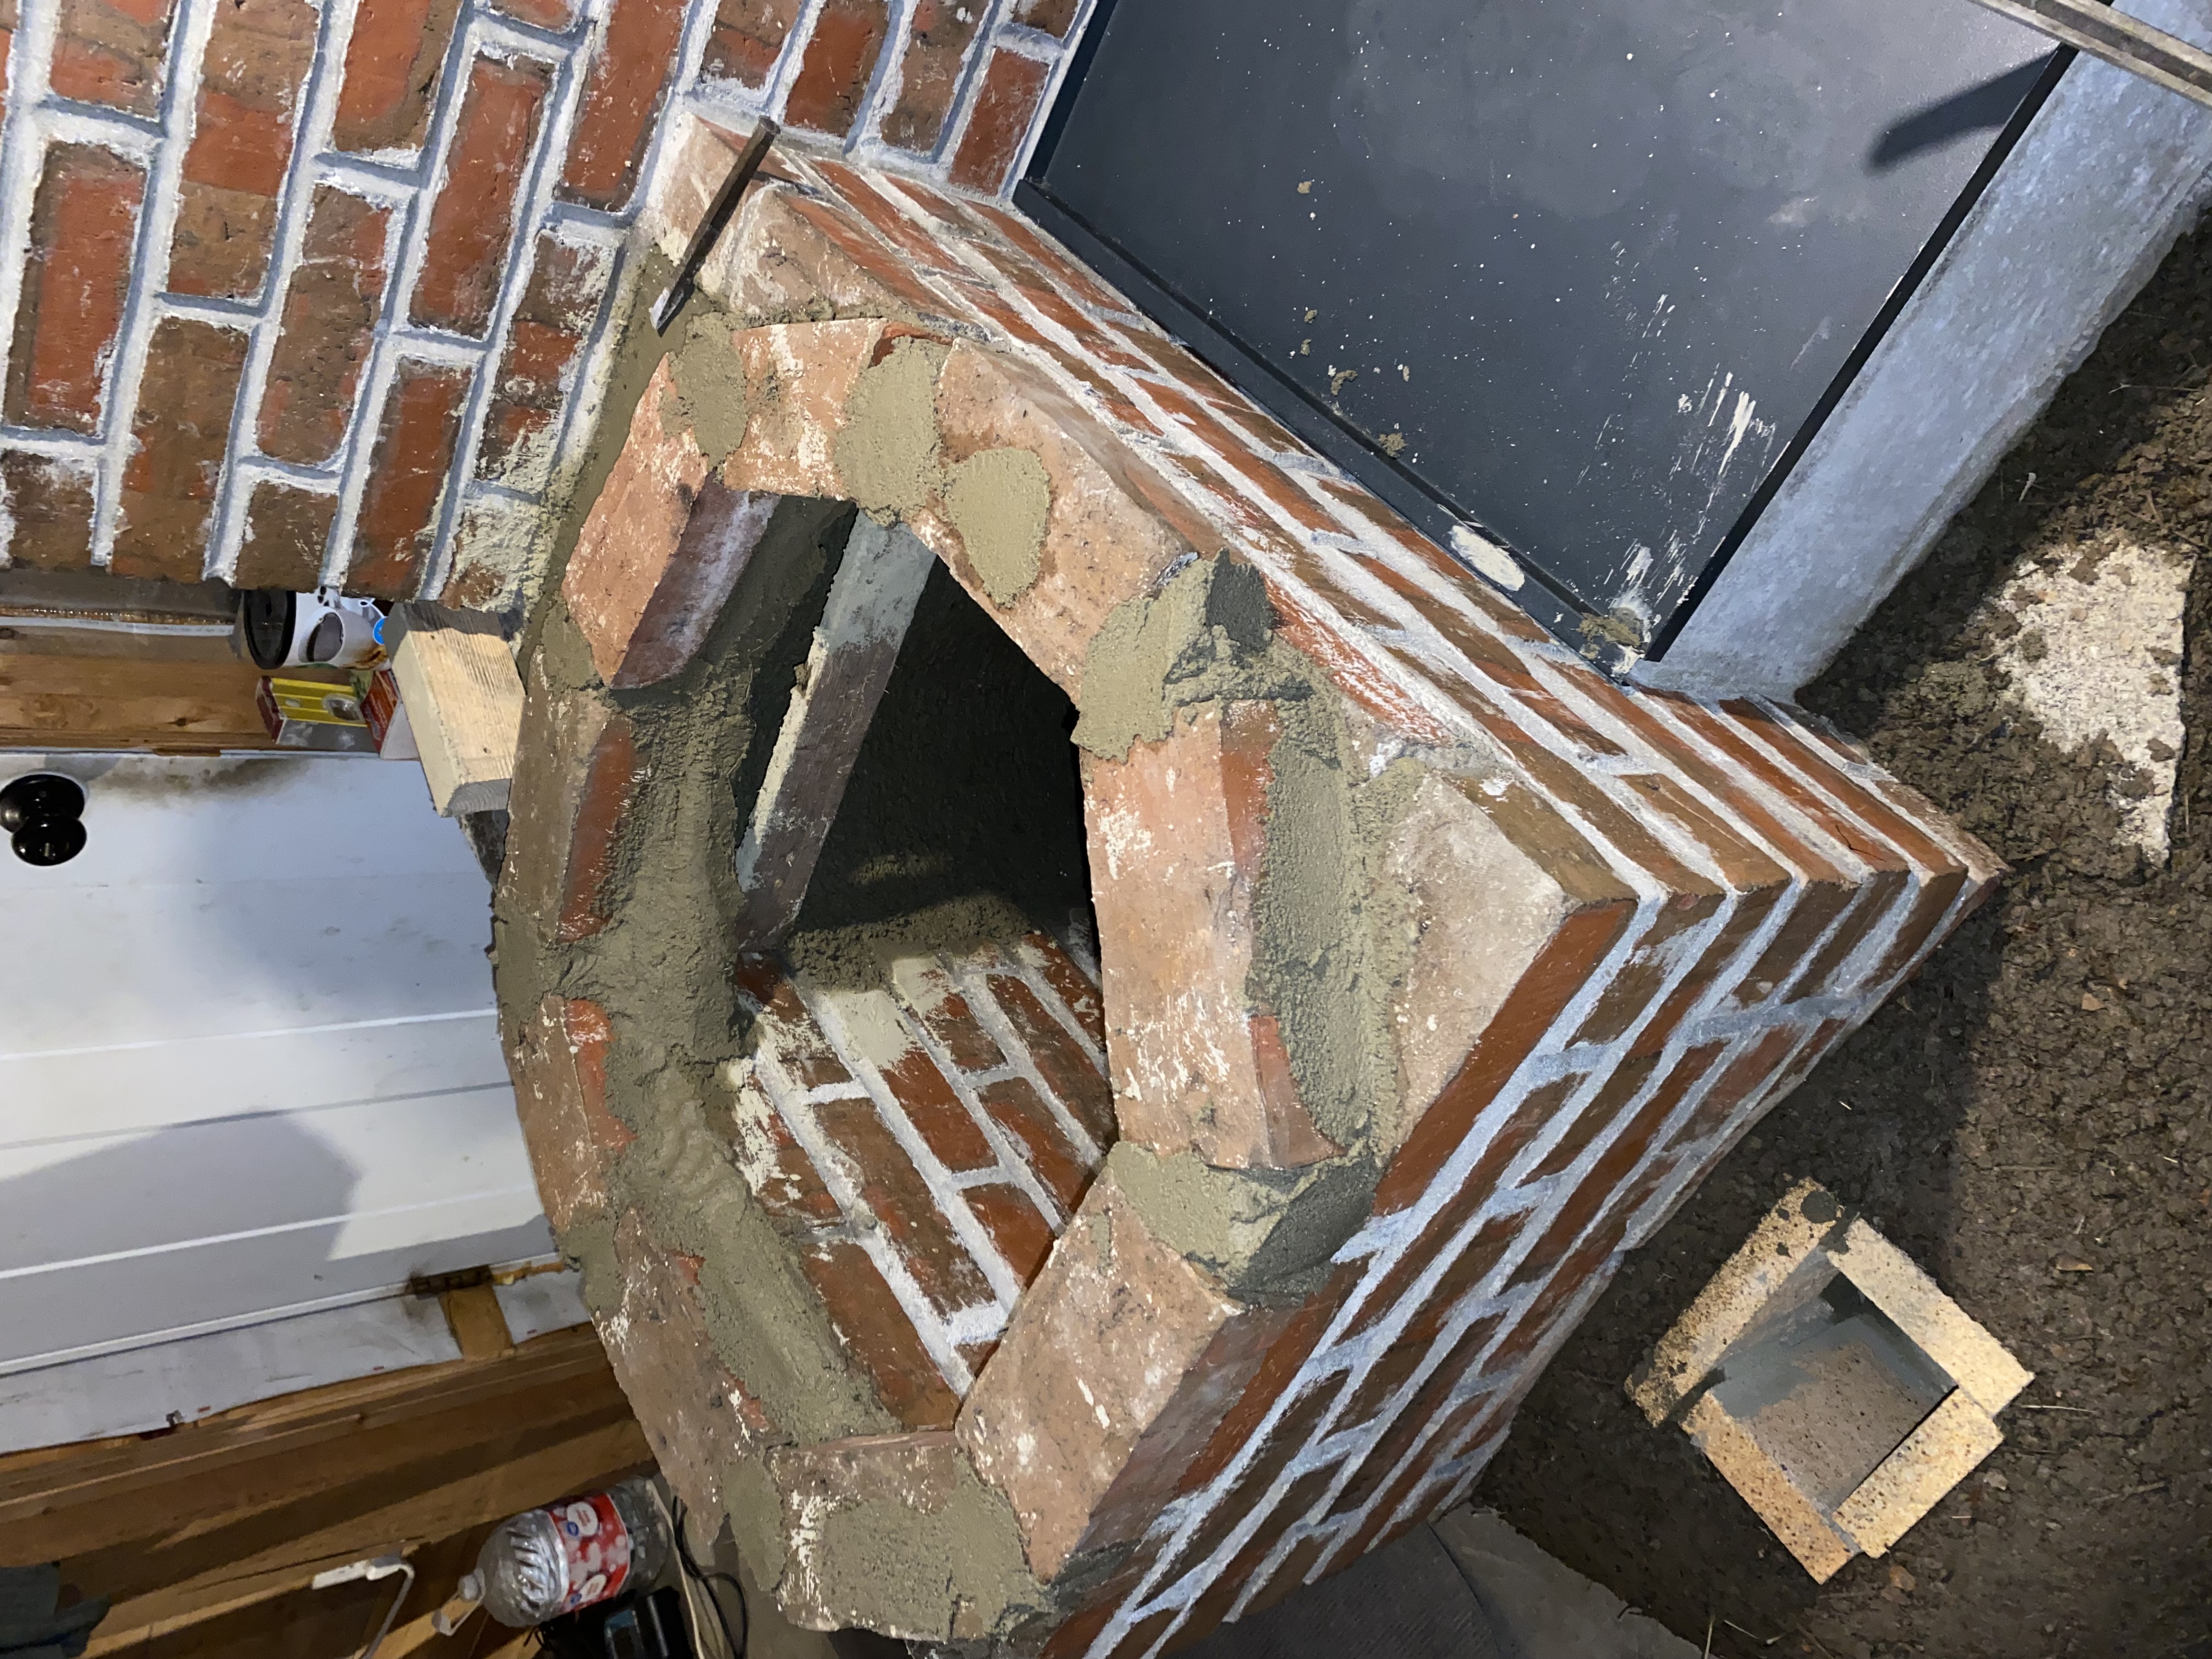
Hello everyone, I’ve been a lurker on and off for years. As you know it’s getting colder outside. In Maine it’s already down to the lower twenties and it’s cold in the house unless we crank up the Kineo cook stove. I made a wood box out of brick years ago when I built this house as seen in the pics. I need to make a heater  and would like to make a 6” rocket. I would like to incorporate the would box if possible. The wood mix is 28.5”L x 16.5”D x 27.5H. To the right of the wood box I have 64”L x 33”D of floor space and the chimney is centered on the 64” wall 2” of the brick wall. Money is very limited. We do have an abundance of beautiful grey Maine clay on our property as seen in one of the pics. We have a few good barrels with half to to 3/4 paint already gone.
For the heat riser I have 2@ 48” x 42” 18ga steal sheets I can make an insulated heat riser with using clay and perlite. The ceiling over the wood box is 102”from the floor.

Does anyone have any ideas or insight on instructing us on a way forward? Use the brick wood box or not use it and just do a small conventional system and save the wood box for wood. Time is of the essence and this is a project that that we would start right away and get done quickly as in we would work on it all day everyday till it’s finished. Thank you in advance!
IMG_2617.jpeg
[Thumbnail for IMG_2617.jpeg]
IMG_2613.jpeg
[Thumbnail for IMG_2613.jpeg]
IMG_2612.jpeg
[Thumbnail for IMG_2612.jpeg]
IMG_2611.jpeg
[Thumbnail for IMG_2611.jpeg]
IMG_2610.jpeg
[Thumbnail for IMG_2610.jpeg]
 
gardener
Posts: 1906
Location: Proebstel, Washington, USDA Zone 6B
1292
4
wheelbarrows and trailers kids trees earthworks woodworking
  • Likes 8
  • Mark post as helpful
  • send pies
    Number of slices to send:
    Optional 'thank-you' note:
  • Quote
  • Report post to moderator
I bet your masonry skills will serve you well!
 
pollinator
Posts: 83
Location: North italy
57
bike wood heat rocket stoves
  • Likes 8
  • Mark post as helpful
  • send pies
    Number of slices to send:
    Optional 'thank-you' note:
  • Quote
  • Report post to moderator
Hello Shawn
It would be helpful to have some more information—for example, the dimensions of the flue and a more detailed description of the space you wish to heat.
 
Posts: 1015
Location: Sierra Nevada foothills, 350 m, USDA 8b, sunset zone 7
295
  • Likes 11
  • Mark post as helpful
  • send pies
    Number of slices to send:
    Optional 'thank-you' note:
  • Quote
  • Report post to moderator
If you added 15 courses of bricks, made a door opening and chimney inlet at a bottom, in theory you could fit a 5" batch box in a tall and slim bell.
 
Shawn Carey
Posts: 11
7
  • Likes 1
  • Mark post as helpful
  • send pies
    Number of slices to send:
    Optional 'thank-you' note:
  • Quote
  • Report post to moderator

Jeremy VanGelder wrote:I bet your masonry skills will serve you well!


Thank you Jeremy! Enough to get me in trouble or at least save me some money!
 
Shawn Carey
Posts: 11
7
  • Likes 5
  • Mark post as helpful
  • send pies
    Number of slices to send:
    Optional 'thank-you' note:
  • Quote
  • Report post to moderator

Cedric Noussan wrote:Hello Shawn
It would be helpful to have some more information—for example, the dimensions of the flue and a more detailed description of the space you wish to heat.


Hello Cedric, I have an existing 6” flue at a height of 163 from floor to the top of metalbestoes exterior. Interior floor to metalbestoes can be 64” or 101” where the flue temps are much cooler I can do the 101” to bottom of metalbestoes and sell the 36” insulated piped to help pay for more materials! The room size is 440 sqft with passive solar, air tight and and very over insulated. We will be moving hot air into a separate part of the home at 1000 sqft but only doing so natural circulation. We were brought in a barn so we go in and out a lot in the winter, have cats and dogs and a mini farm so door opens and closes a lot. We have to leave a window open in the room about 1.5” all winter for fresh air. It be nice to be able to cook on the barrel. Nice sunny days in the winter we like to leave the solid insulated door open and use just the storm door of course not at -30 degrees but…. We do live in north central Maine below zero for 2-3 months. It be nice to build something that we can burn pine, hemlock, spruce or poplar slab wood with but not a necessity. I hope this help!
 
Shawn Carey
Posts: 11
7
  • Likes 5
  • Mark post as helpful
  • send pies
    Number of slices to send:
    Optional 'thank-you' note:
  • Quote
  • Report post to moderator

Cristobal Cristo wrote:If you added 15 courses of bricks, made a door opening and chimney inlet at a bottom, in theory you could fit a 5" batch box in a tall and slim bell.

I am interested in a batch box build and would love to be able to incorporate the wood box one way or another whether I dump the heat riser into it and then into the bench mass or sit a better on top of the wood box or something. I thought about sitting a barrel on top of the wood box and widening the wood box for the barrel circumference for the 5” needed around the barrel. I have a pretty cool little starting point right now with the wall and the box I just gotta be crafty and frugal with money. Where can I buy the batch box doors? Or faceplate and door?
 
Rocket Scientist
Posts: 4842
Location: Upstate NY, zone 5
799
5
  • Likes 14
  • Mark post as helpful
  • send pies
    Number of slices to send:
    Optional 'thank-you' note:
  • Quote
  • Report post to moderator
Do you have, or have access to, more brick? With a start like you have, continuing in brick seems like a good idea. To make a batch box, you will really need firebrick; if you build the core from red brick, I would expect the firebox to deteriorate quickly, maybe even in the first winter of serious Maine use.

A 6" batch box core from firebrick on edge (so 2 1/2" thick walls) would just fit inside your existing box with 1" gap for insulation, but would not allow the gases to go down to the base of the enclosure.Given the electrical switch box on the wall behind it, I would be leery of extending that enclosure straight up, or of putting a barrel on top of it.

I think your best bet would be a new or expanded bell enclosure, possibly knocking out some bricks from the bottom side wall to allow air circulation between existing and new bell structures.If you took the existing down a few courses at front and set the core into that, then extended the existing left and front up a few more courses, I think you could do a sidewinder into a taller bell to the right (more or less doubling the existing footprint), and with a good-sized opening lower in the right side of the existing, that could become a functional part of the bell.

If more red brick is hard to come by, you could make the extended bell from cob as long as the core/riser exhaust zone is protected by firebrick. I would make cob bell walls 6" thick for safety if you don't have brick for a continuous inner layer.
 
Shawn Carey
Posts: 11
7
  • Likes 8
  • Mark post as helpful
  • send pies
    Number of slices to send:
    Optional 'thank-you' note:
  • Quote
  • Report post to moderator
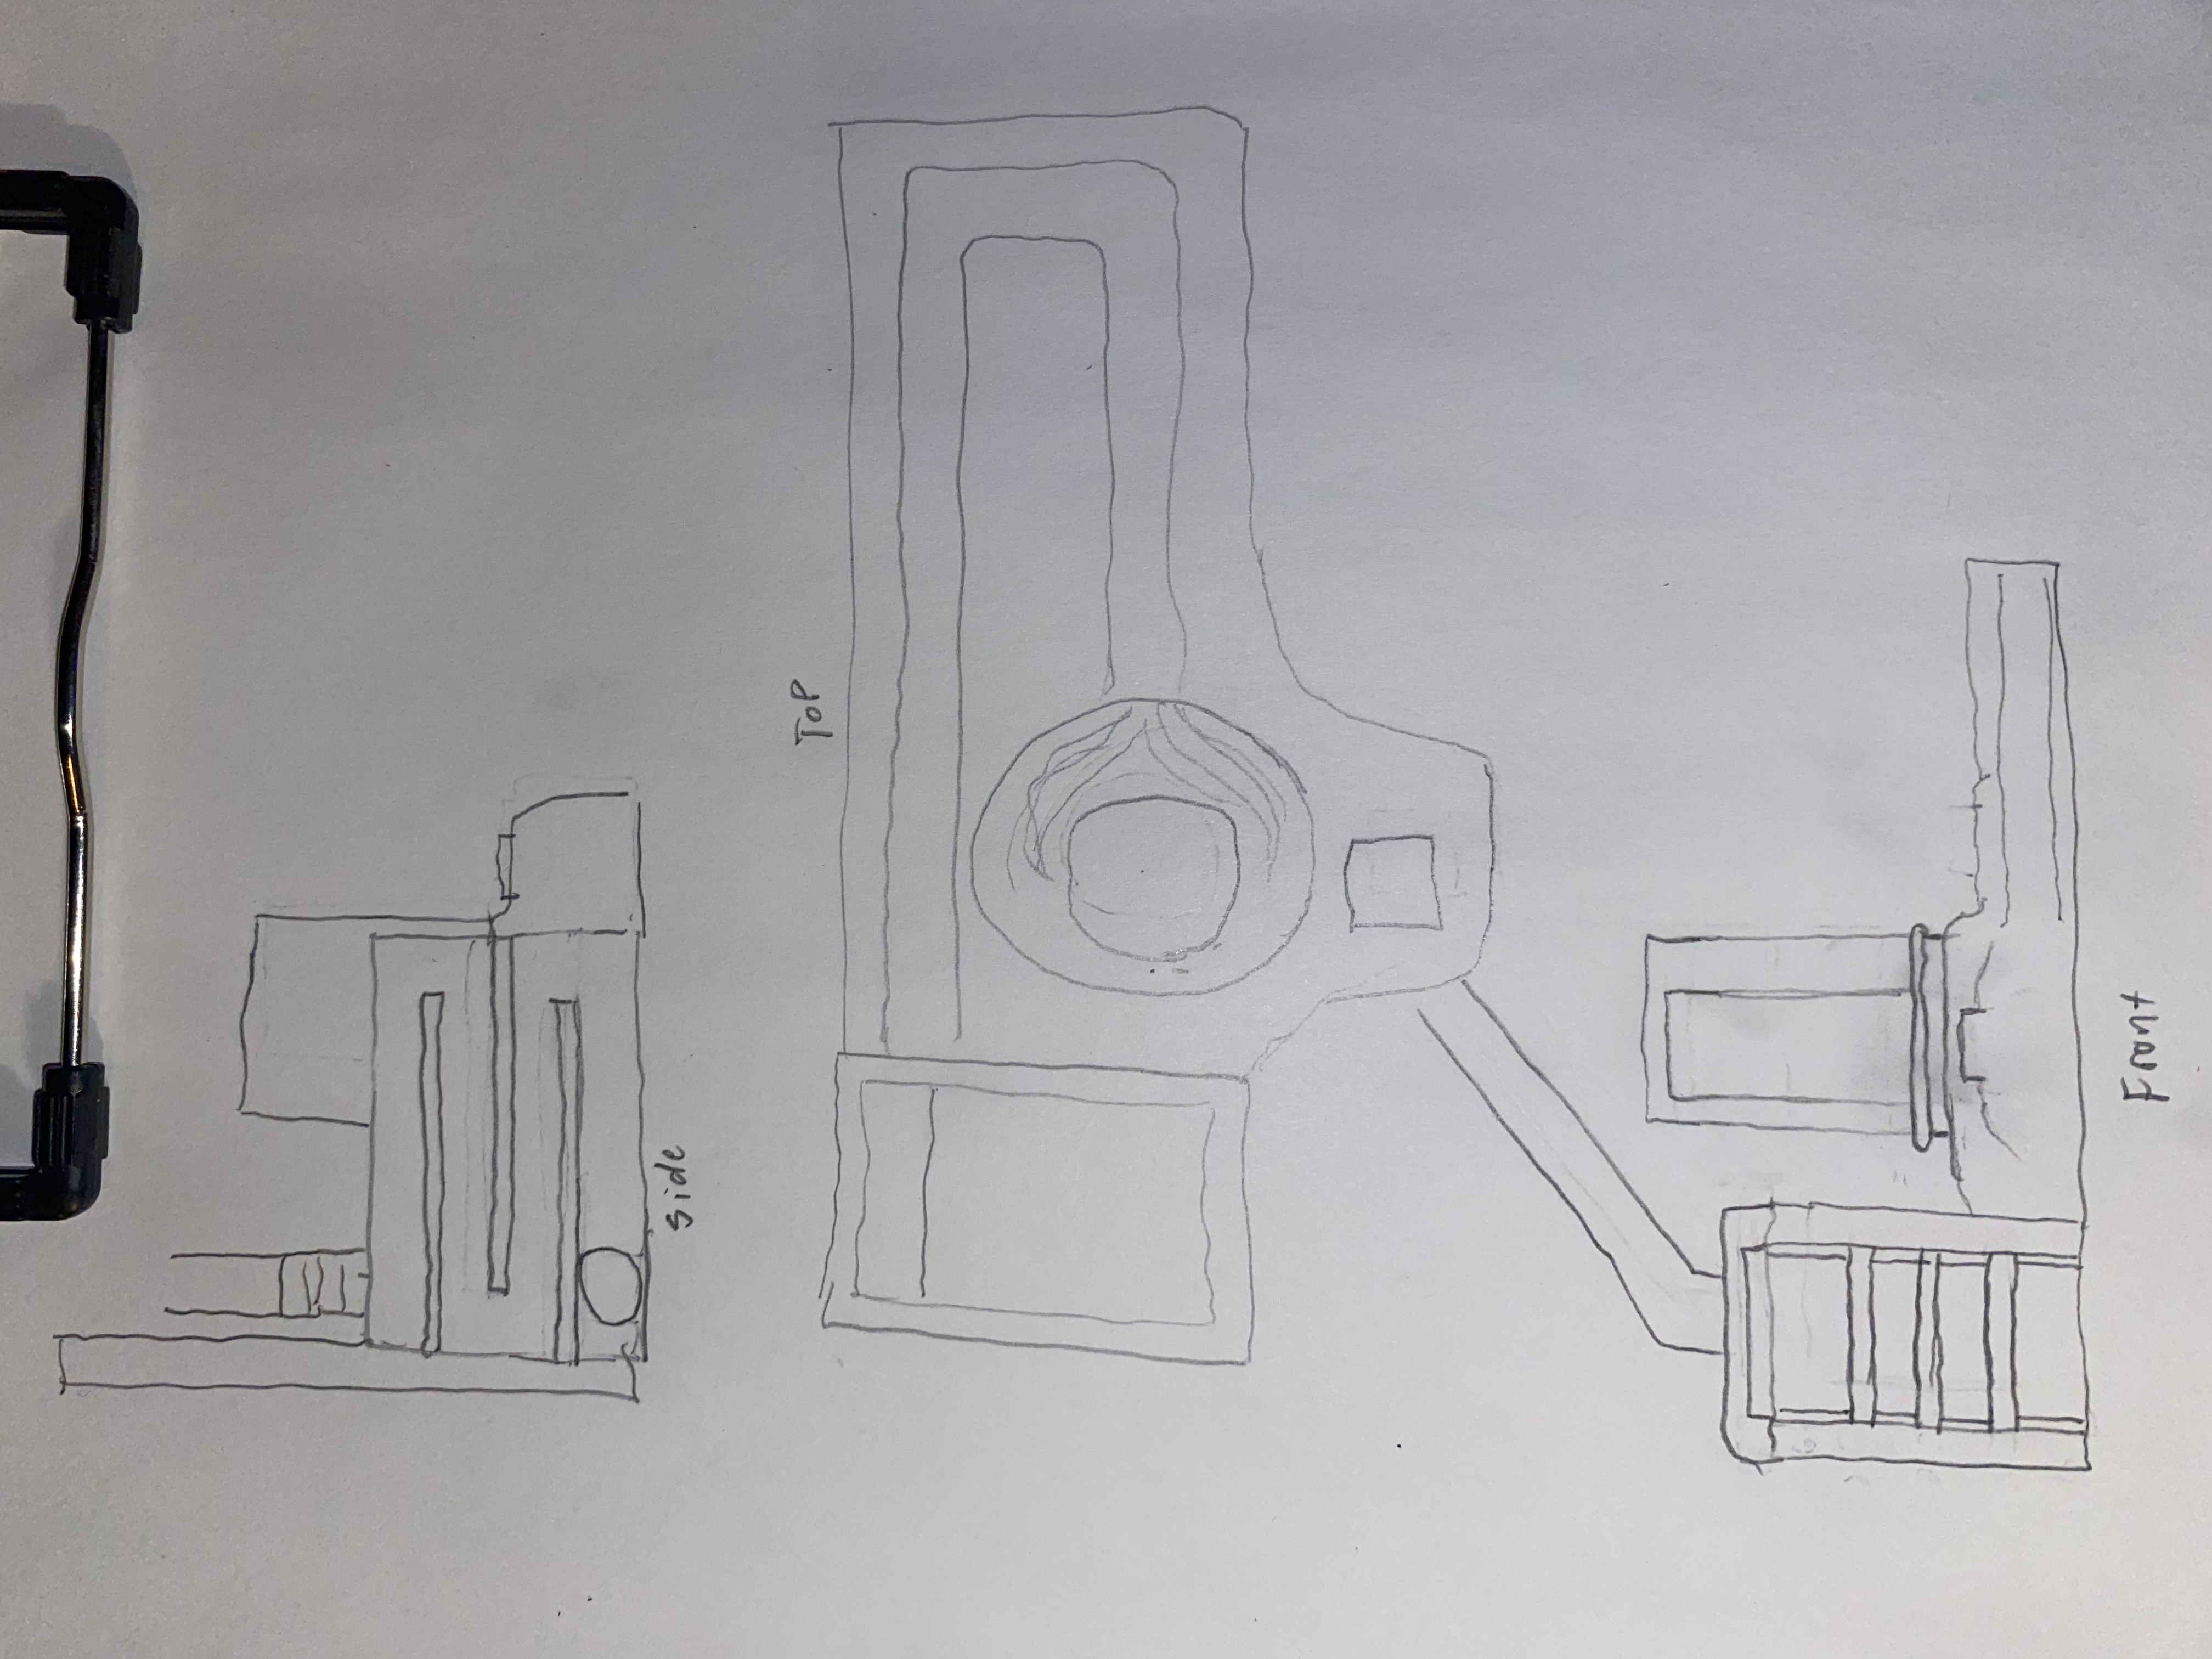
Would this work for my application? I have 2x8x16” pavers I can use for the masonry bell to make the baffles. This inside of the existing bog is 16.5” x 28 so I’d end up with roughly a 5” baffle by 16. Baffle height is 6”. 6” of the heat riser down through the bench mass and ito the bell to exhaust up and out the chimney. Going this route if I can just seal the inside or outside of the masonry bell with cob or clay, make an insulated heat riser with clay/perlite, cap the masonry bell with the 2” paver then finish and seal with top with cob then all I have to purchase is refractory bricks for the core, bench duct a bit of the white insulation, gasket for barrel seal, lock ring for barrel seal. What do y’all think?I am on a ver tight budget.
IMG_2633.jpeg
[Thumbnail for IMG_2633.jpeg]
 
Glenn Herbert
Rocket Scientist
Posts: 4842
Location: Upstate NY, zone 5
799
5
  • Likes 10
  • Mark post as helpful
  • send pies
    Number of slices to send:
    Optional 'thank-you' note:
  • Quote
  • Report post to moderator
There is no reason to use baffles to force a convoluted flow path in the bell (not actually functioning as a bell in your sketch).

What I would recommend is to make the bench an open cavity with just enough brick pillars inside to support the roof/seat, with the manifold open all around and into the side of the existing box, so gases can flow freely. Then have a stovepipe from low in the middle back of the bench to the chimney. Hot gases will naturally flow into the box and upper layer of bench cavity, and cooler gases will sink to the floor and out through the stovepipe to the chimney.
 
Shawn Carey
Posts: 11
7
  • Likes 9
  • Mark post as helpful
  • send pies
    Number of slices to send:
    Optional 'thank-you' note:
  • Quote
  • Report post to moderator
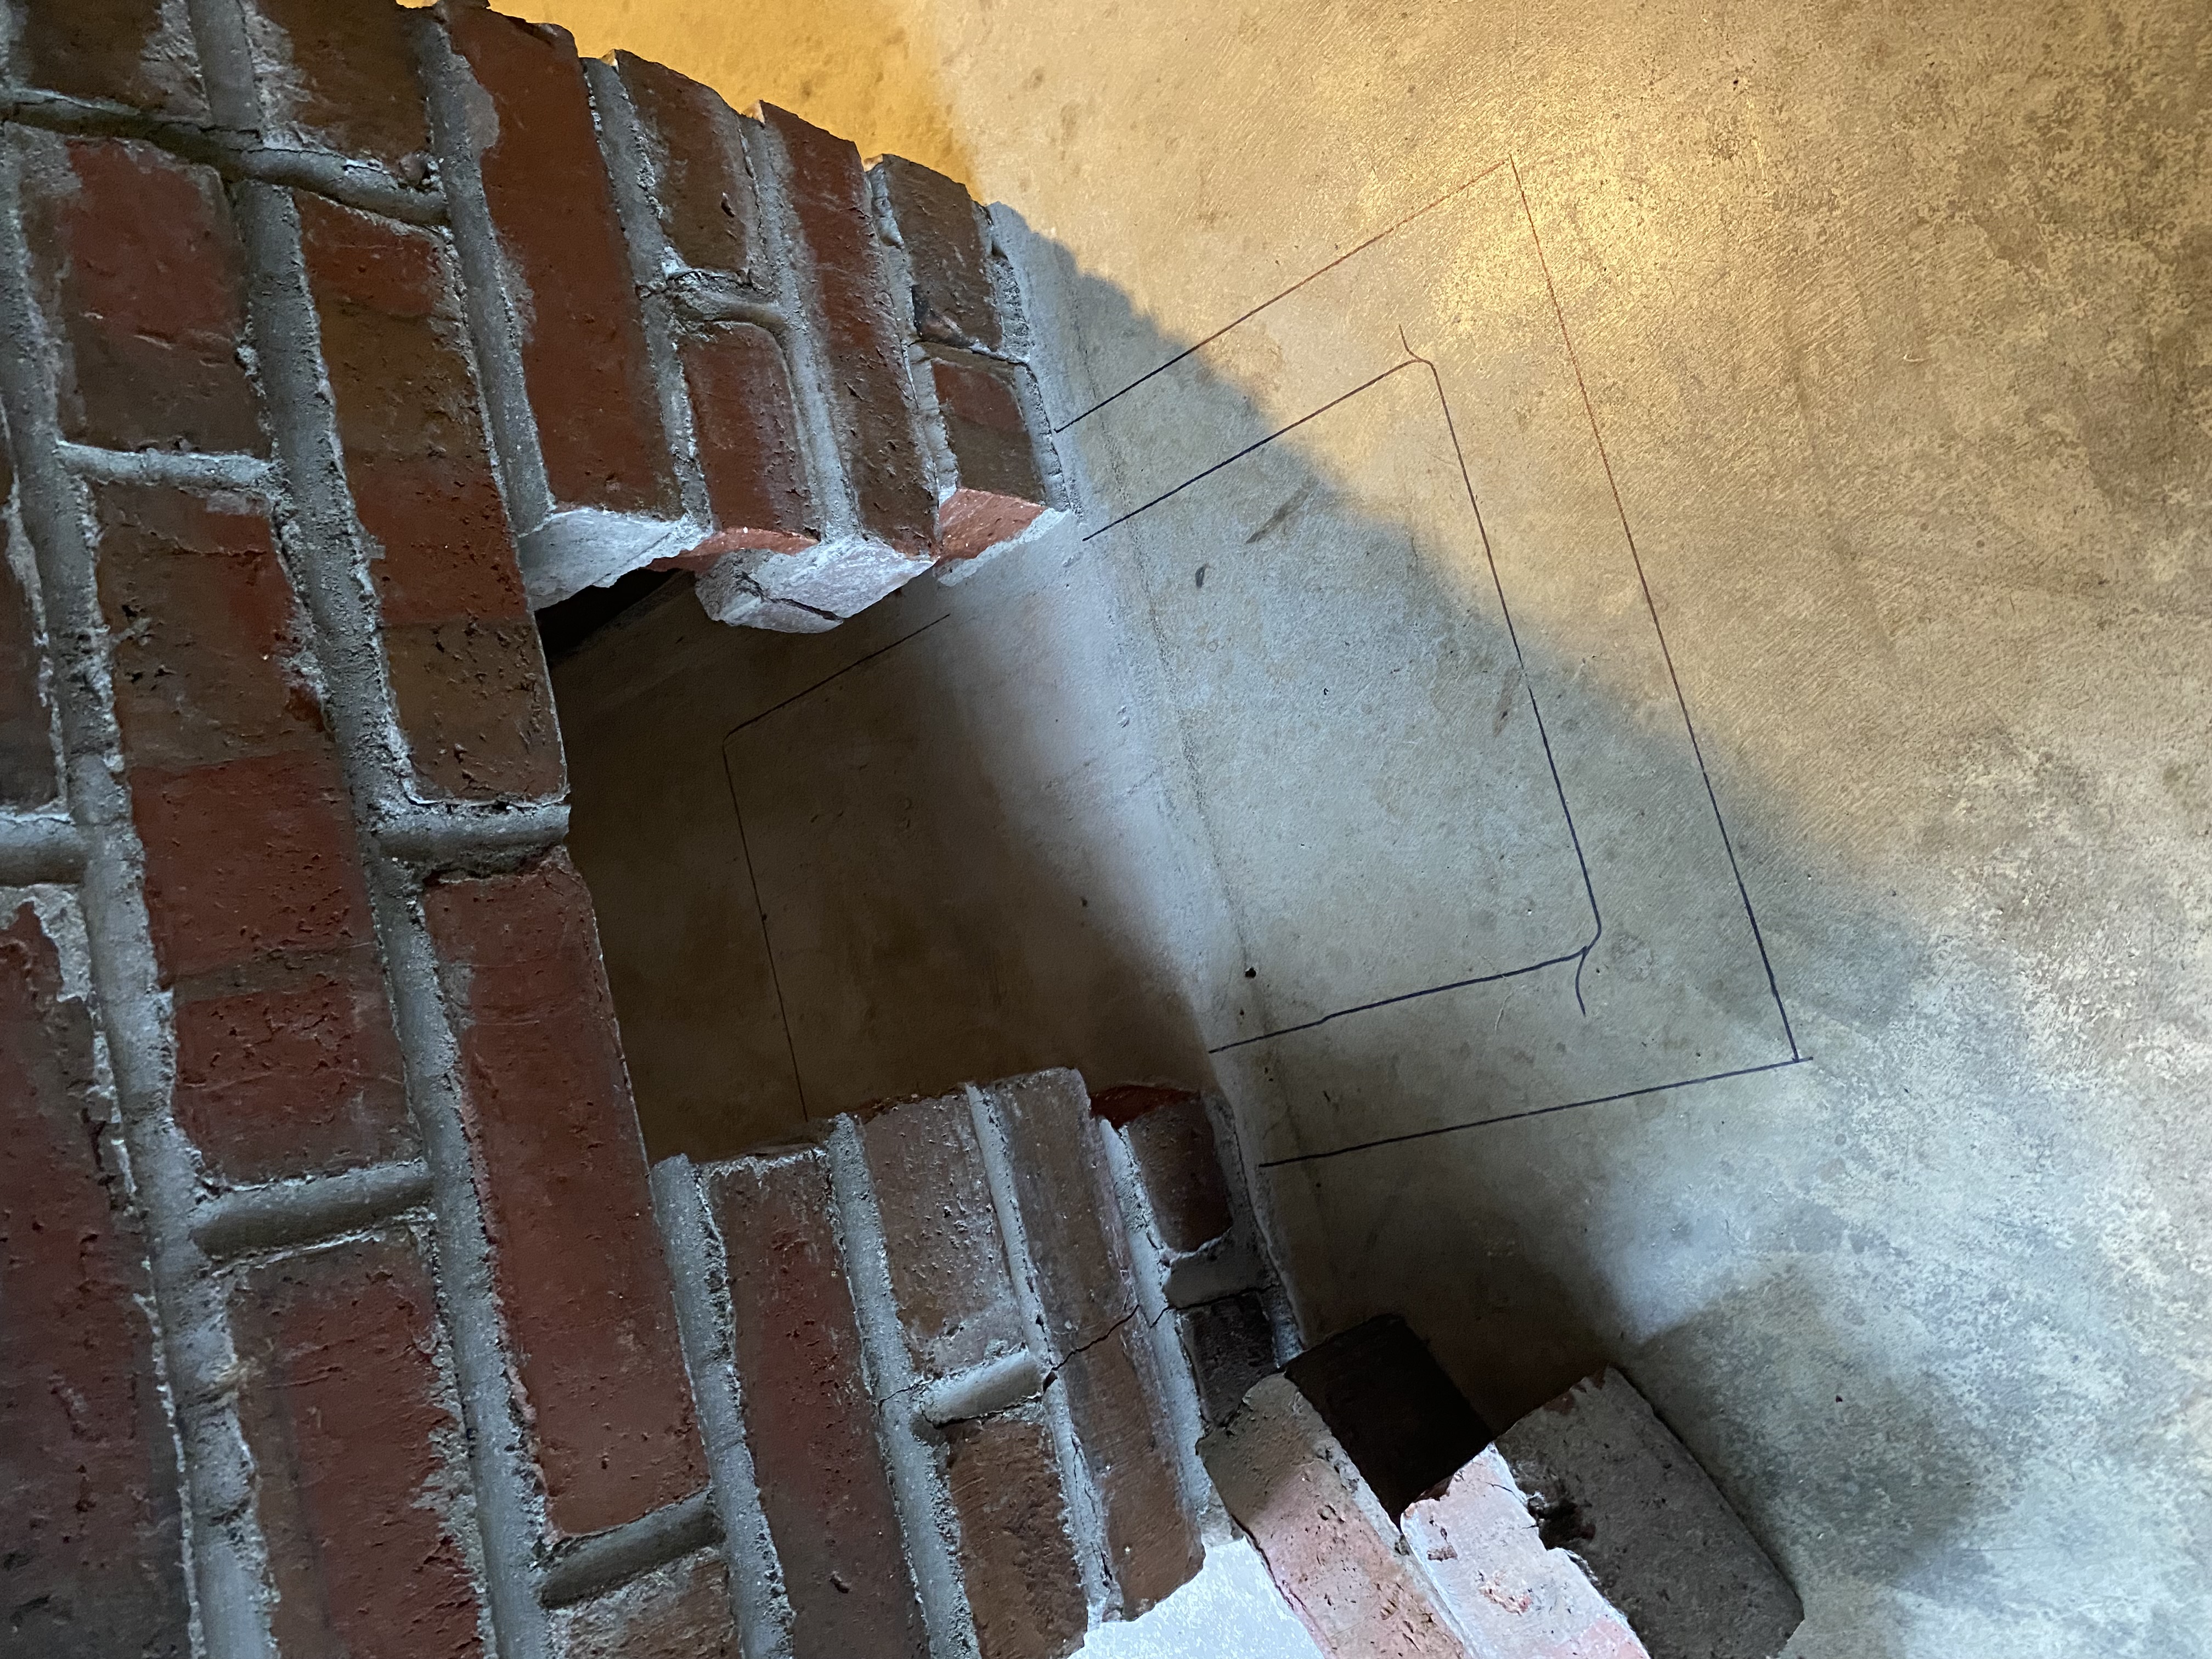
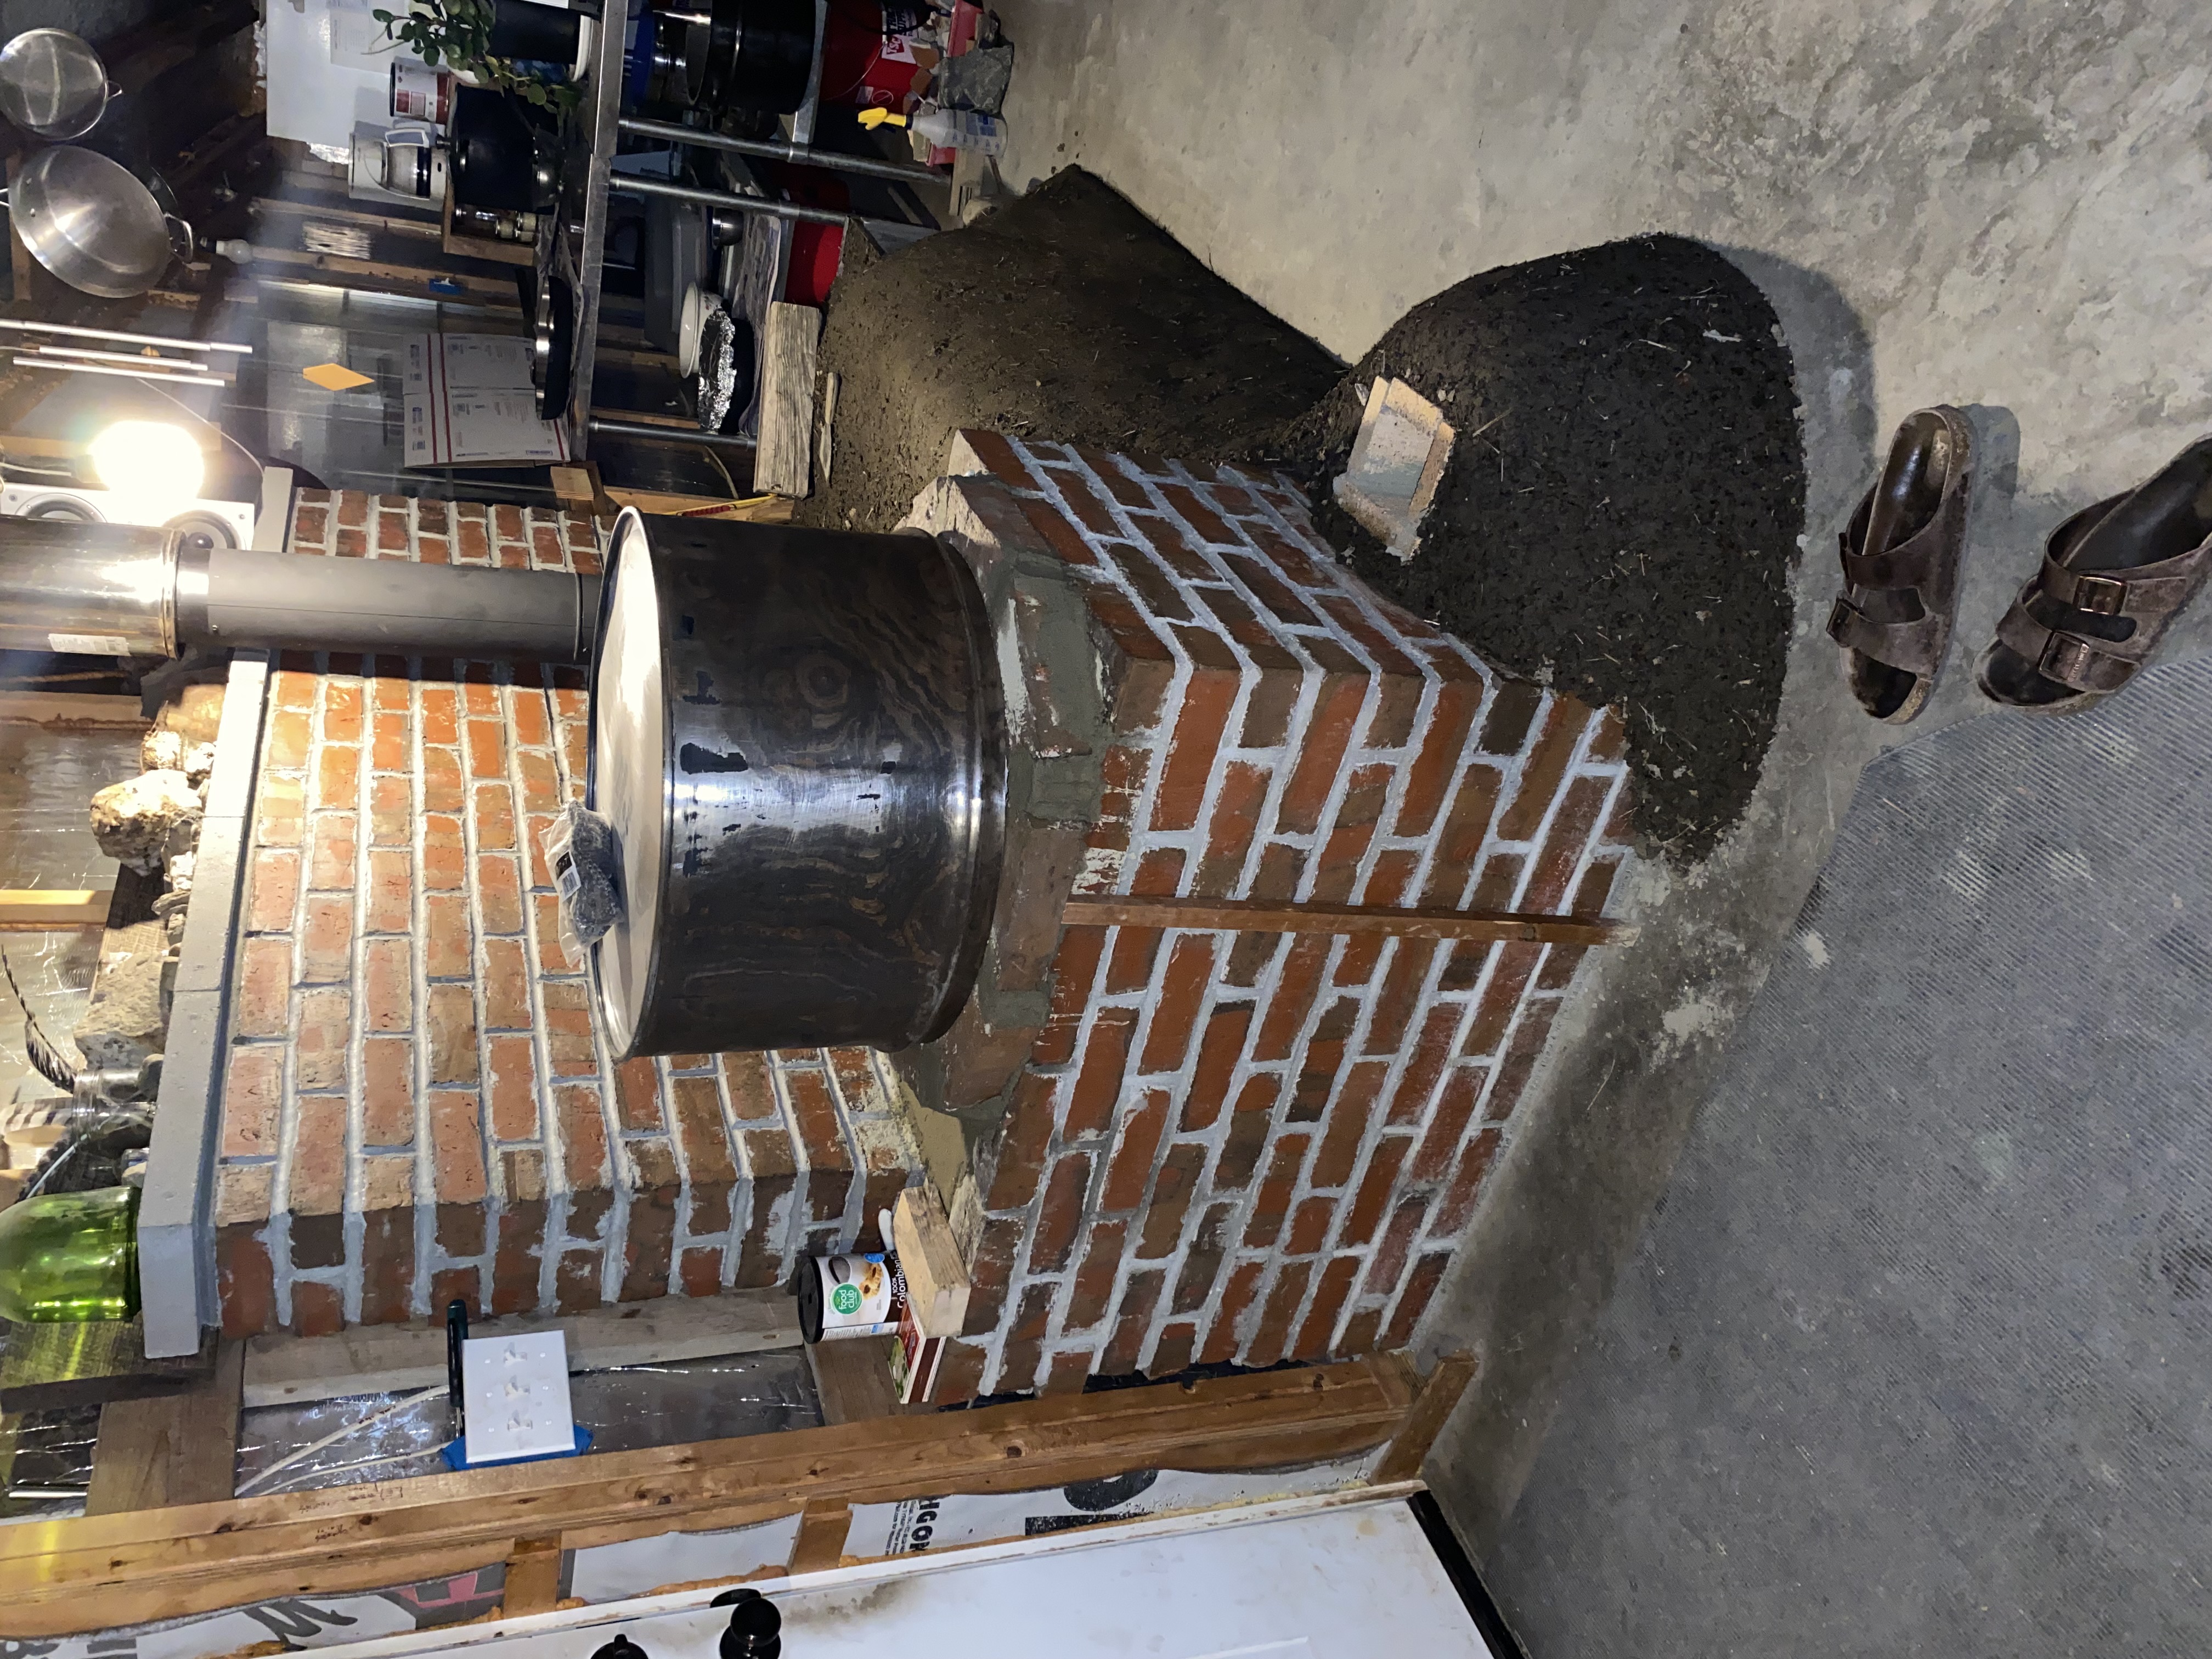
So this is a 4x4.5” 18” tunnel and 36” riser. I am thinking I use the existing wood box as a bell by cutting opens the bottom middle front and sliding the tunnel and feed in and put the riser on it. I’ll add one more course of bricks which will allow me to embed struts to span the top of the wood box in order to set the barrel bell on top and then put a 14” of a barrel top on top. We will put a lot of mass behind the barrel bell to stop the radiant on the wall and light switch. I will be cobbing the whole wood box to seal it. When attaching the barrel to the masonry bell should I have a top and bottom transfer tube and if so can these be larger than 4” or match the 6” chimney flue juice box? We want to do a flat bench wide open inside but with limited materials it is hard to span 32” x 64 flat. I could make the bench walls out of 2x8x16 block or pavers. I have some aluminum track used for mounting dolor panels to racks or roofs that I can use for struts to span the bench and I have some corrugated metal roofing to sit on the struts to pack cob on if that works then I can scrap the barrel storage bench because the barrel bench will have terrible hotspots. Is it ok to have a 16”H open cavity and 4-5” of cob on top of the metal roofing? Btw I can make a taller heat riser if necessary. I will be packing the feed tube, tunnel and start of riser with clay/perlite and make a clay/perlite 4x4 riser. I hope this works!!
IMG_2644.jpeg
[Thumbnail for IMG_2644.jpeg]
 
Glenn Herbert
Rocket Scientist
Posts: 4842
Location: Upstate NY, zone 5
799
5
  • Likes 7
  • Mark post as helpful
  • send pies
    Number of slices to send:
    Optional 'thank-you' note:
  • Quote
  • Report post to moderator
A 4" J-tube core which is what you are describing may or may not function well depending on exact details, but in any case is much too small to do you any good. What is the character and size of your existing chimney? If at least 6" metal or 8x8 flue tile, and the chimney draws positively when first started, I believe you could put an 8" J-tube core in, which would give enough heat to warm the space well without feeding it all day.

I have a bunch more to say but have to run now. I will post again this afternoon with details.
 
Glenn Herbert
Rocket Scientist
Posts: 4842
Location: Upstate NY, zone 5
799
5
  • Likes 10
  • Mark post as helpful
  • send pies
    Number of slices to send:
    Optional 'thank-you' note:
  • Quote
  • Report post to moderator
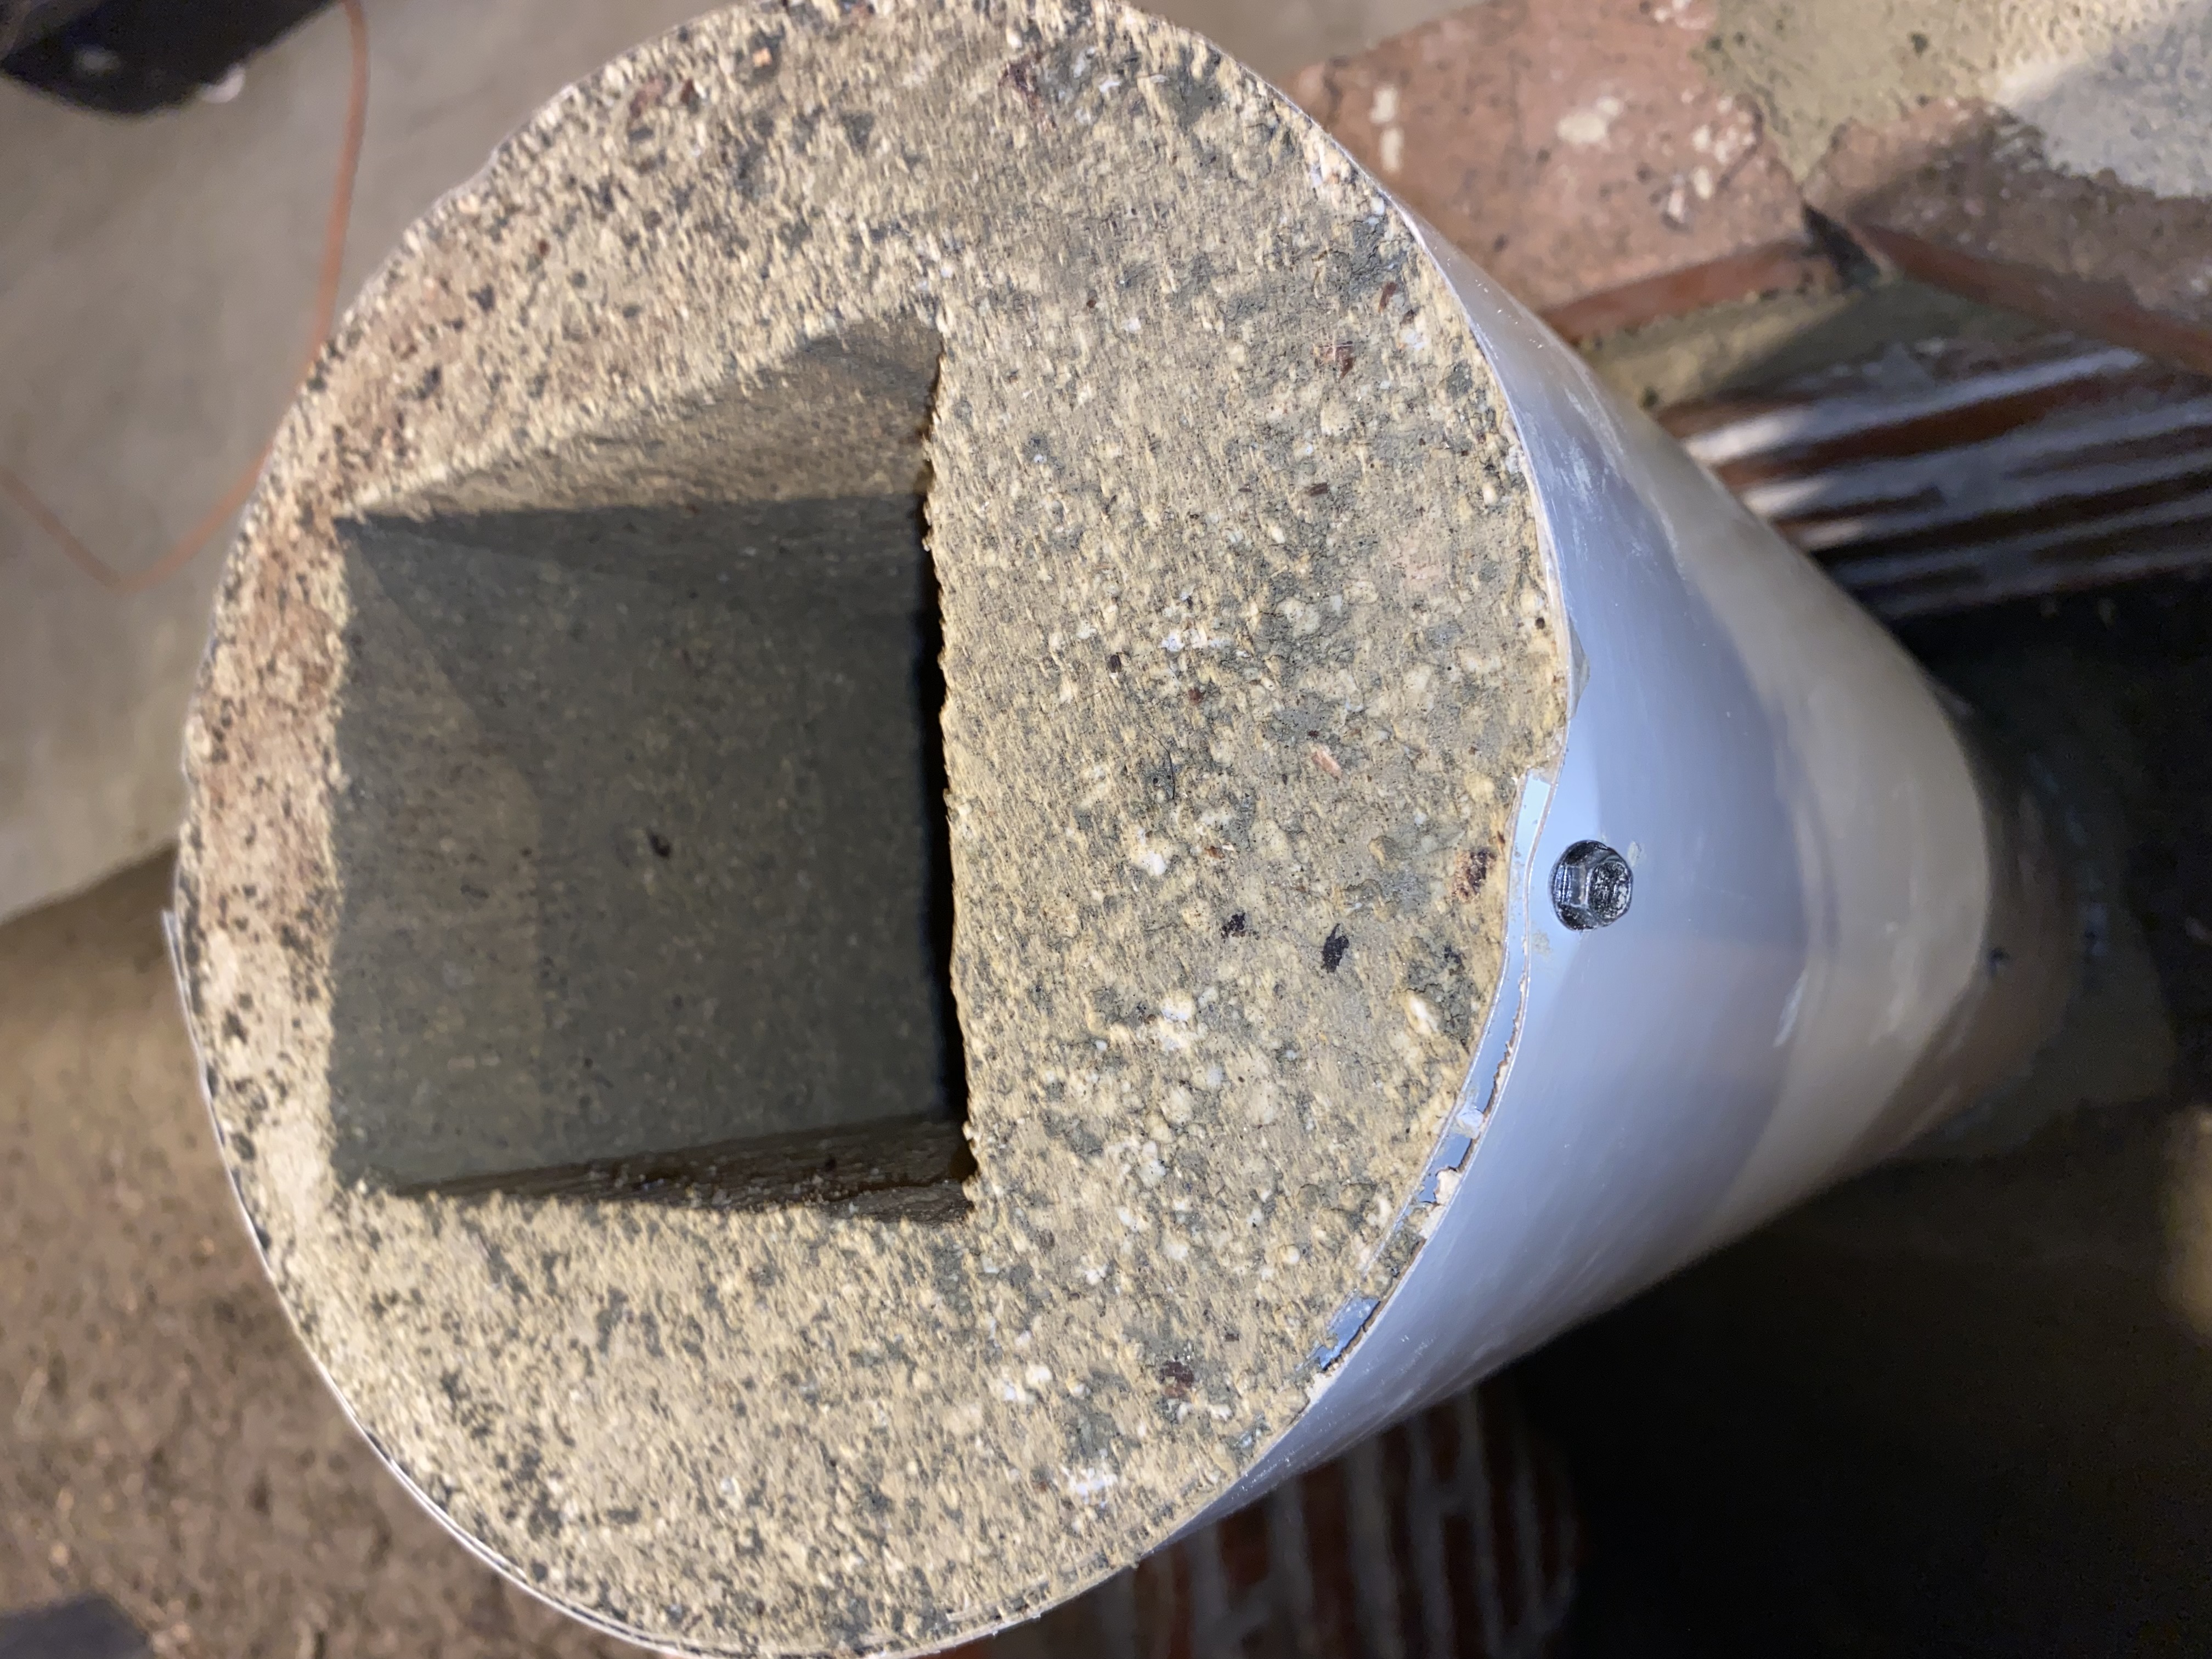
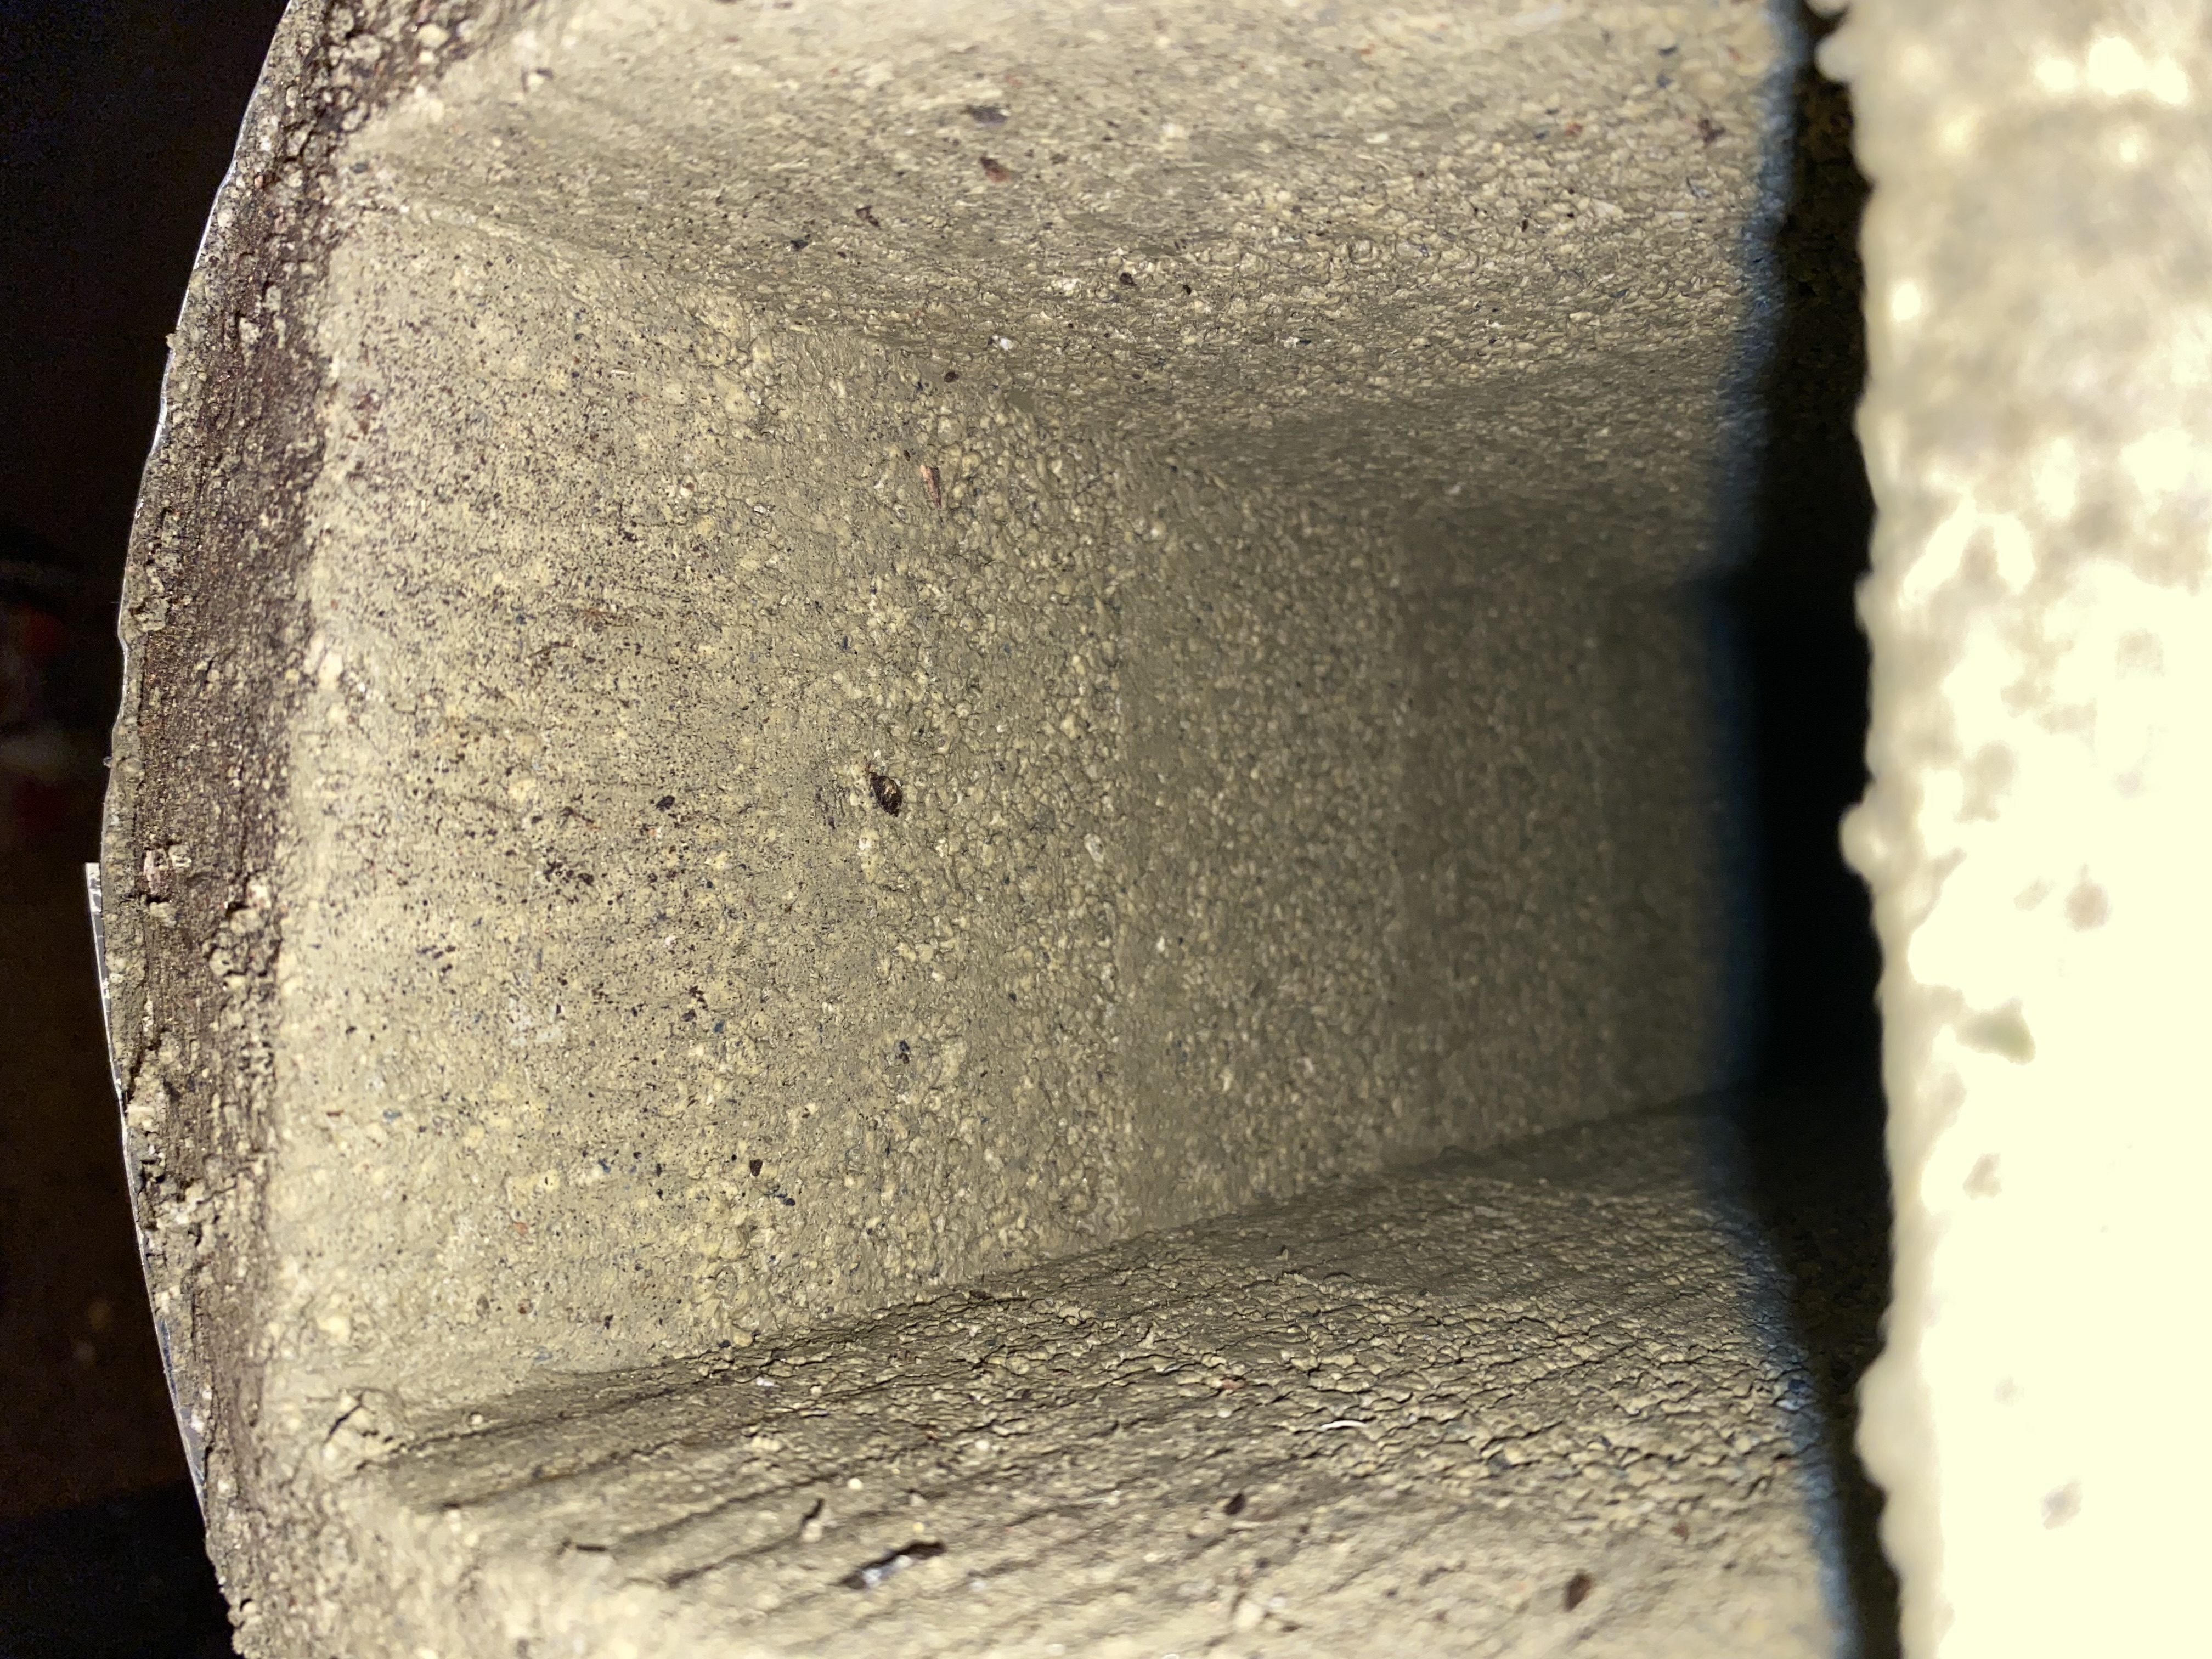
If you want the J-tube feed to stick out of the front of the wood box, an 8" core can work fine. Given the framing between the brick box and the doorframe I would go with 3" of cob over the brick - enough to be sturdy but not take too much space or too long for heat to start to come through it. My recommendation would be an 8x8 feed opening, 8" x 9" high burn tunnel with 8-10" long roof, and 8" diameter riser from perlite-clay. You can line the floor with an inch of strong cob, or pieces of firebrick split 1 1/4" thick, to get the right dimension without cutting lots of firebrick. From my experience, you want about 2" thickness on the riser which gives 12" outside diameter. The simplest way to make this is with a piece of 8" sonotube and a pair of 6" stovepipe sections bent out and snapped together to make a 12" sleeve. As it commonly comes in 2' lengths, I would advise three pieces of stovepipe with one cut in half and fitted to itself, giving a 36" height to set on top of the burn tunnel walls. 36 + 8 = 44", which is just enough for an 8" J-tube with 16" high feed tube. See my RMH build for riser construction details.

You need some insulation under the core so the floor doesn't suck heat out of it; an inch or two of perlite-clay under the core would do the job nicely, with scraps of 1 1/4" firebrick at intervals to stabilize things. To strengthen the core, especially the feed tube, I would surround it with at least 4", 6" would be better, of cob with some perlite mixed into the inner couple of inches. This would give a pretty good mix of strength and insulation. I would use a good amount of straw in the main/outer layer, around the feed and around the brick box, so you don't get large cracks.

For the bell bench, I would make walls of 2" thick block as you mentioned, and internal piers of 4" hollow block on end to support the roof, spaced as widely as you can while supporting all the roof panels. I have found 16 x 16 or 18 x 18 concrete pavers at Lowe's or Home Depot, and those supported all around the edges and at corners in the middle will make a good base for a cob seat. The bell cavity will have the coolest air at floor level, but I would still put in an inch of perlite-clay with a smooth hard top for cleanability, after placing structural block.
 
Shawn Carey
Posts: 11
7
  • Likes 12
  • Mark post as helpful
  • send pies
    Number of slices to send:
    Optional 'thank-you' note:
  • Quote
  • Report post to moderator
4.75 x 4
9 x 18 x 39
Hole to bench is roughly 5 x 6

I did not realize I can cob the whole fire brick plenum. Everything I see and hear says insulation with white or mineral. Had I known I can cob it for structural integrity I definitely would have.

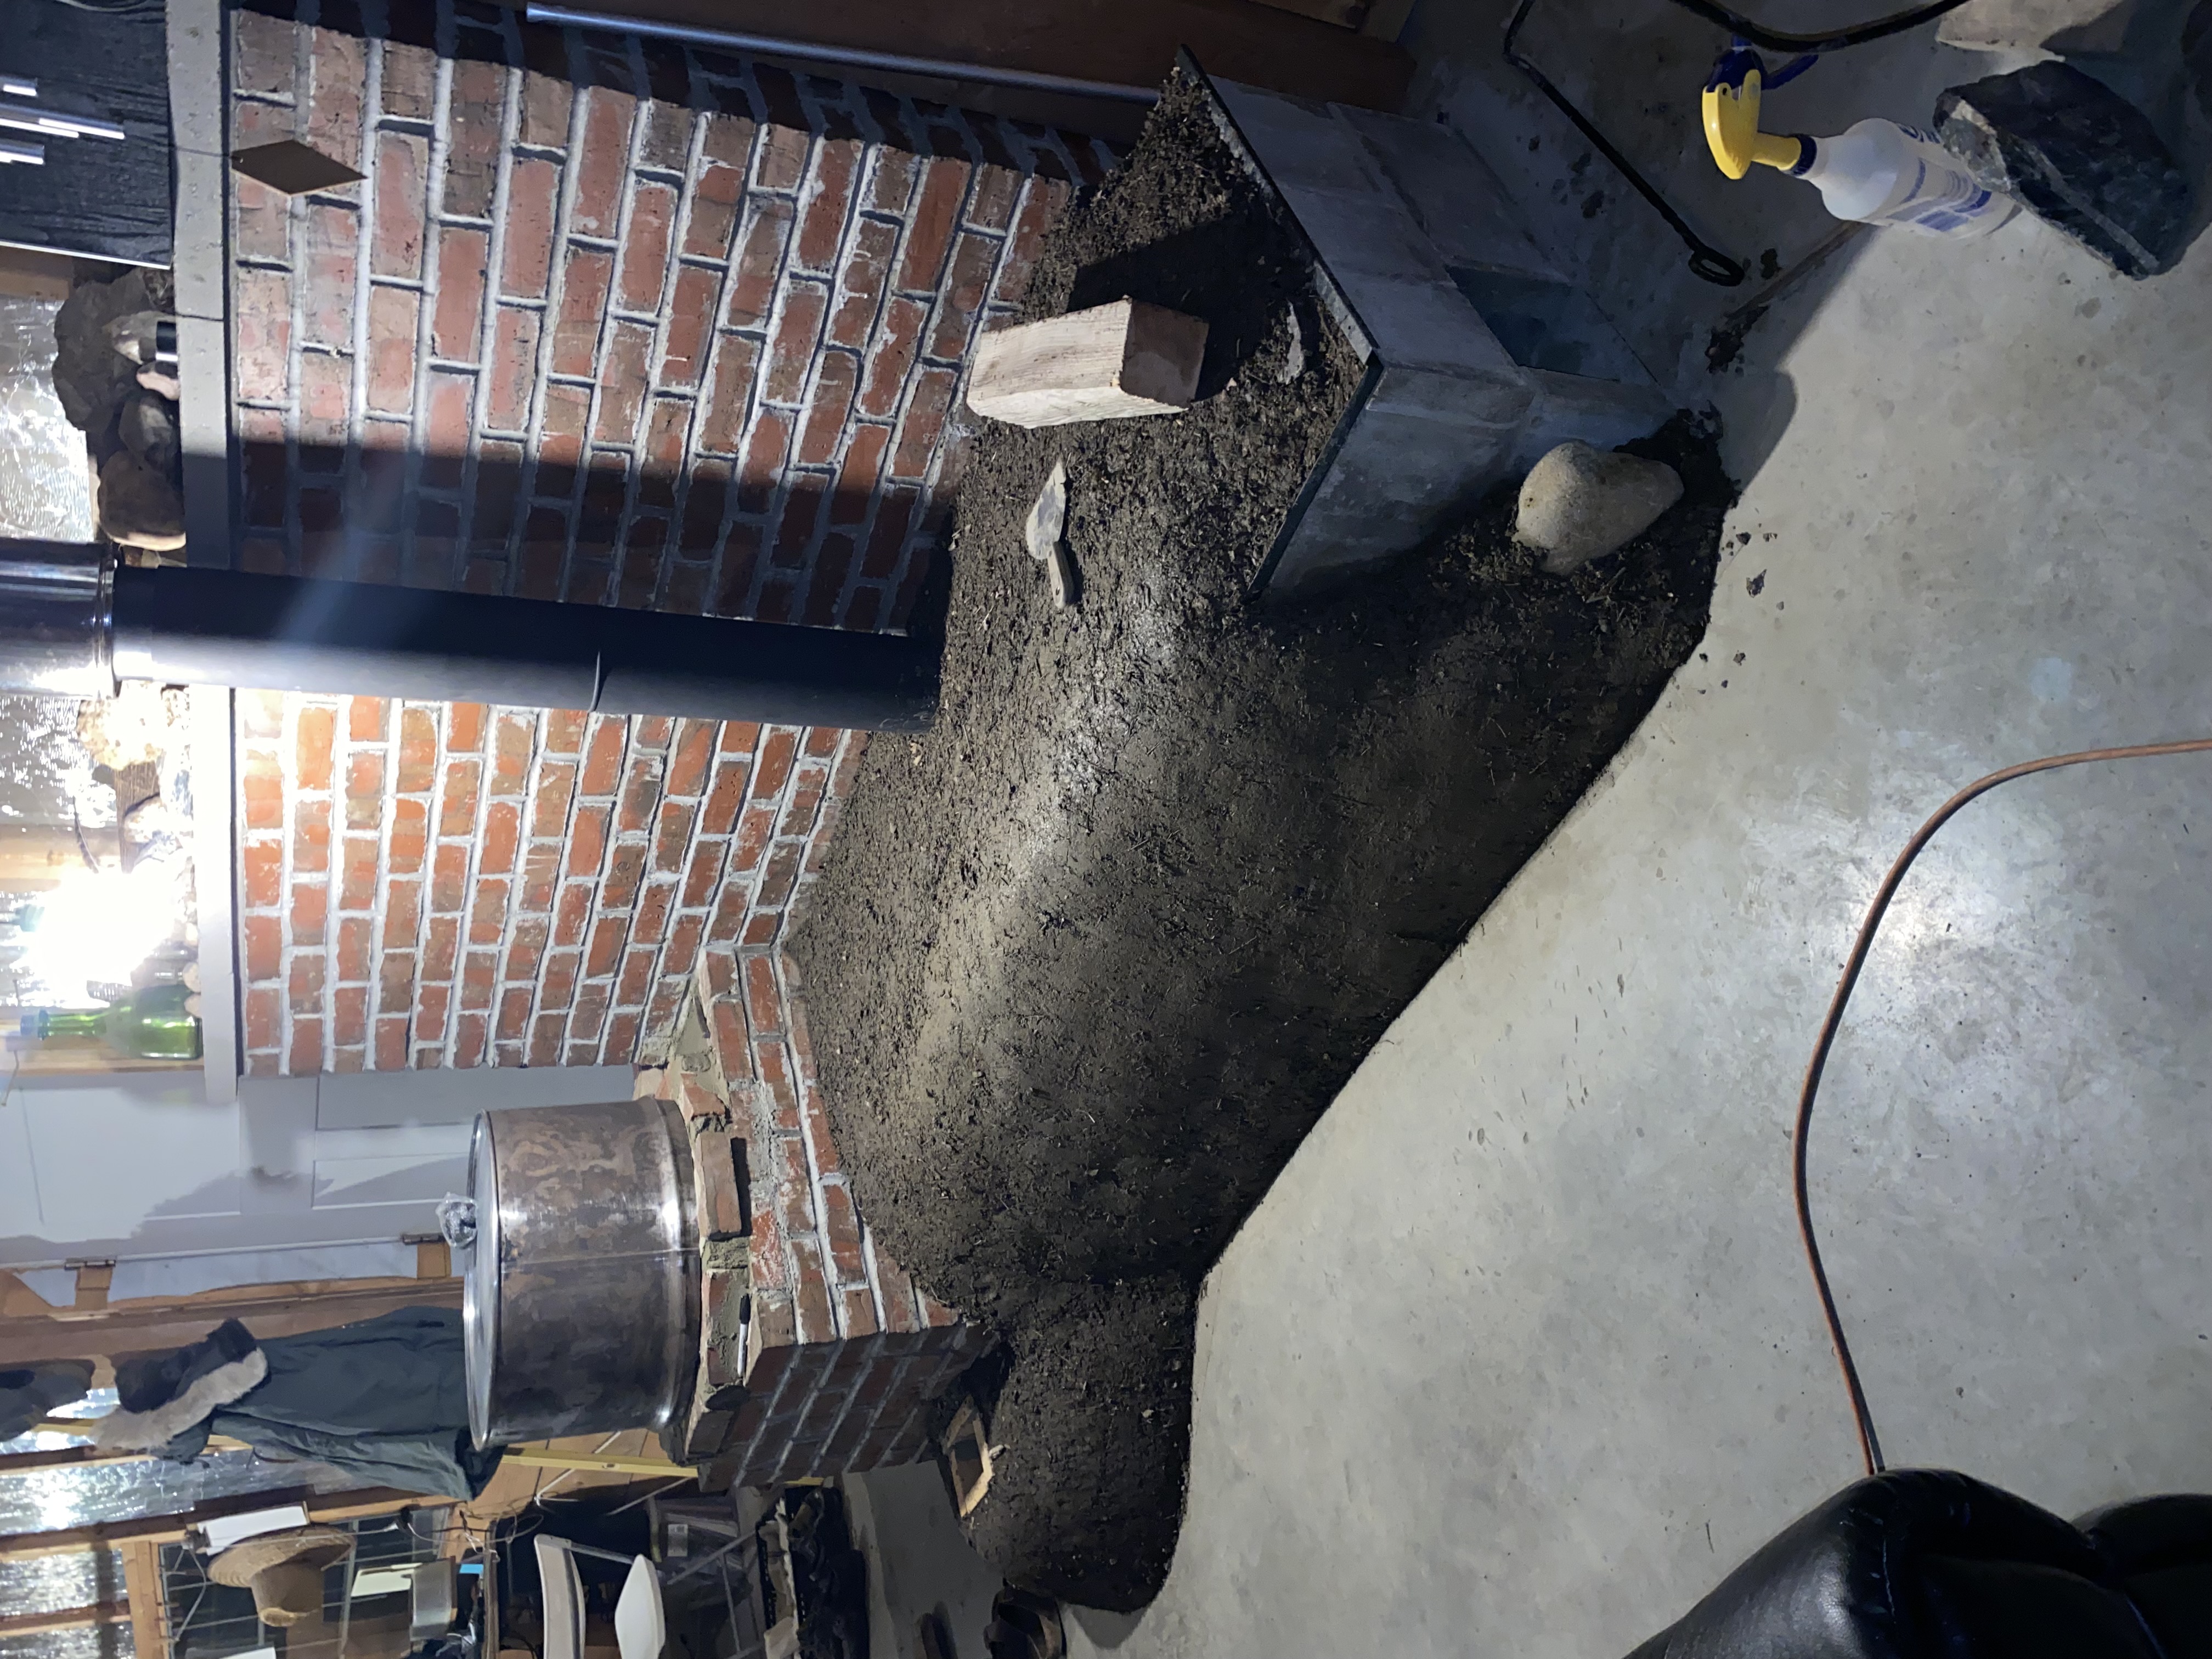
On the note of using a 4x4 to heat our home, we have had heat in our house yet this year and I just checked all our surface temps with a laser gauge and I had 63-67 degrees. Our house is very insulated and have lots of passive solar shining onto concrete all day. We use 4” rocket stoves twice a day to cook with and they can throw some good heat and that’s in an L configuration. Honestly the heat off the drum alone for an hour or 2 a day twice a day will probably heat our home.

We will be able to do a pre fire tomorrow at some point I will keep you all posted.
IMG_2652.jpeg
[Thumbnail for IMG_2652.jpeg]
IMG_2653.jpeg
[Thumbnail for IMG_2653.jpeg]
IMG_2656.jpeg
[Thumbnail for IMG_2656.jpeg]
IMG_2660.jpeg
[Thumbnail for IMG_2660.jpeg]
IMG_2659.jpeg
[Thumbnail for IMG_2659.jpeg]
IMG_2663.jpeg
[Thumbnail for IMG_2663.jpeg]
IMG_2664.jpeg
[Thumbnail for IMG_2664.jpeg]
IMG_2665.jpeg
[Thumbnail for IMG_2665.jpeg]
IMG_2666.jpeg
[Thumbnail for IMG_2666.jpeg]
IMG_2670.jpeg
[Thumbnail for IMG_2670.jpeg]
IMG_2669.jpeg
[Thumbnail for IMG_2669.jpeg]
IMG_2674.jpeg
[Thumbnail for IMG_2674.jpeg]
IMG_2677.jpeg
[Thumbnail for IMG_2677.jpeg]
IMG_2678.jpeg
[Thumbnail for IMG_2678.jpeg]
IMG_2679.jpeg
[Thumbnail for IMG_2679.jpeg]
IMG_2680.jpeg
[Thumbnail for IMG_2680.jpeg]
IMG_2683.jpeg
[Thumbnail for IMG_2683.jpeg]
IMG_2685.jpeg
[Thumbnail for IMG_2685.jpeg]
IMG_2684.jpeg
[Thumbnail for IMG_2684.jpeg]
 
Shawn Carey
Posts: 11
7
  • Likes 7
  • Mark post as helpful
  • send pies
    Number of slices to send:
    Optional 'thank-you' note:
  • Quote
  • Report post to moderator
Why cant’t I put a flew damper in the chimney flue to slow down the draft in order to hold more heat. I don’t think I’ll have an issue with combustion once the tunnel and riser heat up so why not slow the flow down? If I have 12” sticks in the I feed it’ll be kind of hard to restrict the draft with a brick or tile.
 
Rocket Scientist
Posts: 899
Location: Guernsey a small island near France.
418
  • Likes 9
  • Mark post as helpful
  • send pies
    Number of slices to send:
    Optional 'thank-you' note:
  • Quote
  • Report post to moderator
You can fit a damper and see if you can find a use for it but there are a few facts to bare in mind, in order to burn cleanly, rockets stoves need to burn hot and fast so air flow is a very important aspect.
I like to have as much control over the air flow as possible however with a J tube you are stuffing the main air inlet with wood so you have to be careful to leave enough space and not cram it all in.
There is a very helpful addition you could have added called a ‘P channel’ which is a simple metal plate that allows a guaranteed amount of air into the burn tunnel.
Can I just ask what sort of cement have you used in your build?
 
Glenn Herbert
Rocket Scientist
Posts: 4842
Location: Upstate NY, zone 5
799
5
  • Likes 9
  • Mark post as helpful
  • send pies
    Number of slices to send:
    Optional 'thank-you' note:
  • Quote
  • Report post to moderator
Nice work!

You didn't mention how superinsulated your house is; from talking about using that big kitchen stove, it seemed like you needed an average amount of heat to keep the place warm in winter.

A J-tube feed really should be tall enough to hold your typical fuel and have a brick slid over the top for draft control and emergency shutoff. Depending on a downstream damper for flow control is a dangerous idea, especially if it is possible to severely restrict flow with it. If someone closes it while there are still live coals, you could build up carbon monoxide in the room. Draft control is best done with a closure for the top of the feed tube.

I do have concerns that a small system like yours may take a long time to warm the mass you have. It may be hours after you light it that the cobbed bench starts to get warm. The partial barrel over the riser will throw some instant radiation; only use will show how much.
 
Glenn Herbert
Rocket Scientist
Posts: 4842
Location: Upstate NY, zone 5
799
5
  • Likes 10
  • Mark post as helpful
  • send pies
    Number of slices to send:
    Optional 'thank-you' note:
  • Quote
  • Report post to moderator
You can still add a P-channel to your J-tube feed, just a piece of sheetmetal with edges bent to assure a small clear air path down to the top of the burn tunnel. There are examples elsewhere on Permies.
 
Shawn Carey
Posts: 11
7
  • Likes 6
  • Mark post as helpful
  • send pies
    Number of slices to send:
    Optional 'thank-you' note:
  • Quote
  • Report post to moderator

Fox James wrote:You can fit a damper and see if you can find a use for it but there are a few facts to bare in mind, in order to burn cleanly, rockets stoves need to burn hot and fast so air flow is a very important aspect.
I like to have as much control over the air flow as possible however with a J tube you are stuffing the main air inlet with wood so you have to be careful to leave enough space and not cram it all in.
There is a very helpful addition you could have added called a ‘P channel’ which is a simple metal plate that allows a guaranteed amount of air into the burn tunnel.
Can I just ask what sort of cement have you used in your build?


The brick box was built 7 years ago with Portland. The brick ring on top of it I used clay sand. Inside the brick box I constructed a heat shield against the back wall using 1/4 hardware cloth and cay perlite everything else in the bell and burn chamber if clay sand and cob. Bench is 2” pavers with Portland. Covered now with clay, screened 1/2” sand and leaves run through a mulcher.
 
Shawn Carey
Posts: 11
7
  • Likes 9
  • Mark post as helpful
  • send pies
    Number of slices to send:
    Optional 'thank-you' note:
  • Quote
  • Report post to moderator
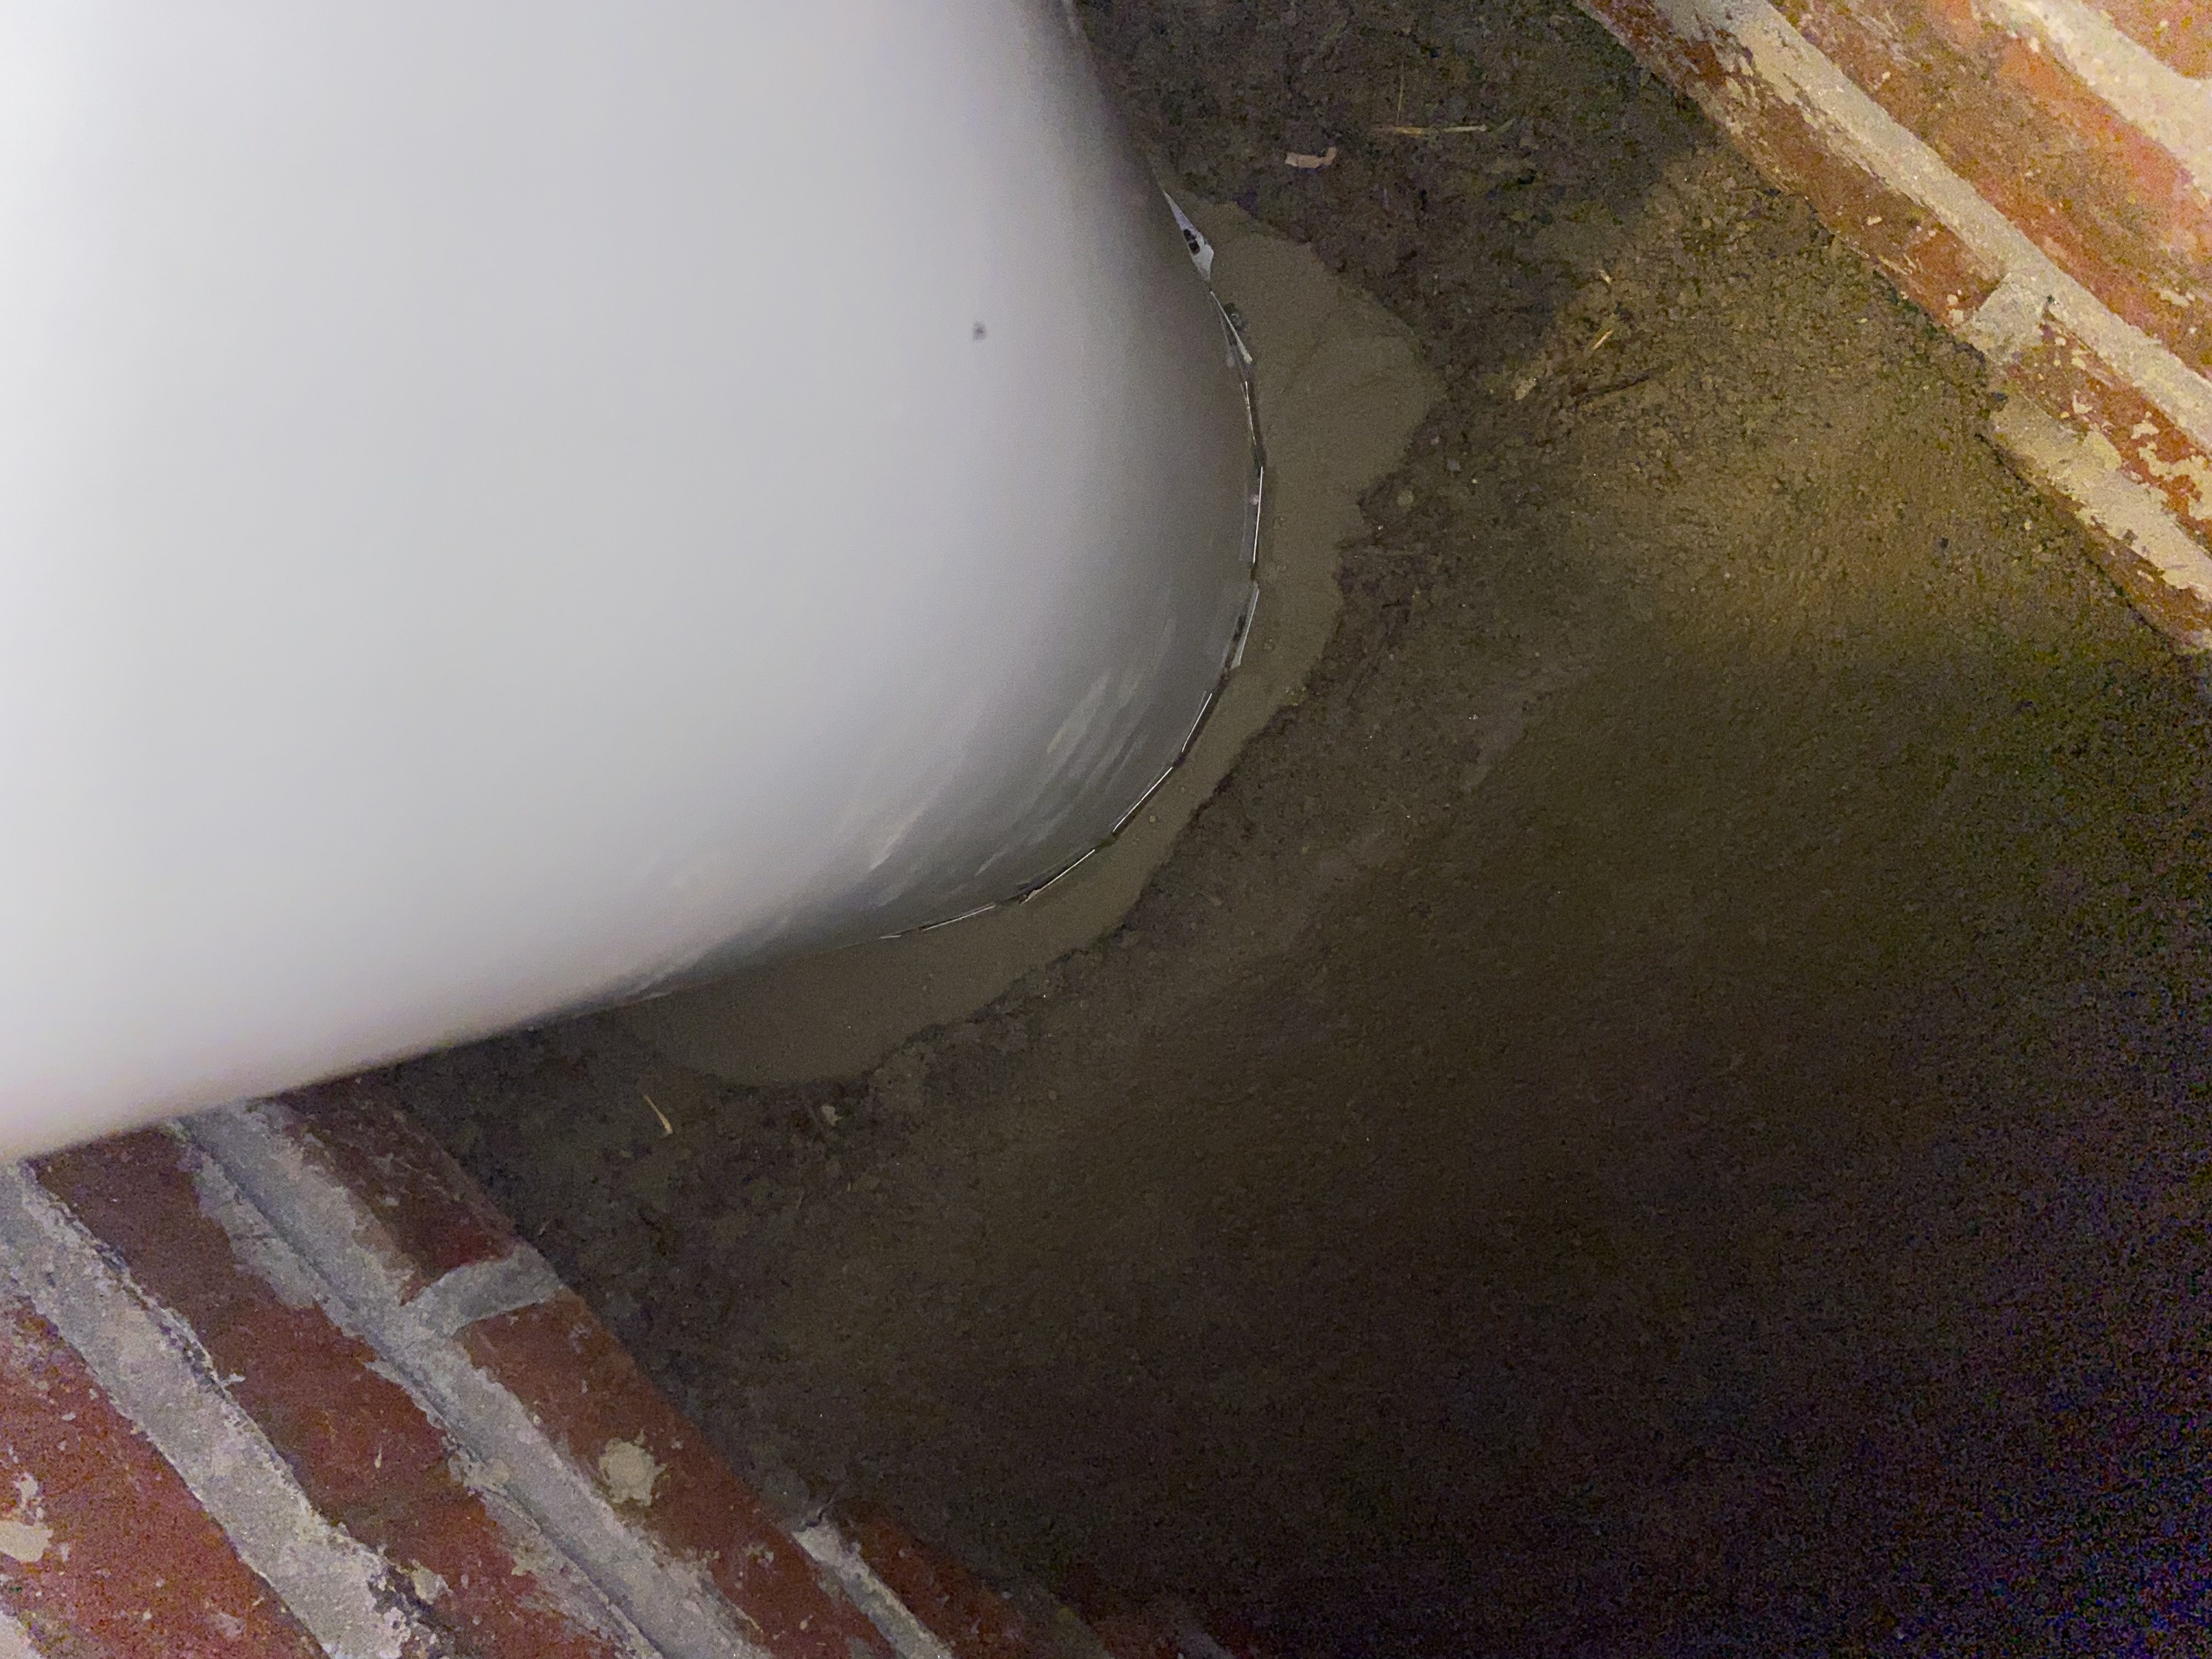
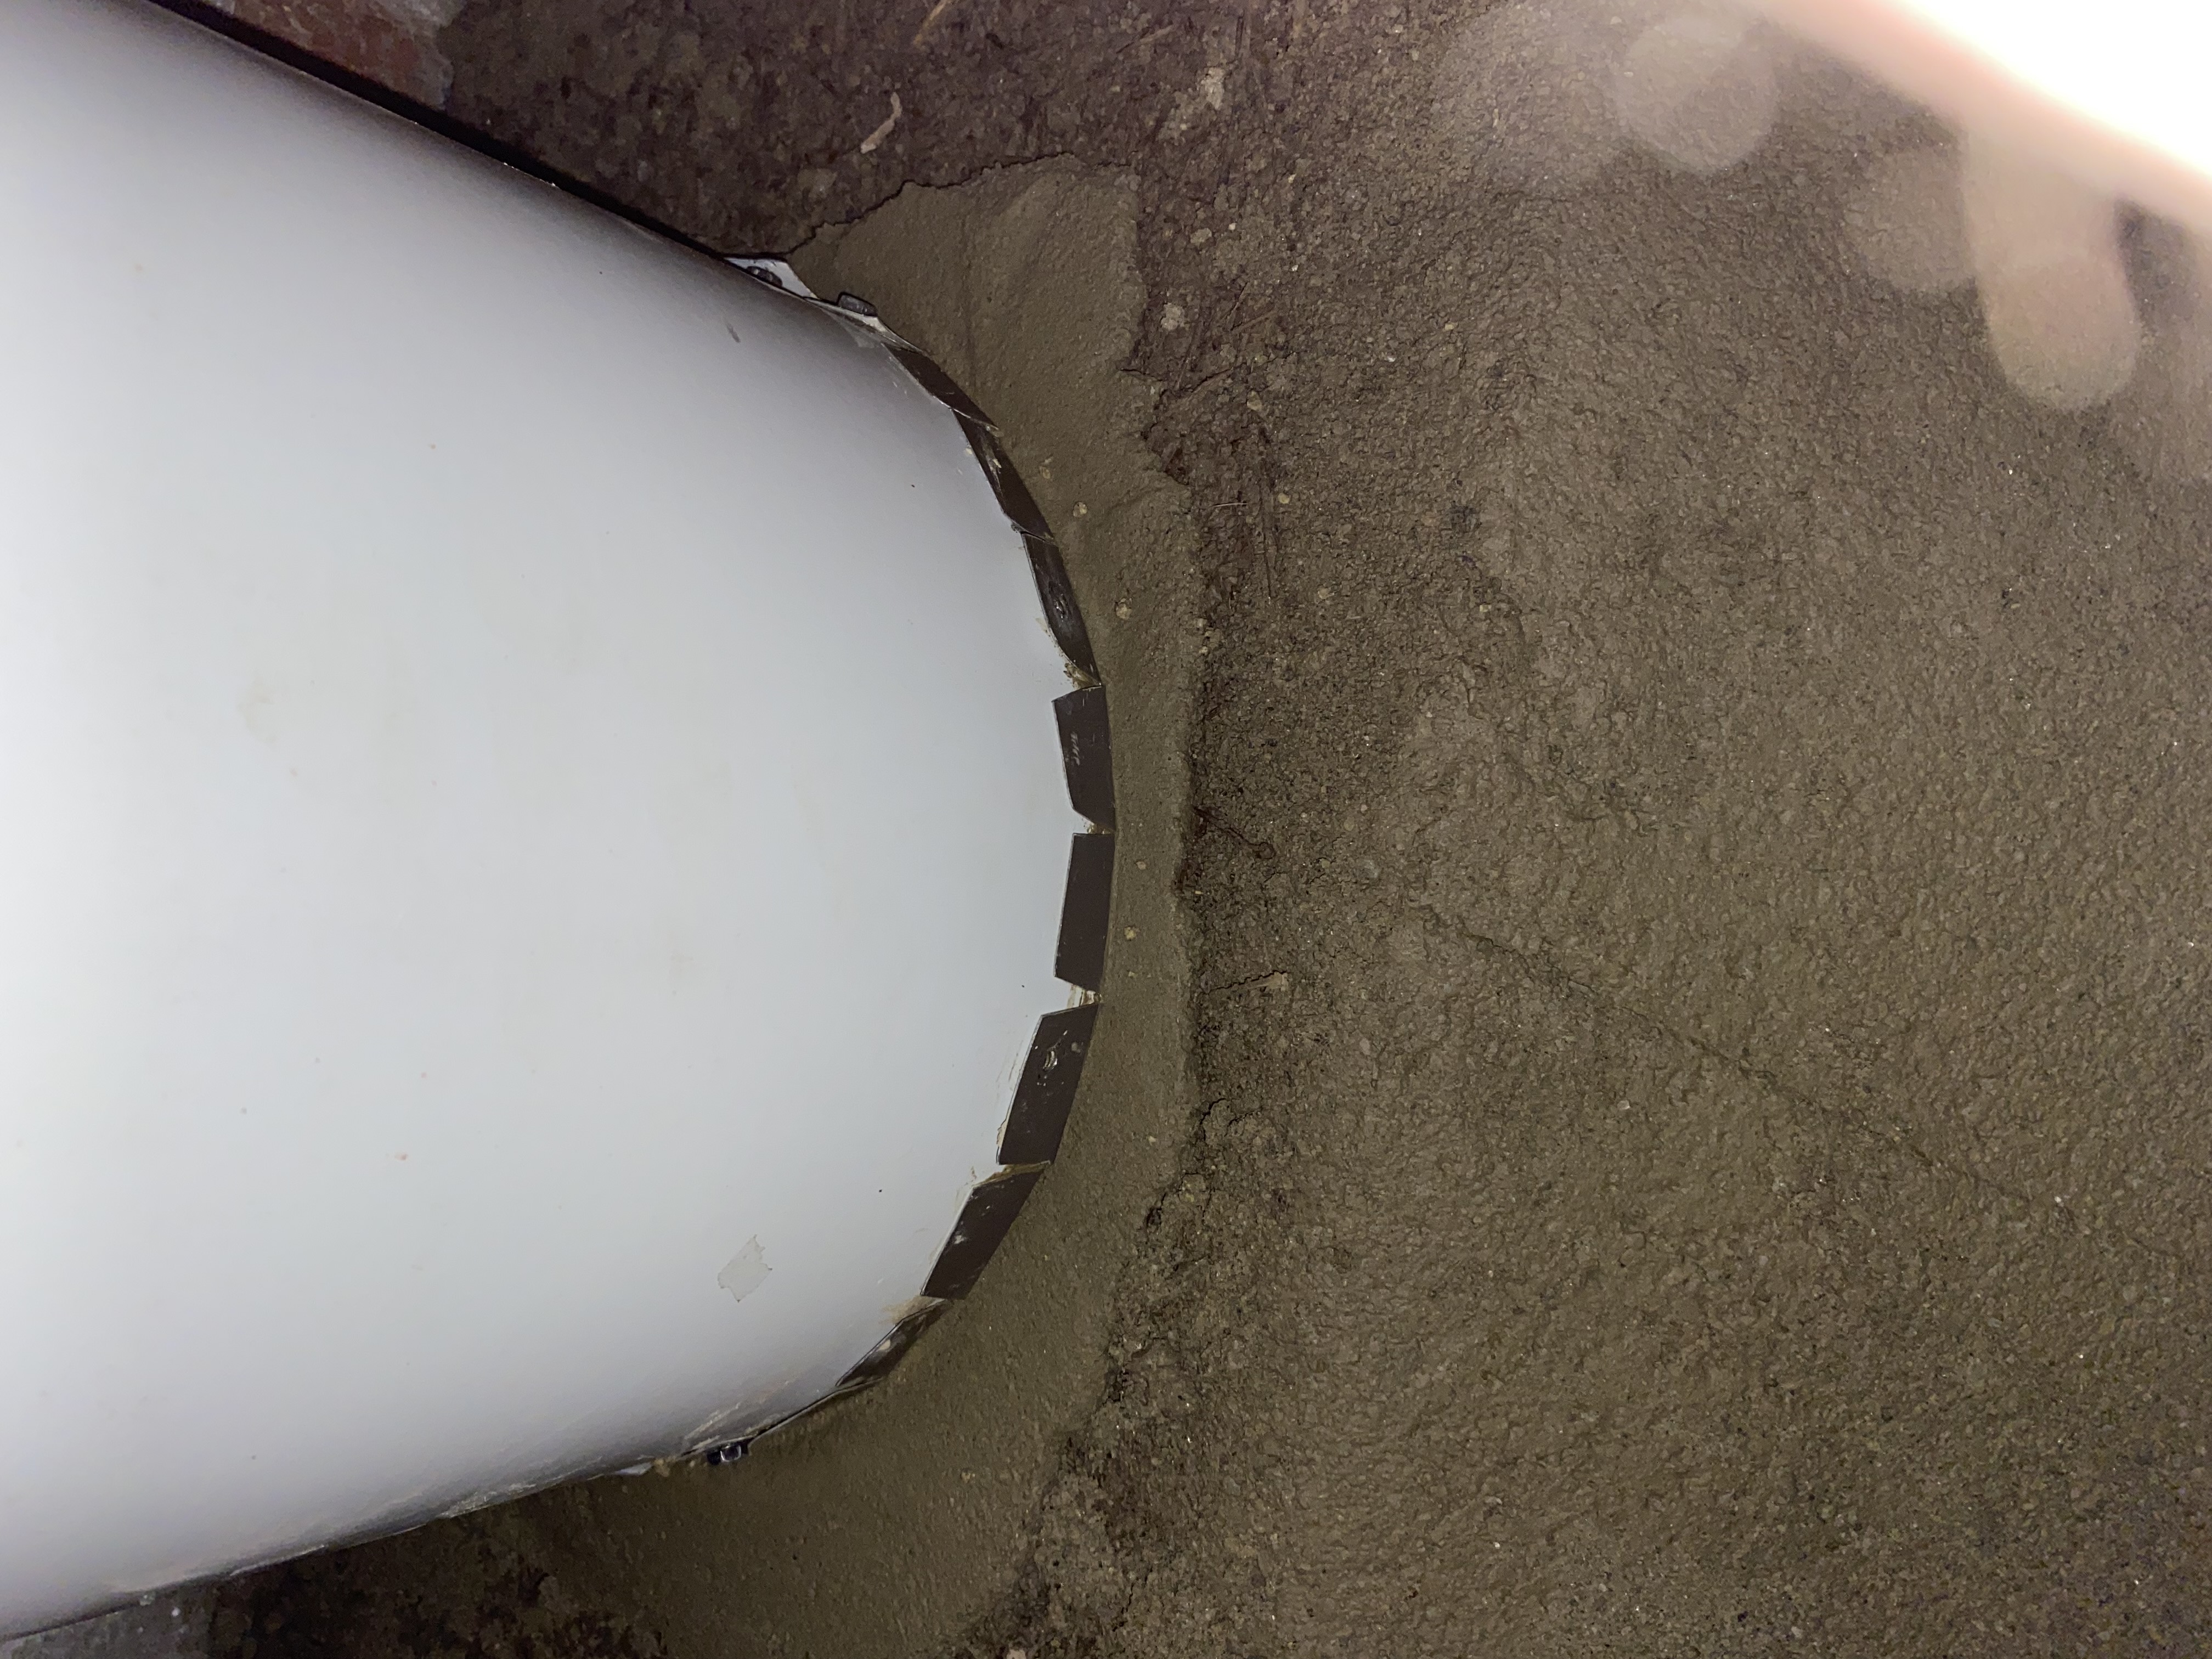
Right now i have the chimney set at 4” from the floor inside the bench. The internal dimensions of the bench are 70”L x 24”D x 16”H. By raising and lowering the exhaust what changes will I see visa versa?

In the pics is a stove gasket. What I’d like to do is set the barrel on the gasket and clay sand or cond up to the barrel. I want to use the rib of the barrel just above where I cut it to also act as a seal when the cob is finished. Us the barrel rib like a plug to get 2 seals instead of one. On the brick ledge ring I will put a fresh 1/4” layer of clay sand, place the gasket and then embed the barrel onto the gasket. The 1/4” thick clay sand should be just enough flex but also have a hard bottom.

But what should I use for material around the barrel itself to form that second seal using the rib of the barrel? Packing to hard or banging the side of the barrel distorts the shape of the barrel so it’s got to be be something I don’t have to smash or pound into place.
IMG_2689.jpeg
[Thumbnail for IMG_2689.jpeg]
IMG_2690.jpeg
[Thumbnail for IMG_2690.jpeg]
IMG_2691.jpeg
[Thumbnail for IMG_2691.jpeg]
IMG_2692.jpeg
[Thumbnail for IMG_2692.jpeg]
IMG_2693.jpeg
[Thumbnail for IMG_2693.jpeg]
IMG_2694.jpeg
[Thumbnail for IMG_2694.jpeg]
IMG_2695.jpeg
[Thumbnail for IMG_2695.jpeg]
 
Shawn Carey
Posts: 11
7
  • Likes 3
  • Mark post as helpful
  • send pies
    Number of slices to send:
    Optional 'thank-you' note:
  • Quote
  • Report post to moderator
Instead of the stove gasket I could shave some 1/2-3/4 thick strips of mineral wool for the gasket which I think would be a much better option
 
Glenn Herbert
Rocket Scientist
Posts: 4842
Location: Upstate NY, zone 5
799
5
  • Likes 7
  • Mark post as helpful
  • send pies
    Number of slices to send:
    Optional 'thank-you' note:
  • Quote
  • Report post to moderator
I think the stove gasket is the best choice for the bottom edge of the barrel, though I would have gotten a thicker version which would be easier to assure a good seal with. I would set the barrel on the fresh cob and wiggle it a bit to clearly mark the location, then carefully make a groove following the mark so the gasket is positively held in place.

I think the mineral wool strips would do well as the seal for the barrel ridge. I would form the cob to meet the ridge while the barrel is sitting on the base cob; then when the barrel is sitting on the gasket there will be a small gap below the ridge that can be packed with mineral wool. A blunt knife blade or the like can push the wool snugly into the gap without distorting the barrel.  Or you could lay an even strip of mineral wool on the slope of the cob ridge so that it seals there when the barrel sets down onto the base gasket.

Your core versus bell sizing is problematic. A 4" batch box, extrapolating from the chart at batchrocket.eu, would take about 25 square feet of ISA, and a J-tube is less powerful for a given size so might equate to a 3" batch box, or maybe 15-20 sf at most. Your bell has about 30 sf not counting the barrel, and I think the barrel at around 8-10 sf will radiate most of the heat before it gets to the bench. The bench may never get very warm.
 
I agree. Here's the link: https://woodheat.net
reply
    Bookmark Topic Watch Topic
  • New Topic