• Post Reply Bookmark Topic Watch Topic
  • New Topic
permaculture forums growies critters building homesteading energy monies kitchen purity ungarbage community wilderness fiber arts art permaculture artisans regional education skip experiences global resources cider press projects digital market permies.com pie forums private forums all forums
this forum made possible by our volunteer staff, including ...
master stewards:
  • Nancy Reading
  • Carla Burke
  • r ranson
  • John F Dean
  • paul wheaton
  • Pearl Sutton
stewards:
  • Jay Angler
  • Liv Smith
  • Leigh Tate
master gardeners:
  • Christopher Weeks
  • Timothy Norton
gardeners:
  • thomas rubino
  • Jeremy VanGelder
  • Maieshe Ljin

RMH in a box

 
Posts: 20
  • Likes 1
  • Mark post as helpful
  • send pies
    Number of slices to send:
    Optional 'thank-you' note:
  • Quote
  • Report post to moderator
Hi Everyone, I am looking to build my first RMH enclosed in a wood box along the lines of the portable RMH constructed in the Wood Burning Stoves video and the pebble RMH Paul built, for use in my 12ft yurt on a wood deck. I plan to sleep on top of the thermal mass. I have read Ianto Evans' book, although I believe an edition old, and watched the three of the Wood Burning Stoves videos. I have also researched this forum. With the knowledge I have gained I started planning my first build, but I have questions. I suppose I will start with my plan. I also have attached a, fairly, to scale plan of my build.

1. I will reinforce the deck/floor of my yurt. It only sits 18 in off the ground so I will slide some cinder blocks under the floor joists and use wood blocks to make up the difference.
2. I will build a box from 2x6 or 2x8 dimensional lumber. I am, sort of, separating the thermal mass and the combustion unit, so technically I will have two boxes, or one box not in the form of a rectangle. I am not entirely sure how I am going to construct this yet. Please see attached diagram. I plan on constructing the larger box to 7'L x 30"H x 36"W.
3. I was considering cutting a sheet of plywood to protect my wood floor from physical damage. Thoughts?
4. I will follow advice from this forum on protecting the floor from heat, from the bottom: One layer of aluminum foil shiny side up, a thin layer of sand (I didn't see this as advice, but I have seen that sand is a great insulator so I thought, why not?), bricks arranged to create air channels and support a sheet of cement backer board, then the cement backer board, then another layer of aluminum foil. Do I need to use this same level of protection/insulation under the thermal mass, in addition to the combustion unit?
5. On top of this base layer, which is within the wood box and above my wood floor, I will construct my combustion unit (burn tunnel, heat riser, steel drum) and my thermal mass unit (single wall stove pipe, rocks/maybe pebbles).
6. I will build the combustion unit following the standard guidelines outlined in the book and the videos. As I am building a 6 inch system I will:
a. Construct my burn tunnel with standard "heavy" firebrick to the following dimensions: wood feed: 10" burn tunnel: 15" heat riser: 30" Im sure during construction I will experience some sort of issue that will require me to adjust the dimensions slightly. Ill be sure to follow the same ratios.
b. Construct my heat riser with standard "heavy" firebrick (to save money versus using more insulative brick). Insulate my heat riser using standard rock wool insulation held in place with either hardware cloth or chicken wire. I would consider using kiln brick/insulative firebrick if the difference is profoundly different in relationship to the cost.
c. I plan to use a 55 gallon drum and will have the drum sit 1.5" from the top of the heat riser. I have seen examples of the drum being cut to fit over the burn tunnel as well as cut to interface with the exhaust. Thoughts on this method versus using bricks and cob to create a "manifold"?
d. I will use cob to seal the drum around the burn tunnel and either create a manifold or seal around the exhaust.
e. I am unsure on what follows. I am sure I need to fill the area around the burn tunnel with an insulative material to protect the box. Should I also insulate the beginning of the exhaust?
7. I will run stove pipe from the exhaust manifold/drum to a clean out then a 90 degree elbow. Continuing the exhaust in stove pipe down to one end of the box at an downward angle, then either level or slightly upward to the other end of the box. Thoughts on level or rising stove pipe here? At the end I will exit the box vertically to a 90 degree elbow to outside the yurt. I will fill the box with a combination of rocks around the farm, maybe some pebbles, maybe some light cob at the top (to sort of seal the box). On top of the mass I will have 1.5" strips of wood spaced about .75" apart to form a sleeping platform.
8. I haven't decided how to run the chimney pipe through the wall of the yurt. I really don't like the idea of cutting into the fabric covering, but I suppose I have to. Any thoughts here?


I organized my questions to make it easier for those willing to provide insight:

1. I can't seem to find information regarding preparing the steel drum. Somewhere I think it was mentioned that there was a Utube video? I do recall in the book, that Ianto recommends building a large fire and putting the drum in it to burn off the paint and anything else in/on it. Im hoping for a more clear/better method.
2. How should I join the bricks in the burn tunnel and heat riser? I have read to just dry stack, clay slip, and also mortar. I have never done masonry work.
3. How do I protect the wood box from heat, both for the combustion unit and the thermal mass unit?
4. Do I need the same "base layer" for the combustion unit and thermal mass? (foil, bricks, cement board, foil)
5. Can I construct the system with the combustion unit not in line with the thermal mass, as I have planned? I suppose this should be my first question.


I think that is everything. If you notice a flaw in my plan, please call me out on it. I hope I don't offend anyone with my questions due to me missing obvious answers in the book, forum, or videos. Thank you in advance for any information and advice you are able to provide.

Thank you,

Ryan
Filename: RMH-v1.pdf
Description: RMH Plan PDF
File size: 22 Kbytes
RMH-v1.jpg
[Thumbnail for RMH-v1.jpg]
RMH Plan JPG
 
pollinator
Posts: 4154
Location: Northern New York Zone4-5 the OUTER 'RONDACs percip 36''
67
hugelkultur fungi books wofati solar woodworking
  • Mark post as helpful
  • send pies
    Number of slices to send:
    Optional 'thank-you' note:
  • Quote
  • Report post to moderator
Ryan Kal ; You have been paying attention,took notes, and read ''The Book " all signs of a future Rocketeer !

Verbose as I am, I will be short to make this easier to refer to !

1) I would add cross braces between individual floor joists, Plywood nailed to the underside of the joists will stiffen up things nicely. Fat cross sections
or slices off of large log ends will spread the foot print of your support pillars as they take the Rocket Mass Heaters RMHs weight, IF the Ground under
your Yurt platform is dry ! (The area around the perimeter should be landscaped to drain standing water away !)

2) 1st part,O.K., 2nd part, why so small ? Will you ever want company? Look at the empty unused space between your thermal mass and the wall !

Near the lefthand top of this page find :::--> permies >> forums >> energy >> Rocket stoves Clickon :::--> rocket stoves

This will take you to the listing of all rocket stove /rocket mass heater RMH Original threads, near the top find forum thread :::-->

video: great rocket mass heaters in upstate N.Y. and Quebec Watch the 1st video! this is the primary heater for this house (an 8'' system )

she often naps on the Day bed / Thermal Mass, this is snuggle sized for two, yours could be bigger or added onto later, (the hard way !)

3,4) Your plan is a near copy of a DVD video of E & Es upscale build and professionally filmed found at village video, goto :::--> Villagevideo.org
find and clickon the U-Tube Icon on the next page find the top set of short video clips labeled Rocket Mass Heater Scenes, and
hover you mouses Icon directly over its near righthand side, this will make a [ > PLAY ] bottom appear to click on !

This will play ~3/8ths of the DVD made with this build is professionally done as is the build, careful it is full of builders eye candy and you will want this
DVD !

The 1st 4 ft of the horizontal pipe in your thermal mass needs the same insulation to protect your floor !

5 ) O. K.
6 a)O. K.
b) The very top of your Heat Riser should end with a ring of Cob with a rounded cone or Gumdrop shape to keep Fly Ash from settling out onto the Heat
Risers rim !

c) The 1.5'' was a suggested minimum, go for 2'' Where you have seen barrels notched out to make a transitional area between the outside bottom of
the Heat Riser and the horizontal chimney of the Thermal Mass you are seeing a 1/2 barrel that gets mated to a full barrel. This works well if you can
find two identical barrels built to ship dry powder in that have completely Removable Tops. This are held on with a clamping ring! A good location to hunt
these is for cleaning supplies like a car wash ! OR - Go with the Firebricks and Cob to make the manifold, this one should be easier to insulate and seal !

d )With all the firm statements about remembering the Constant Cross Sectional Areas C.C.S.A.s, and keeping them Whole-y Here we want a large
round or oval opening, 2Xs or 3Xs the regular C.C.S.A.s! This is an important change, It reduces unwanted turbulence, Allows for the friction loses due
to Laminar Flow and you will find Fly Ash collecting in this location !

e) Just the Floor !

7) I can not see the placement of your 1st clean out, ideally this is close to the transitional area to let you inspect and clean this area !

Remember that your final goal is to have an exhaust temperature ~ 150dF~ at your final vertical chimney! You can find a sew in kit to add a thimble
to the side of your tent, west of the Mississippi it may be called a jack, You get this from horse trekking, and/or hunting tent outfitters ! or you can go
out through a sky light in some Yurt models !

There will be a part two to follow ! For the good of the Crafts ! Big AL
 
gardener
Posts: 3471
Location: Southern alps, on the French side of the french /italian border 5000ft elevation
194
  • Mark post as helpful
  • send pies
    Number of slices to send:
    Optional 'thank-you' note:
  • Quote
  • Report post to moderator
A picture is worth a thousand words!

It starts to get intresting from there!

https://permies.com/forums/posts/list/40/30289#246873
 
allen lumley
pollinator
Posts: 4154
Location: Northern New York Zone4-5 the OUTER 'RONDACs percip 36''
67
hugelkultur fungi books wofati solar woodworking
  • Mark post as helpful
  • send pies
    Number of slices to send:
    Optional 'thank-you' note:
  • Quote
  • Report post to moderator
Ryan Kal : Here we go again !

1) Permies.com has a sister site richsoil.com go there, find and click on the Rocket Mass Heater word phrase, then watch all of those videos
to the end !

the barrel burning issue is well documented there! The 2-3 lengths of stove pipe will be re-used for the 1st part of the horizontal run of pipe through your
Thermal Mass The time it takes will be cut in 1/2 by wrapping the sides of the barrel in a paper mache` to hold in the heat and reduce the material to be
cleaned up to one central spot

2) dry stacking is acceptable for your 1st outdoor test to see and hear it work, and make sure you can fit everything in the space planned for it, and you
have all your parts and your clean outs will go in their most useful places, expect to have to cut stovepipe to fit !

With a well made Clay Slip resembling a a slightly thin pancake batter, you quickly dip the firebricks in water 3-5 sec, shake off the excess and dip them
individually in the Clay Slip as you lay your bricks in place (Practice this stacking dry 1st, individual course by course!) Bricks sealed this way for your 1st
firing will pop apart for disassembling , with only brushing brick against brick for cleaning !

Mortar! the mystery revealed Mortar has some cement, Clay and Builders Sand, Cob and Adobe have Clay and Builders Sand ! Cob is easy to
clean off of bricks, Mortar less so, G.D. the man who cements bricks together with concrete !

3) Foil, it can be glue to the inside of your wood forms, then infill with clay and Perlite, or clay and vermiculite ! at least 3'' and seal with cob ! this is another
reason for testing outside and adjusting as needed !

4) Asked and answered !

5) O. K., Worry more about Clean out placement !

This is more than you even asked for ! while I was typing I added a little but even this is not all inclusive ! Hope this helps and is timely For the Crafts !

Think like fire! Flow like Gas! Don't be a Marshmallow! As always your questions and comments are solicited and welcome ! Pyro-magicly Big AL !
 
Rocket Scientist
Posts: 4526
Location: Upstate NY, zone 5
574
5
  • Likes 1
  • Mark post as helpful
  • send pies
    Number of slices to send:
    Optional 'thank-you' note:
  • Quote
  • Report post to moderator
You mention aluminum foil as part of your insulating sequence. The entire value of aluminum foil is for its reflective surface facing an air space; if you put solid material against both sides of the foil. it becomes worthless. Instead of floor - foil - sand - air & bricks - cement board - foil - mass, try floor - (maybe sand) - foil - air & bricks - foil - cement board - mass.
 
Ryan Kal
Posts: 20
  • Mark post as helpful
  • send pies
    Number of slices to send:
    Optional 'thank-you' note:
  • Quote
  • Report post to moderator
Thank you! Currently digesting all the information and getting more excited by the moment.

Ryan

 
allen lumley
pollinator
Posts: 4154
Location: Northern New York Zone4-5 the OUTER 'RONDACs percip 36''
67
hugelkultur fungi books wofati solar woodworking
  • Mark post as helpful
  • send pies
    Number of slices to send:
    Optional 'thank-you' note:
  • Quote
  • Report post to moderator
Glenn H. ; Good catch on the proper placement of Aluminum reflective heat shields, they Should be installed with an air gap on both sides when possible!
Worthless is to strong a term, while heat shields are up to 80/85% efficient at reflecting radiant heat energy with proper installation they still function as
a defuser, increasing the size of the heat sink on the non radiated side ! For the Good of the Crafts ! Big AL
 
Glenn Herbert
Rocket Scientist
Posts: 4526
Location: Upstate NY, zone 5
574
5
  • Mark post as helpful
  • send pies
    Number of slices to send:
    Optional 'thank-you' note:
  • Quote
  • Report post to moderator
Sheet aluminum (like flashing) could have value as a diffuser in a heat sink regardless of its exposure, but kitchen-type foil has so little cross-sectional area that it wouldn't do much of anything toward conducting/diffusing heat.
 
allen lumley
pollinator
Posts: 4154
Location: Northern New York Zone4-5 the OUTER 'RONDACs percip 36''
67
hugelkultur fungi books wofati solar woodworking
  • Mark post as helpful
  • send pies
    Number of slices to send:
    Optional 'thank-you' note:
  • Quote
  • Report post to moderator
Glenn ; Interesting point, and you are right, guarding against a point of diminishing returns, with more mass, more diffusion, more Thermal loading ! A.L.
 
Ryan Kal
Posts: 20
  • Mark post as helpful
  • send pies
    Number of slices to send:
    Optional 'thank-you' note:
  • Quote
  • Report post to moderator
So, I have watched many videos and read even more. You were right Allen, I want to buy the Wisner's DVD, but Ill have to pass right now. Im glad that they are gracious enough to give as much information as they did in the demo clips.

I feel pretty confident in my plan moving forward, which is a good feeling, but I am still a little hesitant due to the nature of this project. In response to your responses:

1. I had thoughts of making the thermal mass box larger, but I have a small space. Perhaps I can construct it with a curve along the back, though I was thinking of using that space for discreet storage. I think 3 ft wide is large enough for two, as long as you like to be close to that other person.

2. Regarding the floor/base layer, could I substitute paver bricks (with holes) for the cement backer board? I will eliminate the sand. So: foil, bricks spaced to support more bricks with air channel, more foil?

3. Could I substitute paver bricks (with holes) to build the manifold that supports the barrel and creates the exhaust manifold?

4. I am going to put a clean out just outside the exhaust manifold. I was thinking of adding a second one at the end of the run through the thermal mass before the exhaust goes vertical and out the yurt. Is it needed?

5. How do I attain an exhaust around 150 deg? Do I need to do anything in particular? This will affect my plan to run the exhaust out of the yurt.

6. I just want clarification on wood box protection. For the combustion unit I will want to glue foil to the box then fill the open space with clay and perlite/vermiculite, then top with cob. I should maintain at least 3 inches between the wood box and any part of the combustion unit, correct? For the thermal mass box, glue foil and maybe use some clay/perlite along the first 4 ft of stove pipe? Pipe clearance in thermal mass box? Regarding the foil, I noticed Glenn's post, should I put another layer of foil one inch into the cob/perlite? Is this necessary?

7. I think I can get some firebrick from my uncle. Though it has been in the elements for awhile, probably a decade. My thinking is that it is still "good", but do I need to take any precautions with it?

I think that is it. I am going to start gathering materials. I am hoping to have it completed by October 5th.

Thanks again for the input!

Ryan


allen lumley
pollinator
Posts: 4154
Location: Northern New York Zone4-5 the OUTER 'RONDACs percip 36''
67
hugelkultur fungi books wofati solar woodworking
  • Mark post as helpful
  • send pies
    Number of slices to send:
    Optional 'thank-you' note:
  • Quote
  • Report post to moderator
Ryan K. : O. K., so with an RMH in a Yurt, your Rocket is always right at the core of everything, but I think you need to look long and hard at how you think of
your RMH.

The Whole construction phase leading up to when you occupy your newly configured space should leave you with a finely crafted piece of built-in furniture, a
piece of craftsmanship fit to be passed on to multiple generations! Not a piece hacked out of the limited space within your yurt !

As a test, find out just how much of your present bed is lost to your personal use if you can only use 3' even if your bed was recycled from a boy scout camp I
bet the mattress is wider than 3 feet, stack a whole bunch of books in your bed and try for just one night to accept the limitations you are imposing on yourself!

Getting a person to share your bed has nothing to do with how wide it is, that part is all on you ! Convincing another person they want to be your bedmate should
not be handicapped by a kiddy bed !

2) Draw out a chalk Outline of your build, Unless you have an unlimited supply of brick, ether paver blocks on top of your air channels and bricks, or Backerboard
is the way to go you can definitely get a sheet of backer board to your site easier than a ton of bricks ! Why eliminate the sand, substitute clay and perlite yes,
eliminate no!
3)Better the old dead soft building bricks than the other bricks with holes, you will have to protect the bricks that you call pavers with more Cob or clay
and Perlite.
4) This is a minimum, you may need more !
5) The more thermal mass you have, and the use of enough horizontal stovepipe going back and forth in your Thermal Mass is your only way to extract enough
heat to get you down to that magic number !
6) A picture is worth a thousand words, I gave you a video so you could see how to do yours sadly and not burn any thing up !
7) if not stored in a bone dry place you must assume that they have soaked up lots of moisture, Turn on the oven you are using now ! points if it is electrical and
bake at a low temperature for 24 hours and weigh before and after, If the before and after vary a 1/4 pound you will have to bake them all, otherwise they may
explode !

When in doubt, and every time you possibly can build your 1st rocket as conventionally as you can, the frustration you save getting peak performance out of your
rocket will only be your own ! For the craft ! Big AL
 
Ryan Kal
Posts: 20
  • Mark post as helpful
  • send pies
    Number of slices to send:
    Optional 'thank-you' note:
  • Quote
  • Report post to moderator
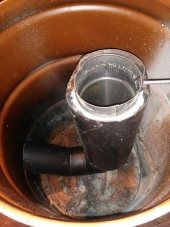
Im finally starting to make some real progress on my rmh. I have all my materials, I have completed the boxes for the thermal mass and the combustion unit, did a dry stack of my combustion unit and ran it (ran great), almost finished cleaning barrel, and i have started the floor protection. Its coming together well, I think.

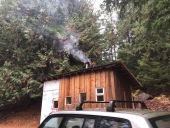
I have decided to run the exhaust out the wall, well under my window. I have researched and thought about this and feel that this is a viable option for me as I live in a circular structure, which would negate some issues of a high and low pressure side of my structure, the wind comes from one direction 90% of the time, I don't have any open roof vents so I don't think I will get the structure trying to pull air in through the rmh and if I do I will crack my window, and I am going to put 3 T's at the end of my exhaust. And, if it doesn't work I will add a vertical chimney outside.

For floor protection I put down alum foil, then fire brick for a 2.5 in air gap, then concrete pavers about 1.5 in thick, then more foil. I feel like I need more insulation and was going to add either sand or perlite w/ a small amount of clay, on top of the foil, just below the base for the combustion unit. What precautions can I take to ensure that I will be able to easily stack level bricks on top of this insulation? I have never done any masonry work.

I will get photos up when I can.

Thanks,

Ryan
 
Ryan Kal
Posts: 20
  • Mark post as helpful
  • send pies
    Number of slices to send:
    Optional 'thank-you' note:
  • Quote
  • Report post to moderator
I opened my eyes and found my answers right in front of me.

I ended up making a form with brick and filling with 2.5 inches of clay/perlite. So, floor - alum foil - 2.5 in air channels w/ brick - 1.5 in concrete patio paver - 2.5 in clay/perlite - first brick course of combustion unit. Im fairly confident this is sufficient.

I assembled the fire brick to form the combustion unit. This took much longer than I had anticipated. Way more work than it looks like on video or in print. But its complete. And I am content, especially since this is the first time I have built with bricks.

I realized I made a mistake in the box construction, as I forgot to adjust the box size for a change in my core design, (just a dimension change from 4x7 to 5x6). I can get around this mistake with a couple small changes.

Next up is the manifold, which is terribly frightening. But I think I have it figured out, or will as I build it.

Ryan
 
Ryan Kal
Posts: 20
  • Mark post as helpful
  • send pies
    Number of slices to send:
    Optional 'thank-you' note:
  • Quote
  • Report post to moderator
I have a working stove. Still have to properly route exhaust and build my mass, but the stove works, and it works well.

Im exhausted, but had so much fun. Im exhausted so Ill post photos and details later.

Ryan
 
Ryan Kal
Posts: 20
  • Mark post as helpful
  • send pies
    Number of slices to send:
    Optional 'thank-you' note:
  • Quote
  • Report post to moderator
Also! It works like everyone says it does, and the videos show. AND the exhaust really is just steam. So cool. Its different when you experience it in person and have just finished building the stove.
 
allen lumley
pollinator
Posts: 4154
Location: Northern New York Zone4-5 the OUTER 'RONDACs percip 36''
67
hugelkultur fungi books wofati solar woodworking
  • Mark post as helpful
  • send pies
    Number of slices to send:
    Optional 'thank-you' note:
  • Quote
  • Report post to moderator
Ryan : Yes, please send lots of pictures, and congratulations One more working Rocket Mass Heater is more important than another flipping' angle getting a dumb
set of wings For the Good of the Craft ! Big AL
 
No matter how many women are assigned to the project, a pregnancy takes nine months. Much longer than this tiny ad:
Rocket Mass Heater Jamboree And Updates
https://permies.com/t/170234/Rocket-Mass-Heater-Jamboree-Updates
reply
    Bookmark Topic Watch Topic
  • New Topic