• Post Reply Bookmark Topic Watch Topic
  • New Topic
permaculture forums growies critters building homesteading energy monies kitchen purity ungarbage community wilderness fiber arts art permaculture artisans regional education skip experiences global resources cider press projects digital market permies.com pie forums private forums all forums
this forum made possible by our volunteer staff, including ...
master stewards:
  • Nancy Reading
  • Carla Burke
  • r ranson
  • John F Dean
  • paul wheaton
  • Pearl Sutton
stewards:
  • Jay Angler
  • Liv Smith
  • Leigh Tate
master gardeners:
  • Christopher Weeks
  • Timothy Norton
gardeners:
  • thomas rubino
  • Jeremy VanGelder
  • Maieshe Ljin

Who's propagating what and how are you doing it?


Posts: 75
Location: Ontario, Canada (44.265475, -77.960029)
  • Mark post as helpful
  • send pies
    Number of slices to send:
    Optional 'thank-you' note:
  • Quote
  • Report post to moderator

Ed wrote:
Thanks Mike:  Prices seem to be coming down a bit.  We have always had great luck with Burntridge, and Raintree.  Someone told me that Raintree has a wholesale arm, something like Northwoods.

Will definately pick up a couple more different varieties.

Ed


If you want the Cdn varieties, the ones developed by the University of Saskatchewan,  you won't get them yet from any US nursery other than the one in Minnesota.  What Raintree, One Green World, and others have are Russian varieties imported by Jim Gilbert at Northwoods/One Green World. As far as I know, these plants have not been bred.  The USask plants are bred from germplasm from Gilbert and the Vavilov.  The USask breeding programme was developed to create another commercial crop for the Canadian prairies. The target market is Japan, particularly Hokkaidō.
 
pollinator
Posts: 174
13
  • Mark post as helpful
  • send pies
    Number of slices to send:
    Optional 'thank-you' note:
  • Quote
  • Report post to moderator
Thanks Mike:  We were going to buy the wholesale amount from prairietechpropagation.com  but decided instead to go for two large heavy duty starter heat mats, thermostat, and misting system.  The whole thing set us back a little over 500 dollars, which is the min. order size at PT.  We have 6 bushes already and will buy a couple more varieties from Burntridge.  We have bought from them before and have never been disappointed.  And then just try and get good at the propagating and grafting.  Makes so much bloody sense.  Lots and lots of areas to fill in, and this seems to be the fastest most cost effective way to do it.  Lots of really old farms around here with berries and fruits that are at least 50 years old so in addition to our new purchases we have lots of existing to work with.

Thanks for the info,

Ed
 
Posts: 123
Location: Northern New Mexico, USA
1
  • Mark post as helpful
  • send pies
    Number of slices to send:
    Optional 'thank-you' note:
  • Quote
  • Report post to moderator
Hi Ed, you will have a blast learning to propagate. Every plant has its tricks. It was good to read that softwood cuttings are super easy for this plant. Early success will keep you motivated!

Here's some ideas for propagation in general. I know nothing about this particular plant you're talking about. (Doubt it will grow here in the dry mountains, though it would be fun to try.) But I will try to give you some sense on how I figure out to propagate a variety that is new to me.

For the softwood cuttings I'd like to suggest that at first you wait until the bushes are really going strong before taking the cuttings. This gives the plant time to put on some good growth before getting cut back. Then, try both tip cuttings and softwood cuttings from a little bit father down the stem. In your plug tray have rows of different length tip cuttings, then different length stem cuttings. Finally, have a row of semi-softwood cuttings. After a few weeks, try giving the cuttings the slightest tug and see if there's any resistance, which would indicate the start of roots. Then a couple weeks later look at the drainage holes on the plugs in case there are visible roots. Then you have a good idea of the ideal cutting for that variety.

Take careful notes so you can refer to it years later and not have to repeat the same work. Eventually you will develop a specification for the cuttings that work for you. Just as an example, it might be tip cuttings 3" long, 4 weeks at 75 degrees. Or maybe tip and stem cuttings, 1" long, 2 weeks at 70 degrees. The shorter in length you can get a successful cutting, the more cuttings you can make from the same amount of plant material.

It's also useful to record what *didn't* work. This helps you avoid repeating the same failures later when you've forgotten what didn't work.

Also since this plant shoots easily off a stem, you can layer some stems for foolproof propagation. A long flexible stem could be buried in the soil next to the bush, or just toss a rock over the stem as was earlier suggested. Or you can fill some pots to the brim with potting soil and bury the stem in a few pots in a row. Then when it roots, you can clip the stem and you don't even have to transplant them into the individual pots! This does require keeping the pots moist during the rooting. With gallon sized pots and a little mulch, that is easy to accomplish.

Of course, all of this is common sense and you've probably figured this all out on your own already. Good luck and let us know next summer how it's all going.

 
Ed Waters
pollinator
Posts: 174
13
  • Mark post as helpful
  • send pies
    Number of slices to send:
    Optional 'thank-you' note:
  • Quote
  • Report post to moderator
As always thanks:

Currently reading Propagation of Trees Shrubs and Conifers by Sheats and

Plant Propagation A to Z

Both good in their own ways.  We have about 17 acres of pretty open pasture.  2 acres now has English Walnuts, then there is another 1/2 acres of currants, apples, and highbush cranberries, elderberries, spice bushes etc. and finally another acre of black walnuts.  We have also started one fringe area, and a shade area, and then we have planted 1,500 ramps back in the woods with a bunch of cinammon ferns.  Everything still looks so empty.  I'm excited about learning to propagate and graft, because there just doesn't seem to be any other way to fill up this canvas (economically) without it.
Ed

 
Ed Waters
pollinator
Posts: 174
13
  • Mark post as helpful
  • send pies
    Number of slices to send:
    Optional 'thank-you' note:
  • Quote
  • Report post to moderator
Hopefully some of you are still hanging around.  We jumped into this with both feet.  Only way to go in my opinion, but I now have a question.  Some of the hardwood cuttings buds seem to be about ready to break dormancy.  I've pulled the cuttings out to check on roots and not alot happening.  In particular this is happening with blue honeysuckle.  I don't have the misting system set up yet so if they break dormancy do I put them into plastic bags until we get a root system going?  We have some sitting on heat maps, and then some just in our seed starter room which stays anywhere from around 40-60 this time of year.  Growing medium is BM2 which is a fine ground peat moss and vermiculite and perlite.
Starting to have some seeds coming out of cold stratification now (Edelweiss today).  Not sure how that will go, but we'll let you know.  Surprised how many seed packets we received that didn't state that stratification was required.  Do your own research. 
Last question, we have a Celeste fig which we have to keep indoors in the winter, and its already breaking dormancy (first winter with us) and looks like we will get some fruit this year.  I read that small leaved figs can be propagated from green cuttings, but large cannot.  How do I tell if this one is a small or large leaf?
We're putting up on our site tomorrow a list of everything we are either growing or trying to grow.  Happy to try and answer any questions if we can.
Ed
http://luckydogfarm.wordpress.com/
 
pollinator
Posts: 1528
Location: zone 7
18
  • Mark post as helpful
  • send pies
    Number of slices to send:
    Optional 'thank-you' note:
  • Quote
  • Report post to moderator
a bump for this thread.

propagating lots of plants and trees still.

just rooted 100+ highbush cranberry and some olive tree. done in a diy mist propagation system.

my asparagus seeds should start ripening real soon, very easy to propagate hundreds, no....thousands of asparagus plants.
 
            
Posts: 75
Location: Ontario, Canada (44.265475, -77.960029)
  • Mark post as helpful
  • send pies
    Number of slices to send:
    Optional 'thank-you' note:
  • Quote
  • Report post to moderator

hubert cumberdale wrote:
done in a diy mist propagation system.


Got pictures??  Thanks.

Mike
 
Jordan Lowery
pollinator
Posts: 1528
Location: zone 7
18
  • Mark post as helpful
  • send pies
    Number of slices to send:
    Optional 'thank-you' note:
  • Quote
  • Report post to moderator
no pictures, its not very fancy looking. i can explain if needed.
 
            
Posts: 75
Location: Ontario, Canada (44.265475, -77.960029)
  • Mark post as helpful
  • send pies
    Number of slices to send:
    Optional 'thank-you' note:
  • Quote
  • Report post to moderator

hubert cumberdale wrote:
no pictures, its not very fancy looking. i can explain if needed.


Pls do (although I do better with pictures than words).

Mike
 
Jordan Lowery
pollinator
Posts: 1528
Location: zone 7
18
  • Mark post as helpful
  • send pies
    Number of slices to send:
    Optional 'thank-you' note:
  • Quote
  • Report post to moderator
its very simple to explain, sorry i do not have a camera.

most of the intermittent mist propagation systems that i needed for my needs are very expensive and hard to find. I did not want to pay the prices offered so i held back on the mist system and continued to use other means.

One day i was over visiting someones garden and they had some bonsai trees. a few tropical species so they needed regular spraying. he had this system set up and i just did what he did.

all hardware stores have the black irrigation tubing and dripper parts, although i hate this stuff. i figured the small amount of plastic used will create thousands of rooted cuttings of trees, shrubs and other woody perennial plants faster and healthier in less space.

things you will need.

a place to propagate.
a source of water, a hose, a spigot on your house, etc....
1/2 inch irrigation tubing
1 mister per 10-12 inches( they come in packages of 5)
any elbow connectors to get the mist setup to and above your cuttings.
1/2 inch poly to spigot connector
1/2 unscrewable cap( easy to flush the system)
one 1/2" manual shut off valve.

so this is very simple

you start off at your water source.

next you screw the adapter onto the water source

insert the black irrigation tubing.

if its off the ground. add an elbow at about 3-4" so it goes down and doesn't bend the tubing instead to go down.

when you get to the ground add another elbow.

run the line to your propagation area, using whatever elbows or bends you need to get there for sharp turns.

when you get to the are you are propagating you will need something to suspend the misters above the propagation trays. i am using two wooden T frames that are upside down built out of 2x4 scraps. and another piece of wood connecting the two for the length of the system. they are only a little over a ft tall. you can do this step any way you want if you have a better way.

before you get to the mist frame. you will need to put in the manual shut off valve in a safe easily accessible spot.

now from the ground put an elbow and then run the pipe up to the height of the frame you just made.

one more elbow to run the tubing above the propagation trays.

run the tubing the entire length, add the unscrewable end cap and your done with the frame.

set up the misters 8-12 inches apart from each other along the length of the frame. my mist system is 12 ft long. i have 10 misters evenly spaced in there.

that's it for those who live on the homestead/farm and can give the plants a mist a few times a day. which is what i do 90% of the time.

if you want it to be automatic there are various veggie garden timers that will do short intervals often.

someone gave me a digital one that does up to 16 sessions a day, i can set it to 1 minute each session. i split this from the morning until when the sun goes down when i am away for a few days and have things propagating.  you don't need to run it at night.

if anyone can tell me how to upload an image i can upload a drawing of the setup.

keep in mind that my 12 ft system can literally do thousands of cuttings at once. most people will only need a 2-3 ft system max unless you plan to plant acres of land. so this can be made to any scale you want, and the smaller the cheaper.

all in all i made mine for under 30$. and have propagated a few hundred plants already much faster than before i had the system.

if anyone knows of a cheaper way to do the timing system i would love to hear it. 10-30 second bursts of mist every 30-60 minutes is best.
 
            
Posts: 75
Location: Ontario, Canada (44.265475, -77.960029)
  • Mark post as helpful
  • send pies
    Number of slices to send:
    Optional 'thank-you' note:
  • Quote
  • Report post to moderator

hubert cumberdale wrote:
its very simple to explain,


But less simple to understand.    Nonetheless, thank you.


1 mister per 10-12 inches( they come in packages of 5)


Can you link to a picture?

if anyone can tell me how to upload an image i can upload a drawing of the setup.


Click on Additional Options at the bottom of the message box and you'll see the ability to browse for a file to upload.

keep in mind that my 12 ft system can literally do thousands of cuttings at once. most people will only need a 2-3 ft system max unless you plan to plant acres of land. so this can be made to any scale you want, and the smaller the cheaper.


I'm usually only interested in doing maybe a dozen cuttings at a time and use a plastic shoebox with a tight fitting lid.  Because it's such a small environment, too little moisture isn't a problem although too much sometimes is. I take the cuttings early in the morning  just past sun-up when the plants are still covered in dew.  I [s]never[/s] very, very rarely water the cuttings since transpiration seems to keep the atmosphere adequately moist.  And I always keep the box well away from direct light and heat. 


In this picture the misting is within minutes of putting the lid on.  There's no moisture in the rooting mix (ProMix BX) and probably little in the air aren't usually dealing with much more than 65-70% humidity.

if anyone knows of a cheaper way to do the timing system i would love to hear it. 10-30 second bursts of mist every 30-60 minutes is best.


I'm not sure if this is cheaper or better than your system but it is an interesting and simple-ish system.
[flash=200,200]http://youtu.be/CHd00zGJfhQ[/flash]
 
Posts: 471
Location: Jackson County, OR (Zone 7)
2
  • Mark post as helpful
  • send pies
    Number of slices to send:
    Optional 'thank-you' note:
  • Quote
  • Report post to moderator
hubert - any idea what kind of volume of water is used in a day with your system?

I don't have much in the way of water pressure right now, next year will be differnt, I hope.  I'm wondering if I can use a camping shower and bicyle pump to pressurize the bladder for my water source and run some tubing and misters off of it.

I probably don't need more than 5-6 sq ft of bed for propagation this summer.

Anyone rooted green cuttings of mulberries?  I have 5 varieties that I would like to amplify as much as possible over the next couple years.
 
Jordan Lowery
pollinator
Posts: 1528
Location: zone 7
18
  • Mark post as helpful
  • send pies
    Number of slices to send:
    Optional 'thank-you' note:
  • Quote
  • Report post to moderator
KB lately i have been using the option of manually opening the flow to the misters. since i have been around more lately. the use of water is very minimum this way, i use the timer when i am away. it uses a little more water but not that much. if you purchased an ideal intermittent mist system timer the water use will be very minimal as you only need the mist to be on for a few seconds.

not sure about the water pressure.

5-6sq ft can produce a hell of a lot of cuttings, thousands per year. be prepared to have a lot of good soil and pots to pot them up in. survival rate of freshly rooted plants planted in the wild is low. i do that with extras. cuttings that grow in tree pots for a year and then planted out do much much better.

so a tip is produce a lot of extras.
 
Posts: 258
1
  • Mark post as helpful
  • send pies
    Number of slices to send:
    Optional 'thank-you' note:
  • Quote
  • Report post to moderator
Anyone propagate ginko biloba? There is a tree in the park that I would like to some how take a cutting from, not sure what would be best.
 
                              
Posts: 10
  • Likes 1
  • Mark post as helpful
  • send pies
    Number of slices to send:
    Optional 'thank-you' note:
  • Quote
  • Report post to moderator
I am currently growing goji berries from seed. I took a few hundred seeds from dried and then re-hydrated berries and placed them in a  zip-lock bag with a moist paper towel. The seeds don't have an extremely high germination rate, so I picked out the seeds that started to sprout and placed them in little cells with potting mix.

Last year I used a similar method but only used roughly 20 seeds and got 3 strong plants, two of which did not survive due to rabbits or squirrels. Of the 40 or so seedlings, I am hoping to have at least 20 tough survivors.
 
Posts: 299
Location: Portland, Oregon Maritime, temperate, zone 7-8.
3
  • Mark post as helpful
  • send pies
    Number of slices to send:
    Optional 'thank-you' note:
  • Quote
  • Report post to moderator
Info on willow water as an aid in propagation:

http://www.bluestem.ca/willow-article1.htm

I love you all!

Pamela Melcher
 
pollinator
Posts: 4715
Location: Zones 2-4 Wyoming and 4-5 Colorado
492
3
hugelkultur forest garden fungi books bee greening the desert
  • Mark post as helpful
  • send pies
    Number of slices to send:
    Optional 'thank-you' note:
  • Quote
  • Report post to moderator
Bump
 
Posts: 10
  • Likes 1
  • Mark post as helpful
  • send pies
    Number of slices to send:
    Optional 'thank-you' note:
  • Quote
  • Report post to moderator
This is insanely useful Thankyou.
 
Taylor Hayes
Posts: 10
  • Likes 1
  • Mark post as helpful
  • send pies
    Number of slices to send:
    Optional 'thank-you' note:
  • Quote
  • Report post to moderator
Thankyou for describing your misting setup
 
Posts: 1273
Location: Central Wyoming -zone 4
46
hugelkultur monies dog chicken building sheep
  • Likes 1
  • Mark post as helpful
  • send pies
    Number of slices to send:
    Optional 'thank-you' note:
  • Quote
  • Report post to moderator
Ahhh a good Ole thread resurrection....
This year I've built a simple ebb n flow hydro system for propagation purposes, went with Chem nutrient hydro because I didn't want to figure out what to do with fish in another month when I tear it down and move it, definitely feels more finicky than aquaponics did a few years back

I've tried about
4x elm
12x plum
20+ honey locust
30+ local apple tree
6+ black walnut
and a few random seeds including nasturtium which I'm happy to say are growing well

I've had what a human would describe as a low success rate thus far and everything is moving slower than others seem to suggest it should(I've heard claims of 4 day root8ng in ebb and flow systems) its been about 4 weeks but progress is occurring and hopefully in a couple weeks I'll be able to transplant to soil
 
Devon Olsen
Posts: 1273
Location: Central Wyoming -zone 4
46
hugelkultur monies dog chicken building sheep
  • Likes 1
  • Mark post as helpful
  • send pies
    Number of slices to send:
    Optional 'thank-you' note:
  • Quote
  • Report post to moderator
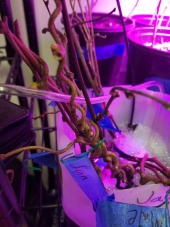
Said propagation setup
signal-2023-05-07-12-57-25-722.jpg
[Thumbnail for signal-2023-05-07-12-57-25-722.jpg]
 
Devon Olsen
Posts: 1273
Location: Central Wyoming -zone 4
46
hugelkultur monies dog chicken building sheep
  • Likes 1
  • Mark post as helpful
  • send pies
    Number of slices to send:
    Optional 'thank-you' note:
  • Quote
  • Report post to moderator
Bit of an update: over the summer hundreds of cutt8ngs tried and hundreds failed to take root, after first image, most attempts were willow and elm, with some cuttings of  currants,Russian olives and goji berry
Goji berry held the longest but all died and failed to root.

The issue was identified as water quality as the water from our well, while potable it is a bit high in dissolved solids, iron, alkali salts and minerals.

The ebb and flow system proved to be a effective evaporator for the water that was pumped into the rock media, causing a concentration of existing salts and other sediment as the water evaporated away, by mid summer the rock showed white discoloration (typical of anything that gets much moisture in our region) and I began to suspect the problem.

When I emptied the bed earlier this winter there was about 1/4 -1/2 inch of salts and solids innthe bottom of the growled.

For my next attempt, I'll try filling the system originally with our well water and from their will only top it off with RO or distilled water, the first fill should give all the minerals needed for the season, and more than enough salts lol
gift
 
Unofficial Companion Guide to the Rocket Oven DVD
will be released to subscribers in: soon!
reply
    Bookmark Topic Watch Topic
  • New Topic