• Post Reply Bookmark Topic Watch Topic
  • New Topic
permaculture forums growies critters building homesteading energy monies kitchen purity ungarbage community wilderness fiber arts art permaculture artisans regional education skip experiences global resources cider press projects digital market permies.com pie forums private forums all forums
this forum made possible by our volunteer staff, including ...
master stewards:
  • Nancy Reading
  • Carla Burke
  • r ranson
  • John F Dean
  • paul wheaton
  • Pearl Sutton
stewards:
  • Jay Angler
  • Liv Smith
  • Leigh Tate
master gardeners:
  • Christopher Weeks
  • Timothy Norton
gardeners:
  • thomas rubino
  • Jeremy VanGelder
  • Maieshe Ljin

composting wood chips with chicken litter and fungi

 
gardener
Posts: 5436
Location: Southern Illinois
1487
transportation cat dog fungi trees building writing rocket stoves woodworking
  • Likes 2
  • Mark post as helpful
  • send pies
    Number of slices to send:
    Optional 'thank-you' note:
  • Quote
  • Report post to moderator
3/11/2020 Update

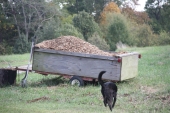
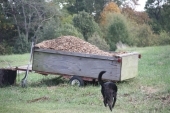
So I decided today I would start to put the chips to good use.  Initially I had thought about letting them sit and rot on their own just a bit, but the weather was nice so I decided to strike while the iron was hot.  I finally got around to building frames to Bed #3 which already had some nicely inoculated woodchips just sitting there.  I went ahead and loaded 7-8 bucket scoops of chips to fill up the bed.  I was a little surprised by how manywoodchips were needed to fill a bed that was already partially full.  I included a picture of my woodchip pile with several bites taken out.  Bed #3 is slightly mounded at the center.  I tried to spread the chips as evenly as possible, but I may need another load of chips to fill in along the edge.

My plans for bed #3 is to plant both summer and winter squash.  I am thinking I will give preference to the winter squash as I have never grown it before.  I bet that a mere 4 plants of summer squash will be plenty.  Given the volume of fresh chips, I might have to resort to using fertile holes.  Preferably I would do this without any more outside inputs, and I do have one of these tools at my disposal--rabbit.  I might have enough of the bunny-poo to make enough fertile holes to get maybe a dozen or so holes for the squash.  

I don't expect any wine caps from bed#3 this year as it presently has a fairly thick layer of chips on top of the old inoculated ones.  Maybe I will get surprised and one or two will pop out, but I am not really expecting any from this bed.  I am expecting wine caps from bed #2 and maybe bed#1, though bed #1 has been thoroughly decayed by this time.  We will see what happens.  After the expected wine cap flushes, I will go ahead and top off beds 1 & 2.

Here are some pictures:

IMG_5961.JPG
Wood chip pile missing several loads
IMG_5962.JPG
Bed #3 in the foreground, Bed #2 in the background, wood chip pile in the background and an old trailer in the middle
IMG_5964.JPG
Bed #3 in the foreground, chip pile in the background and Bed#1 in the background to the left
Bed #3 in the foreground, chip pile in the background and Bed#1 in the background to the right
IMG_5967.JPG
A log edge in bed #1 completely rotted away, partially by wine caps--last spring this still looked like a log, that's what wine caps can do
A log edge in bed #1 completely rotted away, partially by wine caps--last spring this still looked like a log, that
 
Eric Hanson
gardener
Posts: 5436
Location: Southern Illinois
1487
transportation cat dog fungi trees building writing rocket stoves woodworking
  • Likes 1
  • Mark post as helpful
  • send pies
    Number of slices to send:
    Optional 'thank-you' note:
  • Quote
  • Report post to moderator
Jay,

Actually I like those Wallenstien chippers and I really do understand the clean-as-you-go ethic.  Wildfires are pretty rare by me as we are generally wet and humid enough that fires don’t generally spread.  But if I lived in fire country I think I would find a way to afford a decent chipper.  I think a chipper would be a whole lot cheaper than a fire.

Eric
 
steward
Posts: 12421
Location: Pacific Wet Coast
6991
duck books chicken cooking food preservation ungarbage
  • Likes 1
  • Mark post as helpful
  • send pies
    Number of slices to send:
    Optional 'thank-you' note:
  • Quote
  • Report post to moderator
Eric Hanson wrote:

I think a chipper would be a whole lot cheaper than a fire.

Are you competing for the "understatement of the year award?" After what happened recently in Australia, and what has happened not many years ago in the interior of BC, I'm looking for easy ways to hold water in the soil, and keep the "small branches" under control as they feed the start of a fire much more than a large log on the ground does.

Eric Hanson also wrote:

I bet that a mere 4 plants of summer squash will be plenty.

Yes, likely. That said it does depend on varieties - some "Delicatas" seem to be usable as a "summer squash" when young, but if allowed to mature, have a fairly tough shell that helps them keep much longer than some squash. Unfortunately squash is a hard sell at this house with the exception of pumpkin - in pie form! Luckily I have a fairly healthy recipe I can use for pumpkin pie.
I have also grated and then dried summer squash - then I crush it to thicken things like spaghetti sauce or some soups. With our humid summers, I have to rely on an electric food dryer, but life is all about compromises.
I have also made zucchini pickles with onion slices - I like them!
If worse comes to worse and you have too many summer squash, you have my permission to gift them to the compost gods.  ;-)  
 
Eric Hanson
gardener
Posts: 5436
Location: Southern Illinois
1487
transportation cat dog fungi trees building writing rocket stoves woodworking
  • Likes 1
  • Mark post as helpful
  • send pies
    Number of slices to send:
    Optional 'thank-you' note:
  • Quote
  • Report post to moderator
Jay,

Not really *trying* to understate, but just trying to state the obvious.  In my area a wood-chipper is a luxury whereas by you it is more a necessity.  And yes, what happened in Australia is terrifying and heartbreaking at the same time.  

But good that you trim right into a container to make the chipping that much easier.

Regarding the summer squash, I will probably plant some zucchini and some yellow squash.  For winter squash I would like to plant some acorn squash and some blue Hubbard squash.  I would plant pumpkin were it not for two major factors.

1). I am the only person in my family that likes pumpkin pie!

2). I have tried to grow pumpkins before but bugs and powdery mildew (I think) has always killed off the pumpkins while still small.

Any suggestions on how to get the winter squash to grow healthy?  I am hoping that having healthy bedding will make for healthy plants.  I have a neighbor who sells pumpkins and I asked how he got his plants to survive.  He told me that he buys “special” seeds that are treated with a variety of toxic Gick and that he will only handle the seeds while wearing rubber gloves!  Yuck!  No way am I going to do that!  I would rather lose my crops than poisoning my soil.

Thanks in advance,

Eric
 
Jay Angler
steward
Posts: 12421
Location: Pacific Wet Coast
6991
duck books chicken cooking food preservation ungarbage
  • Likes 1
  • Mark post as helpful
  • send pies
    Number of slices to send:
    Optional 'thank-you' note:
  • Quote
  • Report post to moderator
Because I'm starting a limited quantity, I start mine in homemade biodegradable pots - currently re-using organic coffee sacks, but if you don't mind feeding the international monster, 4" coir pots would do the job. This way I can get them started and large enough to help them out-grow the slugs. I've never had an issue with squash vine borers and I think having healthy soil, using nothing to kill off the predator bugs, and actually planting things that will feed and shelter the predators is the best you can do. When mildew has struck early and I remember, spraying with milk seems to do the trick - I've read this in a number of places, but it's been years since I've needed to. I think moving the plants around each year and making sure there's good air flow (so don't plant too many in too small an area and make sure they've got places to run or climb to keep them out of your way) will help. My "Carrots Love Tomatoes" book claims, "Icicle radishes planted in the same hill help and planting earlier or later than usual." Last year I tried a "3 sisters" bed with corn, beans and squash, but I got the squash started too late and it was out-competed for sun which is always my limiting factor. I plan to try again! The Scarlet Runner beans did great. I am definitely trying much more to plant polycultures even if they're all annuals.
 
Eric Hanson
gardener
Posts: 5436
Location: Southern Illinois
1487
transportation cat dog fungi trees building writing rocket stoves woodworking
  • Likes 1
  • Mark post as helpful
  • send pies
    Number of slices to send:
    Optional 'thank-you' note:
  • Quote
  • Report post to moderator
Jay,

Actually I never had s problem getting pumpkins to start—I don’t have the slug pressure that you have—my baby pumpkin plants practically leap out of the ground.  My problem always came when I had several fruits on a vine and they got to about the size of a  grapefruit.  At that point the leaves would start to turn yellow and within about two weeks Squash bugs arrived in droves and the dark, green leaves got a whitish something growing on them (I assume that was powdery mildew).  About 1-2 weeks later the whole plant, vines, fruit and all turned yellow, shriveled up and died.

I never ever used any toxic Gick (even in my pre-Permies days toxic Gick made me nervous), but I did try some OMRI approved products, notably Neem and insecticidal soap.  At best these delayed the inevitable death of the vine.

I did some research and my findings were that for reasons I don’t understand, pumpkins are especially vulnerable to these pest and disease vectors.  Further, most non-pumpkin squash appeared resistant to these little critters.  My summer squash never suffered from anything despite seeing one or two squash bugs.  So with a little optimism and fingers crossed I am going to give winter squash a try again and hope that my wonderful garden bedding full of life makes a difference.

Eric
 
Jay Angler
steward
Posts: 12421
Location: Pacific Wet Coast
6991
duck books chicken cooking food preservation ungarbage
  • Likes 3
  • Mark post as helpful
  • send pies
    Number of slices to send:
    Optional 'thank-you' note:
  • Quote
  • Report post to moderator
Eric Hanson wrote:

At that point the leaves would start to turn yellow and within about two weeks Squash bugs arrived in droves and the dark, green leaves got a whitish something growing on them

I'm suspicious that the "going yellow" part may have actually attracted the squash bugs - just like wolves looking for the sick or weak prey. I think you should put a post in the growies area describing the problem and how you've improved your soil. Something as simple as compost tea just before the risk period might be all you require to fix things, but you need people who would know your ecosystem/weather patterns etc. The yellow leaves make me think low nitrogen, but I may just think that because winter squash are heavy feeders, which is why the natives grew it with beans (although they were to help the corn also!)
 
Eric Hanson
gardener
Posts: 5436
Location: Southern Illinois
1487
transportation cat dog fungi trees building writing rocket stoves woodworking
  • Likes 2
  • Mark post as helpful
  • send pies
    Number of slices to send:
    Optional 'thank-you' note:
  • Quote
  • Report post to moderator
Jay,

You have several excellent points.  First though, I doubt it was nitrogen deficiency as I always planted the pumpkins in manure juiced up with blood and bone meal.  Also, this was only ever with pumpkins, and for reasons I don’t know/understand, many others in the area have similar issues.  Lastly, I have heard that this is specific to pumpkins and not other winter squash.

But you are right, I should/will head over to growies and post the question there.

Thanks Jay!

Eric
 
Eric Hanson
gardener
Posts: 5436
Location: Southern Illinois
1487
transportation cat dog fungi trees building writing rocket stoves woodworking
  • Mark post as helpful
  • send pies
    Number of slices to send:
    Optional 'thank-you' note:
  • Quote
  • Report post to moderator
Changing the subject back to woodchips, I just planted potatoes in bed #1 simply by placing the seed potatoes on the surface and covering with a layer of about 1’ of chips.  So the seed potatoes will be right at the interface of the old chips and the new.  Clouds are clearing so I will try to get some pictures when the lighting improves.

Eric
 
Eric Hanson
gardener
Posts: 5436
Location: Southern Illinois
1487
transportation cat dog fungi trees building writing rocket stoves woodworking
  • Likes 4
  • Mark post as helpful
  • send pies
    Number of slices to send:
    Optional 'thank-you' note:
  • Quote
  • Report post to moderator
I went out and got a couple of pictures where the new potatoes are planted.  It is not a huge plot, but they are more dense than typical as I don't need to account for pathways.  Unfortunately the sunlight I was anticipating never arrived so sorry for the poor lighting.

You can see that there is about 8-12" of chips piled on the surface.  There were some low growing weeds, but I don't really care as I will just smother them with woodchips.  If you look carefully at the log used as a garden edge, you can see how wine caps really obliterated it last year.  Next year it gets replaced.

Eric
IMG_5973.JPG
Wood chips on newly planted potatoes
IMG_5974.JPG
Close up of wood chips over potatoes
IMG_5976.JPG
Side view of new wood chips over potatoes
 
Eric Hanson
gardener
Posts: 5436
Location: Southern Illinois
1487
transportation cat dog fungi trees building writing rocket stoves woodworking
  • Likes 2
  • Mark post as helpful
  • send pies
    Number of slices to send:
    Optional 'thank-you' note:
  • Quote
  • Report post to moderator
Just to round things out, today I added wine caps to my comfrey plants.  I have a total of 6 established comfrey plants next to beds 2&3.  I went to bed #1 and dug out one shovel full of aged and decomposed wine cap infused woodchips (former wood chips might be more accurate). There were occasionally pieces of wood here and there, but mostly the bedding looked like coffee grounds.

As I dug up the one scoop, I could still see plenty of little white strands of fungi in the bedding.  As the scoop fell apart as I placed it in a 5 gallon bucket, even more fungi was plainly visible—mostly it was little white threads, while some was white fuzz generally surrounding a little chunk of wood.  I will fill the hole I left with more woodchips later today.

Going back to my comfrey plants, I made a little ring of spawn around each plant.  I then brought over a single 5 gallon bucket full of woodchips that I spread around each comfrey plant.  As it turns out, 5 gallons of woodchips is not all that much. The comfrey does have a nice, thick ring of chips, but I plan to follow up with more chips to really cover the comfrey area with plenty of woodchips in a nice, thick and broad area.

As with the garden beds, the purpose of the wine caps on/near the comfrey is not so much for the mushrooms, but rather to add extra fertility to the comfrey plants themselves.  I realize that comfrey does not really need any extra fertility, but I figure that it cannot hurt.  It will probably take 6-12 months, but that’s fine.  And any mushrooms I get will be a bonus!

Eric
 
Posts: 269
45
  • Likes 2
  • Mark post as helpful
  • send pies
    Number of slices to send:
    Optional 'thank-you' note:
  • Quote
  • Report post to moderator
Eric, a picture is worth 1000 words, your tomato bed is the smae as my asparagus beds will be.
Thanks so much.
Content minimized. Click to view
 
Eric Hanson
gardener
Posts: 5436
Location: Southern Illinois
1487
transportation cat dog fungi trees building writing rocket stoves woodworking
  • Likes 5
  • Mark post as helpful
  • send pies
    Number of slices to send:
    Optional 'thank-you' note:
  • Quote
  • Report post to moderator
So I have an observation for anyone following this thread.  Today, 4/2/2020, I went out and checked on my woodchips that I sowed last spring in bed#2.  

When I sowed spawn in spring 2018, I did so into chips that were aged and partly broken down, most likely by bacteria.  Last spring when I sowed wine caps in bed#2, I did so into freshly chipped wood.  I used twice as much spawn to inoculate about the same volume of chips and there has definitely been decomposition, but when I checked about an hour ago I did not see as much fungal activity as I thought I would.  The chips were loaded with worms and the bed level has dropped considerably, but I did not see as much white fuzz or white strands.

Part of the reason for not seeing fungal activity might actually be lighting conditions, it being so bright it is a little hard to see into s dark hole—I want to try again when it’s a little cloudier and not so blinding when I look into the holes I dug.  Strangely, I thought I saw more spawn when I checked a couple of weeks ago so the lighting may be an issue.  I have certainly had plenty of rain as of late, and the entire last year was plenty wet.

If the wine caps act like they did last year then I am about 2-3 weeks away from a flush.  It will be interesting to see if things stay close to schedule.  If things don’t stick to schedule, then I suspect that the issue would be a relative lack of bacteria at the time of inoculation.

But even if I don’t get a flush, I still have plenty of compost in the wood complete with loads of worms. Each time I dug into the chips I found multiple worms crawling around.  It will be interesting to see what happens and I will definitely keep this updated.

Eric
 
Eric Hanson
gardener
Posts: 5436
Location: Southern Illinois
1487
transportation cat dog fungi trees building writing rocket stoves woodworking
  • Likes 1
  • Mark post as helpful
  • send pies
    Number of slices to send:
    Optional 'thank-you' note:
  • Quote
  • Report post to moderator
Update 4/3-4/4 2020

Yesterday (4/3) I went out and poked around some more in bed #2 looking for threads of fungi.  I did see a bit more than the last time and I had a few observations.

1). The bed is overall not as squishy as last year’s bed (bed #1) and the top inch or so of the chips is a bit dry.  It was a warm, sunny, dry and windy day, this being the 3rd in a row after weeks of constant overcast skies and seemingly perpetual rain.  

Last year, my mushroom bed in bed #1 had soft chips all the way to the tops.  But there was an important difference between the two.  Bed #1 got covered in a 2-4 inch layer of straw just after inoculation back in 2018.  Last year after inoculating bed #2 I went to get straw, but apparently there was a straw shortage.  I simply could not find straw anywhere.  I substituted grass clippings for straw thinking they would have the same effect.  After sitting for a year growing fungi, Bed #1 still had a layer of straw by spring of last year.  The grass clippings are mostly gone from Bed #2 this spring and the top inch of chips is much more dry than the same layer in last year’s bed.  It is possible that the fungi did not inhabit this top layer.

2). As I dug down I found many more signs of life.  The lower, deeper chips were more moist, DID have fungi (I dug deeper yesterday than previously) and seethed with worms which is great.  In fact, there are more worms in this lower level than in beds in previous years, so there is plenty of biological activity going on down there.  This is good news.

3). I poked around in bed #3 which was haphazardly inoculated last year and parts actually grew quite well.  I framed the bed this year and dumped a lot of freshly chipped wood on the top to fill up the bed.

I dug in there just to see what was going on and I was rewarded by seeing that the new chips are already being inoculated—quite thoroughly—from the bottom up.  I saw plenty of rewarding white strands of fungi reaching from the lower, older chips into the newer, fresher chips on top.  It will be interesting to see how things work out in this bed.


I can’t tell yet if the signs here are encouraging or discouraging for bed #2.  I am not certain what to think about lower levels of fungi in the upper portions of the bed.  I am wondering if the fungi are getting ready to fruit or if bed #2 will be a bust (for mushrooms) this year.  I will make regular observations, take pictures and pay close attention.

Eric
 
Eric Hanson
gardener
Posts: 5436
Location: Southern Illinois
1487
transportation cat dog fungi trees building writing rocket stoves woodworking
  • Likes 3
  • Mark post as helpful
  • send pies
    Number of slices to send:
    Optional 'thank-you' note:
  • Quote
  • Report post to moderator
4/6/2020 update.

I recently planted potatoes on bed #1 which grew mushrooms last year.  My technique was simply drop potatoes on the bed surface and cover with 8ish inches of wood chips.  Today I went to check on the potatoes so I dug in a bit and while I didn’t find the potatoes (dog was with me), I could plainly see that recently applied fresh woodchips were covered in white strands of fungi.  It is really surprising just how fast the newly applied (and chipped) woodchips got infected by the wine caps.  I doubt that the chips have been on the bed for more than 3 weeks.  It’s plainly evident that bed #1 is plenty active and alive with wine caps.

I will try to get some pictures soon.

Eric
 
Eric Hanson
gardener
Posts: 5436
Location: Southern Illinois
1487
transportation cat dog fungi trees building writing rocket stoves woodworking
  • Likes 4
  • Mark post as helpful
  • send pies
    Number of slices to send:
    Optional 'thank-you' note:
  • Quote
  • Report post to moderator
4/9/2020

OOOOOOO!!!

Today I was mowing by my garden beds, and I saw mushrooms!!  

The mushrooms were in bed#1, the first bed I inoculated.  The exciting part is that when I inoculated back in 2018 (actually, just about 2 years ago to the date), I only inoculated about 1/2 of a 32' long bed.  Basically I ran out of spawn to go any further.  The mushrooms I saw today were in a part of the bed NOT inoculated 2 years ago!  I did get some fall mushrooms about 2' from the edge from where I inoculated, but the mushroom furthest was 6-8' from the edge of inoculation based on 2018, or about 5' from where mushrooms emerged from last fall.  It is exciting to see these as it is evidence that I have an active colony growing into new parts of the garden bed.  I might have to call this part of the bed as bed #1b as while it had chips, I did NOTHING to it for the last two years.  It got inoculated all by itself from growth that came from the other half (bed #1a).

There were about 10-12 mushrooms, and most were too big to eat, but I did get 4 that were still edible and they are now in my kitchen!  Yay!

I will follow up with pictures, soon, I just wanted to post this ASAP.

Eric
 
Eric Hanson
gardener
Posts: 5436
Location: Southern Illinois
1487
transportation cat dog fungi trees building writing rocket stoves woodworking
  • Likes 3
  • Mark post as helpful
  • send pies
    Number of slices to send:
    Optional 'thank-you' note:
  • Quote
  • Report post to moderator
4/14/2020

I planted a second round of potatoes in bed #3.  This bed hosted potatoes last year and in fact some are coming up volunteer.  Normally I would never plant the same crop in the same place two years running.  But only part of the bed grew potatoes and I put down a nice thick layer of chips.

Seems like my my last attempt at potatoes was started under two deep a layer of chips.  I don’t think I will see those producing plants.

Eric
 
pollinator
Posts: 701
Location: Sierra Nevada Foothills, Zone 7b
154
dog forest garden fish fungi trees hunting books food preservation building wood heat homestead
  • Likes 1
  • Mark post as helpful
  • send pies
    Number of slices to send:
    Optional 'thank-you' note:
  • Quote
  • Report post to moderator
Hi Eric!

Looking good. I am loving the in-depth reporting. I have yet to make a copycat bed following your technique like I said I was going to. Looks like it won't happen until at least this fall.

But, I did just scoop up a truckload of chips to mulch my new garden with and they were well composted, about 50/50 wood to soil mix. I posted a pic in the Victory Gardens thread but it isn't really close enough to see the details. So, how do you think trying to grow some plants directly in those chips would do? I think I am going back to grab just enough chips to plant a "potato tire stack" and a tomato plant into a pot of just these chips, mostly for experimentation's sake. Maybe I'll do 2 of each and feed only one of each to compare results. Promises, promises...

Anyway, I have chased down two different chipper trucks in my neighborhood in the last week. Both guys said they would dump chips at my house. Both let me down... A little frustrating. But! My neighbor, a tree service guy, said he will bring me a dump truck load some day, although his wife interjected with, "those are our chips, hahaha!". They are doing the same thing as me, spreading chips over their entire pad to revitalize the clay sheet we live on and reduce the mud.

Keep up the good work!

 
Jay Angler
steward
Posts: 12421
Location: Pacific Wet Coast
6991
duck books chicken cooking food preservation ungarbage
  • Likes 2
  • Mark post as helpful
  • send pies
    Number of slices to send:
    Optional 'thank-you' note:
  • Quote
  • Report post to moderator
Dan Fish wrote:

So, how do you think trying to grow some plants directly in those chips would do? I think I am going back to grab just enough chips to plant a "potato tire stack"

I tried the tire thing years ago and it never worked and I've since read from several sources, that it didn't work for them either. I would just put down a 3 foot wide row of that lovely sounding material about 4 inches deep, put your spud starts down about a foot apart and cover with more material. Reserve a good pile of the material and add it as they need hilling. This should be better at conserving moisture which was part of the issue when I tried growing spuds vertically - it was just too hard to keep the moisture where I needed it. That said, if you've only got a tire-sized spot to try to grow in, you've not got much to loose.
 
Dan Fish
pollinator
Posts: 701
Location: Sierra Nevada Foothills, Zone 7b
154
dog forest garden fish fungi trees hunting books food preservation building wood heat homestead
  • Likes 1
  • Mark post as helpful
  • send pies
    Number of slices to send:
    Optional 'thank-you' note:
  • Quote
  • Report post to moderator
Wow thanks! My main problem is moisture conservation and I am glad you brought it up. I should be able to come up with something more along the lines you are recommending somewhere. My problem right now is space but I should be able to rig something up.
 
Eric Hanson
gardener
Posts: 5436
Location: Southern Illinois
1487
transportation cat dog fungi trees building writing rocket stoves woodworking
  • Likes 2
  • Mark post as helpful
  • send pies
    Number of slices to send:
    Optional 'thank-you' note:
  • Quote
  • Report post to moderator
Dan,

Glad you like the thread.  I like that people get something out of it and even though I am handing out advice, I thought it should just point out that I am still learning as well and I too was once groping in the dark.

I don’t know about the potato tire, I have just heard too many people not have it work out, but Jay covered that pretty well already.

But aside from that, I think you have some good plans.  I know it is hard to get chips from tree services, I have tried.  That’s why I had to chip up my own.  Great thing about wine caps is that they are pretty forgiving.  Please do keep us up to date, I would love to hear how things work out down the road.

Great work so far,

Eric
 
Eric Hanson
gardener
Posts: 5436
Location: Southern Illinois
1487
transportation cat dog fungi trees building writing rocket stoves woodworking
  • Likes 2
  • Mark post as helpful
  • send pies
    Number of slices to send:
    Optional 'thank-you' note:
  • Quote
  • Report post to moderator
I am updating this thread today (4/26/2020) with some insight provided to me by Hugo Morvan.  Hugo is building his own mushroom bed by following some basic instructions I have on this site and is actively trying to incorporate live plants into the wine cap growing operation which is just fantastic.  He followed my instructions to a “T”, but then added one further step HERE:

https://permies.com/t/108551/wine-cap-compost-observations#1093304

The step Hugo added was an extremely simple but brilliant addition to the overall growing process and I want to make sure he gets fully credited for this insight.

What Hugo did was build his bed and inoculate as normal, but then added a simple cardboard sheet to the top (with holes cut out for his plantings).  The beauty of this step is that that layer of cardboard really helps regulate the moisture under the cardboard.  His chips were not only moist, the fungus had already spread to the top layer and was even growing through the cardboard!  This is really amazing.  Last year I did not see a meaningful spread of the fungal body for months!  Hugo got it in just a couple of weeks.

On a parallel note I noticed that where I piled a thick (8-12”) layer of chips this year, the fungus grew up in a matter of weeks.  It appears that keeping the wood substrate consistently moist really paves the way for a fast spread of wine caps in the woodchips.  I am going to start placing a cardboard topper where I can as soon as possible.

Eric
 
Eric Hanson
gardener
Posts: 5436
Location: Southern Illinois
1487
transportation cat dog fungi trees building writing rocket stoves woodworking
  • Likes 2
  • Mark post as helpful
  • send pies
    Number of slices to send:
    Optional 'thank-you' note:
  • Quote
  • Report post to moderator
4/30/2020

A quick update on bed 1b, or the western half of the bed that I inoculated with wine caps back in 2018.  I just got finished planting some spring veggies with my daughter.  We were planting in the section not inoculated directly (hence the b in the 1b).  As we dug the trenches for the seeds, it was plainly evident that the fungus had already beat us to the area.  We dug out large white sections of fungi and the wood was spongy.  White threads were everywhere and worms crawled all underneath the surface.  I hope to see good vegetable growth.

I think that as the seeds germinate I will go ahead and add a 1-2” layer of fresh chips as a mulch layer.  The other side of the bed (1a) got a fresh 10ish inches of chips which are colonizing rapidly.

I will keep this updated as circumstances develop.

Eric
 
Jay Angler
steward
Posts: 12421
Location: Pacific Wet Coast
6991
duck books chicken cooking food preservation ungarbage
  • Likes 4
  • Mark post as helpful
  • send pies
    Number of slices to send:
    Optional 'thank-you' note:
  • Quote
  • Report post to moderator
I built this bed last year specifically for tomatoes. Last fall, I buried a bunch of veggie scraps and several dead chickens in it and then covered it with a thick layer of leaves. Two days ago, I pulled off most of the leaves and added some well aged compost that still has chunks of wood in it (most of my compost does). I found some edible mushrooms in one of the chicken runs that were too mucky to consider eating, so if you look in the back right corner, I've stuck them in the soil in the hopes that they will multiply though this bed. Wish them luck?
2020-Apr-29-just-planted-6-toms-and-some-mushrooms.jpg
2020-Apr-29-just-planted-6-toms-and-some-mushrooms
 
Eric Hanson
gardener
Posts: 5436
Location: Southern Illinois
1487
transportation cat dog fungi trees building writing rocket stoves woodworking
  • Mark post as helpful
  • send pies
    Number of slices to send:
    Optional 'thank-you' note:
  • Quote
  • Report post to moderator
Looks nice Jay.
 
gardener
Posts: 5169
Location: Cincinnati, Ohio,Price Hill 45205
1010
forest garden trees urban
  • Mark post as helpful
  • send pies
    Number of slices to send:
    Optional 'thank-you' note:
  • Quote
  • Report post to moderator
Great reporting Eric!
You might have mentioned it,  but are you buying new spawn,  making your own or using previously  inoculated woodchips?

Rather off topic, you mentioned planting with your daughter and finding loads of fungus and worms,  and I thought" I wonder if they have seen Nausicaa of the Valley of the Wind?"
It is serious enough that I only showed it to my daughter this year, as she turned 12, but so good it was hard to wait.
The rousing, uplifting adventure of a young female protagonist with a special relationship to the  fungus and invertebrates of her world.
She's like a Permaculture Snow White,  right down to having a following of stumpy grumpy little men.


Eric Hanson
gardener
Posts: 5436
Location: Southern Illinois
1487
transportation cat dog fungi trees building writing rocket stoves woodworking
  • Likes 2
  • Mark post as helpful
  • send pies
    Number of slices to send:
    Optional 'thank-you' note:
  • Quote
  • Report post to moderator
William,

Interesting note about the movie.  I might see if I can find it and maybe talk my daughter into it.

As to your first question, in 2018 I used 2 5.5 lb bags of spawn to inoculate one bed.  Last year I used 4 bags to inoculate my bed#2 and 1.5 bags to inoculate bed#3.  Ironically bed #3 is doing the best.  

At this point I cannot see myself buying any more spawn as I have plenty from existing beds right now.  I even inoculated my woodchips around my comfrey plants with some already decomposed and inoculated compost left over from my bed#1.

Last year I was skeptical about using compost from my first bed to start my new beds, but now I have built up enough of a spawn base in my beds that I no longer care about a few missing shovel fulls that will promptly be fed by new chips.

Regarding the bed from my last post, that was bed 1b, or the uninoculated side of bed #1.  The spawn simply grew—several feet—from one side to the other.

I hope I was clear here.  I had a cat rubbing my arms while typing on my phone!

Eric  
 
Eric Hanson
gardener
Posts: 5436
Location: Southern Illinois
1487
transportation cat dog fungi trees building writing rocket stoves woodworking
  • Likes 1
  • Mark post as helpful
  • send pies
    Number of slices to send:
    Optional 'thank-you' note:
  • Quote
  • Report post to moderator
Update, 5/21/2020

Last week (call it about 5/12/2020) I got my tomatoes planted in my bed #2.  I need to get some pictures of this bed in here, but it will have to be a better day for taking pictures, but I have finally got my fence/gates around my bed #2 to protect it from deer and bunnies.  I planted tomatoes and as I dug the holes, the chips were riddled with white strands of fungi, presumably wine caps.  This is a significant turn of events from about a month ago when fungal strands were largely absent from the upper layer though still plentiful several inches below the surface.  I have to assume that the conditions for growing improved radically in the last month.  And it has been a wet, cool, cloudy, rainy May thus far.  Who knows, I may still get a late flush of wine caps.  The chips had generally decayed to the point that they looked like coffee grounds.  As I checked on my tomatoes earlier today, they are doing well despite the cool weather.  Still no signs from the sweet potato slips, but that is not unsurprising.  

Two days ago I partially topped off the chips.  The surface level dropped significantly over winter, especially by the raised bed edges, where I added about 5' of new chips just to level out the pile.  There are weeds-a-plenty growing in the bed, so in the next couple of days I will lay down some cardboard or paper and cover with another 2-4 inches of chips in order to really smother the weeds and bring the chip bed back up to at least the top of the bed edges and possibly a couple of inches more.  Given how fast the fungal strands are growing in the bed, and also thanks to Hugo's discovery about how fast fungi spreads under a layer of cardboard, I am sure that the new chips will be wine cap food in no time.

I just thought I would offer a little update, and I promise to get pictures sent in soon.

Eric
 
Joe Grand
Posts: 269
45
  • Likes 2
  • Mark post as helpful
  • send pies
    Number of slices to send:
    Optional 'thank-you' note:
  • Quote
  • Report post to moderator
I just got this email:
TIP: Word of caution, once the earth worms learn where the mycelium is, they will come for it, so moving the bed each year to another location might be a good idea, if you are looking to eat mushrooms.
https://mushroommountain.com/king-stropharia-the-garden-giant/


Eric Hanson
gardener
Posts: 5436
Location: Southern Illinois
1487
transportation cat dog fungi trees building writing rocket stoves woodworking
  • Mark post as helpful
  • send pies
    Number of slices to send:
    Optional 'thank-you' note:
  • Quote
  • Report post to moderator
Joe,

Thanks for the tip.  My primary goal in having mushrooms is to have the excellent bedding it provides.  The actual mushrooms for eating are a tasty side benefit.  But if my wine caps indeed attract worms, then I am more than happy.  And from the looks of things, the worms have found me!

Eric
 
Joe Grand
Posts: 269
45
  • Likes 1
  • Mark post as helpful
  • send pies
    Number of slices to send:
    Optional 'thank-you' note:
  • Quote
  • Report post to moderator
I have nothing but good things to say about earthworms, but I want the mushrooms too.
So I may have to find a way to control the worms, I know this is garden baspheming, but I have fire ants so I have to grow earthworms in a container/bathtub to get any castigs.
Therefore I do not need them competing with the myciluim, which will keep the beds full of compost.
So I may have to put screen wire around the mycilium beds or it may not be problem after all.
What I need is more reseach & if iI find that the problem is minor or a solution I will post it.
 
Eric Hanson
gardener
Posts: 5436
Location: Southern Illinois
1487
transportation cat dog fungi trees building writing rocket stoves woodworking
  • Likes 1
  • Mark post as helpful
  • send pies
    Number of slices to send:
    Optional 'thank-you' note:
  • Quote
  • Report post to moderator
Update 6/2/2020

Just had an observation on my mushroom bed.  Since converting over to woodchip/wine cap bedding, I have been amazed by the prolific fertility of mushroom compost.  My bed #2, which is in its second year, is presently growing tomatoes and sweet potatoes, as it did last year.  The position of the plants has been swapped so that tomatoes are growing where sweet potatoes (tried—critters ate them all) did last year and vice versa.  Last year’s tomatoes grew well in fertile holes, but the sweet potatoes grew (before they got eaten) in pure woodchip/wine cap bedding.  This year the tomatoes are growing in pure woodchip/wine cap bedding as an experiment to see how a heavy feeder would do without a fertile hole.

Happily, the young tomatoes are growing like gang busters!  I planted them a few weeks ago, but we have had a very cool and wet spring up to this week when the temperatures finally got out of the 60s (I like cooler weather but my tomatoes don’t!).  Actually, in the past I have planted tomatoes too early and they looked sickly in the cooler weather, not doing well until the heat came.  But despite weeks of cooler than normal temperatures, these tomatoes look great!  They are already beginning to shoot up and the foliage is nice and dark green—and this is without any nitrogen added by me.

I just got done laying down a cardboard weed barrier, and I need to get some woodchips on top to keep things in place and generally make things purdy.  After I spread more chips I will upload some pictures.

Eric
 
Eric Hanson
gardener
Posts: 5436
Location: Southern Illinois
1487
transportation cat dog fungi trees building writing rocket stoves woodworking
  • Likes 5
  • Mark post as helpful
  • send pies
    Number of slices to send:
    Optional 'thank-you' note:
  • Quote
  • Report post to moderator
Hello all,

A while back I promised I would post an update of my raised bed with the new gate and fence sections.  I procrastinated long enough and I finally have them.  The way it is set up is that the "fence" consists of 6 gates, all of which can be lifted out for access.  This gives me access to any part of the bed I want yet keeps the critters at bay.  Notably, my surviving sweet potatoes are growing nicely without any critter pressure and I am optimistic that I will get a good harvest this year.

Picture #1 is a picture with all the gates in place.

Picture #2 shows one of the gate sections removed for access.

Picture #3 shows the bed growing sweet potatoes with a gate section removed

Picture #4 shows my tomatoes growing

It is worth noting that the tomatoes are NOT growing in fertile holes.  They are planted in straight wood chips aged one year, with a weed barrier of cardboard held in place by still more wood chips.

I really hate weeding, and as you can see, there is virtually no weed pressure anywhere in the bed.  What few weeds exist can easily be pulled out, and since they are rooted in wood chips, when I pull them, the entire root mass comes along for the ride.

Eric
IMG_5998.JPG
Bed with gates in place
IMG_5999.JPG
Gate section removed for access
IMG_6003.JPG
Sweet potatoes
Sweet potatoes
IMG_6004.JPG
Tomatoes
Tomatoes
 
Eric Hanson
gardener
Posts: 5436
Location: Southern Illinois
1487
transportation cat dog fungi trees building writing rocket stoves woodworking
  • Likes 1
  • Mark post as helpful
  • send pies
    Number of slices to send:
    Optional 'thank-you' note:
  • Quote
  • Report post to moderator
Update, 1/10/2021,

Earlier (late fall 2020) I dug around the chips in all my beds to check on fungal activity and I was a little disappointed.  I only found one area in all three of my garden beds where I had very clear and obvious signs of fungal activity despite all beds having been inoculated by spring 2019 at the very latest.  This surprised me as I used considerably more spawn to inoculate and earlier I had seen much more clear evidence of fungal activity such as white strands of mycelia running throughout the bed.  

The one place where I did see plenty of fungal activity was where I planted tomatoes, so perhaps there is something about the tomatoes that the Wine Caps really like.  Potentially it could be the fine root mass, or the nice, dappled shade provided by the plants.

On account of COVID and concerns of potential food scarcity (mostly a precaution here) I planted either sweet potatoes or regular potatoes in all of the rest of my beds (remaining 2.5 of the 3 beds).  The potatoes grew just fine, but the chips beneath them did not have tons of mycelia running through the chips.  I have a couple of thoughts about possible causes for the lack of mycelial growth:

1)  The root crops have some inhibiting effect on Wine Caps (all of the potatoes looked fine, even though I harvested some months late).

2)  Perhaps the Potatoes and Sweet Potatoes gave inadequate shading for the Wine Caps.

3)  I did not give any of the beds any water other than what fell from the sky.  It was a normal year for us--hot and humid.  Possibly the tomatoes shaded in the moisture better that the other crops

4)  I would have added straw, but apparently there was a straw shortage as I could find no straw anywhere so wood chips were exposed to direct sunlight for at least part of the growing season

If anyone has their own thoughts, I would love to hear them.  Being winter, I don't expect to see much, if any growth till the temps get reliably above freezing.

Eric
 
pollinator
Posts: 191
Location: Lake Geneva, Switzerland, Europe
46
  • Likes 2
  • Mark post as helpful
  • send pies
    Number of slices to send:
    Optional 'thank-you' note:
  • Quote
  • Report post to moderator
And how was the potato harvest?
 
Eric Hanson
gardener
Posts: 5436
Location: Southern Illinois
1487
transportation cat dog fungi trees building writing rocket stoves woodworking
  • Likes 1
  • Mark post as helpful
  • send pies
    Number of slices to send:
    Optional 'thank-you' note:
  • Quote
  • Report post to moderator
Hi Susan, thanks for asking.

The potato harvest was good but not great, but a lot of that is my fault.  I planted virtually all my garden space in potatoes as a sort of COVID panic emergency plan with the potatoes going in just as the grocery shelves were starting to empty out early in the COVID scare last spring.  As the shelves filled back up my panic lessened and my concern for the majority of the potatoes went away.  I did harvest some in a timely manner and those were just fine, but I left a bunch just stay in the ground--I know, not a great practice.  I went and checked on things a couple of weeks ago and found that I still had potatoes in the chips and they were in surprisingly decent shape, but I did not have as many as I would have expected.  Part of this is because I did not really dig up my bed--I was really looking for fungi patterns.

In the past, when I have been more timely at getting my potatoes out, the potato harvest was much better than last summer.

My sweet potato harvest on the other hand was quite good.

Eric
 
Eric Hanson
gardener
Posts: 5436
Location: Southern Illinois
1487
transportation cat dog fungi trees building writing rocket stoves woodworking
  • Likes 1
  • Mark post as helpful
  • send pies
    Number of slices to send:
    Optional 'thank-you' note:
  • Quote
  • Report post to moderator
Update, 4/12/2021

Rejuvenating my mushroom beds.

Last year was a bit disappointing from the standpoint of harvesting mushrooms.  For reasons I still don’t completely understand, none of my beds actually produced and Wine Caps.  I have been curious and investigating about this event since last fall passed without and mushrooms.  But here is a basic synopsis:

Bed #1 was the first bed to be raised and the first to be inoculated.  The eastern portion (1a) gave me my first flush a couple of years ago.  The Wine Caps spread throughout the rest of the bed in subsequent years.  Last spring I planted potatoes by placing the seed potatoes on the surface and covering with about 10-12” of wood chips thinking that the new chips would be fresh fodder for residual fungi.  As of yesterday when I went digging around looking for mycelium, I found none, but the wood chips were largely broken down to all but the top 2”.

Bed#3 was actually the second bed to get inoculated (it was the last to get raised).  This bed did have some mushrooms 2 springs ago, even though it was only haphazardly inoculated with a little left over spawn. It too was planted with potatoes last spring in the same manner as bed#1–place potatoes and pile on the chips.  Although I saw no actual mushrooms, upon digging I could find a few spots where the mycelium was prolific.  But in most places it was absent.

Bed#2 is the real mystery.  It never grew even a single mushroom.  When I dug I did find a couple spots where there was some mycelium present, occasionally fairly densely, but most places I dug showed nothing.  One pattern I noticed was the places that had mycelium also had the thinnest layer of chips.  Thicker areas of chips showed now mycelium strands.

In all the beds there was quite a bit of wood chip decomposition, but I made one last observation.  I also have 6 comfrey plants located just outside the garden raised beds.  They have been mulched with wood chips for years, but last year I added some mycelium infected chips from the garden beds to encourage Wine Caps around the comfrey as well.  I finished by adding a thick layer of wood chips on top of the mycelium.  Yesterday I could barely find any growing mycelium and the chips themselves were not broken down well at all.

I did contact Field & Forest, my supplier of spawn and they told me some interesting information.  Firstly, they told me that they get best results with a mixture of chips and straw.  Beds 1&3 were inoculated with straw layers and produced mushrooms but bed#3 never got straw due to my acting late 2 years ago and a COVID shortage last year.  Perhaps this explains the poor mushroom performance in bed#3.  They also told me that it is possible to put on too thick a layer of chips and essentially smother the fungi.  They recommend 3-6 inches but I at least doubled that.  Finally, I found that the actual mushrooms grew best next to tomatoes, probably because of shade, but last year I grew a lot of potatoes that of course die back in heat.

With this in mind I am taking a few steps.

1)  I did pick up some straw to mix with and cover the wood chips.

2)  I am going to order a little bit more spawn to hopefully rejuvenate the beds, especially bed#2 that never produced chips.

3)  I am going to try an experiment by adding straw directly adjacent to some areas of good mycelium growth.

I will keep this updated.

Eric
 
Eric Hanson
gardener
Posts: 5436
Location: Southern Illinois
1487
transportation cat dog fungi trees building writing rocket stoves woodworking
  • Likes 2
  • Mark post as helpful
  • send pies
    Number of slices to send:
    Optional 'thank-you' note:
  • Quote
  • Report post to moderator
An update: 5/4/2021,

While walking the dog this morning I took a quick look at my comfrey plants and to my surprise, Wine Caps were popping up around one of the plants!  This was a nice bit of good news as last year my mushroom production was rather disappointing.  However, some of my observations may point to a reason why.  

I did know that Wine Caps like to grow in close proximity to soil, but one of the new mushrooms was a full 6" away from the nearest wood chip.  I can only assume that the Wine Cap hyphae had tunneled out at least that far in order to push up that mushroom.  There were also a half-dozen other mushrooms growing nearby, but they were all right on the edge of the wood chips that mulched the comfrey plants.  Normally I give my comfrey plants a fresh layer of wood chips each year, but last year I also added some nice, fresh spawn straight out of the garden beds that were inoculated last year.  This gives me two thoughts.  First, it appears that the spawn I dug was indeed fresh and fertile--enough so that it colonized around at least one comfrey plant.  Secondly, I am wondering if I dug out the healthiest portions of my spawn in my chip-beds last year and they are taking time to re-establish.  This could certainly explain why I saw very limited fungal activity and no actual mushrooms
On a slightly different note, ALL of the mushrooms were either coming straight out of the ground itself with no apparent wood chip directly adjacent or coming out of wood chips only about 1" thick.  Perhaps in addition to taking the heathiest portion of my chip beds, the remaining wood chips may have been too thick, with the soil buried under too deep a layer of wood chips.

Again, I will keep this updated and I plan to attach a picture in about 2-3 hours or so.

Eric
AE48AD14-CDDA-4ED3-9337-36A2882B8DA8.jpeg
A large Wine Cap growing 6 inches away from wood chips
5AC4A719-68E6-4EAB-B78A-545D3A1FFA27.jpeg
Baby Wine Caps, some in and some out of wood chips
DD97A8A3-EDCF-4812-A2A2-F77D7205EF2E.jpeg
Wine Cap Mushrooms, some growing in chips, some growing in soil
B4BDC7A0-AA60-477D-A180-A5390658C23E.jpeg
A cluster of Wine Cap Mushrooms growing in wood chips and on top of soil
 
Susan Wakeman
pollinator
Posts: 191
Location: Lake Geneva, Switzerland, Europe
46
  • Likes 3
  • Mark post as helpful
  • send pies
    Number of slices to send:
    Optional 'thank-you' note:
  • Quote
  • Report post to moderator
According to Stamets, Winecaps are both saprophytic (wood digesting) and symbiotic, needing both plants and bacteria in order to thrive. From what you are saying, I am wondering if their role is in this intersection between woodchip and compost means that they move on when their job is done?
Then again, I heard that winecaps were used in Hungary(?) to degrade cornstalks, and that the mushrooms were harvested in the cornfields.
 
Eric Hanson
gardener
Posts: 5436
Location: Southern Illinois
1487
transportation cat dog fungi trees building writing rocket stoves woodworking
  • Likes 2
  • Mark post as helpful
  • send pies
    Number of slices to send:
    Optional 'thank-you' note:
  • Quote
  • Report post to moderator
Susan,

You are on the right track.  Everything you read from Stamets is essentially correct.  The exact detailed procedure for reproducing a continuous batch is still a bit mysterious and more art than science.  The place where I order my spawn is engaged in some government research about growing mushrooms more productively.  Further, they take input from amateur growers out there like myself and others.  

One of their findings is that the Wine Caps really like to have some degree of soil contact—probably for the bacteria.  I am going to experiment with adding in some bacterial cultures to see what happens.

Really going observations!

Eric
 
I'm all tasted up for a BLT! This tiny ad wants a monte cristo!
A PDC for cold climate homesteaders
http://permaculture-design-course.com
reply
    Bookmark Topic Watch Topic
  • New Topic