• Post Reply Bookmark Topic Watch Topic
  • New Topic
permaculture forums growies critters building homesteading energy monies kitchen purity ungarbage community wilderness fiber arts art permaculture artisans regional education skip experiences global resources cider press projects digital market permies.com pie forums private forums all forums
this forum made possible by our volunteer staff, including ...
master stewards:
  • Nancy Reading
  • Carla Burke
  • r ranson
  • John F Dean
  • paul wheaton
  • Pearl Sutton
stewards:
  • Jay Angler
  • Liv Smith
  • Leigh Tate
master gardeners:
  • Christopher Weeks
  • Timothy Norton
gardeners:
  • thomas rubino
  • Jeremy VanGelder
  • Maieshe Ljin

Mocking up my new batch box core

 
rocket scientist
Posts: 6307
Location: latitude 47 N.W. montana zone 6A
3178
cat pig rocket stoves
  • Likes 8
  • Mark post as helpful
  • send pies
    Number of slices to send:
    Optional 'thank-you' note:
  • Quote
  • Report post to moderator
Hi all;  Getting warm here.  
I took the plow off the truck yesterday!   March 7th a new record!
Time to start work on my batch box's!
I don't dare start on converting the rocket in Liz's studio , might / will get cold again.
Now the shop Dragon is different, if it gets too cold while I'm working out there, I'll put on coveralls...

So today instead of working on cars, I have been playing with my new insulated fire bricks ! Building a mock up of my core and riser base.
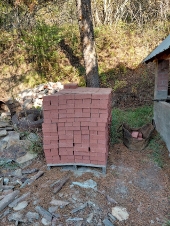
I bought 50 bricks @ $1 each.  I was thinking (there's the problem!) that 50 should be plenty for 2 batch's...  WRONG...  I think I'll end up using 45 or so on just the 8"...
Another beautiful ride to Big Fork is in our future... oh well a sterling example of better planning in action!
I should of held a tail gate safety meeting prier to embarking on that sunny spring day drive...

Working with these insulated bricks is a joy!  I am cutting them with a carpenters wood saw!   You do need to be gentle as the edges like to break, but all in all they are awesome!
No comparison to cutting the heavy brick's with an angle grinder, while wearing a respirator and a face shield !
A cardboard base with an eight inch circle is all I needed. Dimensions on a batch ,like box size and port size are critical .  
I'm lucky in that there will only be minimal brick cutting involved for the 8" build.

Still working on my secondary floor ports.  The 6" version is almost finished and the 8" is started but my Makita grinder is acting up!  Of Course!
I have new brushes coming for the Makita ,but to be sure there is also a new Matabo grinder coming as well!

I've been studying Matt's video on door building and have pieces and parts on hand and some arriving soon.
Its all starting to come together...


20200308_135738.jpg
[Thumbnail for 20200308_135738.jpg]
8" Batch
20200308_140322.jpg
[Thumbnail for 20200308_140322.jpg]
8" Batch
20200308_140327.jpg
[Thumbnail for 20200308_140327.jpg]
8" Batch
20200308_140347.jpg
[Thumbnail for 20200308_140347.jpg]
8" Batch
 
Rocket Scientist
Posts: 1807
Location: Kaslo, BC
524
building solar woodworking rocket stoves wood heat greening the desert
  • Likes 3
  • Mark post as helpful
  • send pies
    Number of slices to send:
    Optional 'thank-you' note:
  • Quote
  • Report post to moderator
Hooray Thomas!  The day is here and the crowds cheer!  

I bet as a kid you had Lego's and made all sorts of interesting things, and I can see that you still like to play with building blocks.... The big boys kind.

I wish you well on your journey and as always, look forward to all the details of your build. Also, the details of your J tube tear-down if there is something we can learn from a stove that's been in service for a while.
 
thomas rubino
rocket scientist
Posts: 6307
Location: latitude 47 N.W. montana zone 6A
3178
cat pig rocket stoves
  • Likes 4
  • Mark post as helpful
  • send pies
    Number of slices to send:
    Optional 'thank-you' note:
  • Quote
  • Report post to moderator
Hi All;
After looking at my mock up, I began to wonder if an octagonal riser base was necessary? It sure uses a lot of brick.
Maybe I could build a square base to sit my 5 minute riser on?
I made a post last night over at Donkeys board asking that very question.

This morning I got a reply from Peter. The short answer was no, not a good idea.
His suggestion was, if I have enough Skamols. To build a square base and continue up building the entire riser with bricks.

His experiments show that your riser should be all round or all square. Combustion suffers if attempting to use both.

So later today, I'll be dry stacking a square base and seeing if I have enough bricks to build the entire riser from. For an 8" batch that would be just shy of 58".
If not then I'll stick with a round base and use my 5 minute riser.

I'll post photo's later on the square riser attempt.


thomas rubino
rocket scientist
Posts: 6307
Location: latitude 47 N.W. montana zone 6A
3178
cat pig rocket stoves
  • Likes 2
  • Mark post as helpful
  • send pies
    Number of slices to send:
    Optional 'thank-you' note:
  • Quote
  • Report post to moderator
Well , the answer is a big NO. I do not have nearly enough Skamols  to build the riser from bricks.  
All I had did not quite reach 3'  I was shooting for 58"... not gona make it.
Back to plan A ,A round riser base.  I'l be filling the gaps between bricks with ceramic blanket and sealing them off with cob. Then topping it with my 5 minute riser.
20200310_101615.jpg
[Thumbnail for 20200310_101615.jpg]
Plan B
20200310_101620.jpg
[Thumbnail for 20200310_101620.jpg]
Plan B
20200310_101626.jpg
[Thumbnail for 20200310_101626.jpg]
Plan B
20200308_140327.jpg
[Thumbnail for 20200308_140327.jpg]
Plan A
 
Gerry Parent
Rocket Scientist
Posts: 1807
Location: Kaslo, BC
524
building solar woodworking rocket stoves wood heat greening the desert
  • Likes 2
  • Mark post as helpful
  • send pies
    Number of slices to send:
    Optional 'thank-you' note:
  • Quote
  • Report post to moderator
Thomas,  Did you look at Peters site for different brick arrangements? Perhaps one of them would use less bricks for the heat riser?  heat riser designs
 
thomas rubino
rocket scientist
Posts: 6307
Location: latitude 47 N.W. montana zone 6A
3178
cat pig rocket stoves
  • Likes 2
  • Mark post as helpful
  • send pies
    Number of slices to send:
    Optional 'thank-you' note:
  • Quote
  • Report post to moderator
Hi Gerry;
I did look at the different riser designs.  I'll have to count bricks and see what one is easy AND uses the least amount of brick. (don't want much do I)
With the mock up I went with simple, although I do like how it looks.

After chatting with Peter a bit more I may be changing batch size anyway...  
He pointed out how much more bell an 8" needs. My bell is sized to be near a 6" roughly 57' isa, the 8" needs 101' isa.
That puts riser base on the back burner until I know what size  I'm building.
Gaining 44' isa  will not be easy.  Peter suggested I see if I can gain enough to utilize a 7"  We will see...
 
thomas rubino
rocket scientist
Posts: 6307
Location: latitude 47 N.W. montana zone 6A
3178
cat pig rocket stoves
  • Likes 1
  • Mark post as helpful
  • send pies
    Number of slices to send:
    Optional 'thank-you' note:
  • Quote
  • Report post to moderator
Played with bricks again today.  
After some measuring things, I'll going to make this a 7" Batch.
I spent a lot of time trying to design a riser base that I was happy with.

For my bell, to add ISA I am going to put a second barrel on top of the first. That will add 21' by itself.
As this is a marginally insulated shop having more instant heat will be no problem.  Plenty of head room above.
Heck I might even get crazy and insulate the roof over the stove.
I'm planning on adding a foot more to the brick walls as well.

6 inches of snow due tonight , temps in the single digits ... Don't think I'll tear the working dragon apart just yet...
20200313_152237.jpg
[Thumbnail for 20200313_152237.jpg]
7" mock up
20200313_152244.jpg
[Thumbnail for 20200313_152244.jpg]
7" mock up
7-mock-up.jpg
7 mock up
7 mock up
20200313_152249.jpg
[Thumbnail for 20200313_152249.jpg]
new riser base
 
Gerry Parent
Rocket Scientist
Posts: 1807
Location: Kaslo, BC
524
building solar woodworking rocket stoves wood heat greening the desert
  • Likes 1
  • Mark post as helpful
  • send pies
    Number of slices to send:
    Optional 'thank-you' note:
  • Quote
  • Report post to moderator
I know this is still a mock up and subject to change, but were you thinking of building the base of your riser in layers like in the last photo cutting out the material up to the pencil line? If so, that would add a fair bit more thickness to the depth of the port which would go much beyond the 2" recommended depth. I think I remember Peter saying to me something like too little or too much depth to the port affects how the venturi behaves. Just curious as to what your thinking.
 
thomas rubino
rocket scientist
Posts: 6307
Location: latitude 47 N.W. montana zone 6A
3178
cat pig rocket stoves
  • Likes 1
  • Mark post as helpful
  • send pies
    Number of slices to send:
    Optional 'thank-you' note:
  • Quote
  • Report post to moderator
Pay no attention to random circles on bricks... Could have been my granddaughter playing ... well, if she had been here ... oh and if she wasn't 16 now.
Plans have changed again! Circle will be up tight to the wall.
Picture's will follow when I get some more accomplished.
 
thomas rubino
rocket scientist
Posts: 6307
Location: latitude 47 N.W. montana zone 6A
3178
cat pig rocket stoves
  • Likes 2
  • Mark post as helpful
  • send pies
    Number of slices to send:
    Optional 'thank-you' note:
  • Quote
  • Report post to moderator
Posted over at Donkeys this morning. Asking about acceptable port depth.
Peter responded quickly.  There is some leeway in port depth. Not a lot mind you but some.
My 2.5" insulated Skamol bricks will work just fine!
HooRay! That's one less piece of CF board I need to purchase!  
 
thomas rubino
rocket scientist
Posts: 6307
Location: latitude 47 N.W. montana zone 6A
3178
cat pig rocket stoves
  • Likes 4
  • Mark post as helpful
  • send pies
    Number of slices to send:
    Optional 'thank-you' note:
  • Quote
  • Report post to moderator
Hi All;  Got some more done on the batch mock up today.
My time today was spent using a jig saw to cut bricks.
My time was also spent running back to town to buy more jig saw blades!
I only broke one... but I dulled out 3 others. All brand new.  You know your blade is dulling only when you break a brick! I broke several bricks!
Going with a non conventional way of making a riser base. Its using more bricks, but I like how its turning out.
I think with breakage, I'll be using all 50 of my skamol bricks on one 7" batch box!
Good think there is 10,000 more of them a few hours away!
20200316_150103.jpg
[Thumbnail for 20200316_150103.jpg]
7" mock up
20200316_150114.jpg
[Thumbnail for 20200316_150114.jpg]
7" mock up
20200316_150228.jpg
[Thumbnail for 20200316_150228.jpg]
pieces
20200316_150216.jpg
[Thumbnail for 20200316_150216.jpg]
true scrap
20200316_150138.jpg
[Thumbnail for 20200316_150138.jpg]
after the second trip to town
20200316_150146.jpg
[Thumbnail for 20200316_150146.jpg]
8" J tube dragon keeping things warm!
 
Gerry Parent
Rocket Scientist
Posts: 1807
Location: Kaslo, BC
524
building solar woodworking rocket stoves wood heat greening the desert
  • Likes 1
  • Mark post as helpful
  • send pies
    Number of slices to send:
    Optional 'thank-you' note:
  • Quote
  • Report post to moderator
I foresee a perfect double rams horn with how smooth those bricks are being cut. I guess the skamols are quite gritty with all those diatoms to dull the blade that fast eh?
 
thomas rubino
rocket scientist
Posts: 6307
Location: latitude 47 N.W. montana zone 6A
3178
cat pig rocket stoves
  • Likes 3
  • Mark post as helpful
  • send pies
    Number of slices to send:
    Optional 'thank-you' note:
  • Quote
  • Report post to moderator
And here we have a full mock up of the box and riser base.
I have FOUR uncut bricks left out of 50!  I'll use a few more cut down pieces on the door side of the box.
I'm very pleased with how the riser base came out.  Today's cutting went much smoother than yesterday!
Today, I would only cut three bricks before changing out for a new blade!  
Overkill? Maybe, but for $1 each I can buy jig saw blades 3 miles from home. For $1 each I can buy Skamols 120 miles from home... A  no brainer !
Next I'll assemble the five minute riser for this beauty.  I already have an unsnapped section of 10" pipe that I will shrink down to 9".
I have 1" Morgan Superwool on hand , cut it to size for a 7" riser and I'm good to go!
As easy as these Skamols are to work with I may inset the riser down into the base bricks. Use a dremel and notch it in 1/2" or so.
I have a 1" x 12" x 24" CF board on the way for the roof.

More to come as I complete the riser and move on to the door.
20200317_120131.jpg
[Thumbnail for 20200317_120131.jpg]
20200317_120101.jpg
[Thumbnail for 20200317_120101.jpg]
20200317_120249.jpg
[Thumbnail for 20200317_120249.jpg]
20200317_120125.jpg
[Thumbnail for 20200317_120125.jpg]
20200317_120111.jpg
[Thumbnail for 20200317_120111.jpg]
20200317_120243.jpg
[Thumbnail for 20200317_120243.jpg]
 
thomas rubino
rocket scientist
Posts: 6307
Location: latitude 47 N.W. montana zone 6A
3178
cat pig rocket stoves
  • Likes 3
  • Mark post as helpful
  • send pies
    Number of slices to send:
    Optional 'thank-you' note:
  • Quote
  • Report post to moderator
Hi All;
Today I built my 8 minute riser...  at 42" tall I needed 2 pieces to fill my 9" pipe , creating my new 7" riser ! Took a few extra minutes, so its an 8 minute riser!
The extra pieces are what I have left of 12.5' after creating an 8"riser and a 7" riser, also using up quite a bit while building my bell.
I think I got my moneys worth!
I numbered all the bricks so I can copy the build easily.
Next I need to cut some angle iron for a door frame and then maybe tomorrow go weld up the floor channels.
20200319_120521.jpg
[Thumbnail for 20200319_120521.jpg]
8 minute riser
20200319_120527.jpg
[Thumbnail for 20200319_120527.jpg]
7
20200319_120534.jpg
[Thumbnail for 20200319_120534.jpg]
Extra from 12.5'
20200319_120604.jpg
[Thumbnail for 20200319_120604.jpg]
numbered and ready to move
20200319_120616.jpg
[Thumbnail for 20200319_120616.jpg]
20200319_120921.jpg
[Thumbnail for 20200319_120921.jpg]
a new 7
 
thomas rubino
rocket scientist
Posts: 6307
Location: latitude 47 N.W. montana zone 6A
3178
cat pig rocket stoves
  • Likes 2
  • Mark post as helpful
  • send pies
    Number of slices to send:
    Optional 'thank-you' note:
  • Quote
  • Report post to moderator
And the door frame ready to weld.
Note) To make a 7" id riser I cut 26.5" of Morgan superwool.
20200319_140343.jpg
[Thumbnail for 20200319_140343.jpg]
 
Gerry Parent
Rocket Scientist
Posts: 1807
Location: Kaslo, BC
524
building solar woodworking rocket stoves wood heat greening the desert
  • Likes 1
  • Mark post as helpful
  • send pies
    Number of slices to send:
    Optional 'thank-you' note:
  • Quote
  • Report post to moderator
From that angle Thomas, that fire box is a beast! Looks like it holds about a half cord of wood per batch? 🥵  Its gonna have your shop hot in no time.

Seeing as how soft they are, curious as to how you will hold the metal door frame to the Skamols.
 
thomas rubino
rocket scientist
Posts: 6307
Location: latitude 47 N.W. montana zone 6A
3178
cat pig rocket stoves
  • Mark post as helpful
  • send pies
    Number of slices to send:
    Optional 'thank-you' note:
  • Quote
  • Report post to moderator
Ha Gerry;  
Half cord might be a slight overestimate, I'm thinking no more than a third!
Not sure yet about the angle.  I bought Rutland stove cement, I might "glue it. Also might try drilling a couple of pegs just to keep it there.
It will be a welded square, should just sit there
It will be faced with 1/8" aluminum plate. Same thing the door will be built from. Decommissioned road signs ...
I've got that 1/8" thick superwool gasket. I'll put it behind the aluminum plate. Same for the window.
Its all a learning curve for me oh Batch master...  I should be asking you...


steward
Posts: 15500
Location: Northern WI (zone 4)
4842
7
hunting trees books food preservation solar woodworking
  • Likes 1
  • Mark post as helpful
  • send pies
    Number of slices to send:
    Optional 'thank-you' note:
  • Quote
  • Report post to moderator
Just eyeballing it, that box looks to be about 15" tall and 20 1/4" long.  That should hold a fair bit of wood!  So, say someone was already cutting their firewood at 18", would that be ideal for that depth firebox?  Hypothetically speaking of course :)

Please take plenty of pictures of all the steps, especially the door!
 
Gerry Parent
Rocket Scientist
Posts: 1807
Location: Kaslo, BC
524
building solar woodworking rocket stoves wood heat greening the desert
  • Likes 2
  • Mark post as helpful
  • send pies
    Number of slices to send:
    Optional 'thank-you' note:
  • Quote
  • Report post to moderator
I repeat for Mike: "Please take plenty of pictures of all the steps, especially the door!"  

This is where our experiences will definitely part so I will definitely be another set of eyes and ears peeking over your shoulder also Thomas.

I know from (a not so great) experience that the stove cement sticks really well (especially to things that you don't want it to stick to) and that aluminum is very light, so I hope the bond will survive the years of having a door tugging on it. Being that you'll more than likely be the sole operator, you probably will refrain from swinging on it or slamming it shut (we assume) so it will be a good experiment for your students to learn from.
 
thomas rubino
rocket scientist
Posts: 6307
Location: latitude 47 N.W. montana zone 6A
3178
cat pig rocket stoves
  • Likes 1
  • Mark post as helpful
  • send pies
    Number of slices to send:
    Optional 'thank-you' note:
  • Quote
  • Report post to moderator
Hi Mike;
No problem taking plenty of photo's! As you see, I like photo's.
With threads like Gerry's and mine, we help spread the word to curious folks like you. Who want a bigger better rocket but are daunted, by not quite clear guidelines. Photo's make it better!
Next summer we can look forward to your thread on building a batchbox!  Oh with plenty of photo's please!

You pegged the box size 10 1/16 wide 15 1/8 tall and 20 3/16 deep. Did you cheat and read the chart???    
Yes 16-18 " wood would be perfect .

I've watched Matt walkers video on door construction numerous times.  All the info is there, freely shared by Matt !!!
I like that it is not welded but pop riveted.
Hinges and butterfly latch are "musical equip road case" gear.
Glass is 4 x 5 Robax ceramic glass. $17 off Ebay
 
thomas rubino
rocket scientist
Posts: 6307
Location: latitude 47 N.W. montana zone 6A
3178
cat pig rocket stoves
  • Likes 5
  • Mark post as helpful
  • send pies
    Number of slices to send:
    Optional 'thank-you' note:
  • Quote
  • Report post to moderator
Hi All;
Started my day by cleaning the shop floor.
First I cleaned up by the dragon so I could move my mock up closer. Then I swept up all the clay dust on the whole floor!  Clay dust is insidious!

Next I moved the whole mock up over and placed it up on firebricks so I can work on my door properly.
I trimmed an inch off of my new sheet of CF board so it fits perfectly on top.

Then I set to work with my Jig saw. I created a primary air intake plate.  Chart calls for a square 2.75 x 2.75" I changed that to 3.75 x 2.0" rectangle.
Some 1" x 1/8" Morgan superwool gasket material and some pop rivets made short work of attaching the plate and frame. The intake plate will be backed with CF board.
A "plug" of CF board and aluminum will close off the primary air, after the fire is out.
CF board and cob will seal up around the secondary air port.

Next up , the door!  


20200322_123241.jpg
[Thumbnail for 20200322_123241.jpg]
20200322_123254.jpg
[Thumbnail for 20200322_123254.jpg]
20200322_123303.jpg
[Thumbnail for 20200322_123303.jpg]
20200322_123643.jpg
[Thumbnail for 20200322_123643.jpg]
20200322_123650.jpg
[Thumbnail for 20200322_123650.jpg]
20200322_144933.jpg
[Thumbnail for 20200322_144933.jpg]
20200322_145033.jpg
[Thumbnail for 20200322_145033.jpg]
20200322_145045.jpg
[Thumbnail for 20200322_145045.jpg]
 
Gerry Parent
Rocket Scientist
Posts: 1807
Location: Kaslo, BC
524
building solar woodworking rocket stoves wood heat greening the desert
  • Likes 1
  • Mark post as helpful
  • send pies
    Number of slices to send:
    Optional 'thank-you' note:
  • Quote
  • Report post to moderator
Progressing along very well Thomas.

I don't think I've ever seen a separate plate made for the primary/secondary air opening that is permanently affixed to the stove body. In a way though, its kinda like mine with the casserole door sitting up high with a wall of mud (instead of a plate) under it.

Its hard to tell in the photos but how much room are you leaving (once the CF board is in place) between this plate and the floor channel intake?
This is the place where chunks of charcoal can sometimes fall down into and plug up part of the air intake hole. Are you thinking of using a threshold plate?
Curious minds want to know.
 
thomas rubino
rocket scientist
Posts: 6307
Location: latitude 47 N.W. montana zone 6A
3178
cat pig rocket stoves
  • Likes 3
  • Mark post as helpful
  • send pies
    Number of slices to send:
    Optional 'thank-you' note:
  • Quote
  • Report post to moderator
Hi All;  Got some time to work on the batch box door today.
This is probably the hardest part of the build.  I've redesigned several times already.
1/8" thick aluminum road sign ,re-purposed  into rocket stove parts!
Hinges and butterfly latch are all music equipment road case hardware.
Nice thing about these hinges, is they are lift off. Makes working on it much easier. Will also make loading wood much easier as well.
Still need to cut the window opening and mount the ceramic glass.
Now i have to wait for some more CF board to arrive to insulate it.

Soon I'll be building a wooden form to aid installation.  Inserted inside the box while mudding bricks ,keeps the size just right.
Have to bring a 55 gal barrel up from the field and cut the top out. I'll be adding it on top of my current barrel to add ISA (internal surface area)

Its taking time but its all coming together!.  

20200325_141815.jpg
[Thumbnail for 20200325_141815.jpg]
20200325_141822.jpg
[Thumbnail for 20200325_141822.jpg]
20200325_141830.jpg
[Thumbnail for 20200325_141830.jpg]
20200325_141843.jpg
[Thumbnail for 20200325_141843.jpg]
20200325_145223.jpg
[Thumbnail for 20200325_145223.jpg]
20200325_145238.jpg
[Thumbnail for 20200325_145238.jpg]
 
thomas rubino
rocket scientist
Posts: 6307
Location: latitude 47 N.W. montana zone 6A
3178
cat pig rocket stoves
  • Likes 3
  • Mark post as helpful
  • send pies
    Number of slices to send:
    Optional 'thank-you' note:
  • Quote
  • Report post to moderator
Buffed  the new door out today. Need to get some high heat black paint to finish it off.
My new sheet of CF board arrived in the mail this afternoon.
I was sure I had small aluminum angle on hand...  I now have an 8' piece of 1/8" x 1" aluminum angle ordered... next week .
Always just one more thing.
20200326_143331.jpg
[Thumbnail for 20200326_143331.jpg]
 
Gerry Parent
Rocket Scientist
Posts: 1807
Location: Kaslo, BC
524
building solar woodworking rocket stoves wood heat greening the desert
  • Likes 1
  • Mark post as helpful
  • send pies
    Number of slices to send:
    Optional 'thank-you' note:
  • Quote
  • Report post to moderator
Now that its all (temporarily) together aren't you a little ichy to light er up for a test run?
 
thomas rubino
rocket scientist
Posts: 6307
Location: latitude 47 N.W. montana zone 6A
3178
cat pig rocket stoves
  • Likes 2
  • Mark post as helpful
  • send pies
    Number of slices to send:
    Optional 'thank-you' note:
  • Quote
  • Report post to moderator
Test drive .... ?   I want to run it wide open down the drag strip!!!
But... I can't until she's legal.  
SOON!  I'll make this dragon fly!!!
download-(1).jpg
[Thumbnail for download-(1).jpg]
 
thomas rubino
rocket scientist
Posts: 6307
Location: latitude 47 N.W. montana zone 6A
3178
cat pig rocket stoves
  • Likes 1
  • Mark post as helpful
  • send pies
    Number of slices to send:
    Optional 'thank-you' note:
  • Quote
  • Report post to moderator
So the CF board arrived on Thurs. it was supposed to arrive Saturday.
I ordered 8' of aluminum angle on Wednesday afternoon . It was scheduled to arrive next Wednesday.... It arrived TODAY !! That's order too me in less than 3 days!
If nothing else this exile from traveling has left the roads open for the big freight shippers!  The arrival time on everything has been quicker than expected.

Cut and riveted on several stiffener's. Used superwool gasket to keep things sealed.
I've actually used about 5' of my angle already!  I have plenty, but I'll be buying another stick to build the 6" batch.
Played with the window placement a bit. Need a solid plan before I cut thru my new door!
Got to late to keep going so it will be tomorrow.
20200327_143446.jpg
[Thumbnail for 20200327_143446.jpg]
20200327_144459.jpg
[Thumbnail for 20200327_144459.jpg]
20200327_143501.jpg
[Thumbnail for 20200327_143501.jpg]
20200327_144445.jpg
[Thumbnail for 20200327_144445.jpg]
 
thomas rubino
rocket scientist
Posts: 6307
Location: latitude 47 N.W. montana zone 6A
3178
cat pig rocket stoves
  • Likes 2
  • Mark post as helpful
  • send pies
    Number of slices to send:
    Optional 'thank-you' note:
  • Quote
  • Report post to moderator
Got some time in on the door today!
Working with CF board is a joy.   Easy to cut with a hacksaw blade, easy to drill, a metal file will shave material quickly.
The lower piece is just press fit into place.  The upper piece with the window I drilled and added bolts with large washers to hold it all tight.
Getting closer every day to installing this beauty!
20200329_134532.jpg
[Thumbnail for 20200329_134532.jpg]
20200329_134657.jpg
[Thumbnail for 20200329_134657.jpg]
20200329_134653.jpg
[Thumbnail for 20200329_134653.jpg]
20200329_134708.jpg
[Thumbnail for 20200329_134708.jpg]
 
Mike Haasl
steward
Posts: 15500
Location: Northern WI (zone 4)
4842
7
hunting trees books food preservation solar woodworking
  • Mark post as helpful
  • send pies
    Number of slices to send:
    Optional 'thank-you' note:
  • Quote
  • Report post to moderator
So if I'm following, with the insulation there, everything is protected except for the three bolts/fender washers and the edge of several pieces of angle iron.  I take it the hot bolts aren't a worry for melting the aluminum stop sign?
 
thomas rubino
rocket scientist
Posts: 6307
Location: latitude 47 N.W. montana zone 6A
3178
cat pig rocket stoves
  • Likes 4
  • Mark post as helpful
  • send pies
    Number of slices to send:
    Optional 'thank-you' note:
  • Quote
  • Report post to moderator
Hi Mike;
Good question!
The thin side of the angle I believe/hope is a non issue.
The bolts may get hotter than I want. Could they melt the aluminum?  I highly doubt it as aluminum sheds its heat almost as fast as you apply it.
Maybe I'll cement a few squares of cf blanket over the bolt heads. Make it a nonissue.

With insulated walls and roof. And the only heavy firebrick being  the 45's on the floor.  I expect door area temps to be much lower and well within steel capability's.


Gerry Parent
Rocket Scientist
Posts: 1807
Location: Kaslo, BC
524
building solar woodworking rocket stoves wood heat greening the desert
  • Likes 2
  • Mark post as helpful
  • send pies
    Number of slices to send:
    Optional 'thank-you' note:
  • Quote
  • Report post to moderator
Too bad your window wasn't a little bigger to see more of the fire. Certainly much better than no window though.
Perhaps its best this way though so that you don't get overly distracted from working on your car staring into the fire!

If you do follow through with Mike's suggestion, wondering if you inset the washers a bit into the CFB, then the little insulated plugs you make will sit flush.
 
thomas rubino
rocket scientist
Posts: 6307
Location: latitude 47 N.W. montana zone 6A
3178
cat pig rocket stoves
  • Likes 1
  • Mark post as helpful
  • send pies
    Number of slices to send:
    Optional 'thank-you' note:
  • Quote
  • Report post to moderator
Yes, A bigger window would be nice.  But at least I can check on the state of the fire.
That ceramic glass is not cheap!
Sadly the door will be facing the work bench , so a bigger window would not distract me from working... too bad. More pleasant to watch the fire!

As far as the bolts.  I think they would be fine as is. But... if I was to do something.
My first thought would be, squares of the ceramic blanket  just cemented over top.
Never thought about insetting them. Not sure I want to take the chance of compromising the board. Its only an inch thick ... they are soft and will crack.  
 
thomas rubino
rocket scientist
Posts: 6307
Location: latitude 47 N.W. montana zone 6A
3178
cat pig rocket stoves
  • Likes 2
  • Mark post as helpful
  • send pies
    Number of slices to send:
    Optional 'thank-you' note:
  • Quote
  • Report post to moderator
Good Morning All;  
After considering the advice of our fearless forum leader last evening.
This morning I experimented with some smaller scrap pieces of CF board.
Seem's that a Bimetal hole saw without the pilot drill.  Held by hand and turned carefully can indeed countersink a hole safely in CF board!
Creating a plug from another piece proved to be problematical.  However broken pieces of board and some blanket glued in with Rutland cement worked just fine!
I can also attest to how well Rutland sticks to your fingers if you don't put on gloves first!
20200330_095954.jpg
last one
last one
20200330_100400.jpg
all done
all done
20200330_095935.jpg
the mess created
the mess created
 
Mike Haasl
steward
Posts: 15500
Location: Northern WI (zone 4)
4842
7
hunting trees books food preservation solar woodworking
  • Likes 2
  • Mark post as helpful
  • send pies
    Number of slices to send:
    Optional 'thank-you' note:
  • Quote
  • Report post to moderator
Could a guy just cut the face off a wood burning stove that has a glass door and just secure it somehow to a batch box?  

Maybe like this one?  https://pullman.craigslist.org/hsh/d/moscow-woow-stove/7086122683.html
 
thomas rubino
rocket scientist
Posts: 6307
Location: latitude 47 N.W. montana zone 6A
3178
cat pig rocket stoves
  • Likes 2
  • Mark post as helpful
  • send pies
    Number of slices to send:
    Optional 'thank-you' note:
  • Quote
  • Report post to moderator
I think you could Mike.  As long as you can insulate it.
I imagine that not just any would work but some might.

As you know, this is all new for me.  And as is normal, i'm winging it...
I will see how well this door style works out.
If I'm unsure, I may use a different design when I build the 6" in Liz's studio.

Need to take this dragon out for a ride first and see how she fly's!
98024746c7f064ba065b1caa1b70ad7f.jpg
[Thumbnail for 98024746c7f064ba065b1caa1b70ad7f.jpg]
We are Apprentice Rocket Scientists!
 
Gerry Parent
Rocket Scientist
Posts: 1807
Location: Kaslo, BC
524
building solar woodworking rocket stoves wood heat greening the desert
  • Likes 1
  • Mark post as helpful
  • send pies
    Number of slices to send:
    Optional 'thank-you' note:
  • Quote
  • Report post to moderator
Hey Mike,  I remembered there were a few people that tried this. They use most of the stove though, not just the door. One of them here:

BBR-firebox-frame-wood-stove

another one here:

Batch-box-RMH-Jotul
 
Gerry Parent
Rocket Scientist
Posts: 1807
Location: Kaslo, BC
524
building solar woodworking rocket stoves wood heat greening the desert
  • Mark post as helpful
  • send pies
    Number of slices to send:
    Optional 'thank-you' note:
  • Quote
  • Report post to moderator
Not as pretty as I envisioned those plugs Thomas but as they say, function over fashion!
Perhaps after a few firings, they'll blend in nice anyway.... to appease my perfectionism!

As an afterthought, I wonder if the CFB board could have just been glued to the aluminum skin?
 
thomas rubino
rocket scientist
Posts: 6307
Location: latitude 47 N.W. montana zone 6A
3178
cat pig rocket stoves
  • Mark post as helpful
  • send pies
    Number of slices to send:
    Optional 'thank-you' note:
  • Quote
  • Report post to moderator
Maybe , but the window just sitting there might decide to slide down.  
Didn't want to take a chance.    
 
thomas rubino
rocket scientist
Posts: 6307
Location: latitude 47 N.W. montana zone 6A
3178
cat pig rocket stoves
  • Likes 1
  • Mark post as helpful
  • send pies
    Number of slices to send:
    Optional 'thank-you' note:
  • Quote
  • Report post to moderator
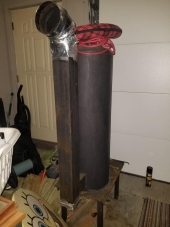
Down to the field this morning, and brought up a solid 55 gal barrel to use on top of my first.
Using my nifty, drill powered nipper. It took longer to carry the barrel up then, it did to cut it.

Next I need to build a wooden form box for assembly.
Getting closer every day...
20200331_111004.jpg
[Thumbnail for 20200331_111004.jpg]
20200331_111009-(1).jpg
[Thumbnail for 20200331_111009-(1).jpg]
20200331_144539.jpg
Rural paint removal
Rural paint removal
20200331_165333.jpg
2 hrs later
2 hrs later
20200331_165324.jpg
2 hrs later
2 hrs later
Staff note (Gerry Parent) :

Double-Headed-Sheet-Metal-Nibbler-Cutter-Drill-Attachment-Metal-Sheet-Cutter
AKA..."Cool Tool"
https://permies.com/t/100169/chimney-stack-attatchment-brick-bell#826679

 
thomas rubino
rocket scientist
Posts: 6307
Location: latitude 47 N.W. montana zone 6A
3178
cat pig rocket stoves
  • Likes 1
  • Mark post as helpful
  • send pies
    Number of slices to send:
    Optional 'thank-you' note:
  • Quote
  • Report post to moderator
Got up this morning and despite 2" of heavy wet snow. The burn barrel was happily smoking away!   A new board or two and she is flaming away!
This afternoon I will have to tip it on edge to get the last of the paint to bubble off.
For those thinking how horrible this must smell, I can assure you that it does not.
The heating is slow and the baked on barrel paint has to reach a certain temp. At that point tiny flakes of paint just fall off.  
In the past I tried using an oxy/acetylene torch... heats fast... stinks to high heaven's!  
20200401_100935.jpg
Next morning
Next morning
 
Don't sweat petty things, or pet sweaty things. But cuddle this tiny ad:
Heat your home with the twigs that naturally fall of the trees in your yard
http://woodheat.net
reply
    Bookmark Topic Watch Topic
  • New Topic