gift
Rocket Mass Heater Plans: Annex 6" L-shaped Bench by Ernie and Erica
will be released to subscribers in: soon!
  • Post Reply Bookmark Topic Watch Topic
  • New Topic
permaculture forums growies critters building homesteading energy monies kitchen purity ungarbage community wilderness fiber arts art permaculture artisans regional education skip experiences global resources cider press projects digital market permies.com pie forums private forums all forums
this forum made possible by our volunteer staff, including ...
master stewards:
  • r ranson
  • Nancy Reading
  • Carla Burke
  • John F Dean
  • Jay Angler
  • paul wheaton
stewards:
  • Nicole Alderman
  • Pearl Sutton
  • Anne Miller
master gardeners:
  • Christopher Weeks
  • Timothy Norton
gardeners:
  • Nina Surya
  • Matt McSpadden
  • thomas rubino

L-shaped rocket stove - heater combo for outdoors?

 
Posts: 14
Location: Canada, Zone 5b
5
  • Mark post as helpful
  • send pies
    Number of slices to send:
    Optional 'thank-you' note:
  • Quote
  • Report post to moderator
I've been lurking around for a while now and I've built the L-shaped coffee can rocket stove, then upgraded to steel pipe and put a 'chicken wire' grate for better air flow. I'm using the regular Home Depot bricks I had been using for my fire pit around the steel pipe and I'm "insulating" that in between with sand from the kids' sand box. This works great so far to cook a meal, much better than the fire pit did before that and I'm using way less fuel, nicer flames, no soot or smoke any longer. Awesome.

What isn't that great is the fact that the regular camp fire put out much more heat outwards, i.e. where I'd sit around the camp fire. It's getting much cooler now in the evenings (it's Canada after all) and I'd like to use the rocket stove not just for cooking a meal here or there but also to stay outside a bit longer and be warm (ish ). The heat that's radiated upwards, even with the fire out is awesome but it's impractical to hold all body parts over the top in turn

I've read a lot on here and elsewhere about rocket mass heaters and also seen some really great outdoors versions. I'm not gonna be able to build something that big (and expensive) though. I was wondering if you guys think I could somehow convert the L-shaped steel pipe (HVAC pipe) version into something that resembles an RMH on the real cheap (as in the SO doesn't notice a hole in the wallet) with the materials I have mostly. I'm not looking for anything that's particularly efficient or particularly hot. I just do like that it is definitely much more efficient than a regular campfire and much more convenient for cooking too. I basically just fire deadfall from the trees in my yard.

Here are my thoughts and maybe you guys can poke holes in it and tell it's just not gonna work or where I might need to adjust:

My first assumption is that I'm probably not gonna reach temperatures high enough to either melt or deform the steel pipe or to cause issues with the galvanization (I read that thread about the Zinc Oxide etc.). Or would I? It'd be used for maybe a couple hours from time to time (like weekends).
I want to basically 'cap off' the pipe I have sticking up right now, somehow have a 'cooktop' on it and direct the exhaust to the right side where it would heat some sort of thermal mass. I'm thinking it might be enough to use cement on the top to create a sort of dome and cement in a 'hot plate', e.g. a cheap old cast iron pan or something. I'd poke a hole in the pipe on one side for the slightly cooler gases to escape to the side. All of this sits on some patio stones btw. that have cracked in one place from all the fires I've made there already but they're done with that it seems. Has been 5 years now and they've cracked exactly once, when I made the first fire.
Thermal mass wise I'm just looking for something that I could either lean against or place my feet on. It has to also be kinda small as I'm building this between the property line, some trees and other structures. The fire pit I had was ~25" diameter maybe. It can be a bit larger but not too much, maybe an extra foot wide if that helps?!
I'm also not worried about brick vs. fire brick. Fire brick is real expensive here and the SO would not like that at all. I could buy a bag of Quickcrete or so if it helps (still got a half one) without too much notice . My soil is real sandy (lots of sand pits in my area), so that goes out the window for a clay source.

I was thinking of using one "bell" on the side there and maybe just build that from either some of the bricks (could 'save' brick by cementing the left side all the way from the bottom to the 'hot plate') - buying a few more should be in budget. I also have two batts of rock wool left over and was wondering if that's better or worse (or even workable at all) instead of sand, which is kinda more of a heat sink than insulation anyway.

 
pollinator
Posts: 4054
Location: Kansas Zone 6a
292
  • Mark post as helpful
  • send pies
    Number of slices to send:
    Optional 'thank-you' note:
  • Quote
  • Report post to moderator
Have you tried a pocket rocket? They are the most efficient way to radiate heat outdoors, although not as pretty to look at as an open fire pit.  
 
A Rutha
Posts: 14
Location: Canada, Zone 5b
5
  • Mark post as helpful
  • send pies
    Number of slices to send:
    Optional 'thank-you' note:
  • Quote
  • Report post to moderator
Not sure what you mean exactly by pocket rocket vs. what I described having built already?

Not exactly what I have, this is just a quick google find so I can show you basically what I have right now:  
 

Basically I did that but sand "insulated". The coffee can is my inner tube and I used two stacked on top of each other with the outer layer being the bricks just to hold the sand in. Replaced the coffee cans with galvanized HVAC pipe after.

So now I want to top it off, build a bell on the side and add some mass. Really, I guess, I'm looking to move the mass from my "insulation" to the side as the sand I have right now gets real hot but the bricks actually stay very cool.
 
rocket scientist
Posts: 6528
Location: latitude 47 N.W. montana zone 6A
3398
cat pig rocket stoves
  • Likes 2
  • Mark post as helpful
  • send pies
    Number of slices to send:
    Optional 'thank-you' note:
  • Quote
  • Report post to moderator
Hi A;  
If you have home depot bricks why not build a J tube  rocket? Its easy easy!
Do you have or can get 2 55 gallon barrels ?
One goes over the riser and one you split in half length wise. Those two half barrel or just one as your limited on space become a bench "bell".
Use preferably bricks, to surround the  "bell" cover with mud. You have mud right? Or use quickcrete.
Wala one cheap easy fast butt warmer

From your description what you are cooking with now, probably would not work well as a bench heater.
If this interests you then ask for details.
I am adding this to the rocket stove and rocket mass heater forums as well


R Scott
pollinator
Posts: 4054
Location: Kansas Zone 6a
292
  • Likes 1
  • Mark post as helpful
  • send pies
    Number of slices to send:
    Optional 'thank-you' note:
  • Quote
  • Report post to moderator
Here is a good overview of a pocket rocket.  I have seen them from a gallon paint can up to a 55 gallon barrel.

 
pollinator
Posts: 556
Location: Northwest Missouri
215
forest garden fungi gear trees plumbing chicken cooking ungarbage
  • Mark post as helpful
  • send pies
    Number of slices to send:
    Optional 'thank-you' note:
  • Quote
  • Report post to moderator

thomas rubino wrote:Hi A;  
Those two half barrel or just one as your limited on space become a bench "bell".
Use preferably bricks, to surround the  "bell" cover with mud. You have mud right?


Curious how you're connecting your riser cover drum to the split drums under the bench. Are you taking a short length of pipe from the hot drum into the first half drum?
Trying to figure out how you're interfacing those two pieces. I'm intrigued by your mention of using half drums instead of metal ducting through a bench. I guess these parts that interface don't leak when they're covered with mud.    
 
thomas rubino
rocket scientist
Posts: 6528
Location: latitude 47 N.W. montana zone 6A
3398
cat pig rocket stoves
  • Likes 1
  • Mark post as helpful
  • send pies
    Number of slices to send:
    Optional 'thank-you' note:
  • Quote
  • Report post to moderator
Hi Matt;
You are correct that cob covers all leaks!
Some metal tape or just a piece of anything to cover the little gaps when joining two barrels for a bench.  
When cutting a barrel to use this way you leave a small area of the lid (2-3") intact to keep the barrel rounded.
Your Chimney exits out the top from the end barrel.
As far as how to transition. Like any rmh. you can use a cut half barrel under your riser barrel.
Or you can build a brick box behind the core and let that be your transition area.   (how I did it)

Matt Walker invented this idea for a build he did in did in a bar back east someplace.
 
A Rutha
Posts: 14
Location: Canada, Zone 5b
5
  • Likes 1
  • Mark post as helpful
  • send pies
    Number of slices to send:
    Optional 'thank-you' note:
  • Quote
  • Report post to moderator

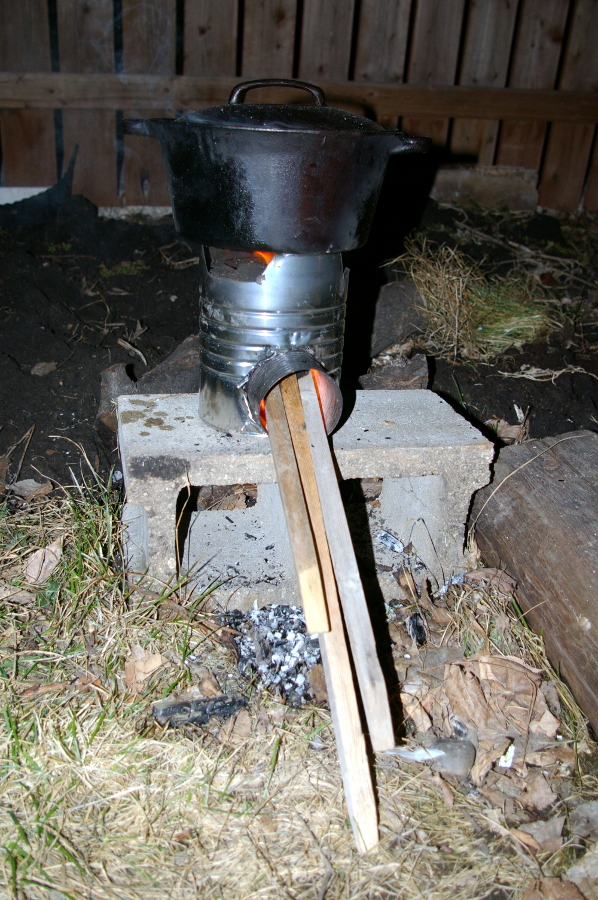
R Scott wrote:Here is a good overview of a pocket rocket.  I have seen them from a gallon paint can up to a 55 gallon barrel.

https://youtu.be/Vblt_kcebdA


As mentioned, that's kinda the setup I have, just that I used other materials as available and it's an L vs. J for the feed.

thomas rubino wrote:Hi A;  
If you have home depot bricks why not build a J tube  rocket? Its easy easy!
Do you have or can get 2 55 gallon barrels ?
One goes over the riser and one you split in half length wise. Those two half barrel or just one as your limited on space become a bench "bell".
Use preferably bricks, to surround the  "bell" cover with mud. You have mud right? Or use quickcrete.
Wala one cheap easy fast butt warmer

From your description what you are cooking with now, probably would not work well as a bench heater.
If this interests you then ask for details.
I am adding this to the rocket stove and rocket mass heater forums as well


Only rain barrels and those are plastic and full of water :) And yeah because of space I didn't want to do two bells. I've seen the "three stone column" builds that look beautiful and are space efficient footprint wise vs. a lot of other builds I looked at. I won't be able to build something that beautiful though and have even less space available, which is why I would want to go with just one bell and I don't want to go very high either. What I saw was basically gazebo height and that's too much, because this is close to the property line and thus neighbors, not next to the house/patio.

Brick wise I think you're right. I might as well just try to use them for a J tube style and use the pipe I have for the end part of the riser only. Mud wise, yes and no. There's nowhere in the yard that I could just dig up without the SO noticing a hole in the lawn :P and even then, it'd be a very very sandy 'mud'. That's why I thought about the quickcrete but that means thinking, asking around and planning become more important as concrete is a bit more permanent :) If this was back at my parents, I'd be all set. The nicest clay mud you can imagine for kids to play with. Of course my mum didn't like that for trying to grow carrots lol!

Thanks for the encouragement. I guess I'll just have to take it apart and experiment in the end.
 
A Rutha
Posts: 14
Location: Canada, Zone 5b
5
  • Likes 1
  • Mark post as helpful
  • send pies
    Number of slices to send:
    Optional 'thank-you' note:
  • Quote
  • Report post to moderator
Also just came across this, which basically seems to encourage us as well to just use regular cheap brick for the kind of use I'd have for it: https://survivalcommonsense.com/safe-to-use-concrete-bricks-in-rocket-stove/

Sure, if I'm gonna build a proper structure that's supposed to heat my house through many winters, I'll use the right materials to last a lifetime (i.e. firebrick). For my experiments especially and even after that for occasional use cheap Home Depot concrete brick ($0.69 CAD here - so like double the cost he's quoting :) - and I already have those!) I can't go wrong. Now it just has to stop raining in the evenings so that I can actually try this!
 
A Rutha
Posts: 14
Location: Canada, Zone 5b
5
  • Likes 1
  • Mark post as helpful
  • send pies
    Number of slices to send:
    Optional 'thank-you' note:
  • Quote
  • Report post to moderator
I tried it with the bricks I have but I think I had way too many gaps (they're not rectangular bricks, which was fine to hold the sand "insulation" around the metal tube but doesn't work as the actual material. So I'll have to get a bunch of new bricks to try this out.

That said I think I found what I was looking for as a base for the space efficiency now  


Minus the real mass to the side but good enough for trying something and adjusting I'd say.
 
thomas rubino
rocket scientist
Posts: 6528
Location: latitude 47 N.W. montana zone 6A
3398
cat pig rocket stoves
  • Likes 1
  • Mark post as helpful
  • send pies
    Number of slices to send:
    Optional 'thank-you' note:
  • Quote
  • Report post to moderator
Now that will do the job for you!  A real rocket stove, a cook top and a brick mass that will warm up.

I will mention that plain clay brick (not firebrick) will work much better than concrete bricks.
 
A Rutha
Posts: 14
Location: Canada, Zone 5b
5
  • Likes 1
  • Mark post as helpful
  • send pies
    Number of slices to send:
    Optional 'thank-you' note:
  • Quote
  • Report post to moderator
Thanks. I hope I'll find some of those somewhere around here, if my trials work out with the cheap brick.

Also what all this made me think of was what my grandma used to have in her house back in Germany. It sat in the wall between the kitchen (in the eating nook) and the living room. Here a nice short English language source with nice pictures of a few: https://www.rvharvey.com/kachelofen.htm
 
A Rutha
Posts: 14
Location: Canada, Zone 5b
5
  • Likes 2
  • Mark post as helpful
  • send pies
    Number of slices to send:
    Optional 'thank-you' note:
  • Quote
  • Report post to moderator
So, tried both the regular "J tube style brick rocket stove" you see all over Youtube as well as the space saving version I showed. Tried that one first actually and just couldn't get it to draft at all. I then tried the regular style J made of bricks and I had to 'help it along' by burning something in the riser but really it never worked very well at all. As soon as I opened the J to make it an L, it starting roaring just like my HVAC duct version did. Let that burn for quite a while and then started 'closing it up' again to make it a J style. That just totally killed the nice little fire that was roaring before.
 
thomas rubino
rocket scientist
Posts: 6528
Location: latitude 47 N.W. montana zone 6A
3398
cat pig rocket stoves
  • Likes 1
  • Mark post as helpful
  • send pies
    Number of slices to send:
    Optional 'thank-you' note:
  • Quote
  • Report post to moderator
Hi A;  
I'm sorry you are having so much trouble with this.
The reason you are having great success with  fires in an L tube, is they are just a campfire with a chimney.
As long as your there to keep pushing wood towards the riser it is going to burn like crazy. Quickly with no heating up involved.

The little brick box you showed us needs zero air leaks. It must be sealed. And it must be dry.   If not it will never work as intended at all.
One thing about bricks is they have to heat up. Takes around an hour for heat to really start radiating from them.

Another thing about J tubes and brick bells. They must be exactly sized or they will not perform.  
You have mentioned youtube,  they rarely give you sizes and they build these contraptions long enough to make a video. Most "but not all" of those builds will not last a year.
J Tubes have been around over 30 years... there is no question that they work exactly as stated.

A properly built J tube works and sounds like a rocket and should last a lifetime.
I just disassembled mine after seven years of hard core use.  It was perfect inside ! Would have kept burning for years to come.  
 
A Rutha
Posts: 14
Location: Canada, Zone 5b
5
  • Likes 1
  • Mark post as helpful
  • send pies
    Number of slices to send:
    Optional 'thank-you' note:
  • Quote
  • Report post to moderator
If it really needs no air leaks at all then that would definitely be it, as those bricks will leave some tiny gaps here and there. I thought I could get this going, try out how I like it, even if not at max efficiency etc. I guess there's no such thing as free lunch and I gotta go all in :)

Thanks for the help!
 
Rocket Scientist
Posts: 1810
Location: Kaslo, BC
525
building solar woodworking rocket stoves wood heat greening the desert
  • Mark post as helpful
  • send pies
    Number of slices to send:
    Optional 'thank-you' note:
  • Quote
  • Report post to moderator
Hi A,      There's something that doesn't quite feel right with what you said. If all you did was take what is called the "feed tube" off the J tube to turn it into an L rocket and got a much better draft then something more than just a few air gaps at play here causing you grief. Its hard to speculate without seeing what you mean. Can you include pictures of both?

BTW... a simple clay/sand mortar is all you need to seal all those gaps. Easy /cheap to make and easy to remove once done so your not really having to commit to anything even when mortared in this way.
 
A Rutha
Posts: 14
Location: Canada, Zone 5b
5
  • Likes 1
  • Mark post as helpful
  • send pies
    Number of slices to send:
    Optional 'thank-you' note:
  • Quote
  • Report post to moderator
Attaching a pic I just took. This is in "L mode" as you can see. For J mode I turn the bricks you see sticking out and place the other ones around on top. That large-ish piece of wood actually roared nicely in the L mode version but even the smaller ones didn't work at all in J mode.

Also I think after googling more it should be perfectly fine to buy cheapo clay kitty litter without additives and use that and my sandbox sand for trying this out. The first posts you find are always the ones that say you can't and that also tell you can't use hay only straw etc. But after a while it's possible to find that anything goes really. Especially for trial and error and taking it down again and back up differently etc. Finding clay seems impossible here. Pure clay kitty litter is easy. Finding straw is hard, hay I have plenty and cheap for the Guinea pigs from the horse farm around the corner.
Lrocket.jpg
[Thumbnail for Lrocket.jpg]
 
Gerry Parent
Rocket Scientist
Posts: 1810
Location: Kaslo, BC
525
building solar woodworking rocket stoves wood heat greening the desert
  • Likes 1
  • Mark post as helpful
  • send pies
    Number of slices to send:
    Optional 'thank-you' note:
  • Quote
  • Report post to moderator
A couple of things I'm noticing in your dry stack of bricks.

Can you put them on their side instead of flat as you have them?
Also, is the burn tunnel only one brick deep? Your dimensions look really small and constricting in the photo.
If you make a 6" J tube, the dimensions can be about 5.5" x 5.5" all the way through.  
Yours look like their stacked at 1.5" x 3" or so.
 
A Rutha
Posts: 14
Location: Canada, Zone 5b
5
  • Mark post as helpful
  • send pies
    Number of slices to send:
    Optional 'thank-you' note:
  • Quote
  • Report post to moderator

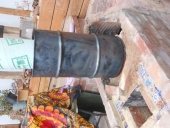
Gerry Parent wrote:A couple of things I'm noticing in your dry stack of bricks.

Can you put them on their side instead of flat as you have them?
Also, is the burn tunnel only one brick deep? Your dimensions look really small and constricting in the photo.
If you make a 6" J tube, the dimensions can be about 5.5" x 5.5" all the way through.  
Yours look like their stacked at 1.5" x 3" or so.


For the "2 bells" version I did stack them on their sides. This version is the 'basic' one, like for example this (you just gotta love the kid lol - but there's a bazillion of these out there) https://www.youtube.com/watch?v=v26b3jrylEc

The tunnel is 2 bricks high, which is the same size as the riser and also the J feed. The brick that those sticks are resting on in the front are the first row of bricks. The one on the left of that is turned and in the J version would be turned back such that it's where the sticks rest now and creates the second row. As you can see there's 2 rows of bricks on top of the tunnel and the whole front is 4 bricks high. So then a brick across that second row in the front to close the third row of bricks, which is the first row you see creating the top of the tunnel and then a fourth row on top of that.
 
A Rutha
Posts: 14
Location: Canada, Zone 5b
5
  • Likes 2
  • Mark post as helpful
  • send pies
    Number of slices to send:
    Optional 'thank-you' note:
  • Quote
  • Report post to moderator
I've built a 'one bell' version now, left the L-shape feed for now and closed it up all around. Made the cob from just sand and non-clumping clay kitty litter. It draws and the smoke/hot gases come out the other end. My chimney is a bit short at the moment, since I'm just reusing the cut up pipe but at least for testing I can probably rig up some coffee 'tin' cans. Making a better 'hot plate' now for cooking (since I'm not using a drum).

After it fully dries I'll probably see all the clay/sand mixing mistakes I made and redo half of it :)
 
A Rutha
Posts: 14
Location: Canada, Zone 5b
5
  • Likes 2
  • Mark post as helpful
  • send pies
    Number of slices to send:
    Optional 'thank-you' note:
  • Quote
  • Report post to moderator
So it's almost dry and I've fired it up for cooking today. The steel top plate however is bending quite a bit. I thought I could just put it on top and cob around it to keep it in place. Unfortunately it bends up around the edges. This is bad in two ways because it meant I needed to repair some cracks from the edges lifting but also my cast iron pan did not make full contact and never got really hot enough. Bacon took forever. Good for really nice slow cooked scrambled eggs though.

Any tips for integrating a hot plate for cooking? Please no 55 gal drum suggestions :)

That said the whole thing is just really nice and warm at the moment. It's been 3 hours since I fired it last and it's just radiating heat all around now. Awesome.
 
thomas rubino
rocket scientist
Posts: 6528
Location: latitude 47 N.W. montana zone 6A
3398
cat pig rocket stoves
  • Likes 1
  • Mark post as helpful
  • send pies
    Number of slices to send:
    Optional 'thank-you' note:
  • Quote
  • Report post to moderator
Hi A;  Cast iron would work great.
 
Gerry Parent
Rocket Scientist
Posts: 1810
Location: Kaslo, BC
525
building solar woodworking rocket stoves wood heat greening the desert
  • Likes 2
  • Mark post as helpful
  • send pies
    Number of slices to send:
    Optional 'thank-you' note:
  • Quote
  • Report post to moderator
Matt Walker uses a salvaged cooking range top which is made out of ceramic glass. I believe he insets it in a brick form leaving about 1/2" gap for expansion and sets it on a rope gasket to seal.
See his Tiny masonry cookstove for pictures and a description.
 
A Rutha
Posts: 14
Location: Canada, Zone 5b
5
  • Likes 1
  • Mark post as helpful
  • send pies
    Number of slices to send:
    Optional 'thank-you' note:
  • Quote
  • Report post to moderator
Thanks guys. Ceramic sounds awesome but a bit big right now (and not easy to find I would presume). I like the idea of the rope seal. I guess I could use that.

I had thought of getting a cheap cast iron pan at first and just putting that in (upside down) but was worried about the weather. Would cast iron be ok if it's covered or wouldn't it start to rust even from just dew and such? I don't have a proper cover yet and was using the dry spell to get this done and now with rain in the forecast I just have it covered with a tarp that's weighed down.
 
thomas rubino
rocket scientist
Posts: 6528
Location: latitude 47 N.W. montana zone 6A
3398
cat pig rocket stoves
  • Likes 1
  • Mark post as helpful
  • send pies
    Number of slices to send:
    Optional 'thank-you' note:
  • Quote
  • Report post to moderator
Hi A ;   Use a cast pan and keep it oiled.     Although letting it surface rust won't hurt anything.
 
A Rutha
Posts: 14
Location: Canada, Zone 5b
5
  • Likes 2
  • Mark post as helpful
  • send pies
    Number of slices to send:
    Optional 'thank-you' note:
  • Quote
  • Report post to moderator
I've torn down the old version now, which only really worked as an L-rocket. I think it was simply the wrong diameter (too large probably).

I've re-built now in smaller. In the picture you can still see part of the wall (this has now been torn down actually).

My system now looks like this and the interior is entirely built from cheap HD pavers. As you can see, yes I'm really in Canada, my chimney is just loosely stacked Tim Horton's Coffee cans with the bottom removed. This system now draws nicely. Actually it begins to draw really quickly. A bit of paper/carton and it's started, vs. the old version which would suck air the wrong way around even when it was hot.


                               |    |
         ________________      |    |
         |    _____     |      |    |
         |    |    |    |      |    |
         |    |    |    |      |    |
|    |   |    |    |    |      |    |
|    |___|    |    |    |______|    |
|_____________|    |________________|


Today I've remixed all the taken down cob and insulated the thing all around. I still have the steel plate on top but I gotta use the dry nights/days to get the cob dried. But now at least it's cobbed in place instead of just held down with left over bricks. I only laid it on a ring of cob this time and cobbed it in on two sides only and there's not a lot of smoke coming out on top at all.
20201003_184314.jpg
[Thumbnail for 20201003_184314.jpg]
 
I got this tall by not having enough crisco in my diet as a kid. This ad looks like it had plenty of shortening:
OffTheLand.net is 100% FREE to sell, barter, and share your abundance LOCALLY!
https://permies.com/t/274612/OffTheLand-net-FREE-platform-sell
reply
    Bookmark Topic Watch Topic
  • New Topic