• Post Reply Bookmark Topic Watch Topic
  • New Topic
permaculture forums growies critters building homesteading energy monies kitchen purity ungarbage community wilderness fiber arts art permaculture artisans regional education skip experiences global resources cider press projects digital market permies.com pie forums private forums all forums
this forum made possible by our volunteer staff, including ...
master stewards:
  • Carla Burke
  • John F Dean
  • Nancy Reading
  • r ranson
  • Jay Angler
  • Pearl Sutton
stewards:
  • paul wheaton
  • Devaka Cooray
  • Leigh Tate
master gardeners:
  • Timothy Norton
  • Christopher Weeks
gardeners:
  • Jeremy VanGelder
  • Matt McSpadden
  • thomas rubino

Seventeen Years with Staw Bale Buildings.

 
Posts: 135
Location: Springdale, WA USA - Cold Mediterranean Climate
1
  • Likes 2
  • Mark post as helpful
  • send pies
    Number of slices to send:
    Optional 'thank-you' note:
  • Quote
  • Report post to moderator
Since it looks like this could prove useful to people here, I'm going to post a number of picture documenting our straw bale buildings and a couple of non straw bale buildings. The purpose is to show you what we did, tell you what didn't work, How we think it can be done better, and why we think straw bale buildings are the best. Before I get to the buildings themselves, let me show you some picture from our first year here on the homestead so you can see what we had to work with and see if Image Shack and the Permies Forum are going to play nice with each other.

We were moving from Lake Stevens, WA to NE Washington Sate which is made of the southern edge of the Selkirk Mountains. We were eager to move, but January proved to be too early in the year.


We tried again in February. The snow was a couple feet deep.


Fortunately, I had thought to make snow shoes.


When the snow finally did melt, the ground turned into a mud with the consistency of pudding.


It did finally dry out and we needed to get a telephone to the house. It was 1993 and cell phones weren't happening in our valley. That meant we needed a land line. Burying it in the ground proved interesting as the first 500 feet was seriously rocky.


The ground turned sandy, so we switched to a ditch witch for the rest of it.


We also put in a well that year. By this time the temperatures were reaching the mid 90'sF and the humidity had dropped to about 16%.


Now it looks like this is going to work, so do you like the links or embedded?
 
out to pasture
Posts: 12327
Location: Portugal
3179
goat dog duck forest garden books wofati bee solar rocket stoves greening the desert
  • Likes 2
  • Mark post as helpful
  • send pies
    Number of slices to send:
    Optional 'thank-you' note:
  • Quote
  • Report post to moderator

Yone' Ward wrote:

Now it looks like this is going to work, so do you like the links or embedded?


Embedded!
 
Yone' Ward
Posts: 135
Location: Springdale, WA USA - Cold Mediterranean Climate
1
  • Mark post as helpful
  • send pies
    Number of slices to send:
    Optional 'thank-you' note:
  • Quote
  • Report post to moderator
So embedded it is.

We bought a China Diesel Generator. It was a three cylinder engine with a cheap knock off of a 1960's dodge charging system that produced too much voltage and lot's of radio interference. It also had a governor that required hand oiling. I figured out a way to automatically oil it, but dad was stubborn about it, so it never worked very well. It also really didn't like the cold. You're not here for the generator though.


We decided to build the room for the generator out of stone. We used the larger field stones pulled out of our field. Our mortar mix was: 1 cement + 3 sand + 1 lime. Could you use cob? Probably, but we had never heard of it and our place is 100% clay free.


We erected the doorways and windows first, then stacked the rocks up with mortar.
[URL=http://imageshack.us/photo/my-images/822/cstonebuilding03.jpg/
][/URL]

Doing it in this manner, we could only go up about a foot a day, then we had to wait for the mortar to solidify before going on. Were we to do it again, we would use some 2 foot high slip forms. It's faster and neater.


I believe we were planning possibly building an entire house at the time.


This is about as far as we got with the building. I plan on finishing it and incorporating it into the house I want to build, but the generator is history, at least for now.


So how does stone building compare with straw? Stone is excellent in stabilizing the temperature, but makes lousy insulation. We would need to make the walls several feet thick to get good heat retention. This is a major reason it was never finished. Other projects demanded our time and that winter the temperature dropped to 29 degrees below zero. This happens every decade or so and we realized a stone house just wasn't going to cut it. We were starting to hear about straw bale buildings at this time, and we were in need of a pump house.
 
Yone' Ward
Posts: 135
Location: Springdale, WA USA - Cold Mediterranean Climate
1
  • Mark post as helpful
  • send pies
    Number of slices to send:
    Optional 'thank-you' note:
  • Quote
  • Report post to moderator
So here we are, it looks like the summer of 1995. We need a pump house that will keep the plumbing from freezing. We had read some book from the library on straw bale building, so we decided to make it happen. If the farmer you get the straw from offers to deliver for a price, consider it. Chances are, it will take you several trips to arrive with enough straw for your building if all you have is a pickup.


We decided to make the pump house round with 10 feet of space inside. This requires a 13 foot diameter floor. We poured a slab. If you are not building a pump house, I do net recommend ever pouring a slab. Every square foot of that slab will brutalize your body as you make it. Just like with the stone house we built and anchored the door way first.


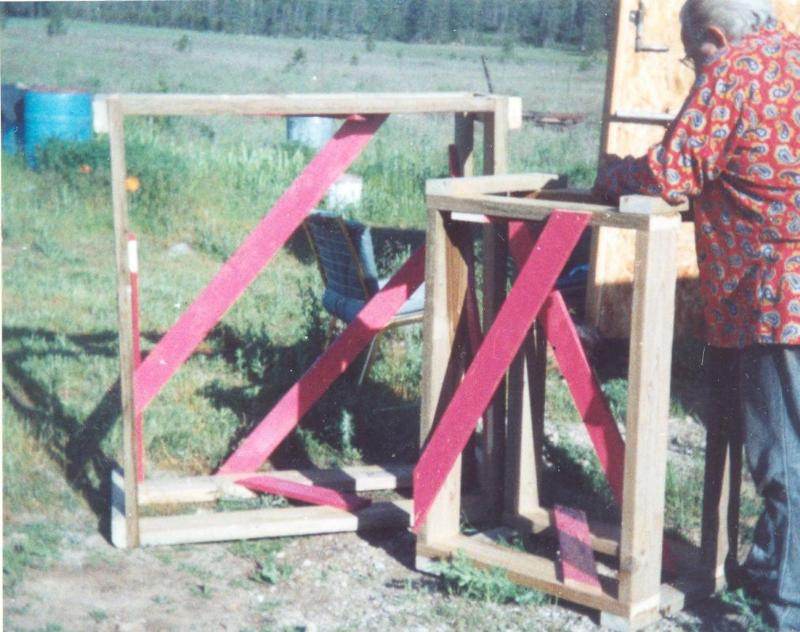
We also built one window frame and, in both cases, we stapled one inch chicken wire directly to the boards.


We drove wooden sticks down through the bales to pin them together. We didn't do anything fancy here, we just broke them off at about the right length and shoved them down.


Here is where we encountered our first problem. The wall was wanting to fall over in spite of it being round. We had to prop it up with a stick.


The bales also started to bow out in the middle, so we had to tie this heavy rope around the bales to keep them in place. Even at this point, it felt different inside the pump house than outside of it. For those of you who want to know if we ever had any kind of inspection on our buildings, you can see our ginger haired inspector at work here. All of our work has a cat seal of approval except the doors. They don't like doors much.


One day while out in the woods collecting firewood, we found a discarded drag link from the logging operation. We figured we could find a use for the cable someday and lugged it home. Sure enough, it made great rebar. You can see the top of one of the pegs we pinned the bales with, the chicken wire we wrapped the bales with (more on that next time), and some of the concrete we put on top of it.


Here I am putting the final touches on the exterior stucco. We mixed 9 sand + 3 sawdust + 2 cement + 3 lime and troweled it onto the chicken wire. This was very difficult and required a very precise water content yet still half of it would fall off as we put it up. If I were to do it now, I would build a variant of a slip form and pour a wet mix down between the bales and the form and tamp it good. It will give a more even wall too. If you look close, you will see a pair of steel wires across the door. these replaced the heavy rope and could be stuccoed over. Once the stucco was set, we could cut them off the door way.


It took me a while to understand how straw could ever be strong enough to support a roof. Finally it dawned on me that it's best to describe it as the roof is a raft and it floats on top of the straw bales. While the straw is floppy when straw bales are wrapped with masonry, there is a synergistic effect between the two that makes a wall with incredible load bearing and insulative abilities that neither possesses by itself. We filled the roof up with sawdust that we got for free.


So, what has 17years done to the structure? Take a look of this picture I just shot of it.


Well we were short on money and didn't put the salvaged metal roofing on correctly until last year, and the sawdust got wet, but we fixed that this year and the sawdust dried out. The plywood ceiling is a little warped, but is still solid. If you look above the door, we never did get that spot covered with a fist coat of stucco, yet no bugs call it home even though we have lot's of bugs. European Paper Wasps have set up camp on the underside of the metal roofing, but nothing in the straw itself. Our well pump that was supposed to last 12 years, died at 17, but that's a whole nother issue. The other day is was 90F outside and when I opened the pump house and checked the thermometer by the well head it read 64F. In the depth of winter we set up a small electric heater, the type that goes under a desk, and that keeps it above freezing. All things considered, this may be our best building on the place right now.
 
Yone' Ward
Posts: 135
Location: Springdale, WA USA - Cold Mediterranean Climate
1
  • Mark post as helpful
  • send pies
    Number of slices to send:
    Optional 'thank-you' note:
  • Quote
  • Report post to moderator
So now that we have water, maybe we should build a bathroom with a flush toilet, shower, and laundry hook up. Great Idea! We started off by pouring a slab. Bad Idea! All we really needed was a footing under the straw. Pouring a slab really beats you up and takes away several options.


The slab is poured, and we are collecting straw bales together. That blue house in the back is a OSB pre-fab abomination that we managed to live in for 13 years. It was slowly falling down the whole time. It still is.


There are several things going on in this picture. You see the black stripes on the straw? That's water damage. It did not prove to be a problem for us. the bales dried out and were fine, but it does get hot and dry here in the summer. It's dry most of the year. You may not fair as well. Unless you have a good place to store the straw, I recommend only buying 110% of what you expect to use in a season to prevent this. Like before, you can also see the door frame already built and in place. If you look closely, you can see rebar sticking up though the bales from the floor. The Idea was that the rebar would help keep the bales from leaning like they did in the pump house. All it really did was make the project harder. I don't recommend this. You can see a big rectangular stack of something in the top left of the picture. That is some free fiberglass ceiling tiles we picked up. They were a mistake. I'll explain later.


This is a salvaged bus window we framed in and put in the wall.


Here is a close up of us being uber precise with trimming one of the sticks that pin the bales together. Why is it a Milwaukean saw? It was an inside joke that must not have been very funny, because none of us remember why it was funny.


Here you see we are having a problem with our longest wall, the one on the left. We are only four bales high and the wall wants to lean over. The rebar did not hold the wall in place, we had to prop it up with a stick again. I'll explain how we would stop this now later.


One of the books said to make double ended hooks like this and use them to hook the chicken wire to the bales. the Idea was on hook would grip the straw, the other the chicken wire. They don't work very well.


This works much better. This is a piece of 1/2 inch doweling sharpened on one end and a hole drilled through the other to make it a giant sewing needle. You thread it with single strand fence wire and sew the chicken wire to the bales. It can be done by one person, but it works better with two. The wire likes to tangle and it helps to feed it through the bales carefully.


Another book recommended embedding the plumbing, water pipes, drain pipes, and electrical conduit in the bales. If nothing goes wrong it will be ok, but when you plumbing freezes and shatters the pipe inside the wall, your bales get soaked and you have to chisel through your stucco to fix it. My bales dried out, by my weather is dry.


We got lucky, The winter of 1995-1996 was mild. We got to this point in late December. As you can see, the roof raft floats nicely on the the wall. The wooden plate on the top of the wall is anchored to the cement cap on the wall and has rebar in the cap just like on the pump house, only it's straight and actual rebar.


So how has the room worked out? Let's start with a picture complete with one of Paul's favorite light bulbs.:


You remember the stack of fiberglass ceiling tiles? We cut them to size and squeezed them in between the rafter we figured we would get R-20 something insulation value from them. Turns out fiberglass ceiling tile only gets an R value of R-1 per inch. That means the roof has an R value of maybe R-8. And those windows? It's had to tell because I took the picture at about 4PM and the sun is almost shining straight into the camera, but they were an attempt to home build double pane windows. They are all broken to some degree. They are also supposed to hinge down to let hot air out. Great Idea, they just don't work well. The bathroom remained unoccupied for several years after the new house was built. It proved too hard to keep warm and the pipes froze & shattered. That being said, the place is the most comfortable room of the old house. It's still warmer in the winter and cooler in the summer. I plan on taking down the ceiling tile and using either sawdust or fiberglass batting. I know that stuff works. I'll board the windows up for now. My plans involve that becoming an inside wall later, so just boarding them up is a workable plan.

Now let me see about showing your the new house.
 
Yone' Ward
Posts: 135
Location: Springdale, WA USA - Cold Mediterranean Climate
1
  • Mark post as helpful
  • send pies
    Number of slices to send:
    Optional 'thank-you' note:
  • Quote
  • Report post to moderator
This picture is every bit as miserable as it looks. Even though this was a mild winter, we were still cold and and to stand downwind of the stove on a windy day. We couldn't very well tear the house down and rebuild, we needed somewhere to live.


My dad and mom sat down and started drawing up plans. They settled on a six sided house with each wall being 20 feet long. They started by, you guessed it pouring a slab. Good news for me, This was in 2000 and I had left for Detroit to seek fortune in late 98. Though if you know what happened to Detroit, you know about how that went. The slab proved to be a bit of a fiasco, but progress continued. He erected this OSB form the next year.


4 of the 6 walls would be stack wood walls. Mortar went around each end and sawdust with lime went in the middle. He butted it all up against the form.


I suspect somewhere there is an OSHA compliance officer balled up in the corner weeping, but no one got hurt.


He made four walls of stack wood while the western two walls were straw. He put the form wall on the outside of the straw walls.


While I was not there to help, some of my nieces were. behind them you see the stack wood wall after the form was removed. Plaster board was put up later.


Again the window frames were pre built and mortared in place.


Building the place took 7 years. It wasn't until September of 2006 before the final piece, the wood stove was installed. Of course having bare straw just behind the stove is a fire waiting to happen, so we circle back around to where I started.


We have a marble quarry not too far away, so they went up there and collected the stuff they threw away and mortared it to the straw bale wall. They could only go up about a foot a day and had to prop the rocks in place with sticks.


They liked it so much they did most of one straw wall.


They moved in in November of 2006 and worked on the interior all winter.


The deep windows are a great place for plants and canary cages. I'm thinking they could be made into a canary habitat without too much work.


Plaster board is the most common interior, and the easiest to find stuff that is compatible for, but I think this looks way better and is worth the hassle:


The house was awesome but more space was needed, Beginning 2009, we added a 2x6 frame addition on the south west end and the north east. these are the coldest and hottest parts of the house. We were thinking of installing slab wood for siding, but I'm thinking that Rock would be a better Idea. It may not completely fix the problems the additions have, but it should help. Plus the stack wood has developed a problem. It shrank and pulled away from the mortar and now bugs are drilling into it. A nice layer of rock should fix that and make the house better yet.
[URL=http://imageshack.us/photo/my-images/705/fnewhouse14.jpg/
]
[/URL]
 
Posts: 105
4
  • Likes 2
  • Mark post as helpful
  • send pies
    Number of slices to send:
    Optional 'thank-you' note:
  • Quote
  • Report post to moderator
Awesome write up, Thank You!
 
Posts: 423
Location: Portlandish, Oregon
34
forest garden fungi foraging
  • Mark post as helpful
  • send pies
    Number of slices to send:
    Optional 'thank-you' note:
  • Quote
  • Report post to moderator
I just wanted to say thanks for this thread. It has given me more insight than any one thread ever has. Personal stories of good and bad is the best way to learn.
 
Yone' Ward
Posts: 135
Location: Springdale, WA USA - Cold Mediterranean Climate
1
  • Likes 1
  • Mark post as helpful
  • send pies
    Number of slices to send:
    Optional 'thank-you' note:
  • Quote
  • Report post to moderator
I do actually have one more post to make, but I just lowered our new well pump into the well this afternoon and I am to pooped to be useful today.
 
Milo Jones
Posts: 105
4
  • Mark post as helpful
  • send pies
    Number of slices to send:
    Optional 'thank-you' note:
  • Quote
  • Report post to moderator
I want to add, I think the interior cordwood walls are really beautiful. Their limitations as exterior walls took a long time to learn.
 
Yone' Ward
Posts: 135
Location: Springdale, WA USA - Cold Mediterranean Climate
1
  • Mark post as helpful
  • send pies
    Number of slices to send:
    Optional 'thank-you' note:
  • Quote
  • Report post to moderator
Ok, I got our new well pump installed and we have running water again. Not having running water is a bigger hassle than no electricity. You're not here for that though, so I'm going to tell you how I intend on building my next straw bale building:

First you need enough foundation to get past the squishyness of the ground. We have about 12 inches of stuff we charitably call top soil that is sand with some organic matter in it. this turns to mud the consistency of pudding every spring for about a month. below that we have 12 inches of transition soil that gives way to about 20 or 30 feet of sand and gravel. If we dig through that transition stuff we can pour a foundation footing that wound sink and rise with the freeze thaw cycle. I've figure out that if you dig a nice wide trench and stack tires in it filled with the sand and gravel, you can top it with four inches of cement and you have a very solid foundation. Your soil may not be so compatible to this method though. We cut one side wall out of the tires, filled it with sand and gravel, soaked it with the hose and stepped on it good. Once dry, it's almost like concrete. One guy from Norway told me watering the tire filling was going to cause it to mold. He was very certain of this. Said I should do cob instead. I told him how my ground was made of anti-clay. He thought that was ridiculous, there absolutely was clay on my place. Dude has no clue.

Next I plan of stacking the straw bales three high. The top row will have the stakes for row four sticking up out of the bales. Once it's wrapped with chicken wire, I will put slip forms up a couple inches from the straw bales. If I have to have plaster board on the wall, I will go about 3 inches from the wall so there is room to embed a 2x4 in the wall without it touching the straw. At this point I can mix my special straw bale mortar a little on the damp side and pour in down beside the straw and tamp it in good. I'll lay a couple pieces of rebar along the top of the bales and a layer of the mortar on top of the bales to cover the rebar. Once this is solidified, I do the whole process again on top of what I just completed. This prevents the whole wobbly wall problem.

The bales we got were 16 inches x 18 inches x 42 inches. The straw fibers ran the 18 inch direction. We read that straw bales had a better R value when the heat had to travel cross ways on the straw fibers and we figured that if the straw fibers went up and down water would drain out of them if they got wet. I do not know if either of those theories are valid though. A problem that has cropped up since we built with straw is that farmers have taken to packing their straw in these giant round bales that aren't really suitable for building. There are a couple ways around this that I know of. One way is to contract with a farmer before he bales his straw. He like money like anyone else, so at the right price, he should be willing to put them in the smaller bales and maybe even deliver them. This could be better in the long run, if you don't have the truck to haul the straw. The other way is to bale the stuff yourself. I noticed on YouTube that there are videos of hand balers. It is a subject of future research for me. You could buy the big round bales and re-bale them. Personally, when I look out in my field I see 20 acres of Knapweed, Sulfur Cinquefoil, and probably a dozen other noxious weeds I could cut down with my scythe and sickle to pack in a baler. I could even make custom sized bales.

I consider rock to be an excellent companion to straw. A pound of rock on the inside of a straw bale wall is probably worth at least two pounds on the outside of the wall. It's a heat battery that stabilizes the temperature. I will put up another form about a foot from the completed straw wall use it to hold my rocks as I mortar them in place. I'll be going up to the quarry soon, so I'm going to look to see how many 12" rock there are to be found. I figure on mortaring the first 9 inches from the wall. Once it's up I want to grout it with black grout to help bring out the color of the rock. Rock needs to be kept dry though. If water gets into your external rock wall and freezes, it can crack it.

One of the books we read before we built our wall claimed R-50 for a straw bale wall. More recently studies have come out claiming that straw bale walls are only about R-30. I'm sure that they measured R-30, but I want to know more about how they built their wall. Another one of the books we read mentioned that different types of straw gave different R values, and again, the direction of the straw fibers in the wall mattered also. If you build a particularly crappy straw bale wall with poorly packed bales, I have no doubt that you could get a pretty bad R values. I know our walls are incredible. Even with broken windows and bad roof insulation the walls do an amazing job of keeping the rooms comfortable. I have never been in any buildings that come close to the performance of our straw walls. Given that, I have no doubts that a well built straw wall can achieve R-50.

In conclusion, I would say Straw has proven to be the best building material we have worked with. The bugs aren't going to cause the stack wood house down any time soon, but it's apparent to me that Straw has a better life span than the stack wood. It's fast too. I understand some people like cob a lot, but I believe the straw in cob is one of the reasons it is so good.
 
Posts: 5
  • Mark post as helpful
  • send pies
    Number of slices to send:
    Optional 'thank-you' note:
  • Quote
  • Report post to moderator
That was a great write up. I really enjoyed reading it.
reply
    Bookmark Topic Watch Topic
  • New Topic