• Post Reply Bookmark Topic Watch Topic
  • New Topic
permaculture forums growies critters building homesteading energy monies kitchen purity ungarbage community wilderness fiber arts art permaculture artisans regional education skip experiences global resources cider press projects digital market permies.com pie forums private forums all forums
this forum made possible by our volunteer staff, including ...
master stewards:
  • Carla Burke
  • John F Dean
  • Nancy Reading
  • r ranson
  • Jay Angler
  • Pearl Sutton
stewards:
  • paul wheaton
  • Devaka Cooray
  • Leigh Tate
master gardeners:
  • Timothy Norton
  • Christopher Weeks
gardeners:
  • Jeremy VanGelder
  • Matt McSpadden
  • thomas rubino

RMH in a Tipi

 
pollinator
Posts: 202
Location: Ontario
60
  • Likes 1
  • Mark post as helpful
  • send pies
    Number of slices to send:
    Optional 'thank-you' note:
  • Quote
  • Report post to moderator
Ernie had suggested this "U" in order to stop further tearing.
DSC04061.JPG
[Thumbnail for DSC04061.JPG]
rip-stop mend
 
Olenka Kleban
pollinator
Posts: 202
Location: Ontario
60
  • Likes 1
  • Mark post as helpful
  • send pies
    Number of slices to send:
    Optional 'thank-you' note:
  • Quote
  • Report post to moderator
clips to hold the coming hem-line in place.
DSC04070.JPG.png
[Thumbnail for DSC04070.JPG.png]
 
Olenka Kleban
pollinator
Posts: 202
Location: Ontario
60
  • Mark post as helpful
  • send pies
    Number of slices to send:
    Optional 'thank-you' note:
  • Quote
  • Report post to moderator

Miles Flansburg wrote:Olenka, one of the things that I have seen done is a pole run horizontally from above the door, out to any given length, supported outside of the lodge, by two poles that form a bipod set of legs. Just above the door, at a height of your choice, the pole comes through where the "stick laces" connect the cover, and is supported by a short pole at a right angle to it, which is attached to the two upright tipi poles on either side of the door. A canvas is then thrown over the horizontal pole to form a sort of triangular pup tent that is attached to the ground and as tight up against the tipi cover as possible. This can also have a canvas door flap at the front.
Sorry for not having a sketch. Does that make sense? Sort of like this.


I think the sewing awl would be of great use for making this kind of vestibule. The hemming looks like a minimal job, which should be fine to do by hand.
 
gardener
Posts: 1871
Location: Longbranch, WA Mild wet winter dry climate change now hot summer
450
3
goat tiny house rabbit wofati chicken solar
  • Likes 1
  • Mark post as helpful
  • send pies
    Number of slices to send:
    Optional 'thank-you' note:
  • Quote
  • Report post to moderator
I grew up with the sewing awl as part of our sail boat repair kit. It is a simple sewing machine for doing very heavy work. catch te loop and pull it tight and be sure to tie off the last stitch.
 
Olenka Kleban
pollinator
Posts: 202
Location: Ontario
60
  • Mark post as helpful
  • send pies
    Number of slices to send:
    Optional 'thank-you' note:
  • Quote
  • Report post to moderator
Yes, and make sure you don't poke your finger! That was my first step.
 
Olenka Kleban
pollinator
Posts: 202
Location: Ontario
60
  • Likes 2
  • Mark post as helpful
  • send pies
    Number of slices to send:
    Optional 'thank-you' note:
  • Quote
  • Report post to moderator
The Indian Tipi book! by the Laubins!
Thank you for sending this wonderful resource, Miles. This book is rich in its content, and sure to provide a lot of solutions!
IMG_20150212_164856.jpg
[Thumbnail for IMG_20150212_164856.jpg]
 
Olenka Kleban
pollinator
Posts: 202
Location: Ontario
60
  • Mark post as helpful
  • send pies
    Number of slices to send:
    Optional 'thank-you' note:
  • Quote
  • Report post to moderator

paul wheaton wrote:

72) The tipi is wonky. The lower edge has an odd shape. We bought it used and now we are beginning to understand why the price was so good.


In the intro to their book, The Indian Tipi (see last post), the Laubins write about the angle of the tipi. There are many traditional conical homes, and many that can be mistaken for the tipi due to common construction. But the tipi is a particularly unique conical home because it is tilted.


The pole at the back should be angled steeper than the rest. Couple this with a an oblong arrangement of the poles, rather than circular, and the hole at the smoke flaps is now better positioned over the fire.

The tipi at the Lab, in order to 'fix' the wonky bottom at the back edge, just needs needs its poles adjusted to the above description.
However, I am not sure that the tipi is large enough to accommodate for this shift. The corner of the bench at the bed (the 'headrest') is already poking the canvas and it'll poke deeper if the back is made steeper. Currently I believe this can be fixed to an extent by rotating the poles since they have sagged, and get the canvas cover on tighter around the poles- it's been a while and it could just a re-do to get some taught-ness back. But then again, I have concern that this tipi cannot handle too much added tension at this point. The fabric has lost a lot of its integrity, and there are parts that give-out and tear with the slightest disturbance.
 
Olenka Kleban
pollinator
Posts: 202
Location: Ontario
60
  • Likes 2
  • Mark post as helpful
  • send pies
    Number of slices to send:
    Optional 'thank-you' note:
  • Quote
  • Report post to moderator
repairing the door
20150217_142551.png
[Thumbnail for 20150217_142551.png]
 
pollinator
Posts: 1481
Location: Vancouver Island
60
  • Likes 1
  • Mark post as helpful
  • send pies
    Number of slices to send:
    Optional 'thank-you' note:
  • Quote
  • Report post to moderator

Olenka Kleban wrote:

The tipi at the Lab, in order to 'fix' the wonky bottom at the back edge, just needs needs its poles adjusted to the above description.
However, I am not sure that the tipi is large enough to accommodate for this shift. The corner of the bench at the bed (the 'headrest') is already poking the canvas and it'll poke deeper if the back is made steeper. Currently I believe this can be fixed to an extent by rotating the poles since they have sagged, and get the canvas cover on tighter around the poles- it's been a while and it could just a re-do to get some taught-ness back. But then again, I have concern that this tipi cannot handle too much added tension at this point. The fabric has lost a lot of its integrity, and there are parts that give-out and tear with the slightest disturbance.


Fabric building shells (even those made with esoteric man_made_last_forever_stuff) wear out faster than most other building materials. Also remember that the tipi was meant to be moved at least twice a year and repairs were made at that time. The original fabric(s) probably got some of their strength or rot proofing from the smoke that was not piped out nice and neat... it also kept some of the insects at bay. Look up the traditional Ger from Mongolia (Yurt) where some of the canvas parts are replaced as often as every three years, while other cloth parts last much longer. The outer shell degrades from sun and pollution, while the inner shell (even with stove and stove pipe) gets replaced next often... the frame may last a life time. Also, a cloth dwelling is not happy being left empty, they like to be lived in or they tend to go moldy and smell odd.
 
pollinator
Posts: 4715
Location: Zones 2-4 Wyoming and 4-5 Colorado
492
3
hugelkultur forest garden fungi books bee greening the desert
  • Likes 1
  • Mark post as helpful
  • send pies
    Number of slices to send:
    Optional 'thank-you' note:
  • Quote
  • Report post to moderator
I was hoping the book would shed some light on a few things. I refer to in all the time, it is getting worn out!

I have put up my lodge many times and gotten the cover on the ground on one side and way up in the air on the other , just because the poles were not right.

It should also have a pattern for making new shells , so future Gappers can make as many as they would like , just have to have some sort of material.

Enjoy !
 
Olenka Kleban
pollinator
Posts: 202
Location: Ontario
60
  • Likes 3
  • Mark post as helpful
  • send pies
    Number of slices to send:
    Optional 'thank-you' note:
  • Quote
  • Report post to moderator
The Sewing Awl

As Hans said,

Hans Quistorff wrote:I grew up with the sewing awl as part of our sail boat repair kit. It is a simple sewing machine for doing very heavy work. catch the loop and pull it tight and be sure to tie off the last stitch.


Yes, it is a lovely little thing! I've now sewn a hem around the door and gone around the tipi putting a "U" stitch around some of the tears to prevent or slow further tearing. It really is quite simple to use.

Making straight lines is especially easy, so long as you give a nice tug after each stitch. Both the 'awl-side' of the thread and the 'underside' end of the thread must be tugged; the tendency is the tug only the awl-side, and this results in a loose stitch on the underside that will go unnoticed until the fabric is turned over. Also, at the beginning of the stitch, make sure that your 'underside' thread is pulled out to the length of the entire stitch. Its length will hang down as you're stitching, but you need that length so that the thread is long enough on the underside to last until the end of the stitch where both the 'awl-side' and 'underside' thread will meet to be knotted together. The "awl-side" of the stitch is continually fed by the spool, so no need to prepare a specific length in advance.

The same goes for making curved stitches: make sure that your underside thread is pulled out to the length you'll need for the stitch, and as you're stitching, make sure to tug both the awl-side and underside end of the thread. BUT don't tug too hard! Unlike the straight line stitch, which can generally any amount of handle hardy tugging, the 'U' stitch needs appropriate tugging that won't result in over-pulling. Tug too hard, and the 'underside thread' will create a shorter path to get to the end of the stitch. In this case, the 'user-side' of the fabric will look good, the stitch will be exactly the 'U' you had planned, but the underside will have a shallower 'U' from too much tension. This can be fixed without needing to reverse the whole stitch. Just undo the knotted end, and from the 'user-side' of the fabric, pull the stitches up the awl. This will bring the 'underside thread' back to meet the same 'U' shape as on the 'user-side'. And though it is an easy problem to fix, its best to sew carefully and watchfully of both sides of the fabric the first time, rather than going back and adjusting. The adjustment leads to excessive twisting of the thread, which keeps the stitch from maximum taught-ness that could have been achieved on the first go.


I'm not sure how helpful the above descriptions are, but generally the tool is so easy to use that the user will soon come to these lessons on their own. Heck, that's how I learned these basic sewing awl lessons. Have no fear, use the awl.
20150217_094802.jpg
[Thumbnail for 20150217_094802.jpg]
underside thread has been pulled too tight!
20150217_095030.jpg
[Thumbnail for 20150217_095030.jpg]
pulling up the stitches on the 'user-side' while watching the underside
20150217_095404.jpg
[Thumbnail for 20150217_095404.jpg]
all fixed! the 'U's on both sides have been matched-up.
 
Olenka Kleban
pollinator
Posts: 202
Location: Ontario
60
  • Likes 2
  • Mark post as helpful
  • send pies
    Number of slices to send:
    Optional 'thank-you' note:
  • Quote
  • Report post to moderator
If you look closely at this picture, you'll see the initial thread that I tried mending with. It was not up to holding back the tear from spreading! Hopefully the sturdier thread will do the job.
20150217_095833.jpg
[Thumbnail for 20150217_095833.jpg]
 
Olenka Kleban
pollinator
Posts: 202
Location: Ontario
60
  • Likes 2
  • Mark post as helpful
  • send pies
    Number of slices to send:
    Optional 'thank-you' note:
  • Quote
  • Report post to moderator
This awl was purchased at Hide & Sole in downtown Missoula. It was on sale, as well as the wax thread spools. The 20% discount resulted in their price being better than what I've found for on-line prices, especially with the added shipping cost.
I'll also put in a little pug here for Bob's Sew & Vac of Missoula. On our hunt for tipi repair implements we first headed to Bob's, described our mends and fabric. He's the one who told us that we need a sewing awl, and pointed us down the street to the leather shoe store.

Thank you, Bob.
 
pollinator
Posts: 710
Location: SE Ohio
78
goat rabbit books fiber arts sheep homestead
  • Mark post as helpful
  • send pies
    Number of slices to send:
    Optional 'thank-you' note:
  • Quote
  • Report post to moderator
There! I knew i had seen a bull boat type tipi rain cover! :p

The tipi is also meant to be the slight tilt of the cone shape to make it sturdier. Native americans used the same design on a much much shorter scale when they used only dogs for pack and pull animals. Same as ya have two long poles to pack a horse travois they used dogs. You or the dogs had to carry things so ya used short, more easily packed poles.

From my reading the tipis when used for everyday living were repaired constantly. The open fire helped constantly rainproof the hide cover. As you can imagine the top of the tipi would become stiff from all the smoke treatment. The topmost hides would be removed and reused into things like moccasin soles etc. The next hides down would become the new topmost hides and new hides sewn to the bottom. I am assuming the lace up section in front would get more wear on it and need trimmed and resewn and that would even out the shape correctly for use.
Hope that makes sense.

I dont know how that would translate to help with a fabric tipi. I think about the time native americans were being pushed around and all they didnt really stay with the cloth tipi before just having to live in "regular houses". I havent read anywhere else of people living extended periods of time in fabric tipis.

Theres a neat guy who actually lives here in Virginia in a canvas tent. Link to his blog: http://dshillingtentliving.blogspot.com/?m=1
 
Olenka Kleban
pollinator
Posts: 202
Location: Ontario
60
  • Mark post as helpful
  • send pies
    Number of slices to send:
    Optional 'thank-you' note:
  • Quote
  • Report post to moderator
Len,

Yes yes! These are all good points to keep in mind when it comes to tipi longevity and planning to live in the space as a home. I think generally at the Lab we've come to the realization that the canvas has a good 3 year lifespan, but we were also looking at ways to stretch the longevity a little longer- the right upkeep could mean cheaper long-term living. Derick reflected a lot on the differences between the traditional use of a tipi versus how we are using it. Overall it seems like we have not changed much, however the differences do add-up. We see this particularly with the canvas. Like you said, sun and pollution lead to degredation, but smoke gives rot-proofing. Derick saw this latter point about the lack of smoke running through the place as significant change in the treatment of the structure. From afar, particularly at the back where there is no paint, it is clear that the canvas is suffering from the bench-down. From up-close, there are black mould spots that dot the surface all over, except at the very top. And to touch, in some places the canvas is significantly weaker than what it once was. It is soon time for a canvas replacement, but good note and examination of canvas use and care is the first step before moving on to a new canvas.
 
kadence blevins
pollinator
Posts: 710
Location: SE Ohio
78
goat rabbit books fiber arts sheep homestead
  • Mark post as helpful
  • send pies
    Number of slices to send:
    Optional 'thank-you' note:
  • Quote
  • Report post to moderator
In the summer it would be very neat to try set up one and run it just open fire. Then towards fall take it down for repair etc, build the RMH, put it back up around the RMH.
Or get some new fabric/cover and setup on some low sticks with a nice smokey punky fire under it . Like laying a hide over a small cool fire to smoke it on a sapling latticework sort of deal).
 
Olenka Kleban
pollinator
Posts: 202
Location: Ontario
60
  • Mark post as helpful
  • send pies
    Number of slices to send:
    Optional 'thank-you' note:
  • Quote
  • Report post to moderator
kadence,

Yes, the more we reflect on the traditional, time-tested use of the tipi, the better our experience will be. Seeing that the Lab's tipi is not one that calls to be taken down, adjusted, and moved from time to time, it'd be beneficial to think of a regime that'll incorporate the useful cycle of actions that a nomadic home has with the needs of the same home with a different purpose.

We can aim to have a 6 month rule or something, where the tipi steward(s) does a check-up on the home: check for places that need mending, make note of the state of the fabric, turn the poles to counter sagging, etc. My concern is that this kind of a rule might easily be overlooked. Gappers are kept busy, and suddenly the tipi repairs that were made 1 year ago felt like they were made yesterday, so the tipi goes unawaredly uncared for. The use of the nomad's tipi involved opportune times to make these checks, but our settled tipi needs added mindfulness for this in order to get it done. A giant hourglass would be neat! And much for entertaining and motivating than having a date set in a calendar!
 
Olenka Kleban
pollinator
Posts: 202
Location: Ontario
60
  • Likes 1
  • Mark post as helpful
  • send pies
    Number of slices to send:
    Optional 'thank-you' note:
  • Quote
  • Report post to moderator
And now that I've thought of a silly, unrealistic idea for the reminder of tipi care, I have clarity of mind for a more realistic (and fun!) idea!

Celebration. Kadence, you mention a task that would naturally be best for summer, and a task for fall. I like it.

At home I regularly celebrate feasts by the calendar. We all do. I can best speak of my own experiences, so I'll paint a picture of some events that my collective, kosa kolektiv celebrates for contemporary practicality and for remembrance of ancestral tasks. Melanka (julian calendar New Years) is for breaking-up the winter and feasting during the long, cold winter; Maslyanytsia (like Mardi gras) is for indulging in rich foods before fasting; and Obzhynky are for celebrating the late summer's harvest and preparing food. Some of the original inspiration for the celebrations are still practiced today, and some, especially in urban areas, are folk customs that are of the past. New Years is very relevant today- winter is still winter; on the other hand Mardi gras is a major time of party despite not all celebrators intending to fast; and then we have Obzynky, which for many people, especially those living in urban areas or where local trade is not as active as it once was, is a time to celebrate the ancestral way of getting-by... AND it is a time to bring us back to a grow-your-own mind-set.

Dedicating 2 days of the year to tipi care can absolutely be made into a celebration. The reality is that the traditional, nomadic use of the tipi had opportune times for doing check-ups on the home. Our tipi is settled, and requires more mindfulness in order to make sure that certain regular tasks get done. Imagine: a dedicated day of festivities. These tasks will not only get done, but done on a regular basis, and done with much joy! This can also be a good way for people to come together and do things that an individual tipi steward can't do on their own. Of course, tasks that need immediate attention can happen when they will. But there's a list of things that need once in a while care: lifting the cover and turning the poles, or even a complete re-raising of the tipi; fall installation of the ozan and liner, spring take-down of the ozan and liner + washing (they get very dusty, especially the ozan), mending of the cover, liner and ozan; a good clean-out of the RMH ducts, a re-cobbing of the mass if necessary, or even a re-colouring of the bench; maybe a campfire in order to get some smoke through the place (and celebrate the way a tipi is used traditionally); and help the tipi dwellers with any other tasks that require the help of community. It could also be a good time for a group brainstorm of solutions for efficient tipi living, rather than just doing it through the internet (here) and through books (thank you Miles!). And every few years this day can feature the replacement of the old canvas cover with a new one. Miles mentioned that it would be a good idea for a gapper to make one. This would be more cost-efficient for the Lab, and to have a celebration go along with it would mean that the hard work of making a tipi cover would go noticed and appreciated. And the spotlight on the event could mean that the tipi maker inadvertently motivate them to put more attention to detail into their work, rather than making a cover just to get by. The day can end with a feast, and everyone can relax together. Maybe there'll be a pig roast! or deer! and RMH-baked pie for dessert!
 
Olenka Kleban
pollinator
Posts: 202
Location: Ontario
60
  • Mark post as helpful
  • send pies
    Number of slices to send:
    Optional 'thank-you' note:
  • Quote
  • Report post to moderator
kadence, Len,

You both mentioned smoke.
Do you have any idea how long the mould-resistance lasts? I'm wondering: is occasional smoking of the canvas significant enough, or does it have to be a daily task? Also, the mass/bench is quite big and would block the lower part of the tipi from receiving smoke treatment from an open campfire. Perhaps it can be smoked with a bee smoker while the tipi is erect, or as kadence described with a low fire under a lattice frame with the tipi cover laid out on top.

Perhaps it's time to make a test! 2 pieces of canvas: one unsmoked, one smoked once per season. Is there a difference in mould development? I believe these samples of canvas would represent the bottom of the tipi cover, where the canvas is faced with the elements (sun, rain snow, pollution) without being heated.
 
Olenka Kleban
pollinator
Posts: 202
Location: Ontario
60
  • Likes 2
  • Mark post as helpful
  • send pies
    Number of slices to send:
    Optional 'thank-you' note:
  • Quote
  • Report post to moderator
Here is a picture of the bottom of the tipi from the back. The dark part- mould? It is the section of the tipi that has the hardest time getting dry once wet. It does not receive strong sun, and does not receive much heat from the RMH (the colour change of the canvas in this photo coincides with the height bench inside).

Back in November I thought this section was deteriorating faster than the rest because the bench cut-off good airflow to this section from the inside, and the tarps along the bottom (which Derick and I, and Emily and Tony last winter) cut-off good airflow to this section from the outside. I thought the way to go might be to take the tarps off, and capitalize on solid ozan and liner use. This could make a cell of warmth on the inside, but still allow air to circulate along the underside of the canvas.

But now I think the bigger problem is just precipitation build-up, and the inability for that part of the canvas to warm-up and dry out. I am not sure if snow build-up happened on the tipi last year, but Derick and I initially did not knock it off. The snow and ice helped to keep the tarps in place along the bottom edge, and added insulation to our home. But now I sweep it off right away. It weighs on the canvas and keeps it moist.
low.JPG
[Thumbnail for low.JPG]
 
Olenka Kleban
pollinator
Posts: 202
Location: Ontario
60
  • Likes 1
  • Mark post as helpful
  • send pies
    Number of slices to send:
    Optional 'thank-you' note:
  • Quote
  • Report post to moderator
Snow on the tipi. November.
winter-tipi-pan.JPG
[Thumbnail for winter-tipi-pan.JPG]
DSC00832.JPG
[Thumbnail for DSC00832.JPG]
 
Olenka Kleban
pollinator
Posts: 202
Location: Ontario
60
  • Mark post as helpful
  • send pies
    Number of slices to send:
    Optional 'thank-you' note:
  • Quote
  • Report post to moderator
Snow on the tipi. January.
Time to knock it off.

Now I sweep it off every morning that I wake up to it.
DSC01836-snow-sag.JPG
[Thumbnail for DSC01836-snow-sag.JPG]
DSC02282-heavy-snow-on-tipi.JPG
[Thumbnail for DSC02282-heavy-snow-on-tipi.JPG]
DSC02297-tipi-wet-canvas.JPG
[Thumbnail for DSC02297-tipi-wet-canvas.JPG]
 
Olenka Kleban
pollinator
Posts: 202
Location: Ontario
60
  • Likes 1
  • Mark post as helpful
  • send pies
    Number of slices to send:
    Optional 'thank-you' note:
  • Quote
  • Report post to moderator
Here the door, newly hemmed. All the original canvas is still there, just tucked back or rolled up inside. It can be un-done is the doorway needs to return to its original shape in the case that this shape is not working out well. It is rather tall. 'Twill be good for Paul.

20150218_111814.jpg
[Thumbnail for 20150218_111814.jpg]
 
Olenka Kleban
pollinator
Posts: 202
Location: Ontario
60
  • Likes 1
  • Mark post as helpful
  • send pies
    Number of slices to send:
    Optional 'thank-you' note:
  • Quote
  • Report post to moderator
A few weeks ago Rick and Jason came over and did the job of taking down the tattered rain cap.

Thank you, b'ys. A fine job done.
DSC03043.JPG
[Thumbnail for DSC03043.JPG]
look at that ingenuity
DSC03041.JPG
[Thumbnail for DSC03041.JPG]
DSC03035-taking-down-the-raincap.JPG
[Thumbnail for DSC03035-taking-down-the-raincap.JPG]
 
Olenka Kleban
pollinator
Posts: 202
Location: Ontario
60
  • Mark post as helpful
  • send pies
    Number of slices to send:
    Optional 'thank-you' note:
  • Quote
  • Report post to moderator
take down


it's like flying a kite. or puppeteering.

 
Hans Quistorff
gardener
Posts: 1871
Location: Longbranch, WA Mild wet winter dry climate change now hot summer
450
3
goat tiny house rabbit wofati chicken solar
  • Likes 2
  • Mark post as helpful
  • send pies
    Number of slices to send:
    Optional 'thank-you' note:
  • Quote
  • Report post to moderator
Some observations from scattered posts. (1) The poles were not set with the pattern steeper in the back and shallower in front. (2) The current mass shape may not allow that arrangement. (3) The lower part of the fabric
is not getting enough heat to dry out. (4) The winter liner might work better if it went from the bench back up to the ozan.

Suggestion: When the tipi is disassembled this summer re cob the back of the mass to match the new angle of the poles so that the air being drawn through the ruble base would be drawn up between the mass and the fabric and heat from the mass would help dry the fabric. The heat between the fabric and the liner would also keep the liner warmer thus reflecting back more radiant heat to the occupant.

I think these modifications would improve both cover life an occupant space and comfort.
 
Olenka Kleban
pollinator
Posts: 202
Location: Ontario
60
  • Mark post as helpful
  • send pies
    Number of slices to send:
    Optional 'thank-you' note:
  • Quote
  • Report post to moderator
Thank you, Hans.

Helpful re-cap.
 
kadence blevins
pollinator
Posts: 710
Location: SE Ohio
78
goat rabbit books fiber arts sheep homestead
  • Likes 1
  • Mark post as helpful
  • send pies
    Number of slices to send:
    Optional 'thank-you' note:
  • Quote
  • Report post to moderator
Link to pic of how air circulation is supposed to go in a tipi: http://www.surfacearch.com/images/tipi1.jpg

 
kadence blevins
pollinator
Posts: 710
Location: SE Ohio
78
goat rabbit books fiber arts sheep homestead
  • Mark post as helpful
  • send pies
    Number of slices to send:
    Optional 'thank-you' note:
  • Quote
  • Report post to moderator
On waterproofing tipi, mildew and discoloration,.. http://www.ahkitipi.com/questions-and-answers/water-proofing-mildew
 
pollinator
Posts: 1234
Location: Chicago/San Francisco
196
  • Likes 1
  • Mark post as helpful
  • send pies
    Number of slices to send:
    Optional 'thank-you' note:
  • Quote
  • Report post to moderator
Olenka

Some tipi mold thoughts. (Just that - I have no direct experience w/tipi's).

How does water drain away from the tipi? During rain? During winter when there is snow banked up the sides after a blizzard or wind and drifting? You said you brush off the snow now but this winter is very mild, no? A "real" winter might well mean you could not do this (too much snow) and snow might remain banked up the bottom of the tipi for days, maybe weeks, at a time. In that situation, what path can the melt water (from heat of the living space melting snow banked against tipi) take?

The above was brought to mind by thinking about what it takes to prevent mold and I think dryness is paramont - but is an impossible goal. UV and and fabric "treatment" help but do not cover the bases. UV helps a lot on sunny days but there's one side low down where it won't reach; also it's blocked by snow on the tipi. Smoke treatment only affects fabric higher up. So that means keeping the fabric dry is pretty important and the way to do this is air movement and warmth. Warmth means melting of snow which may be on the tipi and that means water needing control.

I suspect fabric health and mold reduction ranks right up there w/the comfort of the human occupants. ?? Right?? If so then the inner tipi environment s/b designed w/as much thought to fabric (tipi) health as human convenience. The tipi is a system and would benefit from a holistic approach that looks at the whole, not just individual issues. This means stepping back and looking things like location of heat source, "furniture", interior decorating (cob bench, piles of stuff, wall hangings ), clearance around inside bottom of tipi, air circulation space for _all_ the fabric... I think after all that you will still have to look at the lower 18" as a "consumable" that will deteriorate quickly and need replacing - due to the need to keep the tipi warm enough which requires minimizing air-changes/hour which means reducing air flow which means "sealing" the tipi/ground join which means the lower tipi fabric will live on the ground all winter and be wet much/most of that time.

And/Or... You could talk to Jay Whitecloud and see what he might suggest about raising the tipi up on a 24"(?) podium above the adjoining ground so that the bottom edges of tipi would drain right _over_ the edge of the podium which would remain essentially dry and _snow-free_ most of the time. Just maybe sufficiently to stay dry and live longer. I would think the podium would need to be the same foot print as the tipi, so it sort of perches on a knee wall, to ensure there can be minimal accumulation of snow or water around the outside edges. But it would still be important to plan the RMH run so the bottom of the tipi received warmth all around the full circumference and place furniture and large interior elements to provide air flow at ground level all around the perimeter where you have the greatest moisture problem. A podium might also allow placing an insulating layer under the whole floor and increasing the effectiveness of the RMH. In fact it would likely be important to insulate the inside of the "stemwall" (the outer circumference of the podium) because sitting above ground level will expose the mass of earth under the tipi to ambient air temperatures which can be much lower than the ground temperature. Also the shape of the podium relative to prevailing winds could greatly influence how much drifting of snow became a problem.

Recap: Look at the "system", including the local environment, the tipi and yourselves as a whole. There may be things besides/beyond the tipi that you can modify which will make important differences to how your system functions. Eg. site scaping, placement of large interior elements, maybe add-ons like a vestibule. And also your great vision of making a community event of regular large maintenance. After all, "sustainable" is a forever ongoing permie-process, not a single fixed accomplishment. A once a year tipi tear down and resurrection could be a great scheduled attraction! WORK, Work, work... and Food Dancing,Stories. WWS. <G> There's always going to be more new people that would really like to see how a tipi is "done". Shucks, maybe there's room for two tipis... <g>

Cheers

Rufus
 
Olenka Kleban
pollinator
Posts: 202
Location: Ontario
60
  • Mark post as helpful
  • send pies
    Number of slices to send:
    Optional 'thank-you' note:
  • Quote
  • Report post to moderator
Nice illustration of airflow. This is flow that we do not have, or at least not with the illustrated ease. I am not exactly sure how the air flows through this tipi set-up with the RMH heat. It is roughly the same, but slightly different, therefore not the same at all. The drama isn't there. And that is making a big difference for the canvas' ability to dry. Also, condensation can be at play here. The RMH's heating and cooling pulses could be getting things wet.

And the mould treatment- looks like lemon (or vinegar) + rinse + sun would be the only appropriate applications. This would be a nice summer treatment, or something that gets done at the tipi fest.
 
kadence blevins
pollinator
Posts: 710
Location: SE Ohio
78
goat rabbit books fiber arts sheep homestead
  • Mark post as helpful
  • send pies
    Number of slices to send:
    Optional 'thank-you' note:
  • Quote
  • Report post to moderator
Old thread on tipis from elsewhere on the net.. I like this site for primitive crafts and this sort of thing since it seems like they have the know how and time testing alot of the time to back up their advice.
http://paleoplanet69529.yuku.com/reply/415066/Re-Tipi-care
 
Olenka Kleban
pollinator
Posts: 202
Location: Ontario
60
  • Likes 4
  • Mark post as helpful
  • send pies
    Number of slices to send:
    Optional 'thank-you' note:
  • Quote
  • Report post to moderator
Hello friends,

It is time that I leave the tipi. Tuesday will be my last day. If anyone is interested in staying there, get in touch on this forum or feel free to PM me.

Thank you to all who have been following the posts.
Thank you to those of you who have replied, asked questions, and given awesome feedback: Miles, Hans, Mary, Len, Glenn, kadence, Julia, Valerie, Thomas, Rufus, Cassie, Adrien, Jami, David, Nancy, Judith and more.
Thank you Judith for your attention to detail and sending goodies in the mail based on your keen eye in this forum.
Thank you Marta! I got your email with winter tipi tips from your friend, and I keep forgetting to reply! Argh, me! thank you! It was a pleasure to meet you and Tim.
Thank you Miles and Hans for hangin' in there with me, for giving much appreciated guidance along the way.
And Miles, the gift of the books you sent is really a treasure.
Thank you to Paul, the host. and apple feeder.
Thank you Jocelyn. You are a good friend.
Thank you Rick, Jason, Sam and Jesse- You are a hilarious bunch. Just when I stop thinking of donuts, you help me get back on the right track.
Thank you Cassie for your film skills.
Thank you Jesse, for being a good neighbour.
Thank you Tim, Kristie, and your sweet little troopers. It's been good to live by a family.
Thank you Mike and Violet.
Thank you dogs.
Thank you Ernie and Erica. Your work is great.
Thank you Zach and Ernie for answering my questions about wildlife.
Thank you Zach and Raleigh. Always smiling, you pair.
Thank you Rich, Sofia, Tel, Bryce, Val, Seth.
Thank you Missoula Public Library. Everyone should get a library card. It's fantastic.
Thank you Devon for getting me a camera for this trip.
Thank you Mama, Tato, Taras, Ksenia, Rick, Marg, kosa kolektiv, and friends back home.
Thank you Tony and Emily for really getting things going here, writing about your experiences, and prepping Derick and I for our move out here.
Thank you Derick. I will be home soon.
IMG_20150221_184304.jpg
[Thumbnail for IMG_20150221_184304.jpg]
 
Olenka Kleban
pollinator
Posts: 202
Location: Ontario
60
  • Likes 1
  • Mark post as helpful
  • send pies
    Number of slices to send:
    Optional 'thank-you' note:
  • Quote
  • Report post to moderator
I will keep posting. I have more photos still to come. And the discussion is great, will keep chiming in. I will be one the move for the next two weeks, visiting various western Canadian cities before I'm Ontario-bound and settled back in Toronto, and then finally to Smithville, and then dear Warkworth. So, posting might be on-and-off for the next while, but I guess that's always how it's been with me living up on the Lab anyways. I look forward to following this thread and seeing the goings on as they progress. And I look forward to posting about the things that Derick and I will be up to at home.
 
Olenka Kleban
pollinator
Posts: 202
Location: Ontario
60
  • Likes 3
  • Mark post as helpful
  • send pies
    Number of slices to send:
    Optional 'thank-you' note:
  • Quote
  • Report post to moderator
This is what I think of my time around the tipi sometimes:

 
Olenka Kleban
pollinator
Posts: 202
Location: Ontario
60
  • Likes 1
  • Mark post as helpful
  • send pies
    Number of slices to send:
    Optional 'thank-you' note:
  • Quote
  • Report post to moderator
Rufus,

I like your holistic mind-set. It is key for making the best go of things, especially for staying humble and ready to take in lessons when dealing with old and new and environmental designs for living.

About sweeping the snow off as it comes:
I'm pretty glued to this point. It is a simple step that does not take much time. Yes, if there was a big boat-load of snow that came overnight one night, or say over a few days if the tipi dweller was away for a bit, then knocking the snow off would be harder, but not necessarily unreasonable. It is definitely one of the easiest tasks of the tipi-homesteader. And letting a tonne of snow sit on the tipi can be detrimental to the canvas since it adds extra tension and can tear the canvas. The situation of our torn doorway happened in part due to added tension from heavy snow and ice build-up. I can't see how repairing tears in the canvas and dealing with a quicker on-set of mould from having the canvas stay wet, and then possibly having to replace the entire canvas earlier than a regularly swept canvas is the better route than just sweeping the stuff off as it comes, even if it's a lot of snow at once. If you can't do it on your own, call a neighbour. If your neighbour is trapped in their home, well, you probably are too. I think extreme snow that can't be swept off is too hypothetical, and good care of the kanvas kone should not be excused for that reason.

Water path:
Precipitation that hits the canvas cover runs down the canvas, and drips off the bottom to the ground. The tipi site is crowned, with the centre of the site being the heighest point, and the rest of the ground has a gradual outward slope away from the centre. All precipitation that hits the ground around the tipi travels down the slope and away from the tipi. There is the sunscoop berm that surrounds the site; I believe it is far away enough from the tipi that the swale between the tipi and the berm is ample enough to catch and drain precipitation, even a hearty spring thaw.

"Yes" to giving a high ranking to mould issues and health on the priority list. Especially with the black developments. Perhaps that should be another rule: any black mould, and the canvas needs immediate attention. Other priorities must be put on hold. Get another gapper to fill-in for you, or negotiate a shift in work hours in order to treat the canvas with a mould killer (lemon wash, rinse, and dry, and maybe smoke treatment). It is your home. You breathe that stuff. You need it to be safe. It'd be interesting to see how often this kind of treatment would have to happen in order to keep any mildew and mould at bay, and how much time it adds to the tipi-homesteaders' list of daily doings. An assessment of this time and process could lead to an understanding that tipi dwellers at Wheaton Labs need more time in order to properly care for their home, or more daylight hours to get this work done (working on home-improvement outside of 9-5 hours is not always realistic during the short days of winter). Or it could lead to the conclusion that the tipi project is not efficient use of time and resources, and significant changes need to be made, like transitioning to a more permanent structure around the existing tipi RMH, instead of sticking with high-maintenance, short-lifespan canvas.

I think a bigger tipi would help air flow without making changes to the existing RMH. The height of the bench is currently at a nice height that keeps the draft entering the living space at a high level, instead of directly hitting the body; but in my opinion, it is currently too close to the canvas shell. A tipi of a larger diameter would give appropriate clearance for air to flow with more ease up the back of the bench and into to the rest of the tipi. It would also have the benefit of having more storage space available for the tipi dweller, as well as more space to make adjustments along the poles. The current set-up has me on my elbows and knees to go around the outer part of the bench to make changes to the liner and check the bottom length of the poles for good rain path.

The idea of raising the tipi so that it sits on a podium is also a good consideration. Increasing the effectiveness of the RMH, or rather, the ability to eliminate/lessen heat sinks in the home, is appreciated for the canvas home steward. The reality is, a lot of fuel is burned to make-up for the draft that takes the heat away, and, I never directly considered this before, but maybe the sand floor too? We currently do not have a man-made floor, just sand. This has been a pleasant floor- it is nice to touch the ground. But it has also meant that dropping fine tools are hard to recover, and dust is ever-present in the air (mine and Derick's schnozes were of dark brown boogers), and now, maybe a consideration of it as a heat sink? An insulated podium could be worth considering. The trouble with raising the tipi to sit on a podium is the RMH- it'd have to be raised too. To rebuild it would just feel like a shame to lose the original build (but well-used and loved for 2 winters), and the podium would have to be damn sturdy to support an RMH, especially the "Mass" part. I imagine a concrete slab would have to be poured in order to support it, or something like that. Or, the heater design could be a lighter one. But then the heat would not be retained so well, and frankly, the fact that that bench holds so much heat is really the prime thing that has been carrying us tipi dwellers through the winter.

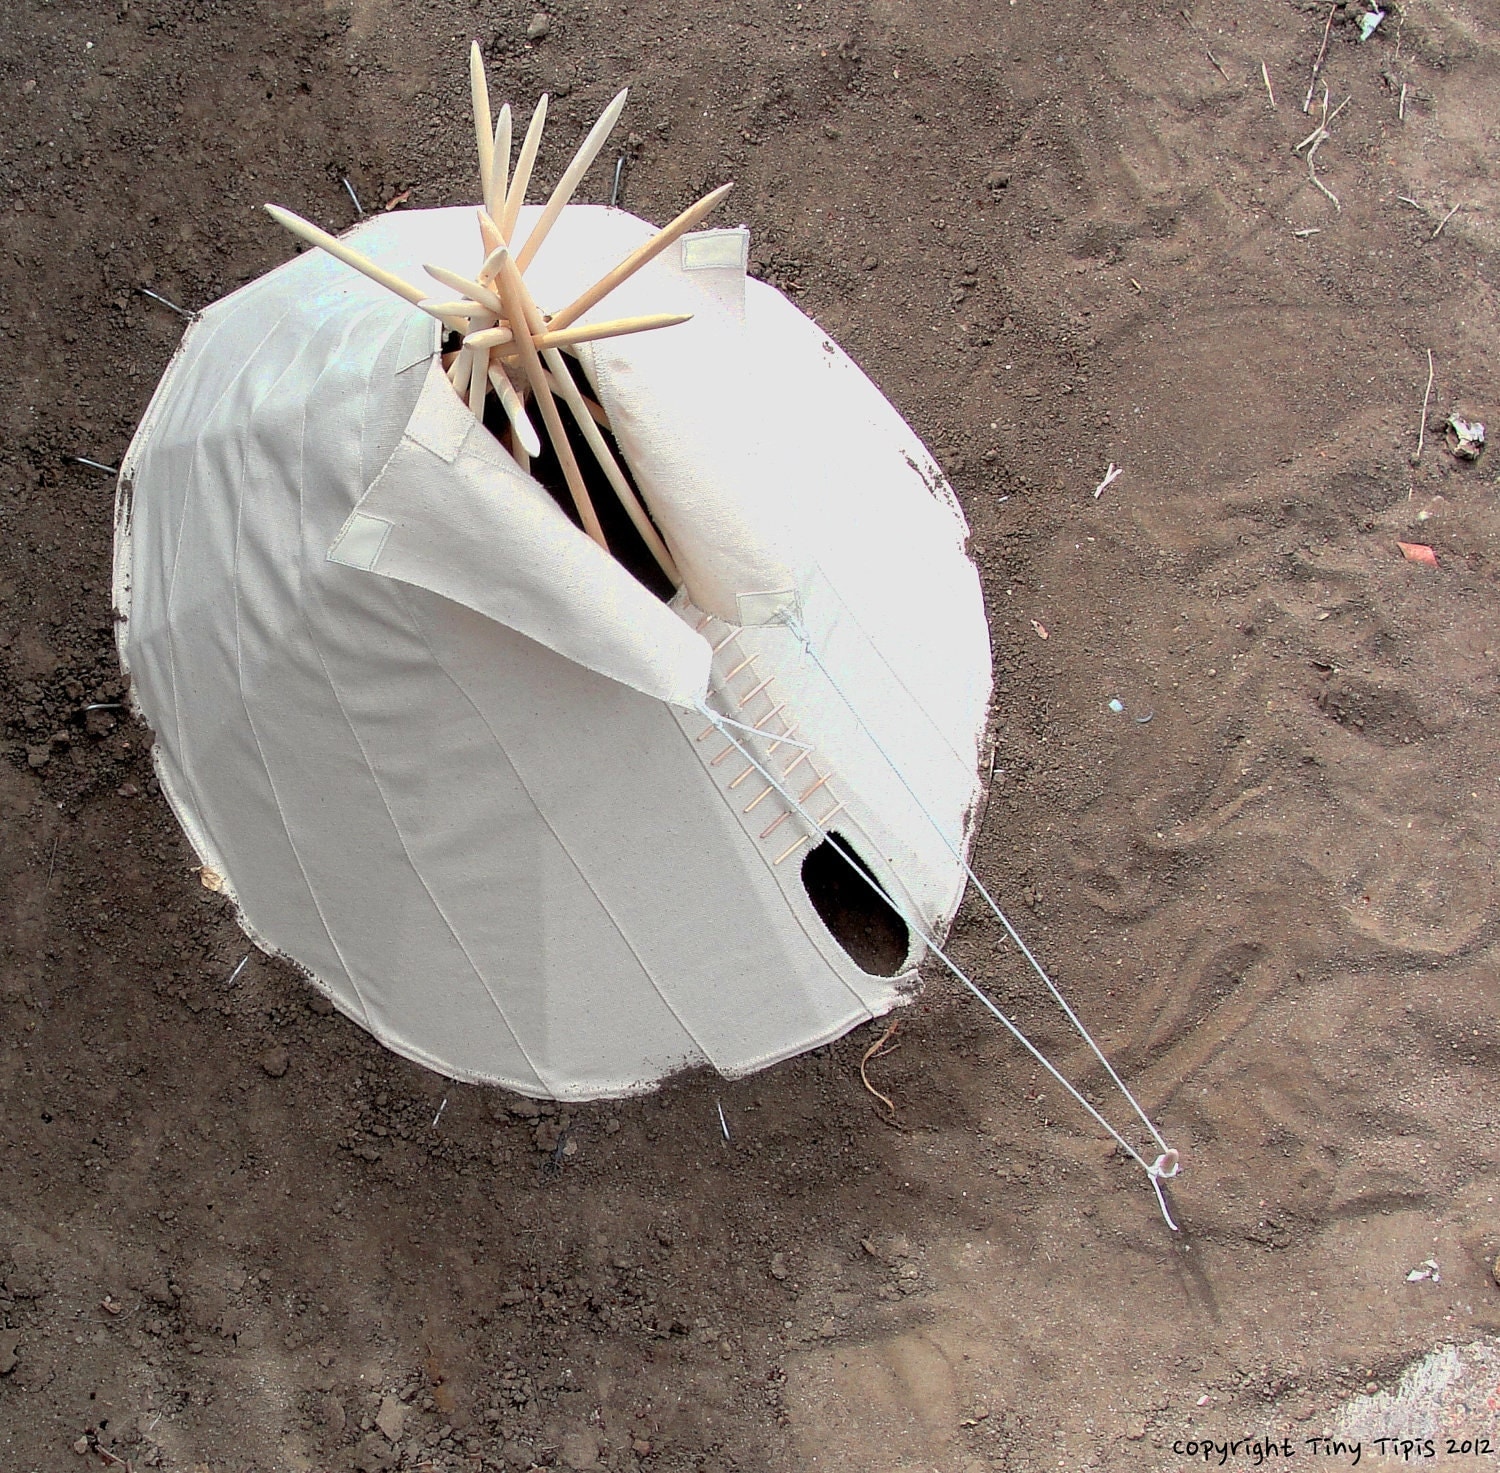
The podium reminds me of another consideration I had for lifting the tipi: a wall. My online tipi research lead me to photos of this particular tipi:


For a settled/not nomadic tipi, especially one with an RMH that does not need the bottom gap for air to flow in to feed an open campfire, a wall is a way to increase usable space, and position the canvas cover higher where the bottom edge will receive more contact with the warm interior air. This could extend the lifespan and/or decrease potential mould management for the canvas. However, it still might go mildew-y just as fast as the previous set-up since condensation might maintain the mould situation, even despite access to warmer air (that air always gets cooled down when the RMH is not being fired). Also, the wall might go mouldy, and then we have a mouldy part of the home that is much harder to replace than the canvas cover. I do like the wood storage that the photo shows in the tipi wall. But, it's not necessary, just a nice touch of added convenience. My other concern about this wall, or at least as featured in the photo, is that it is level (or at least it looks so) along the top. This is good for setting up the poles, but this surface needs to be angled away from the tipi so that rain can be directed away for the site, rather into the site. A wall with a sand core could work: the poles would find good stability in the sand, and precipitation can flow down into the sand wall and to the ground. But that wall would have to be of extremely sturdy retention walls in order to give all the necessary support to the poles and fluid sand. And then what if the shape of the wall isn't right, or the the sand is not angled outward before a winter-freeze, and melting snow ends up pooling oddly on the frozen sand. Overall I myself am not sold on this idea. It complicates the design too much and might not add any efficiency to the design, just more detail and problems to solve.

So, back to simple design, time-tested design.

The Tipi. Just a bigger one that fits the current bench better. And if the bottom rots too quickly, but the top is still ok, the bottom length of canvas can be un-hemmed, released, and replaced with a new piece of canvas. Maybe this can result in 80% of the tipi being used for 6 or so years, and the bottom being replaced every 2 years.

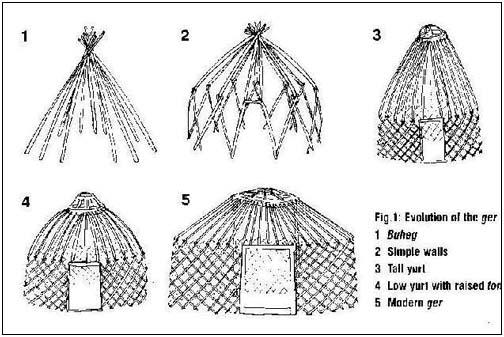
Or, transition to a related, but different design:


I know our canvas home is not meant for nomadic use, so going back to considering nomadic home designs might seem arbitrary. However, I think going towards a ger or yurt design could be a reasonable option for this project with the current RMH.
 
pollinator
Posts: 1703
Location: Western Washington
23
  • Likes 4
  • Mark post as helpful
  • send pies
    Number of slices to send:
    Optional 'thank-you' note:
  • Quote
  • Report post to moderator

Olenka Kleban wrote:This is what I think of my time around the tipi sometimes:


Olenka, that was beautiful. Wishing you the absolute best along your journey and please do keep posting this thread has been wonderful. Like, totally full of wonder.
 
Olenka Kleban
pollinator
Posts: 202
Location: Ontario
60
  • Mark post as helpful
  • send pies
    Number of slices to send:
    Optional 'thank-you' note:
  • Quote
  • Report post to moderator
Thanks Landon!
 
Olenka Kleban
pollinator
Posts: 202
Location: Ontario
60
  • Likes 2
  • Mark post as helpful
  • send pies
    Number of slices to send:
    Optional 'thank-you' note:
  • Quote
  • Report post to moderator
there's a sign out there.


click here for more pictures:

https://permies.com/t/44546/labs/making-signs
 
Rocket Scientist
Posts: 4423
Location: Upstate NY, zone 5
545
5
  • Likes 3
  • Mark post as helpful
  • send pies
    Number of slices to send:
    Optional 'thank-you' note:
  • Quote
  • Report post to moderator
A podium could be built up around the existing RMH foundation, leaving the living space as a well and putting all the canvas above the current bench top. This would make the current tipi structure and canvas still usable as is, with the same effect as a larger one. You might leave a walking-size gap in the podium at the entrance for convenience.
 
My honeysuckle is blooming this year! Now to fertilize this tiny ad:
Sepper Program: Theme Weeks
https://permies.com/wiki/249013/Sepper-Program-Theme-Weeks
reply
    Bookmark Topic Watch Topic
  • New Topic