• Post Reply Bookmark Topic Watch Topic
  • New Topic
permaculture forums growies critters building homesteading energy monies kitchen purity ungarbage community wilderness fiber arts art permaculture artisans regional education skip experiences global resources cider press projects digital market permies.com pie forums private forums all forums
this forum made possible by our volunteer staff, including ...
master stewards:
  • r ranson
  • Carla Burke
  • Nancy Reading
  • John F Dean
  • Jay Angler
  • paul wheaton
stewards:
  • Pearl Sutton
  • Burra Maluca
  • Joseph Lofthouse
master gardeners:
  • Timothy Norton
  • Christopher Weeks
gardeners:
  • Jeremy VanGelder
  • Maieshe Ljin
  • Nina Surya

Paul Wheaton's hugelkultur article thread

 
pollinator
Posts: 236
Location: Central California
1
  • Mark post as helpful
  • send pies
    Number of slices to send:
    Optional 'thank-you' note:
  • Quote
  • Report post to moderator
Hi Karl.

I guess I should have qualified that as ...relatively inexpensive.  Considering that there is about 4000 to 7500 feet per roll depending on type - tons of types and flows. Compared to buying lots of mini-sprinklers, drippers etc, it is cheap.  I have about 300 feet of drip tape in 2 garden beds - six inch spacing - that is 600 emitters I would have had to buy and hours punching holes and installing them or suffer poor irrigation.  My drip tape is about 2.5 liters per hour per hundred feet - great for poor clay soil and low water availability - my well is 1 gpm and is pumped with solar power.  I pump around 700 gallons per day.  I likely have enough drip tape on one roll to last me 10 years.

I got mine from a near local big irrigation supply.  http://www.landmarkirrigation.com/  A few cents a foot but had to be purchased in a big roll for around $150 as I recall.

Do-it-best has the timers as do many other hardware stores.  I like the pictured one best as the digital ones are enough trouble to re-program that you may avoid it.  I would suggest ordering it from the net if necessary to get that particular one.  $40   

Timing changes take seconds with the analog timer as opposed to minutes to a half hour if you goof or lose the instructions on a digital timer.


http://doitbest.com/Hose+Timers-Raindrip+Inc-model-R672CT-doitbest-sku-764587.dib

Mechanical timers are not as good unless you are there ALL of the time so you don't miss watering on a critical day.  The pictured timer is simple.  One knob for run time.  One for hours or days between watering.  Use a filter before the timer and 15 lb pressure reducer.


Pictured are two timers - one for trees and one for drip tape - I did the trees with larger emitters so irrigation time was a lot less than the drip tape required.  I use one hour sets on the drip tape to allow more time for all lines to fill and water well as well as to soak my clay soil a bit better.

I use shutoff Y's to easily allow shutting off lines for repairs or expansion.  Maybe $3 for the Y or less.

The filter should be about $7  - pressure reducer around the same - I paid $5 I think.  Both are pictured above coming off of the hose Y.  All fittings pictured are hose thread as is the timer.

A place to get T-tape - Not necessarily a recommendation - just a web-site found on search with info also http://www.dripworksusa.com/store/ttape.php

another http://www.agriculturesolutions.com/T-Tape-and-Fittings/View-all-products.html

As I mentioned you may be able to get it around half price if you can find a wholesaler that will sell to you - such as Landmark above.


You can save some money doing it my way instead of buying the million fittings they will want to sell you.

Hose to drip adapter off of the timer  $2  Drip is a slip fit into it.  Pictured is 1/2 inch drip hose.

For a stop at the other end of the drip hose, you can use a figure 8 or fold it over and tie it or slice a piece of drip diagonally to elongate it - make it about 1/2 inch wide - and slip it over the end of the folded drip hose.  If a piece is cut straight off it will not be wide enough to slip over the folded end of the drip hose.

Drip hose to T-tape....


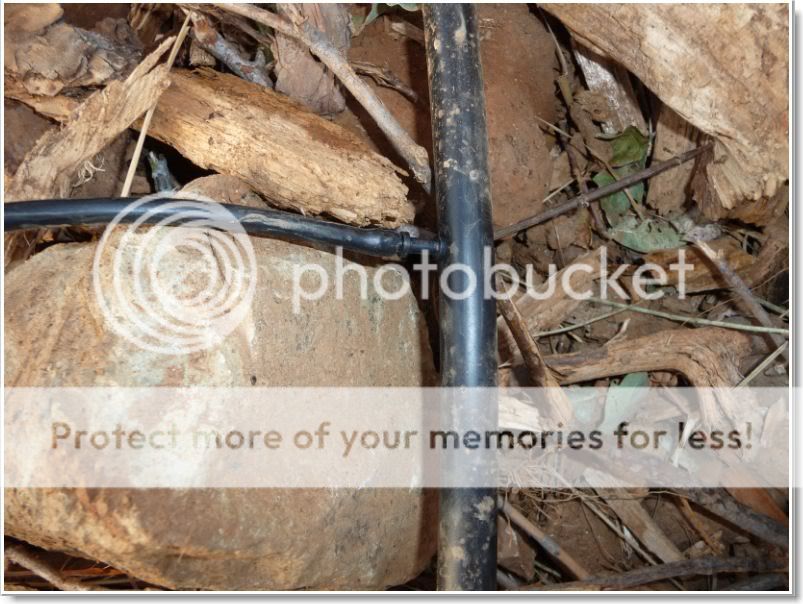
Carefully take the drip punch and punch a hole it the T-tape.  It is significantly smaller than the 1/4 OD tubing.  Cut the 1/4 OD tubing on a 45 or so to make it sharp - slip it into the hole in the drip tape - the drip tape will stretch over the tube forming a water tight seal if done correctly.  Cost - $0  for the connection.  I suggest leaving the drip tape a little extra long and do it near the end in case you booboo and need to re-do it.  Slip the 1/4 OD tubing into the T-tape about a foot more or less to prevent it from accidentally getting knocked out- no securing device is necessary - it will stay.


http://www.agriculturesolutions.com/T-Tape-and-Fittings/Irrigation-Tubing-Hole-Punch/flypage-ask.tpl.html

Most of this stuff is available at Do-it or other hardware stores.

Punch a hole in the 1/2 inch drip hose and insert a straight tubing barb.

http://doitbest.com/Tube+Adapters-Mister+Landscaper-model-MLT-ATE-doitbest-sku-710558.dib


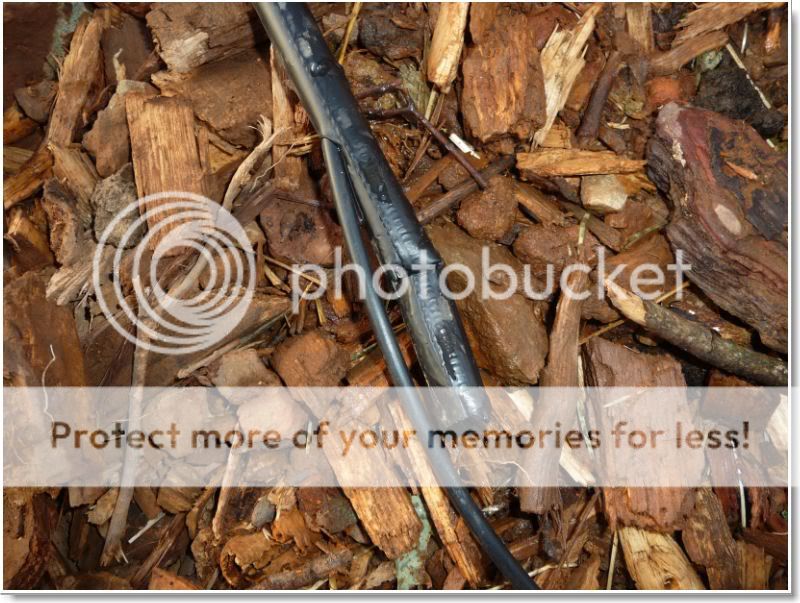
To stop the T-tape at the end, first cut about an inch and a half off to use as a sleeve.  Fold the T-Tape over about 3 times -about 1/1/2 inches or so - and slip the sleeve over it.  This is a cheap way to stop it.  Maybe $.01 or less.  Fold a temporary crease in the end to make it fit into the sleeve easier then flatten it after it is in the sleeve.  A single fold will possibly leak especially on thin drip tape. 


Tee barbs can be used to feed two tapes from a single 1/4 OD tube.

You can do hundreds and hundreds of feet of drip tape off of one timer and faucet depending on the T-tape flow with this method.  For low water availability I suggest low flow tape and longer water time or more frequency with short times - adjust to suit your soil and conditions.  At  2.5 liters per hundred feet per hour, my system does not require much water - I water several times per day for 1 hour depending on the heat.


Posts: 471
Location: Jackson County, OR (Zone 7)
3
  • Mark post as helpful
  • send pies
    Number of slices to send:
    Optional 'thank-you' note:
  • Quote
  • Report post to moderator
Thanks again Glenn for the great details and photos to show the system.  I have always used emitters off of drip tubing for each tree/bush.  It works, but it certainly does take a LONG time to set up for a big area.  I'll be looking in to the drip tape!

Any thoughts on the life-span of the tape?  I've gotten 5 years plus out of the drip line if i use pine straw or other soft mulch over the tubing to keep the UV from damaging it.  Exposed line starts to get brittle in a couple years.
 
Glenn Kangiser
pollinator
Posts: 236
Location: Central California
1
  • Mark post as helpful
  • send pies
    Number of slices to send:
    Optional 'thank-you' note:
  • Quote
  • Report post to moderator
My pleasure, SouthEastFarmer.

It is made out of the same material but lighter - pretty sunlight resistant so I would think 5 or more years is well within reason.  I have used it before and had it last that long.  The one I have pictured was given to me although I did buy a large roll too.  The one given to me is very thin - maybe 2 mil, but works great.

Squirrels may occasionally chew a hole in it trying to get water, but they may do that with any drip system.  Just cut it at the hole - fold the ends and do a double tubing insertion as shown above to keep from having to replace it.  It can also go around corners - check it the first time you put pressure to it to make sure there are no kinks. 

I started using it around 1982, however just made the effort to find it again this year.  I had an irrigation professional working for me at the time so he taught me the tricks.  Many more selections on size now.

Mulched away from UV it could last forever except for animal or shovel damage.  Covered plastic does not decompose much as we have learned from Mike Oehler  and his PSP building system.
 
Glenn Kangiser
pollinator
Posts: 236
Location: Central California
1
  • Likes 1
  • Mark post as helpful
  • send pies
    Number of slices to send:
    Optional 'thank-you' note:
  • Quote
  • Report post to moderator
As I mentioned previously, I took the Bobcat out yesterday to do some barter work for some logs for boards on the cabin and my other project.

I cleared out about an acre of manzanita but with my new found knowledge here I talked them into building a hugelkultur garden rather than burning the manzanita.

Here is the bed.  I will get the logs in a few weeks when I have time to get them(bug damaged trees - dying).

Last year I would have made a burn pile.  Shows what knowledge can do for you.   


It is now all covered with about 8 inches of dirt and topsoil.  This winter it will store water in the wood for next summers garden.  They are going to install drip also.  I forgot to take a pix with the bed finished.

While removing the brush I also removed a couple of cars the previous landowner had buried.  Yes - that is a whole car including all parts -the engine was still in it.


I had to shake the dirt out of the second one. 
 
Glenn Kangiser
pollinator
Posts: 236
Location: Central California
1
  • Mark post as helpful
  • send pies
    Number of slices to send:
    Optional 'thank-you' note:
  • Quote
  • Report post to moderator
You are welcome.  You will be amazed how easy it is after it is in, Karl.

I like to walk by daily and see that all is well, check the plants - you may see the tape creep a bit if not buried and have to adjust it, stake it etc.  I hope to mulch more this year after the plants are up and that will hold it in place better.

I found that I was sinking into the bed last night so will cut the time today.  I wanted to let the bed get a bit of a soaking so I set the timer to water an hour every 4 hours. I will half that to 8 hours today.
 
pollinator
Posts: 4437
Location: North Central Michigan
43
  • Mark post as helpful
  • send pies
    Number of slices to send:
    Optional 'thank-you' note:
  • Quote
  • Report post to moderator
i have some of the old leaky hose type connection systems that was sold years ago by walmart, and i have reused it, refashioned it, over and over, moving it and such for over 25 years..and it still works well..although the frost does occasionally damage the plastic push on connectors and i can't find them any more
 
Glenn Kangiser
pollinator
Posts: 236
Location: Central California
1
  • Mark post as helpful
  • send pies
    Number of slices to send:
    Optional 'thank-you' note:
  • Quote
  • Report post to moderator
California is a big irrigation state and most of our stores carry drip. 

If you know the ID of the hose we could probably find something that will work.  Being out in the boonies here I order lots of things online and figure that delivery is many times cheaper than the cost of fuel and shopping.

There are some half inch push on fittings that are extremely inexpensive - $.35 at our local Do-it best for couplers.
 
author and steward
Posts: 53987
Location: missoula, montana (zone 4)
hugelkultur trees chicken wofati bee woodworking
  • Likes 1
  • Mark post as helpful
  • send pies
    Number of slices to send:
    Optional 'thank-you' note:
  • Quote
  • Report post to moderator
A couple of quick thoughts:

A)  All of the irrigation stuff is temporary, right?  Cuz in the second year and beyond, you shouldn't need any more irrigation.  I suppose for a small hugelkultur bed you might need some irrigation - just less than without hugelkultur.

B)  I remember something about fukuoka saying that he did this a few times and then decided it was too much work.  Instead, he would plant fast growing trees, cut them and then rely on the underground roots to be the hugelkultur bed.

C)  There was a little bit of off topic stuff I should probably delete - I'm gonna leave it and hope that we don't revive that.
 
Glenn Kangiser
pollinator
Posts: 236
Location: Central California
1
  • Mark post as helpful
  • send pies
    Number of slices to send:
    Optional 'thank-you' note:
  • Quote
  • Report post to moderator
Up to you, Paul.  I find that off topic stuff tends to increase the learning process if it is led into by the topic and that censorship without a very good reason is counterproductive.  It disrupts the flow of the topic and alienates members.  I find it better to steer the topic back to the subject rather than micromanage it, but that is just me and this is your forum.

I am in California where there is next to no moisture underground for a couple hundred feet.  I'm on top a rock and claystone mountain.  I will have to monitor the performance of the bed by the response of the plants.  The bed should store about 2 feet of water.  If it works without irrigation for the summer it will be a real indication that this is really working and it will be a first for our area.  We get no rain for at least six months.

The irrigation is for the ability to have a garden this year and to not have to wait for the bed to get dampened until the first rains in November, while still using a minimal amount of water.

Everyone should know how to do drip irrigation to conserve water and for where they don't have a hugelkultur bed.
 
Posts: 163
  • Mark post as helpful
  • send pies
    Number of slices to send:
    Optional 'thank-you' note:
  • Quote
  • Report post to moderator
I think I'm going to do a mini hugelkultur (hugelbeet?) with my 6 sunflower stalks that are just about done living.
 
Glenn Kangiser
pollinator
Posts: 236
Location: Central California
1
  • Mark post as helpful
  • send pies
    Number of slices to send:
    Optional 'thank-you' note:
  • Quote
  • Report post to moderator
It's a start.  Everyone I have introduced hugelkultur to here thinks it is a great idea. 

Whether we need supplemental irrigation or not remains to be seen, but I should know by next summer.

My bed is on a mountain terrace and the bottom 2 feet should saturate with water this winter while the top foot will remain above the surrounding ground surface level.

I only have one area of fill that indicated it may work without irrigation as I had one volunteer Swiss chard on a fill area that stayed alive throughout the entire summer with no irrigation.  This is my first intentional hugelkultur bed, thanks to Paul for introducing it to us on the CP forum.
 
pollinator
Posts: 1528
Location: zone 7
18
  • Mark post as helpful
  • send pies
    Number of slices to send:
    Optional 'thank-you' note:
  • Quote
  • Report post to moderator
i dont think you will need much irrigation glen next year after the winter, living in a very similar climate and location the beds i built last year was a test to see how well it did in the summer heat, i didnt have to water until the end of july. i watered it well once and doubt ill have to water again until next year if at all. so now im building more of them
 
pollinator
Posts: 11853
Location: Central Texas USA Latitude 30 Zone 8
1264
cat forest garden fish trees chicken fiber arts wood heat greening the desert
  • Mark post as helpful
  • send pies
    Number of slices to send:
    Optional 'thank-you' note:
  • Quote
  • Report post to moderator
That is extremely encouraging, soil.  About how deep/thick would you say the wood material is in your beds?

 
Jordan Lowery
pollinator
Posts: 1528
Location: zone 7
18
  • Mark post as helpful
  • send pies
    Number of slices to send:
    Optional 'thank-you' note:
  • Quote
  • Report post to moderator
i dug down 3 ft, filled with rotten logs, on top of that i added sticks and branches to about 3 ft, covered with weeds, then my chicken manure compost, then some normal compost, and topped with a few inches leaf mold mulch. left to sit all fall and winter, planted in spring. they are on contour to the hillside so they sort of act as a swale as well. over winter they settled to about 2ft. tall. i think the key was the logs i buried under ground, this way its harder for them to sweat out the moisture so fast once it gets hot. i do occasionally give them some compost tea when planting new plants and seeds( only in the summer and early fall because we get no rain from mid May to November) otherwise seeds and plants are to fend for themselves.
 
Glenn Kangiser
pollinator
Posts: 236
Location: Central California
1
  • Mark post as helpful
  • send pies
    Number of slices to send:
    Optional 'thank-you' note:
  • Quote
  • Report post to moderator
Thanks, soil.  As you mentioned, my place is very near the same conditions even to the swales or terraces on the hills.  The porphyry clay here will hold some water if it can be kept on the hillside long enough.  I'm hoping that what we have done with our hugelkultur bed will do that. I am scouting out more rotting logs to hopefully increase the size of my beds more before winter.
 
Jordan Lowery
pollinator
Posts: 1528
Location: zone 7
18
  • Mark post as helpful
  • send pies
    Number of slices to send:
    Optional 'thank-you' note:
  • Quote
  • Report post to moderator
yea i had the same problem initially, 90% of the water would wash off the clay/silt hillside, into this small gully and down to the street, into the drain and who knows where from there. now id say 98% of the water goes into the hillside.
 
Tyler Ludens
pollinator
Posts: 11853
Location: Central Texas USA Latitude 30 Zone 8
1264
cat forest garden fish trees chicken fiber arts wood heat greening the desert
  • Mark post as helpful
  • send pies
    Number of slices to send:
    Optional 'thank-you' note:
  • Quote
  • Report post to moderator
Thank you, soil.  I am very encouraged by this information and look forward to seeing everyone's results. 
 
Glenn Kangiser
pollinator
Posts: 236
Location: Central California
1
  • Mark post as helpful
  • send pies
    Number of slices to send:
    Optional 'thank-you' note:
  • Quote
  • Report post to moderator
As in the terrace story from China that I read, This could completely change the environment for the better in  our area of the mountain.

Wish I could find that story again.
 
Tyler Ludens
pollinator
Posts: 11853
Location: Central Texas USA Latitude 30 Zone 8
1264
cat forest garden fish trees chicken fiber arts wood heat greening the desert
  • Mark post as helpful
  • send pies
    Number of slices to send:
    Optional 'thank-you' note:
  • Quote
  • Report post to moderator

Glenn Kangiser wrote:
As in the terrace story from China that I read, This could completely change the environment for the better in  our area of the mountain.

Wish I could find that story again.


Imagine if we could all collect 90% more water on our land, which otherwise would have run off to cause flooding downstream!  Our neighborhoods could become paradise!

 
Glenn Kangiser
pollinator
Posts: 236
Location: Central California
1
  • Mark post as helpful
  • send pies
    Number of slices to send:
    Optional 'thank-you' note:
  • Quote
  • Report post to moderator
It is amazing how much water there is if we could only retain it.

We receive around 50 inchesof rain  per year  here in the Sierra Nevada Gold Country.  Lets say 48" or four feet.  4'x 7.48 gallons  per cubic foot= 29.92 gallons per year per square foot of surface area.

29.92 x 43560 sq feet per acre = 1,303,315.2 gallons per acre per year.  Over 26 million gallons on our 20 acres.

Wouldn't it really be nice if we could hold enough of that that we do not need to pump water to irrigate....
 
travis laduke
Posts: 163
  • Mark post as helpful
  • send pies
    Number of slices to send:
    Optional 'thank-you' note:
  • Quote
  • Report post to moderator
That's what Keyline claims to do...
 
Tyler Ludens
pollinator
Posts: 11853
Location: Central Texas USA Latitude 30 Zone 8
1264
cat forest garden fish trees chicken fiber arts wood heat greening the desert
  • Mark post as helpful
  • send pies
    Number of slices to send:
    Optional 'thank-you' note:
  • Quote
  • Report post to moderator
But how do you implement Keyline if you don't have access to a tractor? 
 
Jordan Lowery
pollinator
Posts: 1528
Location: zone 7
18
  • Mark post as helpful
  • send pies
    Number of slices to send:
    Optional 'thank-you' note:
  • Quote
  • Report post to moderator
terracing, you don't need a tractor to do it. ive done all mine by hand. simply start at the bottom and work your way up. but then again im not terracing acres of land. only about 1 acre.
 
pollinator
Posts: 2103
Location: Oakland, CA
23
  • Mark post as helpful
  • send pies
    Number of slices to send:
    Optional 'thank-you' note:
  • Quote
  • Report post to moderator

Ludi wrote:
But how do you implement Keyline if you don't have access to a tractor?   


I might try using a pick in place of a bunyip slipper imp, working the point of the pick through the subsoil with about the same intent as one would use a spading fork.

Building a large dam with a reliable valve might be prohibitively difficult, but perhaps a hugelbeet near the keypoint will have some of the same benefits for much less investment.
 
Glenn Kangiser
pollinator
Posts: 236
Location: Central California
1
  • Mark post as helpful
  • send pies
    Number of slices to send:
    Optional 'thank-you' note:
  • Quote
  • Report post to moderator
Thanks for the keyline discussion everyone.  I had to study up a bit to make sense of it but I think I am going to start using the information right away.  (If this had not been mentioned as an aside from the main topic, I may not have learned of it for years.. not much time to travel around the forum)  Thanks again.

Here is a link I found to help me understand it.  http://www.laceweb.org.au/kff.htm

This could completely change my area of the mountain.
 
Posts: 383
Location: Zone 9 - Coastal Oregon
1
  • Mark post as helpful
  • send pies
    Number of slices to send:
    Optional 'thank-you' note:
  • Quote
  • Report post to moderator
This is essentially what any chop and drop I do becomes.  I barely weed here, and the things I have to prune such as apple limbs, become this as a swale on my property to help provide water in the time we don't get rain here.  These are naturally seeding and breaking down on their own and doing the exact same as this hoogle-culture. 

IMO, all this is doing is mimicking nature, which is how we learn to do our own permaculture better anyway! 
 
Glenn Kangiser
pollinator
Posts: 236
Location: Central California
1
  • Mark post as helpful
  • send pies
    Number of slices to send:
    Optional 'thank-you' note:
  • Quote
  • Report post to moderator
.. but once we learn to mimic nature then we can take it to new frontiers.

I was having trouble with the learning portion as I had never heard of the concept until Paul introduced it to me.
 
Mekka Pakanohida
Posts: 383
Location: Zone 9 - Coastal Oregon
1
  • Mark post as helpful
  • send pies
    Number of slices to send:
    Optional 'thank-you' note:
  • Quote
  • Report post to moderator

Glenn Kangiser wrote:
.. but once we learn to mimic nature then we can take it to new frontiers.

I was having trouble with the learning portion as I had never heard of the concept until Paul introduced it to me.


Indeed we do take new frontiers, each time we get exposed to new ideas, its like old school brain storming sessions for art ideas or writing assignments.  Isn't being a Permie wonderful?!
 
Glenn Kangiser
pollinator
Posts: 236
Location: Central California
1
  • Mark post as helpful
  • send pies
    Number of slices to send:
    Optional 'thank-you' note:
  • Quote
  • Report post to moderator
It has great benefits.  Education is accelerated  by years if we learn something new by reading a few minutes and are able to grasp and implement the concept.

Beneficial changes to our immediate environment can then be started and made within days or weeks rather than years or decades.
 
Brenda Groth
pollinator
Posts: 4437
Location: North Central Michigan
43
  • Mark post as helpful
  • send pies
    Number of slices to send:
    Optional 'thank-you' note:
  • Quote
  • Report post to moderator
we have been having a fairly severe drought here in our area for about two years..and i have a mix of hugel beds and conventional  beds.

the hugel beds have been doing MUCH better with less water than the conventional beds and there is less attack by insects or diseases (which we allow the birds to take care of most of the time).

i have the same plants in both the conventional beds and hugel beds all were planted at the same time and have gotten the same care.

the hugel beds are much much more productive, esp when it comes to things like tomatos and cole crops.

the trees in the hugel beds appear stronger and have not required additional watering where trees in the conventional beds (all baby trees put in this year) have actually drooped and wilted badly and had to get soakings a few times.)

i have soaker hoses in the entire garden but haven't run them as much as i would have liked to, but the hugel beds have not really required the soakers where the conventional ones wilted very badly and needed the soakers..so i ran them on all of hte beds.

when i redo any of my beds in t he future they will all be converted to hugel beds..and those that i don't redo will be getting bark and wood chips added as mulch or to holes dug into the beds as the materials are available.

we heat with wood so there is always a lot of wood product av ailable as scrap from our wood heating..so the plan is if i have wood products available in the fall i will dig them into the beds to give them time to rot over the wintier before spring planting is done..if not..they will be sidedressed onto the beds as mulch in the spring..generally by spring they would be partially rotted from storage all winter in our area.

we also are burying branches, trees (green and dead and other brush and green materials under pond scum and silt from digging our ponds into our woodsy areas where we have cleared some brush by knocking it to the ground with a tractor..we figure this is basically making some hugel beds on to p of our soil..with the previous woods duff as the bottom layer, branches and trees and other knocked down materials as the next layer and the pondy silty scummy soil on top as a 3rd layer and then the fall drop of leaves and twigs and manure from the animals and wildlife over the fall and winter..)..then next year we hope to begin to plant understory and other trees and shrubs into this more open woods area and among the existing trees, expanding more and more back into the woods as we are able

 
gardener
Posts: 965
Location: ZONE 5a Lindsay Ontario Canada
12
  • Mark post as helpful
  • send pies
    Number of slices to send:
    Optional 'thank-you' note:
  • Quote
  • Report post to moderator
Here's a way to give a second life to christmas trees. We simply lined up the trees and buried them with soil from a pond. This picture shows the trees partially covered, with a reddish tree still exposed at the bottom right side of the line.

I had a delivery job in town over the winter so around christmas time I'd scope out the curbside christmas trees and pick them up at the end of my shift.

x-mas-tree-hugel.jpg
Here's a way to give a second life to christmas trees
 
Posts: 386
15
  • Mark post as helpful
  • send pies
    Number of slices to send:
    Optional 'thank-you' note:
  • Quote
  • Report post to moderator
Do you already know what you will grow in it?
 
Travis Philp
gardener
Posts: 965
Location: ZONE 5a Lindsay Ontario Canada
12
  • Mark post as helpful
  • send pies
    Number of slices to send:
    Optional 'thank-you' note:
  • Quote
  • Report post to moderator
Yup. On top of the mound I planted peas with lettuce rows in between. On the sunny side I planted cucumber, and on the shady side I scattered a seed mix of several types of plants. The seed mix didn't work out so well in terms of germination rate though.

I later learned from 'Sepp Holzer's Permakultur' book that its best to spread a seed mix before the soil settles, whereas I waited a few days.
 
Aljaz Plankl
Posts: 386
15
  • Mark post as helpful
  • send pies
    Number of slices to send:
    Optional 'thank-you' note:
  • Quote
  • Report post to moderator
Nice.

When i'm sowing seed mixes, i mix them with garden soil, add watter, so the thing gets muddy. It's a muddy liquid basically. That's how seeds get coated with mud. Then i just add more soil while mixing everything. When i get normal moist soil again i scatter it.

Sepp's second book is just awesome. I also learned so much from it. And yes, the tip about not packing down soil on terraces before sowing is really important.

Travis, I hope everything will grow good for you.
 
Travis Philp
gardener
Posts: 965
Location: ZONE 5a Lindsay Ontario Canada
12
  • Mark post as helpful
  • send pies
    Number of slices to send:
    Optional 'thank-you' note:
  • Quote
  • Report post to moderator
thanks for the tip about adding soil to the seed mix. I'll give it a try.
 
paul wheaton
author and steward
Posts: 53987
Location: missoula, montana (zone 4)
hugelkultur trees chicken wofati bee woodworking
  • Mark post as helpful
  • send pies
    Number of slices to send:
    Optional 'thank-you' note:
  • Quote
  • Report post to moderator
Is the book available in english?
 
Travis Philp
gardener
Posts: 965
Location: ZONE 5a Lindsay Ontario Canada
12
  • Mark post as helpful
  • send pies
    Number of slices to send:
    Optional 'thank-you' note:
  • Quote
  • Report post to moderator
I don't think that there is an english version. A Woofer who's staying here is such a Holzer fan that he ordered the book, even though he doesn't speak german. Luckily one of our interns is from Germany, and has been graciously translating the book for us. I'm glad this has come to pass because its given me a lot of great info on Hugelkultur among other things.
 
Posts: 70
Location: western u.s.
  • Likes 1
  • Mark post as helpful
  • send pies
    Number of slices to send:
    Optional 'thank-you' note:
  • Quote
  • Report post to moderator
Do rocks have any place in hugelkultur?

Frank Fekonia did something similar with rocks in the bottom 1/3 of old fridges.
http://www.youtube.com/watch?v=62ge_AqaVtM

Could someone comment on the relationship between using rocks plus organic matter as he did,
compared to using wood in hugelkultur, and might there be some benefit to using both wood and rocks?
 
Travis Philp
gardener
Posts: 965
Location: ZONE 5a Lindsay Ontario Canada
12
  • Mark post as helpful
  • send pies
    Number of slices to send:
    Optional 'thank-you' note:
  • Quote
  • Report post to moderator
I've wondered about putting rocks in the mix with the wood, or even a pure rock bed. There are plenty of rock baskets at the edges of farmers fields around here so I think I may give it a try next year.

With the hugel beds I've made, I plan to put rocks on the side for steps, as well as heat and moisture traps
 
expectation is the root of all heartache - shakespeare. tiny ad:
Uncle Mud's EZ Cob Rocket Stove
https://permies.com/t/106214/Uncle-Mud-EZ-Cob-Rocket
reply
    Bookmark Topic Watch Topic
  • New Topic