• Post Reply Bookmark Topic Watch Topic
  • New Topic
permaculture forums growies critters building homesteading energy monies kitchen purity ungarbage community wilderness fiber arts art permaculture artisans regional education skip experiences global resources cider press projects digital market permies.com pie forums private forums all forums
this forum made possible by our volunteer staff, including ...
master stewards:
  • Carla Burke
  • Nancy Reading
  • r ranson
  • Jay Angler
  • John F Dean
  • Pearl Sutton
stewards:
  • Nicole Alderman
  • paul wheaton
  • Anne Miller
master gardeners:
  • Christopher Weeks
  • Timothy Norton
gardeners:
  • thomas rubino
  • Jeremy VanGelder
  • Matt McSpadden

Cottage Rocket: Any experience with building them?

 
Posts: 13
1
  • Likes 6
  • Mark post as helpful
  • send pies
    Number of slices to send:
    Optional 'thank-you' note:
  • Quote
  • Report post to moderator
Thank you, Chris. That would be awesome! I have 40 fire brick, splits.
 
Apprentice Rocket Scientist
Posts: 349
Location: Province of Granada, Andalucía, Spain
147
5
cooking rocket stoves woodworking wood heat
  • Likes 10
  • Mark post as helpful
  • send pies
    Number of slices to send:
    Optional 'thank-you' note:
  • Quote
  • Report post to moderator
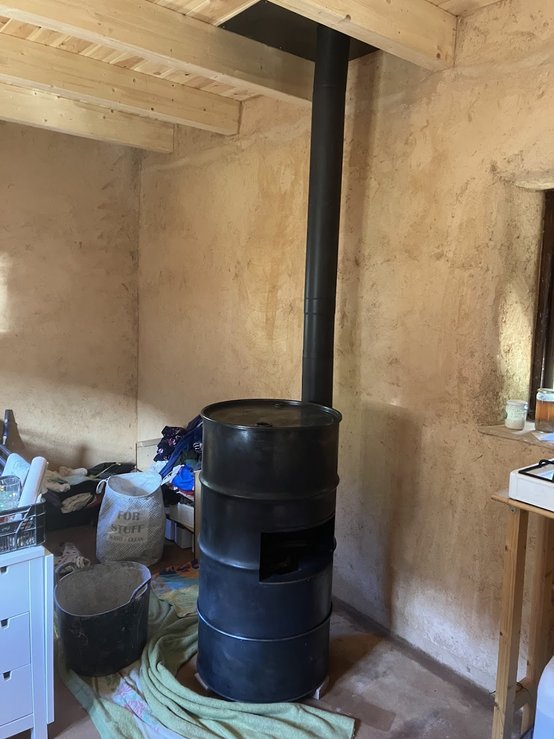
The build is almost complete. The outside still needs to be polished and the inside filled with cob, which I'll do once I find a permanent site for the rocket.

Here's a short video of the first test burn. Almost no smoke despite all still being wet and a bit drafty.

 
rocket scientist
Posts: 6490
Location: latitude 47 N.W. montana zone 6A
3336
cat pig rocket stoves
  • Likes 7
  • Mark post as helpful
  • send pies
    Number of slices to send:
    Optional 'thank-you' note:
  • Quote
  • Report post to moderator
Great Job Apprentice!
Looking very good!
Now, it is time to think about building your first Batchbox!
No door, just a batch and riser.  
You will be mesmerized by the power of an open batch running full tilt!
 
Benjamin Dinkel
Apprentice Rocket Scientist
Posts: 349
Location: Province of Granada, Andalucía, Spain
147
5
cooking rocket stoves woodworking wood heat
  • Likes 8
  • Mark post as helpful
  • send pies
    Number of slices to send:
    Optional 'thank-you' note:
  • Quote
  • Report post to moderator
Thanks Tom!
I was actually thinking about building a BBR fired pizza oven. I really like the design with the arch roof and the gravity door that they built in the woodshop of wheaton labs (https://permies.com/t/193821/inch-batch-box-rocket-mass).
I'll start another thread for that soon.
 
gardener
Posts: 647
Location: Burton, Ohio
304
11
  • Likes 8
  • Mark post as helpful
  • send pies
    Number of slices to send:
    Optional 'thank-you' note:
  • Quote
  • Report post to moderator
Here's a quick diagram and cut list for the BurnBlock in my original CottageRocket and SaunaRocket and WorkshopRocket designs. A $50 tile saw and a speed square to keep the upright bricks plumb while you cut is all you need. I use wire or some long hose clamps or duct tape to hold things together while the cob is drying. Bricks A and A2 have .25" x 1.25" rabit cuts that allow the bricks to hold each other in place. I don't use mortar so the bricks will be easy to replace when they crack.
20250210_161403.jpg
Cut list for Uncle Mud CottageRocket Burn Chamber
20250210_161112.jpg
Uncle Mud CottageRocket BurnBlock
 
Jamey Sturgill
Posts: 13
1
  • Likes 4
  • Mark post as helpful
  • send pies
    Number of slices to send:
    Optional 'thank-you' note:
  • Quote
  • Report post to moderator
Wow! Thank you so much! This is beautiful!
 
Jamey Sturgill
Posts: 13
1
  • Likes 4
  • Mark post as helpful
  • send pies
    Number of slices to send:
    Optional 'thank-you' note:
  • Quote
  • Report post to moderator
Hello Uncle Mud,

I tried harmonizing the sauna rocket plans with the cuts you sent me. The plans say the riser should sit in 5”. That is confusing me the most. Should I just forget about that part.
 
Jamey Sturgill
Posts: 13
1
  • Likes 5
  • Mark post as helpful
  • send pies
    Number of slices to send:
    Optional 'thank-you' note:
  • Quote
  • Report post to moderator
I keep testing it without the cob with little success. I am trying to make sure it will work before I use the cob. It should work without the cob, though. Right?
Here is a short video
https://youtube.com/shorts/_PItO0qaANQ?si=YM589qJTodd1sa18
 
Rocket Scientist
Posts: 4568
Location: Upstate NY, zone 5
591
5
  • Likes 8
  • Mark post as helpful
  • send pies
    Number of slices to send:
    Optional 'thank-you' note:
  • Quote
  • Report post to moderator
In looking at the cut list and the assembly sketch, I am confused about the "B" bricks. In order for the exterior base joint lines to look as shown, the B bricks would need to be in the floor (rabbeted on three sides) rather than in the walls. Likewise, I don't see a purpose to making three sides of the lower end wall bricks rabbeted. I think you would want two B bricks, one cut in half and then rabbeted on three sides ("B2"), and eight A bricks (3 floor, 4 wall and 1 roof), all used whole. The rabbeting for stability is very nicely planned.
 
Chris McClellan
gardener
Posts: 647
Location: Burton, Ohio
304
11
  • Likes 8
  • Mark post as helpful
  • send pies
    Number of slices to send:
    Optional 'thank-you' note:
  • Quote
  • Report post to moderator
You're right Glenn. I've built this in so many ways I mixed up two different layouts. Put the A2 in the middle of the bottom toward the back and use the two B bricks as the ends of the bottom with the 4 end bricks all being A bricks. I will try to update the drawing in the next day or so. Thank you.

Glenn Herbert wrote:In looking at the cut list and the assembly sketch, I am confused about the "B" bricks. In order for the exterior base joint lines to look as shown, the B bricks would need to be in the floor (rabbeted on three sides) rather than in the walls. Likewise, I don't see a purpose to making three sides of the lower end wall bricks rabbeted. I think you would want two B bricks, one cut in half and then rabbeted on three sides ("B2"), and eight A bricks (3 floor, 4 wall and 1 roof), all used whole. The rabbeting for stability is very nicely planned.

 
Jamey Sturgill
Posts: 13
1
  • Likes 4
  • Mark post as helpful
  • send pies
    Number of slices to send:
    Optional 'thank-you' note:
  • Quote
  • Report post to moderator
After putting it in the barrel and it not working I took it apart and put it together outside. Shortening the burn chamber gave me a cleaner burn so I put it back together in the barrel with the shorter burn chamber.

Now it wont burn like a J Tube though. I am getting smoke back.

My feed height is 8”
Burn tunnel is almost 16” the riser is a 5 minute riser on with 8” stove pipe and ceramic fiber in the middle.

I hav built at least 3 rocket stoves attempting to get a j tube to no success. I always end up removing the end of the J and using a L

https://youtube.com/shorts/L7KsN0M50JY?si=cexI06NKz4Np2U9y
 
thomas rubino
rocket scientist
Posts: 6490
Location: latitude 47 N.W. montana zone 6A
3336
cat pig rocket stoves
  • Likes 9
  • Mark post as helpful
  • send pies
    Number of slices to send:
    Optional 'thank-you' note:
  • Quote
  • Report post to moderator
Hi Jamey;
From what I viewed in your video, your J-tube is built to specifications.
It is a heavy firebrick build, so it will not draw well until the bricks are warm.

Are you having trouble with the coals rolling down the burn tunnel rather than staying in the feed tube?
Although I only have Batchboxes now, we did have an 8" full-size J-Tube for over 6 years.

I used a method for starting a cold stove that might work well for you.
I realize your feed tube is tiny, but this should help your J-Tube perform as it should.

Start with two "large" pieces of dry wood and stand them up to block 75% or more of the burn tunnel.
Behind them place paper with a fair amount of proper kindling on top.
Place smaller wood behind and over the kindling.
The two larger "blocking" pieces will create a venturi effect, increasing your draw substantially.
They will also keep the coals at the bottom of the feed tube where they will start heating up the heavy firebricks.
Once your J--Tube is heated up, it should roar like a Dragon!
Give this a try, it might be the fix you are hoping for.


Jamey Sturgill
Posts: 13
1
  • Likes 6
  • Mark post as helpful
  • send pies
    Number of slices to send:
    Optional 'thank-you' note:
  • Quote
  • Report post to moderator
Thank you! Thomas Rubin.
It worked! I think you were right about the bricks getting hot.

https://youtu.be/O-2LZMFm7uk?si=PxUVQ4fqU3jhwTkd

How do you prevent the ash build up when getting it hot and how do others sticks not smoke? Is there a size that is best…..like .5 inch above feed tube and no more?

Thanks again!
 
thomas rubino
rocket scientist
Posts: 6490
Location: latitude 47 N.W. montana zone 6A
3336
cat pig rocket stoves
  • Likes 5
  • Mark post as helpful
  • send pies
    Number of slices to send:
    Optional 'thank-you' note:
  • Quote
  • Report post to moderator
Hey Jamey;
The ash will need to be scooped out.
It's not a big deal; mine would develop a cake of ash several inches thick.
Different wood creates varying amounts of ash.
With that small a stove, you could effortlessly scoop it each time before lighting.
Or wait until the ash builds up, making your wood too long.

With the small feed tube, you will not be far away while it is burning.
When burning branches and crooked sticks, they have a tendency to hang up, and require poking.
I would stay with the feed tube depth as an apx. Max length.

 
Rocket Scientist
Posts: 1810
Location: Kaslo, BC
525
building solar woodworking rocket stoves wood heat greening the desert
  • Likes 6
  • Mark post as helpful
  • send pies
    Number of slices to send:
    Optional 'thank-you' note:
  • Quote
  • Report post to moderator
Jamey
To keep the stray fire and smoke from coming out the feed tube (as Thomas suggested) try to keep your wood length at or lower than it's height. Also, a brick can be placed horizontally to partially cover the feed tube which increases the velocity and draw the fire will have.
 
look out! This tiny ad has a whip!
Permaculture Pond Masterclass with Ben Falk
https://permies.com/t/276849/Permaculture-Pond-Masterclass-Ben-Falk
reply
    Bookmark Topic Watch Topic
  • New Topic