• Post Reply Bookmark Topic Watch Topic
  • New Topic
permaculture forums growies critters building homesteading energy monies kitchen purity ungarbage community wilderness fiber arts art permaculture artisans regional education skip experiences global resources cider press projects digital market permies.com pie forums private forums all forums
this forum made possible by our volunteer staff, including ...
master stewards:
  • Carla Burke
  • Nancy Reading
  • r ranson
  • Jay Angler
  • John F Dean
  • Pearl Sutton
stewards:
  • Nicole Alderman
  • paul wheaton
  • Anne Miller
master gardeners:
  • Christopher Weeks
  • Timothy Norton
gardeners:
  • thomas rubino
  • Jeremy VanGelder
  • Matt McSpadden

Getting started with rocket stoves--10 principles of rocket stove construction from Aprovechio

 
pollinator
Posts: 2204
Location: Massachusetts, 5a, flat 4 acres; 40" year-round fairly even
303
4
kids purity trees urban writing
  • Mark post as helpful
  • send pies
    Number of slices to send:
    Optional 'thank-you' note:
  • Quote
  • Report post to moderator
aprovecho.org/?paybox_id=79

THis is something I wish I could have found early on in trying to build these--to understand the principles of the design chioces that were made in things.  I skipped straight to the 10 principles part.

I imagine some people on here may have better knowledge and say, "some of that isn't true!" or something.  But it seems like a really solid foundation, it is argued with logic and articulated with clarity.  

My one question--why is keeping the same size of draft through the in-opening, burn area, and chimney the best?it seems to make sense intuitively, it seems like it would allow air to go through with minimal eddying and interference with burning...but it's not clear to me that these are always unwanted in every part of things (what about "re-burning" smoke?).  But I plan to take their word for it unless I learn otherwise.

I wish I were better able to find search results on permies about rocket stoves--it seems usually the hits that come back are actually about rocket mass heaters, which are very different in certain aspects of their design, trying to maximize thermal mass and diffuse heat rather than concentrate it in one place (the pot).  So I wonder if anyone has a "best of" list of threads about them, or reveiws of designs, products, etc.?  Or maybe the principles are the best thing to start with? I guess I should probably just get Erica and Ernie's book, but I am spread thin... maybe I  will shortly.
 
Rocket Scientist
Posts: 802
Location: Guernsey a small island near France.
303
  • Mark post as helpful
  • send pies
    Number of slices to send:
    Optional 'thank-you' note:
  • Quote
  • Report post to moderator
I found it quite hard to discover what is really the best way, or best way that has so far been discovered, to put together a rocket stove!
The principle of using the same size opening for firebox and heat riser seems to work but if a large piece of wood falls into the horizontal burn chamber, the fire still seems to work fine!
What I found was the heat riser needed to be taller than the recommended guidelines but this could just be because I have a relativity short chimney or some other factor?
If I were to build another stove or hotplate I would definitely do some things differently but my hotplate works far better than I every really thought it would so I guess there is some margin for design error!
I think the fire box and heat riser materials are very influential, trying to source the ideal mix of strength and insulation is very differcult.
 
Joshua Myrvaagnes
pollinator
Posts: 2204
Location: Massachusetts, 5a, flat 4 acres; 40" year-round fairly even
303
4
kids purity trees urban writing
  • Mark post as helpful
  • send pies
    Number of slices to send:
    Optional 'thank-you' note:
  • Quote
  • Report post to moderator
Thanks Fox!  

I have an update, maybe useful for relative newbies:

housemate and I built a successful rocket stove in maybe 15" with sheet metal.  (And by housemate and I, I mean he and I built one out of refractory, but that one broke, fell over, and then sank into the mud, and then he built the sheet metal one).  

I AM NOT RECOMMENDING DOING IT THIS WAY, BUT THIS WAS GOOD FOR LEARNING.

It's a bit taller than 3:1 height to diameter ratio.

It burned at about 1100-1200F at the top of the chimney (he has awesome sciencey thermometer equipment!), about 1500 at the fire itself--go NOx!!

It had almost no smoke, no ash coming out the top, and minimal creosote, which then burned out when we put in some smaller twigs and raised the temperature a bit.

It was an L tube, constant feeding, good for pyromania.

It had NO insulation whatsoever.

The bricks on either side (to hold it up) didn't get hot beyond maybe the part right in contact with the metal, I didn't even feel heat when I touched the other end of the brick.  Same with the metal feed tube!  (note--dont' try this at home please--or at least lick your finger first and only touch for a nanosecond to find out how hot it is! heat nerve receptors respond more slowly than others...)

We used sticks only, branchets (it's like Cait Blanchet but made of wood, I just mean like thin branches).

One was definitely wet but it still burned.

We took a while for the thing to get lit--to get the chimney hot--like 30 seconds at least, maybe 40--so that it was really really drawing.  And then it worked beautifully!

Housemate says: Power is between 3.1 and 4.6 kW depending on exact time and heating value of the wood.  We burned less than a pound of wood (395 grams) in about 30-40 minutes.  (So, between 1.5 and 2.25 kWh).


So, I conclude (for the moment):

* insulation is not absolutely necessary for the immediate needs.  Probably, given the choice between that and reducing excess thermal mass, I'm surmising that reducing thermal mass is more important.  I'd be inclined to do a tiny bit of insulation.  As you said Fox strength of material is a limiting factor--a thin layer of clay seems like the ideal...if there isn't something great for insulation but at least nonflammable I'd go for that rather than trying to go crazy about insulation.  It would have reduced the creosote even more and helped us maybe burn at a lower temperature overall, use less wood, less NOx, (because we could have used larger pieces and ?) but for the short term the insulation
.

* erring on the side of more height seemed to increase the draft in a way that makes it easier for beginnier users.

* Having generous use of a propane lighter (30 seconds maybe) was worth it.  Paul Wheaton said in a video that his propane lighter with a tiny tank lasts for years...I hope I'm understanding that right, and if so that seems like a worthwhile investment especially for beginners, for learning, for transitional tool.


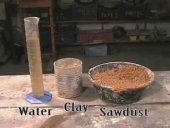
Now, I want to point out that metal sucks longterm for this.  this was for learning purposes only.  But it has the advantage of not falling apart.  Maybe next version we'll make a metal sleeve around clay to hold it?  the refractory stuff with perlite mix just fell apart.  Maybe we'll use pure refractory next time.  It may have needed to dry longer.  This is high-tech stuff that he has at his lab (MIT), already sunk cost, that's why we. were using it.  He also does pottery, I hope we can use some plain old clay cause I think that will hold plenty steady with only maybe a little bit of a metal sleeve around part of it for added stability.


I'm thinking of ash for insulation, and that with a metal can like the first version I made (#10 can quick and dirty version).  The problem with that is the metal of that can conducts heat away from the chimney and burn chamber.  But I don't know anything other than metal you can really use.  Maybe a double-chambered clay thing and put the ash in the middle, but still you're increasing that thermal mass.  

The designs in the videos from Wheaton Labs all seem to use firebrick or some kind of brick, which looks a bit pricey ($70 for 12 bricks which is the minimum I think you'd need to build the whole thing).  So I'm looking for cheaper workarounds.


Fox James wrote:I found it quite hard to discover what is really the best way, or best way that has so far been discovered, to put together a rocket stove!
The principle of using the same size opening for firebox and heat riser seems to work but if a large piece of wood falls into the horizontal burn chamber, the fire still seems to work fine!
What I found was the heat riser needed to be taller than the recommended guidelines but this could just be because I have a relativity short chimney or some other factor?
If I were to build another stove or hotplate I would definitely do some things differently but my hotplate works far better than I every really thought it would so I guess there is some margin for design error!
I think the fire box and heat riser materials are very influential, trying to source the ideal mix of strength and insulation is very differcult.

 
Joshua Myrvaagnes
pollinator
Posts: 2204
Location: Massachusetts, 5a, flat 4 acres; 40" year-round fairly even
303
4
kids purity trees urban writing
  • Mark post as helpful
  • send pies
    Number of slices to send:
    Optional 'thank-you' note:
  • Quote
  • Report post to moderator
OK, i made another mistake, we want about 2,000 degrees F for the temperature, according to Erie and Erica in Fire Science video.  i must ahve mixed up the temperatures in my mind.  And 2800F is the temperature when NOX starts to form, not the lower number I had in my mind.  

Maybe with insulation we'd get to the right temperature--but I'm still really impressed at the no smoke, no creosote to appearances.  I guess even if it you can't see it, it's still not a clean burn though.  
 
Joshua Myrvaagnes
pollinator
Posts: 2204
Location: Massachusetts, 5a, flat 4 acres; 40" year-round fairly even
303
4
kids purity trees urban writing
  • Mark post as helpful
  • send pies
    Number of slices to send:
    Optional 'thank-you' note:
  • Quote
  • Report post to moderator
I managed to cook a pot of buckwheat on the somewhat poorly made, half-done "rocket stove" that my housemate made from stainless steel sheet metal.  

One small step for a city person, one giant leap for citykind.

(Again, do not try this at home, metal burn chamber is temporary only, for learning purposes, until we make a better one.)
 
Just the other day, I was thinking ... about this tiny ad:
turnkey permaculture paradise for zero monies
https://permies.com/t/267198/turnkey-permaculture-paradise-monies
reply
    Bookmark Topic Watch Topic
  • New Topic