|

|
|
|
|

|

|

|

|

|
 1
1


Skill verified by gir bot")

Skill verified by Nicole Alderman")

Skill verified by Mike Haasl")

Skill verified by Ash Jackson")
 2
2
God of procrastination https://www.youtube.com/watch?v=q1EoT9sedqY
regards, Peter
1
1
1
R Ranson wrote:
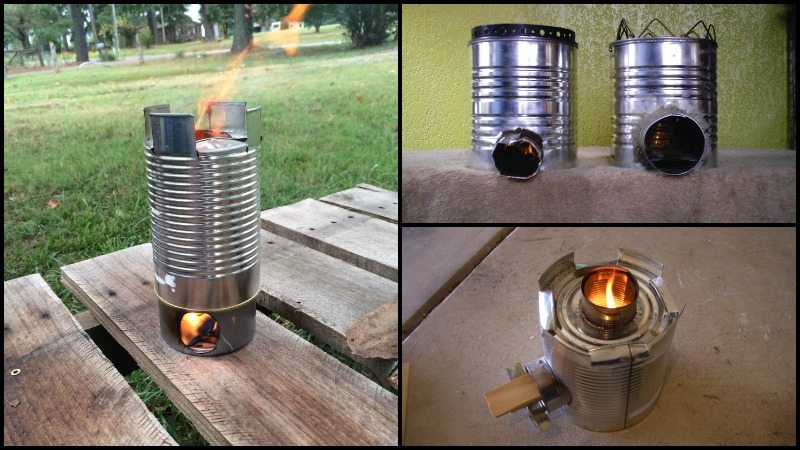
How come the flame keeps going backwards (out the hole we stick the wood)?
How long would a stove like this last? 1-hour total cooking time?
 so, I looked around and found this: rocket stove photo album. It gives some dimensions and instructions.
1
2
so, I looked around and found this: rocket stove photo album. It gives some dimensions and instructions.
1
2
Shaz Jameson wrote:Just wanted to say, I am also a complete RMH n00b, and this thread was the first time I felt like, woah, I could do this too.
So thank you!
1
Although a lot has happened since this book was written, this book still has a lot of good information. It has explanations on how this type of wood burning stove works in general. Rocket Mass Heater Book
Ernie and Erica's book "Art of Fire" goes into detail on all sorts of fire based inventions, and heaps of things most people never knew about fire. It covers the foundations of rocket mass heaters and the predecessor, the rocket stove. And the predecessor to that: the fox stove.
2
Shaz Jameson wrote:I know what you mean.
As a (now-proud) n00b, I look at the very well put together Table of Contents on RMH and recognize that it is an absolute goldmine of information, but it's overwhelming and still not Instructables-level of beginners.
Len Ovens wrote:
I think, at least in these forums, we have tried to always call the RMH a "RMH" and not a rocket stove. This is because they are two different beasts. The RMH is much more complex and requires more knowledge to build or even plan. The RMH is built in place. The rocket stove, or as the title of the thread says "rocket stove cooker" is quite different. It does rely on some of the same principals as the RMH, but not all. The use of the rocket stove or something very close has been used almost since man started using fire. The RMH is quite new and even the principals it is based on are not that old (hundreds of years rather than thousands).


 2
2
Ask me about food.
How Permies.com Works (lots of useful links)
1
Julia Winter wrote:I went to the Aprovecho video gallery and found this video:
Some of it is making your own firebricks, but that requires a kiln. It's probably easier to find a few firebricks.
R Ranson wrote:Not sure where to ask this question but since it's related to my stove, I'll ask it here, and maybe somewhere else later.
When I make up my cob for my stove, do I have to use it all right away or can I dry it to be re-wet later? Or is there a specific stage where I can stop (like before adding the hay) and dry the mix, then rewet it later and add the hay then?
1
1
Don't let perfect be the enemy of good.
1
God of procrastination https://www.youtube.com/watch?v=q1EoT9sedqY
![[Thumbnail for IMG_0947.JPG]](/t/56155/a/40362/IMG_0947.JPG "Filename: IMG_0947.JPG
Description:")
![[Thumbnail for IMG_0952.JPG]](/t/56155/a/40363/IMG_0952.JPG "Filename: IMG_0952.JPG
Description:")
![[Thumbnail for IMG_0953.JPG]](/t/56155/a/40364/IMG_0953.JPG "Filename: IMG_0953.JPG
Description:") 1
1
God of procrastination https://www.youtube.com/watch?v=q1EoT9sedqY


Hans Albert Quistorff, LMT projects on permies Hans Massage Qberry Farm magnet therapy gmail hquistorff
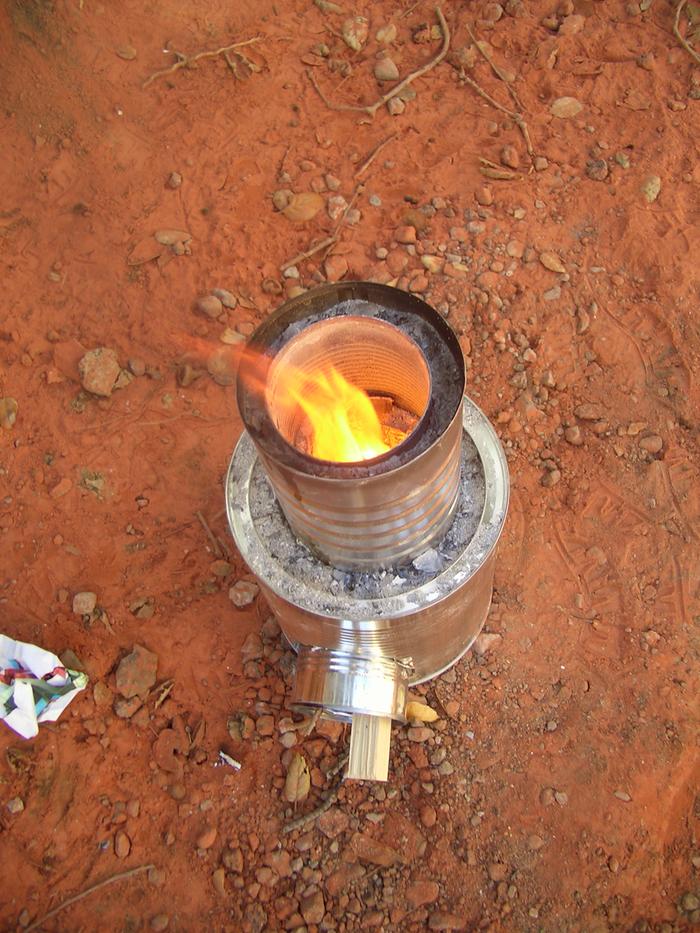
R Ranson wrote:Cob is drying nicely. I've been lighting a small fire in it for about 20 min each day since the cob went in. I'm hoping to dry the cob from the inside out... if that makes any sense. I'm worried if the top drys too fast, the moisture trapped inside will make the cob rot.

As you can see from the photos, the pot I tried at first was a touch too big for a small fire and made lots of smoke. I think if I had the fire good and going, there would be enough room for the air to get out, but most of the time I'll be using a much smaller pot.
You have 4 gaps. And the total surface of those gaps should be at least equal to the CSA of the heat riser, 1.5 is better, due to the friction caused by the gas direction change.
Also remember that your pot is less than the boiling point of water and it will cool the flu gas. The flu gas even if burning completely is made of CO2 and water. With no pot both will be invisible, but the pot will bring the temperature down and so some of what you are seeing may be steam too.
If this is not a problem in cob homes with 2 foot thick walls with no fire to dry them, then I think you will have no problems here
1
God of procrastination https://www.youtube.com/watch?v=q1EoT9sedqY
R Ranson wrote:
Also remember that your pot is less than the boiling point of water and it will cool the flu gas. The flu gas even if burning completely is made of CO2 and water. With no pot both will be invisible, but the pot will bring the temperature down and so some of what you are seeing may be steam too.
It does not help that the wood was a bit wet, the fire just started, and the water in the pot cold. This is good to remember.
3


|
The world's cheapest jedi mind trick: "Aw c'mon, why not read this tiny ad?"
grow your own garden and build your own home in the gardening gardeners program
https://wheaton-labs.com/bootcamp
|