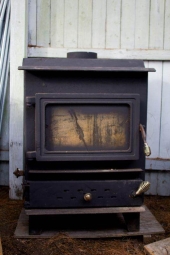
Here is part 3 of my RMH build. To recap, I built a 7" ceramic fiber board core following Peter van den Bergs Double Shoebox Rocket II open system design (open system=no door, no secondary air tube.) Then installed it into an old fuel oil tank. Then tested it in my driveway... and now here it is installed in my shop!
Being in a shop with a sheet metal roof and slab floor, I was able to keep the install cheap and simple. I will describe it from the ground up.
-Floor: I wanted to keep the metal tank off the floor, away from moisture. To do this I put it on concrete pavers treated with a water repellent polymer. The floor was not level so I have some metal shims on top of the blocks on one side.
-Stove body and core: Best explained with the diagram below and original build post. One downside of the all CFB core is the fragility. It got scraped up a bit pulling it out and re-inserting it after I rolled the tank into the building.
-Thermal Mass: Inside the stove body I have 6 pails of concrete. They're about 3/4 full so they nest nicely. 3 on each side to make columns of thermal mass on either side of the core with room for airflow around them. To tune the stove (changing the ratio of quick radiate heat vs longer stored heat) I can add additional mass on the outside, such as bricks and/or cob.
- Flue: There is a stub of 8" flue bolted onto the stove body that sticks out of the stove. I have sealed this with sand-clay mortar, a simple recipe of 1 part fire clay: 3 parts sand : water to desired consistency.
- Chimney: 8" black stove pipe up to almost ceiling height, then a 5' piece of galvanized HVAC pipe. I have used a draw-band to secure the galvanized to the black stove pipe since it sticks up out of the roof and I wanted to prevent wind from rocking it around. This decision will draw scrutiny. Usually you would/should use double wall insulated pipe to penetrate the roof for combustion safety and helping draw (warm insulated chimney = better draw.) I'm cheap and double wall is expensive... so I'm trying it this way first. Not too worried about the safety aspect since the outside of the pipe at ceiling level never got above 60 degrees F, and it's just sheet metal.
-Transition: I used a silicone flashing boot, large enough to accommodate a double wall stove pipe if I decide to upgrade in the future. These are pretty neat since they conform to my corrugated roof. Lots of screws and caulk!
-Cap: Supervent 6" cap. It's made for a double wall pipe so it fits on my 8" single wall pipe with a bit of persuasion. Supposedly this cap uses the Venturi effect to turn wind into draft. It does not quite meet the rules of 2' above roof level that's 10' away. Again, something I can upgrade if it doesn't work out.
If this was in my home, I would follow all the rules that I bent and you should too!
First burns have gone great and were doggo approved. Now I can work in the shop without electric heaters kicking breakers :)
Still need to upgrade my "door" with spark screens and eventually a re-design with glass so I can see the fire better. Or even further upgrade to a secondary air tube and real door.
The long term goal is to get super comfortable with these design elements and do a much prettier and sophisticated build inside the house.
Original Build Thread:
https://permies.com/t/151576/Sherman-Tank-DSR-Rocket-Mass
Troubleshooting Thread:
https://permies.com/t/152831/Open-System-DSR-Smoke


 7
7


![Filename: 32-Sherman-Tank-Drawing.png
Description: [Thumbnail for 32-Sherman-Tank-Drawing.png]](/t/155137/a/131438/32-Sherman-Tank-Drawing.png)

 1
1


 2
2


 2
2


 1
1


 1
1


