S,
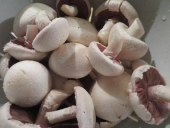
So if you want to try mushrooms, a Wine Cap is a fine starter mushroom. Personally I grow them for the compost more than the mushroom itself, as to me the actual mushroom is a tasty bonus!
I will start this by assuming that you have a flat and level bed to start with. Also, everything I am about to say is specific to wood chips and not sawdust, though I don't think there will be any major differences, and sawdust may actually be better as I will get to in a minute. But i start with raised beds that are 12 inches/30 cm tall. I fill up the beds and heap it full. Given that you are using sawdust, you might not have to heap it as much. Part of the reason for heaping is to allow for some settling. I don't know how much sawdust will settle, but I would think it less than the wood chips (I could also be wrong).
After I get my beds in place, the next step is to excavate holes for tomatoes. You can certainly use other plants, but here are my reasons: The tomatoes provide dappled shade for the mushrooms as the tomatoes grow. Also, the "roots" of the mushroom will interact with the
roots of the tomato. Finally, I get tomatoes!! But to me, the most important part is actually the dappled shade as it helps the Wine Caps grow and helps prevent rapid evaporation of moisture from the wood--and the fungi definitely need the moisture. In my case, I dig holes about 8 inches/20 cm deep and round and back fill with a potting soil mixture (save the excavated chips/sawdust for later). This I amend once with some organic fertilizer; I like blood meal. This is the first and last time I fertilize the bed with any outside amendment. Are you OK with using your own
urine? If so, then you have an easy, free, highly effective and totally natural fertilizer right there. Mark all the little fertile holes with a tomato tower or a stake or something.
Now we get out the mushroom spawn. Again, dig little holes in the surface of the bed. At this point, I dig holes 4-6 inches/10-150 cm deep and round and connect the little holes with little trenches about 2 inches/5 cm deep and wide. Begin sprinkling in the spawn from the brick you purchased (I am assuming you are buying commercial spawn. If not, we can adjust) onto the bottom of the holes and trenches. Make certain to thoroughly cover the bottom of the holes and leave a few lumps of spawn in each hole, As you start to fill the hole, layer with chips/sawdust and add more spawn, and so on until you have reached the surface. If you have any spawn left, sprinkle it on the surface.
Now get those chips/sawdust you saved from the fertile hole excavation. Layer those on the top. In my example, they add about 2 inches/5 cm. At this point water everything down thoroughly. You don't exactly need the bed to be soaking wet, but everything should be at least as moist as a squeezed out sponge. In your case, maybe just a bit more as the sawdust will soak up water better than wood chips. An optional step you might take at this point (I did not, but Hugo Morvan did and he had great results and this is now a standard part of my procedures). is to lay some
cardboard or newspaper down on top of the wood (leave holes for tomatoes). This layer is to protect the wood from drying out and it really speeds up the fungal process--it can cut in half the time needed to get an actual mushroom. Hold that in place with either some more wood chips/sawdust, or my preference is to use
straw and pile it up thickly. Straw will reflect heat and sun, keep the wood cool and moist and Wine Caps just love to eat straw!
Lats part is to plant tomatoes in the fertile holes. You can certainly use other veggies, but I like tomatoes because their foliage grows tall, somewhat broad, lets some air and just a little sunlight through, but really blocks out the harsher elements. Also, the tomatoes produce a wonderful
root mass that will only help the Wine Caps grow. Actually, the two will
feed each other and live in a true symbiosis. Once everything is planted, give a second, thorough watering. Now sit back and wait (and eat tomatoes).
I went ahead and gave a step-by-step set of instructions below in case you need a reference point:
1) Since you plan on using bricks, get them started first. Maybe rake any obvious pine needles, pine litter off the surface, but this is not strictly necessary. (This step was actually for someone else. It means prep the site).
2) Lay down a nice thick layer of cardboard. This will serve as a temporary barrier against things that the Wine Caps don't like about pines. It won't last, but hopefully by the time it breaks down, you will have plenty of mushrooms
3) Get some bagged manure or topsoil and sprinkle to a depth of 1-2 inches. This is just to simulate a soil base. It is probably unnecessary, but worth a try
4) Fill up with wood chips! In fact, I would overfill just a bit so that the chips are slightly mounded above the edges. If you get the wine cap spawn growing right, that level will drop significantly
******Additional optional steps detailed below
5) Take the mushroom spawn you bought and mix in to the chips.
******Additional optional step
6) Water down the chips
7) Cover with 2-4 inches or so with straw (grass clippings can work as well
9) Water everything again
10) Hurry up and wait!! This might well take a year!
*******Additional optional steps:
If you want to use the bed to grow some vegetables the first season, you will have to have some growing medium. The easiest is probably bagged topsoil/manure. I use this to dig fertile holes. A fertile hole, in this case, is a hole you will dig in your chips BEFORE you inoculate with spawn. You simply dig a hole about 6"-12" across and deep. Fill in with the bagged soil/manure, and then mark with a stake or a tomato tower or something so you can find it later. Save those chips you dug out for a little bit.
Step 4.1) Dig fertile hole and save chips
Step 4.2) Fill hole with topsoil/manure
Step 4.3) Mark hole with stake or something
Step 5.1) After inoculating, spread extra chips from fertile holes (the ones you saved) and sprinkle over surface, maybe 1-2 inches deep. This is to serve as a evaporation barrier and help maintain moisture in the inoculated chips
Step 11) Plant your tomatoes (or other plants) The tomatoes will
1) Provide dappled shade
2) give roots for the spawn to interact
3) Give you tomatoes!
This is a part of the
thread I have running HERE:
https://permies.com/t/130092/mushroom-newbie
I have a second, long running thread that documents my own journey from knowing absolutely nothing about mushrooms to having 3 inoculated, functioning mushroom beds today HERE:
https://permies.com/t/82798/composting-wood-chips-chicken-litter
S, I know that this is all a lot to take in, so if you need any help or have any questions, please feel free to ask questions. By the way, I have seen pictures of your
land and it is indeed beautiful. Also, I understand your concerns about the steep slopes. At any rate, good luck and please, keep us updated. I love seeing these projects come together.
Eric