• Post Reply Bookmark Topic Watch Topic
  • New Topic
permaculture forums growies critters building homesteading energy monies kitchen purity ungarbage community wilderness fiber arts art permaculture artisans regional education skip experiences global resources cider press projects digital market permies.com pie forums private forums all forums
this forum made possible by our volunteer staff, including ...
master stewards:
  • Carla Burke
  • Nancy Reading
  • John F Dean
  • r ranson
  • Jay Angler
  • paul wheaton
stewards:
  • Pearl Sutton
  • Leigh Tate
  • Devaka Cooray
master gardeners:
  • Christopher Weeks
  • Timothy Norton
gardeners:
  • thomas rubino
  • Matt McSpadden
  • Jeremy VanGelder

Newby Rocket Heater design questions

 
pollinator
Posts: 875
Location: Kansas
231
forest garden fungi bee medical herbs writing greening the desert
  • Mark post as helpful
  • send pies
    Number of slices to send:
    Optional 'thank-you' note:
  • Quote
  • Report post to moderator
I am considering an outdoor rocket stove which will be surrounded by soil on three sides, probably set into a cob bench on either end. Will that be sufficient insulation, or would I still need firebricks and so on?

As currently planned, it would be about 16-20 inches high, with a side J feeder and a rear exhaust (through soil) so someone could sit on the bench beside it and feed the heater. Two flat top cooking units, or one top cooking unit and (preferably) a baking oven built in as part of a sunken entertainment area.

The baking oven would be immediately adjacent to the riser, so it would get the heat first. Heat then flows over/through the baking oven into the rest of the chamber. I'm not even sure I'm understanding how this works correctly. Could the heat from the riser go directly into the oven without causing problems? Making the heater itself into a two bell system, if I'm understanding correctly? What problems could there be in this kind of setup? What would I have to take into consideration?

Although I've researched rocket stoves, I'm still a total newby and have never actually built one. I'm just in the first planning stages, but I think it would work.
 
Rocket Scientist
Posts: 4530
Location: Upstate NY, zone 5
576
5
  • Mark post as helpful
  • send pies
    Number of slices to send:
    Optional 'thank-you' note:
  • Quote
  • Report post to moderator
So you are thinking of one bench with a J-tube rocket at each end? Each of these would need to be separate, one feeding each half of the bench, to work properly, so the design issues are basically one short bench with rocket core, doubled in mirror image. How long is the bench you are contemplating? Unless it is quite long, probably more than 20 feet, you don't need more than one 8" J-tube core.

You can have a cooktop on the barrel surrounding the J-tube riser, and an oven right beside the barrel. I would not want an oven on top of a riser because you could get 1000 degrees on the floor of the oven and burn up your food. With more clarification on your desires we can give more specific advice.

You could use common old red bricks (not modern hard red bricks) for the whole system. You would want insulation around the whole J-tube and riser to  keep those parts as hot as possible. Firebrick is not at all insulating, unless you get the expensive soft light kiln bricks. Ordinary hardware stores do not have those. You could use insulating firebrick for the heat riser, though the simpler path of firebrick splits (4 1/2" x 9" x 1 1/4" thick) on edge to give a thin wall, with fiberglass or rockwool wrapped around it and held in place with chicken wire or hardware cloth, would work fine.
 
Lauren Ritz
pollinator
Posts: 875
Location: Kansas
231
forest garden fungi bee medical herbs writing greening the desert
  • Likes 2
  • Mark post as helpful
  • send pies
    Number of slices to send:
    Optional 'thank-you' note:
  • Quote
  • Report post to moderator
No, I'm not extending the heat into the bench. The bench will just be there, to be sat on. The rocket stove (NOT mass heater) will be set back into soil, with soil underneath and (theoretically) on both sides. The riser will feed into the first chamber, on the same level, which will be set up as a baking oven. The "barrel" will actually (at least in my plan) be part of the stove itself and double as a baking oven.

I've been researching this for a while, but I'm apparently not making myself clear. I'm not even sure I'm using the right words.

Now that I think of it, the title may have been misleading, since I used "RM" in the title and it's not technically a mass heater.

I need to draw this out and post the pictures.
 
Posts: 52
2
  • Likes 1
  • Mark post as helpful
  • send pies
    Number of slices to send:
    Optional 'thank-you' note:
  • Quote
  • Report post to moderator
It sounds very interesting, could you post a sketch of what you plan to do?
 
Lauren Ritz
pollinator
Posts: 875
Location: Kansas
231
forest garden fungi bee medical herbs writing greening the desert
  • Likes 3
  • Mark post as helpful
  • send pies
    Number of slices to send:
    Optional 'thank-you' note:
  • Quote
  • Report post to moderator
Top view, front view. Very rough, of course. I have it in my head but my drawing has limitations. :)

This will be two feet below grade. The bench will be apx 16 inches at seating level. So the earth insulation will be back, underneath, and both sides. I see a covered cutout for the oven, with a movable rack inside. It might be possible to have both the oven and two top units, but that will depend on the heat available.

As I understand, once the exhaust reaches the top of the riser it's pretty much done combusting so the air going into the first chamber would be clean but very hot. I'm not sure how important the space around the riser is--if it's well insulated, having it against the wall of the chamber shouldn't make much of a difference to the heat it puts out but may make a difference in how the heat flows toward the exhaust pipe.

As mentioned before I could make the whole thing out of brick, but that comes later.
IMG_20201224_192039811.jpg
[Thumbnail for IMG_20201224_192039811.jpg]
 
rocket scientist
Posts: 6355
Location: latitude 47 N.W. montana zone 6A
3209
cat pig rocket stoves
  • Likes 2
  • Mark post as helpful
  • send pies
    Number of slices to send:
    Optional 'thank-you' note:
  • Quote
  • Report post to moderator
Hi Lauren;  Only thing I suggest is to give the exhaust a short vertical chimney.
It will work much faster that way.
 
Glenn Herbert
Rocket Scientist
Posts: 4530
Location: Upstate NY, zone 5
576
5
  • Likes 4
  • Mark post as helpful
  • send pies
    Number of slices to send:
    Optional 'thank-you' note:
  • Quote
  • Report post to moderator
So you want the oven next to the riser, with the heat flowing down around/through it. That sounds like an excellent plan. If the circle you show on top of the bell is the cooktop, that would work much better directly over the riser (and large enough that pots can be located to get more or less of the heat blast, as desired).

A short chimney, at least above head level, would help not only with draft but, since you are not planning to extract heat into a big mass, with safety.

In the Utah climate with little rain, the (sandy?) earth surrounding the core may well be good enough insulation for your purposes. In my climate, that would be totally nonfunctional as the clayey soil is damp year round and conducts heat away very quickly.
 
Lauren Ritz
pollinator
Posts: 875
Location: Kansas
231
forest garden fungi bee medical herbs writing greening the desert
  • Mark post as helpful
  • send pies
    Number of slices to send:
    Optional 'thank-you' note:
  • Quote
  • Report post to moderator
The city is called Sandy :) and we're sitting in the floodplain of an old riverbed. So yes, lots of sand. I have no clay, but if I do the riser with firebrick I can also put another layer of regular brick around the outside and fill the space between with sand for insulation. Might make the build more complicated, but all materials that I have easy access to.

Do you think the two chambers are necessary? What would be the temperature difference in the first chamber as compared to the 2nd? If the 2nd chamber is still pretty hot then I could do a copper pipe water heater to absorb some more of that heat before it escapes into the air.

Currently the plan is to vent out the back, the vent pipe rising at least to the level of the soil. I can make it taller if necessary.  

I could also vent out the top rather than the back, avoiding the risk of someone falling over the vent pipe but taking up more interior space. I believe the vent pipe will have to be at least several inches taller than the stove for draw, I was thinking as much as a foot which will put it 6-8 inches above the soil level. Head height standing in front of the oven would make the stove pipe about 3 feet above soil level, which seems extreme.
 
Glenn Herbert
Rocket Scientist
Posts: 4530
Location: Upstate NY, zone 5
576
5
  • Mark post as helpful
  • send pies
    Number of slices to send:
    Optional 'thank-you' note:
  • Quote
  • Report post to moderator
I think building a second layer of brick and sand would be a bunch of work for mediocre results, and you would be much better off just wrapping a few inches of fiberglass around the firebrick riser and securing it with wire or chicken wire - most anything light and noncombustible.  

A second bell would only be useful for extracting more heat into a mass, which is irrelevant to your case. You would want to have the exhaust from the bell below the bottom of the oven so that the hot gases flow all around it, but much more does not seem to be useful for your purposes.

The temperature at the top of the second chamber would be less than the temperature at the bottom of the first chamber, and several hundred degrees lower than the temperature at the top of the first chamber. The second chamber might be cool enough to run a copper pipe through for water heating, but only if the pipe is not pressurized and cannot be shut off at the outlet. If it can be shut off, you risk a steam explosion which could potentially kill someone.

You definitely want your chimney to extend at least several feet above the top of your riser, or you are likely to have problems with lighting and draft. Five feet above the riser would give me confidence in reliable functioning. Also, since the exhaust will be hot yet hopefully smokeless and invisible, I think you need to have the exhaust point inaccessible for safety.
 
Lauren Ritz
pollinator
Posts: 875
Location: Kansas
231
forest garden fungi bee medical herbs writing greening the desert
  • Mark post as helpful
  • send pies
    Number of slices to send:
    Optional 'thank-you' note:
  • Quote
  • Report post to moderator

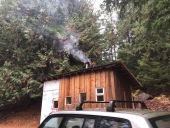
Glenn Herbert wrote:A second bell would only be useful for extracting more heat into a mass, which is irrelevant to your case. You would want to have the exhaust from the bell below the bottom of the oven so that the hot gases flow all around it, but much more does not seem to be useful for your purposes.

The temperature at the top of the second chamber would be less than the temperature at the bottom of the first chamber, and several hundred degrees lower than the temperature at the top of the first chamber. The second chamber might be cool enough to run a copper pipe through for water heating, but only if the pipe is not pressurized and cannot be shut off at the outlet. If it can be shut off, you risk a steam explosion which could potentially kill someone.

You definitely want your chimney to extend at least several feet above the top of your riser, or you are likely to have problems with lighting and draft. Five feet above the riser would give me confidence in reliable functioning. Also, since the exhaust will be hot yet hopefully smokeless and invisible, I think you need to have the exhaust point inaccessible for safety.


OK. Thanks.

Based on what you said above, the 2nd chamber might actually be useful in eliminating some of that heat before it reaches the chimney. I could even split it up into several chambers, as long as the variations don't interrupt the flow of air toward the exhaust. The possibilities are endless in using that heat. Water still seems the simplest if I can figure out how to do it safely.

I can't be sure that the chimney will remain out of the range of children, since this will be a public area in the yard. I'll keep planning and see if I can figure out a way.

I do have a question, though. I keep seeing concerns about these stoves having to be rebuilt or destroyed after a few years, usually because the riser becomes unstable or springs leaks. I'm not planning to use metal, so that eliminates one problem, but this will be a permanent structure so I need to build it in a permanent fashion. Any ideas?
 
Glenn Herbert
Rocket Scientist
Posts: 4530
Location: Upstate NY, zone 5
576
5
  • Mark post as helpful
  • send pies
    Number of slices to send:
    Optional 'thank-you' note:
  • Quote
  • Report post to moderator
In your dry climate you will see any weathering effects much slower than in an average moist and cold environment. If you use firebrick for the structural elements (and any kind of brick outside the hot core), and protect the core area from most precipitation, your installation should last for decades. A metal cover that can quickly be set aside when fire is desired would be very effective. You might not even need that much - I don't know your climate well enough to be sure.
 
Lauren Ritz
pollinator
Posts: 875
Location: Kansas
231
forest garden fungi bee medical herbs writing greening the desert
  • Mark post as helpful
  • send pies
    Number of slices to send:
    Optional 'thank-you' note:
  • Quote
  • Report post to moderator
OK, another question. I did a first prototype (just stacked the bricks up) and it backdrafted rather badly until the fire was going well and after it started to die. I assume part of that was all the gaps and part the lack of a chimney (and my "assistant" kept pulling the bricks off to play with the fire). Those would both be taken care of in the final "draft," pun intended, but are there other reasons? Is there any way to prevent this?

I did hear the rocket for a while and it was venting a great deal of heat through the "chimney" without any smoke during that time.

Also, I am apparently very bad at building fires. Any suggestions on getting the fire started without wasting half a box of matches? I finally resorted to a candle...
 
gardener
Posts: 1908
Location: Longbranch, WA Mild wet winter dry climate change now hot summer
466
3
goat tiny house rabbit wofati chicken solar
  • Likes 1
  • Mark post as helpful
  • send pies
    Number of slices to send:
    Optional 'thank-you' note:
  • Quote
  • Report post to moderator
Tip for starting fire: As you found a candle works good for generating enough heat differential to start the draft. A much more economical answer is to ask for the waxed cartons that wet produce is delivered in to stores. These are unrecyclable problems in the waste stream but very repuposeable for fire starting. Strips of them will burn just like a candle. Start strips back in the burn chamber then strips with kindling in the feed chamber. This should provide good starting but as you observed checking for unfavorable conditions first is important. Documenting conditions and results on each start will help you tune your appliance.
 
Lauren Ritz
pollinator
Posts: 875
Location: Kansas
231
forest garden fungi bee medical herbs writing greening the desert
  • Likes 1
  • Mark post as helpful
  • send pies
    Number of slices to send:
    Optional 'thank-you' note:
  • Quote
  • Report post to moderator
Hm. :) Nope, I lit the candle so I could use it to start the fire rather than lighting more matches. I didn't even think of using it to start the draft.
 
Lauren Ritz
pollinator
Posts: 875
Location: Kansas
231
forest garden fungi bee medical herbs writing greening the desert
  • Likes 2
  • Mark post as helpful
  • send pies
    Number of slices to send:
    Optional 'thank-you' note:
  • Quote
  • Report post to moderator
I have finished the 3rd prototype, with two bells. The cooking surface directly over the riser (an old piece of fireplace flue, and yes I'm aware there are problems with that) got pretty darn hot. The cooking surface beyond got hot, but not hot enough to cook anything. The outside of the flue liner was still cool at the end of the test.

Nothing has been insulated yet, and it's not sealed.

I still need to work out the jtube feeder. Right now I'm feeding wood directly into the burn chamber so the burn isn't as clean.

It has the riser, an apx 18 inch wide area for the first bell, then a gap down at the base about two inches wide that stretches the full width of the stove. The chimney (right now just a pile of bricks) is in the 2nd chamber. The draw works perfectly as long as there is a small fire in the 2nd chamber, but stops when that fire goes out. I think part of the problem is that the stove isn't sealed, but I'm wondering if the structure is wrong as well? Could the gap between the bells be badly placed, or too small? The gap is about 32 inches total, 16 inches wide and two inches deep. This is approximate, but should be pretty close.
 
Lauren Ritz
pollinator
Posts: 875
Location: Kansas
231
forest garden fungi bee medical herbs writing greening the desert
  • Likes 1
  • Mark post as helpful
  • send pies
    Number of slices to send:
    Optional 'thank-you' note:
  • Quote
  • Report post to moderator
Pit is dug and I have the base in place. None of this is set in yet, I'm just figuring out how things might work. Still lots of gaps because of that. The burn chamber is equivalent 6 to 8 inches and it drafted quite nicely even with no insulation. The plan is to have an air intake into the burn chamber, but that will be for later.

In actually setting it up and working out the relative sizes, it looks like I'd be better off turning the two base pieces sideways so the stove will be a little longer. As is, there's probably only room for the baking chamber and a chimney. If I move the riser forward off the slab I could probably get two chambers in there but they would be rather small. It would also have the benefit of lowering the cooktop by several inches. Setting the slab into the soil would have a similar effect.

Any ideas? Should I stick with one chamber (the oven) or turn the slabs sideways and create a second? At the moment I'm thinking a dehydrator for the 2nd chamber, but that will depend on the heat levels once I get this thing built.
IMG_20210524_162232055.jpg
[Thumbnail for IMG_20210524_162232055.jpg]
 
Lauren Ritz
pollinator
Posts: 875
Location: Kansas
231
forest garden fungi bee medical herbs writing greening the desert
  • Likes 1
  • Mark post as helpful
  • send pies
    Number of slices to send:
    Optional 'thank-you' note:
  • Quote
  • Report post to moderator
I shifted the riser forward so it's just at the edge of the pad.  Because of the way the bricks are set this limited the height of the burn chamber to 3-4 inches (the width of one brick) which will need to be corrected. But it did start rocketing, so that's good. It burned well for maybe half an hour, until I stopped feeding it. I'm assuming at this point that the massive amounts of ash are because it's not sealed or insulated. I'll need to go out and evaluate in a few minutes, once it cools down. Another issue was that part of the "floor" is lower than the rest, so shifting the fuel got tricky. In the final that will be corrected as well.

So I think the riser and burn chamber are good. The feeding tube needs some help.

I'm thinking of cementing the whole inside of the system (riser/burn chamber/feeding tube) but I'm not sure if that will affect the flow.
 
Lauren Ritz
pollinator
Posts: 875
Location: Kansas
231
forest garden fungi bee medical herbs writing greening the desert
  • Likes 2
  • Mark post as helpful
  • send pies
    Number of slices to send:
    Optional 'thank-you' note:
  • Quote
  • Report post to moderator
Burn tunnel and riser are in place and I'm working on the feeding tube. The fire is starting immediately and blowing back into the insulated riser immediately. I haven't noticed any smoke from the fire itself, just smoke blowing through the gaps in the stove body which is not yet sealed. The last test used a double handful of sticks and a couple small pieces of 2x4, and the mass was still radiating 8 hours later.

I decided to go with just one chamber, primarily because of size. Now that the riser is insulated the first chamber would be only 11 inches wide, and the oven opening will be 10 inches, so there's not enough space to really do anything. However, with the larger space the flow will be directly to the chimney, and I'm not sure how much of the heat will actually be used.

I'll need to do more testing to figure out how best to do the "oven" piece. At this point my thoughts run to 1) sealing the oven in a box 2) building in disturbance to keep the heat moving and mess up its path to the chimney 3) putting more mass inside the oven to store the heat.

 
Glenn Herbert
Rocket Scientist
Posts: 4530
Location: Upstate NY, zone 5
576
5
  • Likes 1
  • Mark post as helpful
  • send pies
    Number of slices to send:
    Optional 'thank-you' note:
  • Quote
  • Report post to moderator
Very informative video. I think your plan for a single bell chamber is good... it will allow easy use. Do you plan a black oven, or white? (Cooking zone in the airflow, or isolated?) Once the system joints are sealed up, you will probably have no measurable ash carried onto the oven area, and no smoke either. I have a 6" L-tube cob oven with the oven floor above the riser which splits into multiple flame paths and enters around the edges of the floor. It does not get noticeable ash, and food comes out great. It has a wooden door which gets soaked in water before each session, and has a thin layer of char on the inside.

I think the system would work best with a chimney similar in size to the riser, but #10 cans may work fine. With the partition next to the chimney, there is no longer a reason to run the chimney down to the bottom of the chamber. Just make the lower chimney of brick with a good-sized entrance at the base, and extend it above the roof with the cans or stovepipe as needed for good draft. I would suggest adding a bypass damper just below the roof so draft is really easy to start. At worst, it will be unnecessary and you can leave it closed; at best it will make starting easy. A piece of sheetmetal that slides up and down (up to open, down to close) would be simple and ought to last in your application.
 
Lauren Ritz
pollinator
Posts: 875
Location: Kansas
231
forest garden fungi bee medical herbs writing greening the desert
  • Mark post as helpful
  • send pies
    Number of slices to send:
    Optional 'thank-you' note:
  • Quote
  • Report post to moderator
The plan was to do the cooking (baking) zone in the airflow, but with the much larger space I'm not sure how that will work. More testing to be done. : )

Would I do the bypass damper at the top of the riser, or by the chimney? Sounds like you meant by the chimney.
 
Glenn Herbert
Rocket Scientist
Posts: 4530
Location: Upstate NY, zone 5
576
5
  • Mark post as helpful
  • send pies
    Number of slices to send:
    Optional 'thank-you' note:
  • Quote
  • Report post to moderator
Yes, a hole in the side of the chimney, with a slot that the damper can slide in to open and close it. It doesn't need to be as big as the chimney, just enough for air to flow.

The size of the space where the oven is does not matter much; it will all be hot near the top of the chamber. I would make the door in the side around 16" wide so it can fit a pizza, and arched or corbeled at the top so it is not tall at the sides but tall enough in the middle to fit the largest thing you want to cook.
 
pollinator
Posts: 637
Location: Wellington, New Zealand
15
  • Mark post as helpful
  • send pies
    Number of slices to send:
    Optional 'thank-you' note:
  • Quote
  • Report post to moderator
Based on lots of experience, my thoughts are that baking in a low mass rocket oven requires continuous heat so the fire has to be going all the time.  And since the draft is highly dependent on the weather, wood humidity, temperature etc, you're going to end up invariably with soot on your food too many times unless it's inside a dutch oven.  Bread ovens such as earthen pizza ovens, bake on the residual heat stored in the walls of the oven.

And if you're trying to do pizza, forget it for Neopolitan pizza as the oven has to get its cooking surface in the 300-500 C range, and that's pretty hard when the heat is coming from outside the oven, and not directly heating the cooking surfaces.

 
Glenn Herbert
Rocket Scientist
Posts: 4530
Location: Upstate NY, zone 5
576
5
  • Mark post as helpful
  • send pies
    Number of slices to send:
    Optional 'thank-you' note:
  • Quote
  • Report post to moderator
I would agree for a low mass oven. The one proposed seems to be a medium situation, with plenty of brick mass surrounding the cooking area. Depending on the material of the cooking surface, it might not get hot enough for long enough to bake a pizza crust properly before the top overcooks; I don't have enough experience with pizza to be sure. If the cooking surface has some mass and can be gotten really hot, then it might do a good job.
 
Lauren Ritz
pollinator
Posts: 875
Location: Kansas
231
forest garden fungi bee medical herbs writing greening the desert
  • Mark post as helpful
  • send pies
    Number of slices to send:
    Optional 'thank-you' note:
  • Quote
  • Report post to moderator
I decided to do a roman arch for the opening. I'm in the process of blocking in the riser side of the oven, and once that's done I'll be doing more tests to determine the best cooking options. Screen or solid, enclosed or open. Dutch oven? Stone mass vs brick mass? Lots of possibilities.

 
Lauren Ritz
pollinator
Posts: 875
Location: Kansas
231
forest garden fungi bee medical herbs writing greening the desert
  • Likes 1
  • Mark post as helpful
  • send pies
    Number of slices to send:
    Optional 'thank-you' note:
  • Quote
  • Report post to moderator
I know it's been a while, but I'm still working on this thing.

Are there any problems with using a cement board for the top of the oven? I don't want the top to collapse, but I need something under the "roof" and this seemed the simplest. I'll cover it with hardware cloth and cement in the whole thing. I should have stepped the blocks in to make a smaller opening at the top, but I didn't think about it.

I'll be running another test today or tomorrow.
 
Hans Quistorff
gardener
Posts: 1908
Location: Longbranch, WA Mild wet winter dry climate change now hot summer
466
3
goat tiny house rabbit wofati chicken solar
  • Likes 2
  • Mark post as helpful
  • send pies
    Number of slices to send:
    Optional 'thank-you' note:
  • Quote
  • Report post to moderator
I don't know if you solved the problem with the arch but I suggest a sheet metal piece would naturally spring into an arch mold that would hold the bricks in a smooth arch. It would probably be easier to cut the arch bricks in half make 2 rows with the outer row having more brick pieces so the arch would be less dependent on the wedge of mortar to hold the arch.  The cement board would probably work well over the oven possibly with a layer of insulation between it and the ferrocement cap.  It  probably not hold up over the riser; that should hive something like a cast-iron cook top.  
 
Lauren Ritz
pollinator
Posts: 875
Location: Kansas
231
forest garden fungi bee medical herbs writing greening the desert
  • Likes 1
  • Mark post as helpful
  • send pies
    Number of slices to send:
    Optional 'thank-you' note:
  • Quote
  • Report post to moderator
 
Lauren Ritz
pollinator
Posts: 875
Location: Kansas
231
forest garden fungi bee medical herbs writing greening the desert
  • Likes 2
  • Mark post as helpful
  • send pies
    Number of slices to send:
    Optional 'thank-you' note:
  • Quote
  • Report post to moderator
More rocks inside for thermal mass.
IMG_20211123_152434277.jpg
[Thumbnail for IMG_20211123_152434277.jpg]
IMG_20211123_152226737_HDR.jpg
[Thumbnail for IMG_20211123_152226737_HDR.jpg]
 
Lauren Ritz
pollinator
Posts: 875
Location: Kansas
231
forest garden fungi bee medical herbs writing greening the desert
  • Likes 1
  • Mark post as helpful
  • send pies
    Number of slices to send:
    Optional 'thank-you' note:
  • Quote
  • Report post to moderator
I am absolutely new to cement work. It is currently hanging out in the teens (Fahrenheit) and the bag says it needs to be consistently 40 degrees for cement to cure. However, when the oven is burning it radiates for probably 6 or 8 hours. I also don't want to wait until next March/April/May to finish this thing.

So, my question is, could I do the cement work after it's had a chance to heat up, then let it cool down overnight and fire it up again in the morning? Would the cement cure right under those conditions?
 
Glenn Herbert
Rocket Scientist
Posts: 4530
Location: Upstate NY, zone 5
576
5
  • Likes 2
  • Mark post as helpful
  • send pies
    Number of slices to send:
    Optional 'thank-you' note:
  • Quote
  • Report post to moderator
I'm afraid not. Cement/concrete/mortar needs to cure in moderate temperatures for at least a week for minimal strength, a month is needed for full cure. A day or less would leave you with weak crumbly material.
 
Lauren Ritz
pollinator
Posts: 875
Location: Kansas
231
forest garden fungi bee medical herbs writing greening the desert
  • Mark post as helpful
  • send pies
    Number of slices to send:
    Optional 'thank-you' note:
  • Quote
  • Report post to moderator
So it is technically finished and I am running a burn test. The fire flows back into the burn tube, the cooking surface over the riser gets hot, but very little of that heat is getting into the actual oven. The chimney is actually just warm to the touch. The oven is hot on the outside, but not hot enough to cook anything inside.

Any ideas about why?
IMG_20220425_162313504.jpg
[Thumbnail for IMG_20220425_162313504.jpg]
 
Hans Quistorff
gardener
Posts: 1908
Location: Longbranch, WA Mild wet winter dry climate change now hot summer
466
3
goat tiny house rabbit wofati chicken solar
  • Likes 1
  • Mark post as helpful
  • send pies
    Number of slices to send:
    Optional 'thank-you' note:
  • Quote
  • Report post to moderator
It is doing the job of a rocket mass heater heating all that mass including the earth behind the wall.
For an oven you need a small insulated mass that can be heated to the desired temperature.
 
Lauren Ritz
pollinator
Posts: 875
Location: Kansas
231
forest garden fungi bee medical herbs writing greening the desert
  • Likes 2
  • Mark post as helpful
  • send pies
    Number of slices to send:
    Optional 'thank-you' note:
  • Quote
  • Report post to moderator
Thanks. With that in mind I ran another couple of tests. Putting a pan underneath rather than using the grill made a difference, as did letting the fire go out and extending the cooking time to take advantage of the stored heat. The bread was perfect, but it took a full two hours to bake it.

Yesterday I stacked up bricks around the baking surface and I'll be testing that tomorrow. There is still plenty of space, I think. That will put the stored heat closer to the bread or whatever else I'm baking, and hold in more of the heat from above.

I did get an interesting new effect, where I essentially got a blowtorch from both the feeding tube and the cleanout--one or the other open, or both. Rather a shock. It had to be feeding backward through the stove somehow, but in the whole process I've never seen this. Flames were probably blowing two feet or more away from the stove itself.
 
Lauren Ritz
pollinator
Posts: 875
Location: Kansas
231
forest garden fungi bee medical herbs writing greening the desert
  • Mark post as helpful
  • send pies
    Number of slices to send:
    Optional 'thank-you' note:
  • Quote
  • Report post to moderator
I ran the test with the bricks around the baking surface, and the bread was perfectly done in an hour. No smell or taste of smoke. I'll "formalize" that structure and run one test with a baking stone, then I think I'm done.

The stove can be used for hotdogs or marshmallows over the feed tube, normal cooking on the cooking surface over the riser, and also baking. It runs on sticks or small logs, the draw starts immediately even when wind is blowing or the stove is cold (I take the cooking surface off when I start the oven) and it holds a great deal of heat for residual baking.

I'd like to know what people think is going on with that blowtorch effect I mentioned above, if anyone has any ideas, but I think this experiment is a success.
 
I love a woman who dresses in stainless steel ... and carries tiny ads:
12 DVDs bundle
https://permies.com/wiki/269050/DVDs-bundle
reply
    Bookmark Topic Watch Topic
  • New Topic