• Post Reply Bookmark Topic Watch Topic
  • New Topic
permaculture forums growies critters building homesteading energy monies kitchen purity ungarbage community wilderness fiber arts art permaculture artisans regional education skip experiences global resources cider press projects digital market permies.com pie forums private forums all forums
this forum made possible by our volunteer staff, including ...
master stewards:
  • Nancy Reading
  • Carla Burke
  • r ranson
  • John F Dean
  • paul wheaton
  • Pearl Sutton
stewards:
  • Jay Angler
  • Liv Smith
  • Leigh Tate
master gardeners:
  • Christopher Weeks
  • Timothy Norton
gardeners:
  • thomas rubino
  • Jeremy VanGelder
  • Maieshe Ljin

J-tube Monarch wood stove retrofit

 
steward
Posts: 1897
Location: Coastal Salish Sea area, British Columbia
1057
2
books chicken food preservation pig bike solar wood heat rocket stoves homestead ungarbage
  • Likes 6
  • Mark post as helpful
  • send pies
    Number of slices to send:
    Optional 'thank-you' note:
  • Quote
  • Report post to moderator
So this stove came up for free, it came with a bunch of firebricks and had been repaired before. It just so happens to be a stove from a old family on the island. So it is cool to retro fit it for our outdoor kitchen.


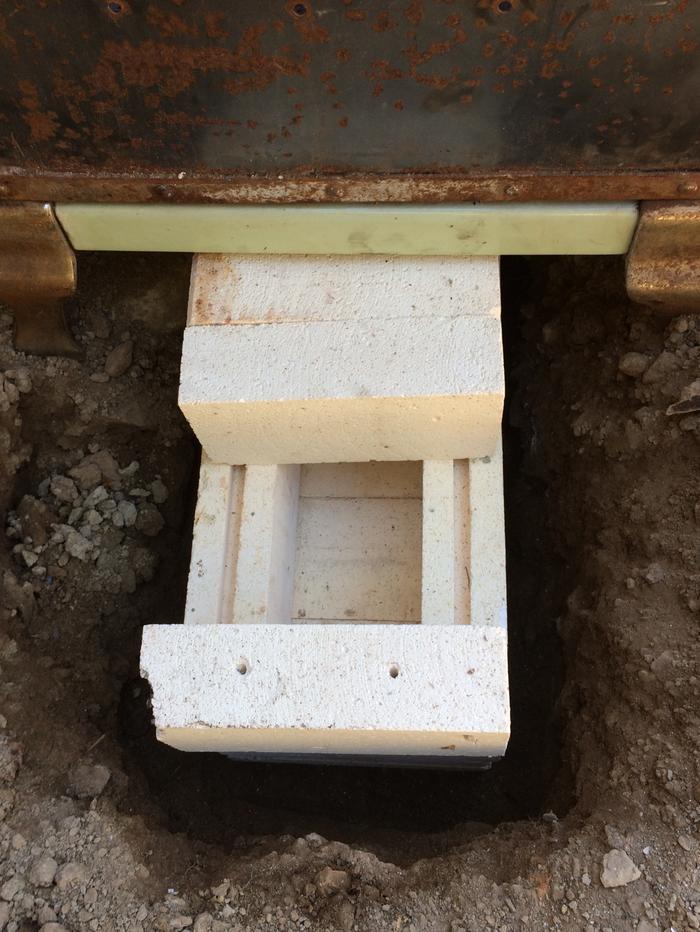
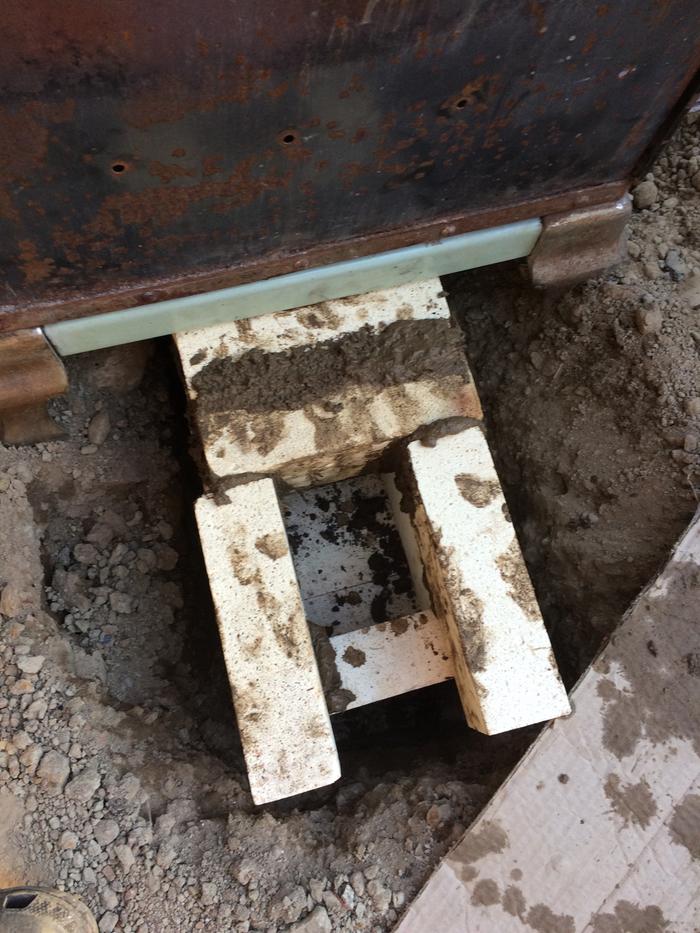
I made the J-tube go through the floor of the stove box.


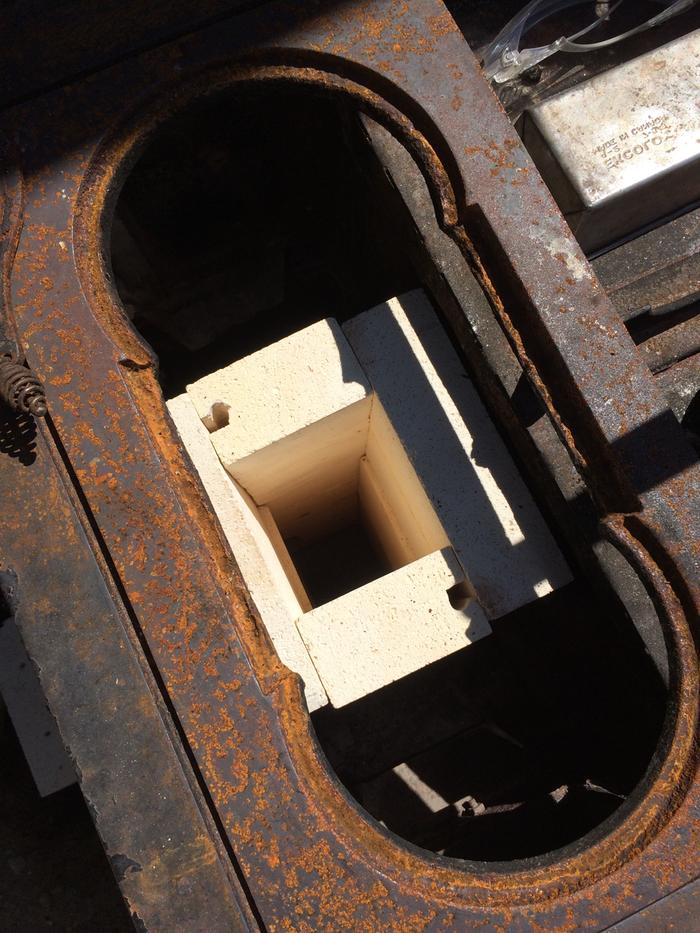
Dry fitting the bricks


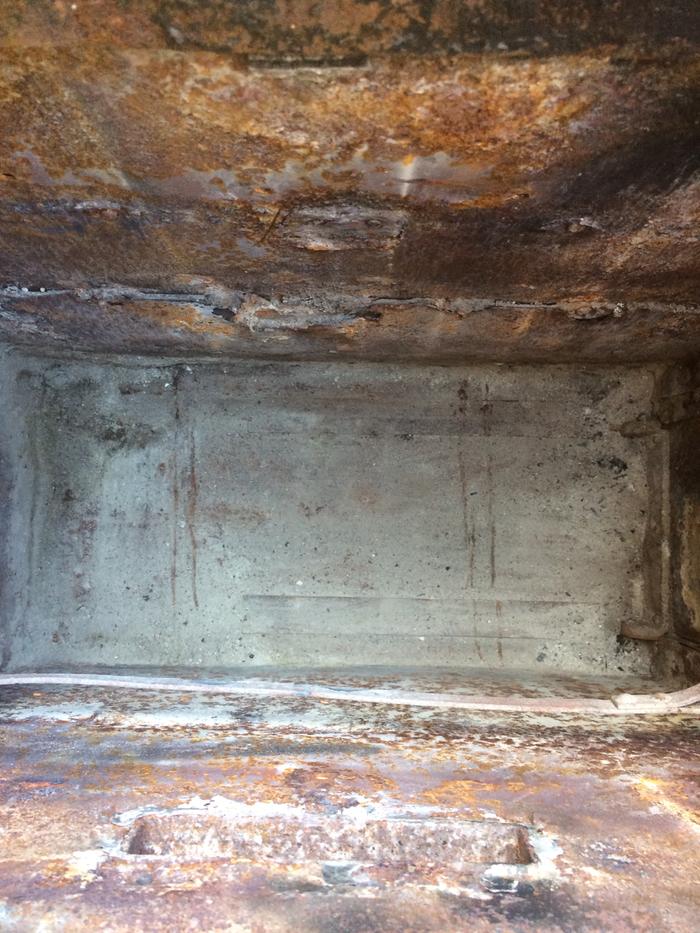
Cutting the hole through the firebox floor


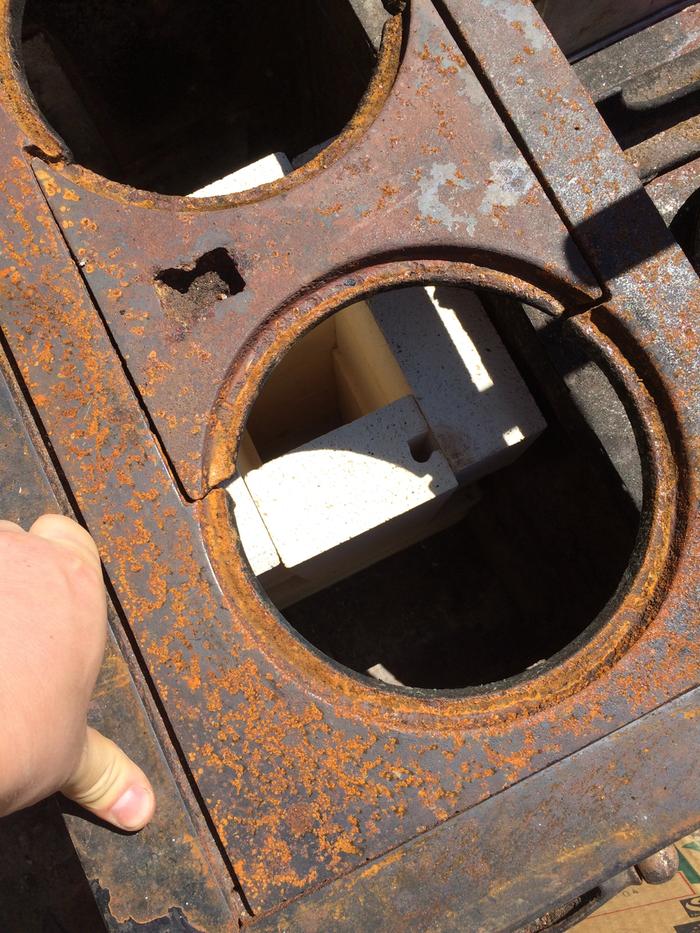
Dry stacked the riser


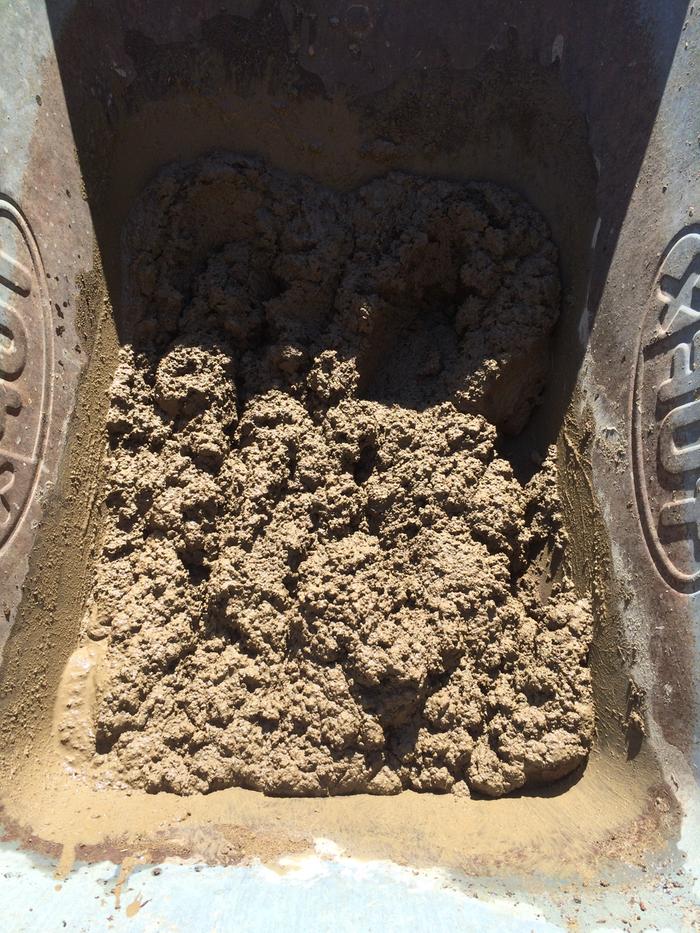
Made some mortar by sifting the soil i dug out of the hole for the j-tube. I sifted it though 1/2" screen, than 1/8" screen.


Due to clearance issues i needed to use half bricks for one side of the riser


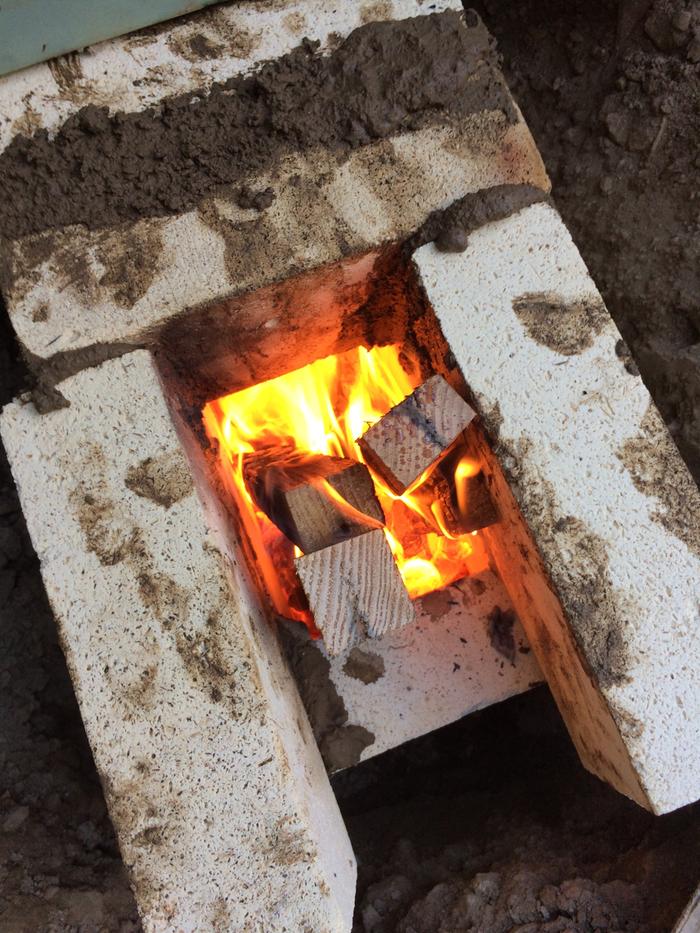
I am still working on final finishes, Fired the stove up right after i finished mortaring it!


stove


I managed to get it to 500F on the top. I am going to add more cob to the top to direct the exhaust more efficiently. The stove also has 30+ holes in it, which i am going to mend eventually.

The fire box measures about 4.5 x 4.5 roughly.  Firebox is about 10" tall. Riser is about 32"
I used almost all IFB.

There will be more photos to come as i figure out the exhaust routing!!
 
rocket scientist
Posts: 6320
Location: latitude 47 N.W. montana zone 6A
3192
cat pig rocket stoves
  • Likes 2
  • Mark post as helpful
  • send pies
    Number of slices to send:
    Optional 'thank-you' note:
  • Quote
  • Report post to moderator
Jordan, Great Job!
Is that stove going to be under a roof?  
So your measurement's,   4.5x4.5 but a 10" tall tunnel?
It looked like it burned good. All insulated bricks should keep your heat roaring up into the monarch.
Be careful of abrasion in the feed tube using the insulated bricks.
Is the riser all IFB ?  If not might want to wrap it with an insulator.
 
 
Rocket Scientist
Posts: 1809
Location: Kaslo, BC
525
building solar woodworking rocket stoves wood heat greening the desert
  • Likes 3
  • Mark post as helpful
  • send pies
    Number of slices to send:
    Optional 'thank-you' note:
  • Quote
  • Report post to moderator
Looks great Jordan!

Look forward to more photos as the build progresses and the rust slowly disappears.
 
jordan barton
steward
Posts: 1897
Location: Coastal Salish Sea area, British Columbia
1057
2
books chicken food preservation pig bike solar wood heat rocket stoves homestead ungarbage
  • Likes 1
  • Mark post as helpful
  • send pies
    Number of slices to send:
    Optional 'thank-you' note:
  • Quote
  • Report post to moderator

thomas rubino wrote:Jordan, Great Job!
Is that stove going to be under a roof?  
So your measurement's,   4.5x4.5 but a 10" tall tunnel?
It looked like it burned good. All insulated bricks should keep your heat roaring up into the monarch.
Be careful of abrasion in the feed tube using the insulated bricks.
Is the riser all IFB ?  If not might want to wrap it with an insulator.


The measurements are 10" for feed tube, 18" for the burn tunnel, 32" for the riser. It looks like my CSA is around 21.

Yea there is still more tweaking to do. I have a limited amount of full size hard firebricks. so maybe i will come up with some more to use for the feed tube.

The stove will eventually go under a roof. It is going to be for our outdoor summer kitchen!

I was amazed at how much water the IFB held. The weight of the bricks tripled in my opinion.


Yea at this point i am going to be careful with the burn tunnel. The bricks came from a kiln and they have these channels in them. I put them facing down in the burn tunnel. Hopefully this will help and be kind of like a p channel.

The riser is almost all IFB, due to clearance issues i needed to use only firebrick splits on one side of the riser.


This thing is super holey. I am going to try and separate the top 3 inches of the stove from the rest due to the holes. I hope to work on it more over the next few weeks/days.

Yes the rust will slowly disappear. I believe i only have a wire wheel and a paint scraper wheel. Than i can put oil on it to keep it looking nice.
 
jordan barton
steward
Posts: 1897
Location: Coastal Salish Sea area, British Columbia
1057
2
books chicken food preservation pig bike solar wood heat rocket stoves homestead ungarbage
  • Likes 3
  • Mark post as helpful
  • send pies
    Number of slices to send:
    Optional 'thank-you' note:
  • Quote
  • Report post to moderator
spent some more time on the stove today. I managed to get 741*F on top of the stove. things are slowly drying out. There appears to be two holes which steam was escaping from.
Also the top insert plates are quite leaky. They most likely need to be cleaned up as they are rough right now.
I am able to keep my hand in the exhaust stove pipe for 10 seconds so far. The inside of the pipe registers around 120*F. Not that this is very accurate as the pipe is resting ontop of the stove outlet.

here is what i did today.


thomas rubino
rocket scientist
Posts: 6320
Location: latitude 47 N.W. montana zone 6A
3192
cat pig rocket stoves
  • Likes 2
  • Mark post as helpful
  • send pies
    Number of slices to send:
    Optional 'thank-you' note:
  • Quote
  • Report post to moderator
Hey Jordan;
It looks like you are channeling the flow from the riser  as it passes over the oven. Are you attempting to slow it down?
Are you using the stoves built in bypass to ease startup?
Your getting 700F+ now on the stovetop. That is way past normal cookstove temps
Is this for cooking or heating?
What kind of oven temps are you getting?  Or is the oven temp gauge broke?
 
jordan barton
steward
Posts: 1897
Location: Coastal Salish Sea area, British Columbia
1057
2
books chicken food preservation pig bike solar wood heat rocket stoves homestead ungarbage
  • Likes 2
  • Mark post as helpful
  • send pies
    Number of slices to send:
    Optional 'thank-you' note:
  • Quote
  • Report post to moderator

thomas rubino wrote:Hey Jordan;
It looks like you are channeling the flow from the riser  as it passes over the oven. Are you attempting to slow it down?
Are you using the stoves built in bypass to ease startup?
Your getting 700F+ now on the stovetop. That is way past normal cookstove temps
Is this for cooking or heating?
What kind of oven temps are you getting?  Or is the oven temp gauge broke?


Yes i am channelling it to make it more concentrated. Otherwise it is just an open chamber up there. about 2.75" by 20" which is much bigger than the csa.

I did use the bypass to start it, it seems to help, however i have only started the stove twice..

This is mostly for cooking, as it is an outdoor stove.

I am not attempting to use the oven. I have a rocket oven! I have opened the oven and it is warm in there. More like a warming oven which will be great for keeping foods warm.


This stove is mostly an improvement over the open j-tube. Pots will stay cleaner( my partner gets mad when they get black). It also gives me more places so i can cook a few things at once! Which the single j-tube didn't work well for.

Edit

When i say the stove top got over 700*F I am talking right above the riser. When you move the temp guage down the channel i made. The temps get lower and lower. Closer to 250*F near the end. So what ever temp is required it can be achieved with the channelling.
 
author & steward
Posts: 5295
Location: Southeastern U.S. - Zone 7b
3078
5
goat cat forest garden foraging food preservation fiber arts medical herbs writing solar wood heat homestead
  • Likes 1
  • Mark post as helpful
  • send pies
    Number of slices to send:
    Optional 'thank-you' note:
  • Quote
  • Report post to moderator
Jordan, this is a very interesting project. Now that you've had a chance to use it awhile, what do you think? Would you do anything differently if you were to do it again?
 
jordan barton
steward
Posts: 1897
Location: Coastal Salish Sea area, British Columbia
1057
2
books chicken food preservation pig bike solar wood heat rocket stoves homestead ungarbage
  • Likes 1
  • Mark post as helpful
  • send pies
    Number of slices to send:
    Optional 'thank-you' note:
  • Quote
  • Report post to moderator

Leigh Tate wrote:Jordan, this is a very interesting project. Now that you've had a chance to use it awhile, what do you think? Would you do anything differently if you were to do it again?


Hey leigh.

The one big drawback to using this is it is outside. and we do not have a roof over it yet. Also locally it is discourage to have wood fires during the summer.

So initially i would try and build this after i have an outdoor kitchen set up. Right now it is just a stove outside with a piece of metal roofing on it. So I need to cut up all the food inside before i can use the stove, than carry it out and make sure i remember stove hot pads for my hands! Usuallly it is atleast 4-5 trips back and forth between the house and the stove. I would much rather make the dinner outside next to the stove.

Next i would look at the stove and check it for how the top cooking surface inserts fit. On this stove they were quite rusted and therefore did not seal very well. It allowed the heat to exit where the plates/inserts had rusted. Some of them were rusted around the round inserts as well.


Now that i have it, i would use some morgan superwool to seal the top cooking surface to the channels i made.

It very well might get these upgrades in the future. Once all of the other projects disappear ;D
 
Leigh Tate
author & steward
Posts: 5295
Location: Southeastern U.S. - Zone 7b
3078
5
goat cat forest garden foraging food preservation fiber arts medical herbs writing solar wood heat homestead
  • Likes 2
  • Mark post as helpful
  • send pies
    Number of slices to send:
    Optional 'thank-you' note:
  • Quote
  • Report post to moderator
Jordan, my husband and I have been wondering if we could somehow convert our wood cookstove to a rocket design, so I'm really pleased to hear you've happy with yours. Ours is in the kitchen, though, so there's the big question of, "what if it doesn't work?" Outdoors is a great place to test! And I think once you get a roof over your stove, you will love cooking outside.

We're working on an outdoor kitchen too, but we went with the Walker masonry stove plans. Next summer, we hope to replace our soapstone wood heater with a batch box rocket stove. We're leaning toward a masonry style, so the outdoor cookstove is a functional learning experience. If we could replace both the heater and cookstove in the kitchen with rocket designs, it would be a huge savings on wood.

Anyway, your retrofit is inspiring!
 
Look! I laid an egg! Why does it smell like that? Tiny ad, does this smell weird to you?
Rocket Mass Heater Jamboree And Updates
https://permies.com/t/170234/Rocket-Mass-Heater-Jamboree-Updates
reply
    Bookmark Topic Watch Topic
  • New Topic