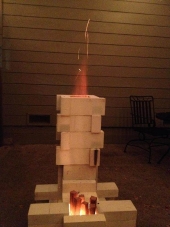
It is done. It is mesmerizing. I've watched it burn for most of my waking hours since Tuesday lol. I love it.
Except...boiling water only succeeds after 20mins running at full burn. The small cast iron pot I use has a lid. Thermocouple fan is also up top making it more difficult. More on all this later...
Building one of these is a fair amount of work. Taking a cluttered garage and creating enough space for a raging fire to safely heat a drafty & uninsulated workspace.
I've learned that to create a rocket stove of any sort one needs to dabble in many different skills. This project was a refresher on; layout & prep, metal cutting, welding(or self-tappers screw), bending/forming, siding/cladding, masonry, thermodynamic material properties, fire safety. I can definitely see the benefits of a monolithic mass/finish like cob.
Cutting the tiles was a daunting task that I hadn't figured out when I started this. My uncle, whom you saw welding above, just happened to have a small wet saw that really saved my bacon. You can see in the photos below it was used for mitered corners and the fire box bricks which penetrate the outer barrel. I modified the wet saw, by removing the riving knife and blade cover to get max depth out of the Ø4" blade. The curved section slotted into the top brick was done by hand with a grinder and run of the mill steel blade. If you want the proper angle grinder tool for doing this yourself, look up
Diamond "Tuckpointing" Blades.
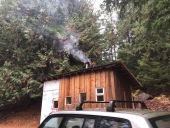
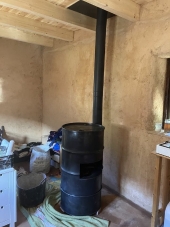
A lot of different brands were thrown together to make the exhaust pipe. Luckily I was able to assemble them with minimal modifications for a fairly snug fit. These were shown to past the visual and olfactory smoke leak-tests BEFORE having aluminum heat tape added. It's majority double wall (air pocket insulation) gas furnace ducting which is rated for flue gasses of 118°C (245°F) with a max temp of 233°C (470°F). I don't have a proper method for testing the flue temp without leaving an unwanted whole somewhere but from just putting my hand on the few single wall pipes I can tell it is not even above 70°C. Double wall pipe helps the draft but has a much lower thermal flux than single wall. If I ever find a free piece of Ø6" single wall black stove pipe I'll switch it out, but for now I'm content with the draft/heat exchange trade off.
So far I've done minimal rigorous testing. This is for two reasons. One, I've been building up my intuition for what this set up is capable of i.e. how different materials burn/pyrolysize and horizontal vs vertical feed. Secondly all I have is a multimeter capable of reading temp using a thermocouple in terms of measuring tools, I don't have a full plan on how to test this...I've done calorimetry studies 10+ years ago in Uni but this doesn't fit in a test tube in a lunch box cooler lol. Because of this, the drive to innovate on this apparatus is a little stunted because I've yet to devise solid/fair bench mark test for the current set up. Following this I think boiling a known volume of water is on the right track.
All that being said I think the gap between the riser and top surface is too great and thus not having the best heat exchange. The current gap is just less than 4", If I were to reduce this I believe the "cook" surface would exceed the current maximum of 460°C (860°F) and really cut down on the boiling time.
So far this is like the bare bones model. None of the bricks are mortared together, no high-temp silicone in the barrel/brick slots, no choke point/venturi at firebox/riser junction, no secondary air, no mitered corners for forced cyclone, no rockwool insulation around the riser(inner barrel is in place)...so there are still a number of tweaks to get this rocket roaring, but the purr is has now is still quite nice

I still feel like I'm leaving out key info, If you have any questions or want specific pics let me know I'll do my best to accommodate.
Ok picture time lol.

 4
4


 1
1


 1
1


 1
1


 2
2


 1
1


 2
2


 1
1


