I have built three of these over the years. For the second and third, I used a grinder with a sanding disc to remove the paint prior to firing it up. This was a bit of work but worth it for an indoor unit. It is true however that the paint will eventually burn off if you don't remove it before use. You have to get it pretty hot though if you want to burn it off quickly.
As for barrel type, I recommend you use the the open top kind with a disk lid or cover and a thick metal retaining strip or ring. This give you easy access to the inside for firebrick or refractory cement installation, and easier attachment of the feet and exhaust or second barrel attachment collar. You can pour a cement mixture of this nature in three steps. Do the first one to an inch or two high in the center, let harden, and then rotate and do a second pour. Then rotate the other direction and do a third pour. The 2nd and third pours will overlap the edges of the first slab poured . Putting a few 1 inch long self tapping metal screws through the sides from the outside to be embedded in the concrete will ensure it remains in place. You can also throw in a bit of cheap chicken wire or large grid hardware cloth to resist scaling or cracking but make sure it is embedded. I recall reading somewhere that you can also substitute a high Portland concentration concrete to make a kind of high temp concrete, but have not tried that. This was in the context of making propane forge chambers...
As long as I am on the topic of refractory cement mixes, an idea I have is to improve the combustion temp characteristics of these stoves by adding vermiculite, thus partially insulating the combustion chamber for a better burn. It would be wise to attach a second level barrel for heat exchange, and some fins on the stack, as well. If you don't do this and just use the bung end type, then get large diameter self tapping sheet metal screws. Be sure to set the clutch on your drill gun appropriately so as not to strip the holes as you do the install. Of course you can just use machine screws or stove bolts but this is a bit of a pain, especially if doing through only the door opening. Don't use galvanized screws or bolts. No point since the barrel is not galvanized, and you don't zinc fumes coming off this thing. Perhaps this is less of a concern for an outdoor unit.
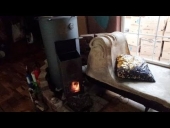
Please forgive me for being a bit off topic since this might be overkill for an outdoor trash wood burner, but it is nice to experiment, and barrel stoves do have indoor utility in many cases. For example, I can envision a situation where one might want to pack in supplies in a couple of them to remote building sites and then convert the empties barrels to a stove.
Ideal type but look for a used one:
https://www.bayteccontainers.com/55galstdrop.html I would recommend the bolt ring kind, but either will work. You will want to replace the gasket ring with stove gasket or stove cement.
For what it's worth, if you are just using this as a glorified burn barrel, you may be better off just using a burn barrel but putting a 6 or 8 inch hole in the top (cut the top off if using the bung type of drum) but place it back on the barrel once you get the fire going. Add handles or a bracket for a stick or pole to remove it when hot for refueling, or put it on a hinge. Putting a chimney on a burn barrel greatly improves the efficiency and cleanliness of the burn. Once red hot you will get minimal smoke or soot - just super hot emissions. Don't forget the air inlets at the bottom of the barrel. If you cut them with a grinder and do them as slats - i.e., don't cut them all the way off; just cut three sides of the rectangular openings, and bend them in at an angle to the tangent of the barrel - the incoming air will be directed in more or less tangentially into the barrel creating a cyclone effect. You will get a whirling dervish of combustion emissions sort of like a cyclone coal furnace. If you do this without a lid/chimney, it will stretch up to 8 feet high. Pretty impressive and nice on a cold night for a social get together, but imperative that you don't have any vertical obstructions like tree limbs above it. This may seem obvious, but you can get away with a lot of tempting of fate with a regular open burn barrel because the emissions are not as hot to begin with and lose directional cohesion only a foot or so above the edge of the barrel (see Rocky 1 South Philly Italian market running scene for example of this - yes I spent some time in Philly and they do run burn barrels there in the winter - or did at least until 2014 when I left)
Frankly, you don't need the kit for what you have in mind. Look up some videos on these. This one would probably work for you:https://www.youtube.com/watch?v=3xMHbJIFdfc If you go this route, attach the hinges for the door before cutting, then cut to the hinges and then take them off temporarily to make the rest of the cut, and then reattach the hinges. You get perfect alignment and ultimately easier. Again as prior mentioned, if using self tapping screws, take care not to strip the holes as you install. Use the clutch setting if you haven't been using drill guns for decades and have a good 'touch' with them.
Again, a bit of an apology for extending the scope past your initial post. But we are all here to learn and share info...


 7
7


Skill verified by Nicole Alderman")

Skill verified by Mike Haasl")