

|

|
|
|
|

|

|

|

|

|


 1
1


For all your Montana Masonry Heater parts (also known as) Rocket Mass heater parts.
Visit me at
dragontechrmh.com Once you go brick you will never go back!
3
![[Thumbnail for Old-J-tube-to-live-once-again-as-a-BB.JPG]](/t/132799/a/102793/Old-J-tube-to-live-once-again-as-a-BB.JPG "Filename: Old-J-tube-to-live-once-again-as-a-BB.JPG
Description:")
![[Thumbnail for cobbed-right-over-rock-wool.jpg]](/t/132799/a/102794/cobbed-right-over-rock-wool.jpg "Filename: cobbed-right-over-rock-wool.jpg
Description:")
Silence is Golden
For all your RMH needs:
dragontechrmh.com
2
![[Thumbnail for 1.-metal-removed-from-perlite-and-clay-riser.jpg]](/t/132799/a/102795/1.-metal-removed-from-perlite-and-clay-riser.jpg "Filename: 1.-metal-removed-from-perlite-and-clay-riser.jpg
Description:")
![[Thumbnail for 2.-perlite-in-good-condition.jpg]](/t/132799/a/102796/2.-perlite-in-good-condition.jpg "Filename: 2.-perlite-in-good-condition.jpg
Description:")
![[Thumbnail for 3.-very-fragile-as-it-broke-apart-really-easy.jpg]](/t/132799/a/102797/3.-very-fragile-as-it-broke-apart-really-easy.jpg "Filename: 3.-very-fragile-as-it-broke-apart-really-easy.jpg
Description:")
![[Thumbnail for 4.returning-to-the-earth.jpg]](/t/132799/a/102798/4.returning-to-the-earth.jpg "Filename: 4.returning-to-the-earth.jpg
Description:")
Silence is Golden
For all your RMH needs:
dragontechrmh.com
3
Visit Redhawk's soil series: https://permies.com/wiki/redhawk-soil
How permies.com works: https://permies.com/wiki/34193/permies-works-links-threads

Skill verified by Nicole Alderman")

Skill verified by Mike Haasl") 1
1
![[Thumbnail for Removable-threshold.jpg]](/t/132799/a/102835/Removable-threshold.jpg "Filename: Removable-threshold.jpg
Description:")
![[Thumbnail for Threshold-runners.jpg]](/t/132799/a/102836/Threshold-runners.jpg "Filename: Threshold-runners.jpg
Description:")
Silence is Golden
For all your RMH needs:
dragontechrmh.com
4


Silence is Golden
For all your RMH needs:
dragontechrmh.com
1
For all your Montana Masonry Heater parts (also known as) Rocket Mass heater parts.
Visit me at
dragontechrmh.com Once you go brick you will never go back!
2
Visit Redhawk's soil series: https://permies.com/wiki/redhawk-soil
How permies.com works: https://permies.com/wiki/34193/permies-works-links-threads
2
![[Thumbnail for mad-rocket-scientists.jpeg]](/t/132799/a/103701/mad-rocket-scientists.jpeg "Filename: mad-rocket-scientists.jpeg
Description:")
Silence is Golden
For all your RMH needs:
dragontechrmh.com
2
![[Thumbnail for cracked-and-crumbling-with-rope-gasket.jpg]](/t/132799/a/104313/cracked-and-crumbling-with-rope-gasket.jpg "Filename: cracked-and-crumbling-with-rope-gasket.jpg
Description:")
![[Thumbnail for new-and-slick-with-no-rope-gasket.jpg]](/t/132799/a/104314/new-and-slick-with-no-rope-gasket.jpg "Filename: new-and-slick-with-no-rope-gasket.jpg
Description:")
Silence is Golden
For all your RMH needs:
dragontechrmh.com
1
![[Thumbnail for 1.-linseed-oil-darkens-plaster.jpg]](/t/132799/a/104416/1.-linseed-oil-darkens-plaster.jpg "Filename: 1.-linseed-oil-darkens-plaster.jpg
Description:")
![[Thumbnail for 2.-linseed-oil-around-door-frame.jpg]](/t/132799/a/104417/2.-linseed-oil-around-door-frame.jpg "Filename: 2.-linseed-oil-around-door-frame.jpg
Description:")
![[Thumbnail for 3.-inside-coated-also.jpg]](/t/132799/a/104418/3.-inside-coated-also.jpg "Filename: 3.-inside-coated-also.jpg
Description:")
Silence is Golden
For all your RMH needs:
dragontechrmh.com
1
![[Thumbnail for 1.-crack-top-left-of-door.jpg]](/t/132799/a/104517/1.-crack-top-left-of-door.jpg "Filename: 1.-crack-top-left-of-door.jpg
Description:")
![[Thumbnail for 2.-crack-continues-vertically-down-the-front-right-side.jpg]](/t/132799/a/104518/2.-crack-continues-vertically-down-the-front-right-side.jpg "Filename: 2.-crack-continues-vertically-down-the-front-right-side.jpg
Description:")
Silence is Golden
For all your RMH needs:
dragontechrmh.com
2
For all your Montana Masonry Heater parts (also known as) Rocket Mass heater parts.
Visit me at
dragontechrmh.com Once you go brick you will never go back!
1
Silence is Golden
For all your RMH needs:
dragontechrmh.com
4
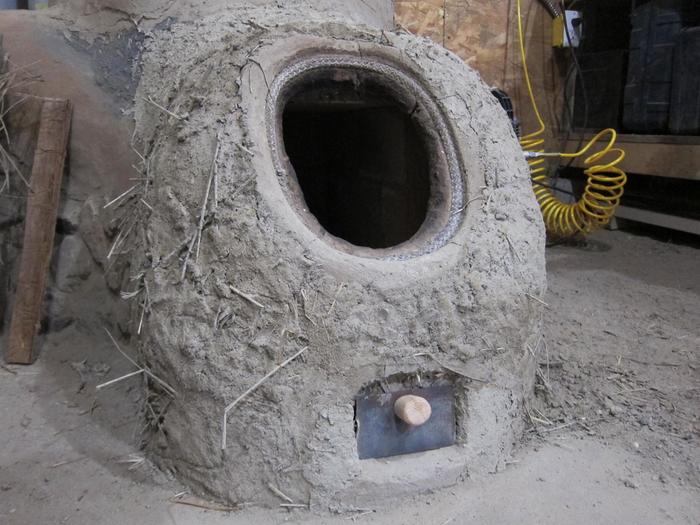
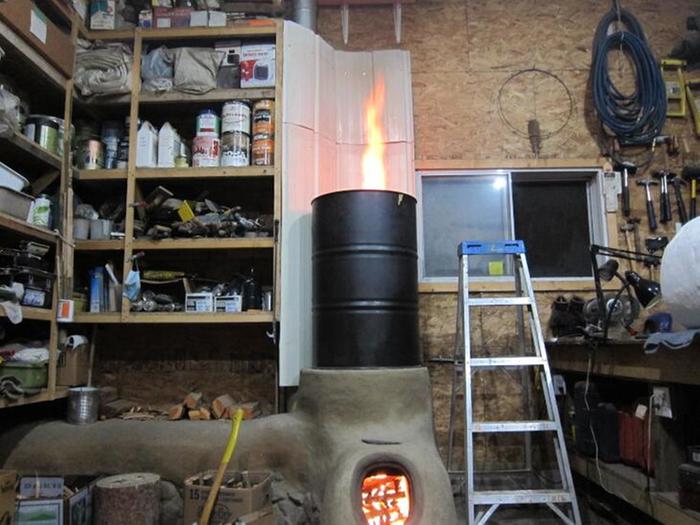
Gerry Parent wrote:Lighting up the batch though, there was just a little bit of smoke that came into the room while I lit the fire and as soon as I put the casserole door on (wedged slightly open), it ran in the right direction and all was good till the end of the burn. I put some extra wood in it about 15 minutes into the burn and no smoke came out the door at all. It behaved with great draft like it was in the middle of winter.
Now, the rest of the system hasn't changed except the core, so all things being equal, the batch is the sure winner in my books for being a non-babysit type of stove during the shoulder season in particular.
regards, Peter
2
Silence is Golden
For all your RMH needs:
dragontechrmh.com
Silence is Golden
For all your RMH needs:
dragontechrmh.com
3
![[Thumbnail for ash-tray-prototype.jpg]](/t/132799/a/108047/ash-tray-prototype.jpg "Filename: ash-tray-prototype.jpg
Description:")
![[Thumbnail for linseed-oil-holding-cob-strong.jpg]](/t/132799/a/108048/linseed-oil-holding-cob-strong.jpg "Filename: linseed-oil-holding-cob-strong.jpg
Description:")
![[Thumbnail for Extra-5-layer-of-rock-and-cob-to-raise-barrel-up-a-bit-more.JPG]](/t/132799/a/108049/Extra-5-layer-of-rock-and-cob-to-raise-barrel-up-a-bit-more.JPG "Filename: Extra-5-layer-of-rock-and-cob-to-raise-barrel-up-a-bit-more.JPG
Description: actually 4\"")
Silence is Golden
For all your RMH needs:
dragontechrmh.com
3
.jpg "Filename: download-(44).jpg
Description: Mr Gerry Parent has earned his diploma!")
For all your Montana Masonry Heater parts (also known as) Rocket Mass heater parts.
Visit me at
dragontechrmh.com Once you go brick you will never go back!
3

Silence is Golden
For all your RMH needs:
dragontechrmh.com
3
![[Thumbnail for D5D63BC0-216A-466B-9B84-0CCA474BBBA6.jpeg]](/t/132799/a/108119/D5D63BC0-216A-466B-9B84-0CCA474BBBA6.jpeg "Filename: D5D63BC0-216A-466B-9B84-0CCA474BBBA6.jpeg
Description:") 3
3
Silence is Golden
For all your RMH needs:
dragontechrmh.com
3
![[Thumbnail for 232C74D0-1A83-4B67-A675-A8AEE116586A.jpeg]](/t/132799/a/108146/232C74D0-1A83-4B67-A675-A8AEE116586A.jpeg "Filename: 232C74D0-1A83-4B67-A675-A8AEE116586A.jpeg
Description:") 3
3
Silence is Golden
For all your RMH needs:
dragontechrmh.com
3
![[Thumbnail for 6BE504AA-0EFB-435A-BD83-4A03FA422CF9.jpeg]](/t/132799/a/108246/6BE504AA-0EFB-435A-BD83-4A03FA422CF9.jpeg "Filename: 6BE504AA-0EFB-435A-BD83-4A03FA422CF9.jpeg
Description:") 1
1
![[Thumbnail for IMG_0643.jpg]](/t/132799/a/119234/IMG_0643.jpg "Filename: IMG_0643.jpg
Description:")
![[Thumbnail for IMG_0645.jpg]](/t/132799/a/119235/IMG_0645.jpg "Filename: IMG_0645.jpg
Description:")
Silence is Golden
For all your RMH needs:
dragontechrmh.com
1
God of procrastination https://www.youtube.com/watch?v=q1EoT9sedqY
Silence is Golden
For all your RMH needs:
dragontechrmh.com
1
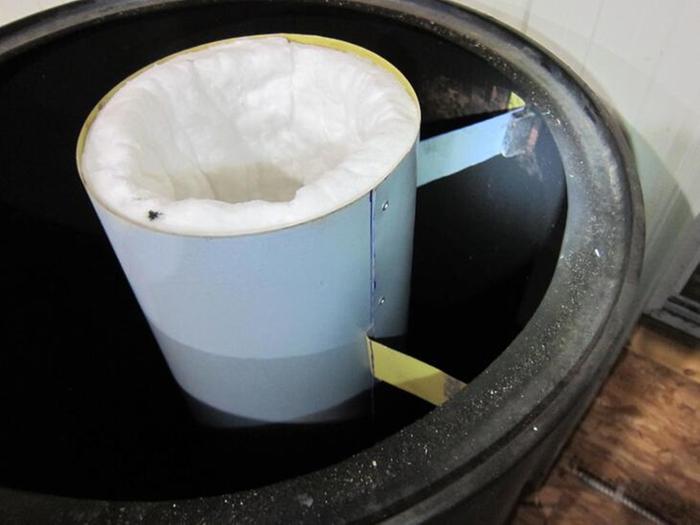
45 sounds good. It's just to push the convection airflow, nothing fancy needed!Gerry Parent wrote:Hi Max, What angle would you suggest? From your description, I'm envisioning a 45 degree angle. Would it need a reflective surface like foil to aid in reflecting the heat or keep it white as is?
God of procrastination https://www.youtube.com/watch?v=q1EoT9sedqY
2
Silence is Golden
For all your RMH needs:
dragontechrmh.com
2
Gerry Parent wrote:So not only am I protecting the wood on the ceiling from overheating, I'm also making it easier to encourage the natural convective flow as illustrated in this diagram by rounding off the ceiling/wall corner with the metal deflector?
Do you think the red and blue arrows will show up in the shop after I install it to show that its working correctly?
source
God of procrastination https://www.youtube.com/watch?v=q1EoT9sedqY
2
Peter van den Berg wrote:
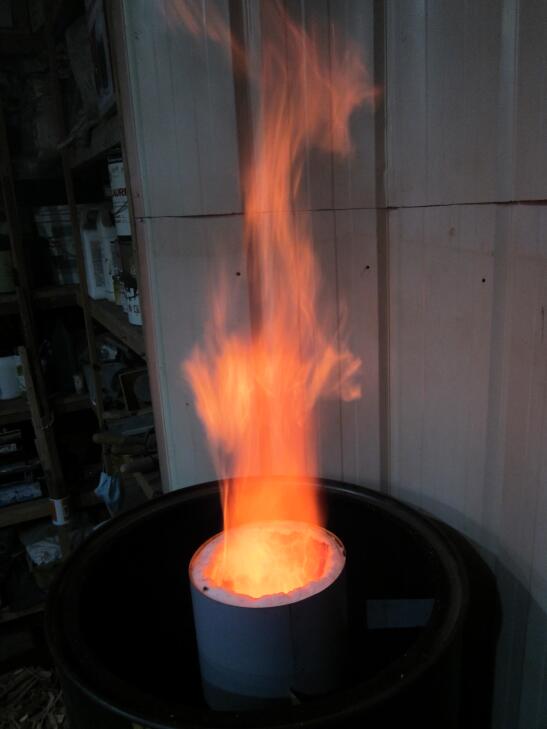
Gerry Parent wrote:Peter, I think I remember reading something about you saying something over at Proboards.com (which I can't find right now) that flames that come out of the riser are not the most ideal situation. If this was you that said this and is a correct statement, could you elaborate on it a bit and what could be done to make it more 'ideal'.
We are entering fundamentals here, largely untrodden territory I might add. In an ideal situation combustion is all over and done within the confinement of the riser. Flames out of the riser isn't a good thing: compare it to a candle flame. What happens there is that the oxydizing of the combustible material only takes place at the outside of the flame. Inside there's no oxygen so therefore no burning.
Flames out of the riser usually are oscillating, in a split second it comes up, goes down and up again. Looks like it's doing right, after all it isn't like a steady candle flame is it? But outside the riser the temperature is much, much lower and therefore one of the conditions in order to achieve complete combustion isn't met anymore. I didn't come up with that by myself, the Testo teached me that flames out of the riser aren't as good as one might think. Lots of carbon monoxide and some smoke as well are released into the outside air. Apart from the fact that smoke is wasted fuel it also becomes a pollutant, we shouldn't allow that to happen.
And no, the flames won't be that high when the barrel is in place, since coaching the gases into a 180 degree change of direction means friction. The larger the top gap, the less friction seems to be a good rule of thumb.
Now how to counteract this effect, adding friction isn't something I am particularly fond of, quite the opposite. But during development of the DSR2 I learned another thing: the end of the riser, expansion room or whatever you like to call it can be made smaller than system size. Just a bit more csa as the riser port seems to do the trick, any smaller than that and the whole thing became very sluggish. The maximum gas velocity in the riser port seems to be limited by the end port, combustion goes on in a less violent way and CO production is very low.
This effect of the above is largely not understood yet, it has something to do with expansion of gases between riser port and end port. While fiddling with the DSR2 I tried restricting the top of the extremely short riser and the whole of the thing stopped working the correct way entirely. It looks like there need to be some sort of expansion room between those two ports. The overall effect is an afterburner flame that stays largely inside the riser stub. Running full tilt the flames are entering the expansion space but tend to stay at the rear half due to the stumbling block halfway the expansion room's ceiling.
In case this end port thing is one of those effects dictated by laws of physics it might work on a straight riser as well.
I need to stress this is pure speculation, I didn't try this with a straight riser as yet so the waiting is for somebody to try it out.
Silence is Golden
For all your RMH needs:
dragontechrmh.com
For all your Montana Masonry Heater parts (also known as) Rocket Mass heater parts.
Visit me at
dragontechrmh.com Once you go brick you will never go back!
2
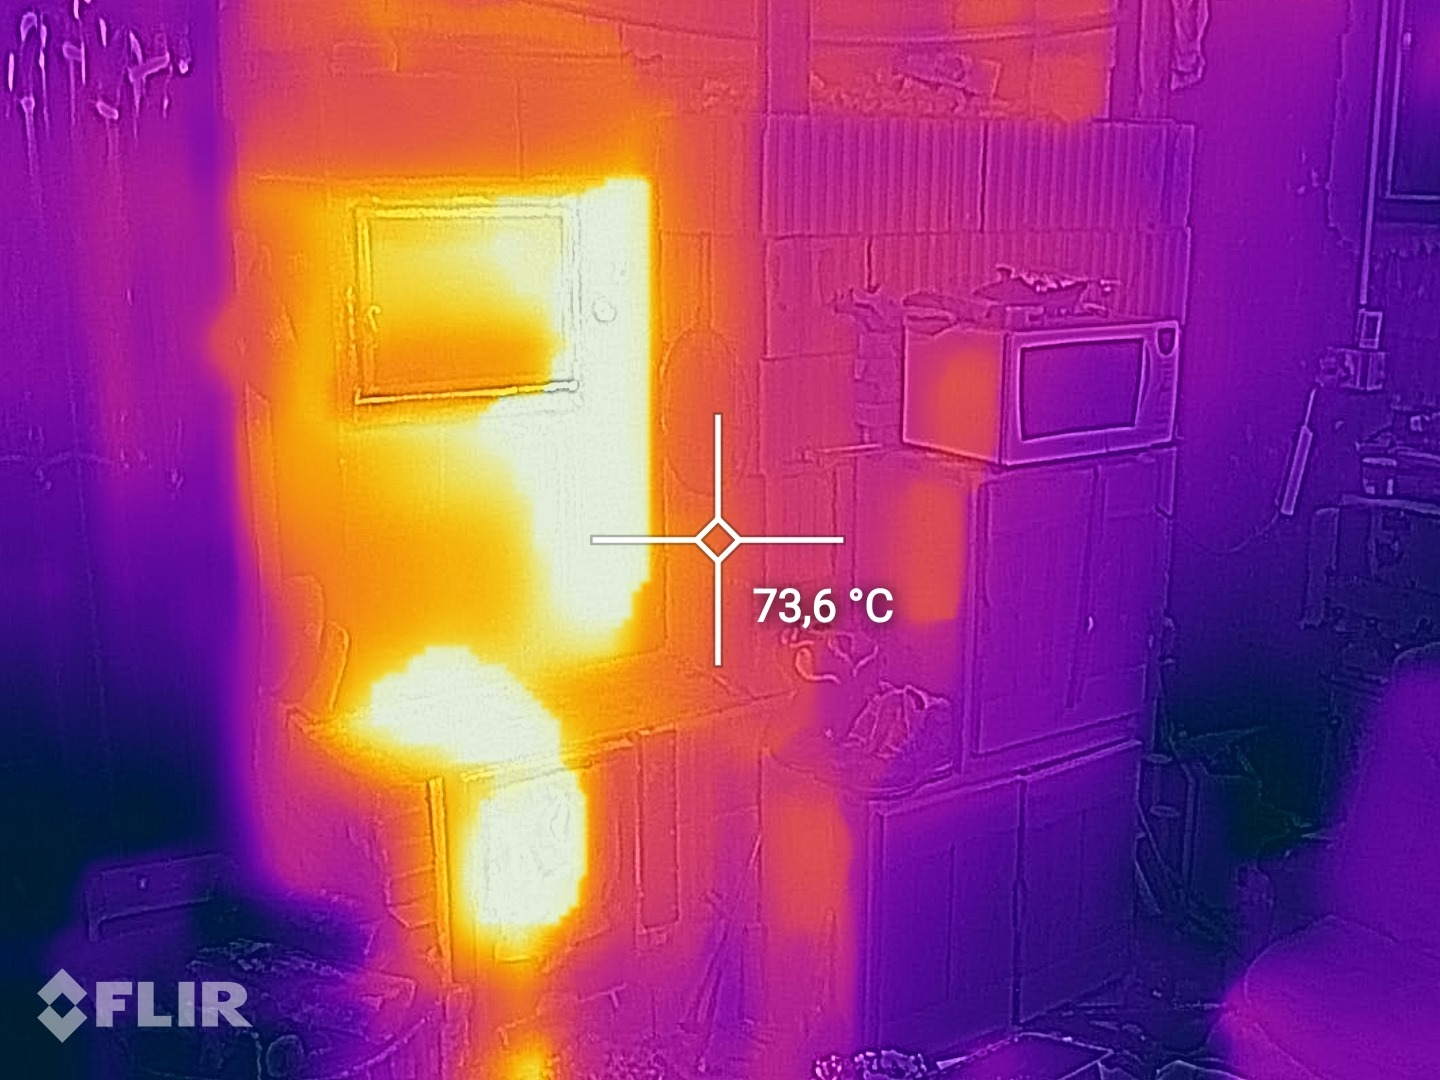
Yes it mightthomas rubino wrote:Oh My ! How cool is that!!!
I'm surprised that there was so little change.
I have to wonder if putting the barrel on might change things.
 But without window, we won't know!
God of procrastination https://www.youtube.com/watch?v=q1EoT9sedqY
1
Year 4 of gardening. Orchard is happy, grass needs a goat. And the garden is about to get swallowed by surrounding trees.
1
regards, Peter
3
Silence is Golden
For all your RMH needs:
dragontechrmh.com
2
Gerry Parent wrote:
Peter: Glad to hear the experiment is repeatable and predictable and to know that more height is not always better.
I'm having a bit of trouble visualising your "end port" idea. You said the lid has a hole that is 5-10% larger than the riser port. Did you really mean smaller? I'm not sure how it would help to restrict the flow if made larger.
I would assume that this lid could be made out of the same 1" cf blanket with the circle cut made on an angle to act like a funnel?
Seems like a simple enough experiment to try before removing the extra length of riser. Might need to observe it from outside though if it decides to smoke violently again!
God of procrastination https://www.youtube.com/watch?v=q1EoT9sedqY
2
regards, Peter

|
professionalism is finding the perfect flavor of apathy --tiny ad
PIE - The Easy Way to Support Permies.com
https://permies.com/t/240094/PIE-Easy-Support-Permies
|


