• Post Reply Bookmark Topic Watch Topic
  • New Topic
permaculture forums growies critters building homesteading energy monies kitchen purity ungarbage community wilderness fiber arts art permaculture artisans regional education skip experiences global resources cider press projects digital market permies.com pie forums private forums all forums
this forum made possible by our volunteer staff, including ...
master stewards:
  • Nancy Reading
  • Carla Burke
  • r ranson
  • John F Dean
  • paul wheaton
  • Pearl Sutton
stewards:
  • Jay Angler
  • Liv Smith
  • Leigh Tate
master gardeners:
  • Christopher Weeks
  • Timothy Norton
gardeners:
  • thomas rubino
  • Jeremy VanGelder
  • Maieshe Ljin
  • Likes 9
  • Mark post as helpful
  • send pies
    Number of slices to send:
    Optional 'thank-you' note:
  • Quote
  • Report post to moderator
This is a badge bit (BB) that is part of the PEP curriculum.  Completing this BB is part of getting the sand badge in textiles.

In this project, you will knit (or crochet) a hot pad out of wool yarn.

To document completion of the BB, provide proof of the following as pics or video (< 2 min):
  -  Show your wool yarn and needles or crochet hooks
  -  Show your hot pad in progress
  -  Show your completed hot pad
  -  Unfelted, it should measure about 10 by 10 inches (If you felt it, it will end up smaller, and that's okay!)

Here's a tutorial on how to knit (for a tutorial on crocheting, check out the dishcloth Badge Bit)!

Step
1

Pick yarn and needles


First you need to pick your yarn. Look for wool yarn. If it says "prewash," you will not be able to later felt it. That's okay if that's what you want. The reason we chose wool for this Badge Bit is because it is fire and heat resistant--perfect for hot pads!

Note: If you chose a thicker yarn, your project will go a LOT faster!

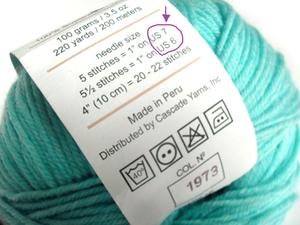
Next, choose your needles. Look on your yarn. There should be a place where it says needle size. Sometimes there's a range.


For a nice tight knit on this, you'll probably want the smaller needle size, or even to go down one size lower. If you choose to felt it afterward, you can go up a size or two. Hot pads are really forgiving!


Step
2

Make a slip knot


Next, you'll want to make a slip knot. There are LOTS of ways to do this. And, even if you get it wrong, it's not the end of the world. Here's a tutorial on how to make one type of slip knot.


Here's my slip knot.


Here it is on my needle


Step
3

Cast On


Now it's time to cast on. There are two methods to casting on--that is, making loops ("stitches") on your needle. This determine how WIDE your hot pad will be.

I prefer the first method in the following video, because it basically teaches you the knit stitch. What you're doing is making a knit stitch and putting it back on your left needle (when NOT casting on, the lop stays on your right needle).


You're going to cast on (create) enough stitches to make your hot pad about 10 inches wide. You'll want to STREEEEEETCH your little loops/stitches out to really see how wide they are. When stretched, they should be about 9 or 10 inches (often, on your next row, they'll magically stretch out even wider).

Here's 38 stitches on my size 10 needles with "worsted weight" wool yarn. My, that doesn't look wide enough!


Here they are stretched out. Way too wide! It's fine if it's wide, but it'll take longer to make!


So, I slipped off 8 stitches. Now it measures about 9 inches, which will probably magically increase to 10 inches on the next row.


Step
4

Knit


Now it's time to knit! You're going to do what you just did in the last row, but instead of putting the loop back on your left needle, you're going to LEAVE IT on your right needle. So, as you knit along, there will be less stitches on your left needle, and more and more on your right. You're doing it correctly!

Here's a great video on how to knit


I've just made my second row, and when I stretch out my stitches, it is more than 10 inches. But, that's because I'm really stretching it. It will probably be around 10 inches slack.


Step
5

Keep Knitting Rows


Now that you've made your first row, you're going to move your needle that's full of loops/stitches to your left hand, and knit another row!

Keep doing this, over and over and over and over again until your hot pad is as long as it is wide!

----------

Here you can see that I've knit about 8 more rows.


And, it looks like my hot pad is just under 10 inches. I probably should have cast on 34, rather than 30 stitches. But, since this is for my 2 year old, I'm not goind to worry. I could, however, take my needle out and unravel the hot pad and start again if I really wanted it 10 inches.

Step
6

Cast off


Now that you've gotten it as long as it is wide, it's time to cast off, WITHOUT dropping all those stitches! To do this, you knit two stiches, then pull the right one UP and OVER the left stitch and off the needle. You'll only have one stitch now on your right needle. Then you knit another stitch, and pull the rightmost one UP and OVER your left stitch and needle. Keep doing this until you only have one stitch left. Measure out about 5-8 inches of yarn and cut the yarn (*gasp!*) and put the yarn through the last stitch/loop. Pull it tight!


You might want to weave your few inches of yarn through your hot pad a few times and tie some knots, just to be on the safe side (that's what I always do, anyway!)

Step
7

(OPTIONAL)Felt/Full the Hot Pad


If you want a really thick hot pad that you can take things out of the oven with, without burning your hand, you can felt your hot pad!

The basics of felting (also called "fulling" when one is felting something that's already made):

* Hot water loosens the fibres, allowing them to tangle. And when you scrub it around in the hot water, it really tangles them up!
* Cold water tightens the fibres, shrinking them up.

To make a really well felted thing, with no little holes, you want to use a lot of hot water and a lot of movement. You can either do this by hand in the sink or bathrub--just scrub your hotpad around in hot water for a while. OR, your can throw it in the washing machine and let it churn away in hot water. Make sure to check it frequently in the washing machine (TURN THE MACHINE OFF before sticking your arm in!). Things that are felting tend to go from the same size to the same size, to a little smaller to *BAM* a whole lot smaller! So, check on it!

Once it's down to about the size you want, stretch and scrub it until it's the shape you want. Let it dry in that shape. *Poof!* Now you have a hot pad!

Here's some of my hot pads that I've made. Mine are double-long, folded over, and sewn on the sides so I can stick my hands in them, but the process is the same


You're hot pad will still qualify if it's lumpy, bumpy, and even if you drop some stitches and it gets narrower as you knit/crochet. This is a beginner project, and you're still likely learning how to wield the long needles and not get tangled in yarn. By the time you've finished this hot pad, though, you should be able to knit/crochet with confidence, and be ready to make something that requires a bit more accuracy. All this hot pad needs to do is keep your table from burning

Test test test.
COMMENTS:
 
steward
Posts: 21553
Location: Pacific Northwest
12040
11
hugelkultur kids cat duck forest garden foraging fiber arts sheep wood heat homestead
  • Likes 5
  • Mark post as helpful
  • send pies
    Number of slices to send:
    Optional 'thank-you' note:
  • Quote
  • Report post to moderator
About a week ago, I got my daughter's hot pad finished, but forgot to post pictures. She wanted LOTS of different colors, so I let her pick them, and tell me which color to do next and how many rows to make of it. I made it twice as long as wide so she could use it as an oven mitt. Here is the final length:


I forgot to mentiion in the tutorial, a really easy way to check to see if your hot pad is square is to fold it in half diagonally. If the edges match up, you're at pretty much a square. This is a great way to quickly check without having to pull out a ruler every few lines.


If you're wanting to make double-sided oven-mitt hot pad, all you have to do is make it a little over twice as long as it is wide (you want it a little more than twice as long as wide, because you fold the oven mitt in half, and so some of the length gets eaten up on the fold). Then you want to cast off, and then fold it in half and attach the two sides together. You can sew them together, but I find that sewing is tighter than knitting, and does funny things when you felt it. So, I knit the edges together (I can post pictures and a more detailed how-to if anyone wants them). So it looks like this:


Then, I use the strands/ "tails" left from knitting and braid or chain stitch them into a long line and sew it as a loop, to make the oven mitt hangable.


Then I throw the whole thing in the washing machine that's full of hot water!

After 4 minutes, it looks like this:


That's totally stretched out--no worries, though! I stretch the thing longways and toss it back in the washer. I take it out after another 4 minutes and stretch it longways and put it inisde-out, and throw it back in. Then turn it rightside out again, after stretching it longways. Here it is after a total of 12 minutes in the washing machine


It's getting the size I want it, so I watch it carefully now. I take it out after a minute or two to stretch it to the correct shape. Throw it in for another minute, check and stretch it, etc. Here it is finished


To dry it, I lay it on a towel and fold the towel around it (keeping it flat) and then step on the towel to have the towel soak up the moisture. Make sure to dry your hot pad FLAT, as it will stay in the shape you dry it in.

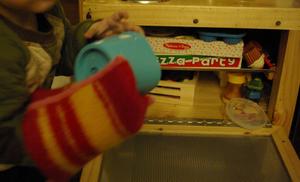
My daughter loves it! She instantly took it over to her pretend kitchen and got things to take in and out of the oven with it!

 
Nicole Alderman
steward
Posts: 21553
Location: Pacific Northwest
12040
11
hugelkultur kids cat duck forest garden foraging fiber arts sheep wood heat homestead
  • Likes 3
  • Mark post as helpful
  • send pies
    Number of slices to send:
    Optional 'thank-you' note:
  • Quote
  • Report post to moderator
Approved submission
I just realized that I had not technically posted a picture of the yarn and needles. You can see the needles in the picture, so that's good. But, there's no picture of the balls/skeins of yarn. So, here's the picture of the yarn and needles (the red yarn is currently in use by my son's hot pad that I've almost finished knitting).
IMGP0719.JPG
knitting
knitting
Staff note (paul wheaton) :

I certify this BB is complete!

 
steward
Posts: 6440
Location: United States
3118
transportation forest garden tiny house books urban greening the desert
  • Likes 4
  • Mark post as helpful
  • send pies
    Number of slices to send:
    Optional 'thank-you' note:
  • Quote
  • Report post to moderator
While at Wheaton Labs, I made a couple of hot pads. These are the progress pictures from one of the hot pads that I made. I made this one with cotton yarn, and it measures more than 10 by 10 inches on both sides. The project probably took about four or five hours, but I was able to do other things, while knitting, like listening to podcasts, watch videos, have conversation, and be part of a meeting. I am not yet skilled enough to do it entirely without looking, but I do only have to glance at my knitting now and then.
IMG_5745.jpg
[Thumbnail for IMG_5745.jpg]
IMG_5746.jpg
[Thumbnail for IMG_5746.jpg]
IMG_5747.jpg
[Thumbnail for IMG_5747.jpg]
IMG_5748.jpg
[Thumbnail for IMG_5748.jpg]
IMG_5763.jpg
[Thumbnail for IMG_5763.jpg]
IMG_5764.jpg
[Thumbnail for IMG_5764.jpg]
IMG_5765.jpg
[Thumbnail for IMG_5765.jpg]
IMG_5766.jpg
[Thumbnail for IMG_5766.jpg]
 
Nicole Alderman
steward
Posts: 21553
Location: Pacific Northwest
12040
11
hugelkultur kids cat duck forest garden foraging fiber arts sheep wood heat homestead
  • Mark post as helpful
  • send pies
    Number of slices to send:
    Optional 'thank-you' note:
  • Quote
  • Report post to moderator
That's some good knitting! I'm pretty sure the hotpad has to be wool, though....mostly because the heat transfers through the cotton way too easily (I tried knitting a cotton hotpad a few times, and the heat always came right through it, no matter how tightly I knit). If Paul has wool yarn, you knit two strands at onces and use the big size 10 needles, and it should go a lot faster.

I really want to certify this, because it obviously shows that you can knit. I think the main reason we did crochet cotton washcloth and knit wool hotpad is because crochet has a lot less stretch to it, making it perfect for washcloths. A knit washcloth might stretch out too much, and not be so useful for scrubbing.

You could probably still use this hotpad for putting on a table under a pot, but I wouldn't try using it to take something out of the oven (ask me how I know, LOL!)
 
Dave Burton
steward
Posts: 6440
Location: United States
3118
transportation forest garden tiny house books urban greening the desert
  • Likes 5
  • Mark post as helpful
  • send pies
    Number of slices to send:
    Optional 'thank-you' note:
  • Quote
  • Report post to moderator
Yeah, I was working with the yarn I had with me. It’ll still work great as a drying towel/cloth, though! Even if it can’t get certified for using cotton instead wool, I could update later with something else, because I’m always crafting something, whether it be crochet, knit, or Tunisian crochet.
 
author and steward
Posts: 52410
Location: missoula, montana (zone 4)
hugelkultur trees chicken wofati bee woodworking
  • Likes 4
  • Mark post as helpful
  • send pies
    Number of slices to send:
    Optional 'thank-you' note:
  • Quote
  • Report post to moderator
If you are going to do cotton, you have to have a strategy to make it thicker, or have an insulative layer.   There are cotton fabric hot pads, but they have an insulative layer.

 
Dave Burton
steward
Posts: 6440
Location: United States
3118
transportation forest garden tiny house books urban greening the desert
  • Likes 2
  • Mark post as helpful
  • send pies
    Number of slices to send:
    Optional 'thank-you' note:
  • Quote
  • Report post to moderator
So, I have this fuzzy skein of what I think is wool. If I made a hotpad out of this and then posted the pics,, do you think I would be able to get certified for this BB?

Does this skein look like wool to you, Nicole? It is soft, fuzzy, and has a wispy quality to it.
IMG_5768.jpg
yarn and needles
yarn and needles
 
Posts: 8887
Location: Ozarks zone 7 alluvial, clay/loam with few rocks 50" yearly rain
2382
4
  • Likes 8
  • Mark post as helpful
  • send pies
    Number of slices to send:
    Optional 'thank-you' note:
  • Quote
  • Report post to moderator

Dave Burton wrote:So, I have this fuzzy skein of what I think is wool. If I made a hotpad out of this and then posted the pics,, do you think I would be able to get certified for this BB?

Does this skein look like wool to you, Nicole? It is soft, fuzzy, and has a wispy quality to it.


Dave, one way to know for sure is to carefully light a two inch  piece of the yarn.  If it smells like burning hair it's most likely wool.  If it flames up and does not self extinguish it might be cotton or  another cellulose fiber or a combination with synthetics.  I like to do this at the sink with water running so I can quickly put out the fire before burning my fingers.  If the charred part feels hard it has some sort of synthetic fiber in the mix.

Be careful!!!  I do this a lot and have had some surprises where the fiber flames up more than expected...

As for potholders...I use the old woven type every day all day long made with a metal potholder maker and they are all cotton...a solid very tight weave...some are more than thirty years old.  
 
You had your fun. Now it's time to go to jail. Thanks for your help tiny ad.
Foundation for Intentional Communities at IC.org
https://permies.com/wiki/190044/Foundation-Intentional-Communities-IC-org
reply
    Bookmark Topic Watch Topic
  • New Topic