• Post Reply Bookmark Topic Watch Topic
  • New Topic
permaculture forums growies critters building homesteading energy monies kitchen purity ungarbage community wilderness fiber arts art permaculture artisans regional education skip experiences global resources cider press projects digital market permies.com pie forums private forums all forums
this forum made possible by our volunteer staff, including ...
master stewards:
  • Nancy Reading
  • Carla Burke
  • r ranson
  • John F Dean
  • paul wheaton
  • Pearl Sutton
stewards:
  • Jay Angler
  • Liv Smith
  • Leigh Tate
master gardeners:
  • Christopher Weeks
  • Timothy Norton
gardeners:
  • thomas rubino
  • Jeremy VanGelder
  • Maieshe Ljin

Step-By-Step Instructions on Growing Wine Caps

 
gardener
Posts: 5436
Location: Southern Illinois
1487
transportation cat dog fungi trees building writing rocket stoves woodworking
  • Likes 18
  • Mark post as helpful
  • send pies
    Number of slices to send:
    Optional 'thank-you' note:
  • Quote
  • Report post to moderator
I thought I would give some basic instructions on how to grow Wine Caps.  I grow Wine Caps in wood chips (straw works too).  In the past I have suggested piling the wood chips 12” deep, but this may be too deep.  This will work if there are a number of fertile holes filled with ample amounts of topsoil, compost or decomposed manure.  Otherwise use 4”-6” of wood chips so they have a good soil interface.

From there dig holes for tomatoes or other vegetables.  I use tomatoes because the grow fast, provide just the right amount of shade and still give wonderful tomatoes.  But any number of crops could be used—peppers, squash, eggplant, etc.  after the holes are dug, fill with soil, manure or other garden bedding.  Mark where the holes are with a stake to find them later.

Next dig still more holes and add in Wine Cap spawn.  Connect each Wine Cap hole with little trenches filled with Wine Caps to connect all the spawn together.  Be sure to sow some Wine Csps close to and/or in between the tomatoes to get a good soil interface.

Plant the tomatoes.

Now cover everything with the left over chips from the holes and soak with water.  After soaking, ideally add about 2-4 inches of straw and soak again.

Now comes the hard part—WAIT!!  Wine Caps take 6-12 months to pop up mushrooms.  But in the meantime, the tomatoes grow quickly and provide shade to help regulate moisture.  Maybe check the chips periodically.  They should be damp but not soaked.  Hopefully you will see little white threads of hyphae growing.  At any rate, mushrooms are a great way to learn patience.   ALSO, these instructions are just a guide and there are NUMEROUS variants out there so please don't think this is the One-And-Only way to grow mushrooms.  There are numerous variations on this practice, but this has been the method that has worked for me.

Step-by-Step directions

1)  Find a place to lay down chips.  Clear all existing vegetation or lay down some cardboard

2)  Lay down a layer of chips about 4-6 inches deep.  NOTE:  This is down from the 12" that I used to recommend.  I have found that too many chips can kinda smother the Wine Cap fungus.  Alternatively, if you want a 12" deep layer, make certain there are plenty of fertile holes filled with ample topsoil/compost/composted manure.

3)  Dig out the fertile holes for tomatoes (or whatever veggie you want to give shade.  Tomatoes have worked great for me).  Save the excavated chips for later.

4)  Fill in the fertile holes with topsoil/compost/composted manure.  Don't get skimpy at this point.

5)  Mark the holes with a stake or something else so you can find the holes later on.

6)  Excavate lots of smaller holes about 4" deep and wide for the Wine Cap spawn.  Especially get these holes in between and near the fertile holes.  Again, save the chips.

7)  Dig shallow trenches 2-3 inches deep that connect the Wine Cap spawn holes.

8)  Add the spawn to the holes and trenches.  Add the spawn in both crumbles and some chunks to the holes.  The chunks act like a little reservoir of mycelium that really gets started quickly.  The crumbles will help to spread the mycelium.  The trenches will help the holes grow towards each other and get established quickly.  ALSO:  consider adding the spawn to the holes in two layers, meaning add in the spawn to the bottom, cover with some chips and then add another layer of spawn then more chips.  This will help the spawn really get started.

9)  After all the holes and trenches have been covered with spawn, either add any left over spawn to the little spawn network or spread the remainder on the top.

10)  Take the set-aside chips from the fertile holes and evenly cover the rest of the chip-bed

11)  Soak the chips.

12)  Add a layer of straw 2-4 inches thick.  This will help to keep sun and heat off the wood chips and keep moisture in.  

13)  Soak again.  The goal should be to have damp but not soaking wood chips.  You will have to decide for yourself if the chips have had enough water but I find that soaking the straw layer down helps attach it to the chips.

14)  Plant your tomatoes or other veggies.

15)  MOST IMPORTANT STEP!!  Hurry up and wait!  This is a great exercise in learning patience.

Optional Steps:

a)  Adding some easy carbohydrates can get the spawn up-and-running faster.  Consider Blackstrap Molasses (or other molasses if you can't find blackstrap.

b)  Adding in a little compost (even if just layered on top) can add in beneficial microbes the Wine Caps like to grow along side.

c)  Some have laid a piece of cardboard on the top to keep moisture in.  In some cases the spawn colonizes VERY fast, as in just days to weeks.  I have not had that luck and it may be that when I added my layer I laid down too thick a layer or perhaps needed some air holes.  Fungi actually need oxygen so it is not impossible that I stifled my fungal growth.  Maybe just add a patch of cardboard hear and there.

d)  Maybe consider a straw bale.  I am experimenting with just plopping down a straw bale in the middle of the garden and inoculating with Wine Cap spawn.  Wine Caps grown on straw produce mushrooms very quickly.  But maybe consider adding in a little bit of topsoil to help give it a bit of a soil interface.

So there you have it, my updated set of instructions on how to grow Wine Caps.  I will continue to update and refine this list as I gain more experience.

Also, if you need more, try this list of Wine Cap related links HERE:
https://permies.com/t/174807/Wine-Cap-Growing-Central-great

Or try the longest-running thread on this list HERE:
https://permies.com/t/82798/composting/composting-wood-chips-chicken-litter
 
steward
Posts: 15505
Location: Northern WI (zone 4)
4846
7
hunting trees books food preservation solar woodworking
  • Likes 3
  • Mark post as helpful
  • send pies
    Number of slices to send:
    Optional 'thank-you' note:
  • Quote
  • Report post to moderator
Do you buy spawn or do you have a way to spread it from existing fungi?
 
Eric Hanson
gardener
Posts: 5436
Location: Southern Illinois
1487
transportation cat dog fungi trees building writing rocket stoves woodworking
  • Likes 6
  • Mark post as helpful
  • send pies
    Number of slices to send:
    Optional 'thank-you' note:
  • Quote
  • Report post to moderator
Mike, you asked a great question.

When one starts one of these projects buying in new spawn is almost always necessary unless a free dose of spawn from someone else’s patch is already available.  And even when I am starting a new patch, I have used new spawn.  I get mine from Fieldforest.net and they have been great to work with.

The reason I start out with new spawn, even when I have an existing bed, is that I don’t want to disturb my existing bed too much by digging a bunch of holes and taking out my hard-won mushroom compost.  

However, if you don’t mind the work, you can certainly start a new bed from the spawn of an old bed.  I can think of two ways to do so.  The first would be to poke around in the existing bed and find patches with the healthiest looking spawn—looks like a thick, thick cobweb of white strands weaving in and out and in between existing woodchips.  Simply take this patch and use it like fresh spawn—it IS fresh spawn.

The other way might be even better but the timing is important.  As actual Wine Cap mushrooms push up, gently pick a few up by their base and gently “plant” in a new bed of chips.  I have never tried this approach but I have been told that it establishes very quickly in new wood chips.

On a personal anecdote, I have some comfrey plants growing right next to my mushroom garden beds.  Every year I add a new layer of wood chips.  Last year I added just a bit of spawn from a place in my garden and then covered with a 2-3 inch layer of wood chips.  I did not expect much but to my surprise in a few weeks I actually had Wine Caps pushing up.  And in fact they escaped the wood chip layer and grew a few inches into the surrounding grass.  

I assume there was some woody debris there or maybe old grass clippings but whatever the case, I got several mushrooms quickly from a thin layer.  If I were to guess I would say that this little patch of Wine Caps grew so well because the layer of wood was thin and had great soil contact.  Also, the comfrey leaves gave great shade to protect from the heat of the sun and helped maintain moisture.  I am going to try more of the thin layer approach this year to see what I can get.

I hope this helps,

Eric
 
Posts: 158
23
3
  • Likes 5
  • Mark post as helpful
  • send pies
    Number of slices to send:
    Optional 'thank-you' note:
  • Quote
  • Report post to moderator
Thanks for the excellent instructions! My water reclamation system is still being set up, will chlorinated, municipal water hurt the growing mycelium? Also, I’m planning to start my bed in the fall in central Alabama, any difference in instructions?
 
Eric Hanson
gardener
Posts: 5436
Location: Southern Illinois
1487
transportation cat dog fungi trees building writing rocket stoves woodworking
  • Likes 4
  • Mark post as helpful
  • send pies
    Number of slices to send:
    Optional 'thank-you' note:
  • Quote
  • Report post to moderator
Lexie,

Doubtless, rain water would be best, but I used municipal tap water with chlorine myself and the mushrooms grew abundantly!

As far as modifying instructions, my only thought is that you are on the right track by starting in fall in your more southern climate.  With a little luck, you should see Wine Caps by spring.  Please do keep us updated.

Eric
 
Lexie Smith
Posts: 158
23
3
  • Likes 4
  • Mark post as helpful
  • send pies
    Number of slices to send:
    Optional 'thank-you' note:
  • Quote
  • Report post to moderator
One more question please. Our bed is built and watered well. It will get diffuse light all winter and will be in deep shade as soon as the trees start greening up in the spring, should we cover with a tarp or cardboard through the winter to protect it from any light and from being contaminated with the huge number of native mushrooms?
 
Eric Hanson
gardener
Posts: 5436
Location: Southern Illinois
1487
transportation cat dog fungi trees building writing rocket stoves woodworking
  • Likes 2
  • Mark post as helpful
  • send pies
    Number of slices to send:
    Optional 'thank-you' note:
  • Quote
  • Report post to moderator
Lexi,

Sorry it took me so long to get back to you.  I have been away for a while, but that is only a half-excuse.  

But to answer your question, I would not cover your chip bed over winter.  If you want to try laying a piece of cardboard here and there, that's one possible idea, but I have found that beds that get completely covered with cardboard don't do well.  Now some people have just laid a piece of cardboard on the surface, covering say, no more than 10% of the total surface area, and sometimes under that piece of cardboard the fungal strands grow really quickly.  But I have been experimenting lately with covering my entire bed in cardboard and I have not had good results.  If I had to guess, I would say that the fungi need more oxygen than I am allowing by covering them, but again, that is only a guess.  Also, Wine Caps don't need total darkness--they actually prefer a little bit of sunlight and I would think that if you can get just a little dappled sunlight in the winter, then that should do well.  Is there any chance you can suspend a tarp well above the bed so as to allow some light and air?  This is just an idea.  Otherwise, I would not try covering with a tarp.

If you have any other questions, I will try to be more attentive this time!


Best of luck,

Eric
 
pollinator
Posts: 773
Location: Western MA, zone 6b
479
cat dog forest garden foraging urban food preservation
  • Likes 2
  • Mark post as helpful
  • send pies
    Number of slices to send:
    Optional 'thank-you' note:
  • Quote
  • Report post to moderator
This is one of those things that have been on my "really need to look into this" topics, and here you have answered/posted most of what I was wondering about.   It sounds like my yard/gardens are set up perfectly to get in gear and explore this more.  Can you seed the spore in the fall?  Is there any problem with doing so in an environment that already naturally puts up many different types of "wild" mushroom bodies?   I'm off to look that up, and see what I can find for small online spawn sellers...  
 
Eric Hanson
gardener
Posts: 5436
Location: Southern Illinois
1487
transportation cat dog fungi trees building writing rocket stoves woodworking
  • Likes 2
  • Mark post as helpful
  • send pies
    Number of slices to send:
    Optional 'thank-you' note:
  • Quote
  • Report post to moderator
Heather,

I think Fall would be a great time to spread mushroom spawn.  As for sellers, I get all of mine from Field & Forest. Com.

I usually try to use as fresh chips as possible, but really that’s not possible unless you boil them which I don’t.  Wine Caps are so aggressive that they sort of “self sterilize” as they go, aggressively outcompeting other mushroom species.

Eric
 
Lexie Smith
Posts: 158
23
3
  • Likes 2
  • Mark post as helpful
  • send pies
    Number of slices to send:
    Optional 'thank-you' note:
  • Quote
  • Report post to moderator
Eric, thanks for the reply, we all have a life and it just keeps on getting in the way of my more sedentary pursuits so…no worries! We built the bed in an old, chain link chicken yard that has an old (think sort of rotten wood and accumulated leaves and limbs) roof with a gate so we can keep those pesky chickens from digging up the mushrooms before we get to them. Is there a certain temperature in the spring that triggers the mycelium to begin fruiting?
 
Eric Hanson
gardener
Posts: 5436
Location: Southern Illinois
1487
transportation cat dog fungi trees building writing rocket stoves woodworking
  • Likes 2
  • Mark post as helpful
  • send pies
    Number of slices to send:
    Optional 'thank-you' note:
  • Quote
  • Report post to moderator
Lexie,

I have my best luck in the relatively cool, muggy, cloudy Spring days.  For me that was May if I am remembering correctly.
 
Posts: 39
Location: Deep South, Zone 9
4
home care forest garden fungi
  • Likes 3
  • Mark post as helpful
  • send pies
    Number of slices to send:
    Optional 'thank-you' note:
  • Quote
  • Report post to moderator
Lexie,

For me in Louisiana, Jan-May was best for the wine caps. By the end of May the heat was kicking in consistently and our overcast, wet of winter was long gone. The wine caps loved the wet winters here. Hope this helps.

 
Lexie Smith
Posts: 158
23
3
  • Likes 1
  • Mark post as helpful
  • send pies
    Number of slices to send:
    Optional 'thank-you' note:
  • Quote
  • Report post to moderator
Suzette, we had the same results. It was very successful and we will definitely be doing it again.
 
pollinator
Posts: 163
Location: Middlebury, Vermont zone 5a
47
  • Likes 4
  • Mark post as helpful
  • send pies
    Number of slices to send:
    Optional 'thank-you' note:
  • Quote
  • Report post to moderator
In the northeast, I would highly recommend Northspore for all of your mushroom needs.  Their website has lots of good information and videos, and they publish a weekly newsletter on Sundays that has great information from recipes to the latest scientific studies.  Check it out!  By the way, after harvesting huge bowlfuls of mushrooms, I was getting desperate as to how to preserve them.  I'd freeze-dried huge amounts but that takes a while.  Finally, I tried freezing them after sauteeing them down--wine caps exude lots of water and take longer than many to cook down if doing a lot.  Anyway, it was totally successful!  After thawing, I cooked them with some parsley, wine, and parm.  Delicious!
 
Posts: 10
2
  • Likes 3
  • Mark post as helpful
  • send pies
    Number of slices to send:
    Optional 'thank-you' note:
  • Quote
  • Report post to moderator
Thank you for this chat.  I planted wine cap spore from North Spore late in April and have only seen 1 mushroom pop up!  We're in NE Indiana and the 2, 1 x 6 ft strips are between 2 tall raised beds.  There's a trellis between the beds that had cukes and beans on them, creating a partially shaded area.

I've kept the strips fairly moist.  The base was fresh hardwood chips with a small amount of compost then some straw.  I added less than an inch of undyed bark mulch in the heat of summer.  Do we just need more time?
 
Posts: 42
6
fungi foraging medical herbs seed
  • Likes 3
  • Mark post as helpful
  • send pies
    Number of slices to send:
    Optional 'thank-you' note:
  • Quote
  • Report post to moderator
Hi, I also use NorthSpore for my first try at wine caps. I had 2 small raised beds with good soil . I added some compost and then the spawn, covered with chopped straw and watered well. I did not have many other plants in each bed, so tried to keep them moist. I only got a handful of wine caps a couple of weeks ago. I plan to add small wood chips and compost this fall. I hope to have more later this fall and next year. I am also trying some shitake logs- they take more time. So yes growing mushrooms teach patience.
 
Posts: 14
Location: SE Missouri, 7A
2
  • Likes 2
  • Mark post as helpful
  • send pies
    Number of slices to send:
    Optional 'thank-you' note:
  • Quote
  • Report post to moderator
What time of the year should you start?  Is it too late, zone 7a?  Utility company just delivered a couple of loads of wood chips, would it be better to inoculate now or wait until spring?
 
Barbara Simoes
pollinator
Posts: 163
Location: Middlebury, Vermont zone 5a
47
  • Mark post as helpful
  • send pies
    Number of slices to send:
    Optional 'thank-you' note:
  • Quote
  • Report post to moderator
Nick, now would be fine.  You may not get any mushrooms this fall, but surely in the spring you will get a flush.  When I got my first kit, I kept it in the fridge, as directed, until November.  We had had a mild autumn and I was nervous about planting the spawn--I don't know why! Anyway, I was getting tired of how much room it was taking in the fridge and I wanted it to get going before we did have real cold.  I wouldn't advise waiting that long, but the mushrooms did "take" and the following spring I had so many mushrooms.  I did use cardboard, straw and wood chips.  At that point, I really figured it was too late and that cold would kill the spawn, so what did I have to lose, but no.  

You wouldn't want other mushrooms to get a hold in the wood chips.  I do have lots of mushrooms around here and I think I have some poisonous ones.  Be very careful when harvesting the mushrooms and checking all specifics about the mushroom you think you're harvesting.  For winecaps, I look for the broad stem, the violet-brown under the cap, the corona or ringlet signifying the king  in King Stropharia, the gills vs. pores, etc.
 
Barbara Simoes
pollinator
Posts: 163
Location: Middlebury, Vermont zone 5a
47
  • Mark post as helpful
  • send pies
    Number of slices to send:
    Optional 'thank-you' note:
  • Quote
  • Report post to moderator
Julia, you probably just need more time.  I have a friend who loves to tour my gardens and look at all of the changes each time she is here.  We were walking out back where my first mushroom bed was planted and I didn't even see them that first spring.  She cried out, "Oh my gosh, look at the size of those mushrooms!"  Even after she said that, I took me a little bit of time to see them and we were only a few feet from the bed.  Once I saw them, I was shocked, both by how big and how many but also by how well camouflaged they were.  I use that area to also dump my leaves, which provides them with "food" but the coloring of both together really blended in.  

When you planted them, how moist the ground is, the climate, and the food sources available would all factor in to their production.  The mycelium really needs to be established before it throws up the fruiting bodies / mushrooms.  Mine flush out twice each year: spring and fall.  There are random ones that pop up between these two windows, but the big flushes are the ones that make me drop everything and harvest because they really only last for a few days and you have to be vigilant.
 
Barbara Simoes
pollinator
Posts: 163
Location: Middlebury, Vermont zone 5a
47
  • Mark post as helpful
  • send pies
    Number of slices to send:
    Optional 'thank-you' note:
  • Quote
  • Report post to moderator
j flynn, I don't think that soil really matters too much.  Mushrooms aren't like plants.  Instead, they feed by breaking down dead plant matter; that's why straw, wood chips and leaves are all good options.  I think your idea of adding wood chips should make a big difference.  Mushrooms allow for the decay or breaking down of dead plant matter.  That is their role.  They don't feed on soil per se, however they certainly root through it.  Have you ever seen that white stringy stuff in a pile of damp leaves?  That's the mycelium of a fungus getting busy and breaking those leaves down to soil.  If you were to compare it to a plant like a pepper plant, the mycelium would be the stems and leaves and roots.  When the pepper plant is old enough, it will develop the fruit or peppers.  With mushrooms, the fruit are the mushrooms and the plant is the mycelium which take a little while to start producing their fruiting bodies.
 
Eric Hanson
gardener
Posts: 5436
Location: Southern Illinois
1487
transportation cat dog fungi trees building writing rocket stoves woodworking
  • Likes 4
  • Mark post as helpful
  • send pies
    Number of slices to send:
    Optional 'thank-you' note:
  • Quote
  • Report post to moderator
I love that this thread got revived, I only wished that I had gotten to it earlier.  I just wanted to echo what others have only said.  This time of year is about perfect for zone 7 to start a Wine Cap mushroom project.  And also to echo what has already been said, Wine Caps, being a fungus and not a plant technically feed on wood/straw/etc. and not the soil.  That said, Wine Caps do like to have some contact with the soil as they derive benefit from interaction with soil dwelling bacteria and other microbia.

Good Luck!

Eric
 
Posts: 16
Location: Jefferson, North Carolina (mountains)
4
  • Mark post as helpful
  • send pies
    Number of slices to send:
    Optional 'thank-you' note:
  • Quote
  • Report post to moderator
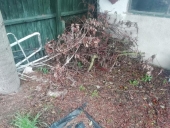
I have a large pile of mostly green leaves with twigs and small branches raked up after Hurricane Helene.  I am wondering if this pile could be used to grow some wine caps or another mushroom.  I am not as excited about growing them for food as using them to break down the pile and to add beneficial mycelium to the surrounding soil.  Has anyone had experience growing mushrooms on fresh piles of leaves, twigs and small branches?  I can flatten the pile to give more surface area but don't really want to rebuild it with layers.  Maybe inoculate the edges of the pile with spawn in sawdust?  I can wait for wood chips but not sure when we will get the chipper fired up.  There will still be a lot of leaves in the mix.
 
Semper Ubi Sub Ubi. Latin for "Always Wear Underwear." tiny ad:
turnkey permaculture paradise for zero monies
https://permies.com/t/267198/turnkey-permaculture-paradise-monies
reply
    Bookmark Topic Watch Topic
  • New Topic