• Post Reply Bookmark Topic Watch Topic
  • New Topic
permaculture forums growies critters building homesteading energy monies kitchen purity ungarbage community wilderness fiber arts art permaculture artisans regional education skip experiences global resources cider press projects digital market permies.com pie forums private forums all forums
this forum made possible by our volunteer staff, including ...
master stewards:
  • Nancy Reading
  • Carla Burke
  • r ranson
  • John F Dean
  • paul wheaton
  • Pearl Sutton
stewards:
  • Jay Angler
  • Liv Smith
  • Leigh Tate
master gardeners:
  • Christopher Weeks
  • Timothy Norton
gardeners:
  • thomas rubino
  • Jeremy VanGelder
  • Maieshe Ljin

Debbie's Really Awesome, Super Simple, Fairly Cheap, DIY INCOGNITO SOLAR DEHYDRATOR

 
pollinator
Posts: 252
Location: Sedona Az Zone 8b
146
  • Likes 52
  • Mark post as helpful
  • send pies
    Number of slices to send:
    Optional 'thank-you' note:
  • Quote
  • Report post to moderator
My Incognito Solar Dehydrator  Part 1           June, 2022
I never understood.... Why people make it so damned complicated??  If lots of folks, including lots of Permie's folks, dehydrate food in their cars (big metal boxes that get super hot in the sun)  why are so many people spending so much time and money and effort and MATH building such complicated contraptions just to dry some food? It's not rocket science. This totally beats me!

So  I asked the question.... if it works so well in a car, how can I make it work better?
    1. No bugs allowed. Got to get rid of the bugs.
2. Perhaps regulate the air flow for faster drying, depending on humidity.
3. Do a better job regulating the temperature depending on what you are drying.
4. More mobile would be nice and make storage easy.
5. And it's got to be pretty cheap!
6. And, of course, no toxic materials.

AND I GIVE YOU MY INCOGNITO SOLAR DEHYDRATOR!
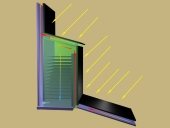
How it works.. Cool air enters through the bottom (which is easy to regulate), heats up and rises. Super damned simple! A little air flows out through the notch in the lid (where you put your hand to open it) unless you decide to cover it. Or you can open the lid up top a lot or a little just using a stick to regulate air flow and make it cooler or warmer. (again, easy to regulate) For even more air flow I have a small, cheap fan that I can just lay underneath it if it is a humid day or if I need things to dry faster for some reason.  Or I can block off both vents with a simple piece of cardboard. It's very light weight and it's on casters (wheels) so it's very easy to move on a flat surface.

What's not to like? The shell is usually free (Your local junkyard, Craigslist- free stuff... not working washing machine). It's recycled and repurposed.(bonus points for that) It's compact, very mobile, not terribly ugly, pretty cheap and easy for anyone to build in a couple of days or so and it works great!!  Yes, you can try this at home!!
DSC05117.JPG
I present to you... THE INCOGNITO
DSC05095.JPG
Rear view
Rear view
DSC05111.JPG
Interior
Interior
 
Debbie Ann
pollinator
Posts: 252
Location: Sedona Az Zone 8b
146
  • Likes 21
  • Mark post as helpful
  • send pies
    Number of slices to send:
    Optional 'thank-you' note:
  • Quote
  • Report post to moderator
HOW I BUILT IT... Part 2.

If you can see it, you can build it. No difficult math or calculations. Just measure twice and cut once stuff. No difficult orientation to the sun. It sits there just like a Gooney bird sucking up the heat.

First. Gut an old washing machine. I see non-working machines all the time on Craigslist. Haul it away for free. It took me about an hour to take out about 14 screws and gut it. And the interior was pristine clean! Replace the top but put a thin piece of weatherstripping between the 2 parts to keep out bugs. Duct tape a thin piece of cardboard over any holes left on top, again, to keep out any bugs.

Second. I unscrewed the feet. I bolted some 1x pine onto the bottom and attached some scrap  6” pieces of 4x4 pine as legs and attached castors to the bottom. This raised it up about 6 inches from the ground and made it very mobile. You can easily place a cheap fan underneath for more air flow.

Third. I've made lots of screens for windows in my house. I took leftover scraps of screen frame and made a 'screen' frame to cover the bottom hole. But instead of using screen I used a cut up piece of a sheet. (Recycled) It works great to let the air in ( cool air comes in through the bottom) but keeps all the bugs out. (And is cheap and easy to replace).  Again, place a thin piece of weatherstripping onto it to totally keep out the bugs. 2 fasteners hold it down.

Fourth. I made a similar kind of thing for the hole in the top to regulate temperature and to let the hot air out... but because it is round/oblong (an unusual shape)... I cut out a piece of thick cardboard and I stapled the sheet to it. I placed small pieces of duct tape over it to keep it in place. (Again, it is really cheap to replace).

Fifth. On my workbench I built the side racks (out of 1x2 and 2x2 pine) that hold the 6 trays. Then I placed the first one, left side, inside the box and drilled 4 holes and bolted it in. Did the same with the right side.

Sixth.  Built the 6 trays on my workbench. I used 2'x2' food grade stainless steel wire mesh. This was the most expensive part of the project. The food grade mesh cost me $115.00. Boy, that hurt. And all the T304 food grade mesh is still made in China! That hurt even more. But I've been trying to find it made anywhere else for 7 years now and I just had to give up. I got mine from GeoPathfinder.com .

Seventh. I prepped the front of the box to hold the door. I cut out small sections of the metal where the hinges would be with a saber saw. Then I bolted a 1 x 3 to the inside, left side (to help hold the hinges) and one to the right side to hold the clasp (to keep it closed). Then I ripped a 2 x 4 down to 2 x 2 ½ and placed it across the top to make the door frame good and solid.

Eighth. Built the door out of the last of the scrap materials I could find in my garage. The issue that I faced was that the whole box weighs maybe... 12 pounds and I had to make a door that was lightweight enough that it wouldn't tip over the box every time I opened it.  So I used some 1/8” glass from an old, free mobile home window (again, recycled and repurposed- more bonus points)  and scrap 1x3 and 1x 8 pine that I ripped down and some leftover trim. And added a thin piece of weatherstripping to the inside. The finished door including the glass only weighs about 4 pounds.

***** I only encountered one problem. To make it as easy as possible I built the wooden frame of the door and attached the hinges to it. Then I laid the box on it's back and placed the door frame on top and attached the hinges to the box so it would hang perfectly straight. Then I added the glass and the trim. Then I stood it up. Unfortunately, the door sags down just a little bit (about ¼ inch) on the right whenever it is not on a perfectly level surface. So I screwed a small piece of wood onto the leg under the right side to hold up the door straight. I close it with a hook and eye screw which I placed carefully so that I can slightly lift up the door if needed onto the scrap wood piece when I close it and then it is perfectly straight.

Then I spray painted it dark green and got carried away with the flowers. But I will be seeing it constantly during my days in the yard and I wanted it to look pretty.

I spent $115 on the mesh, about $30 on hardware and paint and the rest was all scrap lying around and free stuff. Project accomplished. Not bad for an old broad!  
DSC04896.JPG
The bottom
The bottom
DSC04913.JPG
Top screen
Top screen
DSC04950.JPG
Bolted the racks in
Bolted the racks in
DSC04900.JPG
Built the trays
Built the trays
DSC05000.JPG
Hung the door
Hung the door
 
Debbie Ann
pollinator
Posts: 252
Location: Sedona Az Zone 8b
146
  • Likes 15
  • Mark post as helpful
  • send pies
    Number of slices to send:
    Optional 'thank-you' note:
  • Quote
  • Report post to moderator
HOW WELL SHOULD IT WORK. Part 3

I've been researching this a lot for about 2 years now. Every website I have visited has different but similar temperatures and occasionally, humidity levels that their product or yours will/should achieve for optimal performance. Like I said.... different but similar.

The Geopathfinder website (which has been offline for a few months now so perhaps they have gone out of business) shows a temperature graph of their DIY  dehydrator compared to 2 others. Theirs is the gray line compared to one from Mother Earth News and one other. They don't explain why their dehydrator went to 165* on day 2. (an 85* day) Very different outcome from 140* on day one. (80* outdoor temp)  Or if that was good or bad for the dehydrating process.  Doesn't 165* cook the food?

Geopathfinder graph    [SORRY, BUT THE COMPUTERS WON'T SHOW THE GRAPH]

These are the temperature suggestions on the Excaliber electric dehydrator website.
ITEM
THERMOSTAT SETTING
Herbs
95◦F to 105◦F
Cake Decorations
100◦F to 110◦F
Yogurt
110◦F to 120◦F
Vegetables
115◦F to 130◦F
Fruit
125◦F to 135◦F
Meat / Jerky
155◦F

I couldn't find any temperature data on the Permies dehydrator. And no one that was dehydrating their food in their cars offered any temperature analysis. So there doesn't appear to be just one temperature and time for drying your food. Just a general consensus. I think the Incognito fits the mold really well!
 
Debbie Ann
pollinator
Posts: 252
Location: Sedona Az Zone 8b
146
  • Likes 19
  • Mark post as helpful
  • send pies
    Number of slices to send:
    Optional 'thank-you' note:
  • Quote
  • Report post to moderator
HOW WELL DOES IT WORK?  Part 4               June 10, 2022

I was really eager to try it this spring once I finished building it and it was still fairly cool out. But it took me awhile to find a place to put it near the house that has full sun all day. I have trees and shade!  And it's super windy here in April and May with some overcast  days. I had to move it a few times looking for the best spot.

But now the preliminary data is in. I've been watching the temps all through May and checking it out with the top and bottom vents covered with a piece of cardboard. As soon as it reaches 75* outside, the box registers 20*-25* higher or more inside consistently every day regardless of the wind. At 90* outside the box reaches 120* inside. Again, it's still windy here. I have been playing with the vents, cool air comes in from the bottom and exits out the top. I have covered one vent or the other or both with cardboard to slow the air movement. So far I have seen no real significant difference in temperature. I have no way to measure humidity. Haven't tried using the fan yet. And I believe it will work as a slow cooker really well this summer here in the high desert of Arizona.

If you're thinking of building one of your own I suggest you just go outside and measure the temperature in your car for a few days to decide if this will work in your location.

I would make two changes if I had it to do all over again. The trays are going to get cleaned many, many, many times. I wish I had framed them in something other then wood for easier cleaning. When they get yucky I will replace the frames with strips of 1/8” x 1 1/4” aluminum that they sell at most hardware stores. They should be a lot easier to clean then. And I would have spray painted it before I reassembled it and touched it up afterward.

Well, now we're having our first summer heat wave so maybe I'll get to check out if or how well the vents work. I don't have anything to dehydrate right now so I went to the grocery store and bought some fruit and vegies. (Can't believe I did that). A few days ago I tried the fruit. It was 85* outside and 120* in the box. I dipped the apples in citric acid/water and sprayed the bananas with it. After 24 hours the apples turned out wonderful but all the bananas stuck to the trays even though I wiped some vegie oil onto the screens! I won't be doing bananas again any time soon!  

Yesterday I steamed/blanched some vegies (eggplant, zucchini, broccoli and carrots) and placed them in the box around noon. The goal is to keep the temp at or below 130* according to the Excalibur instructions so I don't cook them. It was 95* outside and just about 130* in the box. I got busy and only checked it once more at 3:30 p.m.. It was still around 130* in the box.

O.K. I'm actually paying attention today. Friday, 6/11. Sunny day, some passing clouds. Here's my data....
Time Temp outside Temp in box Comments
7:30-                                                Sun is just hitting the box
8:00-                80                   100 Light wind 3 MPH Vents closed
8:30-                85                   110 “ “
9:00-                88                   118 “ “
9;30                 94                    122 “ “
10:00-              95                    125 “ “
11:00       102                   130 Removed cardboard from top vent
12:00-       104                   125 Wind 5-7 MPH with some gusts- 9MPH
1:00       107 125 “ “ “
2:00-       107 125 Wind down a bit, very overcast but sunny
3:00-       107 125 Wind up, very overcast.
6:00-        95 96 Will leave them to finish drying.

Saturday 6/11- At 3 pm. yesterday the vegies were almost totally dry but suddenly the wind picked up and thick clouds moved in. I'll take them out of the box later today, done. I think I will try it with the vents wide open next time since that does not appear to effect the temperature. I'm very pleased with the initial results.

My final analysis.... It works great but obviously depends on the weather!!! It's cheap. It's easy to build, if you can see it you can build it. You can do this at home. It's not a big ugly stationary thing. It's lightweight and portable. And it's kind of pretty and eclectic and whimsical!  I'm a woman and I like pretty! And whimsical is my favorite thing.

Happy gardening... and dehydrating everyone.
DSC05098.JPG
Fruit
Fruit
DSC05112.JPG
Vegies
Vegies
 
pollinator
Posts: 132
Location: Schofields, NSW. Australia. Zone 9-11 Temperate to Sub Tropical
72
forest garden fungi books medical herbs bee seed
  • Likes 7
  • Mark post as helpful
  • send pies
    Number of slices to send:
    Optional 'thank-you' note:
  • Quote
  • Report post to moderator
Thank you so much Debbie for such easy to follow steps. I have everything collected that I need except the food grade wire, and have taken note of your suggestion to use aluminum surrounds instead of wood for easier cleaning. Grateful for your sharing too. Love your dehydrator deco by the way, very creative.
 
Posts: 11
Location: East of Nashville, TN
1
8
trees books food preservation cooking medical herbs seed composting homestead
  • Likes 4
  • Mark post as helpful
  • send pies
    Number of slices to send:
    Optional 'thank-you' note:
  • Quote
  • Report post to moderator
Debbie, Thanks for the great post! This could work well in the climate here in Tennessee. I especially like the paint job! Your instructions are fantastic! I can build this!
 
Posts: 1
Location: Cumming, United States
  • Likes 7
  • Mark post as helpful
  • send pies
    Number of slices to send:
    Optional 'thank-you' note:
  • Quote
  • Report post to moderator
You could focus more of the sun's light onto the dehydrator for more heat. Scrap cardboard covered with mylar (used potatoe chip bags) should increase the temperature and extend your operational season.
 
Posts: 8
2
  • Likes 3
  • Mark post as helpful
  • send pies
    Number of slices to send:
    Optional 'thank-you' note:
  • Quote
  • Report post to moderator
This is great Debbie, thank you! I've been looking at designs and plan to build one this summer, looks like this will be the first model.
I was wondering if you had dimensions for the wood and screen, how much to buy?
 
Posts: 39
Location: wet tropics in Oz
5
5
  • Likes 8
  • Mark post as helpful
  • send pies
    Number of slices to send:
    Optional 'thank-you' note:
  • Quote
  • Report post to moderator
Debbie, I really like this, well done and thank you for sharing your incognito venture.

A lot of dehydrator recipes that I do (raw cakes, breads and the like), require a sheet of some sort for the first half of drying, and then taking the sheet out and finishing the drying on the mesh tray. I bought proper silicon sheets (or some such stuff, I forget now what it is, 6 years later) As the dehydrator was free I felt ok to buy some thing like this for it. But you can use baking paper for sure.

Bananas will always stick to the mesh, if you can soak the whole tray, the little bits come off easily once they rehydrate! So start them on baking paper, then flip straight onto mesh once the outside is no longer tacky.

I dry a lot of bananas this way.
 
pollinator
Posts: 288
Location: WNC 7b
77
4
hugelkultur goat forest garden trees chicken homestead
  • Likes 3
  • Mark post as helpful
  • send pies
    Number of slices to send:
    Optional 'thank-you' note:
  • Quote
  • Report post to moderator
Great photos and descriptions! Hope to make a dehydrator soon.

This is totally buildable. Love all the resuse of parts!
 
steward
Posts: 16058
Location: USDA Zone 8a
4272
dog hunting food preservation cooking bee greening the desert
  • Likes 5
  • Mark post as helpful
  • send pies
    Number of slices to send:
    Optional 'thank-you' note:
  • Quote
  • Report post to moderator
I must say that is one of the best ideas I have ever seen for recycling a washing machine.

I love your directions on how to make the dehydrator and the pictures.

Thanks for sharing.
 
Debbie Ann
pollinator
Posts: 252
Location: Sedona Az Zone 8b
146
  • Likes 8
  • Mark post as helpful
  • send pies
    Number of slices to send:
    Optional 'thank-you' note:
  • Quote
  • Report post to moderator
Hi Folks,
Hi Brad,  Washing machines are not made to standard dimensions. Yours might be bigger or smaller. The inside dimensions of mine are 26 and 3/4” wide by 25 and 1/2” deep. So I figured if I used 24” x 24” sheets/trays that would leave me 1 and 3/8” on either side for the rack. So I bolted 2”x2” pine (that the trays sit on) onto 1” x 1”and 1/2” pine. And since 1” x pine is actually just 3/4” thick that left me just over 1” of play so it is very easy to slide the trays in and out.

As I mentioned earlier, the food grade stainless steel mesh was the hardest part. All the other materials I looked into were possibly toxic in one way or another. So if anyone knows of a better or cheaper material please let everyone know. Several companies online sell it in different forms. Most wanted me to send them my request and they would quote me a price! Dang! I got mine from Geopathfinder because they sold theirs in 2' x 2' pieces, 6 for $115. {But their website has been offline for awhile now so I suspect they are out of business} Maybe someone here knows a great place to buy the stuff now. Please let everyone know. A lot of people seem to be interested!

Hi Russell, You bring up a good point. In my research I found a couple of websites that talked about the final product, the flavor of your dehydrated foods. They suggested if you dried it too low and slow or too fast and hot that some foods would lose a lot of favor. So I wanted to be able to regulate the temperature for maximum effectiveness. Here it gets super hot so I was focused on keeping the box cooler. I was planning to put it just outside of my garage. I even built a platform so that I could roll it in to some shade or out of the garage into the sun. You can see the platform in picture # 8, 'hung the door'. But it turned out that spot is in shade for 2 hours each afternoon.

The flip side is.... To get full sun I had to move it down to a different spot in my driveway.  If you look at the very first picture I had intended to place it further back on the brick platform close to the fence so I wouldn't block my driveway. The slats in the fence are white metal which would focus even more light and heat on the box. And in that same picture you can see something white under the box. That is actually an old metal sign that I pulled out of a dumpster. If I find more signs or pieces of white or silver sheet metal I could  place them under the box to focus even more light and heat onto the box. And I realized it would be really easy to heat the box up even more to use as a solar cooker.

Hi Elanor, Thank you for the tip! Since I know very little about dehydrating I have an awful lot to learn now.

Anne, Your compliment means a lot to me.

I thank you all very much. And thanks for all the apples! Happy gardening and dehydrating everyone.
 
Posts: 8
2
  • Likes 4
  • Mark post as helpful
  • send pies
    Number of slices to send:
    Optional 'thank-you' note:
  • Quote
  • Report post to moderator

Elanor Pog wrote:

A lot of dehydrator recipes that I do (raw cakes, breads and the like), require a sheet of some sort for the first half of drying, and then taking the sheet out and finishing the drying on the mesh tray. I bought proper silicon sheets (or some such stuff, I forget now what it is, 6 years later) As the dehydrator was free I felt ok to buy some thing like this for it. But you can use baking paper for sure.


We have used compostable baking paper successfully for the initial dehydrating of soggy stuff to making cleaning easier
 
pollinator
Posts: 146
Location: Upstate New York
56
chicken solar rocket stoves
  • Likes 2
  • Mark post as helpful
  • send pies
    Number of slices to send:
    Optional 'thank-you' note:
  • Quote
  • Report post to moderator

Debbie Ann wrote:
As I mentioned earlier, the food grade stainless steel mesh was the hardest part. All the other materials I looked into were possibly toxic in one way or another. So if anyone knows of a better or cheaper material please let everyone know. Several companies online sell it in different forms. Most wanted me to send them my request and they would quote me a price! Dang! I got mine from Geopathfinder because they sold theirs in 2' x 2' pieces, 6 for $115. {But their website has been offline for awhile now so I suspect they are out of business} Maybe someone here knows a great place to buy the stuff now. Please let everyone know. A lot of people seem to be interested!


I found a roll of stainless steel screen on ebay 24"x118" for about $65, free shipping. Prolly from China but at least it's available and not that expensive.
 
Posts: 26
4
  • Likes 4
  • Mark post as helpful
  • send pies
    Number of slices to send:
    Optional 'thank-you' note:
  • Quote
  • Report post to moderator
really cool !

when you gut it, keep the tub.  it makes an awesome firepit !
 
Posts: 37
2
  • Mark post as helpful
  • send pies
    Number of slices to send:
    Optional 'thank-you' note:
  • Quote
  • Report post to moderator
This is awesome, I have been looking for a way to simplify the design of one of these, just got to collect a bit more material! I was originally looking at those designs that run a length of black pipe away from the main body, which will run up inside and convect heat/air up inside. May well be overkill though, looking at your design, especially as it gets very hot round here.
 
Posts: 2
Location: Erie County, PA
9
  • Mark post as helpful
  • send pies
    Number of slices to send:
    Optional 'thank-you' note:
  • Quote
  • Report post to moderator
this is really an awesome idea.  I have the plans for the big solar dehydrator from one of Paul's kickstarters or dailyish, I can't remember... and I will build it one day.

I for certain see one of these in my near future!

Great work!
 
pollinator
Posts: 370
Location: South of Winona, Minnesota
90
  • Likes 6
  • Mark post as helpful
  • send pies
    Number of slices to send:
    Optional 'thank-you' note:
  • Quote
  • Report post to moderator

Our site, Geopathfinder.com, has gone offline but is still easily found at archive.org, otherwise known as the WayBack Machine, with about 94 screenshots of the entire site ( https://web.archive.org/web/*/geopathfinder.com ). We still sell stainless steel screens but only on E-Bay ( https://www.ebay.com/itm/191531148264 ) in sets of 2, 4, 6, or 8 screens. And after 37 years of use we still haven't found a better design for our climate.

The temperature graphs shown on the site were from a solar dryer researcher who compared a dryer similar to our design with other types. The reason their temp on day two was higher is beacuse they measured at the output end of the airflow and, since the food was drier by the second day, there was less humidity in the food to cool the air stream. That's why we recomend putting food on the higher, hotter screen on its first day (if it needs more than one day) and the lower screen on day two. There probably is no ideal drying temp as long as the food gets dry as quickly as possible, without direct sun on the food, at the lowest heat you can obtain. The idea is to lower the humidity without sacrificing quality or nutrient density. In the humid Midwest most box-type dryers lack the airflow to readily dump humidity, which is why many have circulation fans, and the direct sunlight on the food lowers some nutrients, as noted on our site.
 
Posts: 42
Location: Oregon high desert, 14" rain (maybe more now?)
6
hugelkultur solar woodworking
  • Likes 2
  • Mark post as helpful
  • send pies
    Number of slices to send:
    Optional 'thank-you' note:
  • Quote
  • Report post to moderator
Hi, Y'all...

I made a solar dehydrator a couple of years ago, not nearly as well-performing as Debbie's, but instead of using expensive stainless steel screening for the racks, I just used ordinary black plastic window screening. This turns out to be made from nylon -- in my book, a pretty harmless material.  And since the hardware store just cuts it off the roll, it's much less expensive.

I like that Debbie's design easily gets to 130 degrees or so -- best I could do with mine was about 110. But I hadn't considered using a metal shell for the outside, the sun shining on that easily heats the interior.  Mine was 1/2" exterior plywood, not a good heat conductor. I intend to replace it with something like yours.  Thanks!
 
Larisa Walk
pollinator
Posts: 370
Location: South of Winona, Minnesota
90
  • Likes 4
  • Mark post as helpful
  • send pies
    Number of slices to send:
    Optional 'thank-you' note:
  • Quote
  • Report post to moderator

Jerry Brown wrote:Hi, Y'all...

I made a solar dehydrator a couple of years ago, not nearly as well-performing as Debbie's, but instead of using expensive stainless steel screening for the racks, I just used ordinary black plastic window screening. This turns out to be made from nylon -- in my book, a pretty harmless material.  And since the hardware store just cuts it off the roll, it's much less expensive.


I initially used fiberglass window screen back in the 1970's when I was first experimenting with homemade dryers. I later found out that some fiberglass has lead in its formula. I would caution about using any material that isn't food safe and plastics in general because of the heat factor. Stainless steel may be expensive up front, but it will outlast you even with constant use and will stand up to tough scrubbing with a brush. Plus rodents can't chew through it.
 
Seriously? That's what you're going with? I prefer this tiny ad:
100th Issue of Permaculture Magazine - now FREE for a while
https://permies.com/goodies/45/pmag
reply
    Bookmark Topic Watch Topic
  • New Topic