For all your Montana Masonry Heater parts (also known as) Rocket Mass heater parts.
Visit me at
dragontechrmh.com Once you go brick you will never go back!
Silence is Golden
For all your RMH needs:
dragontechrmh.com
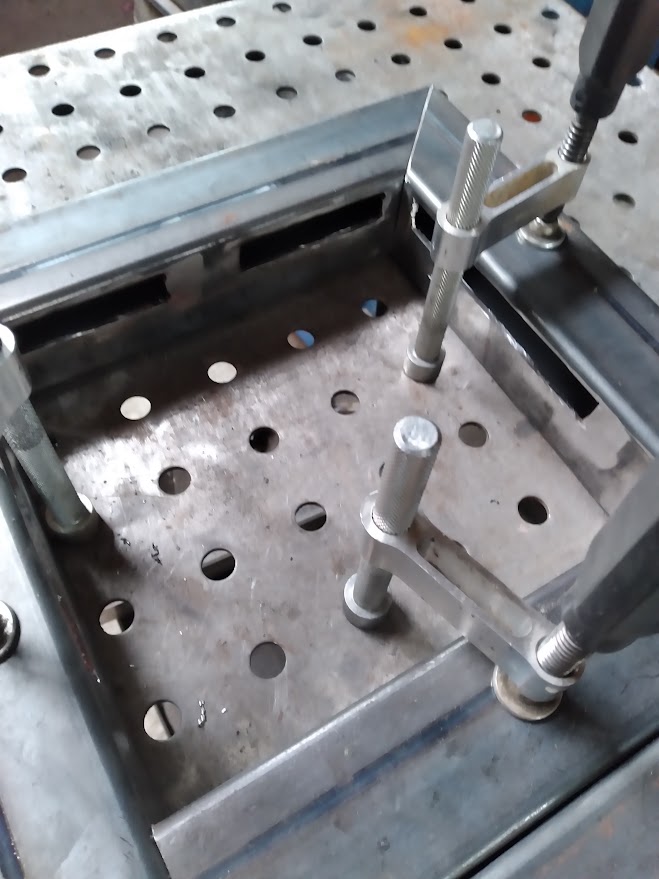
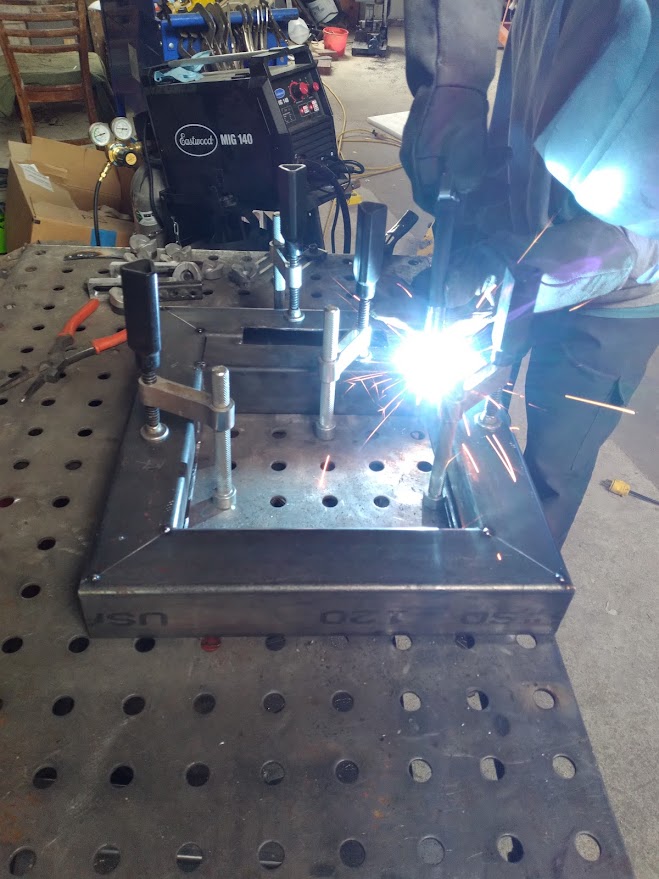
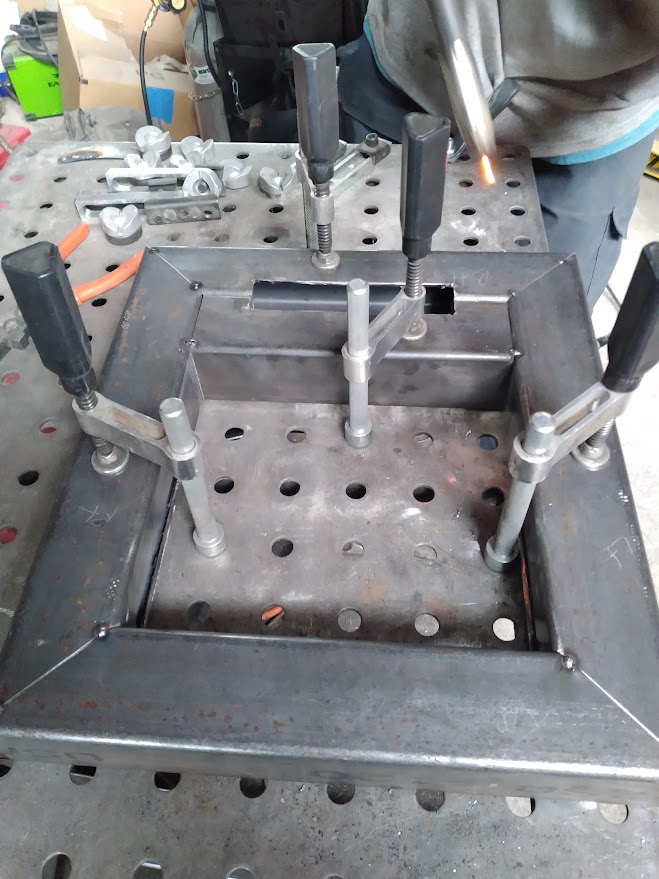
Gerry Parent wrote:While helping Thomas to build the air frame for the shorty door today, when we got to laying out the air channels (particularly the main air inlet at the bottom) we wondered why it has two horizontal square tubes attached to each other which share the main air opening instead of just one.
The only thing we could think of is that maybe Peter wanted to give the door more surface area to seal against that one piece just wasn't going to be enough to provide.
regards, Peter
Peter van den Berg wrote:That reason you mention above was following from a couple of others: the first being to provide enough space for the air stream to split and going through two 90º bends, both left and right. The tube on its own proved to be too restrictive, as long ago as for the DSR2 prototype. The second reason was how to provide a threshold for the ashes to stay in the firebox. And last but not least room for the door seal. The air inlet in the lower part of the door, as shown in the pictures of DSR2, DSR3 and Shorty alike proved to be unpractical in the long run.
So far, the air frame looks good, please go on!
Silence is Golden
For all your RMH needs:
dragontechrmh.com
For all your Montana Masonry Heater parts (also known as) Rocket Mass heater parts.
Visit me at
dragontechrmh.com Once you go brick you will never go back!
Rocket surgeon and soil builder... healthy plants are all about the soil.
- My 6" Batch Rocket specs and materials list: https://permies.com/t/248275/Batch-Rocket-Double-Skin-Bell
- Batch Rocket detailed build thread with Q&A: https://permies.com/t/238503/Batch-Rocket-Build
Peter van den Berg wrote:
That reason you mention above was following from a couple of others: the first being to provide enough space for the air stream to split and going through two 90º bends, both left and right. The tube on its own proved to be too restrictive, as long ago as for the DSR2 prototype. The second reason was how to provide a threshold for the ashes to stay in the firebox. And last but not least room for the door seal. The air inlet in the lower part of the door, as shown in the pictures of DSR2, DSR3 and Shorty alike proved to be unpractical in the long run.
So far, the air frame looks good, please go on!
Scott Weinberg wrote:I enclosed a few photos in case there are some not sure what this frame looks like. ( the door is off and not shown) Just the frame and then some airflow paths drawn in.
regards, Peter
Glenn Littman wrote:Following along with your process and thinking about building my door this summer. For the air slots on the inside of the frame I'm thinking it may be easier to drill 3/4" holes for the ends of the slots and then cut with the angle grinder. Any thoughts on this approach since you have experience cutting with the jig saw? I'm pretty sure I have a 3/4" drill bit.
Silence is Golden
For all your RMH needs:
dragontechrmh.com
regards, Peter
Peter van den Berg wrote:Gents, I think I've spotted a deviation from the drawings I've sent earlier. According to these drawings, the air frame should be mounted in front of walls, ceiling and floor of the firebox. What you've constructed is different in the sense that the frame is resting on top of the firebox floor instead of mounted in front. By doing that, the threshold to keep the ashes in is higher and the door the same size smaller (lower). As long as the air slots in the frame are according to specs, no harm is done, one would say. But... there's another thing, the air frame, although air cooled, will get awfully hot. With more steel exposed to the fire, it will get even hotter. Resulting in a greater expansion of the air in there.
What I've seen with the DSR3, too great expansion will lead to more volume, to such an extent that the fire won't get enough oxygen anymore. Combustion quality will suffer from that effect, no doubt about that. Now it is a fact that the DSR3 construction was/is different from the Shorty's.
It could be that in this case the effect isn't that great, but I wouldn't bet on it.
Just to let you know there might be a pitfall in the vicinity.
For all your Montana Masonry Heater parts (also known as) Rocket Mass heater parts.
Visit me at
dragontechrmh.com Once you go brick you will never go back!
Peter van den Berg wrote:Gents, I think I've spotted a deviation from the drawings I've sent earlier. According to these drawings, the air frame should be mounted in front of walls, ceiling and floor of the firebox.
Peter van den Berg wrote:But... there's another thing, the air frame, although air cooled, will get awfully hot. With more steel exposed to the fire, it will get even hotter. Resulting in a greater expansion of the air in there.
Rocket surgeon and soil builder... healthy plants are all about the soil.
- My 6" Batch Rocket specs and materials list: https://permies.com/t/248275/Batch-Rocket-Double-Skin-Bell
- Batch Rocket detailed build thread with Q&A: https://permies.com/t/238503/Batch-Rocket-Build
thomas rubino wrote:If I cut the floor bricks back even with the walls so the airframe is exposed on the bottom side, would that be a better solution than gasket?
regards, Peter
Glenn Littman wrote:Peter, looking at one of the pictures from your Compact Core Development post (picture pasted below) it appears the door frame air intake is in line with the face of the firebox floor brick. Am I interpreting this correctly? So, there effectively is no threshold for retaining ash (or perhaps a very low threshold)?
Glenn Littman wrote:Can you explain a little further the reason why the expansion of the air will decrease the oxygen. This is of critical interest to me. As you are aware, I live at 8,000' and consequently have to make adjustments to air intakes to account for lower oxygen concentration.
regards, Peter
Peter van den Berg wrote:Quite a long answer, hope this all makes sense.
Rocket surgeon and soil builder... healthy plants are all about the soil.
- My 6" Batch Rocket specs and materials list: https://permies.com/t/248275/Batch-Rocket-Double-Skin-Bell
- Batch Rocket detailed build thread with Q&A: https://permies.com/t/238503/Batch-Rocket-Build
For all your Montana Masonry Heater parts (also known as) Rocket Mass heater parts.
Visit me at
dragontechrmh.com Once you go brick you will never go back!
regards, Peter
Silence is Golden
For all your RMH needs:
dragontechrmh.com
Gerry Parent wrote:Seeing as how this shorty core does not have the need for a floor channel brings up the much higher risk of unintentionally plugging up the port with wood shoved too far back or from a falling piece of coal.
An idea came up....Perhaps an upside down U shaped piece of metal rod (approximately the width and height of the firebox port) could be mounted on a plate steel base and positioned about an inch or so before the port? The plate would be sized the same dimensions as the inside floor so it wouldn't move around and (if needed) a horizontal top spacer butting up against the top port brick to keep it from tilting.
Shouldn't interfere with gas flow any more than a stub would.
Yes, metal is going to spall, but still perhaps last long enough to warrant its advantages.
Any thoughts?
regards, Peter
Peter van den Berg wrote:Sorry to say, most of these type of ideas are solutions looking for a problem. These heaters are radically different from "normal" woodstoves. It's only logical to have a different set of do's and don't's for each type. It did took a lot of work to banish all steel from the firebox' innards, why introducing new steel in there?
Peter van den Berg wrote:My solution, which has been in use for 9 seasons now: the fuel is much shorter (about 4") as compared to the maximum capacity of the firebox. I developed the habit to lay the fuel about 2" behind the threshold, so there's a space of 2" between fuel and rear wall of the firebox.
Plus a second habit: In 99.99% of the burns I use the upside-down method to light the thing. For those that aren't familiar with this: the firebox is loaded with the largest pieces at the bottom, the higher up the thinner the pieces. On top of or between the last pieces some kindling and a single barbeque lighter. So there's time enough to adjust pieces before lighting without the risk of scorching hands, and no fuel will be in the port. Lighting on top means the fire is slower to develop, but that isn't a disadvantage per se.
For those whom are accustomed to a specific length of fuel, the solution could be to build their firebox 4" deeper than the fuel's length so there will be enough space. Between the logs or whatever you have, very little space is required. All fuel front to back, no log cabin, tipi or criss-crossing style. This way, the pile of fuel is relatively compact, plus the required space in front, back and top is easy to achieve.
Silence is Golden
For all your RMH needs:
dragontechrmh.com
Peter van den Berg wrote:...Plus a second habit: In 99.99% of the burns I use the upside-down method to light the thing. For those that aren't familiar with this: the firebox is loaded with the largest pieces at the bottom, the higher up the thinner the pieces. On top of or between the last pieces some kindling and a single barbeque lighter. So there's time enough to adjust pieces before lighting without the risk of scorching hands, and no fuel will be in the port. Lighting on top means the fire is slower to develop, but that isn't a disadvantage per se.
Peter van den Berg wrote:...For those whom are accustomed to a specific length of fuel, the solution could be to build their firebox 4" deeper than the fuel's length so there will be enough space.
Rocket surgeon and soil builder... healthy plants are all about the soil.
- My 6" Batch Rocket specs and materials list: https://permies.com/t/248275/Batch-Rocket-Double-Skin-Bell
- Batch Rocket detailed build thread with Q&A: https://permies.com/t/238503/Batch-Rocket-Build
Those cherries would go best on cherry cheesecake. Don't put those cherries on this tiny ad:
heat your home with yard waste and cardboard
https://freeheat.info
|