• Post Reply Bookmark Topic Watch Topic
  • New Topic
permaculture forums growies critters building homesteading energy monies kitchen purity ungarbage community wilderness fiber arts art permaculture artisans regional education skip experiences global resources cider press projects digital market permies.com pie forums private forums all forums
this forum made possible by our volunteer staff, including ...
master stewards:
  • Carla Burke
  • Nancy Reading
  • John F Dean
  • r ranson
  • Jay Angler
  • paul wheaton
stewards:
  • Pearl Sutton
  • Leigh Tate
  • Devaka Cooray
master gardeners:
  • Christopher Weeks
  • Timothy Norton
gardeners:
  • thomas rubino
  • Matt McSpadden
  • Jeremy VanGelder

How to make a quilt - advice please

 
Posts: 81
Location: VI, BC
18
hunting trees tiny house building homestead ungarbage
  • Likes 6
  • Mark post as helpful
  • send pies
    Number of slices to send:
    Optional 'thank-you' note:
  • Quote
  • Report post to moderator
Good Morning..

I'm hoping that a mod can place this in the correct forum - a long search on Permies yielded confusion on where best to place it.

I'm a Dad of 3 toddlers who is picking up sewing half way through his life. I am acquiring an older sewing machine in the next few days, and just got a nice useable cabinet too.

So what is the advice needed? Context first:

a) I have a duvet filled with wool thats appropriate for most spring/summer nights. Its comfy but I think I may have washed it one too many times as the wool seems to have clumped and has lost some of its warmth keeping skills.

b) I have a duvet cover that is soft through 12 years of useage and is still in good condition. Its too big for the duvet and I am growing tired of the loose and empty ends of the cover (and the duvet getting bunched up inside)

c) I love the idea of a quilt that is masculine in pattern enough for me, but my experiences with a LLBean style quilt was that it was quite stiff in comparison to the duvet and would slide easily off my body whilst sleeping. The form fitting/ draping nature of the duvet is excellent in this regard


Advice please:

May I get some advice from the women (and I guess perhaps some men) how to go ahead and make my quilt (slowly) with materials that will keep me warm, not be wackadoodle toxic but somewhat readily available please?

Can I use a sewing machine for it or does it have to be by hand?


I know I can Youtube all this, but I prefer the earth respecting people at Permies for this project.


Thank you.
 
gardener
Posts: 1460
Location: PNW
894
3
trees books food preservation cooking writing homestead
  • Likes 7
  • Mark post as helpful
  • send pies
    Number of slices to send:
    Optional 'thank-you' note:
  • Quote
  • Report post to moderator
Great questions and project, Lito!  

Making quilts is one of my favorite things to do and I mostly use a sewing machine - I only decorate and "tack" my quilts by hand.  I pretty much have a quilt project every winter.  (Quilt making is hot work in my experience and not super appealing when it's warm but very cozy / nice in the winter).  

So you can make it as simple or complex as you'd like.  If you have big pieces of fabric (like your duvet) and that's what you want to use, you can basically just cut that cover open, take out the insides, put new insides in, take it and sew it shut again.  There are some good organic/cotton but thick/warm fillers (aka batting) that you can use that will be warm and comfy, wrapping nicely around you.  Basically, with quilts, you're making a "sandwich" with the batting being the filling and the material on the outside being the bread.  I always buy a new filler and make it the highest quality I can get / afford but you can re-use this too if you're on a tight budget.  If you want it super warm, you can even double up on this (although the ticker you make it the more difficult it is to tack it later).

To avoid the bunching up issue you mentioned, you want to "tack" the sandwich together in spots all over the quilt.  Basically, you spread the bottom sheet out on the floor as smoothly and wrinkle free as possible, spread out the batting as smoothly and wrinkle free as possible, then add the top layer and repeat.  You then pin it together (quilting safety pins work well) all over so that the sandwich is stuck together and the layers are basically wrinkle-free.  Then you're going to sew the layers together so that the inside doesn't shift when you wash it or use it for years.  You can then "tie" it with yarn or you can use thick thread or you can sew it (it takes a special bobbin if you have thick layers).  How closely you need to sew it together in little spots all over, depends on the batting instructions on the package (it will say somewhere from 4-10 inches, usually).  

We made really simple blankets when I was young with a full sheet of material for the top and bottom (or a couple pieces sewn together to make a sheet) and then tied with cheap yarn.  We often did this as a group while talking or watching a movie and it was great fun.  The downside of the yarn tacking is that it's not super comfortable to lay on - you feel all those little balls especially if it's spread out on the ground and the yard is thick.  The upside is that when you're bored, you can spend time tightening any of the yarn knots that have loosened.  ;)

So it would be easy to create a blanket from the duvet.  And you can also use any sheets of fabric (including old sheets - my most recent quilt had a queen flat sheet for the bottom).

If you want to get more complicated, you can sew squares or smaller pieces together to create either the top and/or bottom piece of the sandwich.  The biggest thing to remember with this is that you want the fabric thickness/stiffness to be similar (example, don't use t-shirt fabric and jeans fabric in the same quilt).  If they aren't similar, they will wear out at the areas they connect and your quilt will develop holes more quickly.  You can cut these squares from any fabric you have or buy fabric from a store like Joann's or Michael's.  I usually wait for a sale or coupon and then buy a bunch of "fat quarters" to get the variety of colors I want for the squares.

I don't do the tiny little piece quilting but I enjoy making blankets with medium-sized squares and decorating them with embroidered words and/or pictures.  I have made a lot of blankets over the years as gifts and enjoy personalizing them with words and pictures that capture that person to me.  My mom and I made a chakra quilt for my older sister, for example, where the colors were all super bright chakra/energy colors and the words that were embroidered were all about our love and appreciation for her. It is always on her bed and she never travels without it.

One of my recent quilts was a Christmas quilt.  I couldn't decide whether to do the "fun" side of Christmas or the "silent night" side so I decided to do a two-sided quilt.  I'm attaching pics so you can get the idea of the two sides and the embroidering I refer to.  

Good luck and feel free to ask more questions if anything I said doesn't make sense!  I'm sure there are a lot fancier quilters on here (and more experienced) who can also give great / better advice.  I'm mostly self-taught and not a "real" quilter.
Winter-quilt.jpg
Winter quilt
Winter quilt
Christmas-quilt.jpg
Christmas quilt
Christmas quilt
 
Lito George
Posts: 81
Location: VI, BC
18
hunting trees tiny house building homestead ungarbage
  • Likes 2
  • Mark post as helpful
  • send pies
    Number of slices to send:
    Optional 'thank-you' note:
  • Quote
  • Report post to moderator
Sonja, this is a terrific response. My brain is swimming with processing all the information you posted and I'll get back to you in a day or so. I am excited by your response - so much good information in there - thank you!
 
Lito George
Posts: 81
Location: VI, BC
18
hunting trees tiny house building homestead ungarbage
  • Likes 4
  • Mark post as helpful
  • send pies
    Number of slices to send:
    Optional 'thank-you' note:
  • Quote
  • Report post to moderator
Good Morning,

Well, its early for me, and I have this project on my mind. Still processing what Sonja wrote and yet I have more questions.

Perhaps it would be useful to set the stage for an absolute newcomer to this skill/ art/ handcraft:


Setup with Machinery/ Needles/ Thread:

a) I am receiving either an old Janome 678, or an old Singer (model unknown) - but both are older than 15 years for sure. Would either of those machines cut the mustard in doing projects like this?
b) I have been very intrigued by some Youtube videos showing a hand crank model that can sew through multiple layers of leather including car tires. Do you have knowledge of this machine? Youtube Link
c) Needles: I understand one will need access to readily available needles and that I'll likely break a few. Is there a good source for sourcing needles for old machines like the ones I am getting? (I am up in West Coast Canada)
d) Can the Chinese leather machine up above be used to sew clothes/ quilts etc?
e) What sort of thread would I need to sew the quilt?
f) I wanted to sew custom pillow cases, what thread and needle would I need there?


Quilt/ Blanket Specific questions:

a) Growing up, my old man had a few blankets made out of rabbit skins I believe it was, called a Kaross (South Africa/ Rhodesia/Zimbabwe).
   - It was rough as heck on the underneath stitching joining the multiple pieces up though the skin was soft enough.
   - As a result, I hated using it as a blanket but the top was luxuriously soft.
   - I want to make one now, though I'd like to make sure either I hunt those rabbits down or source them ethically.
   - I see rabbit fur is readily available on Ebay from China, but my own intel shows an exceptional amount of animal abuse there that I simply cannot support through my financial purchases.
   - Any tips on how to make the Kaross?
   - Any tips on where to source the rabbit fur?
   - Any better sort of hide to use?

b) The thought of cutting up my professionally made duvet inner mortifies me.
   - As a rank beginner at all times, isn't it possible to just add to the inner somehow mechanically with more stitching to bring up the warmth factor?
   - If so, what kind of material would I use and could you suggest a good place to source it?


General Sewing Project questions:

a) I'd like to make my own shopping bags eventually - what materials/needles/thread do you suggest?
b) I'm considering alternatives to using plastic bags in the freezer. Though they are convenient, they are hell on the Environment. As such, I was thinking of sewing cotton (?) bags that I can cinch up to hold the food.
   - Is this foolish?
   - Freezer burn?
   - If not foolish, what sort of material might be good for this project?
   - What sort of thread to use?
   - What sort of "tying up" method would be good to use?
c) If I want to make my children backpacks and such (in South Africa we called them rucksacks), where would I source materials for that?
   - I prefer using more affordable materials that aren't found by going to the big box sewing store that is convenient and overpriced
   - I imagine heavy canvas as a start would be good for that project?
   - Could I go to the local Salvation Army/ Thrift Store and find useful material for this?
   - What sort of machine should be used for this?
   - How does one provide structure (ie: stiffness) to the bag walls so that it stands up by itself like the plastic readily available school backpacks one sees commonly at Walmart and such?
d) I have a wide brimmed hat I quite like made out of cotton
   - How would I stiffen the brim so that its not so floppy?
   - Machine to be used/ thread?


I think thats enough for now. This is how my brain works (for better or worse): find out answers to all the questions thats been bubbling around for some time and once I can get those, I can start with the nitty gritty of acquiring the skills to do this sort of thing and eventually become proficient at it. I sure love to experiment whilst I do it and will likely "break the rules" which I find helps me to learn the boundaries of whats possible (and no)t as I go along.

I appreciate any and all points and advice and thoughts - and your time in answering them!
 
Sonja Draven
gardener
Posts: 1460
Location: PNW
894
3
trees books food preservation cooking writing homestead
  • Likes 4
  • Mark post as helpful
  • send pies
    Number of slices to send:
    Optional 'thank-you' note:
  • Quote
  • Report post to moderator
Hi Lito,

More great questions.  :)  Again, please note that I am not the expert on anything so this is based on my experience and knowledge:

Re. sewing machine: I started my first sewing project (a pieced together blanket from old items I had around) using an older machine that had been given to me.  It was super frustrating to use but it worked.  I successfully made the quilt and learned a ton in the process so either of those would likely work fine.  If you end up enjoying it and decide to keep on, it might be worth upgrading.  I have a newer Janome now and it's a real pleasure to work with (even when I break the thread or it jams randomly, it is still so much better than what I used initially).  It also has some fancy/fun stitches that I use on the binding at the end which isn't necessary but I like the added touch (just realized I forgot to talk about that in my first post so if/when you get to the end of my instructions, come back ;)).  Anyway, from a cheap / reuse / newbie standpoint, I think there's a sweet spot between a tool that sucks so badly that you hate using it and therefore don't keep on, and one that is good enough to get the job done and doesn't cost a ton (rather than purchase something expensive to find out you're just not a fan of sewing, period).

A side note: It might be worth taking it to a sewing machine shop if there are issues and having someone look at it if you're not super handy yourself (I'm not).  Might save you some headaches that could easily be avoided.  

That hand crank machine looks pretty cool.  I have not used one but basically if it can sew through tires or animal skins, it can do a quilt.  You're mostly sacrificing power for speed.

Needles: I've only broken one needle in the nearly 20 years I've been sewing so I've either gotten lucky, I haven't pushed my machine too much or it's not super common.  My understanding is that this is more likely if you're trying to sew something beyond your machine's capacity (the rabbit skin blanket is an example) or you're pulling on the fabric to make it go faster than it wants to and putting pressure on the needle.  So yes, you'll want some extra needles in case it happens (for me at least when I'm ready to sew, I'm ready NOW and anything that completely stalls me out is to be avoided).  I don't know a good source for older machines but my guess is that once you know what machine you actually have, you can find anything on ebay (I assume you can order to Canada?)

Thread: You want to buy better thread rather than the cheapest.  I learned that from my mom.  We were super poor when I was a kid and she always had cheap thread as a result.  It breaks VERY easily and you will be frustrated (see above with machine) on a regular basis.  She had finished projects that unraveled too because the thread broke.  I use Mettler (German made, 100% polyester) thread and order it in bulk online so it's a bit better pricing.  I started with one color and then just used it until i could afford another.  It's nice to have the perfect thread color for what you're working on but definitely not necessary (especially since a lot of the stitches don't even show) and sometimes you make do.

Pillow cases: You can use everything the same as mentioned above.  They are essentially empty sandwiches.

Re. rabbit / other blanket: I would suggest starting a new thread with this whole set of questions so you're getting attention from people who do that sort of craft.  I have seen movies and read books that walk through the process but I haven't actually done it.  I have heard they are incredibly warm and yes, rabbit fur is amazingly soft.

Duvet: Sort of?  If the inside is thick and full and just all shifted to one side, you could spread it all out and then do the tacking I referred to in order to hold it in place.  If it's wadded up and separated or in balls or not very thick/warm, you're not going to get more warmth by adding stitches.  Many duvets really aren't made for warmth as much as fluff and appearance so unless you open it and add something that's made for warm, or I suppose sew another blanket along one flat side of it (doubling it) you're not going to get more warmth.  Maybe leave the duvet alone for now and consider it for a future project when you have more confidence?

Re. general sewing questions:

Shopping bags: I haven't made my own but my niece made me one where she used thick fabric like jeans material.  It works great and has held up well (although it took me some time to start using it - it's so cute, I didn't want to get it dirty or worn out).  Only negative is that it's heavy enough that sometimes the cashier has to come over to self checkout and verify I'm not sneaking unpaid merchandise in there because it's heavier than the machine thinks bags should be.  Same needles and thread as above.

Freezer bags: I don't think fabric would work well for the freezer because of the drying aspect but someone else might know more on that one.  I would post that question in the Zero Waste forum.

Backpacks: The thicker fabric might be a challenge for a standard machine.  I haven't done this either.  I would post this question in either the Zero Waste forum or the Kids forum (a moderator might move it if they think it will work better somewhere else).

Oh, on that note: You might already be paranoid and cautious with 3 little kids, but sewing machines are fascinating to kids and the needle can do damage.  My sister sewed her own finger with the needle when she was a teenager so it's pretty easy to do and you want to make sure to keep your kids away from where you're working.  I would suggest keeping all your sewing stuff high away from them too.  Not everything is dangerous to them but it sure is fun to unravel a spool of thread all over the house.  ;)

Also, forgot to mention before - if your machine has a zigzag option, and you're using cotton fabric that unravels (like quilt fabric) you'll want to use that because otherwise the fabric will slowly unravel with use / washing.  This isn't a problem if you're using old jeans material, t-shirts, etc.  If it doesn't have zigzag, there are other ways to combat this.

Good luck!
 
pollinator
Posts: 494
Location: Klickitat, WA (USDA zone 8, Sunset zone 5)
8
  • Likes 5
  • Mark post as helpful
  • send pies
    Number of slices to send:
    Optional 'thank-you' note:
  • Quote
  • Report post to moderator
I agree with Sonja, but have additional comments.

1) Older sewing machines can often be better than newer ones. I once sewed a canvas tent with my all-metal straight stitch Singer Featherweight. As long as that older Janome is well-adjusted, it should be just fine. In fact, a very good move on your part would be to take the machine to a sewing repair place and have it checked out. A good place will also offer classes for beginning seamsters. The very best teacher is someone you personally know who knows how, the second best teacher is a pro level teacher. It's certainly possible to teach yourself from scratch, especially with youtube and DVDs, but a good teacher can save you a lot of time and frustration.

I'd be leary of the chinese machine. I once saw a modern chinese version of my genuine Singer Featherweight. It was advertised s being made from the original plans used by Singer, and it sure looked like mine. Maybe it was, but the fact was that a pro sewing machine repair person could never get it to work correctly, and he really tried. Metal quality, machining to exact specs? Dunno, just that the buyer had wasted her money on a cute doorstop. Also, factory machines are more powerful than home machines, are designed to run at higher speeds and need to be bolted into the floor supports, otherwise they "walk" all over. Maybe not the best thing for a beginner. Sailing nuts who make their own sails and take their sewing machines with them on the boat favor older machines with outside pulleys and crank wheels, as they can be converted to hand crank machines or treadles. I know that one of their favored machines is a particular Pfaff, but can't remember which one. (When I made the aforesaid tent, I used the crank wheel every time I came to a seam crossing. My machine forgave me.) I believe there is at least one internet forum on sail making, you might want to spend a little time browsing. I've been intrigued by converting a machine myself, but never done it. My childhood best friend's mother was a very fine seamster, and she never used anything but a treadle. Also, I believe there is at least one company (Amish) out there that takes a modern machine and coverts it to treadle. I think it is easier to find a consistent rhythm with a treadle than with a hand crank, and I like to have both hands free to manipulate fabric as I sew.

2) I am highly dubious about fabric freezer bags. Fabric by nature is permeable, You'd need to use some high-tech sports fabric and seal all seams. You can now buy silicon food bags that can go in the freezer. Or you can use what my mother used - aluminum foil. It's reusable several times. When my mom got her freezer in the 50s, they sold waxed cardboard freezer boxes, similar to chinese take-out boxes. Dunno if anyone still uses those for freezing, but I'm sure you can find the boxes at a restaurant supply. Personally, I use canning jars whenever possible.

3) If you like your duvet cover, then keep your duvet cover. Just find a new duvet for the cover to cover. In my neck of the woods, you can find used down comforters for reasonable prices - $30 to $50, depending on size. Used polyester ones are even cheaper. The problem with wool as a filling is, as you've discovered, that it will shrink and clump. So will cotton filling. You can buy wool or cotton batting in quilt-sized pieces and use several layers, but even then, you'll have to both seam and tack it sufficiently to hold the layers in place. Down will also clump, but the answer to that is to wash your down comforter in your washing machine, then throw it in the dryer with a couple of tennis balls, and not on the highest heat setting. Maybe you could try that with your lumpy wool comforter before you give up on it?

Another idea would be to find several wool blankets and seam and tack them together to replace your lumpy wool duvet.

4) Backpacks - yes, you can. Here's a good source - https://www.thegreenpepper.com
 
Posts: 62
Location: San Martin, CA
9
3
  • Likes 4
  • Mark post as helpful
  • send pies
    Number of slices to send:
    Optional 'thank-you' note:
  • Quote
  • Report post to moderator
I am a quilter, however I treat quilting as a hobby, not for utilitarian purposes.  Therefore I do not hand tie my quilts, I machine quilt.

As far as needles, domestic sewing machines all seem to use the same sewing machine needle types.  Here is some info regarding sizing and type of needles. You have several choices of size and type depending on what you are sewing, and what thread you are using. I typically use an 80/10 Microtex for most of my patchwork and quilting.   It is also recommended to change the needle every other time you replace bobbin thread.

https://www.schmetzneedles.com/learning/pdf/schmetz-needle-chart.pdf

I use a cotton thread for patching pieces together.  I iron the seams on the back side so that the top patchwork lies flat as you go.  Once I piece together a "top" (patchwork) I layer batting and backing to make a quilt "sandwich".  The backing may just be one piece of fabric, or it may be pieced, which is a good way to use up scrap fabric.  It's best to have the backing larger than the batting, and the batting larger than the quilt top.  There are several ways to make the "sandwich" stay together and not shift which is called basting.  People would use safety pins, little plastic tacks pins with Pinmoors, baste with thread (temporary large stitches) or use a basting spray. Then I machine quilt, usually using polyester thread, but you can use cotton thread.  Aurifil 50 wt. is excellent for both patchwork and quilting the layers together.  I just like polyester for quilting the layers because it doesn't shrink to leave a crumply appearance as much as cotton, and it's stronger.  If you have a "walking foot" come with your sewing machine, it will help the layers not shift while you quilt.  You can "stitch in the ditch" meaning stitch in the seams from the top to secure all the layers together.  Or you can do what modern quilters like to do, stitch in straight lines across the whole piece.  Once the piece is quilted, you need to cut the layers so that you have a nice straight edge on four sides to make it a perfect square or rectangle.  Then you apply binding, which is strips of fabric sewed end to end, usually 2-1/2" wide folded in half.  You match the raw edge to the edge of the quilt, sew it with a 1/4" seam, then fold it over to the other side of the quilt and sew the fold edge to the back.  Yeah, you probably could watch a few YouTubes on all this to really get what I'm saying!  As far as zig zag as someone else mentions, quilting is generally done with 1/4" seams with straight stitch and the "seam allowance" is ironed flat and placed against batting and secured by quilting.  Then after it's bound there should be no cut edges left exposed to fray.  Quilters don't generally use zig zag unless they are doing something artistic like applique or thread painting.

I sew on a mechanical Janome Mystyle 100 and a Janome Horizon Memorycraft 8200 QCP which has all sorts of fancy bells and whistles on it.  I like to do my patchwork on the little Mystyle and do my quilting on the fancier machine.  Old mechanical Singers are good dependable machines.  The newer ones electronic ones are cheaply made and aren't as good quality.  Janome is a good mid- to expensive range of sewing machines.  Bernina is crazy expensive.  I like to do patchwork with my littler Janome Mystyle, and quilt with the other because it has a "dual feed" foot that is like a walking foot.  I also can change out the foot and do what we call "free motion quilting" and go rogue with my stitching.

As far as your oversize Duvet, you could just turn it inside out and stitch a new seam to make it smaller to match the comforter and turn it back out again.  If I understand the definition of a Duvet, it's the cover for a stuffed comforter.  As to the lumpy comforter itself, I personally would just get rid of it if throwing it into a dryer with dryer balls (or when I was a kid... tennis shoes) doesn't fluff it up properly

 
Lito George
Posts: 81
Location: VI, BC
18
hunting trees tiny house building homestead ungarbage
  • Likes 2
  • Mark post as helpful
  • send pies
    Number of slices to send:
    Optional 'thank-you' note:
  • Quote
  • Report post to moderator
A ton of very useful input here folks. I wanted to let you all know I'm processing this good stuff, and will revert properly in due course. Thank you for making my brain work
 
Lito George
Posts: 81
Location: VI, BC
18
hunting trees tiny house building homestead ungarbage
  • Likes 1
  • Mark post as helpful
  • send pies
    Number of slices to send:
    Optional 'thank-you' note:
  • Quote
  • Report post to moderator

Lito George wrote:A ton of very useful input here folks. I wanted to let you all know I'm processing this good stuff, and will revert properly in due course. Thank you for making my brain work


OK - its been a boot camp of learning trying to make this Singer Stylist 513 work. Its around 46 years old, and whilst I learned how to route the thread correctly, and get the needle threaded correctly (quite a series of twists and turns), I also found out how to get the bobbin thread out. Got the manual from Singer too.

First issue was that the machine was abused. Bits broken off, and even the bobbin holder (plastic ABS) had been cut open and scraped, preventing the lower bobbin thread from coming out. I managed to fix that.

Oiled and cleaned out everything - which improved things beautifully. Removed a lot of working parts to get this far. Replaced them all.

Then, the material wouldnt feed properly (at all). I removed the bottom cover to find out the plastic worm gears had stripped each other out. I managed to shift the worm gears to still engage and I was chuffed with my bit of McGyvery.

I oiled everything down there which was very welcomed by the machine and then did a gentle test run. The balance of the plastic worm gears stripped each other out in short order.

So frustrating.

So, I learned a lot of lessons and I guess that was a couple hours well spent. I feel way more confident around machines now and why this one wasnt working. There were MANY occassions i wished I had a helping hand though. Glad I perservered (self taps on shoulder).

OK onto serious stuff: where does one recycle machines? (Parts are very very difficult to come by). Thanks folks.
 
Lito George
Posts: 81
Location: VI, BC
18
hunting trees tiny house building homestead ungarbage
  • Likes 3
  • Mark post as helpful
  • send pies
    Number of slices to send:
    Optional 'thank-you' note:
  • Quote
  • Report post to moderator

Lito George wrote:

Lito George wrote:OK onto serious stuff: where does one recycle machines? (Parts are very very difficult to come by). Thanks folks.


Update: the internet is singledhandedly the most useful medium in use today for information dissemination. Thats my dissertation. Amen.

No need to recycle. The Janome lady couldn't organise ice in the Antarctic (or else she was having me on from the beginning), so I am stuck (gratefully) with the Singer.

I found through a variety of sources (Ebay/Amazon), USA based shops and local shops that if I bought the parts from brick and mortar shops, the price would be....4x higher than if I bought from Amazon.

I also found the self same parts on Ebay at half the Amazon cost. Cheap as chips, I have bought two full sets of replacement gears and this makes me feel good to be reusing the machine as best as possible and if I have to pass it on one day, then I'll give the next owner the best chance of keeping it running well into the century.


Maintenance tomorrow (perhaps) and I'll start to provide feedback once the machine is up and running. New skillset: becoming a sewing machine tech. lolz....

 
Lito George
Posts: 81
Location: VI, BC
18
hunting trees tiny house building homestead ungarbage
  • Likes 1
  • Mark post as helpful
  • send pies
    Number of slices to send:
    Optional 'thank-you' note:
  • Quote
  • Report post to moderator
Good Morning All,

It's a funny thing capitalism on the internet: I've seen well meaning people offers solutions in a way that causes fear in order to sell a product.

In researching how to fix or replace four gears worth on a sewing machine made about 40 years ago (no iFixit's back then), I came across a video from a fellow linking to an apparently non associated website encouraging purchase of a jig and a DIY manual with photos of how to repair because, "even with the jig and manual by my side, I took the better part of over two hours to get it all right. Buy this manual with an unforgettable 10% discount code and you'll have the only ever chance of fixing this in the world".

Enough to strike cold fear into any living beings heart.

So I took on the task last night. Luckily for me, tools are all so important for living well, and I had what I needed (or close to it). Replaced all the gears (I now have the feeder feet working - yay!), set screws and such in under 40 minutes and it runs like a top. I think.


Here's where the cookie crumbles: the thing sews awfully. Snapped thread every 30-45 seconds. Confirmed the thread is routed correctly.

The actual sewing looks like my 3 year is trying to do it and there are huge gaps, with no thread through the upper cloth, though I see that needle penetrating the cloth furiously.

Maybe I should join a sewing group for ladies, enjoy a cup of tea and get more knowledge passed my way than I could otherwise handle in a year.

I'll post a pic or two in due course.
 
pollinator
Posts: 875
Location: Kansas
231
forest garden fungi bee medical herbs writing greening the desert
  • Likes 4
  • Mark post as helpful
  • send pies
    Number of slices to send:
    Optional 'thank-you' note:
  • Quote
  • Report post to moderator
Your problem is the bobbin thread not catching. Lots of reasons for that, but leave the material out of the machine, open the bobbin cover and do a few very slow stitches without fabric. Watch the process. The needle could be a 50th of an inch off and missing the thread. Simple enough to adjust if that is the case. Or it could be deeper in the workings of the machine (mine was a singer touch-and-sew with stripped gears). If the bobbin case stops spinning, or hesitates and starts again, it's deeper and probably gear related. If the bobbin case spins normally you'll see the process of the thread coming around, the needle coming down, and likely missing the loop of the bobbin thread. In any case this will give you a better idea of where to look.

Also check the upper thread tension. It can be threaded perfectly, and if the tension is too tight or loose it will also cause gaps and missed threads.

That you've gotten it to this point is fantastic. You've learned how to fix your own sewing machine, which very few people bother to do.
 
Lito George
Posts: 81
Location: VI, BC
18
hunting trees tiny house building homestead ungarbage
  • Likes 1
  • Mark post as helpful
  • send pies
    Number of slices to send:
    Optional 'thank-you' note:
  • Quote
  • Report post to moderator
Thank you Lauren,

Your Sherlock Holmes hat was fitting perfectly well with that post of yours. The bobbin thread is indeed not catching. So very frustrating at the same time - I'm itching just to have a few stitches go my way ya know?

I'm going to watch some discovered in depth tutorials on thread tension and then find someone who can educate me why the bobbin thread isn't doing its thing. Makes sense now why the original bobbin has been cut with a knife (apparently) and why I had to use a ginger technique in smoothing it all down so that nothing could catch.

I am guessing this machine was neglected or simply never worked well, sat in the basement for a few decades, then was rediscovered after the GrandMa deceased.


I appreciate your feedback and interest and encouragement - its very helpful
 
jacque greenleaf
pollinator
Posts: 494
Location: Klickitat, WA (USDA zone 8, Sunset zone 5)
8
  • Mark post as helpful
  • send pies
    Number of slices to send:
    Optional 'thank-you' note:
  • Quote
  • Report post to moderator

Lito George wrote:Thank you Lauren,

Your Sherlock Holmes hat was fitting perfectly well with that post of yours. The bobbin thread is indeed not catching. So very frustrating at the same time - I'm itching just to have a few stitches go my way ya know?

I'm going to watch some discovered in depth tutorials on thread tension and then find someone who can educate me why the bobbin thread isn't doing its thing. Makes sense now why the original bobbin has been cut with a knife (apparently) and why I had to use a ginger technique in smoothing it all down so that nothing could catch.

I am guessing this machine was neglected or simply never worked well, sat in the basement for a few decades, then was rediscovered after the GrandMa deceased.


I appreciate your feedback and interest and encouragement - its very helpful


The machine probably worked fine when it was sold. It's not difficult to knock the timing out of whack, a hard blow - such as dropping the machine - could do it. I've never tried to fix a timing issue myself, but I know it can be done, and I'd bet there are YouTubes about how to do it. Don't write it off yet, these all-metal machines are usually very fixable. And you are obviously comfortable with mechanical things.

Grandma probably stored it in the basement because a) she someday intended to see whether it could be fixed and/or b) she couldn't bear to throw something away that she thought could be fixed.

My mother, a depression kid, died with 4 vacuums - one that functioned fine, and three out in the garage in various stages of "not working quite right".
 
Lauren Ritz
pollinator
Posts: 875
Location: Kansas
231
forest garden fungi bee medical herbs writing greening the desert
  • Likes 1
  • Mark post as helpful
  • send pies
    Number of slices to send:
    Optional 'thank-you' note:
  • Quote
  • Report post to moderator
I found a lot of information about fixing bobbin timing and thread tension when I was trying to figure out why the thread was jamming (which turned out to be stripped gears). The information is out there, and the procedure for fixing the problem should be the same for most of the older machines. Mine was manufactured in the 60's and most of the information I found was still applicable.

Don't give up on it. It's been sitting in Grandma's basement waiting for someone who can make it shine again. :)
 
Lito George
Posts: 81
Location: VI, BC
18
hunting trees tiny house building homestead ungarbage
  • Likes 4
  • Mark post as helpful
  • send pies
    Number of slices to send:
    Optional 'thank-you' note:
  • Quote
  • Report post to moderator
[quote=Lauren Ritz
Don't give up on it. It's been sitting in Grandma's basement waiting for someone who can make it shine again. :)

I took your encouragement to heart, and although very frustrated for 3 weeks (after watching a very good tensioning video, and watching my thread repeatedly break after seconds), I tried again recently to get it going.

And the same thing happened. Something is wrong between thread tension, the different settings on the machine for zig zags, thread count per inch, etc etc etc where nothing I tried made it work. I really became exasperated after trying with this machine for months.

New gears all around, oiling, cleaning etc etc.


So enter this older beauty:

She's about 54 years old, runs like a top so far, and showed me how easy sewing should be. I've been cleaning years of staining off of her and although the woman who sold it to me was an overbearing awful human being who deceived about a number of things (including the photo of another mint quality machine to advertise this rather beaten up model), I am at peace with it all.

Its quiet, sews very quickly and I am now going to take the Singer with new gears to the Sally Anne so that someone else with more knowledge, time and inclination can sort it out for free :)


20190902_113409.jpg
Morse 4100 made by Toyota in Japan.
20190902_113426.jpg
This shows the Good Housekeeping seal of approval which actually meant something back in the day.
20190902_113432.jpg
I dont have any attachments though - I would dearly love to have those.
20190902_113445.jpg
1/15th of a HP. How cute! (you'll never find that today on modern machines)
 
Posts: 3
  • Mark post as helpful
  • send pies
    Number of slices to send:
    Optional 'thank-you' note:
  • Quote
  • Report post to moderator
Regarding the Quilt you have to create a wadding to go inside the quilt cover and it has to be tacked by hand to stop it moving and bunching up during use or when washing. You cannot use a sewing machine to do this if you are going to use a thick wadding of wool
 
Lito George
Posts: 81
Location: VI, BC
18
hunting trees tiny house building homestead ungarbage
  • Mark post as helpful
  • send pies
    Number of slices to send:
    Optional 'thank-you' note:
  • Quote
  • Report post to moderator
Thanks Florie. I think there are some machines that can do it (like the leather ones I have my eye on and cannot afford yet = $$$$$$), but you're right - it seems I will have to use these mitts the good Lord gave me and make something decent. Obrigado.
 
Posts: 16
8
  • Likes 6
  • Mark post as helpful
  • send pies
    Number of slices to send:
    Optional 'thank-you' note:
  • Quote
  • Report post to moderator
Oh I love quilting! It's a great way to start making things out of fabric. There is a lot of expensive gear and fancy technique in the quilting world, but the way I do it is easier. As a beginner, I would strongly recommend doing it by hand. While it seems slower, the trouble with a machine is that you make mistakes faster! Working by hand, your hands get to feel what you're doing and you learn that way too. I think handmade quilts look better too! All you need to do is a straight stitch and get your sandwich of fabrics to stick together.
My favourite quilts I made from old bedsheets. As long as your fabric is good quality cotton and the thread you use to sew is cotton it'll all be good. You can use a whole bedsheet as your backing fabric and it'll give you the dimensions you need. Store bought quilting fabric is expensive! You can use quilting pins to hold it all together, but I just use broad tacking stitches in a contrasting colour. Its easier to handle and works just as well, I find it less fiddly. So for me I can make a quilt with an old blanket/or bought wadding, some old sheets cut into strips, a pair of scissors, a needle, and spool of cotton. I find it easier to get it done if I don't have to get heaps of gear out.
A strip quilt is a great quick way to make a quilt. This one pictured uses a raggy edge too. That means the strips on top are laid over each other and a frayed edge is visible as a frill.  If you find some bits are poorly sewn you can just go back over it. It builds up into something beautiful. I like wool wadding for a lightweight warm quilt. The quilt is really used like you use a coat. It keeps the cold off you and the warm in... so I use our quilts over a duvet in winter. And without a duvet and over sheets in early cool of summer mornings.
I made this quilt for my son out of old second hand bedsheets from the opshop. There is another plain sheet underneath, and I just used scraps for the edging.
672A18EA-A2DF-4D8A-9BD3-E085500B0961.jpeg
[Thumbnail for 672A18EA-A2DF-4D8A-9BD3-E085500B0961.jpeg]
 
pollinator
Posts: 717
Location: West Yorkshire, UK
286
  • Likes 4
  • Mark post as helpful
  • send pies
    Number of slices to send:
    Optional 'thank-you' note:
  • Quote
  • Report post to moderator

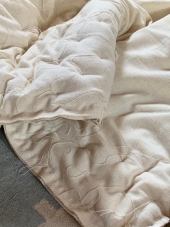
Victoire Peverill wrote:Oh I love quilting! It's a great way to start making things out of fabric. There is a lot of expensive gear and fancy technique in the quilting world, but the way I do it is easier. As a beginner, I would strongly recommend doing it by hand. While it seems slower, the trouble with a machine is that you make mistakes faster! Working by hand, your hands get to feel what you're doing and you learn that way too. I think handmade quilts look better too!  


I just finished hand quilting a patchwork log cabin quilt that I started at least two years ago (maybe three).  It had some long periods of hibernation!  Now I'm hand piecing another patchwork quilt with hexagons.  Piecing by hand means my corners match up much more nicely than the log cabin which I pieced by machine.  I've only made maybe five or six quilts, but I really do like making them by hand, particularly the quilting stitches, despite it taking so much longer.  I don't even need a quilting frame;  after basting the top, wadding and backing together, I just haul it onto my lap and start quilting away (thank you youtube).

I love your quilt Victoire.
 
Lito George
Posts: 81
Location: VI, BC
18
hunting trees tiny house building homestead ungarbage
  • Likes 1
  • Mark post as helpful
  • send pies
    Number of slices to send:
    Optional 'thank-you' note:
  • Quote
  • Report post to moderator

Victoire Peverill wrote:Oh I love quilting! It's a great way to start making things out of fabric. .


I wanted to say thank you Victoire for this awesome, encouraging post. I think it may push me over the edge :)
 
pollinator
Posts: 121
Location: Treasure Coast, Fl
25
dog duck forest garden rabbit chicken bee
  • Likes 3
  • Mark post as helpful
  • send pies
    Number of slices to send:
    Optional 'thank-you' note:
  • Quote
  • Report post to moderator
Hi! following this tread with great interest! one thing i wanted to recommend as a beginner myself. Google "Felt rag quilt tutorial" They are really easy to make, super adorable, cozy and since i read you have little ones you can take all their old baby (little) felt blankets and use them up as squares. It will be a functional memento of when they were babies! I was able to make 2 twin sized ones for my girls using all their baby blankets and since they are usually pastel colors, they color coordinated easily. Mine love theirs.
!
rag-quilt-tutorial_072114_0106.jpg
[Thumbnail for rag-quilt-tutorial_072114_0106.jpg]
 
Lito George
Posts: 81
Location: VI, BC
18
hunting trees tiny house building homestead ungarbage
  • Mark post as helpful
  • send pies
    Number of slices to send:
    Optional 'thank-you' note:
  • Quote
  • Report post to moderator
Oh, had I started this thread two years ago - all my baby blankies have been donated. Shucks! What a great idea.

I like the frayed edge style as well as the straight edge. Your suggestion to use blankets though has inspired me to cut up the existing blankets to make something more personal and homey/ homely whatever the local preference is. Comfy cozy and personal is my thought.

If thats your quilt, I love it!
 
Vanessa Alarcon
pollinator
Posts: 121
Location: Treasure Coast, Fl
25
dog duck forest garden rabbit chicken bee
  • Mark post as helpful
  • send pies
    Number of slices to send:
    Optional 'thank-you' note:
  • Quote
  • Report post to moderator
😬 nope not mine. I didn’t have pics of mine so I pulled one from the internets as an example. However other than the colors, they look exactly the same. One is pink and green and the other one is pink and purple. I love reusing things like this and currently have a pile of T-shirt from their school and summer camps that I plant to make into an “elementary” quilt 😉 using the same method. I love unfinished ends.
 
Lito George
Posts: 81
Location: VI, BC
18
hunting trees tiny house building homestead ungarbage
  • Likes 1
  • Mark post as helpful
  • send pies
    Number of slices to send:
    Optional 'thank-you' note:
  • Quote
  • Report post to moderator
Oh my! What a great idea. I am going to do JUST THAT. Yikes, I think about all the stuff I've given away. I could have used them to make so much by now!

Love the creativity. Perhaps I'll post my efforts one day. Dont expect miracles of something beautiful. Hehehe!
 
Posts: 75
Location: Zone 11B Moku Nui Hawaii
37
  • Likes 3
  • Mark post as helpful
  • send pies
    Number of slices to send:
    Optional 'thank-you' note:
  • Quote
  • Report post to moderator
Good job on finding an older machine in fine shape.  Any time there's a machine with 'stripped gears' it's generally got tons of abuse problems other than just the stripped gears.

Your Morse looks like a great machine with loads of character, to boot!

Last year here seemed to be the year of old Singer 401A machines.  Bought one for $15 at a yard sale which included the sewing desk (which wasn't very nice and ended up being replaced with a $35 cabinet from a different yard sale) and another Singer 401A found at the local dump.  They're wonderful old machines and I much prefer them to the newer machines.


That's the free one found at the dump.  This is the 'before' picture, I finally did get it cleaned up a bit.


The cabinet one, with it's original cabinet.


It's an all metal machine except for one gear made of some sort of resin/fiber sorta stuff.  Direct drive, too.  No belts to wear out.  I don't think there's any new machines like this one anymore.

A good sewing machine makes all the difference!
 
Lito George
Posts: 81
Location: VI, BC
18
hunting trees tiny house building homestead ungarbage
  • Likes 2
  • Mark post as helpful
  • send pies
    Number of slices to send:
    Optional 'thank-you' note:
  • Quote
  • Report post to moderator
Thanke Niele! If you mean scratched and somewhat beaten up in your reference as "character", I'd say you are bang on - hahahaha.

Love your finds btw. That Singer looks awesome to me and something I'd happily parent and operate.


I have two frustrations with my machine.

a) It really struggles to sew through lets say a seam on denim pants and an additional single layer of denim on top of that. Can't penetrate it almost. I find momentum to be helpful (in addition to using my hand sometimes to force the needle through - new needles btw), but its quite limiting in terms of depth of what I can sew.

b) I struggle to sew in line with an edge of material. Invariably, I deviate from the edge causing a less than lovely appearance. I understand this is because I dont have a "hemming" foot for my machine. (?). I dont know how to get one either, given the advanced age of my Toyota. (It always gives me a thrill when I think of my machine being made by that company because it was made in a time truly focused on quality and thus longevity)
 
Dado Scooter
Posts: 62
Location: San Martin, CA
9
3
  • Likes 2
  • Mark post as helpful
  • send pies
    Number of slices to send:
    Optional 'thank-you' note:
  • Quote
  • Report post to moderator
Hi Lito... revisiting this thread.  Old, old Singers are desired by many quilters, but I suggest just junking a Singer with plastic gears.  You can buy a brand new Singer for a very low price, but please do not do that... they are very low quality now.  Probably why the Janome dealer looked at you sideways is because your machine is probably not worth resuscitating.  Reconditioned Featherweights are much, much desired now, and they are often repainted in really fancy colors and resold for about $800.  But you can get a good quality sewing machine brand new for less than that.  Do not buy a any Singer or a cheap Brother because they are cheaply made offshore in wierd places.  The best sewing machines are made in Japan or Switzerland.  

Oh, and about breaking needles... I broke three needles in one sitting.  I kid you not.  I did it while free motion quilting and messing around with different threads that required different tensions.

Oh, and the question about shopping bags... I own two shopping bags that were hand made by an autistic child under the mother's supervision.  They were made out of two layers of quilting cotton.  You sew the "pretty" or right sides lined up and then turned inside out so that the raw edges are inside the bag, and then "top stitched' so that the seams are stitched tight so they don't roll out of shape.  They are quite nice, and made out of Asian prints.
 
steward & bricolagier
Posts: 14680
Location: SW Missouri
10143
2
goat cat fungi books chicken earthworks food preservation cooking building homestead ungarbage
  • Likes 3
  • Mark post as helpful
  • send pies
    Number of slices to send:
    Optional 'thank-you' note:
  • Quote
  • Report post to moderator
Lito George: I just read through this whole thread with interest. I sew, and I prefer older machines.

A thought on your hemming foot, and the attachments: I can't prove it exactly by the pictures, but I'll give you 90% odds that's a normal shaft size, and attachments from most machines will fit it. I suggest hitting thrift stores and looking for boxes of etc sewing machine attachments, buy them cheap, bring them home and try them on. If they don't fit, toss them in the back of a closet, if you get another machine later, they may fit that. There are not a whole lot of different shaft sizes (shaft being the part the needle ends up on) and there's a lot of attachments wandering the world, that no one wants. They are cheap.

As far as needing a hemming foot, you absolutely do not. They are nice, but they are not a need. I have gone years with just a zipper foot (really narrow) on my machine. It's more paying attention, and feeding the fabric in smoothly. If you do want one, check the attachments from the thrift store, boxes like that always seem to have extra feet in them, of various types, try them and see how they do.

Mostly the wavering is like driving a car. If you are paying attention to what is coming up ahead of you, and keeping your speed smooth, it's a lot easier to stay exactly in your lane. If you only watch 10 feet ahead of you, and aren't running a  smooth speed, it's difficult to casually hold  your lane (think of a kid learning to drive, that's what they do, they don't look far enough ahead and they don't keep their speed constant.) When sewing, your lane is the part that is coming up into the machine, watch to be sure the fabric is being fed in smoothly, that you aren't moving it around much when it's coming in. (When you stop the needle to adjust the bulk of your fabric, leave the needle DOWN in the cloth, holds it in place.)

An exercise: Get a sheet, old or new, doesn't matter, you won't damage it, and practice making good straight lines at the edge of the cloth. You don't have to fold it or hem it or anything, just get used to how it feels to stitch a smooth line, how you have to adjust the cloth coming in every so often, how to watch the cloth coming in as well as where the needle is. Most people when they learn practice on smaller pieces of cloth, you learn a lot more by sewing on big, light pieces like sheets. Making a series of parallel lines on a sheet is an excellent exercise, and doesn't hurt the sheet.

Welcome to the rabbithole of sewing! Of saying "crap! I threw that out!! I want it back!!" And when you are at the thrift stores, or yard sales, check for fabric yardage. Fabric, machines, attachments etc are all things that people toss when grandma dies, or when they give up on a too ambitious project, or move. Another good exercise is to read the labels on a bunch of clothes at thrift stores, learn what 100% cotton feels like, so you'll know it when you see a chunk of cloth and are wondering what it is. Some cloth has it written on the selvage edge what the content is, most does not. (Selvage is the long edges of the fabric where the weaving goes back the way it came, not the cut edge, the part the loom made.)

And one more thing, you said something about your machine not wanting to go through denim. If it's where the seam is on something like jeans, and it's a visible one, that looks cute (like on the outside of the pants leg as opposed to the inseam, which is just a normal seam, doesn't look like much) those are 4-6 layers thick, and you can't go over them easily without an industrial machine. Add a layer of your own, and you are now 5 or 7 or more layers deep, of heavy cloth.

What I do when I do something like hem jeans, is cut my length long enough that I can double roll it (about 1.25 inches past where you want it to end up) then cut out the machined seam one fold up, as close as you can to it. Roll the hem twice, as you come up to the seam (which is only one layer doubled over now) stop, tie it off, start again on the the other side. The fabric in the double roll will hold that bit up, and you don't have to sew over something evil. I drew it for you. If you are doing something that isn't a hem, look at the concept of how I do hems, see where you can remove some bulk and even better, if you can make it hold still enough that you can just skip right over that area. I do both. The double roll of the rest of the hem holds it still.


Yay, with a typo in the artwork. Oh well.

:D
 
Lito George
Posts: 81
Location: VI, BC
18
hunting trees tiny house building homestead ungarbage
  • Mark post as helpful
  • send pies
    Number of slices to send:
    Optional 'thank-you' note:
  • Quote
  • Report post to moderator
Pearl, you are well named :)

Thank you for your encouraging words, time taken to draw a diagram and advice. I read your advice when it was posted and instead of responding right away, I decided to practice right away. I've been doing so, and realise that I fell prey to my old fears (perfectionism), instead of listening to my newer mantra, "its not the tool, its the craftsman".

I dont quite get the diagram just yet, but I will. Its been a crazy few weeks and that remains for the next quarter.

In the meantime, I continue to practice as I can, and line up proper good looking seams. I thank you for sharing your experiences and wisdom with me!
 
Pearl Sutton
steward & bricolagier
Posts: 14680
Location: SW Missouri
10143
2
goat cat fungi books chicken earthworks food preservation cooking building homestead ungarbage
  • Mark post as helpful
  • send pies
    Number of slices to send:
    Optional 'thank-you' note:
  • Quote
  • Report post to moderator
Lito George: Practice is really the most important part, and practicing without trying to make something is MUCH easier (do you want to learn to drive on a quiet dirt road or on the freeway in a large city?) Learn how to work your tool, THEN learn how to use it to do what
you want.
Keep that diagram, look at it later, it'll make a lot more sense. Basically, it's how to get past having too many layers of fabric for your machine to handle.  One of the major places most people see that is hemming jeans, but once you understand the concept, you can adapt it wherever you need it.

And I have this thread on watch, if I can be of use, say something here or PM, and I'll get to it soon :)
I LOVE seeing people learn to sew! :D

 
Posts: 4
1
  • Likes 2
  • Mark post as helpful
  • send pies
    Number of slices to send:
    Optional 'thank-you' note:
  • Quote
  • Report post to moderator
Quilter, sewist, fiber artist here. The best machines are the older solid metal ones that are well tuned. That said I have a PFAFF computerized model that is over 20 years old and still runs great. It feeds both the top and bottom of the quilt sandwich at the same time so eliminates the uneven bunching problem.
If your needle breaks on thick fabrics you need a thicker needle. They come in sizes so you can adjust to the material you are using.
I am not sure about this for freezing but you can make beeswax coated fabric that is reusable. Also can wax canvas for rucksacks. Hope this helps.
 
Posts: 8
  • Likes 2
  • Mark post as helpful
  • send pies
    Number of slices to send:
    Optional 'thank-you' note:
  • Quote
  • Report post to moderator
Hi everyone, Gerorge Lito I wonder how you got on in the end with improving your bedding?
Vanessa, have you got to the point of making a quilt with all the t shirts yet?
I ask, because I have been collecting knitted cotton (jersey) fabrics and would like to make a quilt with them. They are mostly my son's pyjamas. He goes through them at the knee at a right old rate, so they can't be handed down. I've patched and the patches wear through in no time, so i figured the only thing they were good for now was a quilt.
The youtube tutorials i have seen with jersey fabrics all recommend using fusible (iron on) interfacing, to help the pieces keep their shape. I have done enough sewing to agree that I need something to help them keep shape.
I don't want to use a polyester chemical combination on my quilt though. Has anybody resolved this problem already?
could I starch the items? use some kinds of scrim? how would I get it to stick? Has anybody used spray on baster? I never have. that's another chemical, although i suppose it would wash out?

If anybody has any ideas it would be much appreciated.

Thansk  
 
T. Down
Posts: 8
  • Likes 1
  • Mark post as helpful
  • send pies
    Number of slices to send:
    Optional 'thank-you' note:
  • Quote
  • Report post to moderator
Well I have done some more searching and have found some videos showing homemade spray baste made with flour, water, salt and rubbing alcohol.
I am planning to try using this solution to glue some light muslin to my jersey fabric pieces instead of using vilene. I will report back once I get all the stuff together.
 
this tiny ad is trying to guide you away from the dark side!
permaculture and gardener gifts (stocking stuffers?)
https://permies.com/wiki/permaculture-gifts-stocking-stuffers
reply
    Bookmark Topic Watch Topic
  • New Topic