• Post Reply Bookmark Topic Watch Topic
  • New Topic
permaculture forums growies critters building homesteading energy monies kitchen purity ungarbage community wilderness fiber arts art permaculture artisans regional education skip experiences global resources cider press projects digital market permies.com pie forums private forums all forums
this forum made possible by our volunteer staff, including ...
master stewards:
  • paul wheaton
  • Anne Miller
  • Carla Burke
  • Nancy Reading
  • John F Dean
  • Timothy Norton
  • Jay Angler
stewards:
  • r ransom
  • Pearl Sutton
  • Tereza Okava
master gardeners:
  • Christopher Weeks
gardeners:
  • M Ljin
  • Megan Palmer
  • Kate Downham

How to make fancy, medieval book covers with kids?

 
steward
Posts: 22885
Location: Pacific Northwest
13717
13
homeschooling hugelkultur kids art duck forest garden foraging fiber arts sheep wood heat homestead
  • Likes 12
  • Mark post as helpful
  • send pies
    Number of slices to send:
    Optional 'thank-you' note:
  • Quote
  • Report post to moderator
So, I've made leather bound books, and taught kids how to bind books, and this year I'm going to have a multi-month bookbinding project in my medieval history class.

The kids will make their own paper, bind their books, make illuminated letters, and (hopefully) decorate their covers.

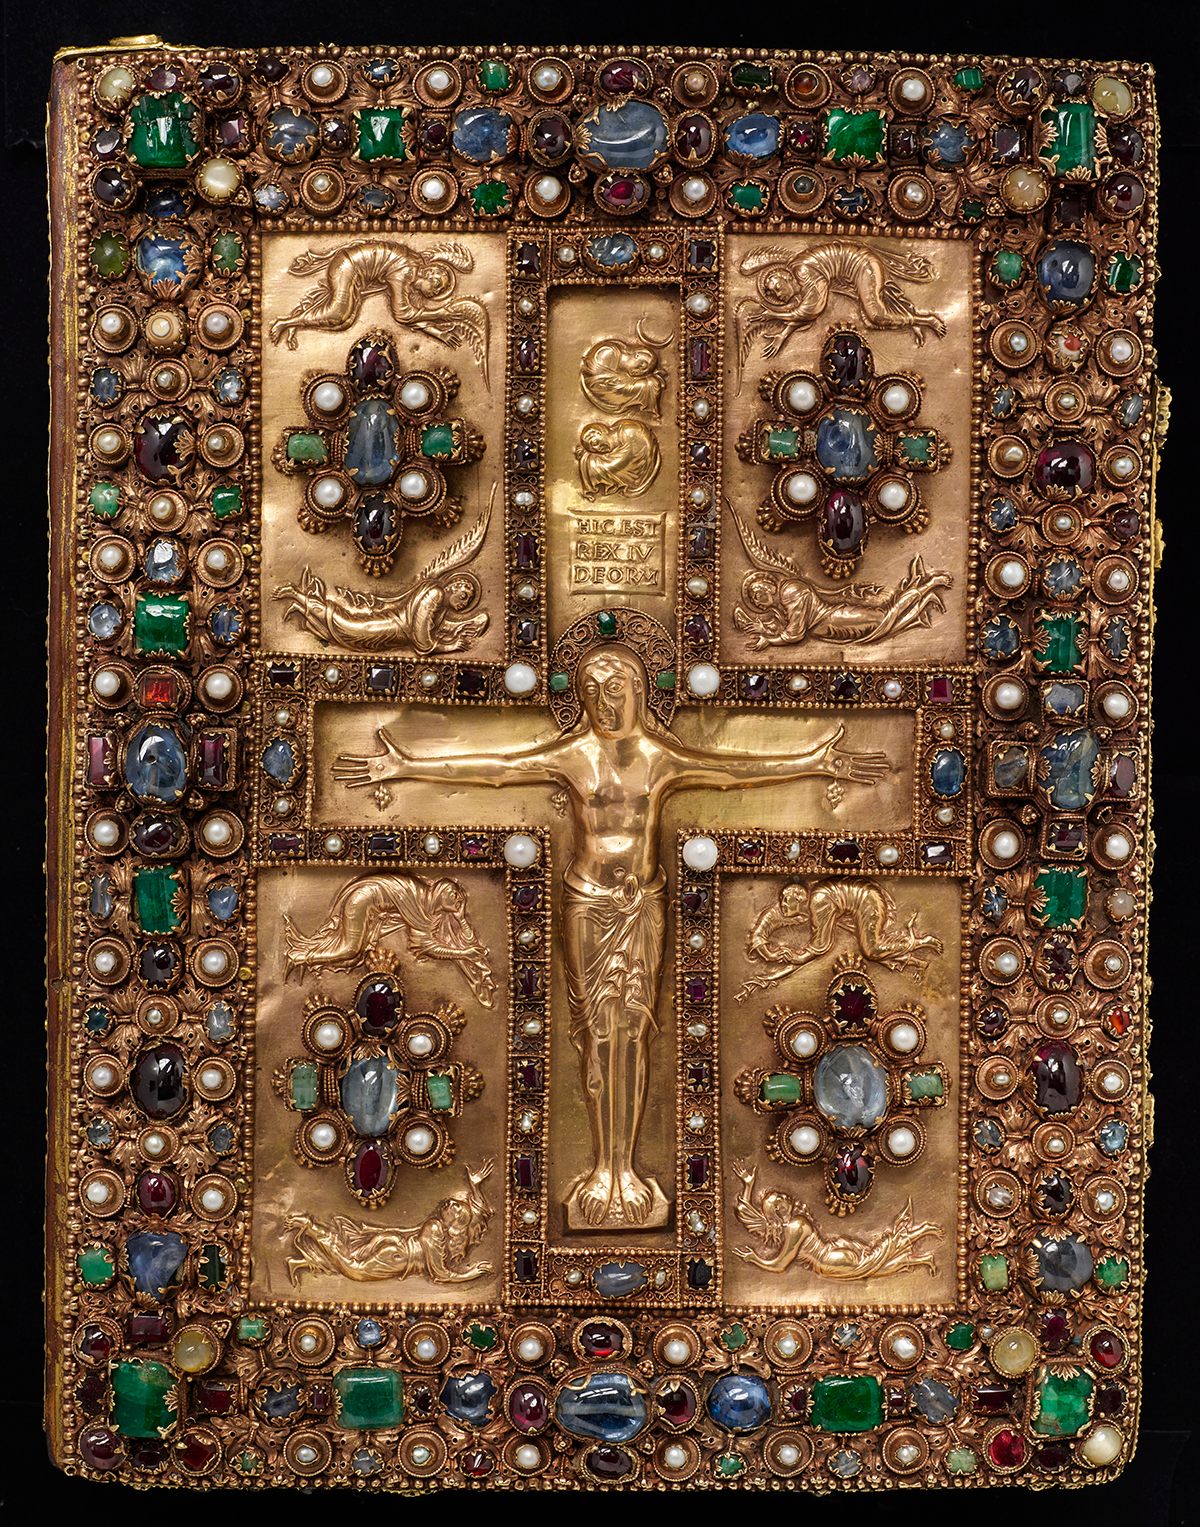
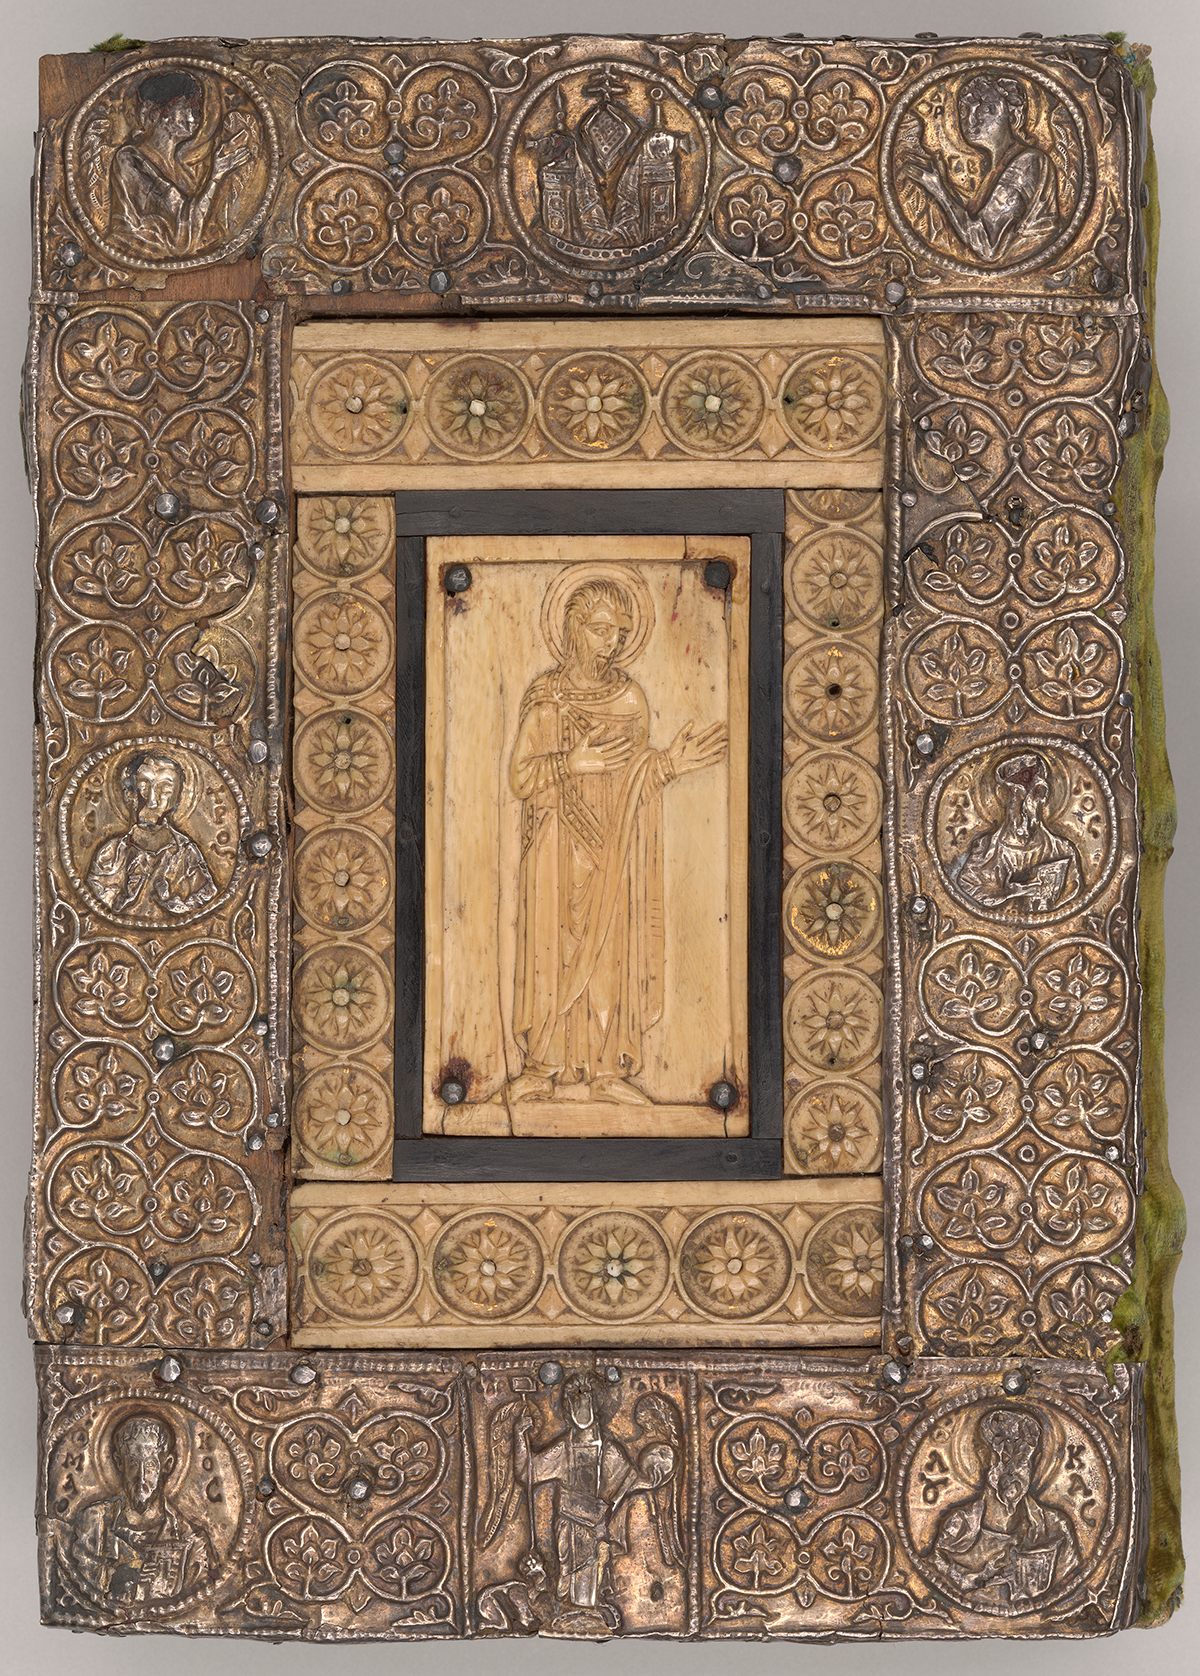
Medieval covers are often truly epic and ornate. There's often leatherworking, jewels, sculptures, silverwork, goldwork, ivory, etc on their covers. They're works of art!

Berthold Sacramentary, 1215

Lindau Gospels, c. 875.
Silver-gilt cover with ivory, Sacramentary


I'm probably going to have the kids do coptic stitch binding. Cord binding was more common in this era (as far as I know), but that requires a jig of some sort, and having 16 of those is a bit too much! For the coverboards, I have (sadly flimsy) chipboard.

I could do cotton sheet fabric for the cover. That worked decently well when I did it last year with my historical Disney Princess class. But, marbling wasn't happening during this time, and white sheets are really....sad looking.

Last year's marbled books
Last year's marbled book's closed


Anyone have ideas for how they could make the covers more medieval?

Here's some ideas I've thought of. But none of them make me too happy.

  • Use stick on jewels. These might fall off, though. Need stronger adhesive.
  • Watercoloring the covers. If the covers get the least bit wet, they'll bleed and kids will be sad.
  • Using egg tempera paint to decorate the covers. Apparently this cracks? I haven't attempted it yet.
  • Dying the cloth with natural dyes? But, cotton doesn't take natural dyes well.[/img]
    [list]Letting the kids color them with sharpies. The colors won't bleed, but it won't be historical.
  • Somehow using some sort of paper or cloth clay to sculpt onto the covers, sort of like paper mache. But, once again, the glue reactivates with water. Unless I do some sort of non-water-soluable glue, l like gelatin. But that's hard to keep warm.
  • Using wool for the cover material, since it takes dye better? That's expensive, though!
  • Using actual leather. This is too expensive!


Any ideas or solutions?

 
pollinator
Posts: 731
Location: Zone 8A
189
homeschooling kids rabbit tiny house books chicken composting toilet medical herbs composting homestead
  • Likes 4
  • Mark post as helpful
  • send pies
    Number of slices to send:
    Optional 'thank-you' note:
  • Quote
  • Report post to moderator
Nicole, do you have meat rabbits? Could be a great use for a rabbit pelt instead of leather. Glued to a backer of course.
 
Nicole Alderman
steward
Posts: 22885
Location: Pacific Northwest
13717
13
homeschooling hugelkultur kids art duck forest garden foraging fiber arts sheep wood heat homestead
 
gardener
Posts: 446
Location: Southern Ontario, 6b
354
cat forest garden food preservation cooking writing ungarbage
  • Likes 9
  • Mark post as helpful
  • send pies
    Number of slices to send:
    Optional 'thank-you' note:
  • Quote
  • Report post to moderator
Do you have any access to thrift stores? Local Facebook marketplace? You can get a large amount of leather off of one beat up leather jacket. It's also shocking how much you get if you skin a couch or leather chair, even if a chunk of it is damaged. ( people may let you skin it for free if it's going to be dumped)
Broken jewelry is sometimes sold in cheap grab bags.
Really cheap and damaged picture frames can also give you great bases for fancy covers. Just take the glass out and you can put in leather, fabric or mosaic panels and then paint, carve or cover the frames.

If you have a local Habitat for Humanity store, they might have partial sheets of small stone or ceramic mosaic tiles. Also the textured wallpaper that looks like tin. Also they can have lots of little metal bits for texture and some even have metal tape for really cheap.

Old buttons can give a really great range of detail and texture to things and you can paint over the plastic ones or too bright metal ones.

Tinfoil can even work, or aluminum plates and baking pans from the dollar store.

 
steward & author
Posts: 48415
Location: Left Coast Canada
20272
10
art trees books chicken cooking fiber arts
  • Likes 9
  • Mark post as helpful
  • send pies
    Number of slices to send:
    Optional 'thank-you' note:
  • Quote
  • Report post to moderator
Some books had clasps or fabric to tie them shut.
 
Nicole Alderman
steward
Posts: 22885
Location: Pacific Northwest
13717
13
homeschooling hugelkultur kids art duck forest garden foraging fiber arts sheep wood heat homestead
  • Likes 5
  • Mark post as helpful
  • send pies
    Number of slices to send:
    Optional 'thank-you' note:
  • Quote
  • Report post to moderator

Dian Green wrote:Do you have any access to thrift stores? Local Facebook marketplace? You can get a large amount of leather off of one beat up leather jacket. It's also shocking how much you get if you skin a couch or leather chair, even if a chunk of it is damaged. ( people may let you skin it for free if it's going to be dumped)


The issue is I have nearly 70 total students (I'm teaching the class to 5 different students), so getting that much leather seems like it would take a *lot* of time.

Dian Green wrote:
Broken jewelry is sometimes sold in cheap grab bags.
Really cheap and damaged picture frames can also give you great bases for fancy covers. Just take the glass out and you can put in leather, fabric or mosaic panels and then paint, carve or cover the frames.

If you have a local Habitat for Humanity store, they might have partial sheets of small stone or ceramic mosaic tiles. Also the textured wallpaper that looks like tin. Also they can have lots of little metal bits for texture and some even have metal tape for really cheap.

Old buttons can give a really great range of detail and texture to things and you can paint over the plastic ones or too bright metal ones.

Tinfoil can even work, or aluminum plates and baking pans from the dollar store.


Ooooh, these are great ideas! The aluminum foil/plates would be a fun way to add that metallic texture. Metal tape sounds really nice, because it comes with a way to adhere it!

Speaking of adhering, any idea how to stick on the jewelry, buttons, etc? I'm not even sure how they did it in medieval times, other than having so much gold on the cover that they attached the jewels like we attach them to rings (with prongs, etc).

Hot glue won't stick for long, and I try to avoid it because it's just melted plastic. I want the kids to see we can make things without hot glue.

We could sew some stuff on, but I think you'd have to plan that out before applying the fabric, and I can see that going wrong in all sorts of ways that would make the kids really sad.
 
Nicole Alderman
steward
Posts: 22885
Location: Pacific Northwest
13717
13
homeschooling hugelkultur kids art duck forest garden foraging fiber arts sheep wood heat homestead
  • Likes 8
  • Mark post as helpful
  • send pies
    Number of slices to send:
    Optional 'thank-you' note:
  • Quote
  • Report post to moderator

r ransom wrote:Some books had clasps or fabric to tie them shut.


They also helped keep the pages from swelling, right? It looks like some also maybe used buttons (from Medieval Books blog):

Dublin, National Museum, Faddan More Psalter, satchel (9th century). Technically a bag that the book is carried in....


Looking into medieval books with clasps, I find (from Samford University):

Once paper became the primary material for book pages, replacing vellum, the clasps were used to relieve strain on the binding and helped hold the book closed. In England and France, the clasp was on the cover and the catch on the back, but in the rest of Europe the positions were reversed. Since books were stacked up, rather than placed on shelves at the time, the clasps didn't pose a problem.

When people began shelving books side by side, as we do today, the problems with clasps began. Not only did clasps rub and dig into neighboring books, often damaging them, but they couldn't be seen and the pressure from the surrounding books on the shelves was usually enough to keep books closed, rendering clasps obsolete.
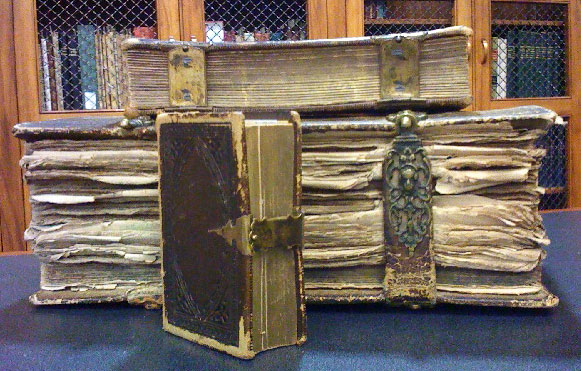


I just realized a lot of these decorations were likely riveted through the leather into the wood cover board. Sadly, the chipboard I orders is super flimsy. I might just glue a layer of "top tab folder" or cardstock to it to stiffen it up. But, even with that, it won't be strong enough to nail things on.
 
Rusticator
Posts: 10092
Location: Missouri Ozarks
5628
7
personal care gear foraging hunting rabbit chicken cooking food preservation fiber arts medical herbs homestead
  • Likes 5
  • Mark post as helpful
  • send pies
    Number of slices to send:
    Optional 'thank-you' note:
  • Quote
  • Report post to moderator
Faux leather from paper bags...?
 
rocket scientist
Posts: 560
Location: in the Middle Earth of France (18), zone 8a-8b
357
2
hugelkultur dog tiny house chicken composting toilet cooking building sheep rocket stoves homestead composting
  • Likes 10
  • Mark post as helpful
  • send pies
    Number of slices to send:
    Optional 'thank-you' note:
  • Quote
  • Report post to moderator

Nicole Alderman wrote:

Here's some ideas I've thought of. But none of them make me too happy.

  • Use stick on jewels. These might fall off, though. Need stronger adhesive.
  • Watercoloring the covers. If the covers get the least bit wet, they'll bleed and kids will be sad.
  • Using egg tempera paint to decorate the covers. Apparently this cracks? I haven't attempted it yet.
  • Dying the cloth with natural dyes? But, cotton doesn't take natural dyes well.[/img]
    [list]Letting the kids color them with sharpies. The colors won't bleed, but it won't be historical.
  • Somehow using some sort of paper or cloth clay to sculpt onto the covers, sort of like paper mache. But, once again, the glue reactivates with water. Unless I do some sort of non-water-soluable glue, l like gelatin. But that's hard to keep warm.
  • Using wool for the cover material, since it takes dye better? That's expensive, though!
  • Using actual leather. This is too expensive!


Any ideas or solutions?


Hi Nicole, I do admire your ambition and drive with the projects!

Medieval book covers were made of wood, covered with leather.
For best results (most satisfying in cost - ease of making - wow effect ratio), I'd look for 3mm (= 0.12 inches) thick cardboard, assuming the books will be approximately the same size as with your previous project.
Little tweaks will give a lot of satisfaction in the end product, like sanding the edges and the corners of the thick cardboard/millboard to a slight bevel on the outside (but leaving the inside edge as is).
Faux leather from brown paper, like Carla suggested, looks quite appealing!

Make a try-out at home to test the materials and techniques.
I'd go with;
- thick cardboard/millboard covers
- underlay elements - cords, split peas etc under the covering. I've done this with thin-ish leather and it works like a dream, not sure about paper.
- faux leather brown paper covering (if going with underlay elements, press the paste-moist covering material gently on the underlay elements with something super soft, like the palm of your hand, close to thumb)
- do some 'finishing' with sharpies
- tin foil "gold and silver", gold possibly created with a thin layer of nail polish? Embossing the tin foil before *magically* sticking it to the cover. I don't have experience with using tin foil on book covers, but am assuming strong glue like wood glue could work.
- stick on jewels for extra bling, also glued with the extra strong glue

I guess the point I want to make is; try it out to see what works towards creating your vision!

Also, when gluing covering on the sewn-on covers, use some kind of moisture barrier between the book block (paper pages) and the covers. I find the plastic pouches for archive paper we used to hold in ring binders works really well for this. So from cover to book block; cover, glued and folded over edge of covering, blotting paper ( paper towels? ), moisture barrier, book block (paper pages). Put a weight on top that is flat and larger than the book you're making to keep the covers flat. Sometimes it's needed to let the spine of the book sit just outside the weight to accomondate the swelling in the spine of the book, created by the sewing of the text block (in that case you'd need to put a board under AND above the book, to allow a symmetrical shape of the spine).
Change blotting paper, initially quite often, to speed up and help drying.

Argh, it's a bit challenging to 'show' stuff in words. Also, I don't want to come over as a preachy know-it-all. Just want to help
If there are any questions, I'm happy to help.


Nicole Alderman
steward
Posts: 22885
Location: Pacific Northwest
13717
13
homeschooling hugelkultur kids art duck forest garden foraging fiber arts sheep wood heat homestead
  • Likes 12
  • Mark post as helpful
  • send pies
    Number of slices to send:
    Optional 'thank-you' note:
  • Quote
  • Report post to moderator

Nina Surya wrote:
Medieval book covers were made of wood, covered with leather.
For best results (most satisfying in cost - ease of making - wow effect ratio), I'd look for 3mm (= 0.12 inches) thick cardboard, assuming the books will be approximately the same size as with your previous project.


The school ordered in chipboard , which is floppier than I'd like, but still stronger than cardboard. I'll probably reinforce it by gluing cardstock from top-tab folders to each board. I don't like how easily this chip board chips!

Little tweaks will give a lot of satisfaction in the end product, like sanding the edges and the corners of the thick cardboard/millboard to a slight bevel on the outside (but leaving the inside edge as is).


Oooh, true. I'm pretty sure I sanded my wood covers at the corners, and it looked really nice. I just tested the chipboard, and it cuts easily with a pair of scissors. Nice!

Faux leather from brown paper, like Carla suggested, looks quite appealing!


I wonder how durable it is. I know--back in high school in the 1990s--we used to cover all our textbooks with paper bags to protect them. Those ended up ripping at the corners and needing reinforcing...but that was after a year of me hauling the books to and fro in my backpack. Though, newer paper bags are often weaker than the old ones, so I'm curious if newer bags wouldn't make as good of covers as the old ones...

- underlay elements - cords, split peas etc under the covering. I've done this with thin-ish leather and it works like a dream, not sure about paper.
- faux leather brown paper covering (if going with underlay elements, press the paste-moist covering material gently on the underlay elements with something super soft, like the palm of your hand, close to thumb)


I'm probably going to sew these books like we did the last ones, with a coptic stitch. With the last books, I didn't glue down the cover fabric on the outside. So, even if we added cords or split peas (need to look up what split peas are), they wouldn't be very visible if we don't glue down the fabric. But, we'll have more time for this project than the last bookbinding we did, so we might be able to take the time to glue down the covers. If we actually use paste, that'll work a lot better than Elmer's glue, I'm thinking.

- tin foil "gold and silver", gold possibly created with a thin layer of nail polish? Embossing the tin foil before *magically* sticking it to the cover. I don't have experience with using tin foil on book covers, but am assuming strong glue like wood glue could work.
- stick on jewels for extra bling, also glued with the extra strong glue


Considering I'm reading that you can use wood glue for stone mosaics, I'm thinking it would work. I might also buy some Weldbond, which is used for ceramics and might work for anything that's smooth-on-smooth.

I guess the point I want to make is; try it out to see what works towards creating your vision!

Also, when gluing covering on the sewn-on covers, use some kind of moisture barrier between the book block (paper pages) and the covers. I find the plastic pouches for archive paper we used to hold in ring binders works really well for this. So from cover to book block; cover, glued and folded over edge of covering, blotting paper ( paper towels? ), moisture barrier, book block (paper pages). Put a weight on top that is flat and larger than the book you're making to keep the covers flat. Sometimes it's needed to let the spine of the book sit just outside the weight to accomondate the swelling in the spine of the book, created by the sewing of the text block (in that case you'd need to put a board under AND above the book, to allow a symmetrical shape of the spine).
Change blotting paper, initially quite often, to speed up and help drying.


When I did my leather-bound books, I used parchment paper to keep the glue from sticking to the pages, and that worked pretty well. I'd forgotten about pressing them--the last books I made with the kids, we didn't take the time to press because there wasn't time. Some of them were a little floppy-looking because of that.

I just checked the marbled books, and, yes, the binding is thicker than the rest of the book. I'm pretty sure I'll have extra chipboard that I could use between each when stacking them to press them.

Since I used gelatin on my own books for glue, it didn't need much drying time or blotting. But, wheat glue (and Elmer's) would.

Argh, it's a bit challenging to 'show' stuff in words. Also, I don't want to come over as a preachy know-it-all. Just want to help :D
If there are any questions, I'm happy to help.


I really, really, really appreciate your help!
 
Nicole Alderman
steward
Posts: 22885
Location: Pacific Northwest
13717
13
homeschooling hugelkultur kids art duck forest garden foraging fiber arts sheep wood heat homestead
  • Likes 6
  • Mark post as helpful
  • send pies
    Number of slices to send:
    Optional 'thank-you' note:
  • Quote
  • Report post to moderator
Speaking of clasps, I want to document here, before I forget, the Islamic way of bookbinding.

They used a similar stitch to coptic stitch to bind the books together, then glued fabric on just the binding, and used that fabric to glue the cover boards to the text block. With glue being the only thing holding the covers to the text block, it makes sense why there's quite a few museum pieces that are just the binding, without the text.

It's facinating how many different ways books can be assembled!

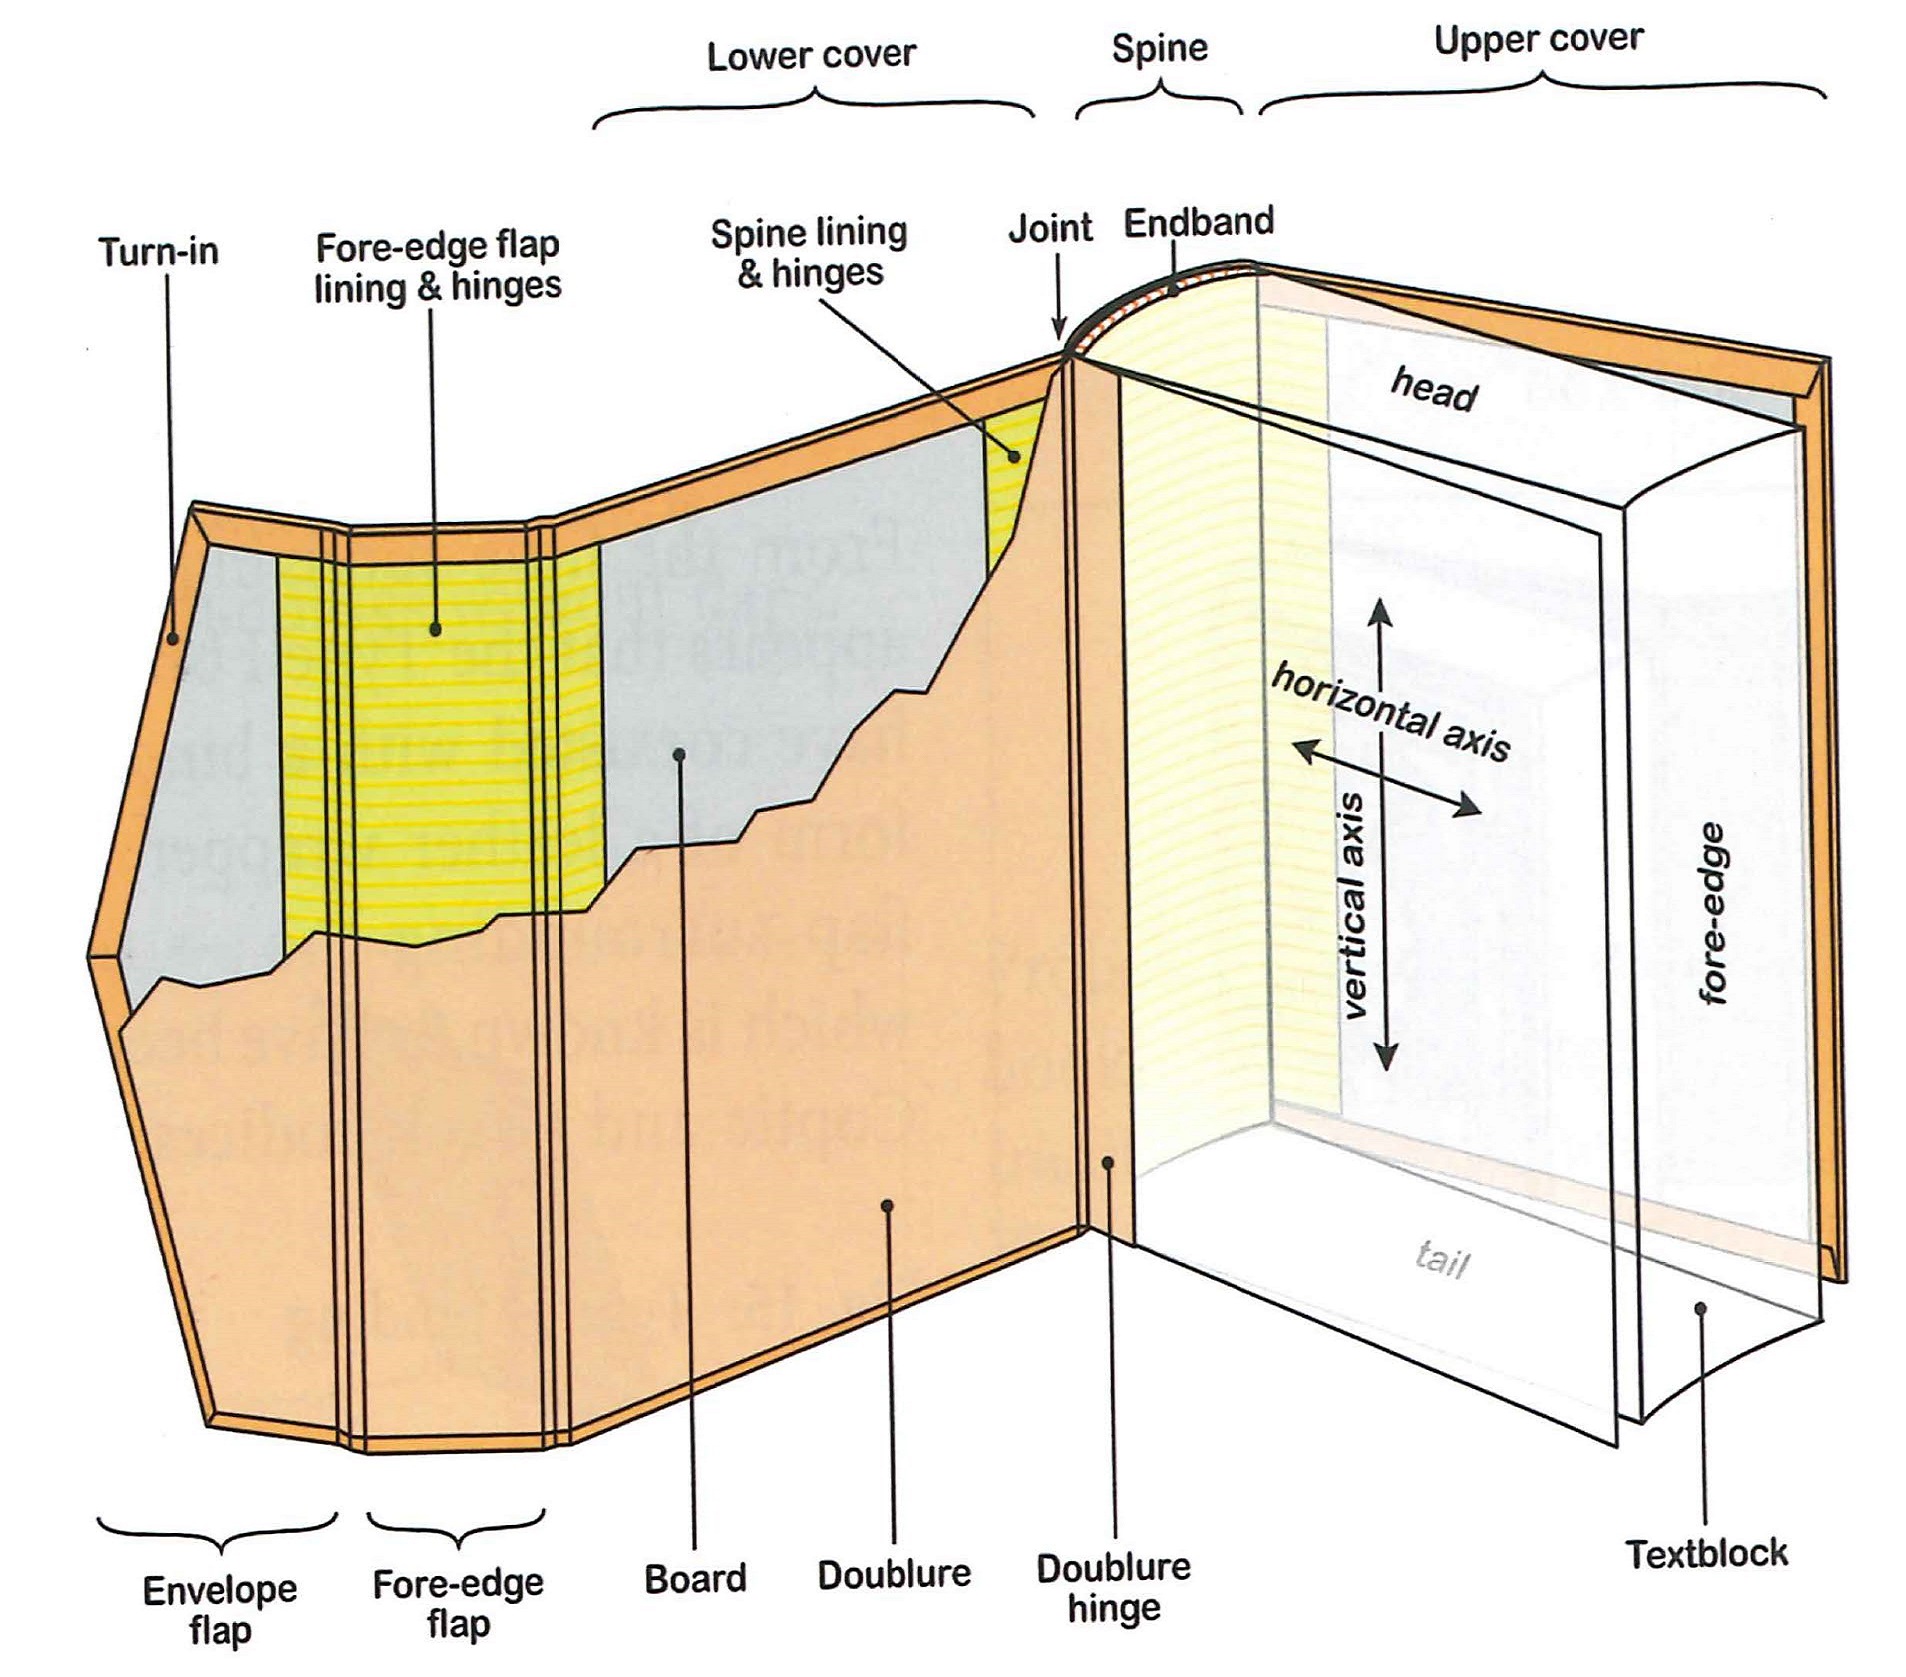
But, anyway, one nifty thing about the Islamic bookbinding is how the covers have flaps!


The anatomy of medieval Islamic books. Click for link


Reproduction of Islamic Book Binding. Click for Reddit link


Here's a video of attaching the flaps:


Anyway, it's a fun thing to show the students. We usually just see the book binding from Europe, and not what was going one elsewhere. Maybe one or two of the older kids might even want to try it, and it could be accommodated by them just having a longer piece of fabric/faux leather.

It took me waaaay too long to find out what Islamic book covers looked like (needed the search terms of "Islamic bookbinding"). I'd love to show the kids pictures of other types of medieval book covers and book bindings. Any other cultures/search terms to use? Byzantine? Indian? Africa? Anywhere else to look? I found some Coptic examples to show, but not much else.
 
master steward
Posts: 16303
Location: Pacific Wet Coast
10799
duck books chicken cooking food preservation ungarbage
  • Likes 6
  • Mark post as helpful
  • send pies
    Number of slices to send:
    Optional 'thank-you' note:
  • Quote
  • Report post to moderator
Nicole Alderman wrote:

Though, newer paper bags are often weaker than the old ones, so I'm curious if newer bags wouldn't make as good of covers as the old ones...


Our chicken feed bags has two layers of fairly strong brown paper that comes free from the cover paper easily, but it does have tiny holes poked in a pattern for air-flow.
Our flour also still comes in paper bags with a shiny layer on top.

If you know people who either buy chicken feed or do lots of baking, you might be able to get enough for the class without too much trouble.
 
Nicole Alderman
steward
Posts: 22885
Location: Pacific Northwest
13717
13
homeschooling hugelkultur kids art duck forest garden foraging fiber arts sheep wood heat homestead
  • Likes 6
  • Mark post as helpful
  • send pies
    Number of slices to send:
    Optional 'thank-you' note:
  • Quote
  • Report post to moderator
Good idea about the chicken feed bags! I use Scratch & Peck chicken feed, and it comes in 3 layers of paper. I actually have a bunch saved up, because I use them for smothering weeds.

I do wonder if the paper will be too stiff, without enough give for book covering. Leather has a slight amount of give. Cotton sheet has a little give, too (not much, though). But paper bags don't really. Maybe by doing all the wrinkling, it would make it more fabric like?
 
gardener
Posts: 3583
Location: Cascades of Oregon
1046
  • Likes 7
  • Mark post as helpful
  • send pies
    Number of slices to send:
    Optional 'thank-you' note:
  • Quote
  • Report post to moderator
Gold and silver Sharpies for illuminated letters.  Wood cabinet molding from a thrift store.
cabinet-molding.jpg
[Thumbnail for cabinet-molding.jpg]
 
Nicole Alderman
steward
Posts: 22885
Location: Pacific Northwest
13717
13
homeschooling hugelkultur kids art duck forest garden foraging fiber arts sheep wood heat homestead
  • Likes 6
  • Mark post as helpful
  • send pies
    Number of slices to send:
    Optional 'thank-you' note:
  • Quote
  • Report post to moderator
I went looking for ways to make fabric look like leather, and I saw some stuff about using wax. This reminded me of how encaustic wax was mixed with pigment to paint things in a relatively water-resistant and durable way. Hot colored wax + kids seemed like a bad idea. And encaustic wax is pretty expensive.

Then I had an epiphany! What's pigment + wax? Crayons!

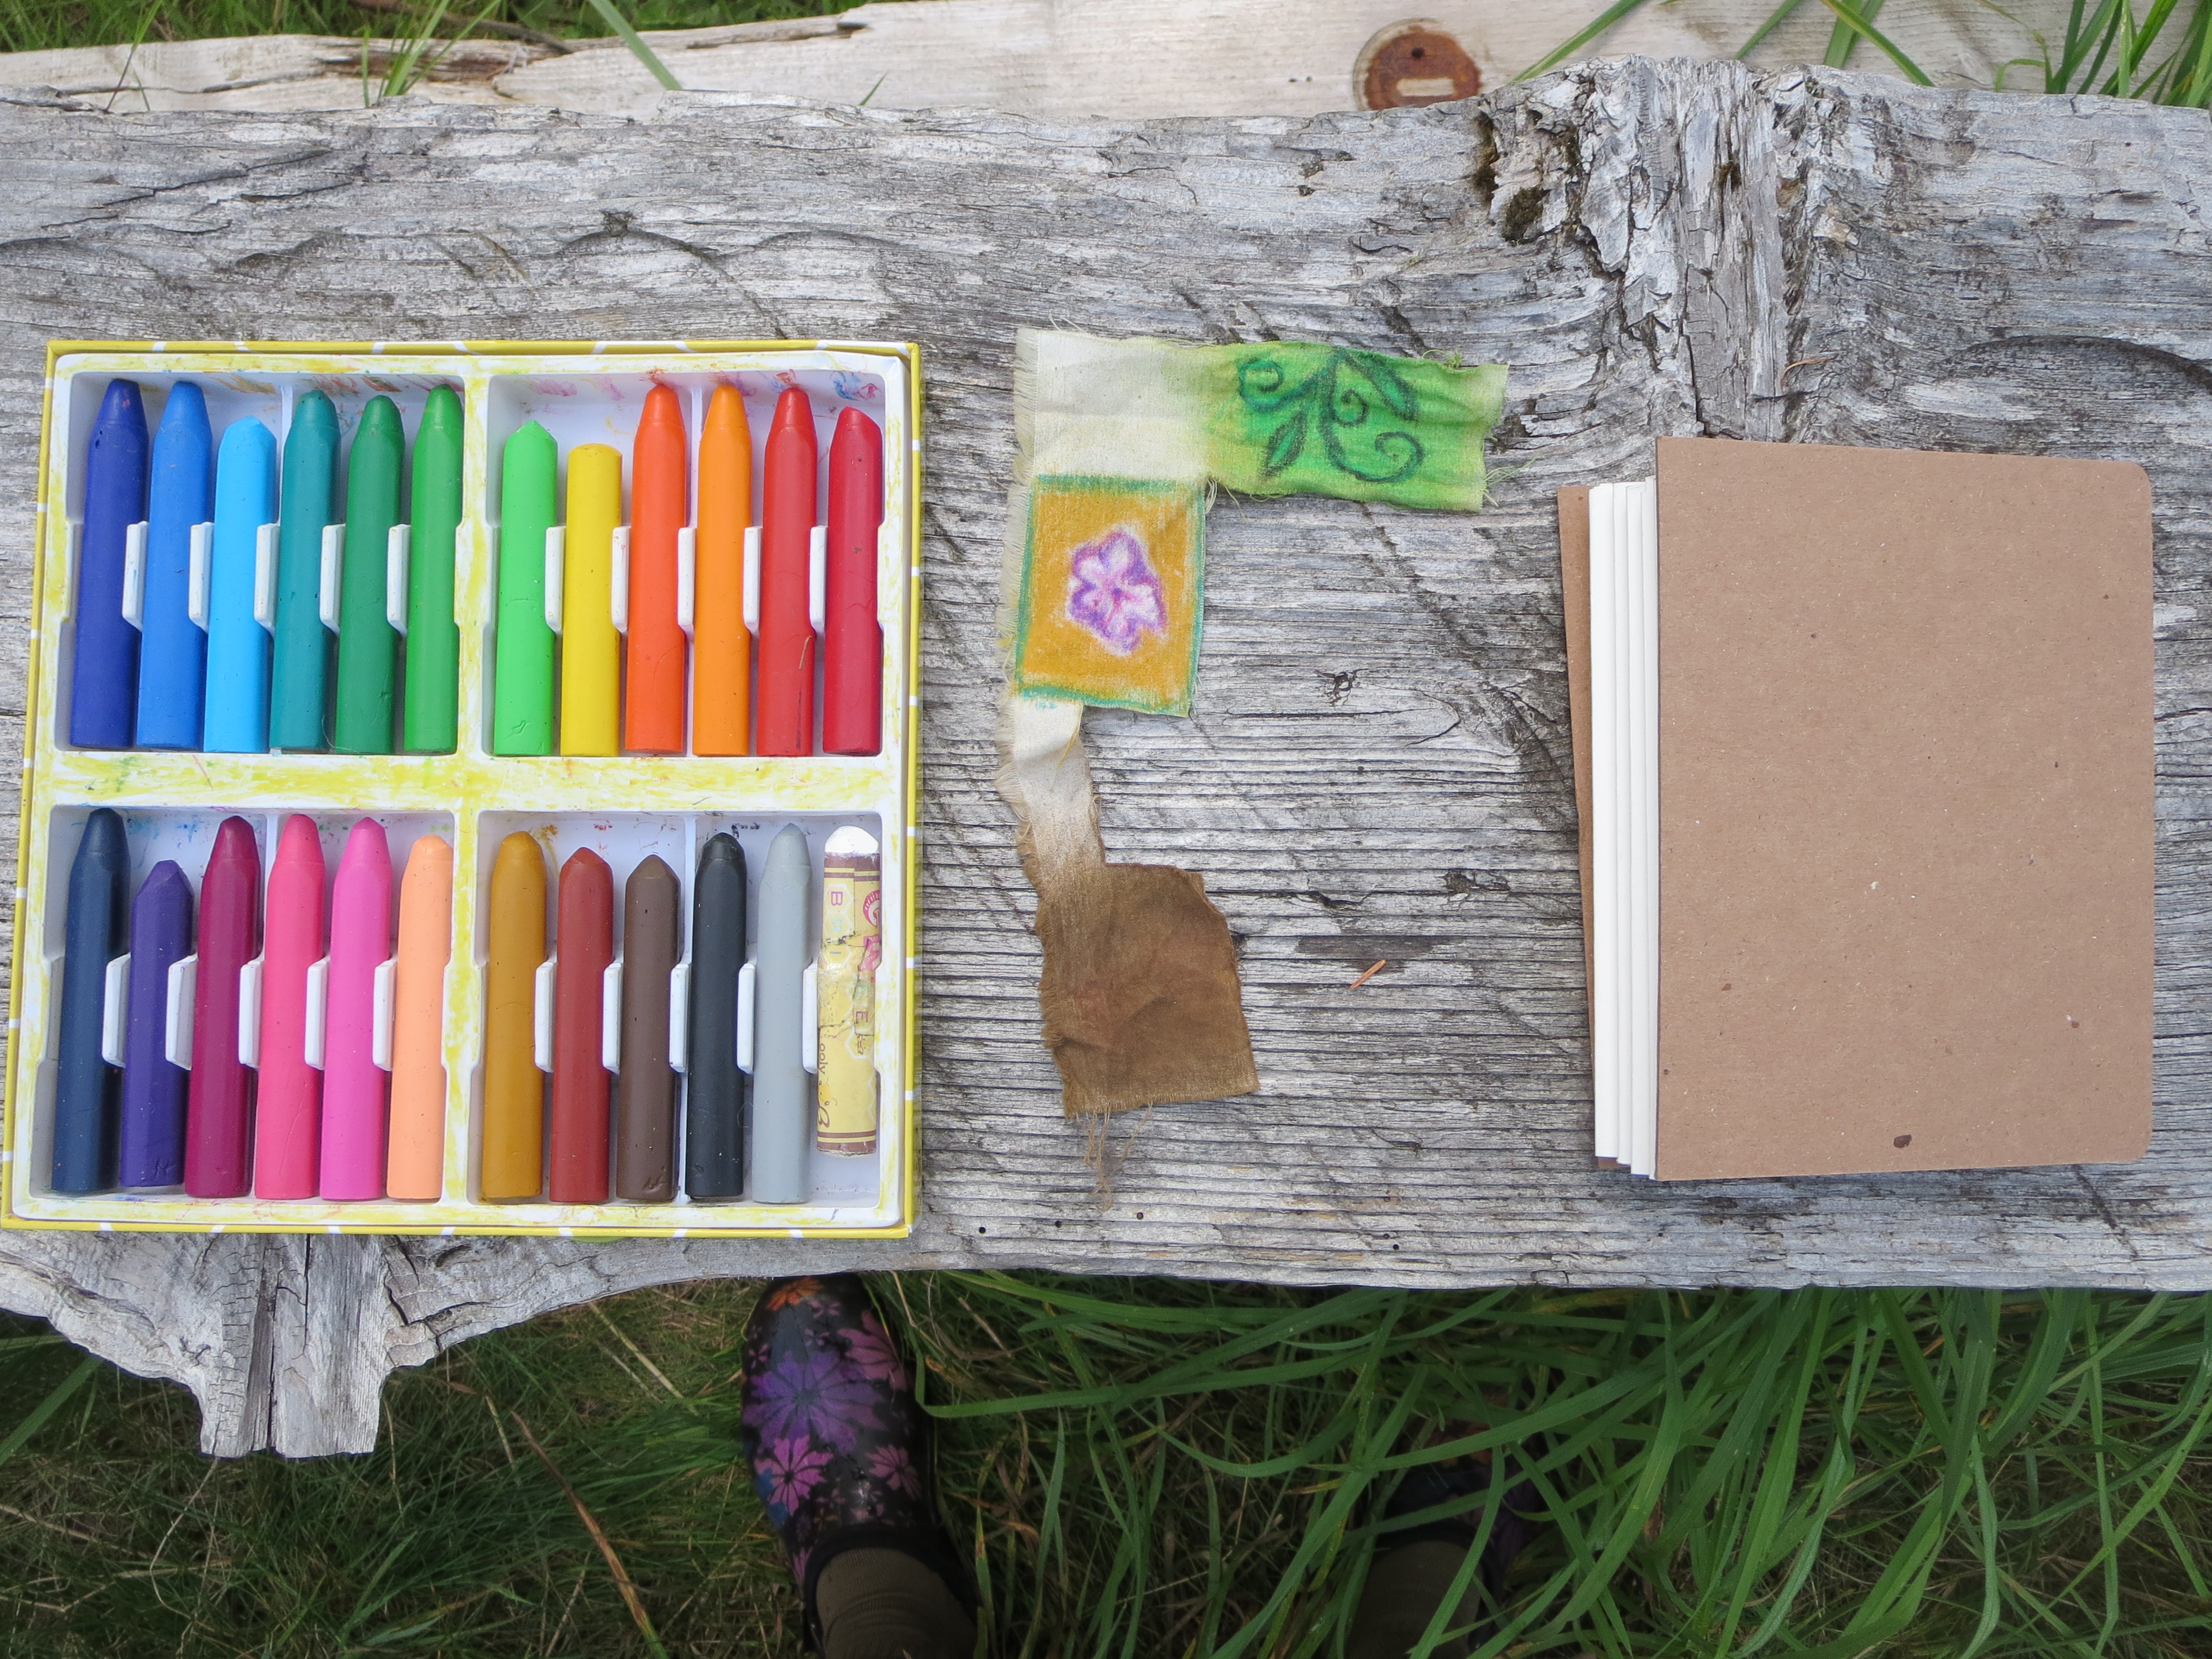
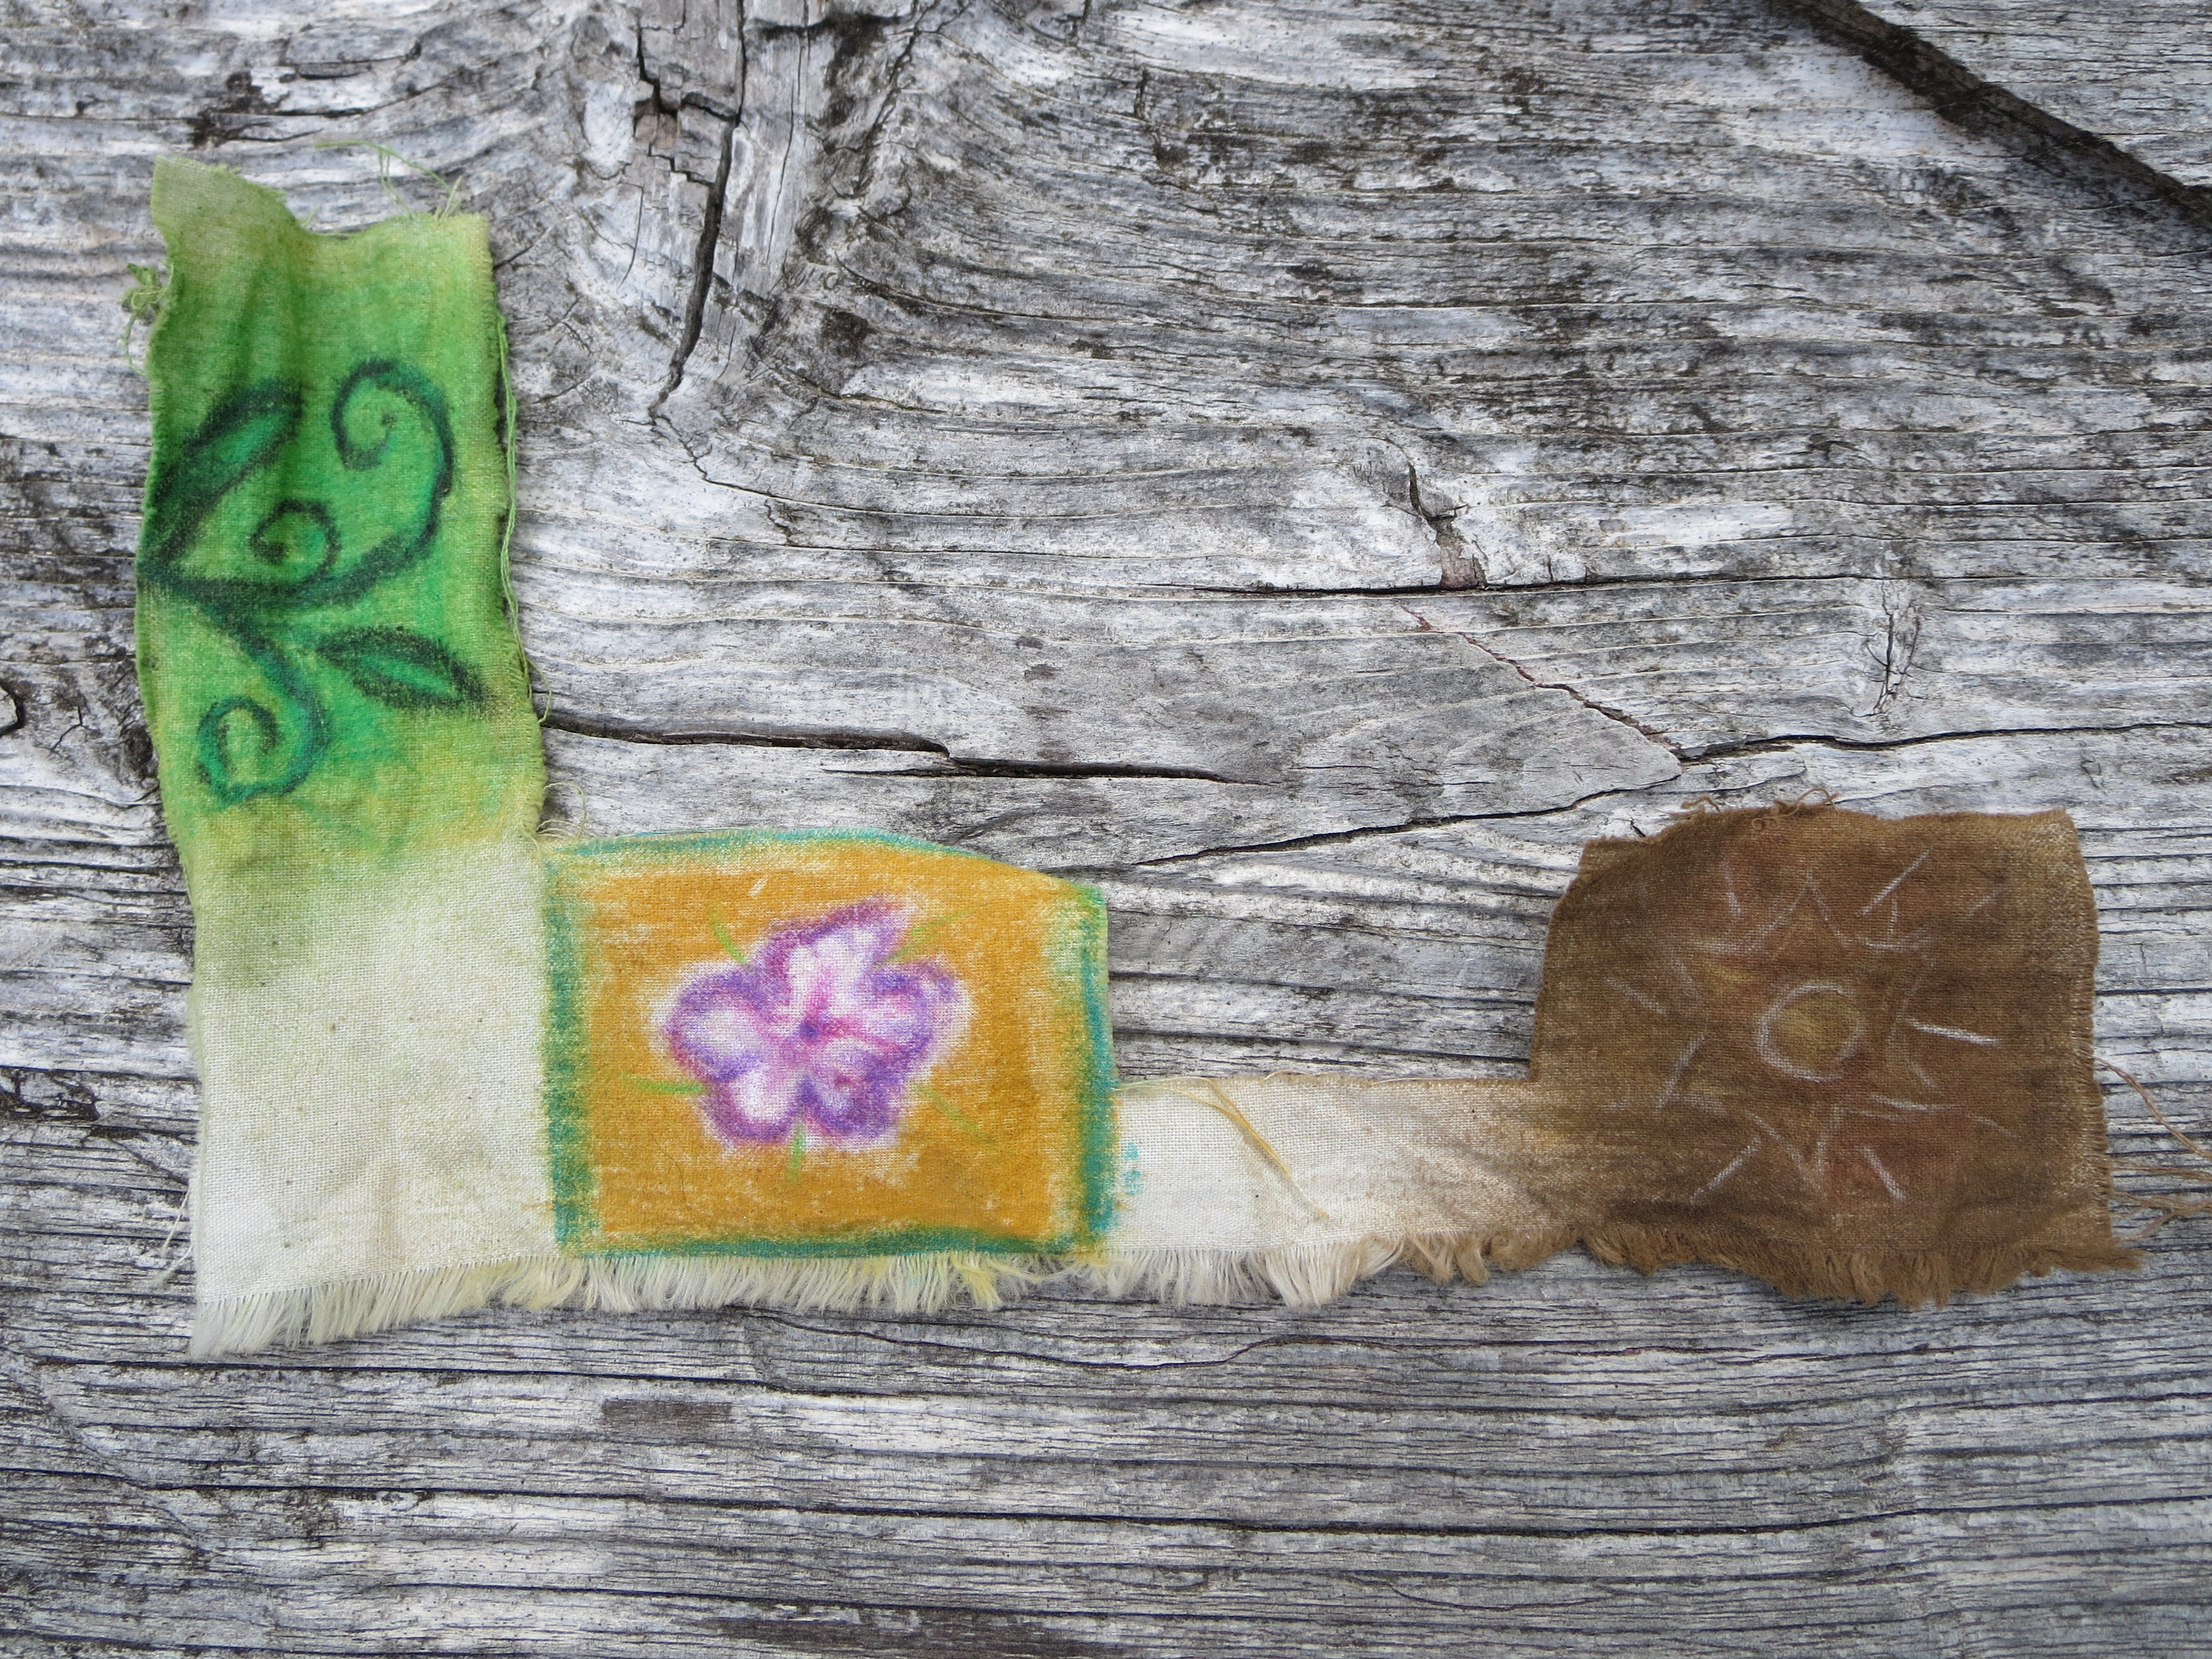
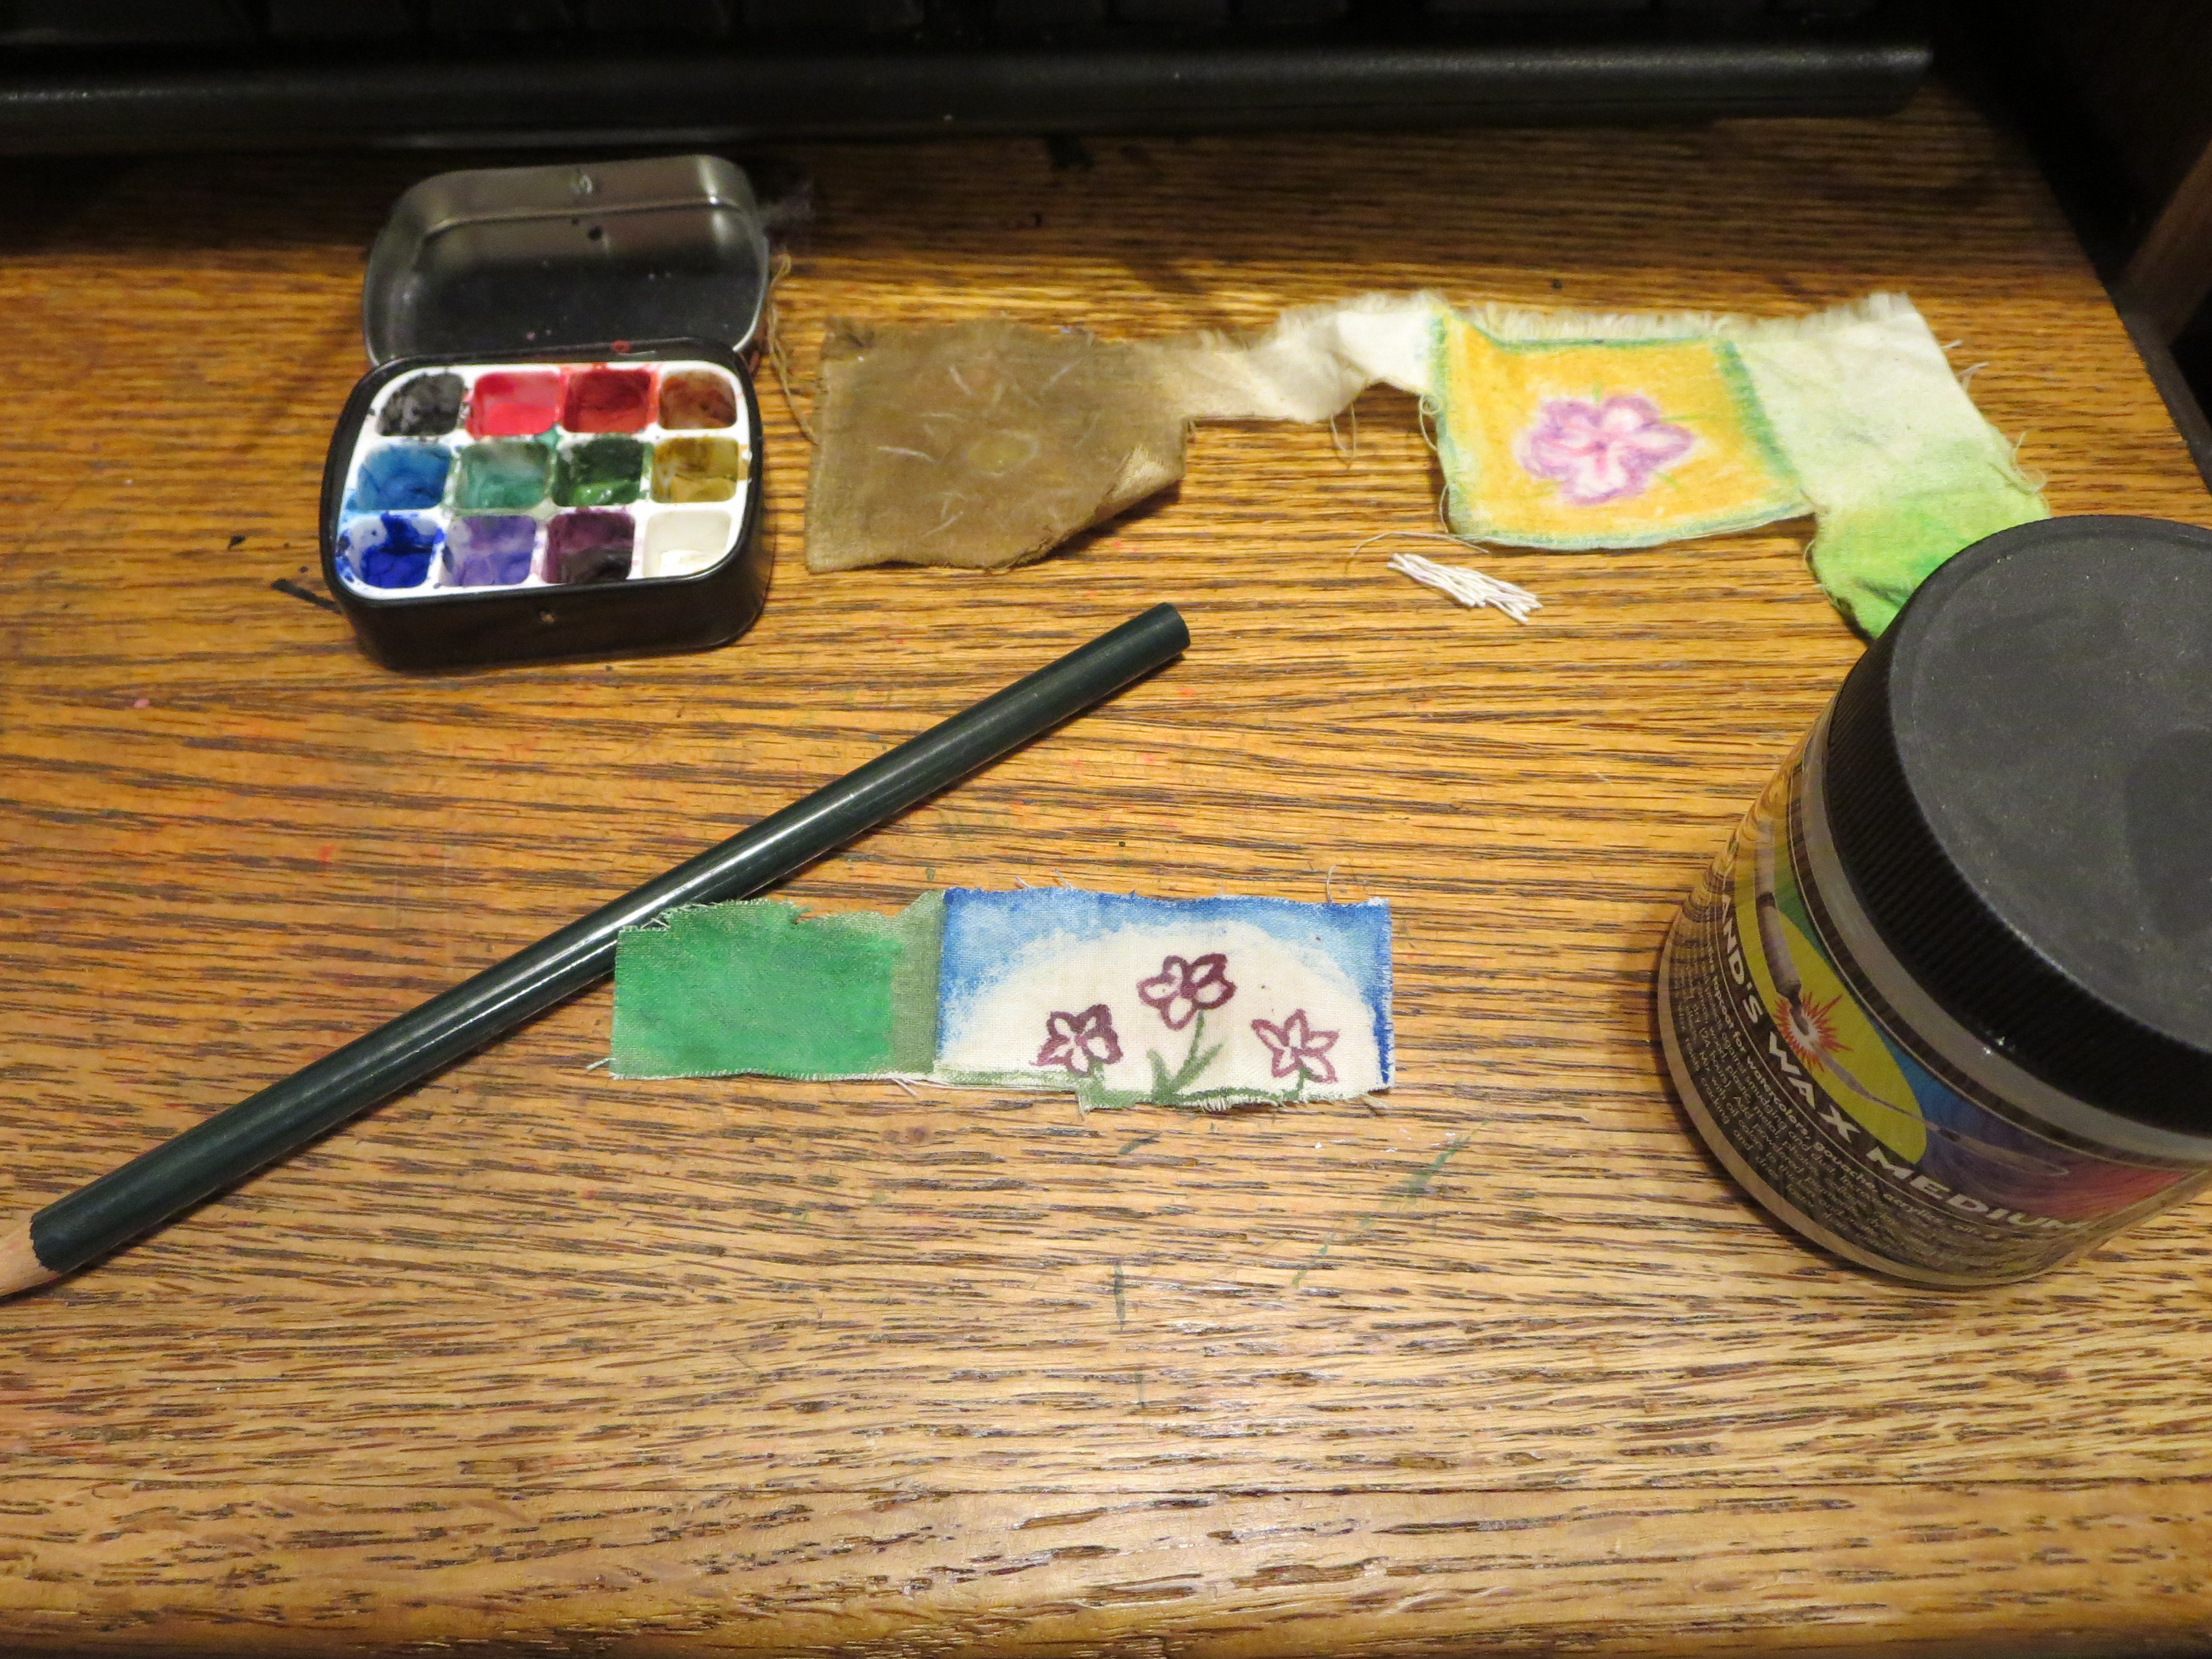
So, I got out my (kids') good crayons and tried coloring them. It's decent. It takes a few layers and pushing hard to get the color in, and it's hard to do when the fabric is flopping around. But, if it's glued to a cover, that wouldn't be a problem.

But, what if kids want to add detail? Crayons aren't good for detail. But, wait! There's colored pencils. They're also wax based. I used my prismacolors, because they're nicer. And, yes, you can add detail on top of the other colors--even white on brown!
IMG_2448.JPG
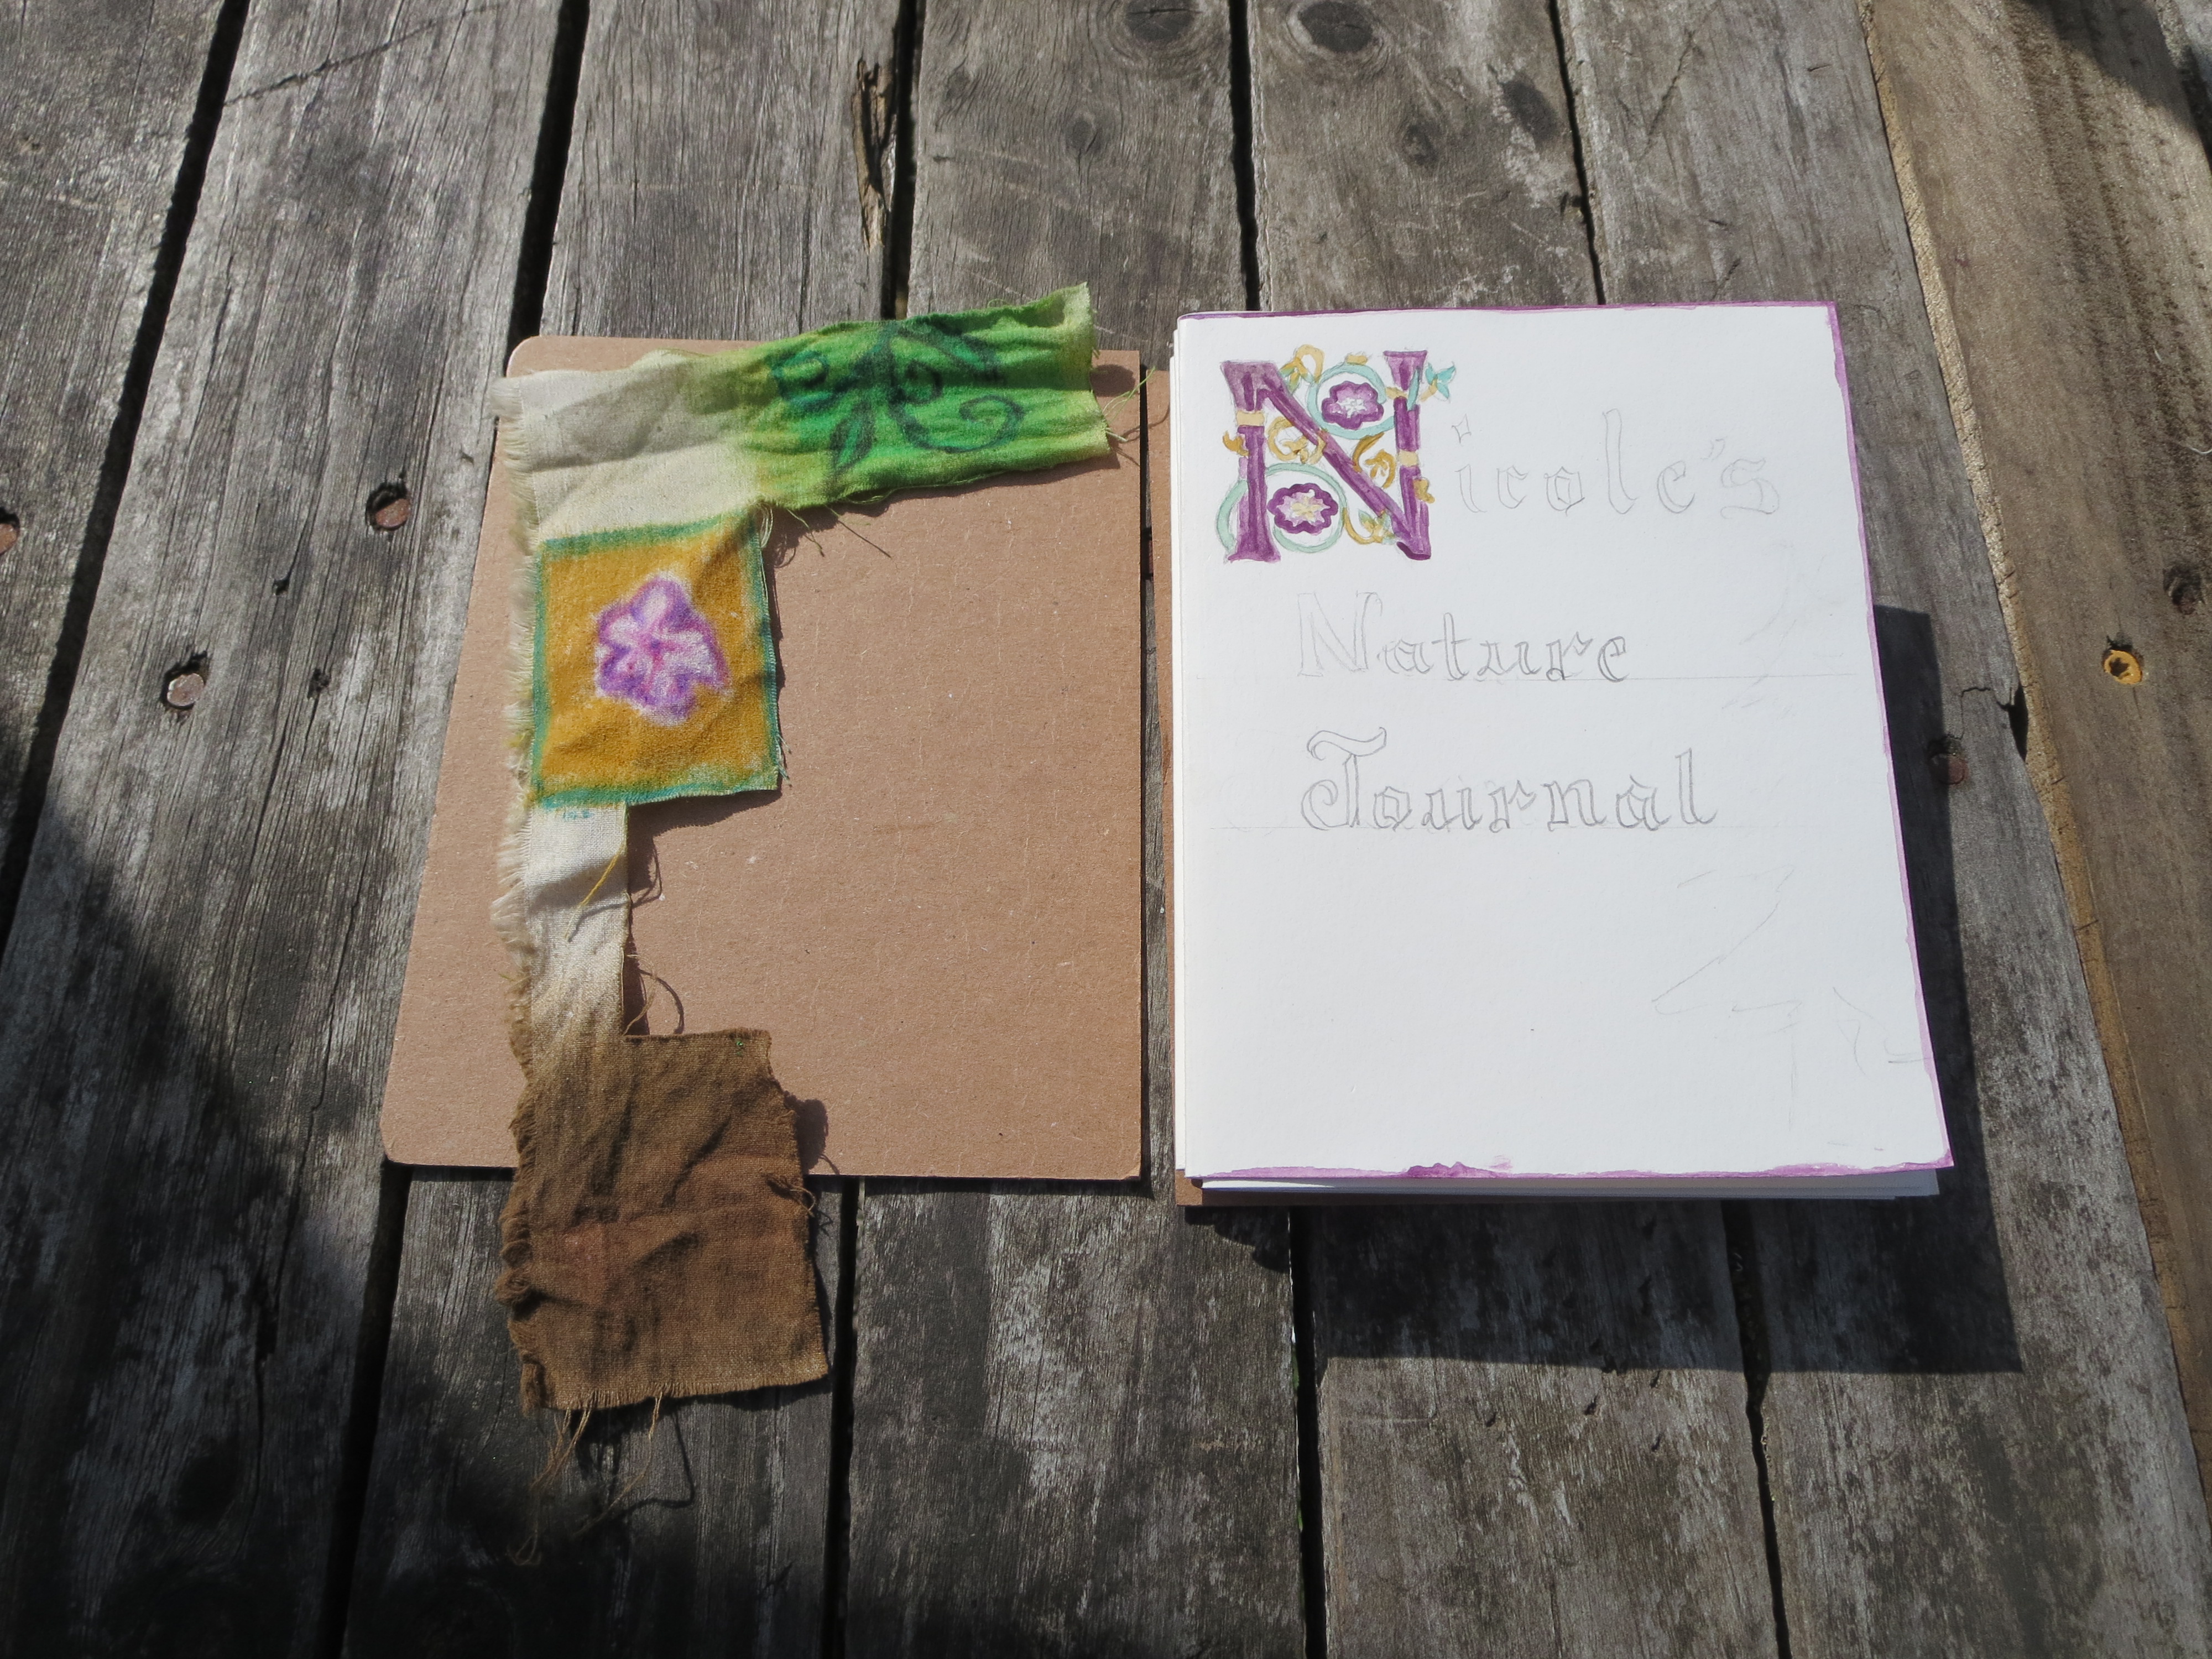
My test book with it's watercolor paper, chipboard, and the colored cotton
IMG_2451.JPG
Now pictured in the shade, with the crayons I used.
IMG_2454.JPG
Now with quickly applied prismacolor details!
 
Carla Burke
Rusticator
Posts: 10092
Location: Missouri Ozarks
5628
7
personal care gear foraging hunting rabbit chicken cooking food preservation fiber arts medical herbs homestead
  • Likes 4
  • Mark post as helpful
  • send pies
    Number of slices to send:
    Optional 'thank-you' note:
  • Quote
  • Report post to moderator
Craft paper or brown butcher's paper would stand in well, for the paper bags, and are likely more uniform and sturdy.
 
Nicole Alderman
steward
Posts: 22885
Location: Pacific Northwest
13717
13
homeschooling hugelkultur kids art duck forest garden foraging fiber arts sheep wood heat homestead
  • Likes 7
  • Mark post as helpful
  • send pies
    Number of slices to send:
    Optional 'thank-you' note:
  • Quote
  • Report post to moderator
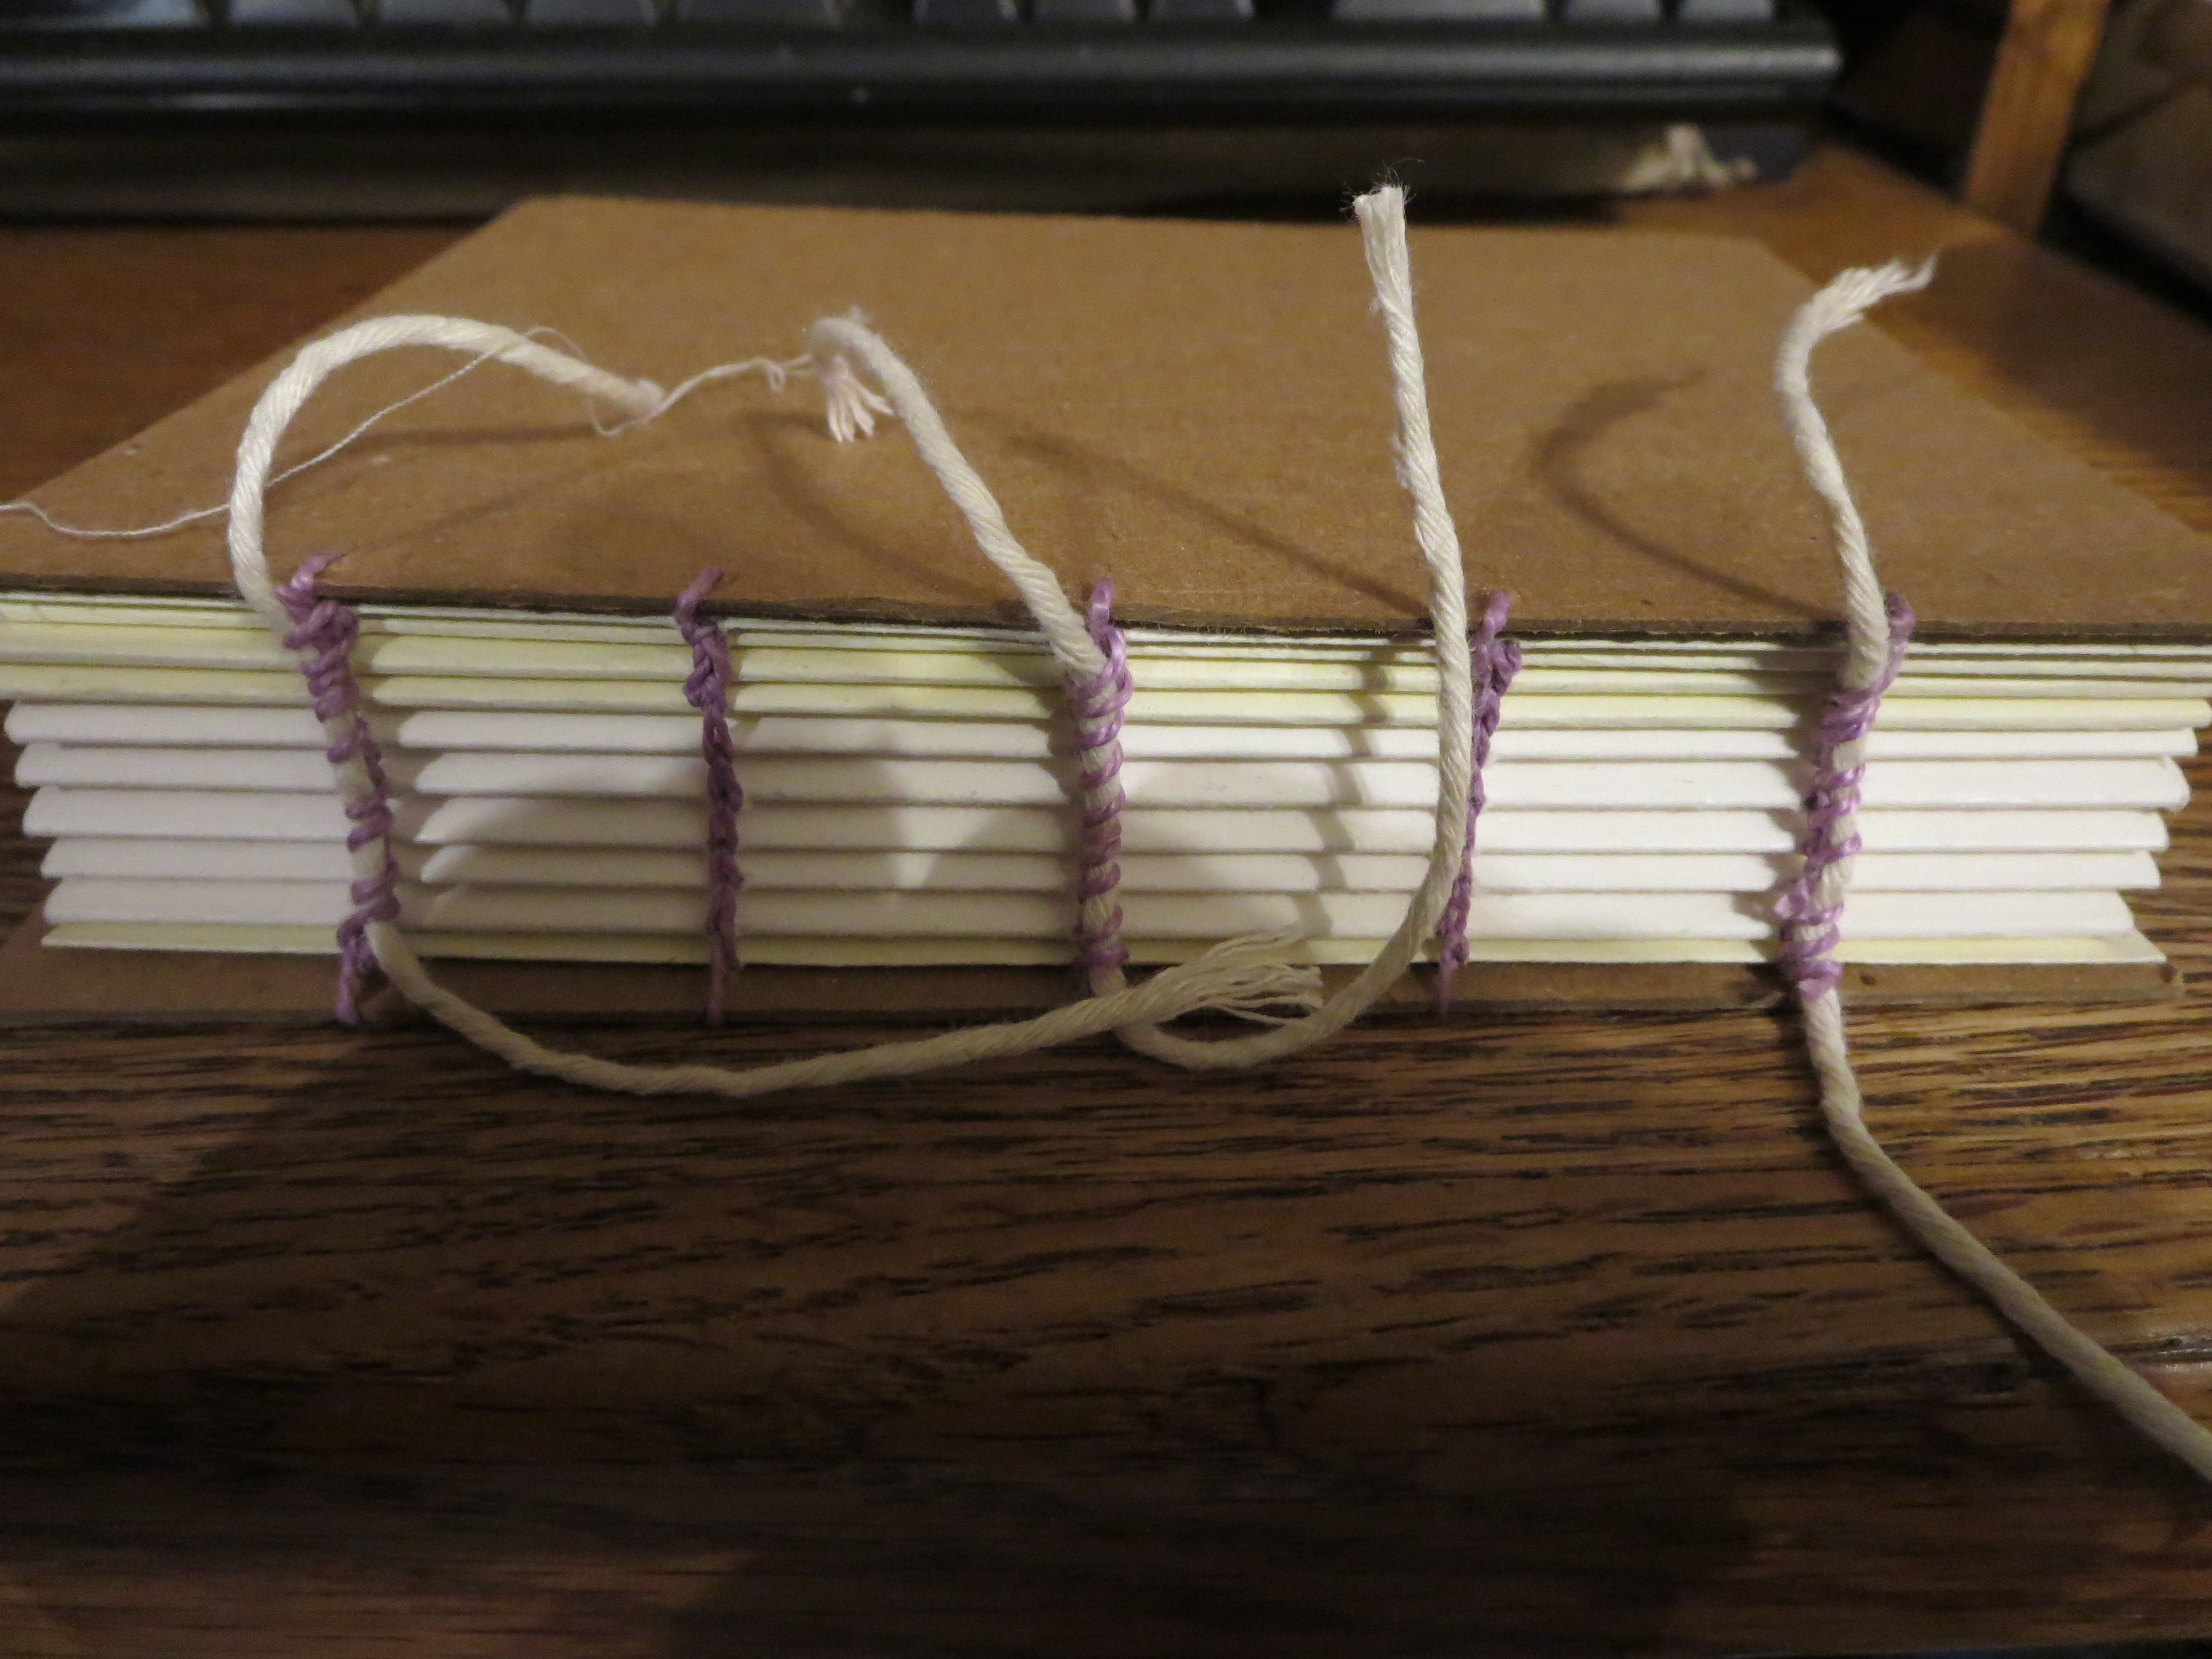
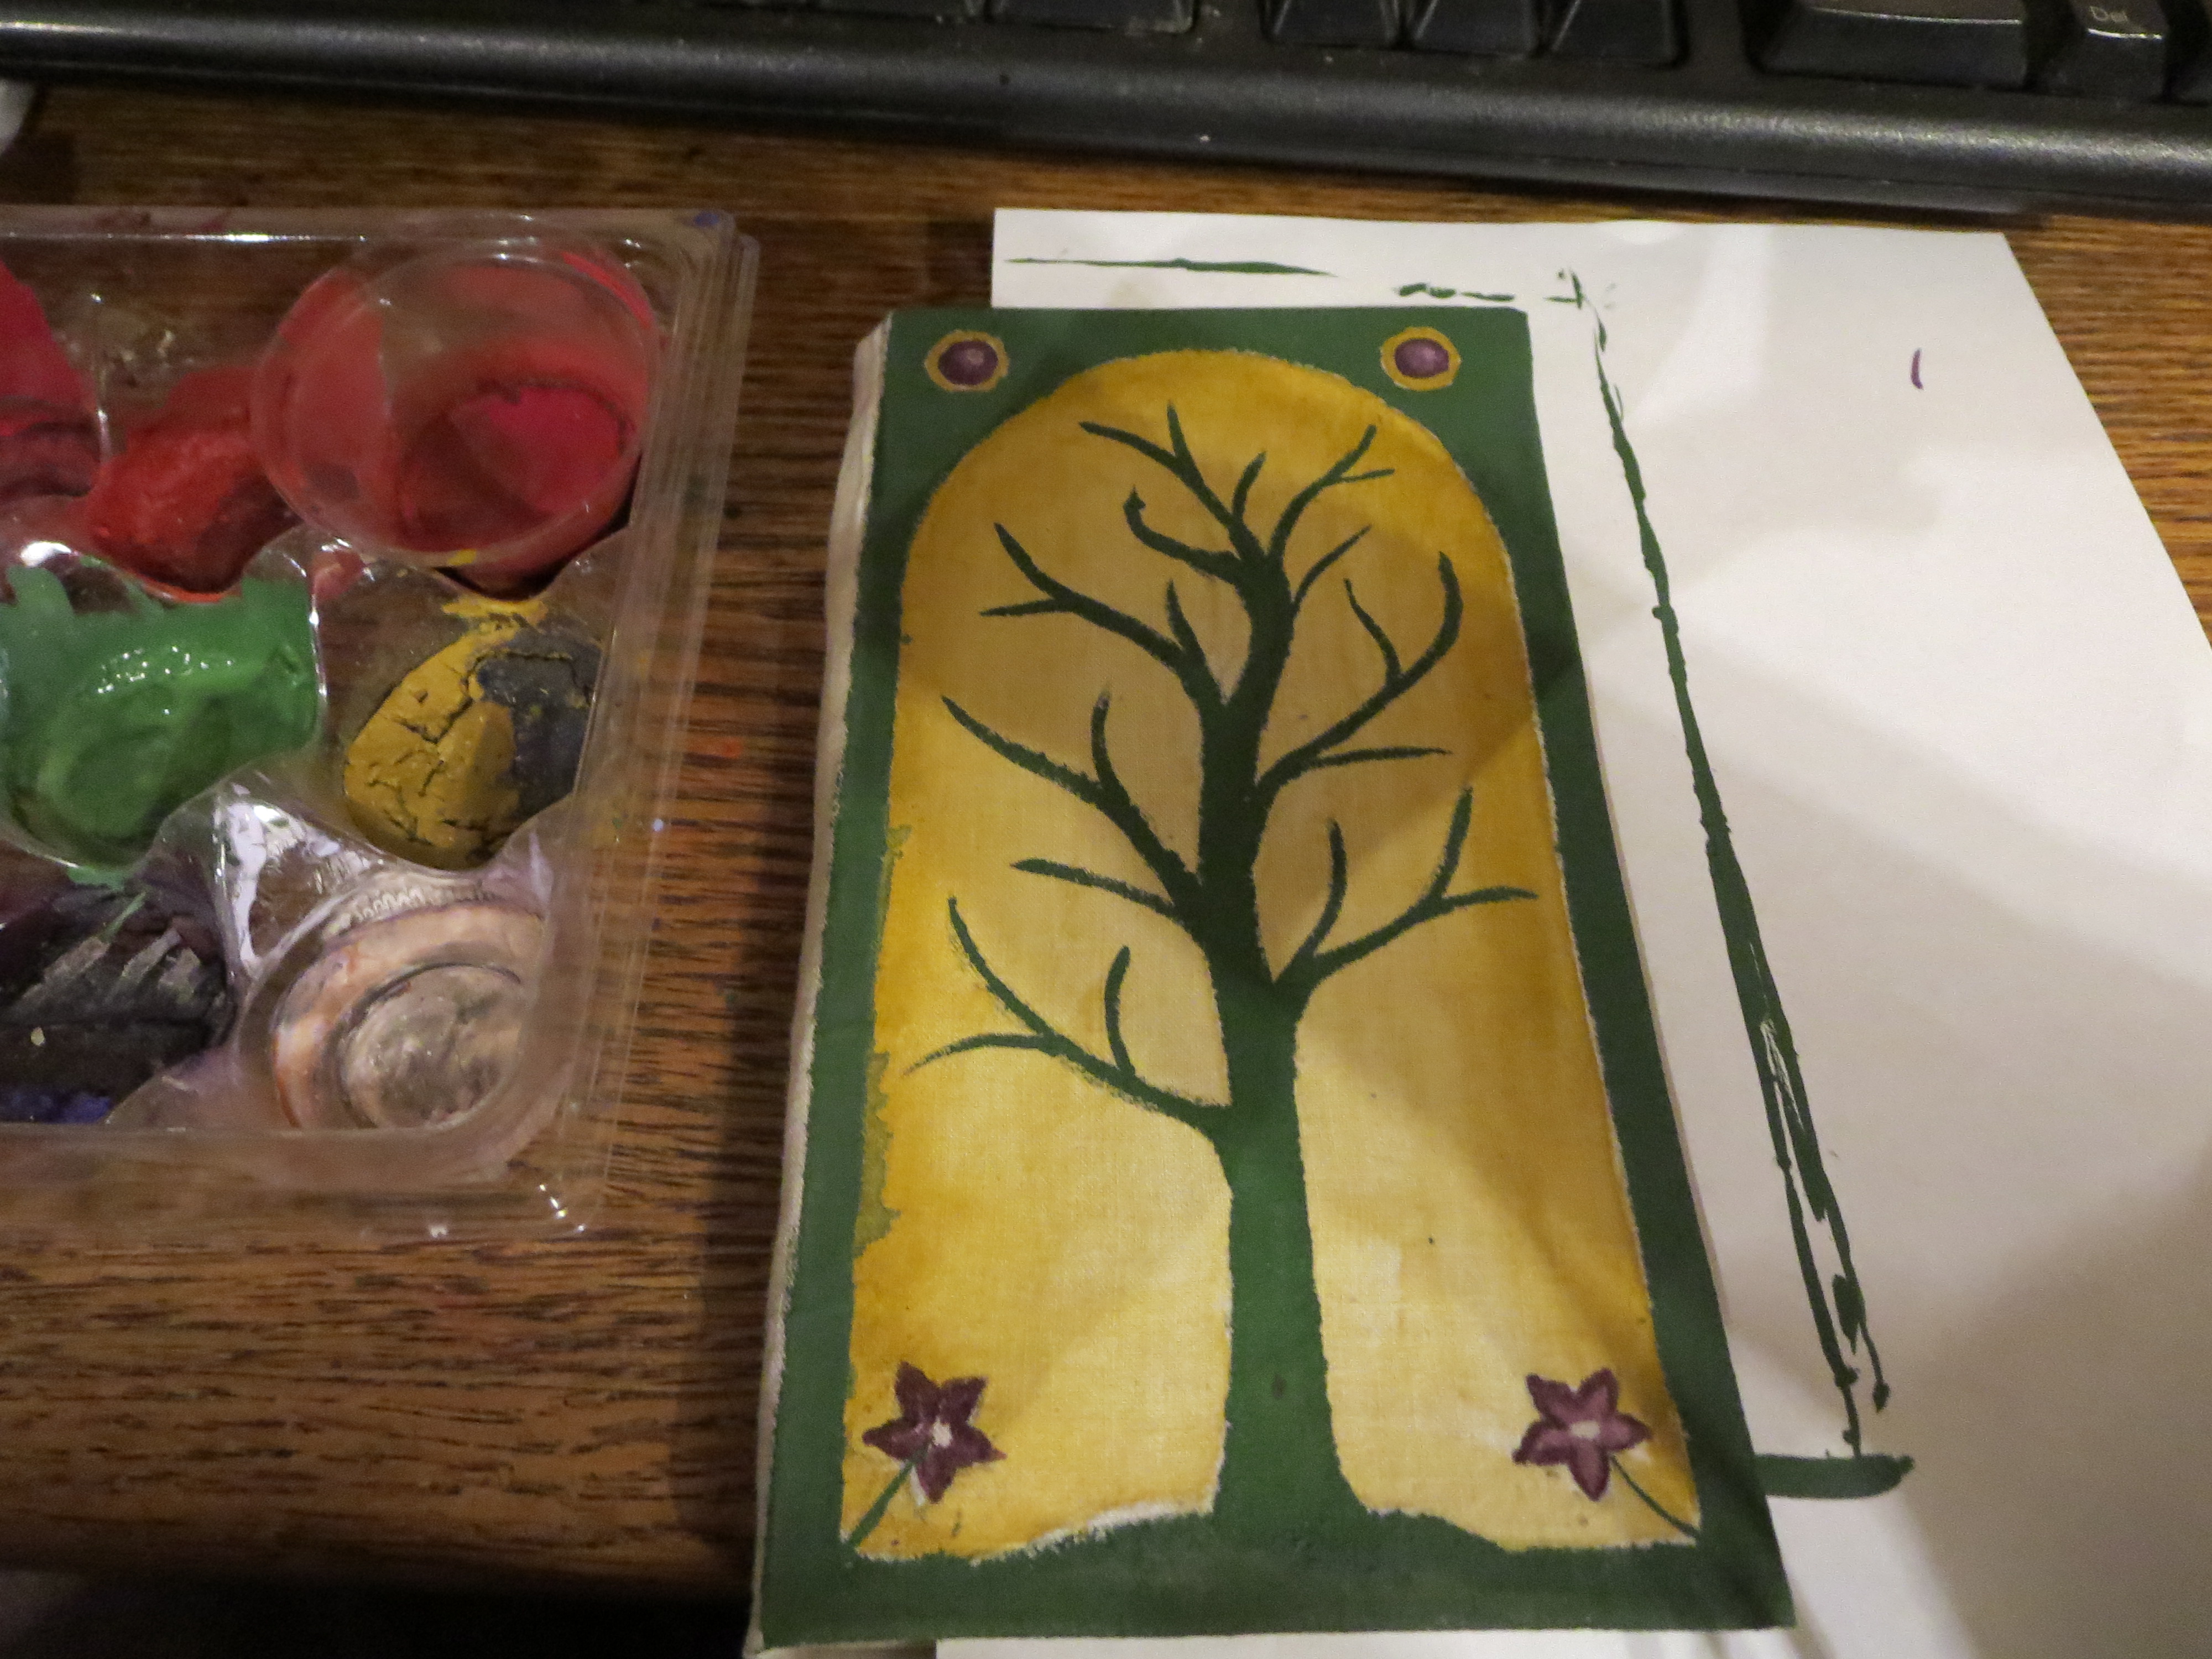
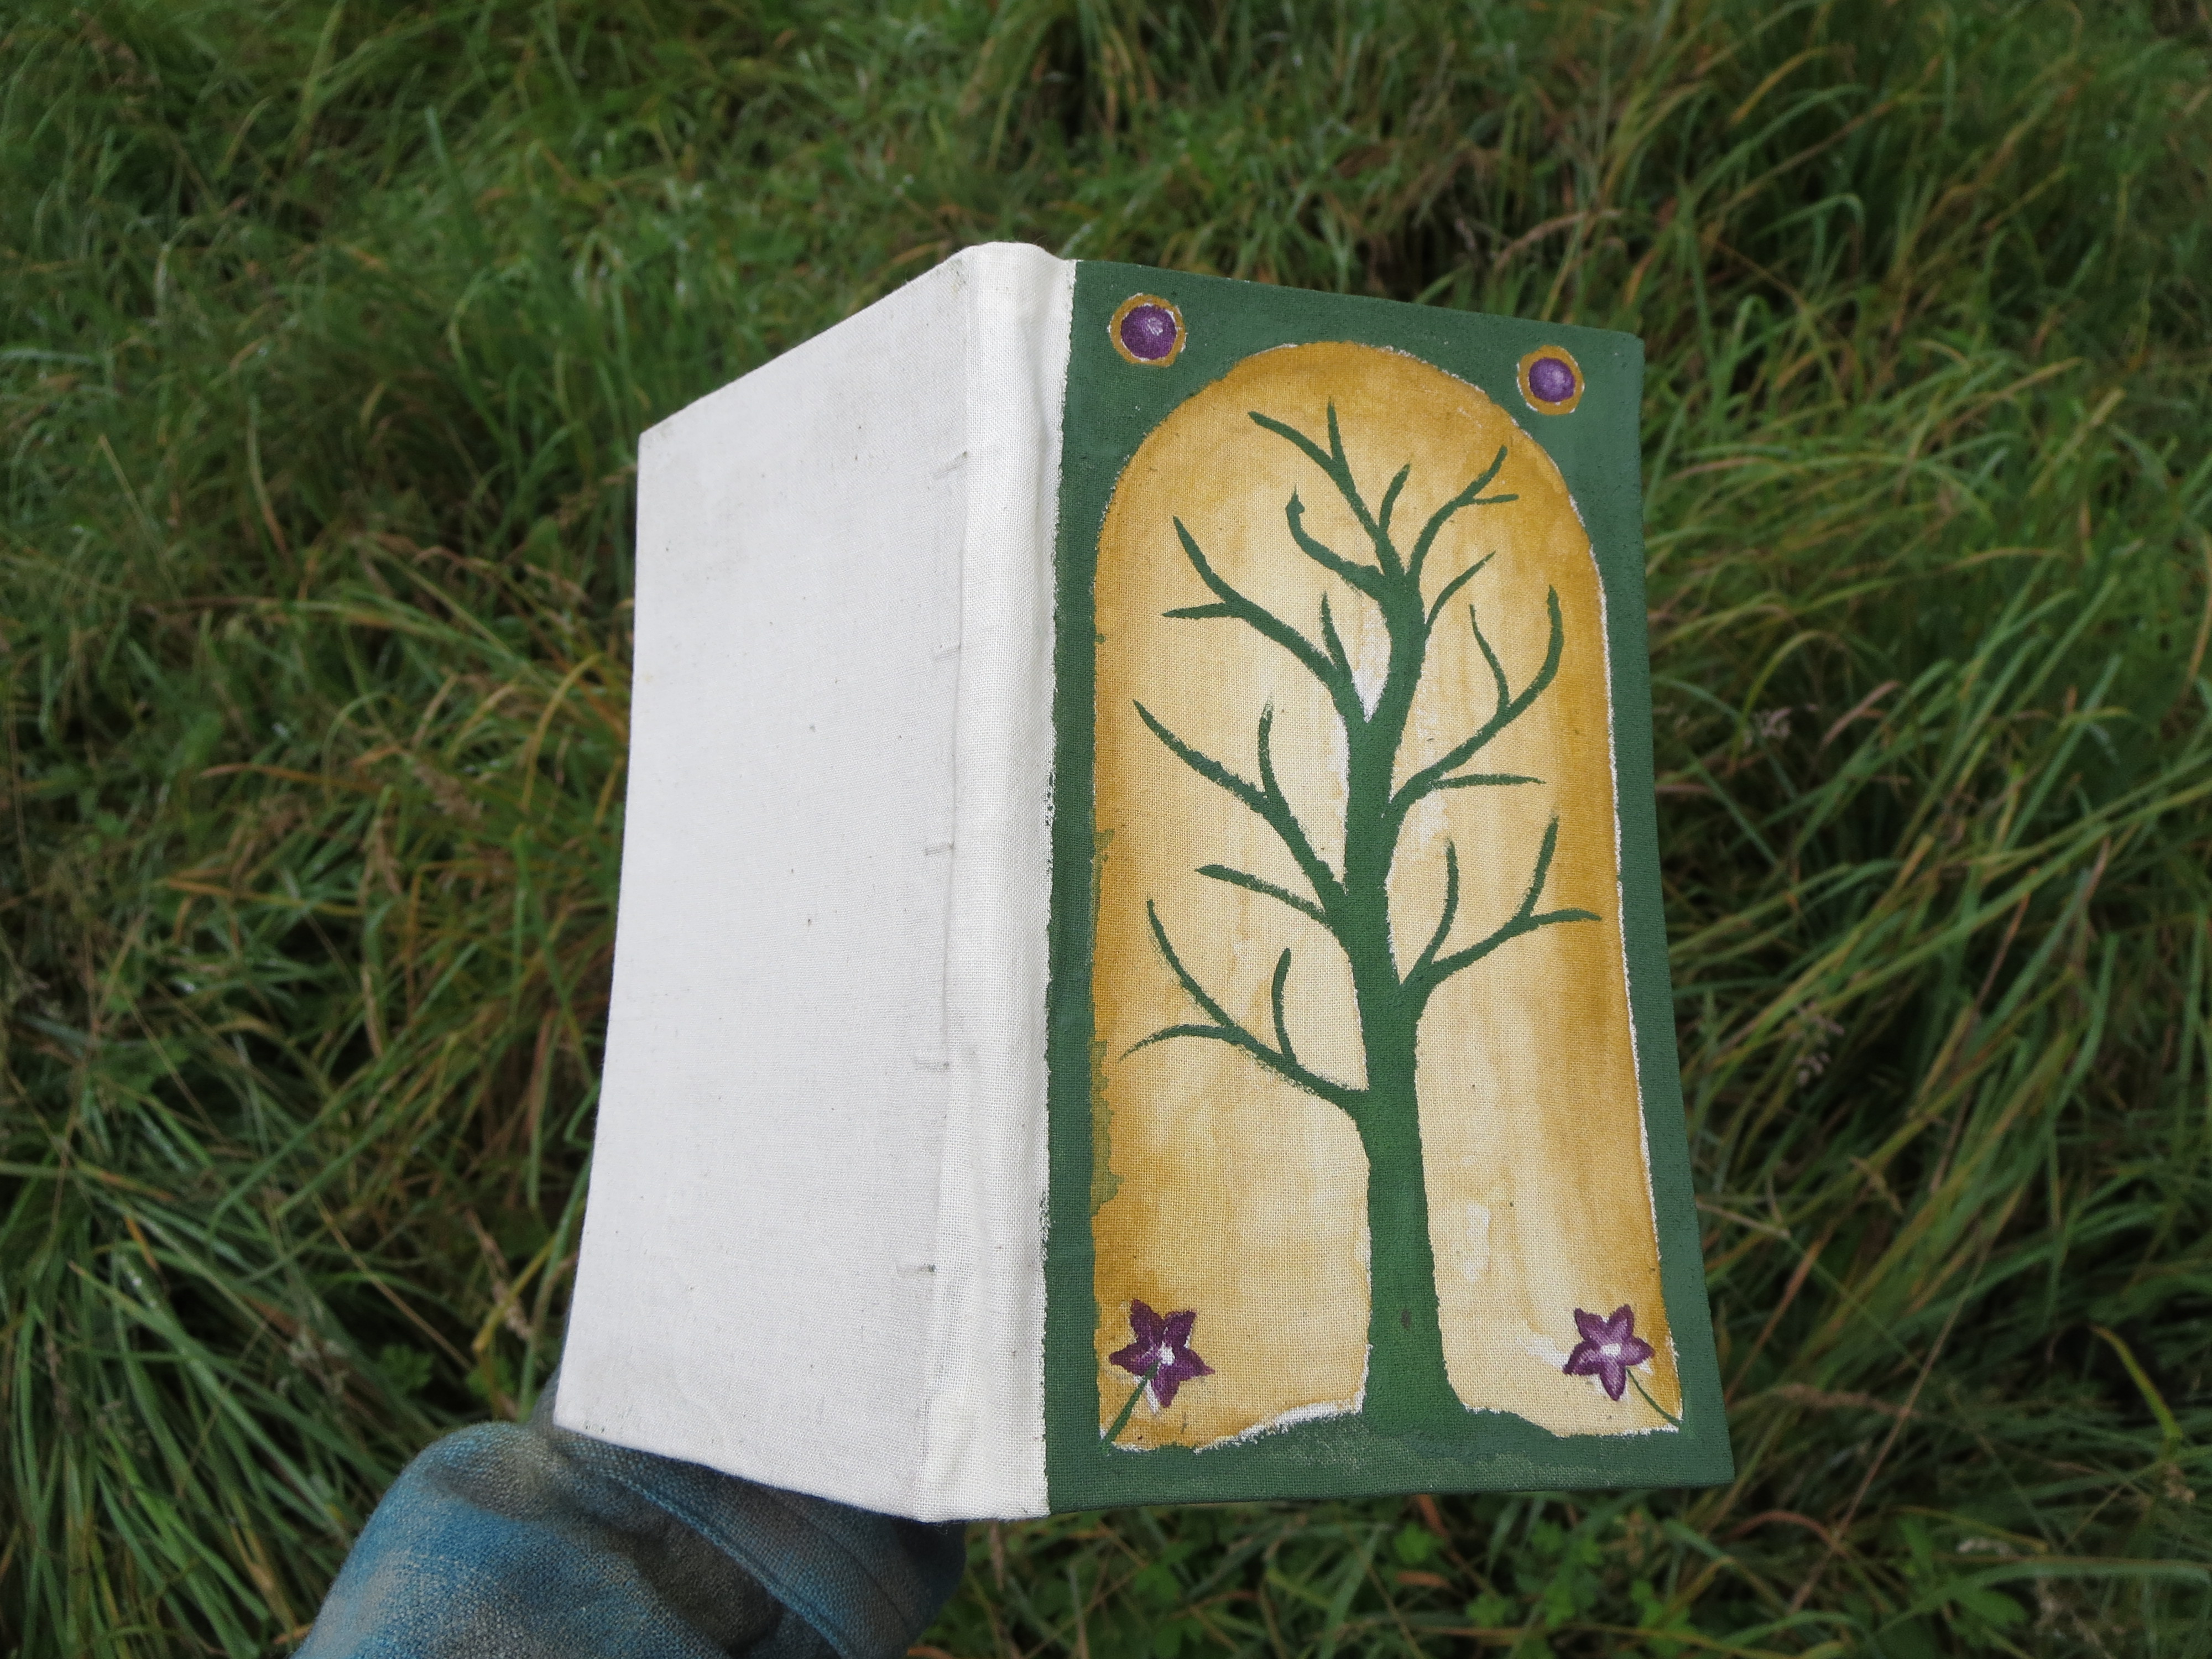
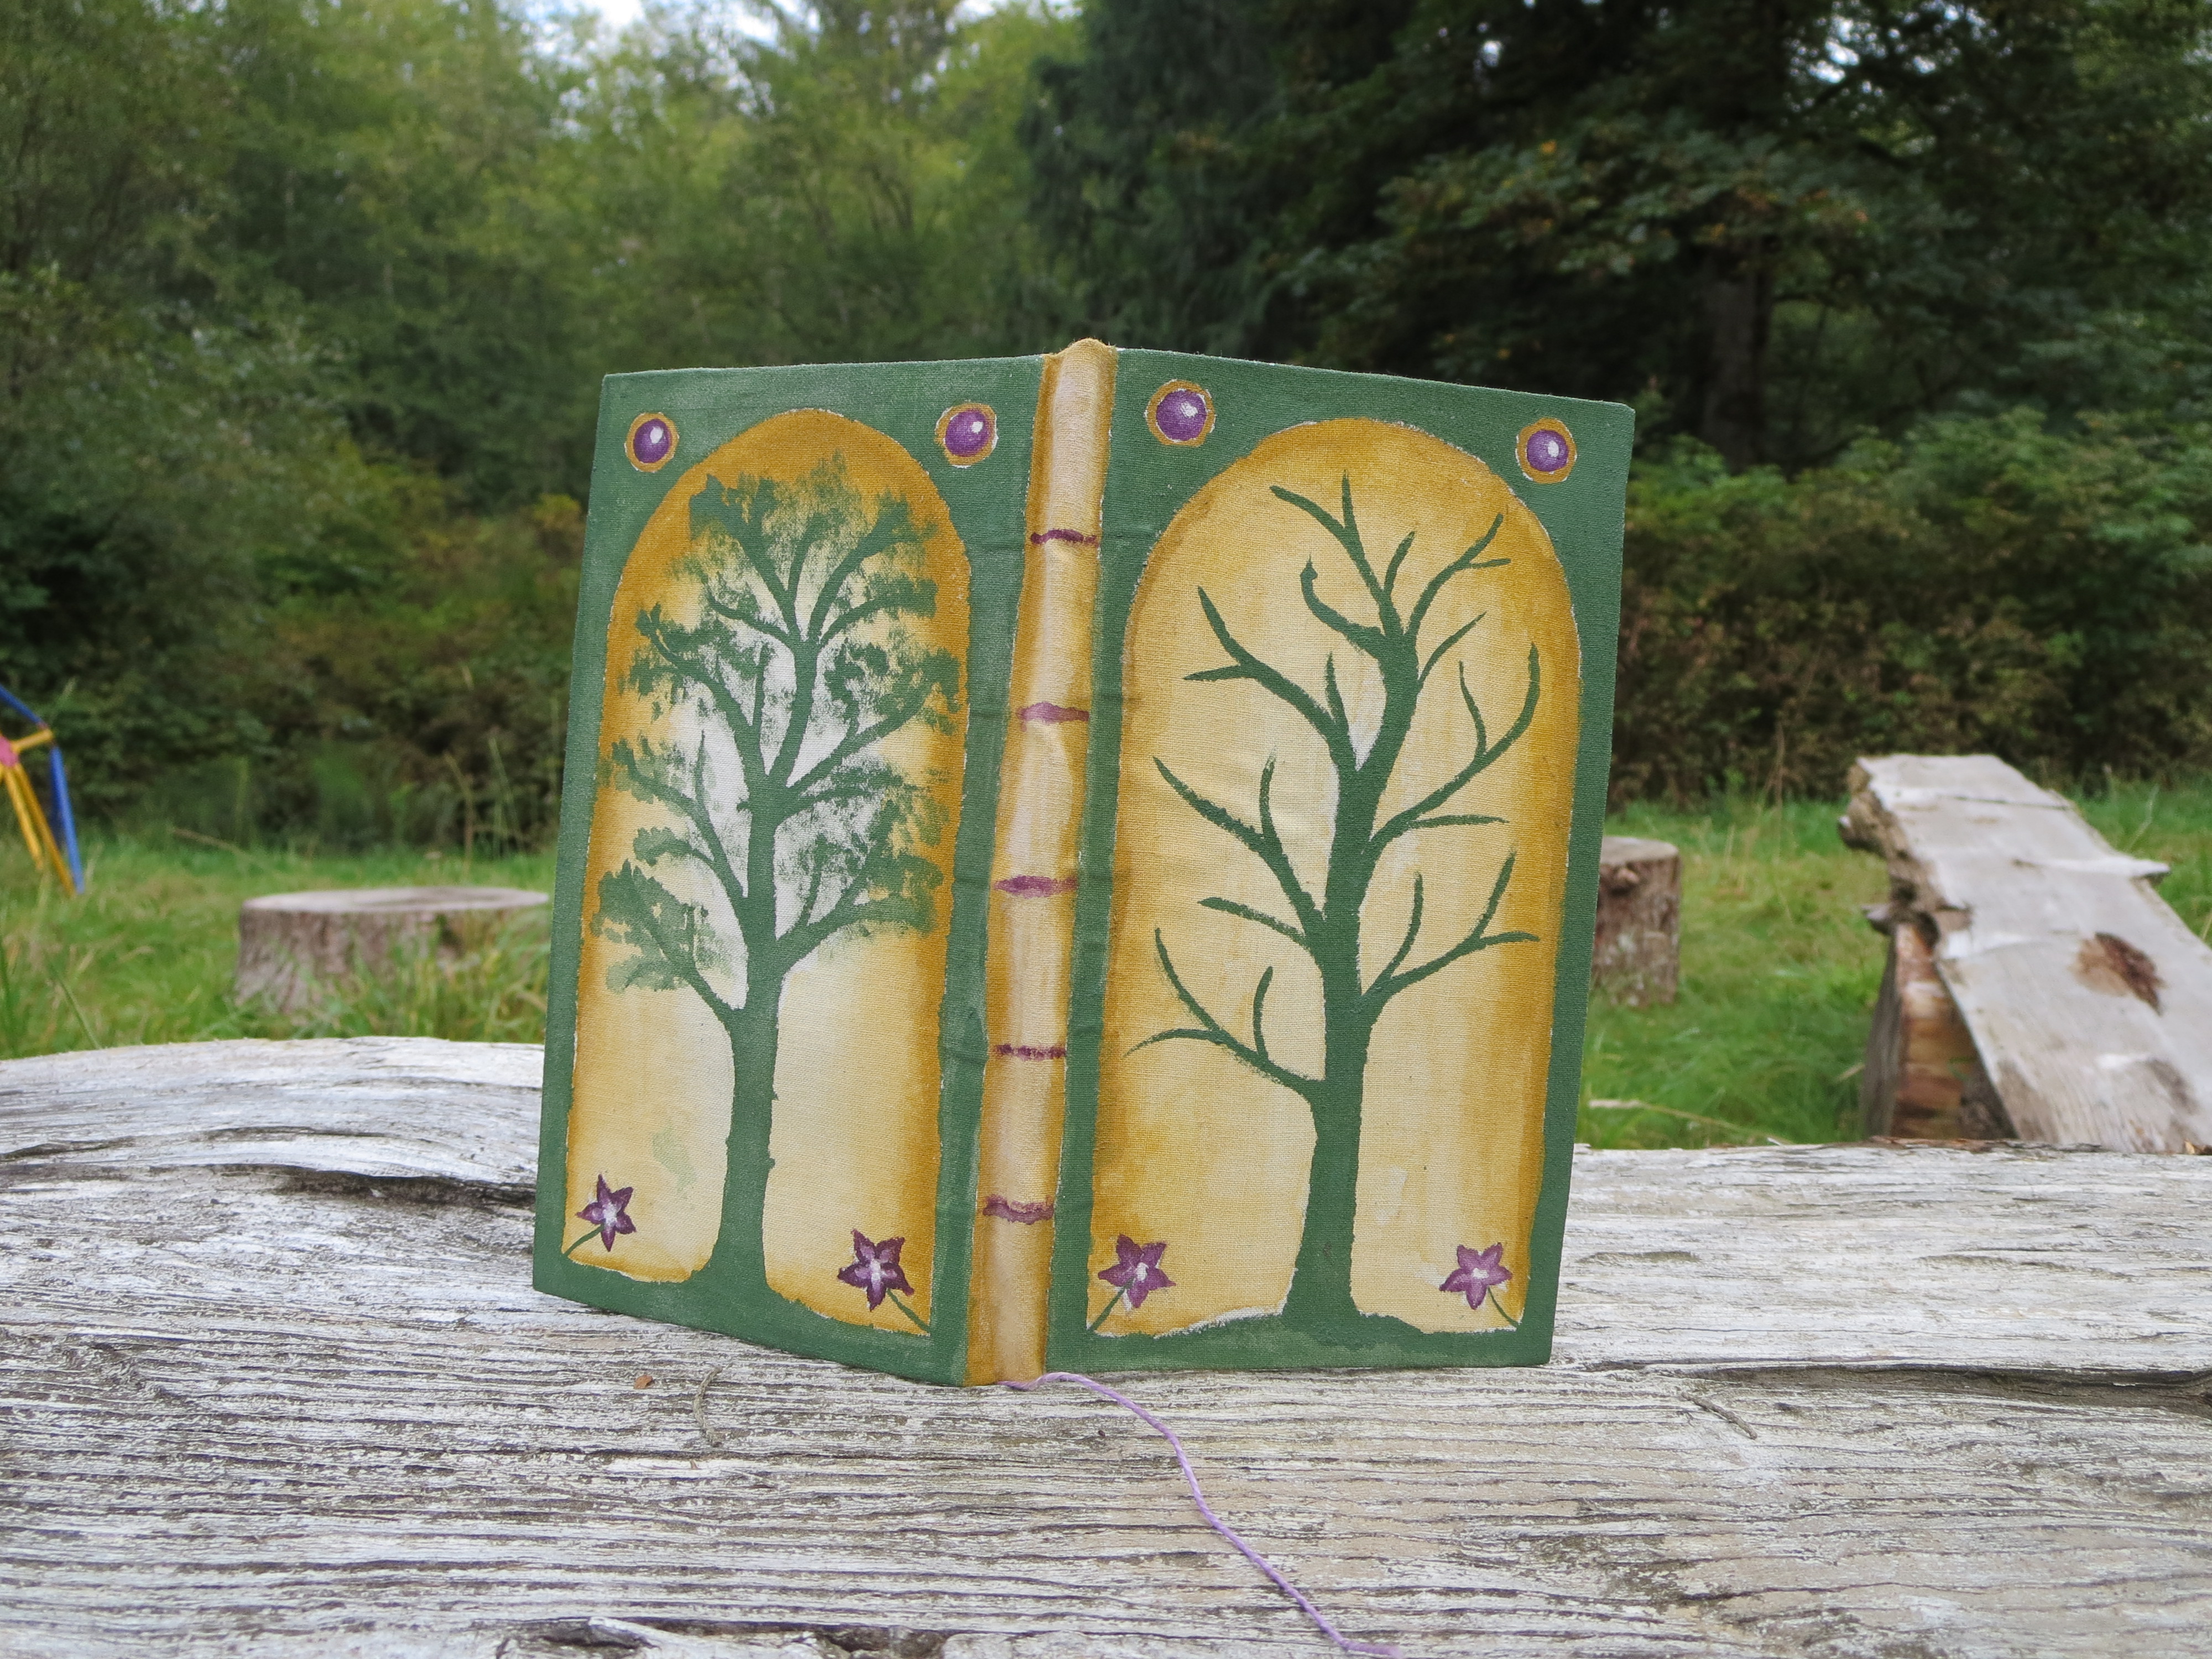
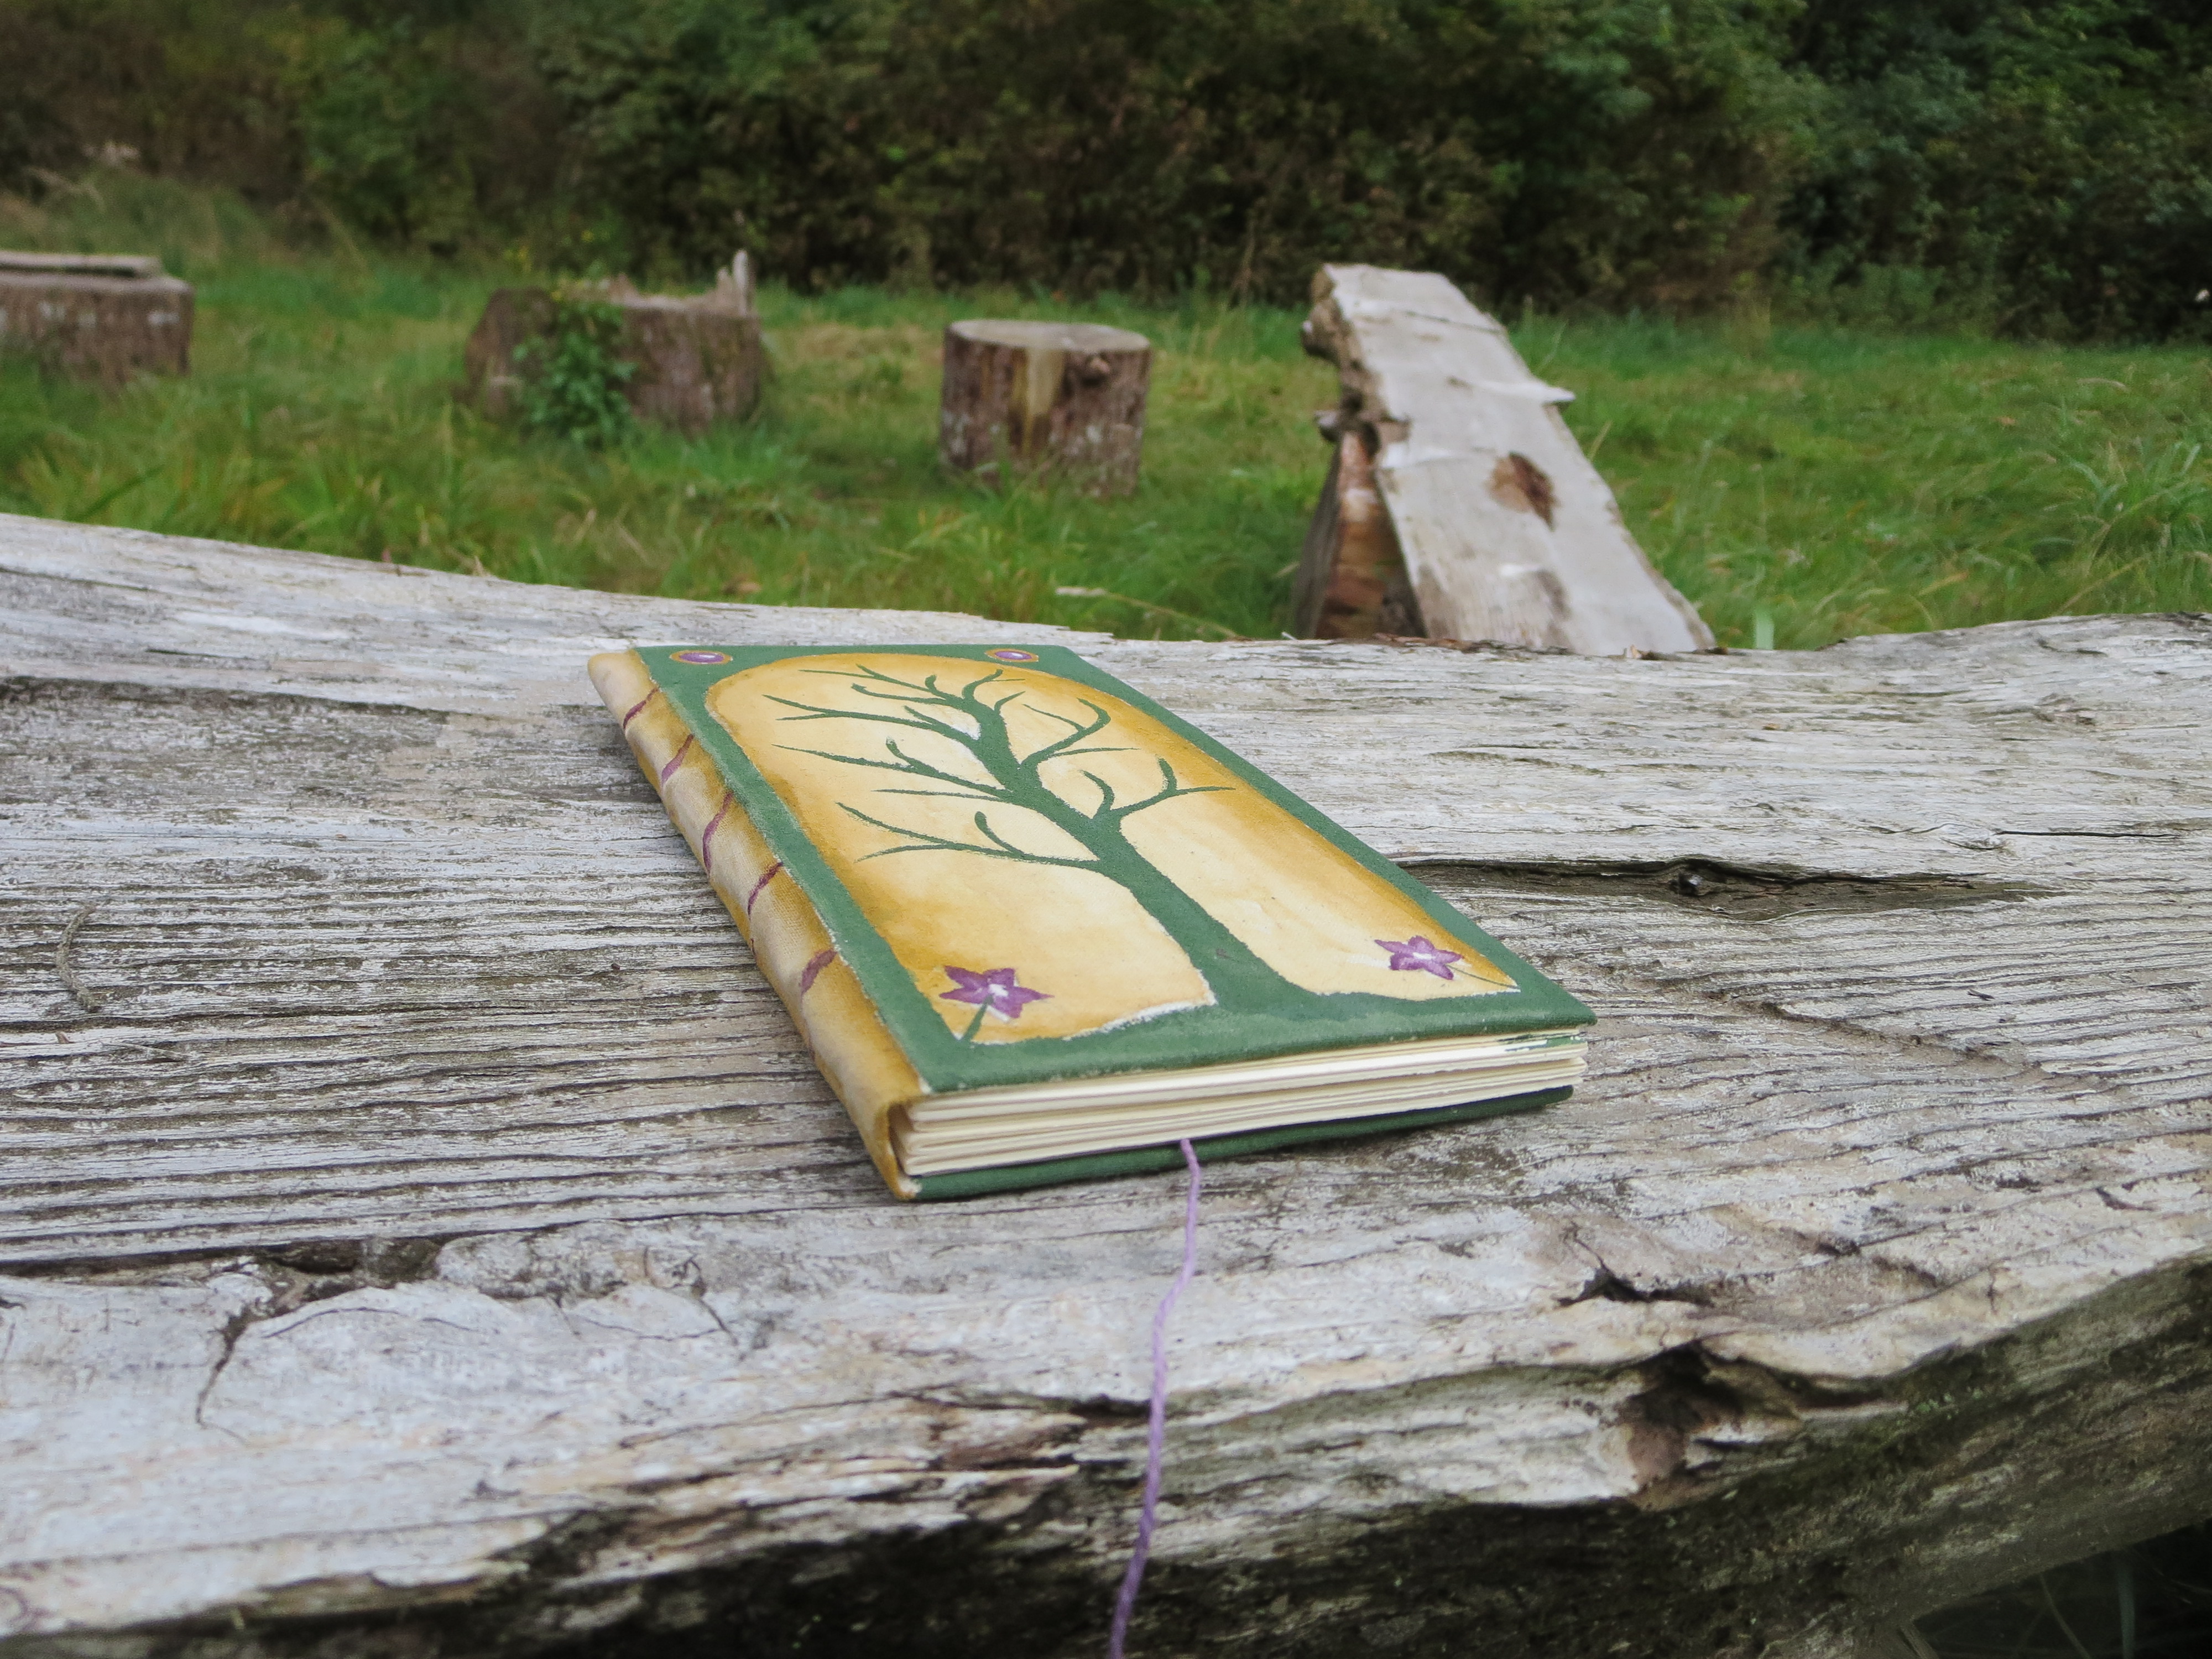
I did some more experimenting yesterday and today. To make it easier on myself, I'm describing what I did in the captions.
IMG_2457.JPG
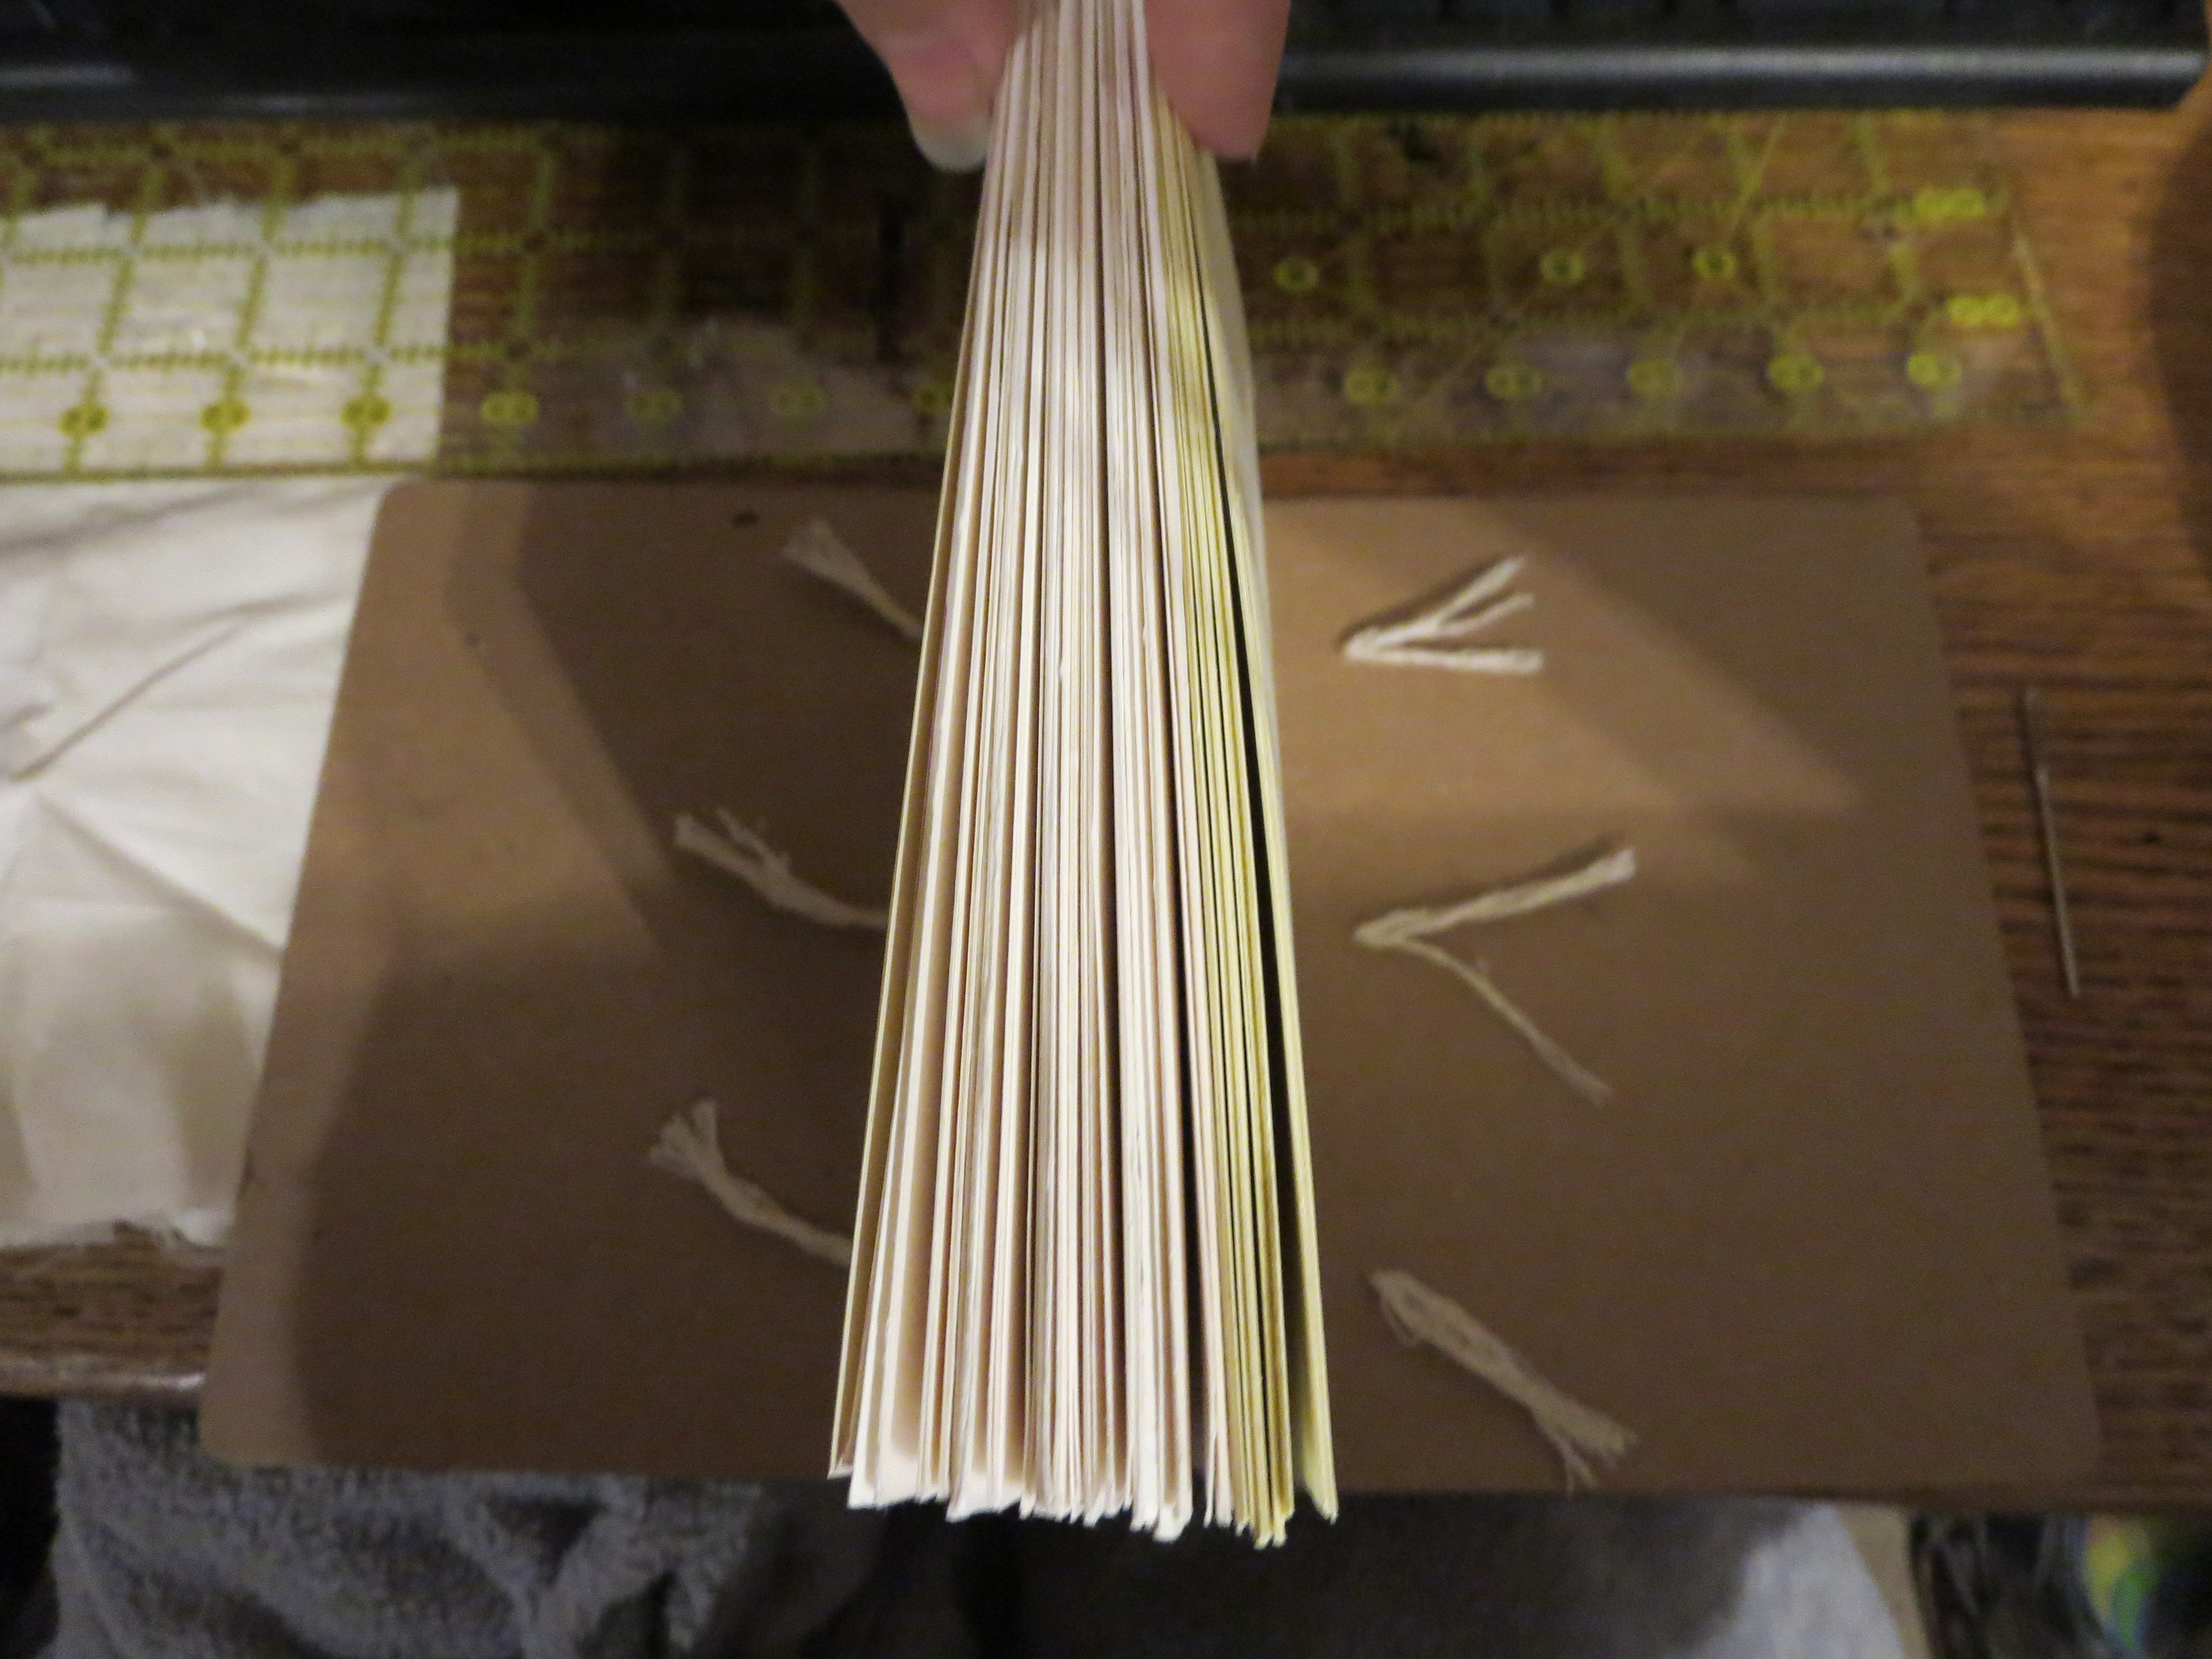
Inspired by Nina, I wanted to see if I could give this Coptic binding faux cords. I just used my thread to wrap them onto the binding
IMG_2458.JPG
Then I realized I could even make them functional if I used an awl to poke through the chipboard and send the cords through!
IMG_2463.JPG
Two experiments: left (green) is watercolor with crayon and colored pencil to seal them. Right is watercolor with damar resin
IMG_2465.JPG
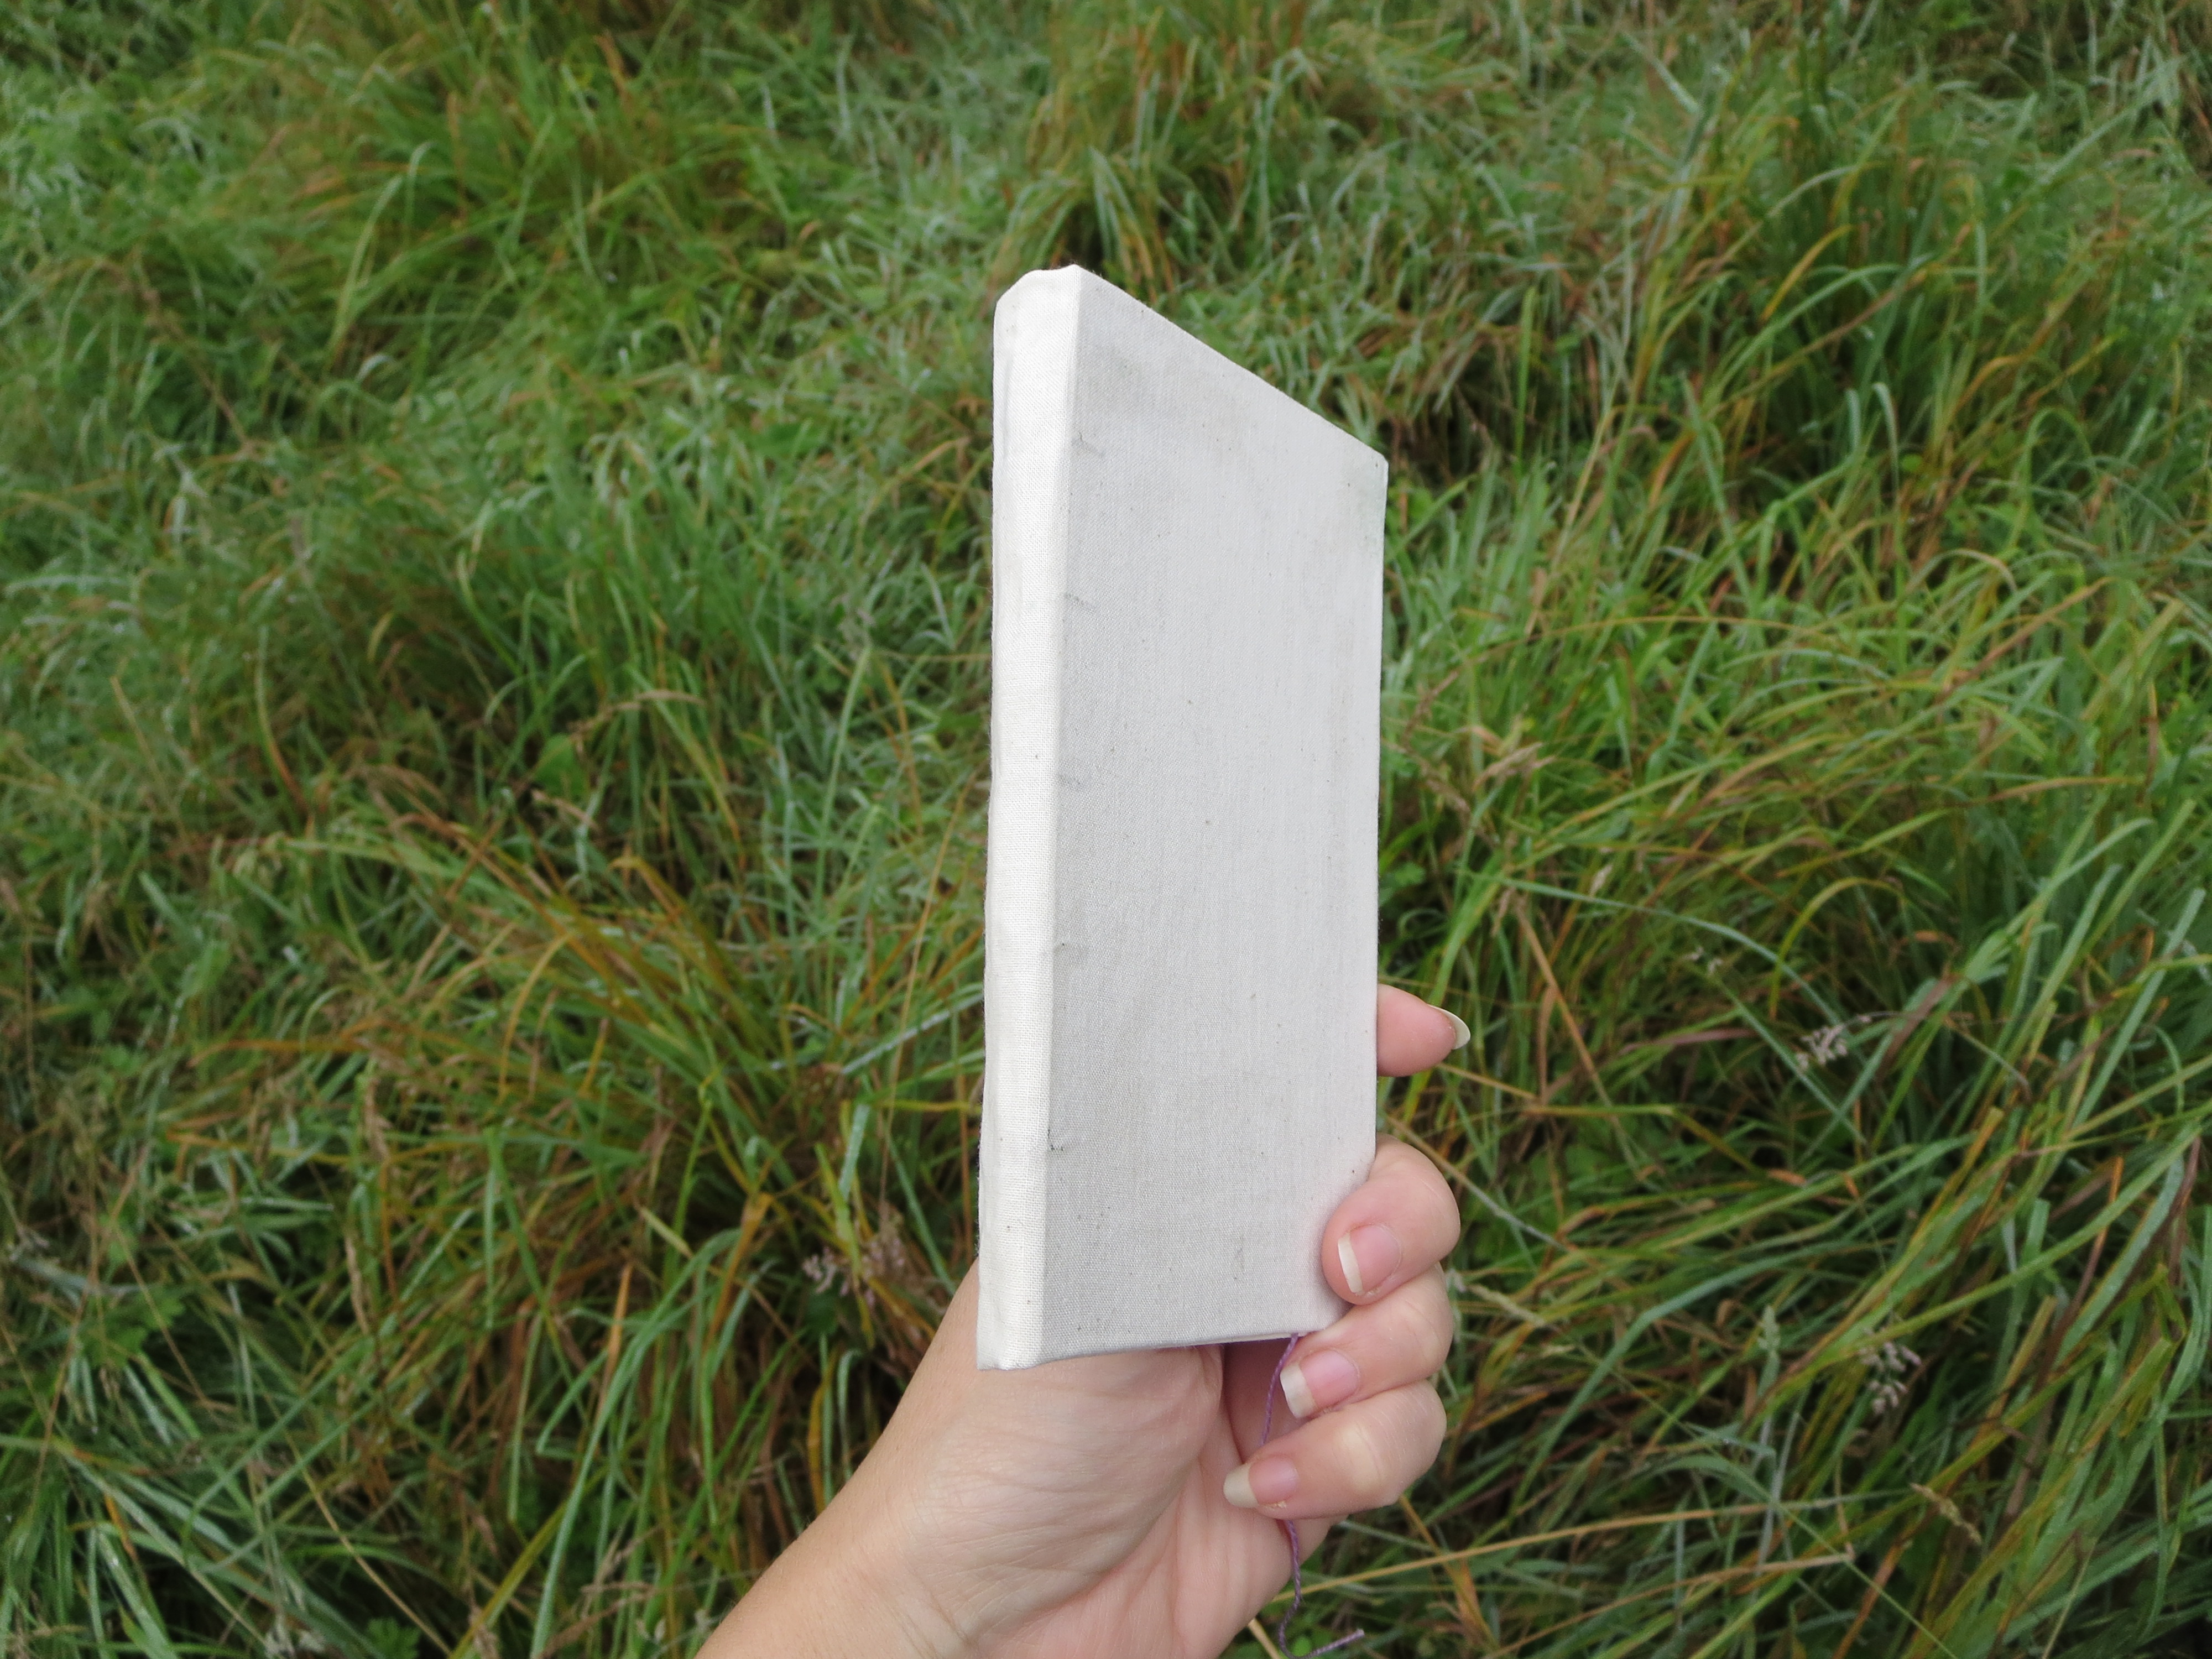
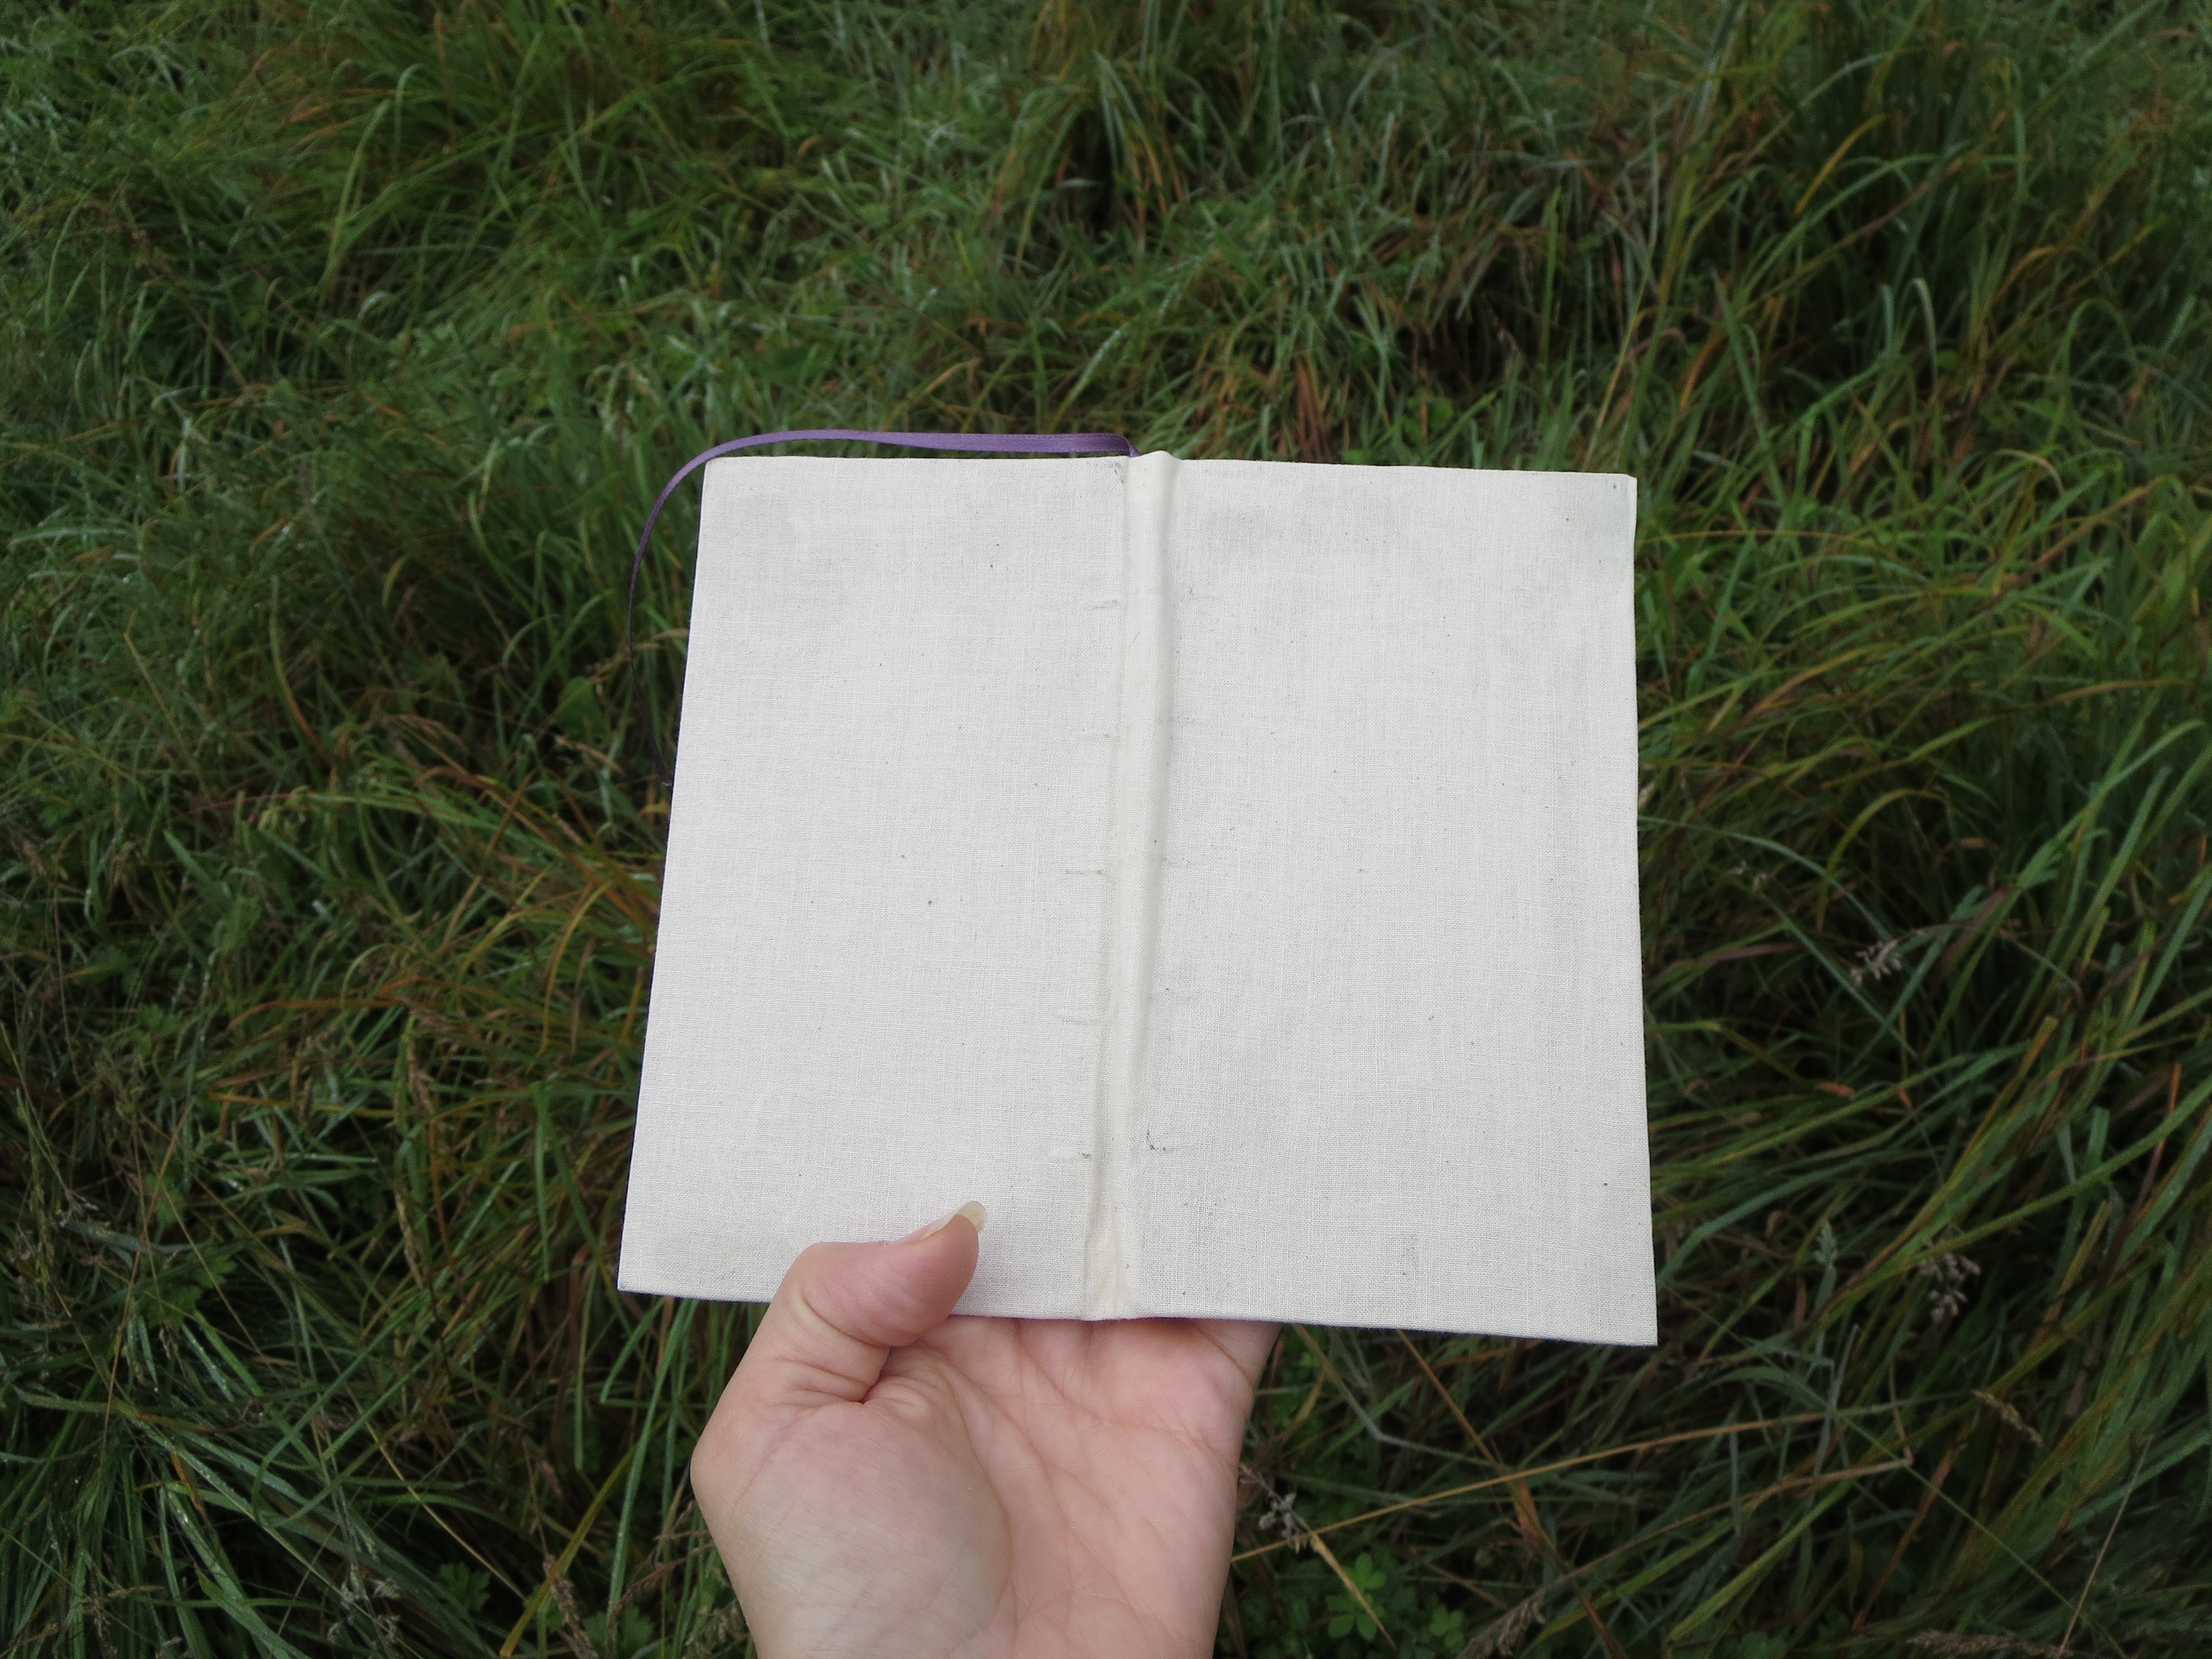
I used gelatin to cover this new journal. I probably won't use gelatin in class, because it's hard to keep liquid. But, I wanted this to be water resistant
IMG_2466.JPG
It looked surprisingly nice once glued down. It's like a canvas, or a modern fabric-covered hardback book. Nice!
IMG_2473.JPG
Waaaait, if it's just cotton glued with gelatin down to a board...doesn't that make it a canvas? Time to paint!
IMG_2475.JPG
One side painted. Suddenly this old cotton sheet doesn't look cheap at all!
IMG_2477.JPG
Both sides painted. My son wanted the tree to have leaves, so the back side has them. It's a little lopsided, but I like it!
IMG_2478.JPG
Looks nice! If I seal it with damar resin, it might even be waterproof (because these handmade watercolros sure arent')
 
r ransom
steward & author
Posts: 48415
Location: Left Coast Canada
20272
10
art trees books chicken cooking fiber arts
  • Likes 2
  • Mark post as helpful
  • send pies
    Number of slices to send:
    Optional 'thank-you' note:
  • Quote
  • Report post to moderator
Wow.

That looks fantastic!

 
Nicole Alderman
steward
Posts: 22885
Location: Pacific Northwest
13717
13
homeschooling hugelkultur kids art duck forest garden foraging fiber arts sheep wood heat homestead
  • Likes 7
  • Mark post as helpful
  • send pies
    Number of slices to send:
    Optional 'thank-you' note:
  • Quote
  • Report post to moderator
Things that worked:
  • Not gluing the spine. This made the book a bit more floppy, but it allows for the pages to open nice and flat
  • Adding cords after the fact. I could do the easier Coptic stitch method, but still get the appearance of the medieval cord binding. Win! This would allow some of the older kids to customize theirs if they wanted to.
  • The bland sheet fabric suddenly looks like a cloth-bound book once glued on. And, it's an open canvas. Kids could draw, paint, use crayon, etc, to decorate it. There's options for those that want more historical accuracy, and those who are less dexterous.
  • Putting a piece of paper under the cover while painting. If you don't, you'll probably paint the pages (which I did))
  • having pieces of paper the same size as the cover to sketch out design ideas.
  • Sketching on the cloth once it was glued down. So much easier than drawing on it when it's loose!
  • My kids thought the yellow ochre paint looked like leather. So, it looked like I had stained/painted leather. Nice!

  • Paint
  • Painting books is fun! I spent way too much time doing this today. But, it was fun! If I had fun, kids probably will, too.


Things that didn't quite work:
  • The boards liked to curl and do other annoying things when painted. Parchment paper and frequent pressing under heavy books fixed that, but it was still sub-par. Having to press so many books at school could get tricky. I could probably press them one on top of each other with parchment paper between books and under the covers, but, still tricky
  • My green watercolor was very thick, but probably should have had more gum arabic or honey or something, because it sometimes chipped off.
  • I used a small section of Elmers glue before switching to gelatin. The watercolor was a bit funky in that area, and didn't "stick" as well as in other areas. But, it wasn't anything too hard to overcome.
  • Watercolor paints bleed, especially if you don't wait between colors. And that makes sadness!


Things I wonder:
  • Will stick on jewels stick to crayon wax or Dorland's Wax? I have a feeling they won't...
  •  
    Nicole Alderman
    steward
    Posts: 22885
    Location: Pacific Northwest
    13717
    13
    homeschooling hugelkultur kids art duck forest garden foraging fiber arts sheep wood heat homestead
    • Likes 2
    • Mark post as helpful
    • send pies
      Number of slices to send:
      Optional 'thank-you' note:
    • Quote
    • Report post to moderator

    r ransom wrote:Wow.

    That looks fantastic!


    Thank you! I see so many places where I messed up a little, but I think the design ended up looking really nice, and other people probably won't notice the little flubs of paint.

    Do you think I need to wait until the paint is all the way dry before applying Dorland's Wax, or could I apply it tonight?
     
    Nina Surya
    rocket scientist
    Posts: 560
    Location: in the Middle Earth of France (18), zone 8a-8b
    357
    2
    hugelkultur dog tiny house chicken composting toilet cooking building sheep rocket stoves homestead composting
    • Likes 6
    • Mark post as helpful
    • send pies
      Number of slices to send:
      Optional 'thank-you' note:
    • Quote
    • Report post to moderator
    Nicole, that looks awesome!
    Wait until the paint is dry before applying wax.

    Your binding has real cords, not faux! You can just loop around the cord (go under the cord in the direction of sewing, loop around cord, go in book again and to the next sewing hole), no need to use the coptic link stitch since the thread is secured around the cord and won't be pulled into the section (fold of leaves).
    The traditional sewing on cords has link stitch (coptic stitch) at the head and tail of the book, and cords in between.

    You're absolutely right about the book opening flat when there's no glue on the spine of it

    You're finding out/remembering medieval binding techniques as you go! Good on you to attach the book to its covers with the cords.
    Endbands (another challenge) work much the same way, cord attaching the book block to its covers (original, medieval function of endbands when covers were heavier).
    If you fan out the cords on the inside of the covers, you can glue them down absolutely flat. We used to sand them ever so lightly and then glue down a fill-in paper that fit inside the turned-in and trimmed neat edges of the covering (same thickness too).

    I can't remember how we did the joint on the outside of the book, the bit where the cord goes from book block to cover boards. Some carving out space from the cover boards was involved to make a shallow 'gutter' for the cord from the spine-edge of cover to the hole where it goes to the other side (inside) of cover.
    But - that's all optimising, fancy stuff - WELL DONE with your creativity, finding out stuff on your own!

    Gelatine goes potentially sticky with moisture. Do you have gesso at hand?
    Waxing the covers after painting is a very good idea. Could you maybe use little stickers to cover the spots where the stick on jewels go while waxing, then you can just peel off stickers and stick on jewels (with extra glue)?

    Good luck, continue having fun with the experiments!
     
    steward and tree herder
    Posts: 14597
    Location: Isle of Skye, Scotland. Nearly 70 inches rain a year
    8273
    6
    transportation dog forest garden foraging trees books food preservation woodworking wood heat rocket stoves ungarbage
    • Likes 9
    • Mark post as helpful
    • send pies
      Number of slices to send:
      Optional 'thank-you' note:
    • Quote
    • Report post to moderator
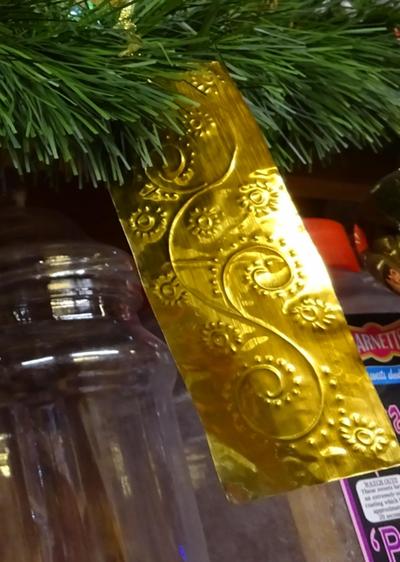
    I had some good success with embossing tomato puree tubes. The metal is a nice thickness and takes a ball point pen imprint nicely. I use it for plant labels - especially trees as you can wrap a strip around a branch and it grows with the tree. I also have used it for xmas decorations in the shop. You can have fun with different designs.

    embossed metal decoration

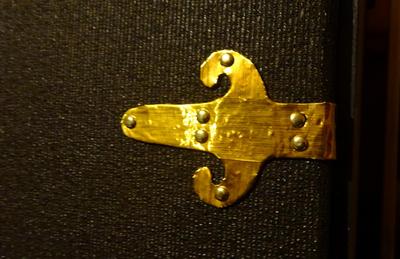
    I've also used it for 'steam punk' sort of hinges on my kitchen cupboards (well I only got round to doing one, but you get the idea!)

    steampunk foil hinge

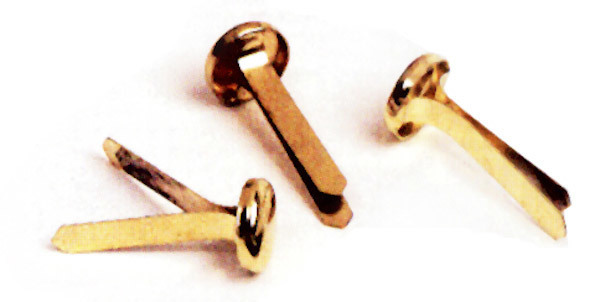
    In this case I wrapped it around a cardboard template to give it some depth. The 'rivets' are those split paper fasteners:


    source

    Anyway, I'm thinking that that sort of thing could make good corner protectors or clasps perhaps. The only thing you'd have to be careful of is that the metal edges can be quite sharp.
     
    Nina Surya
    rocket scientist
    Posts: 560
    Location: in the Middle Earth of France (18), zone 8a-8b
    357
    2
    hugelkultur dog tiny house chicken composting toilet cooking building sheep rocket stoves homestead composting
    • Likes 5
    • Mark post as helpful
    • send pies
      Number of slices to send:
      Optional 'thank-you' note:
    • Quote
    • Report post to moderator

    Nancy Reading wrote:I had some good success with embossing tomato puree tubes. The metal is a nice thickness and takes a ball point pen imprint nicely.
    ...
    Anyway, I'm thinking that that sort of thing could make good corner protectors or clasps perhaps. The only thing you'd have to be careful of is that the metal edges can be quite sharp.


    Sounds like a great find and a fun project to me! If you file the edges of the metal, and hammer sharp corners round you should be safe..ish, I think?

    Can't wait to see your finished book!

     
    It means our mission is in jeapordy! Quick, read this tiny ad!
    a new overhaul of the freeheat page - need feedbacks for world domination
    https://permies.com/t/389799/overhaul-freeheat-page-feedbacks-world
    reply
      Bookmark Topic Watch Topic
    • New Topic