• Post Reply Bookmark Topic Watch Topic
  • New Topic
permaculture forums growies critters building homesteading energy monies kitchen purity ungarbage community wilderness fiber arts art permaculture artisans regional education skip experiences global resources cider press projects digital market permies.com pie forums private forums all forums
this forum made possible by our volunteer staff, including ...
master stewards:
  • Carla Burke
  • Nancy Reading
  • John F Dean
  • r ranson
  • Jay Angler
  • paul wheaton
stewards:
  • Pearl Sutton
  • Leigh Tate
  • Devaka Cooray
master gardeners:
  • Christopher Weeks
  • Timothy Norton
gardeners:
  • thomas rubino
  • Matt McSpadden
  • Jeremy VanGelder

composting wood chips with chicken litter and fungi

 
gardener
Posts: 5451
Location: Southern Illinois
1492
transportation cat dog fungi trees building writing rocket stoves woodworking
  • Likes 2
  • Mark post as helpful
  • send pies
    Number of slices to send:
    Optional 'thank-you' note:
  • Quote
  • Report post to moderator
Chip pile picture update,

Thanks to some suggestions to make the decomposition quicken/progress over winter, I took my first actions in the chip pile in months.  I decided to use the human-urine-as-compost-accelerator-approach.  My initial plan was to dig a hole near the top and fill with used rabbit and hamster bedding that is piled nearby. I went ahead and peeled off the top foot or so of the wood chips (they were frozen into a solid crust), and below that top portion the chips were cool but not frozen.  Further, these chips were quite dark as you can see from the pictures.  8 months ago these chips were a bright white/blonde so some significant decomposition has already taken place, though the pile has a lot further to go.  I decided to forgo the bedding addition as it looks like there was ample microbial action in the pile already.  

For the last 2 days I had been peeing into a 2 1/2 gallon cat litter jug. I got about a gallon of urine and I added about 1 gallon more of lukewarm water to give it more volume (and a bit of heat to keep it from freezing immediately after pouring in).  Finally I covered up the top of the pile.  I plan to repeat this action several more times.

To be clear, I am not expecting to see any major decomposition any time soon as I know that it is winter and therefore cold.  Rather, I thought I might just boost the microbial action a bit with the added N and when the pile does heat up as the weather turns warmer, I will be one step ahead and not have to be thinking constantly "is it time to worry about decomposing chips yet?"  

As always, feel free to comment.

Eric
IMG_5802.JPG
Chip Pile with rake for scale
IMG_5803.JPG
Dark, crumbly wood chips already breaking down
IMG_5801.JPG
Pile-O-Hamster-Beddin
IMG_5805.JPG
Pile after N addition
 
Eric Hanson
gardener
Posts: 5451
Location: Southern Illinois
1492
transportation cat dog fungi trees building writing rocket stoves woodworking
  • Likes 1
  • Mark post as helpful
  • send pies
    Number of slices to send:
    Optional 'thank-you' note:
  • Quote
  • Report post to moderator
Good news on the chip bed!

Given that I live in Southern Illinois, winter is a hit-or-miss affair, and despite some freezing temperatures and even a little snow in the beginning of December, we have had about 3 weeks of rain and temperatures between about 40 to 60 degrees.  

Though I do not (and would not expect to) see any mushrooms in my chip bed at this time of year, I just checked on it while walking the dog and the bed was moist and sponge-like, almost like the chips are thoroughly rotting after all.  Moreover, as this bed grew tomatoes in fertile holes of manure last summer, I can plainly see that the chip bed has dropped about 1-2 inches.  The old fertile holes are now fertile mounds that protrude up about 2 inches where the old tomatoes were planted.  During summer the bed was perfectly level.  

I think this indicates decay, and judging from the chip-level drop, it seems like it has dropped more that when I last posted about a month ago.  Is it possible that the wine cap mycelia have continued doing their job over these last wet, cool weeks?  Given I had the dog, I could not really dig in to get a better perspective, but I can get out soon, dig in and get some pictures back.

Please let me know your thoughts.  This fungi project has me bursting with anticipation.

Thanks in advance,

Eric
 
Eric Hanson
gardener
Posts: 5451
Location: Southern Illinois
1492
transportation cat dog fungi trees building writing rocket stoves woodworking
  • Mark post as helpful
  • send pies
    Number of slices to send:
    Optional 'thank-you' note:
  • Quote
  • Report post to moderator
Even better news!

This time I went out with a hand rake and no dog.  I dug into the top few inches of the wood chips and about 1/4 are thoroughly colonized by strands of white mycelia.  All of the chips are dark and crumbly and while wood chips are still present, they are outnumbered by the much smaller crumbly looking material all around each larger chip.  

As of right now, the consistency of the mulch looks perfect for planting and while planting season is still 3-4 months out at the earliest, is this material ready for planting yet?  Certainly it will get better with time, but it feels like a good planting medium, almost like peat moss.

Would the medium need NPK amendments or would the mycelia provide their own nitrogen?  I am giving serious consideration to planting legumes to help with fertility (I really should have done this in fall, but I can do this with my next beds).

Where I grew tomatoes last year I am planning on growing summer squash, probably in the same fertile holes where the tomatoes grew.  I also thought I would grow beans to fix nitrogen.  Redhawk has given me some suggestions about getting bacteria into the mix and I will be doing this shortly.  I have also been advised to add urine for fertility and to feed bacteria.

So my end questions are:

1) would urine harm the mycelia?  I would think that some dilute urine would be fine but I don’t know this for certain.

2) is there anything else I can do in the meantime to speed along the decomposition process or help add general fertility?

Thanks so much in advance.  Prior to 8 months ago I would never have thought about deliberately using mushrooms as a compost agent, nor using mushroom compost as a growing medium.  Thanks to everyone who helped make this pie-in-the-sky idea a reality.

Eric

 
Eric Hanson
gardener
Posts: 5451
Location: Southern Illinois
1492
transportation cat dog fungi trees building writing rocket stoves woodworking
  • Likes 3
  • Mark post as helpful
  • send pies
    Number of slices to send:
    Optional 'thank-you' note:
  • Quote
  • Report post to moderator
Hello,

This thread has evolved dramatically since I first started it.  I am now a lot more familiar with fungi than I was just months before and I think I have done my garden a lot of good by adding the wood chip and mushroom compost.  Thanks so very much to all those who helped me, guided me away from using 10-10-10 for composting and for generally encouraged me along the way.

I still have some questions as were stated in the last two posts I have made.  The first question is basically "is this composted enough that I could direct seed into?"  The material is dark, smells earthy and is spongy.  It feels so much better than it did even just a few months ago when I last posted pictures.  The weather has been nearly perfect for fungi--cool but not cold, wet and very, very gray skies.

My second question is about adding anything to increase the bacterial count.  I will take Redhawk's suggestion and add the rice/spoiled milk mixture, but I was wondering about adding my own dilute urine (perhaps with molasses) as well.  I have heard mixed information about nitrogen.  Too much and it seems to hurt the fungi, but some is necessary for the bacteria and even some is needed for fungi?  Do I have this about right?  

I am asking now because I want to take action early in anticipation of spring and not wait for spring to come around when it is too late for the early season.  I apologize for the out of focus picture, the camera just would not focus on the mycelia strands no matter how hard I tried.

I am attaching these pictures because I think they represent the condition of the bed as a whole and show some of my findings.


Picture 1 is simply a picture of the bed for perspective.

Picture 2 is a close up of picture one but dug just under the surface

Picture 3 is sadly out of focus, but does show mycelia

Picture 4 is a picture of the surface that until today has never been disturbed since innoculation

Picture 5 is a close up of picture 4

Picture 6 is a small dug up portion of picture 4 that shows mycelia on my little hand rake

I really look forward to your responses.  Optimistically I hope I can direct seed into this material, meaning if today were April and not January, I could just go out and seed right into the chips.  If this is not the case, please tell me and help me get this bed into plant-worthy condition.


Thanks much in advance,

Eric

IMG_5816.JPG
mushroom compost chip bed
IMG_5820.JPG
Wood chips under straw
IMG_5821.JPG
white strands of Stropharia growing in wood chips
IMG_5826.JPG
Undisturbed surface of mushroom bed
IMG_5827.JPG
Image of undisturbed wood chip surface wine caps
IMG_5828.JPG
Mycelium strands growing in wood chips over winter
 
Eric Hanson
gardener
Posts: 5451
Location: Southern Illinois
1492
transportation cat dog fungi trees building writing rocket stoves woodworking
  • Mark post as helpful
  • send pies
    Number of slices to send:
    Optional 'thank-you' note:
  • Quote
  • Report post to moderator
I should have added this in yesterday but I forgot.

If you look at some of the pictures, there is some grass growing, but I can not tell if this from blown seeds or if it is from seed in the straw on the top.  I did pull out one clump of grass that looked like it had developed a root mass in the chips.  Today we got our first sunlight in about 10 days and I can see from looking and poking at the material that it is plainly spongy, almost like a whole mass responding to the force of my finger or foot pressing into it and not like the chip pile from a month ago that refused to give way easily to my poking and prodding.  Is this indicative that the last 3 weeks of dreary but mild weather have really helped break the material down?

Thanks in advance, any input appreciated.

Eric
 
gardener
Posts: 6814
Location: Arkansas - Zone 7B/8A stoney, sandy loam soil pH 6.5
1647
hugelkultur dog forest garden duck fish fungi hunting books chicken writing homestead
  • Likes 4
  • Mark post as helpful
  • send pies
    Number of slices to send:
    Optional 'thank-you' note:
  • Quote
  • Report post to moderator
I want to apologize for not getting to this post sooner.

The spongy feel of your heap is caused by 1. fungal hyphae becoming well established (step one in mushroom production) and 2. the lignin breakdown by bacteria which are the food for the mycelium.
I would expect the heap to be fairly well moisturized now that the fungi have become well established. (they tend to hold moisture in place very well.
At this time I would try to not disturb the heap so the hyphae can fully inhabit the heap of wood chips which will cause the breakdown to move along quicker than it has previously.
If you were to make additions at this time items like spent coffee grounds and greens would be the best choices as long as you mix them with something like straw bedding or even hamster litter.

I expect you will get a nice flush of winecaps come late spring.
I would try to hold off on using this heap in gardens until you have gotten that first flush of mushrooms, once you do incorporate it in the gardens, the process will continue there.

Redhawk
 
Eric Hanson
gardener
Posts: 5451
Location: Southern Illinois
1492
transportation cat dog fungi trees building writing rocket stoves woodworking
  • Mark post as helpful
  • send pies
    Number of slices to send:
    Optional 'thank-you' note:
  • Quote
  • Report post to moderator
Redhawk,

Absolutely no worries about response time and thank you very much for your insight as always.

Glad to hear that you think this is headed in the right direction.  I think will mix in some coffee grounds into our growing pile of hamster litter and rabbit bedding (my daughter’s hamster now has a new neighbor --a lion head bunny), maybe even add some of my own urine, mix the whole concoction up and apply it as a layer over the wood chips and cover with straw--once the torrential rains stop.

Thanks again,

Eric
 
Eric Hanson
gardener
Posts: 5451
Location: Southern Illinois
1492
transportation cat dog fungi trees building writing rocket stoves woodworking
  • Mark post as helpful
  • send pies
    Number of slices to send:
    Optional 'thank-you' note:
  • Quote
  • Report post to moderator
Some good signs and some weird good news,

First off, thanks to everyone who has helped me along with this project.  I feel like I have sort of grown up into a Permie by making this mushroom compost.  My thanks go out especially to Redhawk, who as we all know is a sage about all things compost and microbial.  The good news is that the wood chips have further visibly broken down from just a couple of days age.  I really did not think that I would see results in this time span, but the surface of the chips looks more and more like peat moss than a pile of chips.  The weird good news is that the little bits of grass on top are growing quite well, I think indicating a good supply of nitrogen.

I don't know if anyone knows the answer to this, but does the wine cap compost provide any nitrogen?  Adding some certainly will not be an issue, I just like to use this unusually warm spell this time of year to really promote all things rot and decay in the chip bed.


Thanks a bunch,

Eric
 
Eric Hanson
gardener
Posts: 5451
Location: Southern Illinois
1492
transportation cat dog fungi trees building writing rocket stoves woodworking
  • Mark post as helpful
  • send pies
    Number of slices to send:
    Optional 'thank-you' note:
  • Quote
  • Report post to moderator
Updates

So I am keeping this thread updated to chronicle the progress of a garden bed going from a literal pile of wood chips to hopefully a highly fertile, productive garden bed that produces a bounty of vegetables and maybe even some mushrooms to boot.  I have not posted in the last 3 months or so as the progress in the bed has been very slow and steady--nothing dramatic happening.  Among the observations that I can make are the fact that the surface level of the chips continues to drop.  I can measure this by comparing the surface level of the chips to the surface level of the topsoil I placed in a fertile hole.  At the time of putting in the fertile hole, the topsoil actually stopped about 2 inches from the surface of the chips (the topsoil itself was covered with 2 inches of wood chip mulch).  By now, the fertile holes are now fertile mounts that protrude perhaps 2-3 inches above the surrounding chips surface.

A second observation that I can see is that the chips in the center of the bed have degraded to the point where they now look like coffee grounds as opposed to chips.  The top inch or so still looks like chips that are breaking down, but under that layer, the chips are now looking/feeling like sawdust.  Their friability feels perfect for planting and they retain moisture as well.

Apparently I am going to have to weed after all.  Several volunteer plants are coming up on their own and look nice and green.  This does include a couple of weeds that I am pretty sure are legumes so I am not surprised that these are nice and dark green.  However, I do have some volunteer grass that is coming up and it too is dark green and when I pull the grass gently up strands of mycelium are wrapped around the roots.  I am encouraged by the fungal activity, but I am curious as to where the nitrogen for the grass came from.

Final observation, and I may have to get a picture for this, is that I have peas growing in the bed.  I planted about 300 of them about 2 weeks ago and now I have several that are about an inch or so tall.  I am not growing these so much as a crop but rather for putting nitrogen into the chips, both via their roots and by having their vines rot down after they die back this summer.  Just to be extra scrupulous about the nitrogen, I am planning on following the peas with beans this summer.

At any rate, this is an update to the thread to chart its progress.  With a little luck, this summer I will be growing summer squash where the tomatoes grew last year and I intend to plant some leafy greens into the chips soon.

Thanks to all who have offered up input and advice on this project.  I was going to use 10-10-10 to accelerate decomposition, but I am really pleased that I went with biology over chemistry.

Eric
 
Eric Hanson
gardener
Posts: 5451
Location: Southern Illinois
1492
transportation cat dog fungi trees building writing rocket stoves woodworking
  • Likes 7
  • Mark post as helpful
  • send pies
    Number of slices to send:
    Optional 'thank-you' note:
  • Quote
  • Report post to moderator
Another update  (5/3/19)

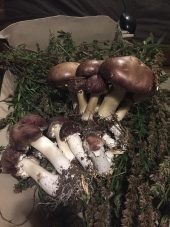
I am keeping this thread periodically updated as circumstances develop in order to chart progress for anyone trying a similar project.  It has been about 3 weeks since my last post and at that time I had no mushrooms.  Starting about 2 weeks ago I got my first baby wine cap in a small cluster of about 4 mushrooms.  Since that time, the mushrooms have been growing exponentially.  It is somewhat odd to look at the garden bed now as it appears that about every two days I get another flush of mushrooms that literally spring to life overnight.  I mean this in the very literal sense--I checked the bed last night and many of the mushrooms that are plainly visible this morning were simply not there yesterday evening.  Some of these mushrooms are absolutely huge!  I got a picture of one mushroom that was larger than my hand with fingers outstretched.  I would estimate that most of the mushrooms are about the size of the palm of my hand (I do have large hands, so in the pictures you can get an idea of the scale).  

I have tried a couple of the very few mushrooms that I caught while still small and they have a nutty-woody taste, not unlike a portabella, but perhaps a bit woodier.  I am enclosing pictures from this morning just so that you can get an idea of the sheer size of the mushrooms and the fast rate at which they grow.  Additionally, I am not the only one who thinks that the mushrooms are tasty as something in my garden keeps eating the mushrooms! That is alright by me as my main purpose is the mushroom compost underneath the surface.  When I started this project I was terribly nervous about things not working out.  Really, all I needed was time and more patience.  I am planning on inoculating three more beds soon at which point I will be done buying wine cap mushrooms as if I ever want any more for any reason, I will simply dig up some of the mushroom compost I already have.  
I will continue to add chips to the surface as the fungi are clearly eating through much of the volume.  

And again, I am enthusiastic about the appearance of mushrooms mostly for the fact that the mycelia have done a very thorough job of breaking down my wood chips into some very nice garden bedding.  This whole enterprise was an attempt to make my own gardening "soil" (perhaps bedding is the right word, I am not exactly certain).  I am attaching some pictures to show just how many mushrooms are popping up all over the bed.  I will continue to update as major changes take place.


I am keeping track of these in the hopes that this record might be of help to someone else who is trying wine cap mushrooms for the first time.  I have learned a tremendous amount of information from these forums and if I can pay it forward, so much the better,

Eric
Something-ate-my-mushroom.jpg
Something ate my mushroom
A-nice-row-of-mushrooms.jpg
A nice row of mushrooms
1-2-day-old-mushrooms.jpg
1-2 day old mushrooms
3-4-day-old-mushrooms.jpg
3-4 day old mushrooms
A-huge-mushroom.jpg
A huge mushroom
A huge mushroom
Some-nice-1-day-old-mushrooms.jpg
Some nice 1 day old mushrooms
 
Posts: 2
2
  • Mark post as helpful
  • send pies
    Number of slices to send:
    Optional 'thank-you' note:
  • Quote
  • Report post to moderator

Bryant RedHawk wrote:

What I'm going to recommend at this point in your wood chip compost is to add bacteria, most likely you have plenty of mycelium growing in that heap but fungi like to feed on bacteria left overs and bacteria use enzymes to break down lignin which is what gives wood its structure.
If you have some fermented vegetable matter going (bokashi) or if you don't, it is fairly easy to grow some good bacteria to add to your wood chip heap, this will speed up the breakdown.

Ways to grow bacteria:

Rice Base (EM) - rinse and part cook about a cup of rice (boil 2 cups water and use 1 1/2 cup rice), this is less water than that much rice needs to fully cook, when the water is almost adsorbed by the rice, turn off the heat and add cool water to stop the cooking process.
Pour that rice/water mixture into a pail and add 1 cup soured milk (have an almost out of date jug in the fridge? that is perfect if you do), stir this mixture and set a lid on the pail, put in a fairly warm spot. Check in three days, it should be ready to pour onto the wood chip heap.

The Bokashi style - use a 5 gal pail and toss your scrap vegetable materials in at every prep session, once there is enough to fill the pail 3/4 full add some (1. near out or out of date milk, or 2. one single serving of plain yogurt), stir in and again set a cover on the pail and place in a warmish spot. (this takes about a week)

Fridge clean out method -  have any fuzzy items in the fridge? this is a good time to simply toss those onto the wood chip heap and work them under the surface a bit.

There are three easy peasy methods to get some good bacteria into that wood chip heap.
Once the bacteria are multiplying along, the fungi will be able to get more of the foods it loves and needs to grow quickly.
This will work on all your wood chip heaps.

I wrote up some faster methods for making the biodynamic style preparations (they are easy access on the soil forum at the top)

Redhawk


How would one best utilize large quantities of spent brewer's grain and huge volume of stale milk/dairy in faciitating biological activity in the wood chip substrate (ideally in conjuction with feeding hogs)?
 
Eric Hanson
gardener
Posts: 5451
Location: Southern Illinois
1492
transportation cat dog fungi trees building writing rocket stoves woodworking
  • Likes 1
  • Mark post as helpful
  • send pies
    Number of slices to send:
    Optional 'thank-you' note:
  • Quote
  • Report post to moderator
I don’t have hogs, but if I had the grains and milk I would be tempted to mix them together and let them sit for a couple days.  This would just be to get the microbial action really going.  As for actually using them, I would apply them directly to your woodchips and mix in a bit.  I might dilute with water if I thought that would help spread the mixture better but it is not necessary.

All of this assumes no hogs.  I am certain that you could feed all of this to the hogs and their manure would be high quality.  I don’t know if the hogs’ digestion would eradicate the microbes in the grains/milk though.

Just my thoughts,

Eric
 
Posts: 1510
110
  • Mark post as helpful
  • send pies
    Number of slices to send:
    Optional 'thank-you' note:
  • Quote
  • Report post to moderator
that's great
nows time to pull out the mushroom cook book
Content minimized. Click to view
 
Bryant RedHawk
gardener
Posts: 6814
Location: Arkansas - Zone 7B/8A stoney, sandy loam soil pH 6.5
1647
hugelkultur dog forest garden duck fish fungi hunting books chicken writing homestead
  • Likes 5
  • Mark post as helpful
  • send pies
    Number of slices to send:
    Optional 'thank-you' note:
  • Quote
  • Report post to moderator
hau Mark,

You can consider the spent brewer's grain as;
1. hog food, they love that stuff and it won't hurt them unless you over feed them.
2. As if they are wood chips, spent grains do very well as a mushroom substrate and should you make a heap with the spent grains and then pour some of the stale milk over them, you have created a container-less bokashi environment (just with O2 (aerobic) instead of anaerobic).
That means the bacteria counts in the heap will go up and you would end up with a wider variety of bacteria species (great for the health of soil, fungi mycelium and your health).

If you have wood chips and you were to make layers of those wood chips and the  brewer's spent grains and if you then poured the stale milk over the whole heap, you would have a fantastic microbe environment.
Should you then add any animal parts or whole animals, then the liquid that seeps through that heap would be Humus and Humic Acid, your soil below that heap will change dramatically for the better, holding more water, minerals and other nutrients.
If you wanted to harvest some mushrooms from that heap, they would most likely be superior to those grown only in wood chips.
I would expect the mushrooms to be longer lasting once picked and I would also expect a stronger flavonoid profile from those mushrooms.

If you do decide to add any animal(s) or their parts to the heap be sure to put them in the center of the heap, that keeps critters from rummaging your heap looking for those animal parts.
Urine is almost never a bad thing to add to any composting heap.

Redhawk
 
gardener
Posts: 570
Location: Central Texas
239
hugelkultur forest garden trees rabbit greening the desert homestead
  • Likes 3
  • Mark post as helpful
  • send pies
    Number of slices to send:
    Optional 'thank-you' note:
  • Quote
  • Report post to moderator
Super interesting and helpful thread!
Most of the last year I've been trying different methods of composting in hopes of expanding my knowledge and experience. I've done hot composting, vermiculture, sheet composting, pig/chicken composting, and a few other methods; but using fungus/mushrooms is something I haven't tried yet, and hope to learn next.
This thread has given me a great baseline to follow in the process of converting one of my piles of wood chips into mushroom compost.
 
Eric Hanson
gardener
Posts: 5451
Location: Southern Illinois
1492
transportation cat dog fungi trees building writing rocket stoves woodworking
  • Likes 4
  • Mark post as helpful
  • send pies
    Number of slices to send:
    Optional 'thank-you' note:
  • Quote
  • Report post to moderator
Kc,

I also have tried a number of different compost systems and by far the best results have been with mushrooms.  I found that I had to be patient.  As in it took just slightly longer than one year to get mushrooms.  But my goodness, what they did to my woodchips!!!  

I still make a more traditional compost heap, but I no longer care about it heating up or even if it is of particularly high quality.  I make my piles in my garden beds, not so much for the compost, but rather for what the compost pile does for the ground on which it sits.  The soil under an old compost pile is magically fertile.  And whatever compost I get I either let stay in place, possibly move around, or use to start a new heap, but in my experience, nothing tops the fertility of land that hosted a compost pile.

Good luck!!

Eric
 
Eric Hanson
gardener
Posts: 5451
Location: Southern Illinois
1492
transportation cat dog fungi trees building writing rocket stoves woodworking
  • Likes 7
  • Mark post as helpful
  • send pies
    Number of slices to send:
    Optional 'thank-you' note:
  • Quote
  • Report post to moderator
Everyone,

I started this project 18 months ago as a true neophyte.  I can’t tell you how much anxiety and self doubt I had about my ability to get the desired outcome.  This experiment is still ongoing, but I have transitioned from begging for advice to dispensing advice.  I am still very much a learner, but I have learned much.  I write this post for two reasons.  First as a thanks to all who helped me along the way, with special thanks going out to Marco and Redhawk.

My second reason for writing this post is more important and focused on those who recently discovered this thread.  This might look challenging, but it is certainly a doable endeavor.  I learned a lot of patience along the way.  Just about a year ago I was convinced that my mushroom project had failed.  Just days later, the mycelium really started to colonize the woodchips and they both visibly dropped in their apparent level (dropping about 3 inches) and becoming very squishy.  It took about another 6 months, but I finally got my first flush of mushrooms.  My point in this is that you can do it too and if you need help or even just encouragement, don’t be shy.

It thrills me that others find this thread useful and I am greatly honored that people still use it as a reference.  If I can help in any way, by all means, don’t hesitate to ask.  That’s why Permies is here.

Eric
 
Bryant RedHawk
gardener
Posts: 6814
Location: Arkansas - Zone 7B/8A stoney, sandy loam soil pH 6.5
1647
hugelkultur dog forest garden duck fish fungi hunting books chicken writing homestead
  • Likes 3
  • Mark post as helpful
  • send pies
    Number of slices to send:
    Optional 'thank-you' note:
  • Quote
  • Report post to moderator
Eric, molasses is composed of both complex sugars and simple sugars (for building your bacteria counts or anything else complex sugars are the right ones) simple sugars feed the bad bacteria not the good ones we are looking to grow.
Urine is almost always great to add, it can contain minerals along with the urea that gives it its name.
 
Eric Hanson
gardener
Posts: 5451
Location: Southern Illinois
1492
transportation cat dog fungi trees building writing rocket stoves woodworking
  • Mark post as helpful
  • send pies
    Number of slices to send:
    Optional 'thank-you' note:
  • Quote
  • Report post to moderator
Thanks for the input Redhawk.  I always love hearing your suggestions.

I wholeheartedly agree about urine.  This summer I started my second mushroom/woodchip bed.  I planted tomatoes in fertile holes filled with bagged manure.  I am aspiring to no longer use bagged manure, but for the moment it works.

I planted a few other veggies directly into aged woodchips just to see what would happen.  The plants in woodchips alone did not start off well.  I eventually added some diluted urine and the veggies took off and never looked back—that is until the deer showed up to let them know who was boss!!

Regarding molasses, can I use molasses from the grocery store or is there a better variety to use?

Thanks as always,

Eric
 
Bryant RedHawk
gardener
Posts: 6814
Location: Arkansas - Zone 7B/8A stoney, sandy loam soil pH 6.5
1647
hugelkultur dog forest garden duck fish fungi hunting books chicken writing homestead
  • Likes 3
  • Mark post as helpful
  • send pies
    Number of slices to send:
    Optional 'thank-you' note:
  • Quote
  • Report post to moderator
You can use any non sulfured molasses (I get mine (black strap) from the grocery store or the one farmer's market we go to)
 
Rusticator
Posts: 8593
Location: Missouri Ozarks
4560
6
personal care gear foraging hunting rabbit chicken cooking food preservation fiber arts medical herbs homestead
  • Likes 5
  • Mark post as helpful
  • send pies
    Number of slices to send:
    Optional 'thank-you' note:
  • Quote
  • Report post to moderator
if you're anywhere near an Amish or Mennonite community, I've found them to be the cheapest source, for good blackstrap. I can buy it from our local Mennonite general store for less than 1/3 of the cost that even Wal-Mart charges.
 
Eric Hanson
gardener
Posts: 5451
Location: Southern Illinois
1492
transportation cat dog fungi trees building writing rocket stoves woodworking
  • Likes 1
  • Mark post as helpful
  • send pies
    Number of slices to send:
    Optional 'thank-you' note:
  • Quote
  • Report post to moderator
Carla,

So I don’t know of any great local source of molasses, but that’s alright,  very helpful advice from you and Readhawk regarding the usefulness of molasses and how to get it.

But doing so would violate one small, almost trivial goal I have for this project.  That goal is to have garden beds that are not only organic, the beds consist entirely of materials found/made onsite!

The woodchips come from tree and brush trimmings on site that I chip up roughly once per year.  I did bring in bagged manure for fertile holes, but this was a one-time application,  I am growing some peas and beans to fix nitrogen.  Of course I bought in wine caps, but this is a part of the initial loading.  I have an likely will continue to use urine both as a nitrogen (and other nutrients) quick pick me up and as an aid for decomposition.

My first chip bed grew amazingly healthy summer squash this year with no additional fertilizer.  They grew in the same fertile holes as tomatoes did last year.  I was wondering about how well planting two heavy feeders in s row with no additional fertilizer was going to work, but the microbes saved the day!!

This is me rambling again, but I thank you for your suggestion and hope that you see my goal.

Eric
 
Carla Burke
Rusticator
Posts: 8593
Location: Missouri Ozarks
4560
6
personal care gear foraging hunting rabbit chicken cooking food preservation fiber arts medical herbs homestead
  • Likes 2
  • Mark post as helpful
  • send pies
    Number of slices to send:
    Optional 'thank-you' note:
  • Quote
  • Report post to moderator
Hi, Eric! Well.... I suppose you could plant sorghum, in the spring, harvest it, make your own blackstrap, and go from there. It would take another year, but it could absolutely be done.
 
Eric Hanson
gardener
Posts: 5451
Location: Southern Illinois
1492
transportation cat dog fungi trees building writing rocket stoves woodworking
  • Likes 1
  • Mark post as helpful
  • send pies
    Number of slices to send:
    Optional 'thank-you' note:
  • Quote
  • Report post to moderator
Carla,

Thanks!

Actually my compost piles now sit in my garden beds.  I used to be all anxious and self-doubting about my compost not heating up.  Then one year I made a compost heap (out of almost pure grass clippings) and it did indeed heat up, shrank dramatically and I eventually scraped about 2 inches of sort-of-finished compost off the ground and spread it on my garden.

The real story started later.  That former heap had a super fertile ring around it and a super fertile ellipse that sloped ever so slightly down hill.  That grass was super dark, rich and healthy for the next 3 years.  At the end of the ellipse was a peach tree that grew twice as fast, healthy and at least twice as large as it’s two companions.

Now I just build my compost piles in an unused corner of the garden beds and let all that composting goodness seep into the ground below.  Ground that hosts a compost heap is magically fertile for years after.  I no longer care if the pile heats up.  What decays decays.  What is left I either spread or use as starter for my next pile.

But Carla, though I am not using hot piles, I still find a way to add nitrogen plus other nutrients to my garden from my own land.  I grow comfrey plants at the ends of the beds.  I mulch them with thick layers of wood chips and next spring I am going to Inoculate with wine cap mushrooms.  Thus far, I have used the comfrey for chop & drop fertilizer, but I am tinkering with the idea of making up some comfrey tea next summer.  My biggest obstacle is that I need the comfrey tea the most in the early spring when I have the least.

Thanks for listening Carla and thanks for all your useful suggestions.

Eric
 
Eric Hanson
gardener
Posts: 5451
Location: Southern Illinois
1492
transportation cat dog fungi trees building writing rocket stoves woodworking
  • Likes 1
  • Mark post as helpful
  • send pies
    Number of slices to send:
    Optional 'thank-you' note:
  • Quote
  • Report post to moderator
Ooooooo!!!

I just got back from cleaning up my garden beds.  They had gotten pretty weedy by the end and I really wanted to see the progress of my wine caps both in my first bed (north bed) and my second, newer bed (west bed).

The north bed got built up with woodchips and inoculated with Stropharia about 18 months ago/April 10, 2018.  The west bed was built and inoculated mid April 2019 (just about exactly a year later).

First the west bed.  It grew tomatoes this year in fertile holes.  The woodchips has been filled, mounded 2-3 inches higher than the 2x10 raised edges.  Generally, the chip level was about 2 inches lower than the bed edges.  So some decomposition is definitely taking place.  Right next to the fertile holes the chips looked more like holes in the pile of chips, especially in between fertile holes.  Obviously there is more decomposition happening adjacent to the soil/manure (bagged) fertile fertile holes.  Actually, fertile holes is no longer the right term.  Those former holes were once covered with about 2 inches of wood chips.  Now they are more like fertile mounds and protrude upwards about 3-4 inches over the average level of chips.  Short version:  something is definitely happening!

So now the north bed.  When I made the bed last year, I filled the whole bed which is about 30 feet long but I only inoculated about half.  Today, that inoculated half (call it the eastern half) actually needs more woodchips.  It used to be about 12” high.  I suspect now the average height is about 4-5 inches high.  The western half which was not inoculated and not filled as high, is now higher than the eastern half.  The garden bedding in the eastern half is really nice, dark, black, crumbly material that was magically fertile this last summer.  While I was clearing weeds out I saw that I had a little flush of mushrooms right along the border between the Inoculated and un-inoculated parts!  This was unexpected but very welcome.  I am not going to eat them as they looked pretty bad on account of getting frozen last night.  I don’t care though!  I just love that I have absolutely positive proof that the fungi are still at work!

I will try to get some pictures later,

Eric
 
Eric Hanson
gardener
Posts: 5451
Location: Southern Illinois
1492
transportation cat dog fungi trees building writing rocket stoves woodworking
  • Mark post as helpful
  • send pies
    Number of slices to send:
    Optional 'thank-you' note:
  • Quote
  • Report post to moderator
So a bit more on the chip bed,

I have a confession to make here.  My weeding got pretty much totally out of control!  I spent the morning clearing weeds, mostly foxtail grass.  Thankfully I had help from my father-in-law and my son.

We had a pretty good system going.  I used a battery powered hedge trimmer and cut the grass & weeds down close to the soil/bedding surface.
My father-in-law raked the the grass/weeds and my son operated the tractor.  We stuffed the grass/weeds into the tractor bucket which my son then dumped on a burn pile.

Honestly, we’re it not for the weed seed in the grasses, I would either leave the grass/weeds on the garden bed surface or I would make a compost heap just as a way of cycling nutrients.  Does anyone have a good way to compost/recycle/reuse a whole lot of weedy grass?  Right now it is sitting on the burn pile, but I have not burned it yet.  In fact I cannot burn it today, likely won’t be able to anytime soon and I really have no desire to do so. I would love to turn this material back into nutrients.  

Suggestions anyone?

Eric
 
Eric Hanson
gardener
Posts: 5451
Location: Southern Illinois
1492
transportation cat dog fungi trees building writing rocket stoves woodworking
  • Mark post as helpful
  • send pies
    Number of slices to send:
    Optional 'thank-you' note:
  • Quote
  • Report post to moderator
So I am kinda over posting, but this time I have some pictures!

This picture shows the side of bed#2 or the west bed.  I included it because it shows how much the chips have dropped.  This spring, the chip level was 2-4 inches above the side supports.  I know it is hard to read, but that little level there reads 5 inches!  I did not dig any of this, that is exactly how I found the bed when I went out to clear out weeds.

280BE792-09BD-4E78-A017-97DEC4618BE2.jpeg
Bed 2, raised garden bed using mushroom composted wood chips as bedding material
 
Eric Hanson
gardener
Posts: 5451
Location: Southern Illinois
1492
transportation cat dog fungi trees building writing rocket stoves woodworking
  • Mark post as helpful
  • send pies
    Number of slices to send:
    Optional 'thank-you' note:
  • Quote
  • Report post to moderator
So I took a bunch of pictures with my last post and I want to put them up with some better context, but that will have to be another day.  My 1st chip bed (north bed) was raised using old 12 inch logs, acquired from blown down trees after a storm in 2009.  The logs (oaks and hickories), were in pretty good shape considering their age.  In fact, last year at this point, the logs were still very much logs.

I checked when I walked the dog earlier, but the logs are in extremely rough shape.  They are soft and collapsing under their own weight,  the Stropharia are plainly consuming the logs at an increasingly rapid pace.  In fact I may have a bit of a problem on my hands.  My plan for next year was to raise up bed #3 (East bed).  As it sits now, bed #1 (north bed) and bed #2( West bed) are both raised and inoculated with Stropharia.  Bed 1 for 2 years now and bed 2 for about 8 months.

So the plan was to raise bed 3, the final bed.  At the present, bed 3 is bit unusual.  It hosted a 5’ pile of wood chips for over a year so the land is healthy from decomposition.  And in fact, the remnants of that pile are still in bed 3, with the woodchips some 4-6 inches deep and on a lark, I did Inoculate those chips last spring with some extra spawn just to see what would happen.  I dug in and no question, the spawn is active.  I would not be surprised at all if I get mushrooms next spring.

My dilemma then is what to do with beds 1 and 3.  To raise them like I did bed 2, I need some 2x10 lumber and some masonry paint (recommended by RedHawk) that resists fungi without being toxic.  Last year it was a chore to get bed 2 raised and bed 3 is about the same size of bed 2.  Bed 1 on the other hand is about 30 feet long (as opposed to 16 feet long).  I was hoping to get one more year out of bed 1 and some of the the border logs are still going strong.  But others are extremely soft, crushing under their own weight.  If I accidentally step on them I might destroy it.

I am tempted to raise bed 3 and just see what happens with bed 1.  Maybe I can find some temporary borders for the rotten logs on bed 1.

I am completely open to suggestions.  Thanks for taking the time to read over my long posts.  I look forward to your thoughts.

Eric
 
Eric Hanson
gardener
Posts: 5451
Location: Southern Illinois
1492
transportation cat dog fungi trees building writing rocket stoves woodworking
  • Likes 1
  • Mark post as helpful
  • send pies
    Number of slices to send:
    Optional 'thank-you' note:
  • Quote
  • Report post to moderator
So to avoid any other confusion, I am posting an aerial picture of my garden beds

Bed 1=North Bed
Bed 2=West Bed
Bed 3=East bed

This Google Earth image is about 2 years out of date, so some of the more recent changes don't show up well (such as the bright white borders of Bed 2).

In case it is not clear, Bed 1 is directly below the text.  Off to the left, there is another potential bed I have left unused for several years and have no immediate plans to utilize.  Call that one Bed 4
Garden-Beds-2.jpg
Aerial view of up and coming raised wood chip beds using wine caps
 
Eric Hanson
gardener
Posts: 5451
Location: Southern Illinois
1492
transportation cat dog fungi trees building writing rocket stoves woodworking
  • Mark post as helpful
  • send pies
    Number of slices to send:
    Optional 'thank-you' note:
  • Quote
  • Report post to moderator
I am including some more pictures of my fungi in action.  This includes pictures in all three of my beds,

Picture #1 shows little mounds where tomatoes grew last year.  The point of this picture is that those mounds were in fact fertile holes at the beginning of the summer and they were completely covered in about 2 inches of woodchips and an additional 2-4 inches of grass clippings (straw was very hard to find last summer)  Bed #2

Picture #2 is a close up of a random spot roughly in the middle of the chip bed, showing strands of mycelia growing.  This particular spot had no crop growing nearby and was relatively free of plant roots.  FYI, plant roots help mycelia grow.  Bed #2

Picture #3 is a small flush of wine caps growing in Bed #1.  Note the grassy weeds growing immediately nearby.  Just to the left is a part of this bed that was never inoculated.  I might try to inoculate the rest of bed one next year.  Bed #1

Picture #4 is a close up of some unearthed chips in bed #3.  Bed #3 was an experimental bed.  It was only about 4 inches deep and I tried growing a few crops with varying success.  I need to get potatoes out as they grew well despite neglect and they can be lifted out with just fingers!  And they are completely clean!

IMG_1495.JPG
The old fertile holes are now fertile mounds
IMG_1496.JPG
a few fungal strands in wood chips
IMG_1502.JPG
A late flush of wine cap mushrooms
IMG_1505.JPG
Fungal strands in woodchips
 
Eric Hanson
gardener
Posts: 5451
Location: Southern Illinois
1492
transportation cat dog fungi trees building writing rocket stoves woodworking
  • Likes 1
  • Mark post as helpful
  • send pies
    Number of slices to send:
    Optional 'thank-you' note:
  • Quote
  • Report post to moderator
So good news for all my fine fungal-loving friends!!

I just got back from checking my garden beds, all of which by now have been inoculated to one degree or another.  The good news is that even just a tiny little superficial peek into and/or under the chip bed shows plenty of white strands.  Ironically, my bed #3, or my East bed, the one that is only about 4" thick and was inoculated a bit haphazardly as a little experiment is showing the most fungal growth.  I inoculated this bed as just a little experiment.  That particular bed had hosted a 5' tall pile of chips (visible in pictures earlier in this thread, taken about a year ago and has a yellow handled rake standing vertically in front and a JD green tractor in the background--just for reference).  Most of these chips were spread to other beds, especially bed #2, or the West bed.    Bed #3 now has a section of wood chips that is covered in white, in a patch about 12" wide by about 18" long.  Assuming this is stropharia growing here, then this bed is off to fantastic decomposition.  Other spots in this bed also show good fungal growth. One factor worth considering is that this bed served as a dumping pile for my daughter's rabbit litter and there is now a nice pile of urine soaked sawdust peppered with rabbit manure.

This rapid fungal growth is not exactly what I expected.  I gave this bed no special treatment.  I don't even think I watered the chips down after inoculation.  I did grow some crops there (and even more weeds) and the chips were only about 4"-6" deep.  In order to get the crops off to a decent start, and not wanting to bring in any more bagged soil/manure, I did add some diluted urine to some of the crops. and that bit of fertilization did wonders to get the little crops off to a healthy start.  

The topsoil underneath had a chip pile sitting there for over a year.  Perhaps the excellent soil health under the pile contributed bacteria (and other soil biota) to the chips, perhaps having fewer chips to inoculate meant that the spawn was not spread so thin, perhaps the diluted urine helped early decomposition, or perhaps all three factors are at play.  At either rate, I expect to have a nice, healthy supply of mushroom compost by spring.

More good news!  I am accumulating a nice pile of brush to chip up shortly (thanks in part to my neighbor who just dropped off a nice load of branches he trimmed) but before I do, I need to do some pretty heavy trimming of my own.  This is perhaps the one good reason to have Autumn Olive.  It is terribly invasive by me, easily establishing in lands not mowed.  On my land, thanks to mowing, it has retreated back to a long living fence where I let it grow to serve as a nice living barrier, a habitat for wildlife, and every couple of years, to harvest for chips!  Fear not, the living fence is about 10-15 feet wide in most places and I only take about 1-2 feet, basically take the branches that try to crowd out the trail I mow parallel to the fence line.  As I barely got a chance to mow that particular trail last summer due to Autumn Olive invasion, it is time to make chips!  And lots of them.

But back on track to the bed.  Generally the beds are doing better this year than last.  I am not exactly certain why.  On Bed #2, I did use about twice as much spawn compared to bed #1 last year so perhaps that played a role.  Bed #3 is breaking down quite well despite neglect and bed #1 not only produced a small, late flush of mushrooms, but actually needs more chips!  The old chips are looking less and less like chips and more and more like actual soil.  Also, their original 12"+ depth is now down to about 3-4', so whatever decomposition took place, it was quite thorough.  I am hoping that if I add a bunch of chips soon, there will be time for serious decomposition by spring planting time.  My original plan for bed #1 was to plant ordinary crops with absolutely no addition of soil.  I can grow in a freshly inoculated bed, but I need to make little fertile holes or trenches.  The goal was for bed #1 to be past the point of needing fertile holes/trenches as the mushroom compost was supposed to be of a sufficient tilthe and texture that little seeds would not get lost in the larger, un-decomposed chips.  Perhaps if I add in say another 8" of chips and need some type of planting bedding I will use the sawdust courtesy of the rabbit?

At any rate, I am keeping this thread updated and alive to chronicle the transformation from regular gardening on soil to converting over entirely to raised mushroom beds.  The hope for next year looks something like this

Bed #1 is ready to be planted in like any other bed.  The chips are so broken down they are basically a dark loamy soil.  At present, they are well on their way, but I may add chip, a lot of them so we will see what happens.  Next year will be Bed #1's 3rd year into the experiment.  Assuming the log edges hold out (really crossing my fingers here--its not looking good) then I will make permanent raised edges akin to bed #2 sometime in 2021.  We will just have to see how things go and I do not rule out having to make a temporary raised edge.

Bed #2 will be year two into the experiment.  I will probably top off with chips (but likely not so much as with bed #1)  I plan to grow Tomatoes and Sweet Potatoes in that bed, just as last year, but I will switch the locations (crop rotation).  Also I plan on not adding any bagged soil/manure.  The sweet potatoes can grow in the fertile holes used by tomatoes last year.  Hopefully next years tomatoes will need no bagged soil/manure, but I might fertilize with urine.  To me this is acceptable as it is produced on site and works very well.

Thank you all for reading.  As always, I am doing this to help out anyone else who might be interested in doing something similar.  Feel free to comment good or bad and of course, I hope this helps.

Eric

Bed #3  I am not exactly certain what this bed will look like.  I would like to plant potatoes, onions. romaine lettuce, kale (for the rabbit), spinach, and some other rabbit food (have to check with my daughter).  If I need to use some bagged manure for this I will reluctantly accept it as necessary to get things growing.  One more important step for Bed #3.  I am planning on making permanent raised edges,  very similar to bed #2.
 
Eric Hanson
gardener
Posts: 5451
Location: Southern Illinois
1492
transportation cat dog fungi trees building writing rocket stoves woodworking
  • Likes 1
  • Mark post as helpful
  • send pies
    Number of slices to send:
    Optional 'thank-you' note:
  • Quote
  • Report post to moderator
Hello all fungal friends (and everyone in general),

Lately I have had several posts describing my gardens as beds #1, #2, and #3.  I did earlier in this thread make a google earth picture with my beds labeled, but the beds were out of date

Here I am detailing a bit better two beds in particular, bed #2 and bed #3 with bed #1 located in the background.

The differences between bed #2 and bed #3 should be obvious.  Bed #2 is the one raised up with white painted 2x10's and bed #3 at the moment is not really raised at all.

Bed #2 also looks a little odd in that it has 6 posts sticking up from the edges.  I am in the middle of a project to put some custom made gates for the bed, something I eventually plan to extend to all of the beds.  The reason is that the beds are extremely fertile, almost too fertile and the deer love to come and munch on my veggies before I do!  I would just fence off the entire area, but my driveway runs through the middle of them and If I fence on just the bed, then I can't really get to the bed.  Ultimately I will have a system of gates that will swing open to keep deer out, allow me in when I choose, and be easy for mowing and such.

If you look at the first picture, Bed #1 is in the background

Eric
IMG_5902.JPG
Bed #2, West Bed, Filled with chips and inoculated in 4/2018
IMG_5903.JPG
Bed #3, East Bed
Bed #3, East Bed
IMG_5904.JPG
All three beds
All three beds
 
Eric Hanson
gardener
Posts: 5451
Location: Southern Illinois
1492
transportation cat dog fungi trees building writing rocket stoves woodworking
  • Likes 1
  • Mark post as helpful
  • send pies
    Number of slices to send:
    Optional 'thank-you' note:
  • Quote
  • Report post to moderator
Hello everyone,

So I am amassing a pile of tree trimmings to chip up and add into my garden beds.  These branches mostly came from an approximately 250' section of living hedge that had become overgrown to the point that it was intruding on and largely displacing a path that I try to keep mown right next to the hedge.  There were a couple of places where wind and wild grape had blown down and smothered a couple of autumn olive bushes, so those bushes plus the vines had to come out.  The hedge is definitely thinner, but I suspect that by July it will be difficult to tell that there was ever a thinning in the first place.

My neighbor across the road helped me a LOT in this project.  I think he actually looks forward to these projects.  Some of the brush actually came from some of his trimmings on his property.

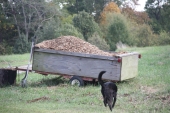
I still have a few more piles or cut branches presently laying on the ground that need to be added to this pile (it is thicker than it looks, there are piles behind this visible pile!).  After I get everything moved into place, I will rent a 12 inch chipper (it costs $300/day, but it really gets the job done!) and chip everything into the somewhat overgrown bed in the right foreground.  Just for the sake of scale, I put my tractor in the picture.  The folded ROPS is about 6' tall.  The chips will be added to my other 3 beds (from this bed in this picture).  Whatever is left will be used to revitalize the overgrown bed.

I am not really certain how many chips I will get out of this, but at the very least I will be able to top off some of my existing beds.  Ultimately, these chips are destined to be mushroom fodder and eventually garden bedding.  I will update later as events unfold.  The nice, Permie part of this is that I am utilizing an invasive for a good purpose, and the autumn olive go from a nuisance to a natural resource.  I have plenty more trimming to do along a much longer hedgerow for either later this spring or next fall.

Eric
IMG_5905.JPG
Brush pile for chipping
 
Bryant RedHawk
gardener
Posts: 6814
Location: Arkansas - Zone 7B/8A stoney, sandy loam soil pH 6.5
1647
hugelkultur dog forest garden duck fish fungi hunting books chicken writing homestead
  • Mark post as helpful
  • send pies
    Number of slices to send:
    Optional 'thank-you' note:
  • Quote
  • Report post to moderator
That pile of wood looks like at least 3 cu. yd. of goodness to me kola Hanson.

I need the weather to cooperate so I can do some thinning.

Redhawk
 
Eric Hanson
gardener
Posts: 5451
Location: Southern Illinois
1492
transportation cat dog fungi trees building writing rocket stoves woodworking
  • Mark post as helpful
  • send pies
    Number of slices to send:
    Optional 'thank-you' note:
  • Quote
  • Report post to moderator
Thanks for the estimate kola RedHawk (I hope I said that properly and respectfully).  What you can’t see in the picture is the pile behind the pile.  It’s not as big, but it’s still there and I have more wood to add, so maybe 5 cubic yards total?

My plan is to get it all chipped up before Feb 1.  I would like to have at least 2 months of time for it to age (6 months would have been preferable, but I get what I get) before I distribute and inoculate.  Some chips will be moved immediately as they will simply top off what I already have.  The rest will have to wait until my next garden gets its bed edges ready.

Given all of my plans, I am hoping that I have enough woodchips.

Thanks kindly once again RedHawk,

Eric
 
Bryant RedHawk
gardener
Posts: 6814
Location: Arkansas - Zone 7B/8A stoney, sandy loam soil pH 6.5
1647
hugelkultur dog forest garden duck fish fungi hunting books chicken writing homestead
  • Mark post as helpful
  • send pies
    Number of slices to send:
    Optional 'thank-you' note:
  • Quote
  • Report post to moderator
As my friend Rory would say, "you did swimmingly mate".
I have tried this trick and it did some good with newly chipped wood, soak the new chips in "ash water" (I used 2 cups of hard wood ash to 4 gal. of water for the starter, then I used a fresh to me oil drum(55gal.) filled that with fresh wood chips, poured the 4 gal of ash water over those then filled the rest of the way with hose water and let the thing sit for around 24 hours. I then poured out the chips so they could drain before I used them in a bed. Two days later I went out to inoculate the new chips but my garden bed had already done it for me since I could see threads of white around the ground contact area. I went ahead and did the inoculation with some shitake and jew's ear slurry (wolf doesn't like the flavor of shitake, so I use them for everything except eating). I noticed yesterday that I am already going to need more chips for that bed this year.

Great gardening kola

Redhawk
 
Eric Hanson
gardener
Posts: 5451
Location: Southern Illinois
1492
transportation cat dog fungi trees building writing rocket stoves woodworking
  • Mark post as helpful
  • send pies
    Number of slices to send:
    Optional 'thank-you' note:
  • Quote
  • Report post to moderator
RedHawk, everyone,

My pile grew by perhaps 1/3 today.  I gathered a lot of brush that had been trimmed by my neighbor in addition to a fair amount that we cleared today.  If that were not enough, we hauled out 3 long logs, somewhere between 25-35 feet long and about 12” diameter at the base.  It will be interesting to see how the chipper takes these behemoths.  

Last spring when I tried chipping I rented a 7” chipper powered by a 15 hp gas engine ($150/day for 2 days).  Unfortunately the chipping was very slow going, the chipper frequently reversed itself (a safety function if it gets over fed) and eventually it just quit working/feeding altogether.

I called the rental place and swapped the old unit for a 12” model powered by a whopping 85 hp Diesel and I just cannot fully convey the tremendous difference.  The 12” model was like some kind of wild animal.  It eagerly consumed all the wood I could feed it, including a couple of larger branches (maybe 8” thick).  There was no hesitation or pushing the wood back out.

I can barely tell you how exhausted I was feeding the 7” model.  So many times I had to bend over to pick up a minor branch that did not exactly give me a lot of chips.  The 12” model on the other hand, gladly ate large collections of whatever I could pick up.  This meant fewer times that I had to bend over.  The chipping was at least twice and more likely 4-5 times as fast.  I used to rent the 7” $150/day model for 2 days.  Now I rent a 12” model for 300/day and have time left over.  It is that much more efficient and my back does not ache nearly as much as it did.

I can hardly wait to see how many chips I make with this pile.

Eric
 
Posts: 672
Location: Northern Maine, USA (zone 3b-4a)
81
  • Likes 2
  • Mark post as helpful
  • send pies
    Number of slices to send:
    Optional 'thank-you' note:
  • Quote
  • Report post to moderator
great to see your progress Eric! i too have several piles around the property. i get 2 very large loads of chips in early and late summer. i also now get 2 good sized piles of chicken manure from my birds that i layer in there. by the next summer its mostly broken down. i then put it around my trees and plants. the wine cap and blewit spawn i put around them 5 yrs. ago are still active so once i put the new compost around them and cover with fresh green chips the mushrooms produced around them by mid summer on is crazy! the green chips on top keep the weeds out. i no longer use fertilizers other than worm castings from my worms, around my trees and plants which was my initial goal! all organic sources from my own property other than the chips which are dumped for free! ;) just keep piling on those chips and your mushrooms will keep thriving and doing their job.
 
Eric Hanson
gardener
Posts: 5451
Location: Southern Illinois
1492
transportation cat dog fungi trees building writing rocket stoves woodworking
  • Likes 3
  • Mark post as helpful
  • send pies
    Number of slices to send:
    Optional 'thank-you' note:
  • Quote
  • Report post to moderator
Steve,

I largely have you to thank for this large and ongoing project.  Thanks for convincing me to abandon the fertilizer approach 2 years ago!

Yes, the mushrooms have gone better than I ever expected and I am a full fledged fungal convert.  I became fully converted this summer when I grew summer squash in the exact same spot that I grew tomatoes the year before.  I pretty much always grew in fertile holes that I freshly amend each year.  Last summer I added nothing to my bedding.  The summer squash not only grew well on the same spot occupied by another heavy feeder, it was by far and away the best, darkest green, richest looking and overall healthiest summer squash I have ever seen.  In fact, it was perhaps the healthiest plant I have ever grown.  I am now spreading the fungal gospel to whoever will listen.

The experiment continues, and I have very high hopes.

Eric
 
Posts: 672
Location: St. George, UT. Zone 8a Dry/arid. 8" of rain in a good year.
207
trees bike greening the desert
  • Mark post as helpful
  • send pies
    Number of slices to send:
    Optional 'thank-you' note:
  • Quote
  • Report post to moderator
Awesome thread!  Thanks for recommending it.  Tons of great information, and I know I need to sit down and study Dr. Redhawks soil building threads.

All of that land!  I'm the one who is jealous!  So, Eric, do tell how you acquired all of that lovely land.  If you're feeling talkative, that is.

Thanks again!

 
Please enjoy this holographic presentation of our apocalyptic dilemma right after this tiny ad:
A rocket mass heater heats your home with one tenth the wood of a conventional wood stove
http://woodheat.net
reply
    Bookmark Topic Watch Topic
  • New Topic