• Post Reply Bookmark Topic Watch Topic
  • New Topic
permaculture forums growies critters building homesteading energy monies kitchen purity ungarbage community wilderness fiber arts art permaculture artisans regional education skip experiences global resources cider press projects digital market permies.com pie forums private forums all forums
this forum made possible by our volunteer staff, including ...
master stewards:
  • Nancy Reading
  • Carla Burke
  • r ranson
  • John F Dean
  • paul wheaton
  • Pearl Sutton
stewards:
  • Jay Angler
  • Liv Smith
  • Leigh Tate
master gardeners:
  • Christopher Weeks
  • Timothy Norton
gardeners:
  • thomas rubino
  • Jeremy VanGelder
  • Maieshe Ljin

FWIW: Rocket stove heater concept (no mass) for shop.....

 
pollinator
Posts: 2538
Location: RRV of da Nort, USA
720
  • Likes 2
  • Mark post as helpful
  • send pies
    Number of slices to send:
    Optional 'thank-you' note:
  • Quote
  • Report post to moderator
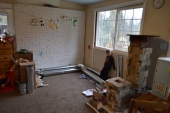
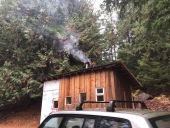
My first foray into this technology. Just a prototype, so it's a work in progress. Put together mostly from parts around the property or from friends. The base is a Drolet camp stove with a 6" flue and with a ~1 inch lip that rises above the top surface of the stove. I cut a matching hole just off-center in the bottom of a 32-gal drum with the open-lid on top. Drum was new, but not lined and plugs in lid are metal. I removed the rubber gasket from the lid and replaced with standard woodstove door rope gasket cemented into place with stove cement. In order to create a seal between the barrel and stove, I placed a square piece of ceramic fabric (Kaowool) over the stove exhaust hole, having cut a matching size hole in the fabric. So the weight of the barrel (with a brick on top) forces the barrel against the ceramic fabric "gasket". Since the flange of the stove exhaust port is ~1 inch rising up through the barrel, it allows for the riser chimney (24". class A, stainless steel inside and out) to fit onto that port without cementing (remember...just a prototype; see photo of inside of barrel). There is about a 2 - 3 inch gap between the top of the riser chimney and the lid of the barrel. The barrel sits on the stovetop in an off-set manner, allowing the exhaust port to be attached behind the stove. After sawing the hole for the exhaust port (~5.5 inches....a bit too small, I think), I attached to this on the outside of the barrel a black stovepipe "T-cap" (male) which had been cut so that it was no longer a closed cap, but an adapter between the barrel and a black stovepipe elbow. (All stovepipe was 6" dia and the internal diameter of the class A chimney section providing the riser tube was also 6"). Then I cobbled together some admittedly leaky black stovepipe and pressure fitted the pieces together. A T-section with a cap was placed near the end of this black stovepipe: To heat the exterior chimney, I just burn some paper in that port, then put the cap back on......Yeah, again....LEEEEEKY! Where it exits the building, it transitions to double-wall exhaust pipe....not class A, but the type used for venting natural gas or other such appliances. Although first runs of the stove were done without a cap on the exterior chimney (seen though the window in one of the photos), I now have a wind-protective type cap that seems to have helped with back-draft a bit.

In all, not too bad. Due to numerous design flaws, there is some back-draft when the door is open, but when running at the right "speed", the door can be open and no back-smoking occurs. With bits of twigs and trimmings scattered about from chainsawing and woodsplitting for the stove inside the house, I've gotten the barrel up to 500 degrees a few times and the exterior piping is cool. The black stovepipe gets a bit warm, but I'm thinking of surrounding that whole run, once improved and completed, with bricks. Right now it exits a "flood vent" on the north side of the building (...if you have to ask, expect the whole story).....so I'm hoping when it's finished and ready to re-assemble in it's final resting spot, that I can create a proper exit hole and insulate it accordingly. Dare I say the weather has not cooperated? With a few days before Christmas, I've been waiting for one of those bone-crushing days of -20 to -30 F to see how it does in this un-insulated shop-wannabee. First few runs had enough smoke inside to chase the chickens out.....last couple runs, no problemo. The heat would allow to get the next phase of some wiring done, with fingers crossed of course.

Comments and questions would be welcomed. Without this site, I don't think I would have ever even gotten interested in the concept. Thanks!
CompleteStove.jpg
[Thumbnail for CompleteStove.jpg]
Complete Stove
DuctingView.jpg
[Thumbnail for DuctingView.jpg]
Ducting View
InsideBarrel.jpg
[Thumbnail for InsideBarrel.jpg]
Inside barrel--Class A riser chimney
 
gardener
Posts: 1054
Location: +52° 1' 47.40", +4° 22' 57.80"
447
woodworking rocket stoves wood heat
  • Likes 2
  • Mark post as helpful
  • send pies
    Number of slices to send:
    Optional 'thank-you' note:
  • Quote
  • Report post to moderator
What you've got there lookes like a batch box rocket. That single barrel is waaay too small for a properly running heater. The first thing that comes to mind: your vertical exhaust need to be much longer, at least extending to above the highest edge of the roof.

edit: The exhaust port in the third picture need to be at least as wide as the riser and the chimney parts.
 
Rocket Scientist
Posts: 4526
Location: Upstate NY, zone 5
574
5
  • Likes 2
  • Mark post as helpful
  • send pies
    Number of slices to send:
    Optional 'thank-you' note:
  • Quote
  • Report post to moderator
And that expensive stainless steel insulated heat riser will burn out very quickly as soon as you have proper rocket heater combustion temperatures. Best to start now casting a new one from ceramic materials (insulating castable refractory, or perlite/clay).
 
Posts: 226
Location: S.W. Missouri, Zone 6B
8
  • Mark post as helpful
  • send pies
    Number of slices to send:
    Optional 'thank-you' note:
  • Quote
  • Report post to moderator
The metal stove is going to burn out if you achieve proper RMH temperatures. And I would anticipate the same for the inside lining of your Class A 24" fire riser, although the stainless steel is said by some to last longer (depends upon the formulation of the stainless, as there are different grades of stainless steel; I do not recall the type that performs longest, however, do note that I have not heard of a stainless that actually survives the conditions, it is a matter of lasting longer before falling apart).

As to your draft issues, two things come immediately to mind:

1. Buy a roll or two of aluminum tape and get that pipe sealed; and
2. Get more pipe to raise the exhaust higher. Typical code says 2-feet taller than any portion of the building within 10-feet of the vertical exhaust stack.

As you say, this is a prototype. And as far as I can tell, an all metal one at that. Expect it to burn out. Which is OK for a prototype. But you get me wondering "why bother" when you then start talking about situating this is a permanent position. I do not think there is going to be a permanent time-frame for an all-metal design.

Thus, I say it is time to start collecting fire brick. You have some options here, but at least 30 of them, and upwards of 70 is better (roughly half of which can be half-size splits, 1.25" thick instead of 2.25" thick). OR start your plan for a poured core. But do one or the other. Temperatures inside a properly burning rocket stove will go well over 1,000 F, and perhaps twice that temperature. This is very hot, and is the primary reason materials fail in these conditions.

As you work out your dimensions you can get a solid count on your brick and/or dimensions (and therefore volume) for a poured core (remember to get the air bubbles out of the mixture).

Personally, I prefer simple for getting started. For my mind set, that means fire brick. I can pick up a brick and move it, and I like that. For me it is the best prototyping material. Plus, you can safely use it in a final installation, and know that it will survive the temperatures reached inside a properly working RMH.

Big box stores like Lowe's, Home Depot, etc. seem to have very expensive fire brick, way over-priced. Better prices are usually found by calling the brick sellers in your area. If for some odd reason they do not carry fire brick ask if they can order it. And whilst talking to them, you might as well as what temperature it is rated for, and if you have any options in that regard. The fire brick I got is rated for 2500 F and cost about $2.25 for a full brick (about $1.80 for a half-size split), in US dollars, after tax; the local box stores wanted $5 a brick!

While at the brick store, find out if they carry perlite (4 cu. ft. bags) and at what price, and fire clay too (usually in 50-pound bags).

Anyone else have trouble moving bags of perlite? The stuff I've gotten has such thin plastic wrap it splits along the seam as soon as I touch it! Next time I'm going to either take a tarp and wrap it immediately, or a big plastic bag and immediately put it in that. I just can't move it without causing a spill, and that is very fine particles, that I don't really like breathing, or trying to keep from going everywhere! In any event, I'd suggest at least wrapping and tying bags of perlite in a tarp for transportation and storage. Unless I am just getting exceptionally thin plastic bags. YMMV.
 
rocket scientist
Posts: 6319
Location: latitude 47 N.W. montana zone 6A
3189
cat pig rocket stoves
  • Likes 2
  • Mark post as helpful
  • send pies
    Number of slices to send:
    Optional 'thank-you' note:
  • Quote
  • Report post to moderator
Erik; Must be your supplier , only issues I ever had was hooking a tear in the side , as they are large bags but never seam ripping .
 
Erik Weaver
Posts: 226
Location: S.W. Missouri, Zone 6B
8
  • Mark post as helpful
  • send pies
    Number of slices to send:
    Optional 'thank-you' note:
  • Quote
  • Report post to moderator

thomas rubino wrote:Erik; Must be your supplier , only issues I ever had was hooking a tear in the side , as they are large bags but never seam ripping .


Thanks. I'll call around and see about finding another supplier, carrying a different brand of perlite.
 
Posts: 318
9
  • Mark post as helpful
  • send pies
    Number of slices to send:
    Optional 'thank-you' note:
  • Quote
  • Report post to moderator
John that is a very neat prototype. Easy to build and change. Have you experimented yet with different port sizes? With small fuel amounts experimentation should have a quick turn around time.
 
John Weiland
pollinator
Posts: 2538
Location: RRV of da Nort, USA
720
  • Likes 2
  • Mark post as helpful
  • send pies
    Number of slices to send:
    Optional 'thank-you' note:
  • Quote
  • Report post to moderator
Thanks for all the excellent responses. Yes, Erik, there is a local brick supplier in addition to the big-boxers so I can definitely shop around for both price and quality comparisons. With regard to the exterior exhaust pipe height where you say "Get more pipe to raise the exhaust higher. Typical code says 2-feet taller than any portion of the building within 10-feet of the vertical exhaust stack." There is the code issue and then there is the thermals issue. I understand the code issue and will need ultimately to comply, but am also wondering if references here to the stack height has to do with chimney "draw".....that marvelous "sucking sound". I was reading another thread indicating increased draw with increased stack height (assuming a tight system)?......a phenomenon apparently increased as well by the differential between air temp outside the stack versus inside the stack (??). The next time I have the barrel off I will try to enlarge the exhaust hole as well to better match the size of the riser CSA. I didn't think about aluminum tape for duct sealing....thanks for the tip. Since this was a pretty weak part of the system, I was going to swap out some of these components for less leaky alternatives as well and use the typical stove cement for sealing.

As you all indicate, lots of weak points in the system.....main burner will likely burnout, no mass being employed, main riser will likely burnout....all based on typical RMH temperatures. I'm considering the fact that, for an uninsulated shop, I'm not really looking to achieve RMH specs, but liked the concept for conserving fuel use, for portability of design, and for the flexibility of concept modification. At 500 degrees F, a brick oven placed on top of the barrel might work, and the chickens in the building get pretty active with the extra heat rising into the rafters [....unless they're just getting nervous over the talk of an added rotisserie.. ]. Although that's not RMH-grade heat, I still need to play around a bit with just what the needs will be to operate comfortably in the shop once a concrete floor is poured and some of the gaps in the building are better sealed. Yet with your comments and this prototyping, I'm keeping open the possibility in retirement of doing something more elaborate and more RMH-"true" on the main floor of our home to replace the present woodstove. [I was always really impressed being in Germany in winter and being blown away by the heat thrown off of a kacheloffen in many public buildings.] Biggest concern there would be reinforcing the floor to withstand the added weight, but I see there's plenty of info on that here as well. I'm not concerned about re-sale of the house.....with changes in FEMA flood codes, we are already in a zone that would prohibit ANY new buildings on this site and the house will likely be demolished when we leave.

Thanks again for comments, tips, and recommendations. Great site and great discussions here!
 
Wyatt Barnes
Posts: 318
9
  • Mark post as helpful
  • send pies
    Number of slices to send:
    Optional 'thank-you' note:
  • Quote
  • Report post to moderator
That's a bummer about demolition. Have you played with your riser height? You could add stove pipe cut to varying lengths for a quick cheap test.
 
John Weiland
pollinator
Posts: 2538
Location: RRV of da Nort, USA
720
  • Likes 2
  • Mark post as helpful
  • send pies
    Number of slices to send:
    Optional 'thank-you' note:
  • Quote
  • Report post to moderator
@Wyatt: "You could add stove pipe cut to varying lengths for a quick cheap test."

Have not considered this....was under the impression that the riser pipe *must* be insulated/insulating and so did not want to be cutting insulated pipe to various lengths. How well does regular stove pipe work for such tests? Will have to consider this during fine tuning....Thanks!
 
Wyatt Barnes
Posts: 318
9
  • Mark post as helpful
  • send pies
    Number of slices to send:
    Optional 'thank-you' note:
  • Quote
  • Report post to moderator
John, what I meant was that now that you have an insulated riser, a temporary one from what everyone says, you can extend it up for test purposes with cheap metal stovepipe. I am assuming a piece of stove pipe on the top of your insulated chimney will survive long enough to give test results. Don't misunderstand, you are farther along than I am, I am still in the wish phase. I am also a problem solver by nature and I did wonder if your riser might be too short. An easy test would be to add a bit of height with a piece of cheap stove pipe for a test burn. From the point of view of testing and modifying I really like your set up.
 
Erik Weaver
Posts: 226
Location: S.W. Missouri, Zone 6B
8
  • Mark post as helpful
  • send pies
    Number of slices to send:
    Optional 'thank-you' note:
  • Quote
  • Report post to moderator
John: I just threw out the typ. code remark, because that seems to be pretty typical, so it gives a standard of reference. As to your questions regarding exhaust chimney stack height, yes, taller is better, and over the tallest part of the roof by 2+ feet is optimal. There is a relationship between height and temperature in the chimney. I don't recall the name of the formula or even the exact formula, but for sake of argument and to illustrate the point, let us pretend it is simply Height * Temperature = Draft. If it were that simple, then a 2000 degree chimney 2-feet all would work as well as a 200-foot tall chimney running 20 degrees (2000*2=4000; and 200*20=4000).

I think there is more to the formula than that, but the idea to grasp is that for a given temperature difference (between the outdoor air temperature and the temperature of the exhaust air inside the chimney) the higher the chimney the better the draw; also, the taller the chimney the better it will draw for a given temperature, thus, when dealing with smoke getting into the room, adding height to one's chimney is one option. This is why I mentioned it.

As Peter mentioned, increasing the exit in the bottom of the barrel is important. Peter knows his stuff, so I'd take whatever he says very seriously.

If that exit is the smallest cross sectional area (CSA) in your system -and it sounds like it is- it is going to cause things to slow down and back up. You want the smallest CSA to be in the fire chamber. Anywhere else and operationally others have experienced problems.

The "rockety sound" is from the fire riser, and it's ratio to the horizontal burn chamber (and feed tube). That relationship is what causes the rocket sound, and what creates the strong draft of the basic rocket stove design. Placing the barrel on top of this, and getting the rapid cooling effect of the air falling from the top to the bottom of the barrel creates a temperature siphon; that also helps move air through the system.

Ratios are very important, as are CSA relationships (which are also ratios).

1:2:4 is an often cited ratio of feedtube:burnchamber:fireriser. So if the feed tube is one foot deep, the horizontal burn chamber is twice as long (2-feet), and the fire riser is four times as tall as the feed tube is deep (4-feet). Smart folks say you can measure this from the center line of the passages. I usually base my calculations on the longest measurements, just for added insurance the system will draw well.

So if my feed tube is three sideway bricks tall (13.5 inches with the brick I am using) then I want my horizontal burn chamber, as measured from the most distant internal wall of the burn chamber, to be at least twice as long as 13.5" is tall (13.5 * 2 = 27 inches measured from the farthest wall of the feed tube to the farthest wall of where the fire riser and burn chamber make their shared 90-degree turn, from horizontal to vertical). Then I want my fire riser to be at twice as tall as the burn chamber is long: 27 * 2 = 54 inches tall.

1:2:4, starting with a 13.5 inch deep feed tube = 13.5 : 27 : 54

When building and thinking about changes, I keep two other rule of thumb ratios in mind:

1. I want the fire riser to be twice as tall as the longest horizontal measurement; and
2. I want the fire riser to be three times as tall as the vertical drop in the feed tube (13.5*3=40.5).

To get the greatest effect, you want the fire riser to be the undisputed champion of draft! This means keeping the feed tube as little like a chimney as possible. Therefore, keep the feed tube as short as is safe and practical, and as cool as practical. And by extension, keep the fire riser, as tall as possible and as hot as possible (I should say "practical" not possible - other experiments have shown excessively tall fire risers face a point of diminishing returns; *IF* I recall correctly, there is little to be gained by making the fire riser greater than 4-times the height of ? what?, either the feed tube or burn chamber).

Also, make the burn chamber as short as practical in the horizontal. Most builds seem to have about four fire bricks as their "bridge" - the bridge is the "roof" of the fire chamber, between the feed tube and the fire riser. You want that as short as fits with your design. You need enough room to fit the barrel in there, and to be able to build the feed tube wall. If the fire riser is off-center, as your design is, you should be able to measure some temperature differences on the walls of the barrel, with one side hotter and one cooler. This centering also effects how long the bridge/roof over the burn chamber has to be.

All of which is a really long way of saying, that maximizing the height of the fire riser, relative to the feed tube and burn chamber, increases the draft of the system. Add to this, the goal of making both the feed tube and burn chamber as short as is practical. And diminish the tendency of the feed tube to act as if it were a chimney, while increasing the tendency of the fire riser to act as if it were a chimney. And make the burn chamber the smallest CSA in the system.

And build with materials and standards able to withstand 2200 F and higher temperatures.

As I have come to understand it, these are the most critical design parameters.

Although, returning to your chimney and exhaust, this can be an important variable. Micro climate and the details of each building effect how well the building acts as a chimney and how well a chimney acts as a chimney (in competition with the building, and in competition with the feed tube). So in some cases, this is not a big deal, and venting out the wall at floor level works great; but at other times, it is required to get the top of the chimney above the roof. There are a lot of variables, so I'm not sure how well it can be predicted in advance. That's why folks say things like run your chimney up to 2-feet higher than the roof in a 10-foot diameter

Now having said all of the above, you may not even have built a basic J-tube rocket stove! In which case you'll need to apply some different standards to your measurements and ratios. If you have actually built a batch feed, I cannot help. But Peter is an expert at that.

When I look at your picture, am I seeing what is basically a wood stove with a fire riser/barrel on top? If so, that's not really either a basic J or batch feed. I suppose you could think of it as a type of L-style rocket stove. But the CSA of the wood stove should be smallest dimension if building as a rocket stove. And that might lead to some design/build difficulties. (I again vote for buying upwards of 70 fire brick, roughly half full size and half splits, and build your prototype that way - it is flexible and eliminates a great number of variables, which I personally believe to be of value.)

If you are not really building what others have found works well, my opinion is you are heading in the wrong direction, *IF* what you want is an operational heating system in a small amount of time. If you just want to experiment, that is a different situation.

I think I started my first prototype by buying 30 full size fire brick. I later added 20 or 30 half brick, and at some point I may have bought another 10 or 12 full brick. You might also check Craigslist for supplies. Sometimes there are good deals there.
 
John Weiland
pollinator
Posts: 2538
Location: RRV of da Nort, USA
720
  • Mark post as helpful
  • send pies
    Number of slices to send:
    Optional 'thank-you' note:
  • Quote
  • Report post to moderator
Thanks much, Erik, Wyatt, and others who weighed in. Really great suggestions that I hope to use in modifying my design. In addition to tightening up the exhaust ducts and adding some height to the external exhaust chimney, I'm going to increase the exhaust port size and possibly play with the riser height....one of the advantages of the removable top. Clearly there are better riser materials and designs for longevity and I hope to incorporate that in a final design. In addition, I'm just going to play temporarily with the idea of adding fire-brick inside the stove to take up some of the CSA and thereby perhaps create a narrow L-shaped burn chamber. [Biggest problem with that idea is that there is no insulation as is usually seen in cross-sectional drawings of the burn tunnel.] Easy enough to do as a test at any rate. I'll try to remember to take photos of a burn-in-action next time to see how things are progressing. Thanks again for great comments!
 
Erik Weaver
Posts: 226
Location: S.W. Missouri, Zone 6B
8
  • Mark post as helpful
  • send pies
    Number of slices to send:
    Optional 'thank-you' note:
  • Quote
  • Report post to moderator

John Weiland wrote:Thanks much, Erik, Wyatt, and others who weighed in. Really great suggestions that I hope to use in modifying my design. In addition to tightening up the exhaust ducts and adding some height to the external exhaust chimney, I'm going to increase the exhaust port size and possibly play with the riser height....one of the advantages of the removable top. Clearly there are better riser materials and designs for longevity and I hope to incorporate that in a final design. In addition, I'm just going to play temporarily with the idea of adding fire-brick inside the stove to take up some of the CSA and thereby perhaps create a narrow L-shaped burn chamber. [Biggest problem with that idea is that there is no insulation as is usually seen in cross-sectional drawings of the burn tunnel.] Easy enough to do as a test at any rate. I'll try to remember to take photos of a burn-in-action next time to see how things are progressing. Thanks again for great comments!


Depends how big that stove is inside. If there is room, you can fill in space, and get insulation, by mixing up some clay and perlite and shoving that in there, then line it with fire brick to make the burn chamber.
 
Glenn Herbert
Rocket Scientist
Posts: 4526
Location: Upstate NY, zone 5
574
5
  • Mark post as helpful
  • send pies
    Number of slices to send:
    Optional 'thank-you' note:
  • Quote
  • Report post to moderator
Even if you don't have space inside the metal stove to add perlite/clay insulation as well as firebrick, just the firebrick (splits or half-thickness ones, 1 1/4" thick) will give more insulation than the metal walls. Have you seen Peter van den Berg's batch box dimensions chart?
http://donkey32.proboards.com/thread/734/peterberg-batch-box-dimensions
 
Glenn Herbert
Rocket Scientist
Posts: 4526
Location: Upstate NY, zone 5
574
5
  • Mark post as helpful
  • send pies
    Number of slices to send:
    Optional 'thank-you' note:
  • Quote
  • Report post to moderator
You mentioned not worrying about "RMH-grade heat", but if you use RMH layout methods without getting hot enough for complete combustion, you are asking for creosote buildup and a fire in your horizontal ducting or maybe the barrel. An RMH is designed to have "a chimney fire with every burn", but inside the heat riser where it is safe and desirable.
 
John Weiland
pollinator
Posts: 2538
Location: RRV of da Nort, USA
720
  • Likes 2
  • Mark post as helpful
  • send pies
    Number of slices to send:
    Optional 'thank-you' note:
  • Quote
  • Report post to moderator
Glenn: Excellent link and thanks for the thoughts on the creosote buildup. Hmmmm....any idea of what kind of minimum temps are needed to make sure that build-up does not occur? I guess on the plus side, I can remove the lid occasionally to examine buildup in the barrel, although accumulation in the horizontal ducting and exterior chimney might be harder to manage. Good things for me to consider,....thanks!
 
pollinator
Posts: 2203
Location: Massachusetts, 5a, flat 4 acres; 40" year-round fairly even
302
4
kids purity trees urban writing
  • Mark post as helpful
  • send pies
    Number of slices to send:
    Optional 'thank-you' note:
  • Quote
  • Report post to moderator
Just a note re: "mass-less rocket mass heater" --

Technically this isn't a "mass-less rocket mass heater" as the daily-ish said, but it is a mass-less heater.

The very low mass Cyclone heater was a great solution to making a storehouse for the excess heat without a greater mass than a legal woodstove:

https://permies.com/t/71576/tiny-house-rocket-mass-heater

now back to your reguarly scheduled thread.
 
You have to be odd to be #1 - Seuss. An odd little ad:
A rocket mass heater is the most sustainable way to heat a conventional home
http://woodheat.net
reply
    Bookmark Topic Watch Topic
  • New Topic