|

|

|

|

|

|
|
|
|
|
|
|
|

|

|

|
.png)
|

|
 4
4


You can only be young once … but you can be immature forever!


 5
5
How Permies works: https://permies.com/wiki/34193/permies-works-links-threads
My projects on Skye: The tree field, Growing and landracing, perennial polycultures, "Don't dream it - be it! "
17

How Permies works: https://permies.com/wiki/34193/permies-works-links-threads
My projects on Skye: The tree field, Growing and landracing, perennial polycultures, "Don't dream it - be it! "
9
7
10
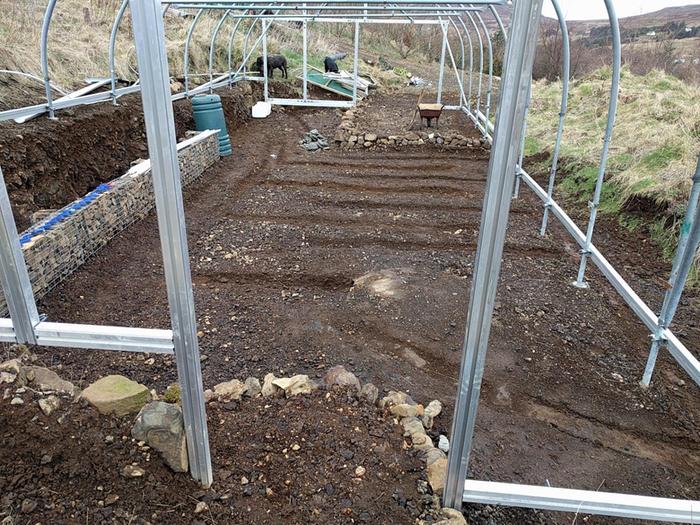
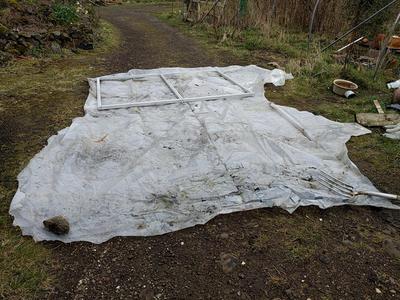
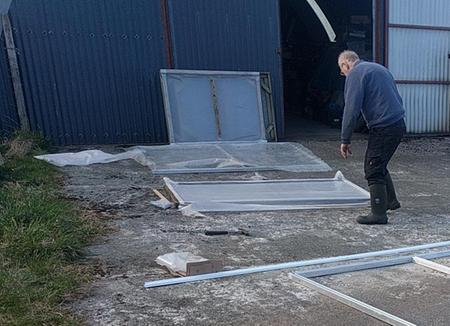
bruce Fine wrote:is plastic a necessary evil in building a greenhouse? trying to recycle plastic for a greenhouse iS probably a non starter. ive been wanting to build a greenhouse for years now but it is slow going accumulating enough window glass to put it together
Gardens in my mind never need water
Castles in the air never have a wet basement
Well made buildings are fractal -- equally intelligent design at every level of detail.
Bright sparks remind others that they too can dance
What I am looking for is looking for me too!

Skill verified by Nicole Alderman") 5
5
bruce Fine wrote:ive been wanting to build a greenhouse for years now but it is slow going accumulating enough window glass to put it together
How Permies works: https://permies.com/wiki/34193/permies-works-links-threads
My projects on Skye: The tree field, Growing and landracing, perennial polycultures, "Don't dream it - be it! "
8

How Permies works: https://permies.com/wiki/34193/permies-works-links-threads
My projects on Skye: The tree field, Growing and landracing, perennial polycultures, "Don't dream it - be it! "
11
How Permies works: https://permies.com/wiki/34193/permies-works-links-threads
My projects on Skye: The tree field, Growing and landracing, perennial polycultures, "Don't dream it - be it! "
16

How Permies works: https://permies.com/wiki/34193/permies-works-links-threads
My projects on Skye: The tree field, Growing and landracing, perennial polycultures, "Don't dream it - be it! "
6
--
"Whitewashed Hope: A Message from 10+ Indigenous Leaders and Organizations"
https://www.culturalsurvival.org/news/whitewashed-hope-message-10-indigenous-leaders-and-organizations
11

How Permies works: https://permies.com/wiki/34193/permies-works-links-threads
My projects on Skye: The tree field, Growing and landracing, perennial polycultures, "Don't dream it - be it! "
5
"We're all just walking each other home." -Ram Dass
"Be a lamp, or a lifeboat, or a ladder."-Rumi
"It's all one song!" -Neil Young
7
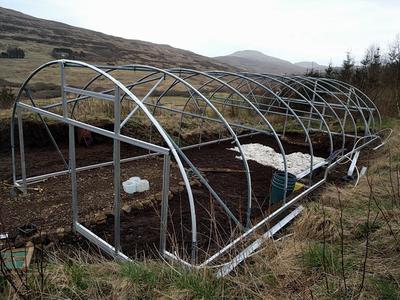
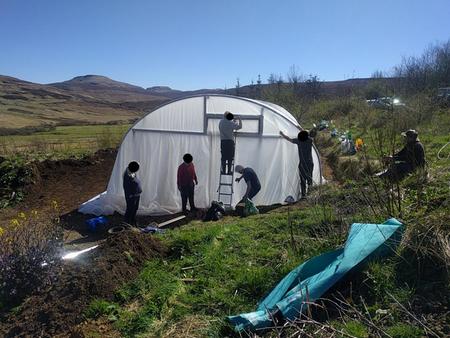
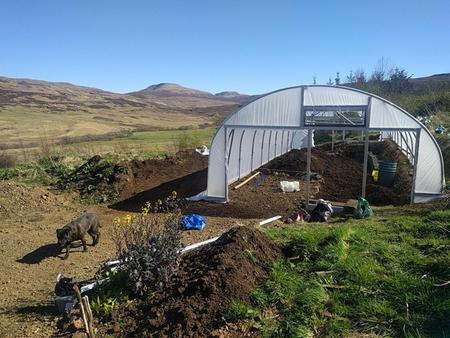
Judith Browning wrote:so exciting!!!
Congratulations on this major step!
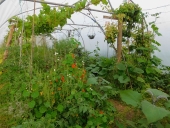
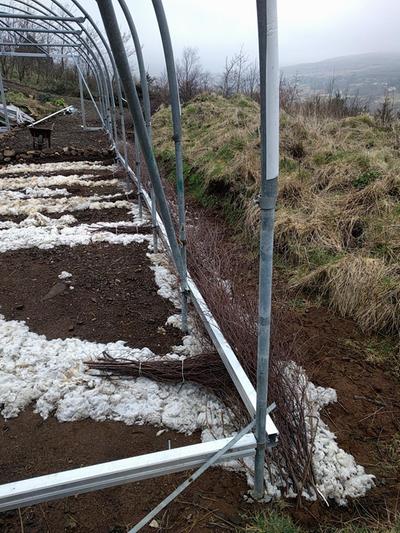
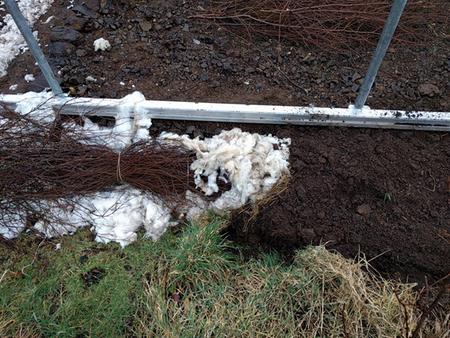
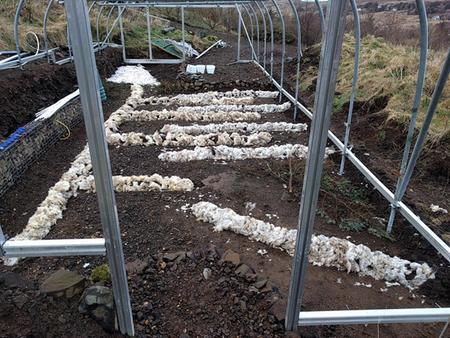
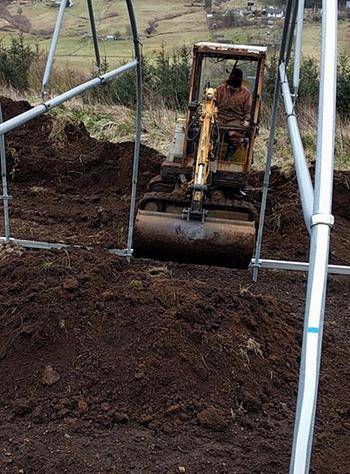
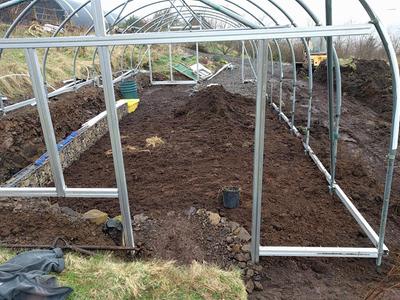
That is such a huge space I can't wait to see what you can grow in there😊
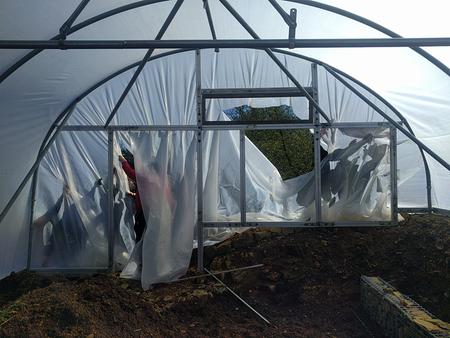
I've already got some tomato plants started and some shrubs, trees and climbers waiting in pots....How Permies works: https://permies.com/wiki/34193/permies-works-links-threads
My projects on Skye: The tree field, Growing and landracing, perennial polycultures, "Don't dream it - be it! "
7
--
"Whitewashed Hope: A Message from 10+ Indigenous Leaders and Organizations"
https://www.culturalsurvival.org/news/whitewashed-hope-message-10-indigenous-leaders-and-organizations
6
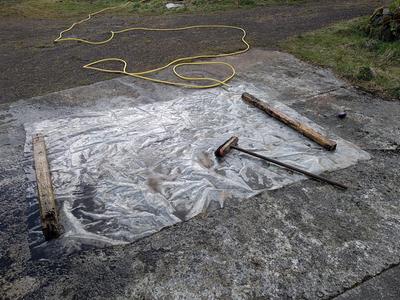
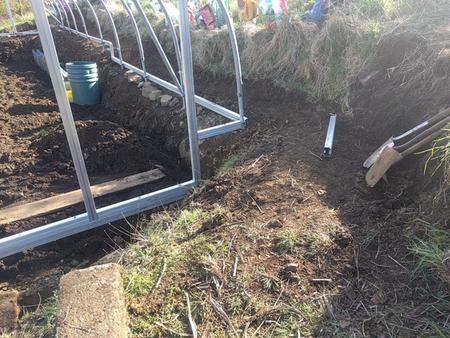
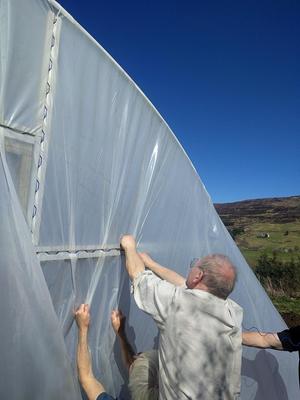
Ac Baker wrote:I've been pondering the wiggle wire cover fitting technology you've used. It's technically re-useable, which makes re-adjusting the cover, or re-covering the tunnel so much more practicable.
How Permies works: https://permies.com/wiki/34193/permies-works-links-threads
My projects on Skye: The tree field, Growing and landracing, perennial polycultures, "Don't dream it - be it! "

|
Every noble work is at first impossible. - Thomas Carlyle / tiny ad
It's a bit like "run away to the circus" but with gardening
https://wheaton-labs.com/bootcamp
|