|

|
|
|
|

|

|

|

|

|
 5
5


 ? Really, that is just too scary !! EEUW, no thanks.


 7
7
How Permies works: https://permies.com/wiki/34193/permies-works-links-threads
My projects on Skye: The tree field, Growing and landracing, perennial polycultures, "Don't dream it - be it! "
7
9

How Permies works: https://permies.com/wiki/34193/permies-works-links-threads
My projects on Skye: The tree field, Growing and landracing, perennial polycultures, "Don't dream it - be it! "
5
3
Clifford Johnston wrote:Corn is not really a feasible crop for me - too much space for too little yield, in my opinion. We grew corn 2 years ago - delicious, but we felt that we didn't get that much yield for the space taken.

How Permies works: https://permies.com/wiki/34193/permies-works-links-threads
My projects on Skye: The tree field, Growing and landracing, perennial polycultures, "Don't dream it - be it! "
14


How Permies works: https://permies.com/wiki/34193/permies-works-links-threads
My projects on Skye: The tree field, Growing and landracing, perennial polycultures, "Don't dream it - be it! "
3
9
How Permies works: https://permies.com/wiki/34193/permies-works-links-threads
My projects on Skye: The tree field, Growing and landracing, perennial polycultures, "Don't dream it - be it! "
13


How Permies works: https://permies.com/wiki/34193/permies-works-links-threads
My projects on Skye: The tree field, Growing and landracing, perennial polycultures, "Don't dream it - be it! "
5
Visit Redhawk's soil series: https://permies.com/wiki/redhawk-soil
How permies.com works: https://permies.com/wiki/34193/permies-works-links-threads

Skill verified by Nicole Alderman")

Skill verified by Mike Haasl") 8
8

How Permies works: https://permies.com/wiki/34193/permies-works-links-threads
My projects on Skye: The tree field, Growing and landracing, perennial polycultures, "Don't dream it - be it! "
11

How Permies works: https://permies.com/wiki/34193/permies-works-links-threads
My projects on Skye: The tree field, Growing and landracing, perennial polycultures, "Don't dream it - be it! "
10
How Permies works: https://permies.com/wiki/34193/permies-works-links-threads
My projects on Skye: The tree field, Growing and landracing, perennial polycultures, "Don't dream it - be it! "
8
--
"Whitewashed Hope: A Message from 10+ Indigenous Leaders and Organizations"
https://www.culturalsurvival.org/news/whitewashed-hope-message-10-indigenous-leaders-and-organizations
8


How Permies works: https://permies.com/wiki/34193/permies-works-links-threads
My projects on Skye: The tree field, Growing and landracing, perennial polycultures, "Don't dream it - be it! "
3


 5
5

Skill verified by gir bot")

Skill verified by Alexandra Malecki")

Skill verified by Opalyn Rose")

Skill verified by Opalyn Rose")

Skill verified by Opalyn Rose")

Skill verified by Opalyn Rose") 6
6
How Permies works: https://permies.com/wiki/34193/permies-works-links-threads
My projects on Skye: The tree field, Growing and landracing, perennial polycultures, "Don't dream it - be it! "
5
--
"Whitewashed Hope: A Message from 10+ Indigenous Leaders and Organizations"
https://www.culturalsurvival.org/news/whitewashed-hope-message-10-indigenous-leaders-and-organizations
12
How Permies works: https://permies.com/wiki/34193/permies-works-links-threads
My projects on Skye: The tree field, Growing and landracing, perennial polycultures, "Don't dream it - be it! "
7
10

How Permies works: https://permies.com/wiki/34193/permies-works-links-threads
My projects on Skye: The tree field, Growing and landracing, perennial polycultures, "Don't dream it - be it! "
9

How Permies works: https://permies.com/wiki/34193/permies-works-links-threads
My projects on Skye: The tree field, Growing and landracing, perennial polycultures, "Don't dream it - be it! "
8
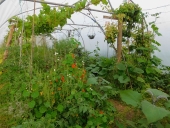
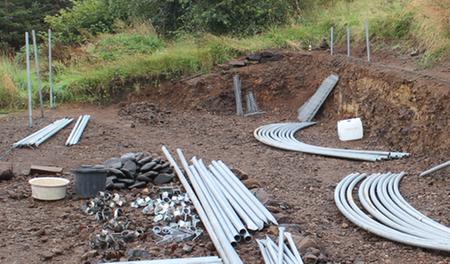
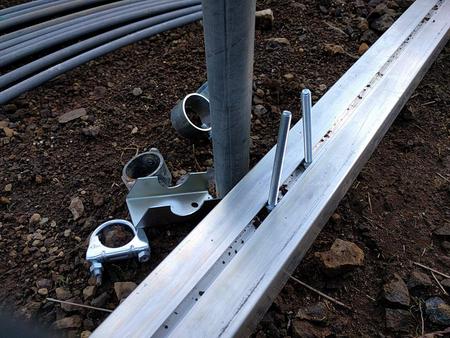
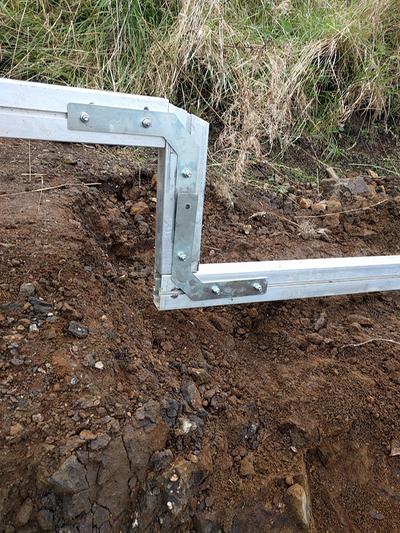
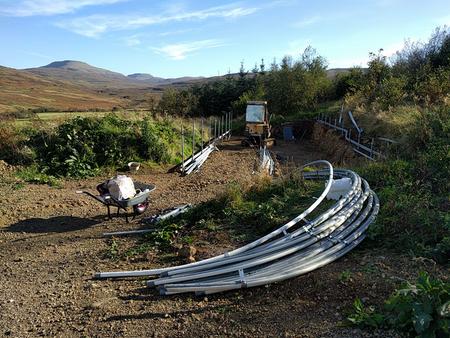
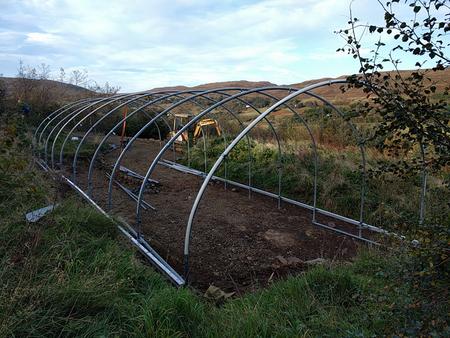
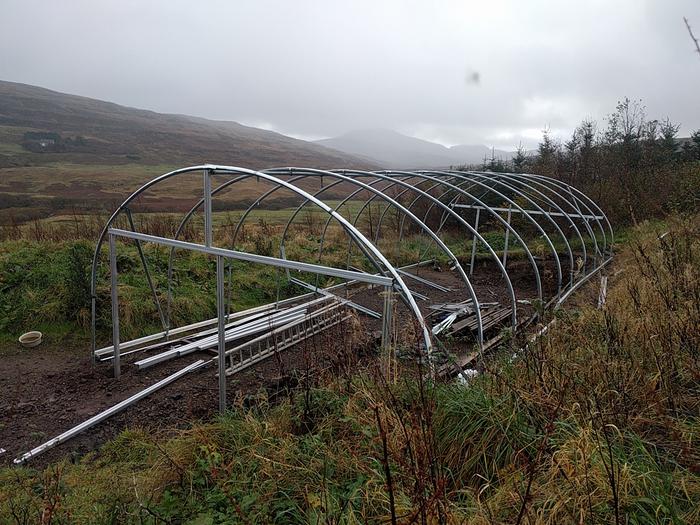
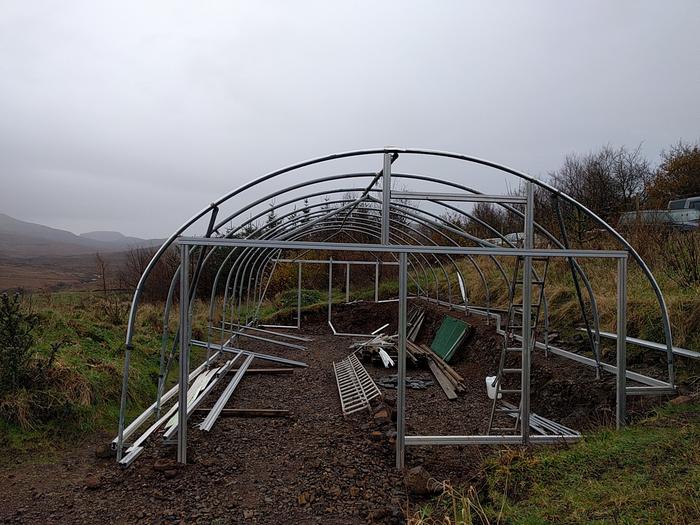
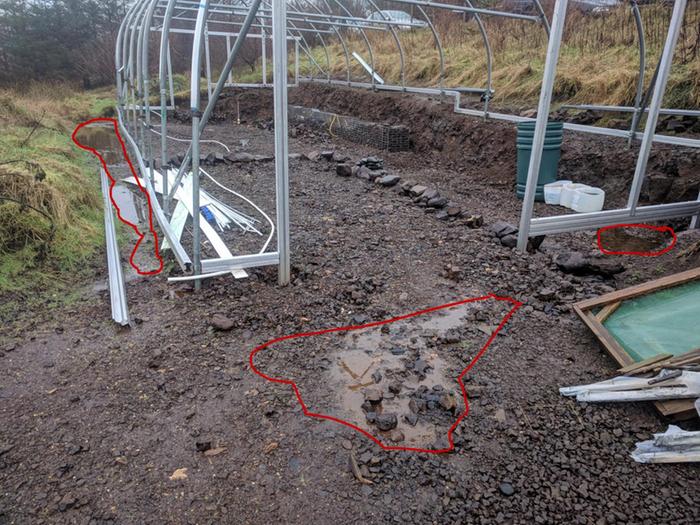
 ) Anyhow - lots of rain at the weekend following frost and snow thaw meant the ground is pretty saturated round here. It gives me the opportunity to see where the natural water flow is around the tunnel without the cover.
How Permies works: https://permies.com/wiki/34193/permies-works-links-threads
My projects on Skye: The tree field, Growing and landracing, perennial polycultures, "Don't dream it - be it! "

|
Laborare non amo - latin for "I do not like to work" - thanks tiny ad
Seeking farmers for Pockerchicory Agrihood
https://www.practicedagrihoods.com/
|