• Post Reply Bookmark Topic Watch Topic
  • New Topic
permaculture forums growies critters building homesteading energy monies kitchen purity ungarbage community wilderness fiber arts art permaculture artisans regional education skip experiences global resources cider press projects digital market permies.com pie forums private forums all forums
this forum made possible by our volunteer staff, including ...
master stewards:
  • Nancy Reading
  • Carla Burke
  • r ranson
  • John F Dean
  • paul wheaton
  • Pearl Sutton
stewards:
  • Jay Angler
  • Liv Smith
  • Leigh Tate
master gardeners:
  • Christopher Weeks
  • Timothy Norton
gardeners:
  • thomas rubino
  • Jeremy VanGelder
  • Maieshe Ljin

Casting Large refractory Slabs

 
rocket scientist
Posts: 6322
Location: latitude 47 N.W. montana zone 6A
3199
cat pig rocket stoves
  • Likes 14
  • Mark post as helpful
  • send pies
    Number of slices to send:
    Optional 'thank-you' note:
  • Quote
  • Report post to moderator
Hi All;
I am currently working on building Peter Berg's newly designed Shorty core.
It requires 3 large-size slabs that are not commercially available, apx,  14"x 18" x 2.5", a 14" x 14" x 2.5", and a 14" x 3" x 2.5".
Unless you live near a refractory casting company these sizes must be made at home.
There is a fair amount of online information on the process, read as much as you can ahead of time to avoid costly mistakes.

I have mixed and poured concrete plenty of times... refractory casting is a similar process but the finished "mud" is not the same.
Refractory comes in #50 + sacks, you mix the entire sack at once to get the proper mix of ingredients.
Attempting to mix a partial sack will result in poor results, all the ingredients must be present to give the proper reaction to cure.
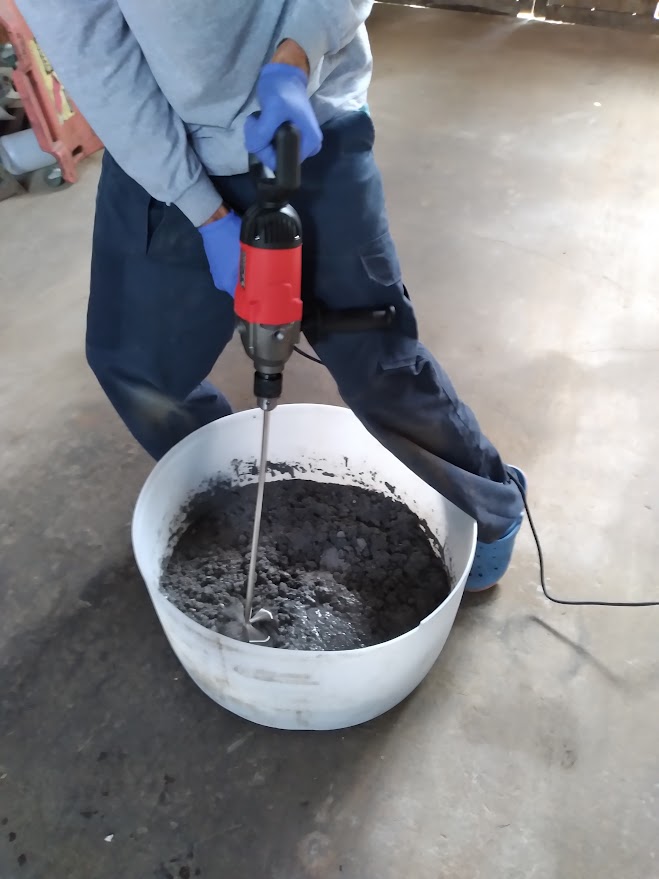
A paddle mixer and a high torque, low RPM drill are used to distribute the material throughout the mix properly.
The amount of water added is very specific.  Adding too much will dilute and ruin your refractory.
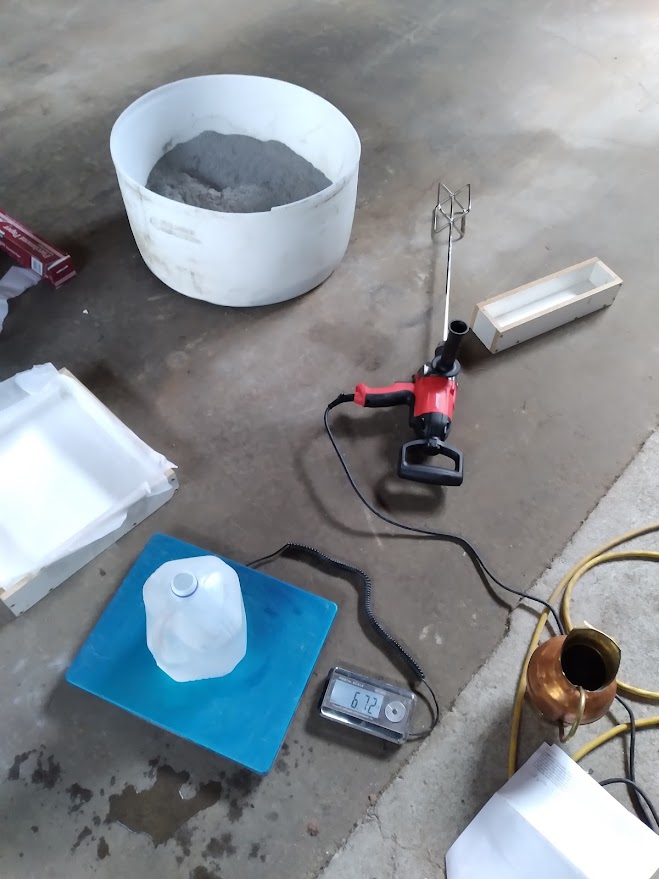
In my case, I needed #6.7 of water or apx .8 of a gallon. It does not seem like enough but you must not add extra.
Once the water is added you have 5 minutes to mix it and 20 - 30 minutes to get it in a form.
A vibrating table is used to eliminate air pockets.
I built a vibe table using a piece of plywood with a junk auto tire bolted to it, a bladeless sawsall was used to vibrate the table.

The Refractory mud when ready to go into the form is extremely dry. A ball created will not have any water evident.
One test is to toss that ball a foot in the air and catch it, if it deforms it is too wet.
There is no "pouring" refractory when it is properly mixed, handfuls are picked up and placed in your form and pushed in tight, and a brick can be used to compress the mud tightly into your form.  After hand-filling and packing, it is time to vibrate.
When vibrating concrete, the water rises quickly to the top of the form.
Very little water rises when vibrating refractory, as there is very little water in the mix.
Care must be taken while vibrating to not over vibrate. Only a small amount of water should appear, mainly around the edges.  Over-vibrating and bringing extra water to the top will weaken your slab and lower the heat resistance, causing your refractory to fail quickly.
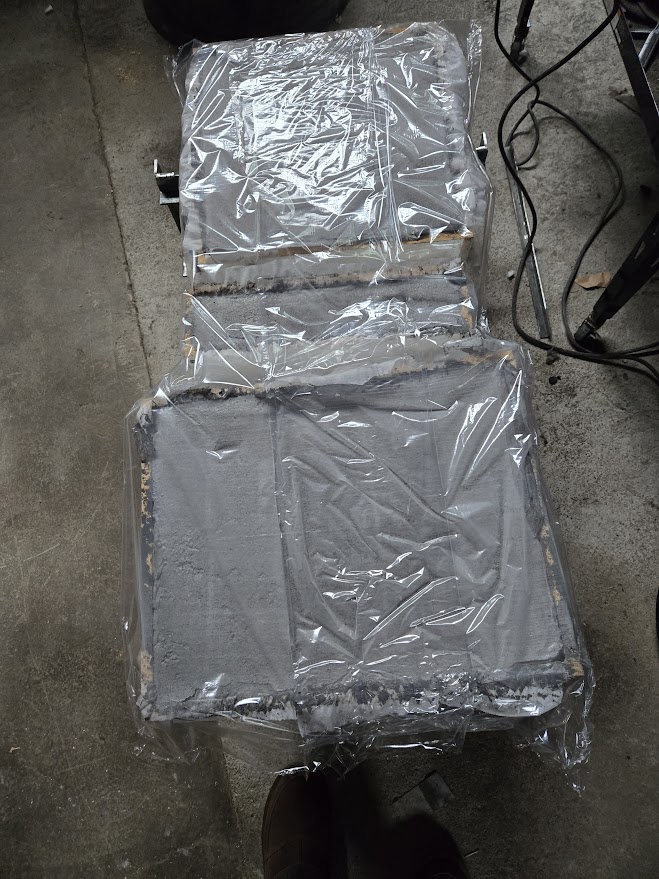
Once vibrated your slabs should be carefully placed in a warm location. After an hour or so the mud should become stiff on top.  Plastic or wet cloth should be placed over the form to control evaporation, a spray bottle of clean water is used periodically to keep things damp.
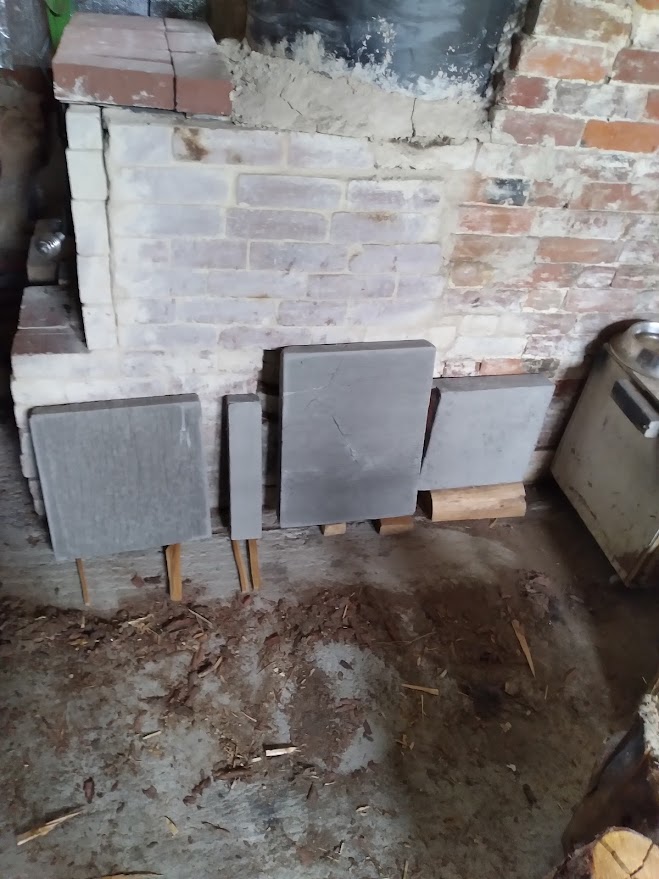
After 24 hrs the green slab is carefully removed from the form and stood on the edge to facilitate further drying.
Care must be taken to not attempt to finish drying by overheating.  Heating is best done in a kiln where the temps are exactly controlled.
When a kiln is not available, drying can be accomplished by placing your slab on the RMH core and building small controlled fires over several days, slowly increasing the fire size to apply more heat and finish the curing of the slab.

The Bottom Line.
Follow the directions exactly.
Refractory mix is not cheap.,
Prices range from $70- $120 for one sack.
Shipping can cost as much as the product.
I paid $245 to have two bags shipped directly to my door.
I could have driven 2hrs each way to Spokane and bought two sacks in person... they would have cost $238 not counting travel.
When mixing, having a second person to assist is invaluable.
I was lucky enough to have Rocket Scientist Gerry Parent here to help.
Without that help, the process would have been much more strenuous and could have easily gotten out of hand.

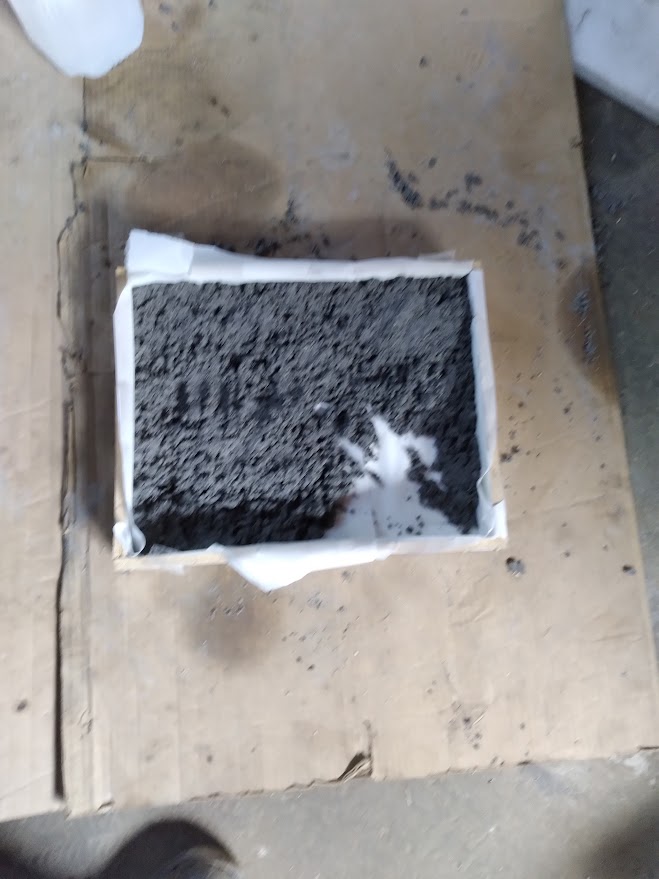
One tip, always build an extra form ahead of time for any excess mud (its too spendy to waste!)
I was lucky to locate a metal box in time to use up the excess!


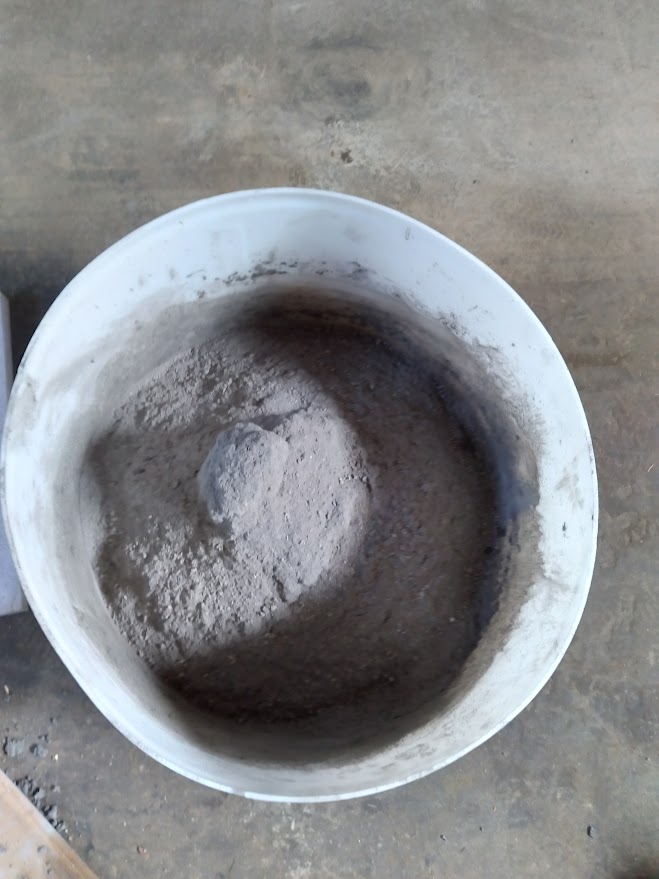
20240504_120648.jpg
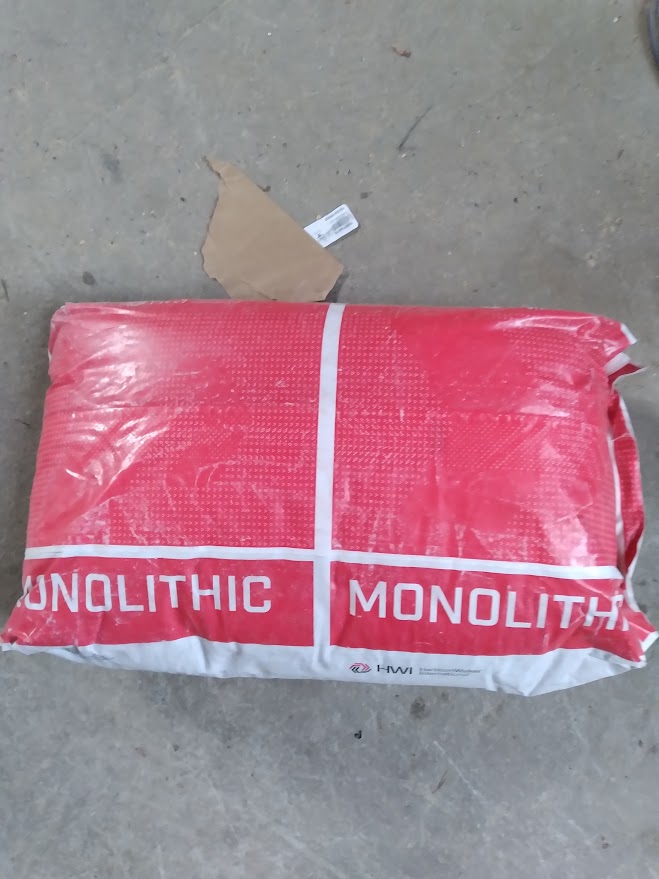
Ks-4 plus refractory mix
20240504_120648-(1).jpg
HF high toque low RPM drill with paddle mixer
20240504_120339.jpg
weighing the water and getting ready to mix
20240504_123112.jpg
nice deep tub to contain things while mixing
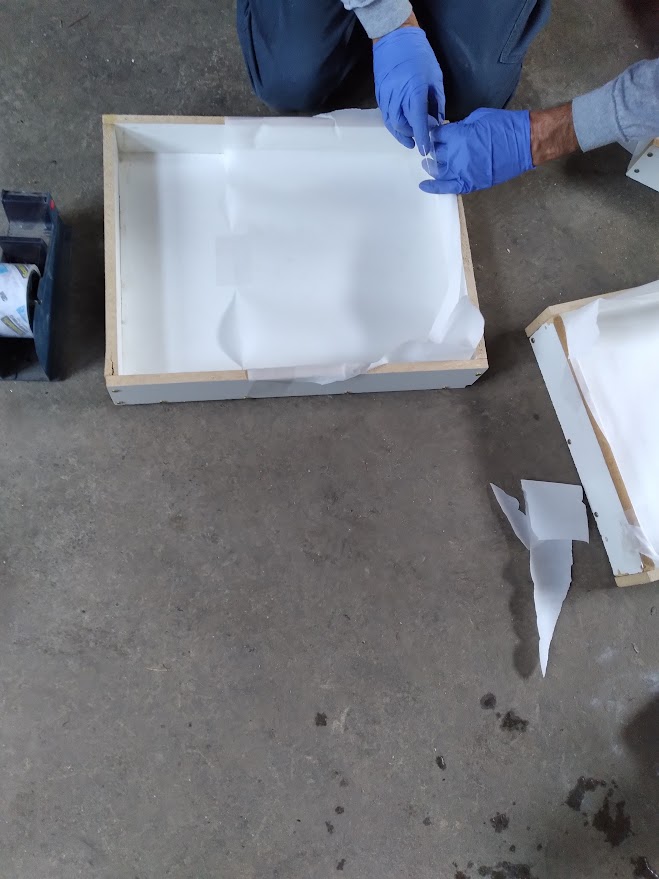
20240504_120631.jpg
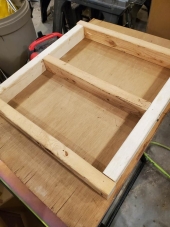
forms ready to go
forms ready to go
20240504_121409.jpg
Hard work
Hard work
20240504_123108.jpg
filling a form box
filling a form box
20240504_123052.jpg
bladeless sawsall to vibrate the shaker table
20240504_123101.jpg
two down and two more to go
20240504_125722.jpg
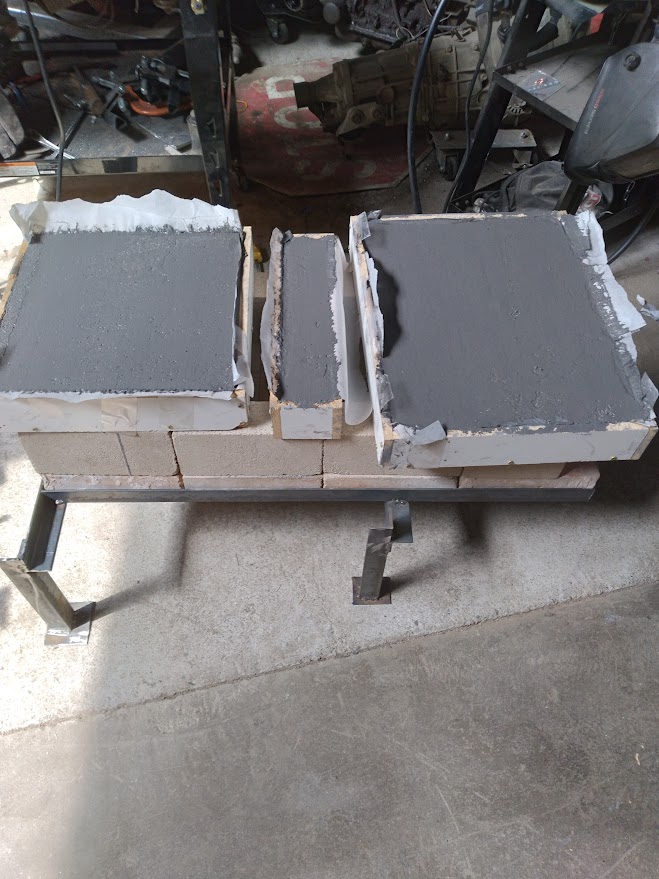
three slabs vibrated and ready to cure
20240504_125710.jpg
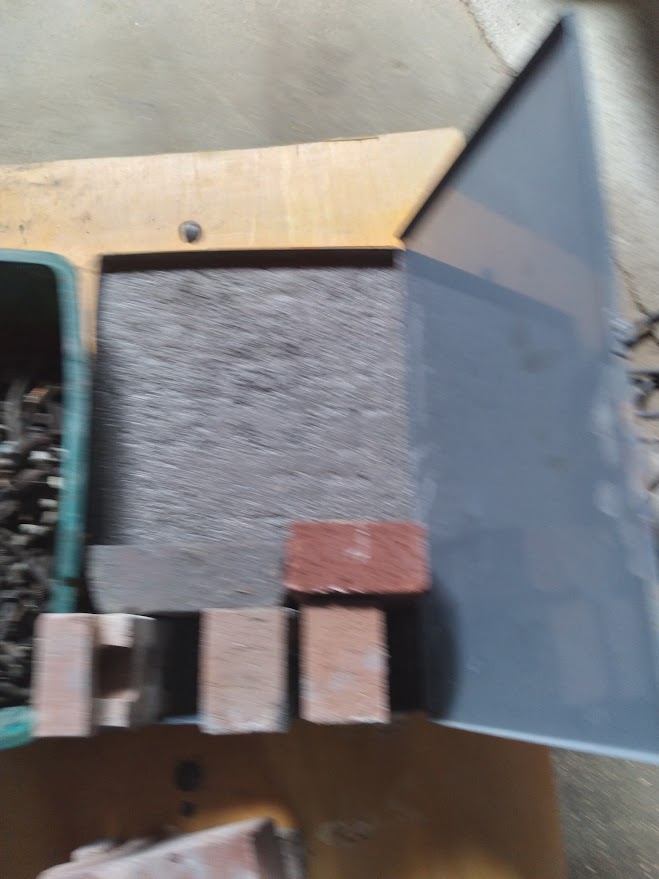
excess mud was quickly placed in an extra "Form"
excess mud was quickly placed in an extra
20240504_182208.jpg
starting the 24 hr cure
20240505_120004.jpg
out of the forms and starting to air dry
 
Rocket Scientist
Posts: 791
Location: Guernsey a small island near France.
299
  • Likes 7
  • Mark post as helpful
  • send pies
    Number of slices to send:
    Optional 'thank-you' note:
  • Quote
  • Report post to moderator
Nice post Thomas, I have a complementary video to add to your post.

https://youtu.be/JUy2dPN4Vj8?si=qq7KMhf4vM-lN7T3
 
gardener
Posts: 5169
Location: Cincinnati, Ohio,Price Hill 45205
1010
forest garden trees urban
  • Likes 6
  • Mark post as helpful
  • send pies
    Number of slices to send:
    Optional 'thank-you' note:
  • Quote
  • Report post to moderator
Wonderful post, as per usual.
I hope you post the completed core!
What did you line the forms with?
 
thomas rubino
rocket scientist
Posts: 6322
Location: latitude 47 N.W. montana zone 6A
3199
cat pig rocket stoves
  • Likes 7
  • Mark post as helpful
  • send pies
    Number of slices to send:
    Optional 'thank-you' note:
  • Quote
  • Report post to moderator
I lined the forms with Parchment paper.
It did not work as well as I would have liked.
Next time I will leave it out as unnecessary.

Here are a couple of photos of the test core being built.  
20240505_134936.jpg
[Thumbnail for 20240505_134936.jpg]
20240505_152103.jpg
[Thumbnail for 20240505_152103.jpg]
 
Rocket Scientist
Posts: 1809
Location: Kaslo, BC
525
building solar woodworking rocket stoves wood heat greening the desert
  • Likes 6
  • Mark post as helpful
  • send pies
    Number of slices to send:
    Optional 'thank-you' note:
  • Quote
  • Report post to moderator
Side note..... As a close observer might notice that is familiar with how the core should look, the inner liner at the base of the riser should all be at the same level, but in our case is not. The reason being is that this core is being dry stacked with an 1/8" layer of superwool gasket between most bricks (bottom and sides). When you leave out this layer on sidewalls of the split firebrick liner, it then becomes offset from the rest of the bricks. Not sure if this (1/4") will affect performance of the stove, but in order to correct it, I guess we could just add it to make it all even. Any thoughts Peter?
 
Fox James
Rocket Scientist
Posts: 791
Location: Guernsey a small island near France.
299
  • Likes 8
  • Mark post as helpful
  • send pies
    Number of slices to send:
    Optional 'thank-you' note:
  • Quote
  • Report post to moderator
I have tried  that thin CF gasket, it just fell apart once the binder had melted away.
Yours may be different of course and perhaps if it is not disturbed  at all it may hold up.
 
William Bronson
gardener
Posts: 5169
Location: Cincinnati, Ohio,Price Hill 45205
1010
forest garden trees urban
  • Likes 6
  • Mark post as helpful
  • send pies
    Number of slices to send:
    Optional 'thank-you' note:
  • Quote
  • Report post to moderator
Based on the slab measurements I'm guessing that one goes above the firebox, another above the riser.
The 14x3x 2.5 one must be a part that is new with this design (or maybe you just did it to not waste refractory!)

The lining of the riser, what is it, firebrick splits or something else?
I wonder if they are non-insulating, since I don't see any at the rear of the riser.

So far I'm hard pressed to see what couldn't be done buy vaulting firebrick, instead of casting slabs.
I will try to read the development page on Donkeys.
I couldn't follow it when i tried before, so maybe I'll work backwards from the end.
It might make more sense to me now it's so far along.

Earlier iterations of the batch box showed clean combustion with a riser only 3(0.1?) times as tall as system size, so I imagine this version is either shorter still, hella hotter or even more clean burning.

 
thomas rubino
rocket scientist
Posts: 6322
Location: latitude 47 N.W. montana zone 6A
3199
cat pig rocket stoves
  • Likes 6
  • Mark post as helpful
  • send pies
    Number of slices to send:
    Optional 'thank-you' note:
  • Quote
  • Report post to moderator
Here is a better look at an almost finished core.
20240506_132031.jpg
[Thumbnail for 20240506_132031.jpg]
20240506_132057.jpg
[Thumbnail for 20240506_132057.jpg]
20240506_132712.jpg
seems it is a cat box not a batchbox
20240506_125040.jpg
[Thumbnail for 20240506_125040.jpg]
 
gardener
Posts: 1054
Location: +52° 1' 47.40", +4° 22' 57.80"
447
woodworking rocket stoves wood heat
  • Likes 8
  • Mark post as helpful
  • send pies
    Number of slices to send:
    Optional 'thank-you' note:
  • Quote
  • Report post to moderator

Gerry Parent wrote:Side note..... As a close observer might notice that is familiar with how the core should look, the inner liner at the base of the riser should all be at the same level, but in our case is not. The reason being is that this core is being dry stacked with an 1/8" layer of superwool gasket between most bricks (bottom and sides). When you leave out this layer on sidewalls of the split firebrick liner, it then becomes offset from the rest of the bricks. Not sure if this (1/4") will affect performance of the stove, but in order to correct it, I guess we could just add it to make it all even. Any thoughts Peter?


I don't expect this 1/4" mismatch would make any difference in performance. It's more neat to have all the surfaces at the same level, but that's just me.
 
Gerry Parent
Rocket Scientist
Posts: 1809
Location: Kaslo, BC
525
building solar woodworking rocket stoves wood heat greening the desert
  • Likes 6
  • Mark post as helpful
  • send pies
    Number of slices to send:
    Optional 'thank-you' note:
  • Quote
  • Report post to moderator

Peter van den Berg wrote:I don't expect this 1/4" mismatch would make any difference in performance. It's more neat to have all the surfaces at the same level, but that's just me.


Thanks for the confirmation Peter.

Another question for you:

Wondering if this core be made without having to do any custom refractory casting or special ordered large bricks?
For instance, could the roof of the firebox and top of the riser be vaulted/arched with regular firebrick while the end port be supported in the center with a small firebrick pillar to support two regular sized bricks? I realize it will reduce the port size (dividing it into two ports), but if it was made slightly bigger to offset it, would it possibly work or be too much of an obstruction for gas flow?

 
rocket scientist
Posts: 175
Location: Sangre de Cristo Mountains, CO - Lat 38°14' - Zone 5b
130
hunting earthworks solar wood heat rocket stoves homestead
  • Likes 9
  • Mark post as helpful
  • send pies
    Number of slices to send:
    Optional 'thank-you' note:
  • Quote
  • Report post to moderator
Tom and Gerry... great work so far to take Peter's Shorty core design forward as a test core. Following closely as I am planning to leverage your experience to build a shorty core stove this summer. Anxiously awaiting your lighting this off and the actual burn results.

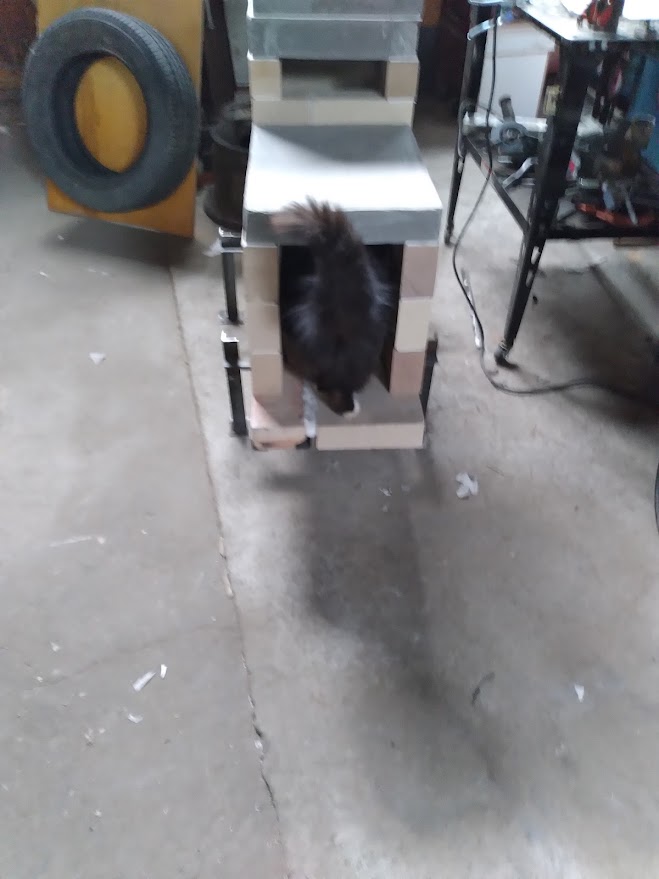
I can't help myself as I sit here and chuckle but to point out to anyone that is of the proper vintage to remember Tom and Jerry. When I saw the cat in the core and knowing it's Tom's cat I couldn't help but thinking Jerry had put something inside to lure Tom in... I can just imagine what Jerry was planning next. If you're not old enough to know what I'm talking about here's the picture to go with the memory, Saturday morning cartoons...

Tom-and-Jerry.jpeg
[Thumbnail for Tom-and-Jerry.jpeg]
 
William Bronson
gardener
Posts: 5169
Location: Cincinnati, Ohio,Price Hill 45205
1010
forest garden trees urban
  • Likes 6
  • Mark post as helpful
  • send pies
    Number of slices to send:
    Optional 'thank-you' note:
  • Quote
  • Report post to moderator

Gerry Parent wrote:
Thanks for the confirmation Peter.

Another question for you:

Wondering if this core be made without having to do any custom refractory casting or special ordered large bricks?
For instance, could the roof of the firebox and top of the riser be vaulted/arched with regular firebrick while the end port be supported in the center with a small firebrick pillar to support two regular sized bricks? I realize it will reduce the port size (dividing it into two ports), but if it was made slightly bigger to offset it, would it possibly work or be too much of an obstruction for gas flow?


Good question!
I think a riser top built as a vault would almost require the bricks right beneath to be vaulted as well.
This could negate the need for a central pillar.

Rather than creating a platform to build the core upon,this build seems to be using the Littman style floor to create the base of the firebox itself.
Is there a way way to apply this idea to the roof of the firebox or the top of the riser?

I'm thinking bricks drilled through on the 2.5 x 3 and 2.5x 9 sides, threaded onto stainless steel rods.
Might cost as much as a custom slab, because of the stainless steel, and drilling two fairly precise holes  in a bunch of bricks seems foolhardy.

Cutting brick is easier. What if we cut a 1/2" deep channel in the  bricks, down the center of each of  the  2.5" sides?
By slipping strips of stainless steel into the slots, the individual bricks would be locked together against downward pressure.
Once the "slab" has been pieced together, we can keep it together by running stainless steel wire around the perimeter, right into the slots.
By tightening the wire, the bricks on the perimeter should be forced together, holding the entire slab together.
I might try this with regular pavers, as a proof of concept.
 
Gerry Parent
Rocket Scientist
Posts: 1809
Location: Kaslo, BC
525
building solar woodworking rocket stoves wood heat greening the desert
  • Likes 5
  • Mark post as helpful
  • send pies
    Number of slices to send:
    Optional 'thank-you' note:
  • Quote
  • Report post to moderator

William Bronson wrote: I think a riser top built as a vault would almost require the bricks right beneath to be vaulted as well.
This could negate the need for a central pillar.


From my understanding of what Peter has come up with in his testing of this shorty core, the end port (exit hole at the top front side of the heat riser) needs to have a lowered overhang in order to help slow the gases down before exiting the port and needs to be of system size (6" in our case).
He explains it here: explanation
Not sure if a curved top and bottom of the end port would fit this bill?

William Bronson wrote:Rather than creating a platform to build the core upon,this build seems to be using the Littman style floor to create the base of the firebox itself.
Is there a way way to apply this idea to the roof of the firebox or the top of the riser?


Metal anywhere inside the core would be doomed to rapid spalling or even melting.

William Bronson wrote:Cutting brick is easier. What if we cut a 1/2" deep channel in the  bricks, down the center of each of  the  2.5" sides?
By slipping strips of stainless steel into the slots, the individual bricks would be locked together against downward pressure.
Once the "slab" has been pieced together, we can keep it together by running stainless steel wire around the perimeter, right into the slots.
By tightening the wire, the bricks on the perimeter should be forced together, holding the entire slab together.
I might try this with regular pavers, as a proof of concept.


A good idea to apply to joining wood together but again, wonder how well it would work in the very high temperatures at the top of the riser or firebox?


Posts: 284
Location: North East Iowa, USA
71
  • Likes 10
  • Mark post as helpful
  • send pies
    Number of slices to send:
    Optional 'thank-you' note:
  • Quote
  • Report post to moderator

William Bronson wrote:

Gerry Parent wrote:
Thanks for the confirmation Peter.

Another question for you:

Wondering if this core be made without having to do any custom refractory casting or special ordered large bricks?
For instance, could the roof of the firebox and top of the riser be vaulted/arched with regular firebrick while the end port be supported in the center with a small firebrick pillar to support two regular sized bricks? I realize it will reduce the port size (dividing it into two ports), but if it was made slightly bigger to offset it, would it possibly work or be too much of an obstruction for gas flow?


Good question!
I think a riser top built as a vault would almost require the bricks right beneath to be vaulted as well.
This could negate the need for a central pillar.

Rather than creating a platform to build the core upon,this build seems to be using the Littman style floor to create the base of the firebox itself.
Is there a way way to apply this idea to the roof of the firebox or the top of the riser?

I'm thinking bricks drilled through on the 2.5 x 3 and 2.5x 9 sides, threaded onto stainless steel rods.
Might cost as much as a custom slab, because of the stainless steel, and drilling two fairly precise holes  in a bunch of bricks seems foolhardy.

Cutting brick is easier. What if we cut a 1/2" deep channel in the  bricks, down the center of each of  the  2.5" sides?
By slipping strips of stainless steel into the slots, the individual bricks would be locked together against downward pressure.
Once the "slab" has been pieced together, we can keep it together by running stainless steel wire around the perimeter, right into the slots.
By tightening the wire, the bricks on the perimeter should be forced together, holding the entire slab together.
I might try this with regular pavers, as a proof of concept.


I have built a vaulted ceiling and was covered in my post of the 7" build done last year.  No drilling, it has worked well. No one ever asked about it, so I never really talked about it more.  I am glad I did it, as no casting was involved. it was simple math for angles, and those of you using frames for the bricks, it (the holding structure) is already there.   Cost wise, no different than standard fire brick.    I would do it again, no hesitation.
Best of success.
Scott
 
Glenn Littman
rocket scientist
Posts: 175
Location: Sangre de Cristo Mountains, CO - Lat 38°14' - Zone 5b
130
hunting earthworks solar wood heat rocket stoves homestead
  • Likes 6
  • Mark post as helpful
  • send pies
    Number of slices to send:
    Optional 'thank-you' note:
  • Quote
  • Report post to moderator
The vaulted ceiling idea is perhaps worth considering to reduce cost by eliminating the custom cast slab over the riser. How it affects the burn performance would need to be tested. Would there even be enough room to vault the firebox roof and not impinge on the outlet of the riser with the gases coming out the front. Perhaps a sidewinder is more conducive to using this approach for the firebox.

Thinking about a sidewinder design, it makes me wonder if using a vaulted roof on the riser would be better approached with the vault running parallel to the riser outlet to help minimize disturbance of the gas flow.

The vaulting could potentially address the two roofs but I don't see how you get away from still needing the one custom cast piece for the top of the riser outlet. Considering Tom's comment that you must use an entire bag of castable material when making a casting of any size, it begins to negate the cost benefit of the vaulted roof to cast one small part.

Although, I'm thinking the custom cast riser outlet header is coming soon as an available piece to purchase from Dragon Technologies. Considering that this piece is only 2.5 x 3 x 14 shipping would not be prohibitive.
 
Glenn Littman
rocket scientist
Posts: 175
Location: Sangre de Cristo Mountains, CO - Lat 38°14' - Zone 5b
130
hunting earthworks solar wood heat rocket stoves homestead
  • Likes 8
  • Mark post as helpful
  • send pies
    Number of slices to send:
    Optional 'thank-you' note:
  • Quote
  • Report post to moderator

Gerry Parent wrote:Side note..... As a close observer might notice that is familiar with how the core should look, the inner liner at the base of the riser should all be at the same level, but in our case is not. The reason being is that this core is being dry stacked with an 1/8" layer of superwool gasket between most bricks (bottom and sides). When you leave out this layer on sidewalls of the split firebrick liner, it then becomes offset from the rest of the bricks. Not sure if this (1/4") will affect performance of the stove, but in order to correct it, I guess we could just add it to make it all even. Any thoughts Peter?


I know many of you caution against using any mortar between firebrick in the core and riser. I'm hardheaded and disregarded that recommendation in my build but I used refractory mortar very sparingly, very thinly buttering the brick to fill any voids and eliminating the dimensional growth that is caused if using SW gasket. Time will tell if this was a mistake but I keep thinking that the mortar is so thin that any cracking of the mortar will be retained in the voids since the gaps were so small, probably never more than 1 to 1.5 mm. Happy to get feedback from others that have tried and failed or succeeded in using the mortar approach to fill the voids.
 
Peter van den Berg
gardener
Posts: 1054
Location: +52° 1' 47.40", +4° 22' 57.80"
447
woodworking rocket stoves wood heat
  • Likes 6
  • Mark post as helpful
  • send pies
    Number of slices to send:
    Optional 'thank-you' note:
  • Quote
  • Report post to moderator

Gerry Parent wrote:Wondering if this core be made without having to do any custom refractory casting or special ordered large bricks?
For instance, could the roof of the firebox and top of the riser be vaulted/arched with regular firebrick while the end port be supported in the center with a small firebrick pillar to support two regular sized bricks? I realize it will reduce the port size (dividing it into two ports), but if it was made slightly bigger to offset it, would it possibly work or be too much of an obstruction for gas flow?


The roof of the firebox could be vaulted, no question about that. Done before in different ways and with commendable results. Since the plan is to use a tension frame anyway, this could be the way forward. What Scott Weinberg did is probably the easiest way, not a rounded vault but a simple pointed "house roof" shape instead.

Whether the roof of the riser box could be done as a vault is an entirely different question. As the development model is now, this would be near impossible to accomplish. But... as long as the steel is outside the core, the tension frame could serve as support for the vaulted riser box as well. The suggestion to do the vaulting parallel to the end port seems to be a good one, but might be difficult to achieve.

Maybe you guys try this core first and build another one in parallel with vaults so you would be able to compare those two?
 
William Bronson
gardener
Posts: 5169
Location: Cincinnati, Ohio,Price Hill 45205
1010
forest garden trees urban
  • Likes 7
  • Mark post as helpful
  • send pies
    Number of slices to send:
    Optional 'thank-you' note:
  • Quote
  • Report post to moderator
The top of the riser outlet could be a two brick vault,sitting right under the vaulted riser header.

The bottom of the riser outlet could be "vaulted",not for structural reasons but to maintain the same cross-sectional area.
This should also keep it in the same relative position to the vaulted firebox roof.

As for metal in core being doomed, that is why I brought up the structure of the firebox floor.
There appears to be metal in that floor.
Also, as I was looking into Scott's build,he has a solution for building the top of bells that seems to work.
It uses metal and requires the protection of ceramic fiber insulation.
Comparing these ideas to wood joinery seems apt.
If the protection from being inside of the bricks isn't enough to save metal, perhaps pegs, or "joinery biscuits" cut from  from
firebrick would do.
Seems too fidley.


I think I find the high cost tricky castings to be at odds with the simplicity of the rest of the build.
Vaulting ain't easy, but it doesn't seem add that much cost or complexity,  just time on task.

Slabs don't change the shape of openings and they certainly offer a cleaner look, but seem to require more money and care.
 
Gerry Parent
Rocket Scientist
Posts: 1809
Location: Kaslo, BC
525
building solar woodworking rocket stoves wood heat greening the desert
  • Likes 6
  • Mark post as helpful
  • send pies
    Number of slices to send:
    Optional 'thank-you' note:
  • Quote
  • Report post to moderator

Glenn Littman wrote:I know many of you caution against using any mortar between firebrick in the core and riser. I'm hardheaded and disregarded that recommendation in my build but I used refractory mortar very sparingly, very thinly buttering the brick to fill any voids and eliminating the dimensional growth that is caused if using SW gasket. Time will tell if this was a mistake but I keep thinking that the mortar is so thin that any cracking of the mortar will be retained in the voids since the gaps were so small, probably never more than 1 to 1.5 mm. Happy to get feedback from others that have tried and failed or succeeded in using the mortar approach to fill the voids.


For me, it was an episode of Stove Chat with Matt Walker where he told us that mortar was not necessary that changed my view on the whole mortar thing. Up until that point, building rocket stoves often meant using scrounged bricks which had rough surfaces that definitely needed mortar. So not good or bad, just optional rather than a necessity, especially when using commercially made firebrick which tends to have very straight and well fitting edges.
So why are we using gasket between all these brand new bricks? Innovation!
 
Gerry Parent
Rocket Scientist
Posts: 1809
Location: Kaslo, BC
525
building solar woodworking rocket stoves wood heat greening the desert
  • Likes 6
  • Mark post as helpful
  • send pies
    Number of slices to send:
    Optional 'thank-you' note:
  • Quote
  • Report post to moderator

Peter van den Berg wrote:Whether the roof of the riser box could be done as a vault is an entirely different question. As the development model is now, this would be near impossible to accomplish. But... as long as the steel is outside the core, the tension frame could serve as support for the vaulted riser box as well. The suggestion to do the vaulting parallel to the end port seems to be a good one, but might be difficult to achieve.

Maybe you guys try this core first and build another one in parallel with vaults so you would be able to compare those two?


Ha ha.... Havn't even lit up our first firing to start the curing process on the poured slabs and already talking about changing the core!
Definitely something to consider though once we get some experience with this one. Just knowing its possible to ease my fore-thinking wondering mind is good enough for now.
 
Gerry Parent
Rocket Scientist
Posts: 1809
Location: Kaslo, BC
525
building solar woodworking rocket stoves wood heat greening the desert
  • Likes 6
  • Mark post as helpful
  • send pies
    Number of slices to send:
    Optional 'thank-you' note:
  • Quote
  • Report post to moderator

William Bronson wrote: The top of the riser outlet could be a two brick vault,sitting right under the vaulted riser header.

The bottom of the riser outlet could be "vaulted",not for structural reasons but to maintain the same cross-sectional area.
This should also keep it in the same relative position to the vaulted firebox roof.

As for metal in core being doomed, that is why I brought up the structure of the firebox floor.
There appears to be metal in that floor.
Also, as I was looking into Scott's build,he has a solution for building the top of bells that seems to work.
It uses metal and requires the protection of ceramic fiber insulation.
Comparing these ideas to wood joinery seems apt.
If the protection from being inside of the bricks isn't enough to save metal, perhaps pegs, or "joinery biscuits" cut from  from
firebrick would do.
Seems too fidley.


I think I find the high cost tricky castings to be at odds with the simplicity of the rest of the build.
Vaulting ain't easy, but it doesn't seem add that much cost or complexity,  just time on task.

Slabs don't change the shape of openings and they certainly offer a cleaner look, but seem to require more money and care.


Better following you now William.
As I mentioned to Peter, vaulting is not something that we need to do right now, but fun to look at for those that want to go that route.
 
Gerry Parent
Rocket Scientist
Posts: 1809
Location: Kaslo, BC
525
building solar woodworking rocket stoves wood heat greening the desert
  • Likes 5
  • Mark post as helpful
  • send pies
    Number of slices to send:
    Optional 'thank-you' note:
  • Quote
  • Report post to moderator

Scott Weinberg wrote:I have built a vaulted ceiling and was covered in my post of the 7" build done last year.  No drilling, it has worked well. No one ever asked about it, so I never really talked about it more.  I am glad I did it, as no casting was involved. it was simple math for angles, and those of you using frames for the bricks, it (the holding structure) is already there.   Cost wise, no different than standard fire brick.    I would do it again, no hesitation.
Best of success.
Scott


Saw your vaulted ceiling and appreciated its simplicity. This is what I had in mind if I was to go this route too.
 
Scott Weinberg
Posts: 284
Location: North East Iowa, USA
71
  • Likes 7
  • Mark post as helpful
  • send pies
    Number of slices to send:
    Optional 'thank-you' note:
  • Quote
  • Report post to moderator

Glenn Littman wrote:
I know many of you caution against using any mortar between firebrick in the core and riser. I'm hardheaded and disregarded that recommendation in my build but I used refractory mortar very sparingly, very thinly buttering the brick to fill any voids and eliminating the dimensional growth that is caused if using SW gasket. Time will tell if this was a mistake but I keep thinking that the mortar is so thin that any cracking of the mortar will be retained in the voids since the gaps were so small, probably never more than 1 to 1.5 mm. Happy to get feedback from others that have tried and failed or succeeded in using the mortar approach to fill the voids.


I have used lots of refractory mortar, and like Glenn says, very thin, (directions tell you the same) The good stuff is very smooth, and if your bricks are good quality, things really lay nice.   I have gone back and "filled" voids,  but I think this is for my own feeling of looking right. But it does stay put. Again, thinly set.

I had a large bell I measured once, at room temp, and then at 275 degrees, and it gained 1/32" (.08mm) with very stable brick. Length measured was 40" you can do the math, but it was very close to book values.  So with that in mind expansion/contraction was minimal.    NOTE: I am not talking about what steel and brick would do together. the coefficient of expansion between the two is much different, thus the case for Super wool.  I would never try to use refractory mix, to take up a joint space between brick and steel.  There are so many factors to consider, such as corners, baffle placement if used, even riser placement in the bell,

That is part of the science I enjoy greatly. Estimating and calculating seems to work better than WAG work

Best of success
Scott
ps... the greatest part of the super wool for joint work, would be the ability to reuse the bricks with ease.  With the mortar, it can be done and I have done 100's, but basically you have to grind off the thin layer with a mask, ( I found a 36 grit flap disk worked best)  and a good work horse type stand. (something to hold the brick easy and quick.

 
Gerry Parent
Rocket Scientist
Posts: 1809
Location: Kaslo, BC
525
building solar woodworking rocket stoves wood heat greening the desert
  • Likes 9
  • Mark post as helpful
  • send pies
    Number of slices to send:
    Optional 'thank-you' note:
  • Quote
  • Report post to moderator
Here's a detail on the refractory brick mold making process that I thought I'd share of what NOT to do.
Seeing that the 3 necessary brick molds were already filled, we had extra mix that we didn't want to waste, so in haste, a shallow metal tool case was quickly emptied and one side had a few clay bricks put in acting as a wall to make it the size and depth we wanted.
The next day, removing these brick 'forms' were not so easy. The refractory stuck to it so hard that the brick sheared a good chunk of it off instead of at its edge.
A masonry grinding wheel was needed to take off this stuck chunk of brick and regain the straight edge we were originally looking for.
Moral of the story is, calculate your volumes before starting out and perhaps have an extra mold ready to go in case excess mix is in need of a home or risk having expensive material be wasted. Also, other than not using parchment paper as a release agent (like we did), be sure to lightly coat each surface with oil as a release agent. One of Peters recommendations is WD-40

On the plus side, we discovered that the metal bottom of the tool case produced a shiny, very smooth surface that reminded me of a granite slab all polished up that if needed to be left exposed, could be an attractive feature.

Question: Bubbles can be seen on the side of the brick. We did vibrate the filled forms until a small amount of water started to show around the edges before screeding the surface. Would it have been better to continue vibrating or will these bubbles pose a problem? Also, when vibrating, we didn't see any bubbles appear at the surface as our mix was quite dry.
shine-on-refractory.jpg
[Thumbnail for shine-on-refractory.jpg]
refractory-stuck-to-brick-form.jpg
[Thumbnail for refractory-stuck-to-brick-form.jpg]
 
Fox James
Rocket Scientist
Posts: 791
Location: Guernsey a small island near France.
299
  • Likes 10
  • Mark post as helpful
  • send pies
    Number of slices to send:
    Optional 'thank-you' note:
  • Quote
  • Report post to moderator
In short, to answer your question…. A few air bubbles wont compromise the piece too much if it is cured properly but, how many internal bubbles, is impossible to guess.
I have already written a fair bit about casting refractory, vibrating the mix is a very important and often a critical factor.
The difference when using a high frequency concrete vibrator or a ‘compromising’ method is ten fold!
Any internal bubbles left in the wet mix can hold moisture, those tiny pockets of air can form steam and that expands to form cracks. ( dramatic if not cured properly)
That is why some manufactures add burn out fibers this allow micro channels to form when heated above 140c as this (in theory)  will allow steam to escape.

A few air bubbles should be ok and they do tend to form around the sides of the mold so the main body might be fine.

For many years I owned and used a proper vibrating table, it was a very expensive investment but after around 10 years of use it was beyond further repair.  At that stage I bought  an offset vibrating motor and made my own table but it was not even close to producing components of the same quality as my purpose made professional one.
However it does work to a fashion……
When a mold is placed a a steel bed, high frequency vibrating table, it will settle the mix in seconds, forcing the mix to tightly form a dense, void free component.
My more basic home made table takes ages before the air stopes rising and never gets all the air out!
Unfortunately this also means the mix can be compromised due to over settling!  
I also use a vibrating poker as seen in my video on this page, it produces a fairly good result, but takes about four times longer than the pro table.
Like the DIY table, this can be an issue as over vibrating can cause the finer grades in the mix to fall to the bottom of the mold. Resulting in a sandy bottom!!
Basically refectory casting cement  is made from crushed fire brick and fondu cement at 4-1. This simple mix can work perfectly well if mixed and vibrated. However, the size of the grains and how much dust, makes a big difference. I think some of the mixes are very poor quality and are doomed to fail!
I make my own from graded and washed grog (crushed fire brick) and add my own fibers and fondu but, it is the vibrating that makes all the difference to how the component will perform.
My molds are always sealed, smooth and treated with mold release agent.
Refectory cement is incredibly prone to sticking to virtually anything remotely  porous!
Good luck with you casting, just make sure it is completely dry before super heating.
 
Gerry Parent
Rocket Scientist
Posts: 1809
Location: Kaslo, BC
525
building solar woodworking rocket stoves wood heat greening the desert
  • Likes 7
  • Mark post as helpful
  • send pies
    Number of slices to send:
    Optional 'thank-you' note:
  • Quote
  • Report post to moderator
Thank you for the informative response Fox.
Have appreciated all your work documenting your own refractory work and advice given.
So far, all our firings have been successful at slowly drying the slabs with no apparent cracks forming.
With the recent warming weather though, we haven't started any large or continuous fires, so time will tell how they hold up in the long term. Would really suck if they decided to crumble or explode after encased in a bell and mid winter! Fingers crossed 🤞
 
pollinator
Posts: 184
Location: Colrain, MA, USA (5a - ~1,000' elev.)
19
  • Likes 6
  • Mark post as helpful
  • send pies
    Number of slices to send:
    Optional 'thank-you' note:
  • Quote
  • Report post to moderator

Fox James wrote:In short, to answer your question…. A few air bubbles won't compromise the piece too much if it is cured properly but, how many internal bubbles, is impossible to guess.
I have already written a fair bit about casting refractory, vibrating the mix is a very important and often a critical factor.
The difference when using a high frequency concrete vibrator or a ‘compromising’ method is ten fold!
Any internal bubbles left in the wet mix can hold moisture, those tiny pockets of air can form steam and that expands to form cracks. ( dramatic if not cured properly)
That is why some manufactures add burn out fibers this allow micro channels to form when heated above 140c as this (in theory)  will allow steam to escape.

A few air bubbles should be ok and they do tend to form around the sides of the mold so the main body might be fine.

For many years I owned and used a proper vibrating table, it was a very expensive investment but after around 10 years of use it was beyond further repair.  At that stage I bought  an offset vibrating motor and made my own table but it was not even close to producing components of the same quality as my purpose made professional one.
However it does work to a fashion……
When a mold is placed a a steel bed, high frequency vibrating table, it will settle the mix in seconds, forcing the mix to tightly form a dense, void free component.
My more basic home made table takes ages before the air stops rising and never gets all the air out!...


How do proper vibrating tables vibrate differently than a sawzall strapped to plywood atop a tire? Are they vibrating at a different frequency? Or with more amplitude? Maybe we can figure this out, and make better castings without paying so much money. How about through-bolting and epoxying a sawzall blade to plywood, then attaching the sawzall to the blade?

I found this, below, here: VIBCO concrete vibrator catalog: (http://www.vibco.com/docs/industry-catalogs/concrete-vibrators-handbook-and-catalog.pdf)
"III. WHICH MODEL AND SIZE VIBRATOR TO CHOOSE?
A. First determine how much vibration force is needed for the complete form. Add form weight to concrete weight
with the following adjustments. It is important to know what slump concrete is used.
a. For concrete with 0” slump or dry concrete, add 200% to the weight of form plus concrete to get the vibration
force needed.
b. For 1” to 2” slump, add 75% to form and concrete weight to get total force needed.
c. For concrete with a 3” to 5” slump – standard for all over the road delivered concrete trucks – use vibrator force
same as the form plus concrete weight.
B. Placement of vibrators - Vibration force travels in a 3’ to 4’ radius from the vibrator on steel forms. It dissipates rapidly
thereafter. Place vibrators in a pattern so that vibration forces overlap slightly. The corners are usually very stiff, so place
vibrators close to the corners on a 2.5’ to 3’ radius.
C. Penetration - Vibration force penetrates concrete up to 6” to 8” depending on slump. Concrete is thicker than 8”,
vibrators (staggered) are needed on both sides of the form.
D. How many vibrators are needed? Make a layout of your form and place vibrators on 6’ to 8’ centers (vibration
travels a 3’ to 4’ radius). On corners, place vibrators on 5’ to 6’ center (2.5 to 3’ radius). Once you have laid out the
vibrator pattern and you know how many you need, divide the numbers of vibrators into the total weight of form and
concrete (see paragraph one). The sum is the VIBRATION FORCE needed on the vibrator...
<snip>
F. Vibration procedure and vibration time.
1. Vibration Procedure: Place vibrators to be used in their lowest position. It’s a good idea to pre-mark the vibrator
position. Do not start vibrators until the concrete reaches them or is no more than 6” above them.
TIP:
If internal vibrators are used, do not start the external ones until the internals have stopped or moved to a higher position. The reason for this
is, internal vibrators throw air bubbles away from the vibrator head against form side leaving air holes and pockets on the surface. External
vibrators throw air bubbles into the mix, up and out, leaving surface against form smooth and blemish free.
2. How long to vibrate? Some experimentation on the customer’s part is always necessary because the time you need
to vibrate varies depending on concrete slump, additives, stiffness of form, vibrator force, etc.Do not start the lowest vibrator until the concrete reaches them or is no more than 6” above. The concrete stiffens the form and if vibrated earlier,
the vibration might move the form, making it flex, promoting leaks and seepage.
a. If there is only one vibrator on the side of the form, keep it vibrating until the form is full and no more air bubbles
are breaking on the top of the concrete and a glistening surface appears.
b. If there are multiple vibrators per side, keep the lower vibrator running until the concrete pour reaches the higher
vibrator – then stop the lower one, start the higher one and let it vibrate until the pour is complete and no more
bubbles break on the surface of the concrete and a glistening surface appears.
G. Helpful hints and corrections after you strip the form (please see page 27 under septic tanks).
H. Additional Tips
1. Metal forms transmit vibration far more effectively than wood forms.
2. Always stiffen up forms to avoid distortion and flutter and for best vibration transmittal to concrete.
3. Rest forms on wood beams or rubber mats to avoid vibration transmittal to floor and surrounding forms, as well as for
quiet operation and increased vibration amplitude and uniform compaction.
4. Vibration time depends on height and structure of form. Vibrators should be operated until a flat, glistening surface
appears and no more air bubbles burst on the surface.
5. Concrete of proper consistency is not susceptible to over vibration and segregation. If segregating occurs, reduce
slump, not vibration time and tighten form joint.
Our experience has been to see “under-vibration” rather than “over-vibration” due to too short vibration time or force, to get a
homogenous, air-bubble-free mix."

Brian
-
 
Fox James
Rocket Scientist
Posts: 791
Location: Guernsey a small island near France.
299
  • Likes 7
  • Mark post as helpful
  • send pies
    Number of slices to send:
    Optional 'thank-you' note:
  • Quote
  • Report post to moderator
Brian, all the pro tables I have seen come with fully adjustable speed motors and the better ones have adjustable spring damping too.
Even the cheap ‘off set vibrating motors’  have adjustable  speed, they are just not as well made or as fast.
A bit like a hammer drill verses a dentist drill…..

The issues with DIY is not having the experience to know how long and how fast to vibrate.
A wet mix of big grain concrete will behave completely differently to a dry mix of small grain refectory!
However, I think for the average practical guy, good results can be achieved by using pre mixed bags and following the instructions.
 
Brian Cady
pollinator
Posts: 184
Location: Colrain, MA, USA (5a - ~1,000' elev.)
19
  • Likes 4
  • Mark post as helpful
  • send pies
    Number of slices to send:
    Optional 'thank-you' note:
  • Quote
  • Report post to moderator

Fox James wrote:Brian, all the pro tables I have seen come with fully adjustable speed motors and the better ones have adjustable spring damping too.
Even the cheap ‘off set vibrating motors’  have adjustable  speed, they are just not as well made or as fast.
A bit like a hammer drill verses a dentist drill…..

The issues with DIY is not having the experience to know how long and how fast to vibrate.
A wet mix of big grain concrete will behave completely differently to a dry mix of small grain refectory!
However, I think for the average practical guy, good results can be achieved by using pre mixed bags and following the instructions.


Fox James, I am grateful for your advice, so of course I won't follow it. This is because I want to use basalt fibers, and also because I have all the other ingredients for the binder, and the burnout fiber already (I do heed your advice on using the burnout fibers). I plan to buy grog (ground firebrick) as aggregate, and maybe sand as filler, too, if the grog is all very course with no fines.

For vibration, I plan to use both a hammer-drill, with a bolt or rod or such in the chuck; and a reciprocating saw, attached by drilling through and bolting an old blade to the form. Each of these has some variable speeds available.

I hope to video-record the process, with an introduction, for what it is worth. I'll make a batch of test bricks first, and hope to heat some, then test breaking strength of all.

I also hope you will advise me on this plan.

Brian
-
 
Fox James
Rocket Scientist
Posts: 791
Location: Guernsey a small island near France.
299
  • Likes 6
  • Mark post as helpful
  • send pies
    Number of slices to send:
    Optional 'thank-you' note:
  • Quote
  • Report post to moderator
Generally, fibres are added at 1-2% by dry weight.
If you are using two different material fibres, I would use 1% of each.
Mixing is key to getting an even distribution, it is not always easy to avoid clumps of fibres!
Some fibres seem to mix in easily and others can be very difficult, the harder less flexible nylon burn out fibres are not normally an issue but I have bought ‘concrete counter top fibres’ that have been near impossible to evenly mix!
Most of the commercial mixes I have worked with seem to use less than 1% but we think that is because it makes the product easier to mix.
From my own experience of using firebrick grog, it really depends on the quality, a lot of the stuff I have bought contained soot and dirt so I assume because the brick was previously used. However I did find a better supplier that sold washed and graded grog.
 
Brian Cady
pollinator
Posts: 184
Location: Colrain, MA, USA (5a - ~1,000' elev.)
19
  • Likes 5
  • Mark post as helpful
  • send pies
    Number of slices to send:
    Optional 'thank-you' note:
  • Quote
  • Report post to moderator
Thank you, Fox James
 
Posts: 17
3
  • Likes 5
  • Mark post as helpful
  • send pies
    Number of slices to send:
    Optional 'thank-you' note:
  • Quote
  • Report post to moderator
Would these larger bricks work instead of having to cast bricks?

https://fibrament.com/products/fire-brick-18-x-12-x-2
https://www.amazon.com/Harman-Heatilator-Brick-1-25%E2%80%B3-3-40-86125/dp/B07HFJ5YTH
https://hechlers.com/product/kozy-heat-fire-brick-long-13-5/
 
thomas rubino
rocket scientist
Posts: 6322
Location: latitude 47 N.W. montana zone 6A
3199
cat pig rocket stoves
  • Likes 3
  • Mark post as helpful
  • send pies
    Number of slices to send:
    Optional 'thank-you' note:
  • Quote
  • Report post to moderator
None of those are the sizes needed.
The first site with the 12 x 18 x 2 firebrick would work as a batchbox roof, but is not wide enough for shorty core.
Shipping can be very expensive on these.
 
Brian Cady
pollinator
Posts: 184
Location: Colrain, MA, USA (5a - ~1,000' elev.)
19
  • Likes 2
  • Mark post as helpful
  • send pies
    Number of slices to send:
    Optional 'thank-you' note:
  • Quote
  • Report post to moderator
Here're two snippet videos, one sped up, of vibrating a test block form containing a very dry, thick refractory concrete mix using a recipricating saw and a blade with a hole drilled in it, screwed to the form, that, if not informative, might be amusing.


Brian
-
 
I wasn't selected to go to mars. This tiny ad got in ahead of me:
A PDC for cold climate homesteaders
http://permaculture-design-course.com
reply
    Bookmark Topic Watch Topic
  • New Topic