|

|

|

|

|

|
|
|
|
|
|
|
|

|

|

|
.png)
|
|
 6
6


 2
2
Silence is Golden
For all your RMH needs:
dragontechrmh.com

 3
3
Peter Sedgwick wrote:Japanese pier and beam foundation with mortise and tenon construction


 1
1
Peter Sedgwick wrote: I feel venting though an outside wall would be most ideal if possible. The snow can sit heavy on the roof in this area of Hokkaido and has a tendency to take out stove pipes when it slides. Snow tore the masonry chimney right off the neighbor's house here last season. Still laying in the front yard. This is an area I would love your advice on a bit later on in the process if possible.
It really all depends on your soil drainage and how susceptible this area will be to water infiltration. A drainage layer is pretty much standard for an on-grade earthen floor to provide a capillary break for any moisture in the ground migrating upwards and could also include drainage pipe in wetter areas. Vapor barrier is particularly helpful if your going to be putting rugs or other objects directly on the floor as these items can block the flow of moisture coming from the ground and possibly cause mold. Pond liner seems a bit overkill to me...The idea of the pond liner comes from an article I read by Tony Sirna at Dancing Rabbit article link as well as a few other builders who worked in similar clay heavy soil situations. No vapor barrier is necessary even if I am putting an earthen floor directly on the ground?
I was thinking that the pumice stone would create insolation across the whole floor base. I am more than open to other ideas and any suggestions regarding the materials I use and the order and thickness in which they are laid.
Silence is Golden
For all your RMH needs:
dragontechrmh.com
3
 2
2
Peter Sedgwick wrote:Thanks Gordon for all the links and info. This will keep me busy.
1
![[Thumbnail for 70118773_2423621837918482_61586064338321408_n.jpg]](/t/122458/a/89112/70118773_2423621837918482_61586064338321408_n.jpg "Filename: 70118773_2423621837918482_61586064338321408_n.jpg
Description:")
![[Thumbnail for IMG_2978.jpeg]](/t/122458/a/89113/IMG_2978.jpeg "Filename: IMG_2978.jpeg
Description:")
![[Thumbnail for IMG_2972.jpeg]](/t/122458/a/89114/IMG_2972.jpeg "Filename: IMG_2972.jpeg
Description:")
![[Thumbnail for IMG_2971.jpeg]](/t/122458/a/89115/IMG_2971.jpeg "Filename: IMG_2971.jpeg
Description:")
![[Thumbnail for IMG_2970.jpeg]](/t/122458/a/89116/IMG_2970.jpeg "Filename: IMG_2970.jpeg
Description:")
![[Thumbnail for IMG_2946.jpeg]](/t/122458/a/89117/IMG_2946.jpeg "Filename: IMG_2946.jpeg
Description:")
![[Thumbnail for IMG_2956.jpeg]](/t/122458/a/89118/IMG_2956.jpeg "Filename: IMG_2956.jpeg
Description:")
![[Thumbnail for IMG_2976.jpeg]](/t/122458/a/89119/IMG_2976.jpeg "Filename: IMG_2976.jpeg
Description:")
![[Thumbnail for IMG_2981.jpeg]](/t/122458/a/89120/IMG_2981.jpeg "Filename: IMG_2981.jpeg
Description:")
![[Thumbnail for IMG_2982.jpeg]](/t/122458/a/89121/IMG_2982.jpeg "Filename: IMG_2982.jpeg
Description:") 2
2
Peter Sedgwick wrote:
1. In this scenario would it work if I use earth bags for my supporting walls for the above described metal top?
(I was thinking to use cinder blocks but they seem too unstable.)
I would stack the earth bags with barbed wire and then cob the inside of the cavity before placing the metal top on, and then cob again over the whole thing. Are earth bags a problem that close to the flu gas chamber if the are covered in cob?
2. How should I approach clean outs for something like this?
3. Would earth bags be an issue against the edge of the raised wooden foundation? I will lay drainage gravel first.
4. Having a hard time finding insolation options here other than foam insulation board. Pumice is proving difficult even though we are on a giant volcano. Any other options?
5. At what layer in the "sandwich" do I add the insolation?
6. Will I still need some drainage gravel on grade if I'm using earth bags?
7. Am I totally nuts?
Other Points:
I will follow the books standard construction for a 6" J-tube configuration using firebricks for the feed tube, burn tunnal, and heat riser. Regular bricks and cob for manifold.
Chimney will go more or less straight out the roof near the peek.
Silence is Golden
For all your RMH needs:
dragontechrmh.com
1
Peter Sedgwick wrote:
After watching videos and researching I feel like the bell bench would be the best option. Not a whole lot of info out there that I can find. Really going on Matt's explanation and the Sundog rebuild video for the construction tips. I've got access to tons of reclaimed cinder blocks. Thinking of using those, filled with cob, for the walls of the chamber then cobbing over and plastering with the same material I use on the floor. Maybe use paving stones for the top of the bench depending on how cheap I can get them. Other option would be to hammer out pieces of drum can like he did in the Sundog video. If anyone has other ideas I'm more than interested.


") 2
2
 4
4
Silence is Golden
For all your RMH needs:
dragontechrmh.com
2
Peter Sedgwick wrote:So basically, all I need to do is find this Morgan Superwool Plus material in 1" thickness and fit it into a chimney pipe with and 8" ID so that the final ID is 6" is that correct?
Not sure I understand what the stainless wire they mentioned is for.
Not sure exactly how to connect the "square" exit on the exit of the burn tunnel to the "round" 5 minute riser. Can you explain this connection a bit? Maybe I missed something.
Here is a new drawing of my plan for layout in cross section. I will use salvaged metal sided refrigeration panel insolation in two staggered layers. The top layer will cover the seams of the bottom layer. Because I will use this material I thought I might not need a vapor barrier. Any thoughts on this?
Silence is Golden
For all your RMH needs:
dragontechrmh.com
Gerry Parent wrote:
Peter Sedgwick wrote:So basically, all I need to do is find this Morgan Superwool Plus material in 1" thickness and fit it into a chimney pipe with and 8" ID so that the final ID is 6" is that correct?
Not sure I understand what the stainless wire they mentioned is for.
That's about all there is to it! But..... if my memory serves me right, I think I remember Thomas pointing out, knowing exactly where to cut it (so very little is wasted as its expensive stuff) so that when fitted in the pipe, the two ends meet nice and tight. A little math should help here. The wire I believe was to act as a backup to help hold the pipe together.
Not sure exactly how to connect the "square" exit on the exit of the burn tunnel to the "round" 5 minute riser. Can you explain this connection a bit? Maybe I missed something.
You could either make a transition piece to help join the two together but I think I remember the consensus was not to worry about it - The irregularity adds to the turbulence and the corners of the square burn tunnel don't get a lot of air movement anyway (the main stream is down the center) which is why a round heat riser is a more efficient use of ISA than a square heat riser. Correct or not, I've used this logic on my stove and its worked just fine for years.
Here is a new drawing of my plan for layout in cross section. I will use salvaged metal sided refrigeration panel insolation in two staggered layers. The top layer will cover the seams of the bottom layer. Because I will use this material I thought I might not need a vapor barrier. Any thoughts on this?
I certainly can't stamp your drawing with a certified, "PASS" but to me it looks good. In my shop I have an earthen floor with no vapor barrier and haven't run into any moisture issues. There is absolutely no clay in my sub soil however. What it says in a few books I've read is that without a vapor barrier, sometimes moisture (migrating upwards) collects under carpets, table legs, cabinets, etc ...places that can't naturally breathe and should be inspected from time to time.
Dan Hatfield Ii wrote:
Peter Sedgwick wrote:
After watching videos and researching I feel like the bell bench would be the best option. Not a whole lot of info out there that I can find. Really going on Matt's explanation and the Sundog rebuild video for the construction tips. I've got access to tons of reclaimed cinder blocks. Thinking of using those, filled with cob, for the walls of the chamber then cobbing over and plastering with the same material I use on the floor. Maybe use paving stones for the top of the bench depending on how cheap I can get them. Other option would be to hammer out pieces of drum can like he did in the Sundog video. If anyone has other ideas I'm more than interested.
Hi Peter,
You can find my videos from a recent bell build on my youtube channel.
https://www.youtube.com/channel/UCXqH6W1oen_2hWeTuhqKpcw/videos
Thanks
Dan
Fox James wrote:With your round peg, square hole question, the square is 6” the pipe is 8” so it sits directly on top.
In my case, I used 50mm of ceramic fibre wool (not come across Morgan’s super wool) inside a 10” pipe and it simply self supports it self over the 6” hole.
![[Thumbnail for IMG_3088.jpeg]](/t/122458/a/89296/IMG_3088.jpeg "Filename: IMG_3088.jpeg
Description:") 1
1
1
1


 2
2
Peter Sedgwick wrote:1. Does anyone have any suggested depths for the tamped drainage gravel? (It will be on grade, dense clay soil)
2. Tamped road base depth?
3. Do I need additional insulation under the firebox, bell bench chamber?
RMH:
I have been studying the Rocket Mass Heater Guide for the metric 6" system but I still have a lot of areas that are unclear to me.
I am trying to source ceramic fiber board to build Matt Walkers version of the core, but still not finding anything that doesn't require me to but 5 sheets of the stuff at ridiculous prices.
Also working on Superwool for a 5 minute riser option if the ceramic fiber board doesn't pan out. I might be forced to do the whole thing in fire bricks.
If so here are a few questions I have:
1. Fire bricks need to be resistant to at least 1300°C (2400°F) correct? Yes
2. Is there any suggested metric dimensions for full and split bricks that I should be looking for?
There are various sizes available here in Japan, but finding full and splits with the same hight and width is proving difficult
The dimensions of a split are usually 9 in × 4 1⁄2 in × 1 1⁄4 in (229 mm × 114 mm × 32 mm)
3. Can I build the manifold with regular masonry bricks and cob fill? The heat at this point is much less but cement products may still be susceptible to the heat over time. Clay bricks are often recommended. The cob should be fine.
4. What is the required ID for the exit and chimney pipe coming out of a 6" system?
Can't seem to find a definitive dimension in the Guide. Everything is kept to system size throughout....so 6" however, the transition should be 4-5X system size.
5. How do I determine if my proposed bell bench interior volume is appropriate for the 6" core system I am planning to make?
Bell Sizing
6. Will I be losing a lot of heat storage mass by using a bell instead of a traditional flue system?
Should I make up for some of that by adding towers inside the stratification chamber?
I have large concrete parking blocks, will those work? There is a fellow working on his bell system right now. Satamax is helping him out with sizing and pillars. Perhaps you could get some helpful hints from this thread: Bell-Chamber-Mass-Questions
7. Do I have to worry about towers creating drag and slowing down the thermal siphon etc. See above
8. Could the system melt the earth bags under the road base and insulation? Probably no earth bags under the stove core but the perlite insulation should do its job
9. I plan to use cob to cover the inside of stratification chamber. Will that be sufficient for the inside? Glenn Herbert in another discussion mentioned the following:
"You do want a double wall for the box if you can, for safety in case there is a crack in the wall. A layer of bricks on edge, or a smooth layer of a few inches of cob that is separated from the stone & mortar layer by say a sheet of cardboard, would be ideal. At the least you need to not have any stones going all the way through the wall, as any crack in the bedding would leak. A good chimney will give enough draft that you will have negative pressure inside the bell except perhaps at startup, reducing risk further."
10. What would be the proper metric hight of a "5 minute riser" if I decide to go that route? If you are going with the barrel over the heat riser there is a minimum gap to leave (at least 2" for cooking but more if you are just using for heating) as this is an area that can cause restrictions in your system from ash buildup. Generally, the taller the heat riser (to a point) the more draw it will give you. So 122cm for a 6"system is a standard minimum. See page 8 in the builders guide
11. Based on my count from the metric 6" core illustrated in the Rocket Mass Heater Guide a full brick core requires at least 75 full fire bricks and 16 split bricks. Any suggestions on how many to buy or how to calculate? Not exactly sure of your question?
COB:
Is this enough testing or do I need to continue testing? Sounds like your all set. The proof is always in the pudding though....meaning, you may get really good results in a test batch but may show up a little different in the final product. I'd say your at a great place to start and because cob is so forgiving (compared to cement) you can always make small modifications along the way.
Added biochar to mix. Good or bad? If your planning on growing something in your cob then that would be great!..... just kidding. From my understanding, biochar is filled with little holes and would think that it would make a better insulator than a mass material which should be heavy and dense materials..
Silence is Golden
For all your RMH needs:
dragontechrmh.com


 2
2
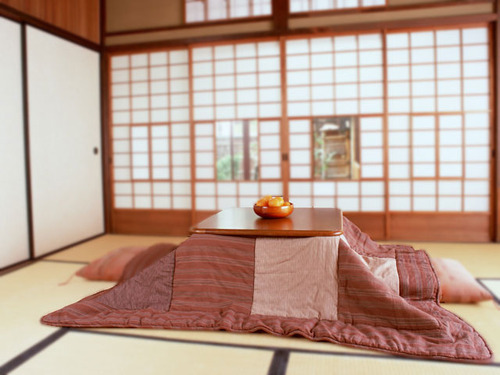
Tereza Okava wrote:I've just been following along to enjoy your experience vicariously (and to feel all nostalgic about a home I lived in like that a lifetime ago in Japan) but I sure do hope that you illustrate/publish books. Your drawings are delightful.

")

 1
1
Silence is Golden
For all your RMH needs:
dragontechrmh.com
1


 1
1
Silence is Golden
For all your RMH needs:
dragontechrmh.com
1
Gerry Parent wrote:Hi Peter, I don't have any experience with your MG 080 Rockwool board. I know a company called Dragon heaters has used a vermiculite board for their heat riser (without a firebrick liner as your intending) but then switched to ceramic fiber product as it was much less fragile. They said: "Most of our original customers were furnished with a heat riser made from vermiculite board. Vermiculite board is fragile and disintegrated easily." I have the most experience with perlite/clay slip and know it holds up quite well (still not as good as ceramic fiber products though but much cheaper and readily available at garden supply shops) but many people have gone away from it due to it being much more labor intensive and needing twice the thickness to insulate properly. Perhaps someone else with experience could comment on this product.
- Your 15cm pipe should be just fine.


Silence is Golden
For all your RMH needs:
dragontechrmh.com
1
Fox James wrote:I am surprised you can’t find and ceramic fibre products, I live on a tiny island and I can now find it for sale.
Perhaps there is a trade name in your area as it is a very useful product for many industrial and domestic uses.


![[Thumbnail for IMG_3631.jpeg]](/t/122458/a/90371/IMG_3631.jpeg "Filename: IMG_3631.jpeg
Description: PULLIN UP THE TATAMI AND FLOOR JOISTS")
![[Thumbnail for IMG_3665.jpeg]](/t/122458/a/90372/IMG_3665.jpeg "Filename: IMG_3665.jpeg
Description: MIMI DIGGIN FOR GOLD")
![[Thumbnail for IMG_3644.jpeg]](/t/122458/a/90373/IMG_3644.jpeg "Filename: IMG_3644.jpeg
Description: DIRT MOVING APPARATUS")
![[Thumbnail for IMG_3666.jpeg]](/t/122458/a/90374/IMG_3666.jpeg "Filename: IMG_3666.jpeg
Description: HEAVY CLAY UNDER HOUSE")
![[Thumbnail for IMG_3713.jpeg]](/t/122458/a/90375/IMG_3713.jpeg "Filename: IMG_3713.jpeg
Description: PAIN TO GET FROM ONE SIDE OF THE HOUSE TO THE OTHER")
![[Thumbnail for IMG_3717.jpeg]](/t/122458/a/90376/IMG_3717.jpeg "Filename: IMG_3717.jpeg
Description: PRESENT STATE")
![[Thumbnail for IMG_3623.jpeg]](/t/122458/a/90377/IMG_3623.jpeg "Filename: IMG_3623.jpeg
Description: MR. BURNS")
![[Thumbnail for IMG_3681.jpeg]](/t/122458/a/90378/IMG_3681.jpeg "Filename: IMG_3681.jpeg
Description: RICE STRAW")
![[Thumbnail for IMG_3682.jpeg]](/t/122458/a/90379/IMG_3682.jpeg "Filename: IMG_3682.jpeg
Description: DRYING THE RICE AFTER HARVEST TODAY (PESTICIDE FREE)") 1
1
Peter Sedgwick wrote:I am currently in contact with Matt directly regarding his 6" Ceramic Fiber Board core. Matt has been super helpful to not just his clients but to everyone. Yay Matt!
In the case of a full fire brick core build you are going to need, "1" 2" of sturdy, noncombustible insulation below the brick floor pad" Quote page 75 of Builders Guide.
This also holds true for a full Ceramic Fiber Board core build? Or can you just put the Ceramic Fiber Board core, centered on a pad of fire bricks to act as base insulation?
(Maybe I should confirm with Matt on this if we go that route.) So the layers are your asking are as follows(?): Compacted road base, Fire bricks, CFB. If that's the case then there should be no problems.
If you look at LuAnne Welchs' build at picture "4-core-foundation.jpg" you will see the heat that gets to the base layer under the CFB. Not sure how much heat would get through the firebrick to the roadbase but to me it doesn't look like it would be much to worry about loosing too much heat to the ground....but I could be wrong. Matt may know and be able to answer you better.
"...wrap entire fire box with soft material insulation: rock wool, ceramic blanket, perlite with clay..." Quote page 98 of Builders Guide.
What "Rock Wool" product are they referring to? Rock Wool also comes in the form of batts. Home Depot
"Fire Box" and "Feed Tube" refer to the same portion of the core, is this correct?
I see the terms used in similar situations and just wanted clarification. Their definition of Fire box includes: burn tunnel, feed tube, and heat riser. Some people also call these 3 parts a "core".
Are there definitive minimum temperature resistance benchmarks for:Do you mean thickness of various types of insulation needed in these areas?
1. Insulation under the fire brick floor pad?
2. Insulation around the feed tube?
3. Insulation around heat riser?
Typhoon today, but the sun comes out tomorrow, so we plan to start ripping out the present floor and getting started on the gravel foundation portion of the build. Feel it is best to get this portion of the project under control and decide the details of the RMH as more core material options are confirmed. Winter is coming, and we're not interested in sleeping with the White Walkers this year...:)
Not sure what White Walkers are...doesn't sound good though! We'll do our best to protect you and Mimi !!
Told Mimi the "Powers That Be" suggest an up grade to leather gloves. Safety First... smile....
Silence is Golden
For all your RMH needs:
dragontechrmh.com
1
Peter Sedgwick wrote:Big pockets of clay in spots. Decided to separate some of the big pockets to refine for slip and perlite mix later. Drying the clay now.
Any tips on how far we should refine the clay to add to the perlite would be great. If you strain the slip through fly screen your good to go. Thinking of making a wood box frame and pouring a clay & perlite slab to go under the core for insulation. Any thickness suggestions here? 2" is a good thickness.
Feels like I'm standing inside my drawings at this point, funny. Ahhhh... the power of manifestation!
Plan to finish the dig tomorrow. Do we need to be very meticulous on leveling at the bottom of this pit? Planning on having it slop a bit so the water runs away from the house. Sounds like a good idea to me.
Silence is Golden
For all your RMH needs:
dragontechrmh.com
3
1
Fox James wrote:I find some of the multi quote post quite difficult to read through so I may of got the wrong idea but I would definitely not recommend a full ceramic fibre board construction for the feed chamber.
This is the only part of the construction that receives hard wear and needs to be lined with something hard like split brick.
The only real disadvantage of using full brick for the fire box and heat riser is the amount of time it takes to heat up.
When I built my first stove I used a high mass construction including a high mass refractory cement riser, it worked really well but took two hours to get really hot.
My new stove makes use of a 1” thick cast cement firebox and everything else is insulating ceramic products, I can now see 500c in 20 minutes.
However.... my old fire worked extremely well and once up to temperature, the stored heat of the riser and firebox kept a more consistent heat for cooking on the hot plate .
Another aspect the high mass seemed to offer was the ability to burn larger pieces of wood (once up to temperature)
So high mass can have advantages ......
My new stove has some non standard design features, one thing that I have found a big improvement was building in small step from the feed box to the fire tunnel. In other words I made the bottom of the feed chamber 3/4” lower than the tunnel, I find this little step, stops the wood from falling into the fire tunnel and stalling the fire.
Are there definitive minimum temperature resistance benchmarks for:Do you mean thickness of various types of insulation needed in these areas?
1. Insulation under the fire brick floor pad?
2. Insulation around the feed tube?
3. Insulation around heat riser?
2
![[Thumbnail for IMG_3742.jpeg]](/t/122458/a/90436/IMG_3742.jpeg "Filename: IMG_3742.jpeg
Description: TAMPA BAY")
![[Thumbnail for IMG_3770.jpeg]](/t/122458/a/90437/IMG_3770.jpeg "Filename: IMG_3770.jpeg
Description: FILLIN THE PIT")
![[Thumbnail for 71651426_1345334282300916_6232423272244314112_n.jpeg]](/t/122458/a/90438/71651426_1345334282300916_6232423272244314112_n.jpeg "Filename: 71651426_1345334282300916_6232423272244314112_n.jpeg
Description: ROOM FULL OF ROCKS")

|
I don't get it. A whale wearing overalls? How does that even work? It's like a tiny ad wearing overalls.
building a permaculture community with hands on gardening and natural building
https://wheaton-labs.com/bootcamp
|