• Post Reply Bookmark Topic Watch Topic
  • New Topic
permaculture forums growies critters building homesteading energy monies kitchen purity ungarbage community wilderness fiber arts art permaculture artisans regional education skip experiences global resources cider press projects digital market permies.com pie forums private forums all forums
this forum made possible by our volunteer staff, including ...
master stewards:
  • Nancy Reading
  • Carla Burke
  • r ranson
  • John F Dean
  • paul wheaton
  • Pearl Sutton
stewards:
  • Jay Angler
  • Liv Smith
  • Leigh Tate
master gardeners:
  • Christopher Weeks
  • Timothy Norton
gardeners:
  • thomas rubino
  • Jeremy VanGelder
  • Maieshe Ljin

Advice on a RMH build in Hokkaido Japan

 
pollinator
Posts: 464
Location: Toyoura Hokkaido
163
  • Likes 4
  • Mark post as helpful
  • send pies
    Number of slices to send:
    Optional 'thank-you' note:
  • Quote
  • Report post to moderator
Hey folks!

Hope all is well in the holiday season.

Here’s a quick few pictures of what we did with the rice hull bags for insulation. In the end we didn’t even use the sewing machine yet. Just filled the bags to the top, covered with a piece of newspaper and then snitched the bags shut.

Took some string and cable nails and just strapped all the bags to the walls. Seems to be working well. Total cost for rice hulls, bags, string and nails under $60 I think.

Likely start experimenting in the spring with more permanent applications in other structures.

Will keep you posted.

Stay safe and well…

Peter

   
D82F59ED-3697-4F25-AFC2-B75CF6F06441.jpeg
[Thumbnail for D82F59ED-3697-4F25-AFC2-B75CF6F06441.jpeg]
8BDFAEFD-1C8C-433C-9AAD-47DE6D842DC3.jpeg
[Thumbnail for 8BDFAEFD-1C8C-433C-9AAD-47DE6D842DC3.jpeg]
3341F006-8C00-4E22-8281-3285AF86B681.jpeg
[Thumbnail for 3341F006-8C00-4E22-8281-3285AF86B681.jpeg]
9BCC8BE2-FB5C-4068-9917-A6123FA7208D.jpeg
[Thumbnail for 9BCC8BE2-FB5C-4068-9917-A6123FA7208D.jpeg]
01A607C6-08D7-4BDF-BD83-2AC6165C457F.jpeg
[Thumbnail for 01A607C6-08D7-4BDF-BD83-2AC6165C457F.jpeg]
F586CF67-8051-4DBB-8296-6796E4E4186D.jpeg
[Thumbnail for F586CF67-8051-4DBB-8296-6796E4E4186D.jpeg]
968A3BB8-0401-4415-84E7-F8AAE75D2FBC.jpeg
[Thumbnail for 968A3BB8-0401-4415-84E7-F8AAE75D2FBC.jpeg]
 
Rocket Scientist
Posts: 1809
Location: Kaslo, BC
525
building solar woodworking rocket stoves wood heat greening the desert
  • Likes 3
  • Mark post as helpful
  • send pies
    Number of slices to send:
    Optional 'thank-you' note:
  • Quote
  • Report post to moderator
Hey Pete & Co.
That gives a whole new meaning to batt insulation. Well done utilizing inexpensive and natural materials to achieve a simple goal.
Will you be covering them up with  anything or going with the ‘truth window’ look?
 
Peter Sedgwick
pollinator
Posts: 464
Location: Toyoura Hokkaido
163
  • Likes 1
  • Mark post as helpful
  • send pies
    Number of slices to send:
    Optional 'thank-you' note:
  • Quote
  • Report post to moderator

Gerry Parent wrote:Hey Pete & Co.
That gives a whole new meaning to batt insulation. Well done utilizing inexpensive and natural materials to achieve a simple goal.
Will you be covering them up with  anything or going with the ‘truth window’ look?


Hey Gerry!

These are gonna be left as is. Brutal truth on this one. Like I said before the old house is really on its last leg so I’ve decided to just use it as a build experiment. See how materials preform without much investment of time and money. Mr Yoshida actually told us the other day that the mice don’t like rice hulls. I didn’t add any borax to the mix, just a piece of newspaper and a tight tie up.

Thinking of trying a small structure in the spring with an earth bag stem wall. Then build pole frame or up cycled old timber with wattle and dob for an outer wall strap the rice hull bags to that and cover with cob from the inside.

Definitely a topic for another thread.

Anyway, stay creative…

Peter & Mimi
 
Peter Sedgwick
pollinator
Posts: 464
Location: Toyoura Hokkaido
163
  • Likes 10
  • Mark post as helpful
  • send pies
    Number of slices to send:
    Optional 'thank-you' note:
  • Quote
  • Report post to moderator
Thought I’d give a bit of an update.

We are part way through our first real winter of using our RMH full time and I’ll have to say it’s been a real pleasure. We are in about a meter and a half of snow at the moment, but the house is pretty warm for a building with pretty make shift insulation. The neighbors come over and everyone is so astonished at just how warm the house is. They ask lots of questions about the heater. Most can’t quite wrap their head around the concept, but they do enjoy having a cup of tea and hanging out on the bench.

For the most part the stove is running pretty well. Checked the clean out area twice in the past month and a half, both times absolutely no build up. I read some people getting lots of ash. We do get a bit in the fire box. I clean out everyday. Insulated fire bricks in the floor seem to be holding up ok. Don’t think they are going to last forever, but should be fine for the season.

Cast a new back wall brick for the feed tube, a while back, out of left over castable refractory mix and risk husks. It’s not taking the brunt of the heat and at the moment it hasn’t cracked or spauled out. Think I might experiment with using the rice husks as a free alternative to perlite for in bell floor and backup insulation in some future builds. With no real price tag associated to the material I could see using 30cm-40cm rice husk & clay mix under floor. Could also use as a secondary insulation solution for around a batch box core. Make it super thick and see what happens.

All the pipes are now frozen in the house. Tried everything to get them back up and running, but really no avail. So at the moment we are living in a house with no running water, no toilet, and no shower, but we do have heat. If I had to choose one in the situation it would be heat every time. Other stuff is just luxury and we can sort it out in due time.

Started felling small trees and learning to properly sharpen and hang hand shaped handles for axes. This whole RMH thing just keeps snowballing with necessary skill sets. All of which I’ll be better for in the end.

Anyway, here’s a few photos of life in the north country.

Hip hip hooray… Peter and Co🏔😎🏔
(Hooray may also be spelled and pronounced hoorah, hurrah, hurray etc.)
875A33FD-E278-47F3-8695-9329DECF77DE.jpeg
Front yard now
Front yard now
18EA59A8-62B3-4346-B973-84248C021AD0.jpeg
Tools of the day
Tools of the day
6A6E5182-5E7E-4BE9-A152-B95B23DFD9D6.jpeg
Rice husk brick drying for 14 days before putting in stove
315E9EFA-D57D-4949-B3D2-380CB50CB89D.jpeg
Feed tube extension
Feed tube extension
DCC70474-48C5-4102-9F83-7F0496F970C9.jpeg
Water situation
Water situation
1627FAC8-5157-4F30-B420-4372DFAF4011.jpeg
Still splitting everyday and night
689B74A6-0179-4E4C-8264-F1D3DD2A9B77.jpeg
Snow off the roof
Snow off the roof
670DC96B-D011-4AB3-9128-9495898DC942.jpeg
Shaping
Shaping
EA17E961-66C9-41CE-BAA8-A5A310D40EBB.jpeg
Hanging
Hanging
A53FB7C0-78BE-47A1-BD77-D5EB138DBA8B.jpeg
Sometimes you need two
6A202379-81CC-4991-A09F-2143A6601162.jpeg
Mount Yotei near the house
9A4ED827-4BFF-415B-BE1B-287A12F52C07.jpeg
Me getting kooky in the backyard
98B1933A-DDEE-431E-A66D-578DD480F306.jpeg
Chimi chilaxing🔥
Chimi chilaxing🔥
 
gardener
Posts: 1236
360
7
trees wofati rocket stoves
  • Likes 2
  • Mark post as helpful
  • send pies
    Number of slices to send:
    Optional 'thank-you' note:
  • Quote
  • Report post to moderator
Thank you for the great update! That frozen water situation looks rough! Is that space not in an insulated area, just too far from the heat? I once had a bathroom that was at a far corner of a house, over an uninsulated space that was too short to get into, and the water pipe could freeze unless I left the faucet slowly dripping or blew a space heater in (water was far cheaper). I wonder if one of those heat differential fans people put on their stoves could blow warm air from the top of the barrel over towards the sink to help any?

Recently EdibleAcres posted a little video on their wood splitting stump, perhaps it would save you from bending over a few thousand times a year and speed up kindling production? Essentially a stump with a few boards attached for a more stable base, and a small tire sitting loose on top that you pack with wood, then chop it all up before removing it:


I've also seen a person use a chain with a bungy cord on the end to hold the wood up instead of a tire and that is adjustable but you could hit the chain with the axe too.
 
Rocket Scientist
Posts: 790
Location: Guernsey a small island near France.
299
  • Likes 1
  • Mark post as helpful
  • send pies
    Number of slices to send:
    Optional 'thank-you' note:
  • Quote
  • Report post to moderator
Lovely looking mountain …..
 
Peter Sedgwick
pollinator
Posts: 464
Location: Toyoura Hokkaido
163
  • Likes 3
  • Mark post as helpful
  • send pies
    Number of slices to send:
    Optional 'thank-you' note:
  • Quote
  • Report post to moderator

Mark Brunnr wrote:Thank you for the great update! That frozen water situation looks rough! Is that space not in an insulated area, just too far from the heat? I once had a bathroom that was at a far corner of a house, over an uninsulated space that was too short to get into, and the water pipe could freeze unless I left the faucet slowly dripping or blew a space heater in (water was far cheaper). I wonder if one of those heat differential fans people put on their stoves could blow warm air from the top of the barrel over towards the sink to help any?

Recently EdibleAcres posted a little video on their wood splitting stump, perhaps it would save you from bending over a few thousand times a year and speed up kindling production? Essentially a stump with a few boards attached for a more stable base, and a small tire sitting loose on top that you pack with wood, then chop it all up before removing it:


I've also seen a person use a chain with a bungy cord on the end to hold the wood up instead of a tire and that is adjustable but you could hit the chain with the axe too.


Hey Mark!

Thanks for the comments.

As far as the frozen water thing goes you are correct, the pipes are located in the back part of the house, that really has very little insulation. I have wrapped the pipes with cable heater coils and insulated them, but to no avail. They will work for a day and then freeze back up. I’ve tried to do what I can in the present situation, but the overlaying issue seems to be that the shut off valve coming out of the ground, is broken. My shut off valve out side for the garden hose works, so when i flip it on and turn on the water it runs fine. I was at my wits end with it after 4 or 5 days or swapping out new pipes and dumping boiling water on them in hope of a miracle. In the end its just made me grumpy and annoyed, so I’ve opted to eat on tinfoil covered plates and go snowboarding instead. Deal with the issue when the weather lets up a bit.

With the wood splitting stuff, I have watched a bunch of those videos on tire builds and bungie-chain stuff. I was about to build a modified version of the tire rig, similar to what Wranglerstar (YouTube) has explained in his build. I like that one because It seem like it would be less of a hassle when it comes to cleaning out debris that build up inside the tire.  Seems like the bungie-chain would work well for taking apart large blocks of strain grained timber rather well.

To be honest, at the moment I’m processing wood of all different sizes and a number of different types, sometimes full of knots. I’m also teaching myself how the profile and sharpen axe heads. So the manual splitting process is helping me understand what geometry works for me in real time. Not just in theory or on the internet. I am starting to get a feeling of what edges will “bite” and what will “bounce” with the wood that I have. Part of that comes for repetition and muscle memory. It’s satisfying to feel the blade bite in and pop a piece of wood open. Then look at that wood and imaging it like a piece of a puzzle that will soon be fit into the feed tube of my RMH and become fuel to heat our space.

I’m far from a purist when it comes to this stuff and I’m all about short cuts, but the miles I’m putting in right now is teaching me so much. And it’s meditation….

Tire in the spring...

Peter
BC2B3A5A-97B6-4471-BF7F-C9B93897EC6A.jpeg
Meditation
Meditation
81C59291-659F-4936-B1CD-99A5393C113F.jpeg
Seems to work
Seems to work
59D28929-8048-4207-9EFF-103968E85499.jpeg
Fire wood is down. Time to get more
EAA071BD-491A-4D31-AA8C-64F53B4D63C4.jpeg
[Thumbnail for EAA071BD-491A-4D31-AA8C-64F53B4D63C4.jpeg]
C5320E8E-E02C-4853-96D8-739C059A1CAB.jpeg
Snow clearing
Snow clearing
F17F3081-E4B0-43A4-AD4A-C00076BA05C9.jpeg
Above the back windows about 2meters
53C73F42-E2C1-4C2A-A552-B17CD1203944.jpeg
[Thumbnail for 53C73F42-E2C1-4C2A-A552-B17CD1203944.jpeg]
 
Peter Sedgwick
pollinator
Posts: 464
Location: Toyoura Hokkaido
163
  • Likes 2
  • Mark post as helpful
  • send pies
    Number of slices to send:
    Optional 'thank-you' note:
  • Quote
  • Report post to moderator

Fox James wrote:Lovely looking mountain …..


It’s defiantly a powerful part of the landscape…
🏔😎🏔
 
gardener
Posts: 3471
Location: Southern alps, on the French side of the french /italian border 5000ft elevation
194
  • Likes 1
  • Mark post as helpful
  • send pies
    Number of slices to send:
    Optional 'thank-you' note:
  • Quote
  • Report post to moderator
I wished we had a dump of snow!
 
Peter Sedgwick
pollinator
Posts: 464
Location: Toyoura Hokkaido
163
  • Mark post as helpful
  • send pies
    Number of slices to send:
    Optional 'thank-you' note:
  • Quote
  • Report post to moderator

Satamax Antone wrote:I wished we had a dump of snow!


I feel your pain my friend…😎
1A850C18-1F33-408F-82D0-732C4FC461EB.jpeg
[Thumbnail for 1A850C18-1F33-408F-82D0-732C4FC461EB.jpeg]
 
Satamax Antone
gardener
Posts: 3471
Location: Southern alps, on the French side of the french /italian border 5000ft elevation
194
  • Likes 2
  • Mark post as helpful
  • send pies
    Number of slices to send:
    Optional 'thank-you' note:
  • Quote
  • Report post to moderator


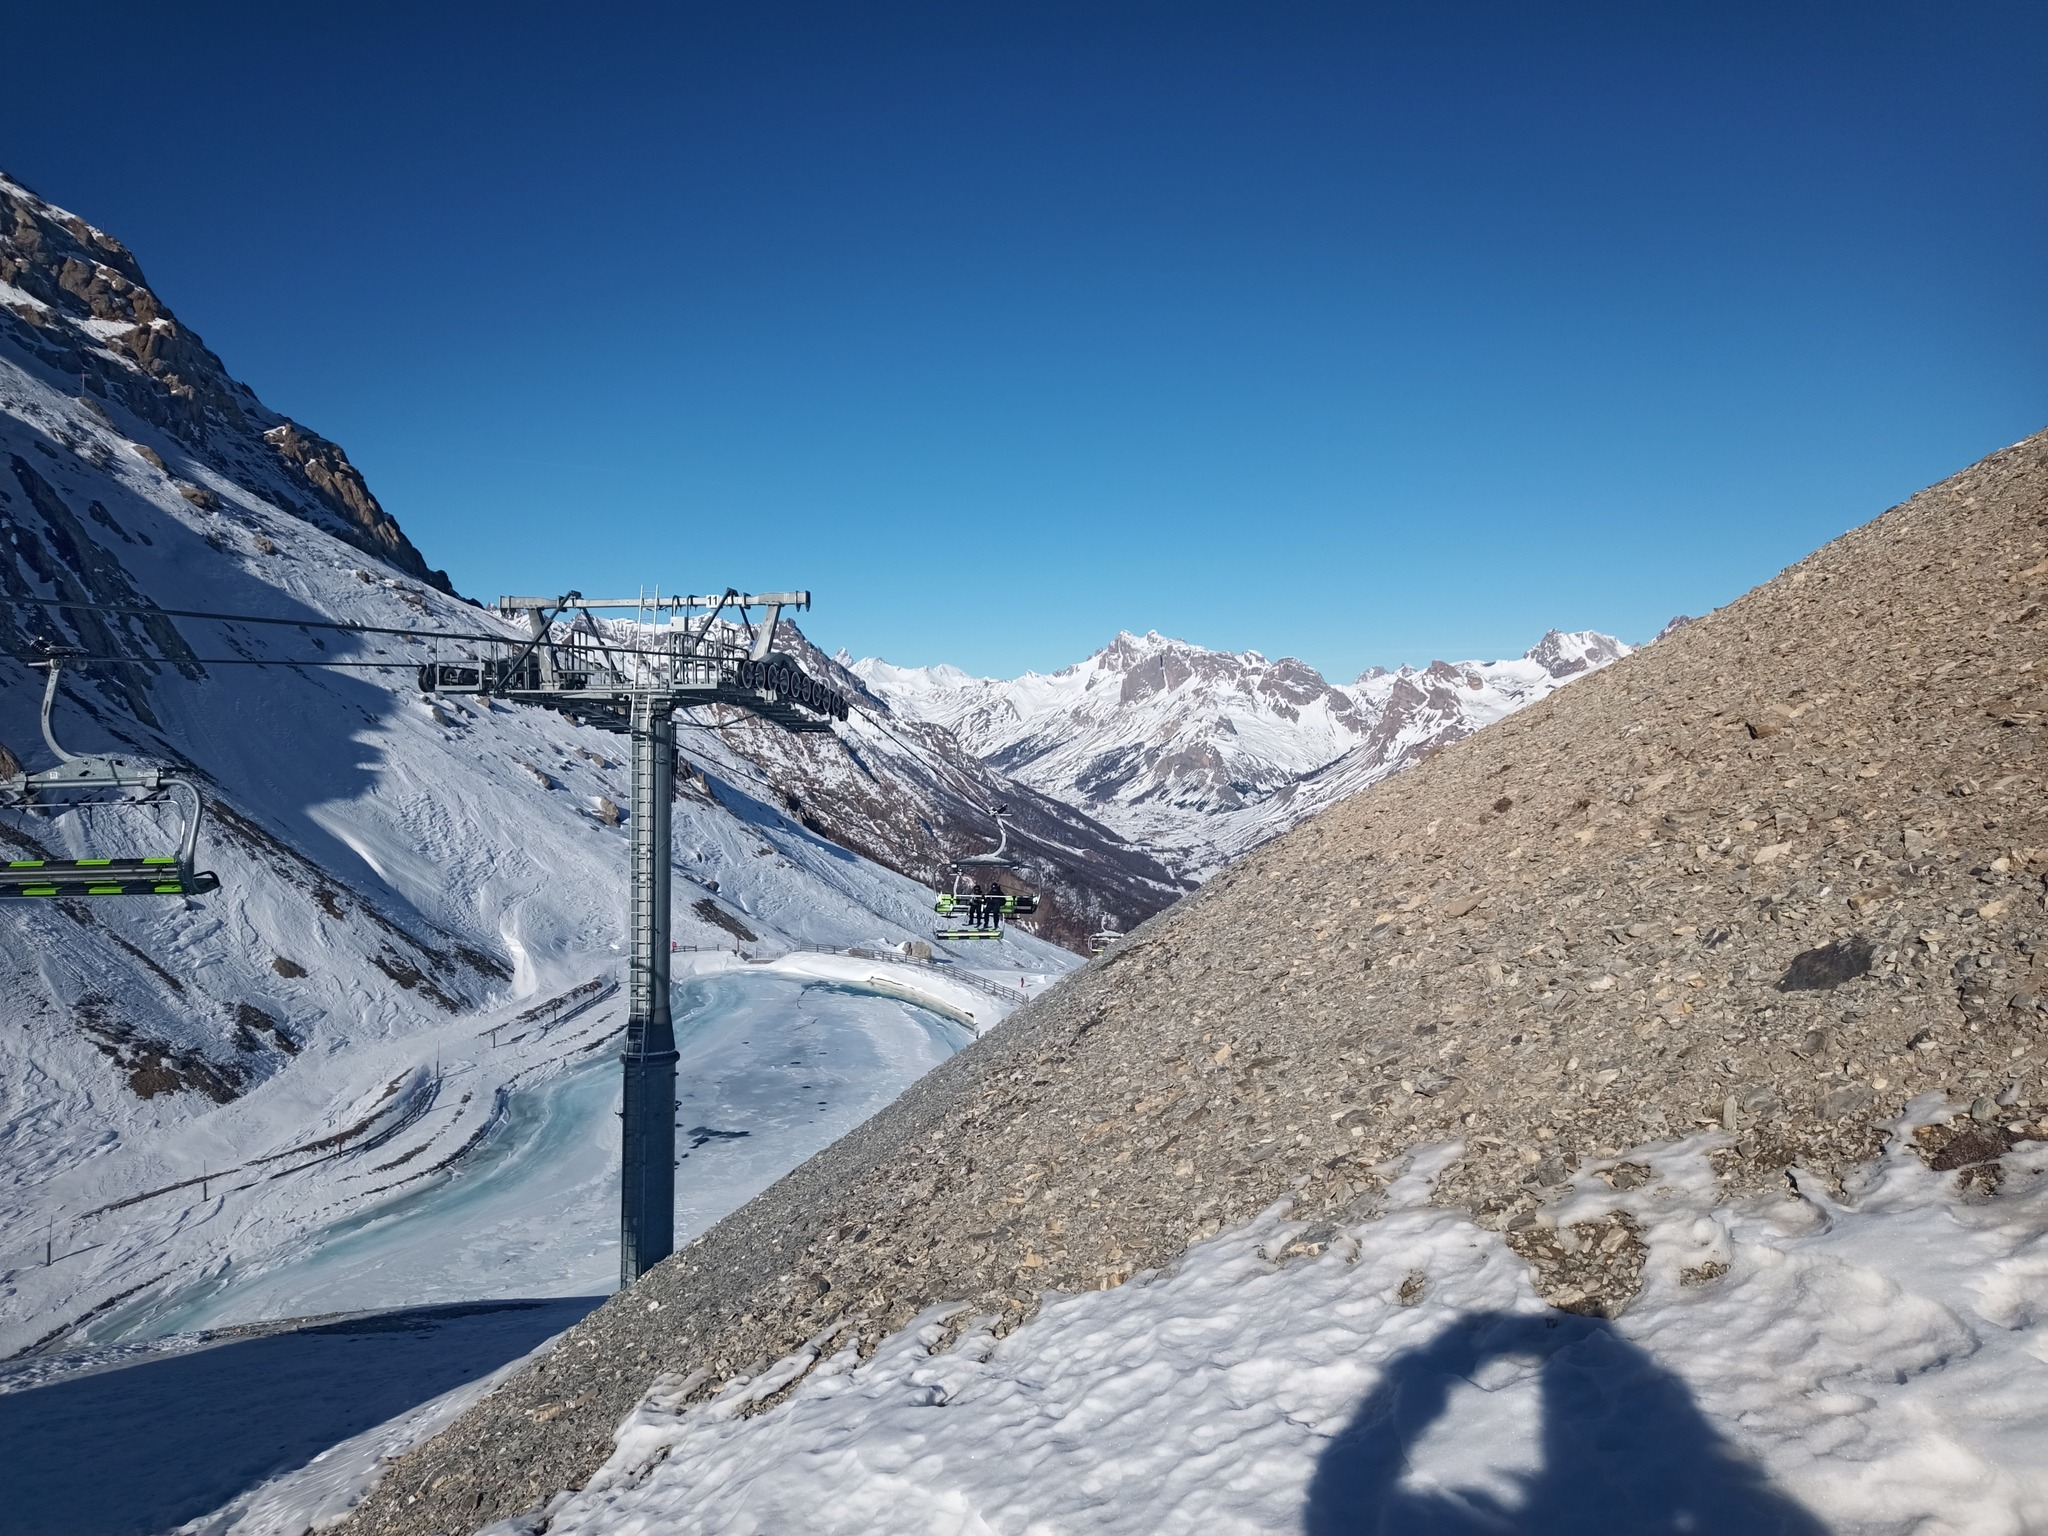
Top of my lift a fortnight ago. It is a smidge better now, but barely!
 
Posts: 305
41
2
  • Mark post as helpful
  • send pies
    Number of slices to send:
    Optional 'thank-you' note:
  • Quote
  • Report post to moderator

Peter Sedgwick wrote:Hey guys,

1. Tamped and leveled road base gravel 6cm-8cm
2. Tamped and leveled pumice stone 4cm-6cm (for insulation)
3. Old carpet (protect the moisture barrier)
4. Tamped and leveled builders sand 2cm
5. Waterproof pond liner as moisture barrier (still debating if this is necessary)
6. Another old carpet (protect the moisture barrier)
7. Tamped and leveled builders sand 2cm
(The above numbers are rough estimated calculations based on information I have gathered from other builds with similar requirements.)


I have a consurn about the pond liner being on the hot side of the pumice insulation and either melting or of gassing something ick.
Finishing the thread has been awesome, I enjoy watching it evolve! Now must hunt the other threads mentioned.
 
Posts: 444
Location: Indiana
58
5
  • Mark post as helpful
  • send pies
    Number of slices to send:
    Optional 'thank-you' note:
  • Quote
  • Report post to moderator
A small suggestion. I may be causing you another problem.
I saw at least two barrels of wood burning.
IF you had a smaller barrel (35 Gal) to stuff into your 50 Gal you could make charcoal out of those wooden pieces.
That would be good on lawns/gardens after all of your cleanup from remodeling.
 
Posts: 2
  • Likes 2
  • Mark post as helpful
  • send pies
    Number of slices to send:
    Optional 'thank-you' note:
  • Quote
  • Report post to moderator
Hey Peter,

Don't know if you are checking this thread much these days. I too live in Japan, but at the other extreme in Kyushu. I stumbled across your build thread and read it from start to finish with great interest as it has answered a lot of my questions about materials and construction that are specific to Japan.

I've purchased an old house in Kitakyushu for $7,000 U.S. and am in the process of remodeling it ( raising door frames as I'm 6'3" and consolidating numerous small rooms into one larger room. I also want to put in a RMH but I'm really leaning towards either Peter's double shoebox or the smaller walker cookstove but I'd like to vent it under the floor.  Where did you source your ceramic insulation board- I have yet to find a source that will sell it to me.


I'm in Kyushu and I built a house using rice hulls as wall insulation. The construction was a box within a box or a house within a house. The walls are about 30 centimeters deep. Rice hulls insulate well and are basically free as you discovered, but there are four significant concerns with this type of construction: 1 you will get infestations of tiny tiny insects for the first 4 years- after that they will have consumed anything edible still remaining on the rice hulls. It is claimed borax will eliminate this problem but I was unable to locate borax here cheaply enough so went without it- the bugs were a PITA!  2 rice hulls take forever to settle if you are pouring/ blowing them into a wall space- so either pour them as you build the wall and the subsequent hammering on of the upper sheathing will help the hulls settle. 3 they will escape any tiny hole in the interior or exterior sheathing- that means you should probably use conduit for all your electical runs and you need to be extra careful when sealing wall/floor joints. 4 Modifying walls is very difficult- if you cut open a wall all the rice hulls will spill out (you have this same problem in your double wall chimney design).

Thanks for all your posts,

Jeff
 
Cj Anderson
Posts: 2
  • Likes 5
  • Mark post as helpful
  • send pies
    Number of slices to send:
    Optional 'thank-you' note:
  • Quote
  • Report post to moderator

Antigone Gordon wrote:

Peter Sedgwick wrote:Japanese pier and beam foundation with mortise and tenon construction


TRADITIONAL MASS-STOVES IN JAPAN

Your great timber framed house is perfect for a traditional Japanese mass stove floor plan. Surely you can design your rocket stove to fit the architecture, considering how these timber-house types were usually heated originally. I've written small introductions to links below.

* Examples of both the L-shaped and tatami-room heated floors are included in chapter-1 of the series "History of Radiant Heating and Cooling"

http://www.healthyheating.com/History_of_Radiant_Heating_and_Cooling/History_of_Radiant_Heating_and_Cooling_Part_1.pdf

* In a Japanese farm house, the burn chamber would typically be in one room, and the heated mass in the next room. The lower pounded-earth floored room would have the burn chamber and a high ceiling. This would usually be the farm-room kitchen and barn entrance room.  The stove's heated earthen mass would be under the floor of the raised room that had low ceilings for keeping heat in. The wall between the burn chamber and the mass would be made from a plastered wall or movable screens which could be adjusted for the season and privacy. This way occasional smoke would not enter the main sitting room so much.


https://ja.wikipedia.org/wiki/%E3%83%95%E3%82%A1%E3%82%A4%E3%83%AB:Kamado-M1685.jpg


https://proxy.duckduckgo.com/iu/?u=https%3A%2F%2Fs-media-cache-ak0.pinimg.com%2F736x%2F2d%2F7a%2Fa4%2F2d7aa4e66277c4369bde5af306116f0e--small-japanese-kitchen-japan-architecture.jpg&f=1&nofb=1


* Even the stand-alone kamado in the middle of a kitchen usually had some invisible chimney buried in the earth.

https://upload.wikimedia.org/wikipedia/commons/a/ac/Kamado4816.jpg
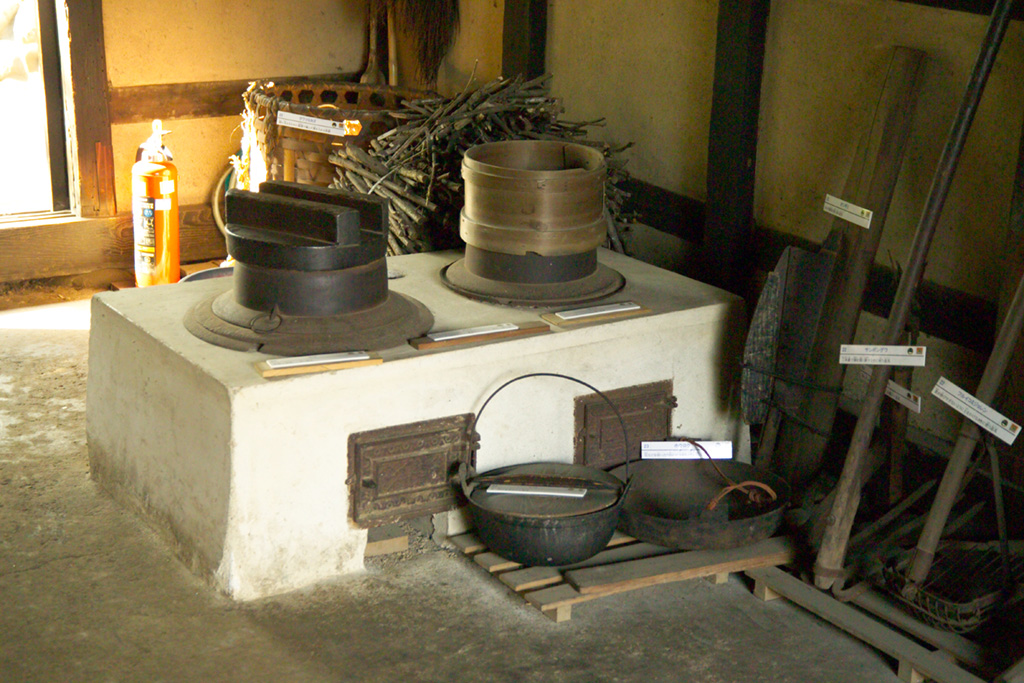

http://www.filtsai.com/japan/2002/18-JulyB/29-indigo-23.jpg
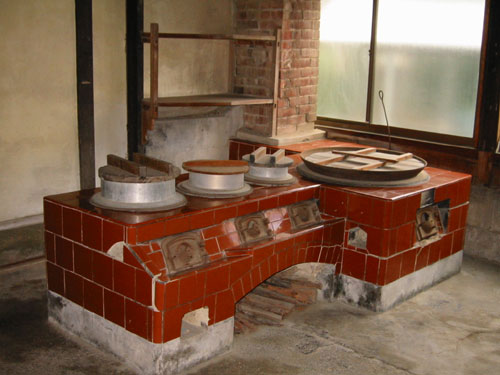

https://i.pinimg.com/736x/03/df/29/03df2929190b8dcc3b037a6418db9de3--japanese-interior-japanese-homes.jpg


https://proxy.duckduckgo.com/iu/?u=https%3A%2F%2Fi.pinimg.com%2F736x%2Fd7%2F5c%2Fbd%2Fd75cbd7c719f85ecd5453c88257f5176.jpg&f=1&nofb=1


https://proxy.duckduckgo.com/iu/?u=https%3A%2F%2Fi.pinimg.com%2F736x%2F79%2F02%2Fbb%2F7902bb2dcb9a8d7e229c483a310205c9--japanese-kitchen-japanese-house.jpg&f=1&nofb=1


* The raised-room floor might also have a sand-filled depression in the middle for keeping a pot warm with small charcoal. Architecture drawings often show this sand pit in line with the kamado in the next room. So likely that may have been directly over the buried kamado chimney.


https://en.wikipedia.org/wiki/Irori#/media/File:Kabuto_Kazari_-01.jpg


https://proxy.duckduckgo.com/iu/?u=https%3A%2F%2Fi.pinimg.com%2F236x%2F8a%2Ff5%2F20%2F8af520cfe8b6eb03a3d4dd6302633465--household-items-diorama.jpg&f=1&nofb=1


https://1.bp.blogspot.com/-on1PreCEUr8/U2VkEU-j2zI/AAAAAAAAO08/t4qpJjWonfg/s1600/P1020533.JPG
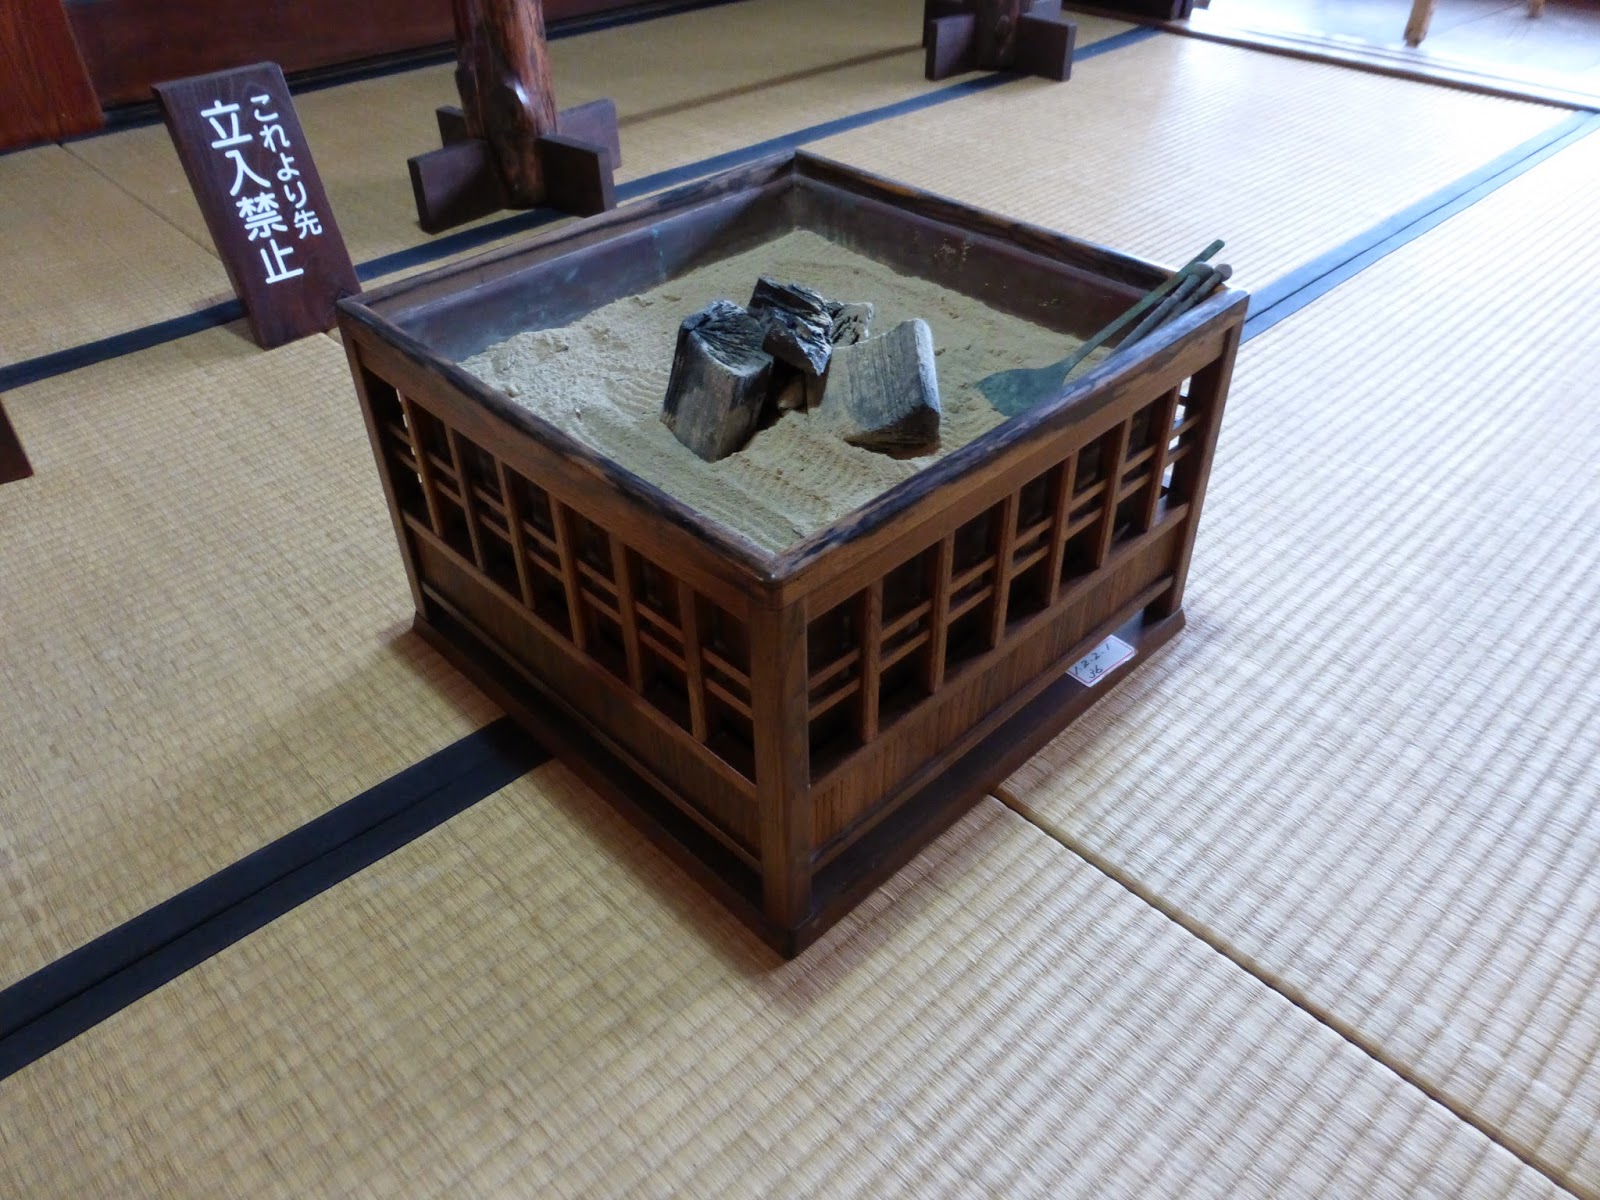

https://3.bp.blogspot.com/-W9tG1NRwTVo/U2VkiNlit2I/AAAAAAAAO2E/_Oaf51r2kRc/s1600/P1020608.jpg


https://tokyobling.wordpress.com/2013/12/18/irori-the-japanese-hearth/
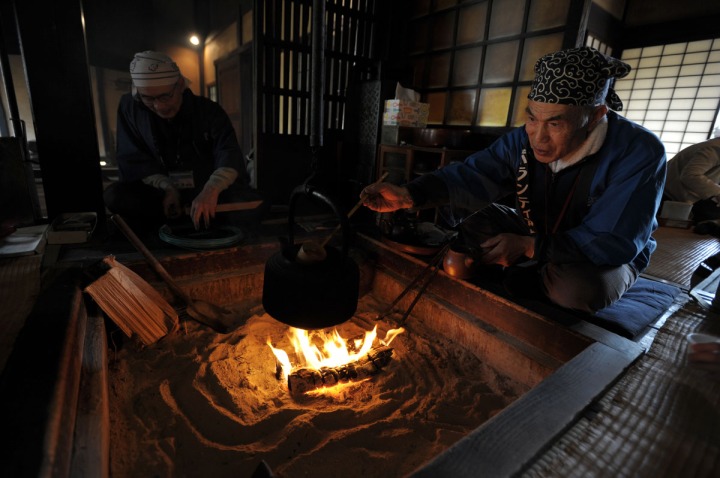

* The heated table "kotatsu" evolved from those irori sand-filled floor pits.

https://nekohakase.tumblr.com/post/68208953171/kotatsu


Keep us posted Peter.

key terms: "traditional Japanese stove", irori, kamado, ondol


Hi everyone,

Just for reference I need to correct an assumption you appear to have made concerning chimneys in traditional Japanese farmhouses.

I actually lived in an old thatched roof Japanese farmhouse and I can assure you that I never saw a traditional Japanese farmhouse with a chimney- the smoke just rose up into the high open thatched roof and found its natural way out. This accomplished two purposes it kept the underside of the thatch dry and coated the underside of the thatch with smoke and eliminated/ reduced the number of pests that might take up residence in the thatch.

Jeff
 
pioneer
Posts: 384
Location: Florida - Zone 10A
36
purity cat dog foraging trees books food preservation cooking medical herbs woodworking homestead
  • Mark post as helpful
  • send pies
    Number of slices to send:
    Optional 'thank-you' note:
  • Quote
  • Report post to moderator
What a beautiful place and culture to live in.
 
Posts: 2
  • Likes 2
  • Mark post as helpful
  • send pies
    Number of slices to send:
    Optional 'thank-you' note:
  • Quote
  • Report post to moderator
Hi Peter, Have been reading up on RMHs and found your saga inspiring!  Did you ever post the finished product?  Would love to see.  Thanks Martha
 
Peter Sedgwick
pollinator
Posts: 464
Location: Toyoura Hokkaido
163
  • Likes 10
  • Mark post as helpful
  • send pies
    Number of slices to send:
    Optional 'thank-you' note:
  • Quote
  • Report post to moderator
Aloha People of the Internet.

This is a post it’s been a long time coming. I know we probably vanished into the ethos and left a lot of people hanging and I apologize for that. Life gets busy, but I would just like to let everyone know that we are alive and well and still going strong here in Hokkaido. Thanks again to everyone who helped make it possible from our build with our stove to all the other advice we received from the beginning.

I’m happy to say that our 6 inch J-tube Is still going strong. We never have problems lighting it, we never have problems with draft, it just works all the time. I can even light it right now in the middle of May and it will begin burning in the proper direction immediately, without any hesitation, without any bypass.  I can say with confidence after endless burns throughout the course of the last five years, rocket mass heating is an absolute fantastic form of heating your home and I wouldn’t trade it for the world.

We’ve spent a lot of time with the stove and the system in general. I can only speak from our own experience and our own build, but I would like to give a few points once again to anyone thinking of building.

1. Run your exit chimney as high as possible out of the peak of your roof.
2. Build your bench/bell so that the gases have space to move.
3. Insulate the floor under your stove and bench/bell as much as possible.
4. Build your riser with the most insulation that you can get.
Those are the main points that we adhered to when we first did our build and I think those are the main reasons why we have had so much success with our stove to date.

After five or six seasons of heavy use the stove has taken a beating for sure. Split bricks in the floor are gone and front panel split of the feed tube is broken for the third time. Side panel bricks are cracked and falling apart. The only brick the is still in one piece is the brick spanning the feed tube the leads to the burn tunnel. I attribute that to the metal P-channel that we have been using. Donkey said the same thing, a long time ago, about the P-channel keep the heat off the front brick. Seems to be working.

I tried several time to put in new floor bricks to “protect” the CFB insulation but every time they fail in a few weeks and crumble to bits. So I just gave up. Now I just leave a layer of hardwood fire ash on the floor of the stove to keep wood from gouging the CFB and it’s working just fine. Photo attached for reference.

Feel free to ask any questions regarding our stove and our experience.

With that said I think it’s getting close to time to retrofit this thing into some sort of batchbox. Will keep you posted on what we do and how it develops.

Here are a few photos and pictures just for fun.

Once again, thank you Peter, Matt, Thomas, Gerry and everyone else for all of your time and commitment to all things rocket.

Also anyone needing leads to refractory insulation vendors in Japan let me know.

I’ll put up some more stuff relatively soon.

Till then, stay cool, stay wild…

Peter, Mimi and ChimiChanga🤙🏽
IMG_2417.jpeg
Stove
Stove
IMG_2416.jpeg
Inside stove with no floor
IMG_2418.jpeg
My finger inside stove with no floor showing broken back brick
IMG_2404.jpeg
Processing lots of wood
IMG_2409.jpeg
Building base to stack wood
IMG_2414.jpeg
Big round stacks of wood
IMG_2382.jpeg
Laying out stones to keep wood off the ground
IMG_3615.jpeg
Riding in the front end of a bulldozer
IMG_9410.jpeg
Dry stack insulated brick pizza oven
IMG_9333.jpeg
Three seasons outside these things don’t break
IMG_1557.jpeg
Dog on the Beach
Dog on the Beach
IMG_0139.jpeg
Person crushed by a pumice stone found on the beach
IMG_6894.jpeg
Chopping Block
Chopping Block
IMG_0155.jpeg
Most likely a bottle of urine (found object)
IMG_2367.jpeg
Some stuff I need to get at the store
IMG_3798.jpeg
A bit of rustic cooking
IMG_1380.jpeg
Village shrine…🤘🏽
Village shrine…🤘🏽
 
Posts: 8
Location: Austin, Texas area
1
  • Likes 7
  • Mark post as helpful
  • send pies
    Number of slices to send:
    Optional 'thank-you' note:
  • Quote
  • Report post to moderator
I thoroughly enjoyed this thread, even though I "should" be doing other things right now. The photos, the amazing drawings, the inspiration, DANG you are the firewood whisperer - WOWWW.

Much love to you, Peter, Mimi, ChimiChanga, and the people and places in Japan.

From Suzie in the Austin area. Got our permaculture swales/berms being done this week by an awesome guy. Onward to rejuvenating some already pretty but could be prettier/healthier Tierra.

Spent a lovely 2 hours yesterday with our bees and my smoker lasted 2 hours which is amazing! I am still a novice at getting it lit, but chopped a bunch of branches this week with my pruners and the bigger pieces with the miter saw, so now I feel smoker fuel-rich.
 
Peter Sedgwick
pollinator
Posts: 464
Location: Toyoura Hokkaido
163
  • Likes 5
  • Mark post as helpful
  • send pies
    Number of slices to send:
    Optional 'thank-you' note:
  • Quote
  • Report post to moderator

Suzie Park wrote:I thoroughly enjoyed this thread, even though I "should" be doing other things right now. The photos, the amazing drawings, the inspiration, DANG you are the firewood whisperer - WOWWW.

Much love to you, Peter, Mimi, ChimiChanga, and the people and places in Japan.

From Suzie in the Austin area. Got our permaculture swales/berms being done this week by an awesome guy. Onward to rejuvenating some already pretty but could be prettier/healthier Tierra.

Spent a lovely 2 hours yesterday with our bees and my smoker lasted 2 hours which is amazing! I am still a novice at getting it lit, but chopped a bunch of branches this week with my pruners and the bigger pieces with the miter saw, so now I feel smoker fuel-rich.


Hey Suzie, glad you are enjoying all the posts. There’s alway so much to learn and explore. I’m learning something new everyday. Good to see you are on your own journey. We have been toying with the idea of smoking food as well for a while, just haven’t done much of it yet. Our neighbor Mr. Yoshida has been doing a lot of it actually. Brought over some smoked scallops a few weeks ago and they were so yummy. And ChimiChanga went bananas for them. Keep having fun with it!
IMG_7158.jpeg
⛰️Hokkaido⛰️
⛰️Hokkaido⛰️
 
Apprentice Rocket Scientist
Posts: 238
Location: Province of Granada, Andalucía, Spain
83
5
gear fungi cooking composting toilet building rocket stoves woodworking wood heat
  • Likes 6
  • Mark post as helpful
  • send pies
    Number of slices to send:
    Optional 'thank-you' note:
  • Quote
  • Report post to moderator
Wow, I just spent 2 hours on this thread again. Thank you Peter for documenting everything so thoroughly. And I'm glad to see you're back on the forum!
 
I knew that guy would be trouble! Thanks tiny ad!
Rocket Mass Heater Jamboree And Updates
https://permies.com/t/170234/Rocket-Mass-Heater-Jamboree-Updates
reply
    Bookmark Topic Watch Topic
  • New Topic