• Post Reply Bookmark Topic Watch Topic
  • New Topic
permaculture forums growies critters building homesteading energy monies kitchen purity ungarbage community wilderness fiber arts art permaculture artisans regional education skip experiences global resources cider press projects digital market permies.com pie forums private forums all forums
this forum made possible by our volunteer staff, including ...
master stewards:
  • Nancy Reading
  • Carla Burke
  • r ranson
  • John F Dean
  • paul wheaton
  • Pearl Sutton
stewards:
  • Jay Angler
  • Liv Smith
  • Leigh Tate
master gardeners:
  • Christopher Weeks
  • Timothy Norton
gardeners:
  • thomas rubino
  • Jeremy VanGelder
  • Maieshe Ljin

Sew a patch - PEP BB textile.sand.patch

BB textiles - sand badge
 
steward
Posts: 6440
Location: United States
3118
transportation forest garden tiny house books urban greening the desert
  • Likes 2
  • Mark post as helpful
  • send pies
    Number of slices to send:
    Optional 'thank-you' note:
  • Quote
  • Report post to moderator
Approved submission
I did this at the end of the day after bootcamp. I sewed a patch into the armpit of one of shirts that had a rip there.

This is the sewing machine that I used, the patch I am going to sew on, and the hole in my shirt.


Before I sewed the patch on, I folded in the edges of the patch and sewed them down so that the patch would not fray. This is me sewing on the patch.


This is after I finished sewing the patch on.

Staff note (Nicole Alderman) :

I certify that this badge bit is complete!

 
pollinator
Posts: 3089
Location: Meppel (Drenthe, the Netherlands)
1018
dog forest garden urban cooking bike fiber arts
  • Likes 5
  • Mark post as helpful
  • send pies
    Number of slices to send:
    Optional 'thank-you' note:
  • Quote
  • Report post to moderator
Approved submission
I noticed my favourite garden working trousers were getting very thin in the part where that always happens because of riding the bicycle (that's my means of transportation).

photo 1: close-up of the tiny holes
I decided to make a repair before this would suddenly turn into a hole. I like these trousers because they are wide enough to wear leggings or tights underneath when it's cold outside.
First I searched my 'repair kit' for a strip of material. I found this navy-blue twill-tape. I pinned it along the part to be repaired at the inside.

photo 2: twill-tape pinned over the 'holey' part
Then I sewed this tape in place with small running stitches, by hand. You can see the start of that in the photo too.
The next part was the machine sewing. To make the thin part of fabric sturdy again I stitched over it in small 'stitched zigzag' stitches several times.

photo 3: sewing machine set for 'stitched zigzag' in 'size 1' (or even smaller)
Now I hope I can enjoy my garden working trousers for many more years.

photo 4: repair ready, close-up

Staff note (Nicole Alderman) :

I certify that this badge bit is complete, and a great tutorial! Thank you, Inge!!!

 
Posts: 5
Location: Knoxville, TN, USA
8
5
  • Likes 2
  • Mark post as helpful
  • send pies
    Number of slices to send:
    Optional 'thank-you' note:
  • Quote
  • Report post to moderator
Approved submission
For your consideration.
My-children-are-rough-on-the-furniture.-I-cut-a-patch-out-of-coutil..jpg
My children are rough on the furniture. I cut a patch out of coutil.
I-slid-the-coutil-inside-the-arm-under-the-upholstery-fabric-and-basted-it-in-with-cotton-thread.-I-trimmed-the-rough-edges..jpg
I slid the coutil inside the arm under the upholstery fabric and basted it in with cotton thread. I trimmed the rough edges.
I-used-embroidery-thread-to-whip-down-the-rough-edges..jpg
I used embroidery thread to whip down the rough edges.
Staff note (Mike Haasl) :

I hereby certify this BB complete!

 
Posts: 53
Location: PNW zone 8b
64
  • Likes 3
  • Mark post as helpful
  • send pies
    Number of slices to send:
    Optional 'thank-you' note:
  • Quote
  • Report post to moderator
Approved submission
I have a hole in a queen size quilt.  The patch is old jeans material, the thread is embroidery and the stitch had to be by hand because the quilt was to big to use the machine.
hole-with-materials.jpg
hole with materials
hole with materials
in-progress.jpg
in progress
in progress
done.jpg
done
done
Staff note (Mike Haasl) :

I hereby certify this BB complete!

 
gardener
Posts: 1958
Location: British Columbia
1113
3
monies home care forest garden foraging chicken wood heat homestead ungarbage
  • Mark post as helpful
  • send pies
    Number of slices to send:
    Optional 'thank-you' note:
  • Quote
  • Report post to moderator
Here is my sew a patch attempt:

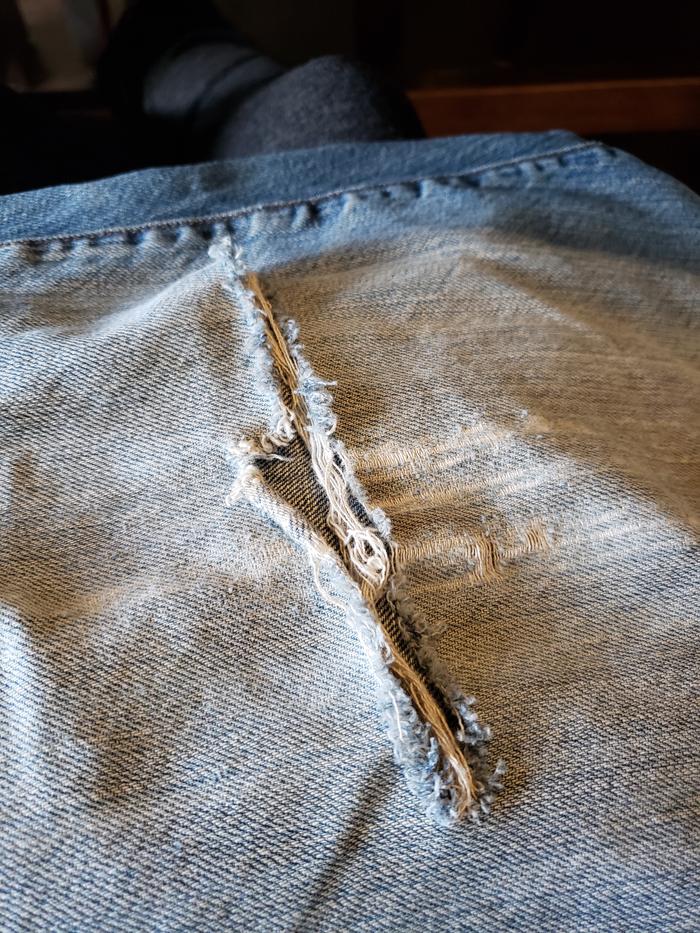
Fiancee's jeans with sizeable whole in the knee:


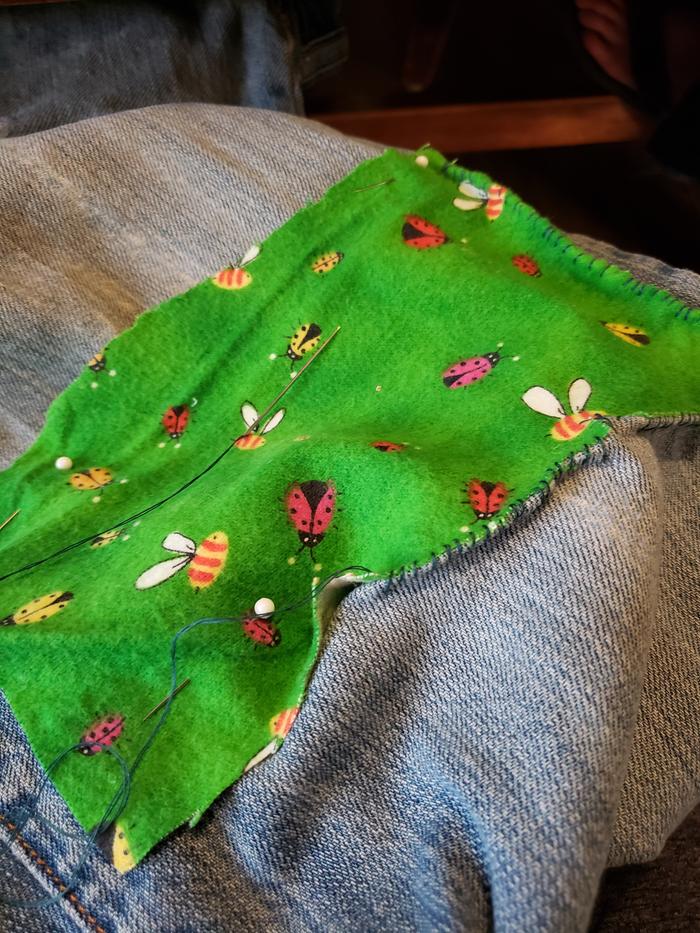
Material - Pins, thread, needle, cute flannel print patch!:


In progress


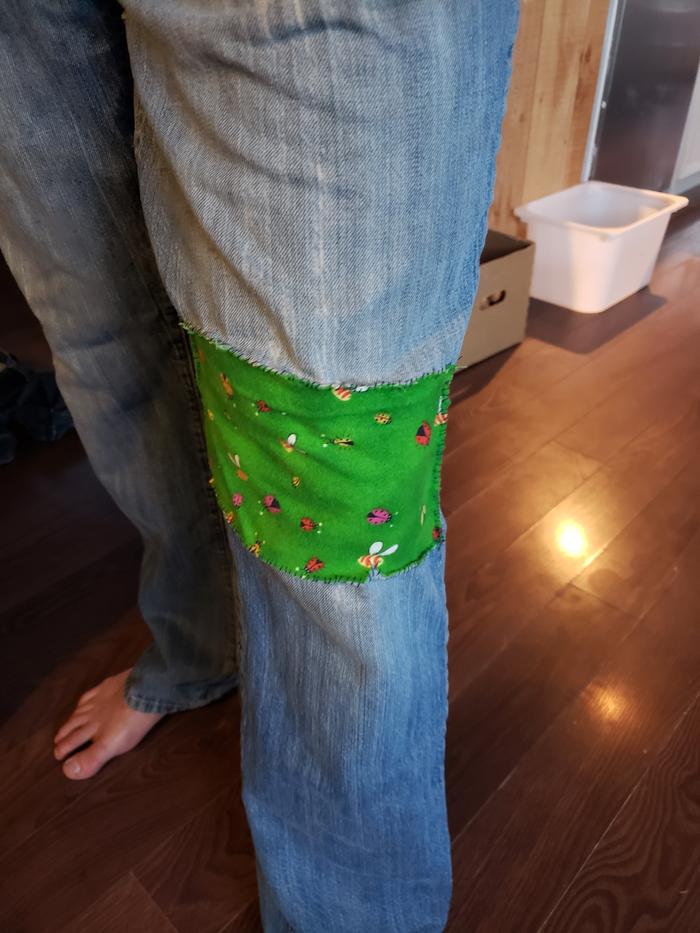
Finished patch!

 
steward
Posts: 21553
Location: Pacific Northwest
12040
11
hugelkultur kids cat duck forest garden foraging fiber arts sheep wood heat homestead
  • Mark post as helpful
  • send pies
    Number of slices to send:
    Optional 'thank-you' note:
  • Quote
  • Report post to moderator
Ashley, I'm thinking it might be good to do a straight stitch about a 1/4 inch in from the border, all the way around. I've noticed that when I patched pants like that, they ripped pretty fast, because the stresses are just where the two fabrics meet. It makes it easy for threads to rip, or pants/patch to re-rip. And, since your stitches are really close to the border of the patch, the patch fabric could rip really easily. (I remember when I was first sewing things, I thought I could get away with small seam allowances and just sew really close to the edge....and it just meant my seams all came undone!)

I think a straight stitch all the way around would help immensely in it being more long lasting and durable!
 
Ashley Cottonwood
gardener
Posts: 1958
Location: British Columbia
1113
3
monies home care forest garden foraging chicken wood heat homestead ungarbage
  • Likes 1
  • Mark post as helpful
  • send pies
    Number of slices to send:
    Optional 'thank-you' note:
  • Quote
  • Report post to moderator
Thanks Nicole! I will do that and get some more photos. This is honestly the first time a have sewn a patch so I'm pretty stoked on finally learning some skills!

... maybe I'll set up the sewing machine I inherited... Scary!
 
Nicole Alderman
steward
Posts: 21553
Location: Pacific Northwest
12040
11
hugelkultur kids cat duck forest garden foraging fiber arts sheep wood heat homestead
  • Likes 1
  • Mark post as helpful
  • send pies
    Number of slices to send:
    Optional 'thank-you' note:
  • Quote
  • Report post to moderator
I'd try the sewing machine first on the pillow....only because I found it really hard to try to sew a knee patch on a sewing machine. (Okay, I never figured it out. I couldn't figure out how to spin it around! Maybe someone has tips for that?)

Pillows are nice for first machine sewing, because it's just a nice, easy straight line with four pivots! Just make sure to have 1/4 to 1/2 inch seam, so your pillow doesn't succumb to the same fate as mine!

The neat thing about learning on patches and darns is, the cloth was already messed up, so it's not like if we mess up the sewing it's the end of the world! It's a great way to learn. I've learnt a lot through patching my son's pants over and over and over and over and over.......
 
Inge Leonora-den Ouden
pollinator
Posts: 3089
Location: Meppel (Drenthe, the Netherlands)
1018
dog forest garden urban cooking bike fiber arts
  • Likes 1
  • Mark post as helpful
  • send pies
    Number of slices to send:
    Optional 'thank-you' note:
  • Quote
  • Report post to moderator
Ashley, I have an advice too … To hand-stitch through both the new patch and the trousers leg a few times in different directions. So the patch is not only fixed at the seams.
 
Nicole Alderman
steward
Posts: 21553
Location: Pacific Northwest
12040
11
hugelkultur kids cat duck forest garden foraging fiber arts sheep wood heat homestead
  • Likes 2
  • Mark post as helpful
  • send pies
    Number of slices to send:
    Optional 'thank-you' note:
  • Quote
  • Report post to moderator
Approved submission
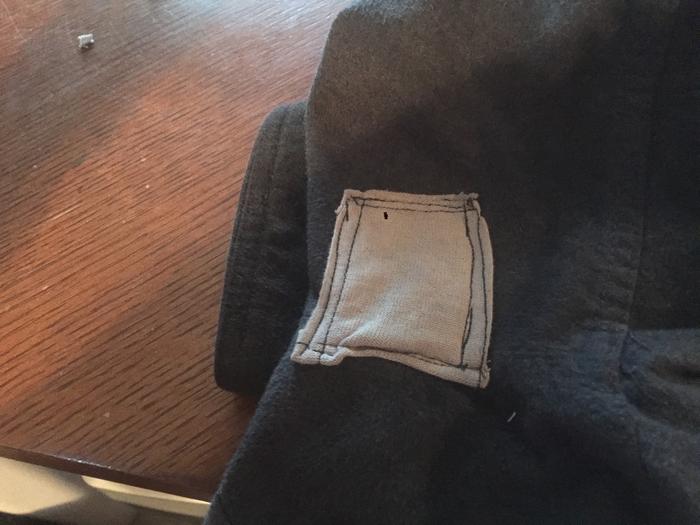
I think I've got pictures of what Inge is talking about. This is how I darned my son's pants. My patch is on the inside, but it could be easily done on the outside, too.

I've started matching the type of fabrics as best I can. So, if I'm mending something that's woven (not-stretchy), I use cloth that's woven for the patch. For knit (stretchy) fabrics, I've been using knit-type fabric for the patch when I have colors that match. I have no idea if this is a good way to go or not, but I'm hoping it helps prevent woven patches on knit fabrics from making holes where the patch it attached.
20200413_172237.jpg
hole with stretch scrap fabric, since the pants are made of stretchy fabric. I think it's good to match the stretchyness when doing patches, but I could be wrong
20200413_172459.jpg
quick-sew around the patch to the pant (this is much easier than pinning it!)
20200413_172935.jpg
stitch one direction
20200413_174255.jpg
stitch the other way--i like to cross over the other stitches. I think this makes it stronger and less likely to have the stitches snag
20200413_165929.jpg
Finished patch on my son!
Staff note (Mike Haasl) :

I certify this BB complete

 
This parrot is no more. It has ceased to be. Now it's a tiny ad:
A PDC for cold climate homesteaders
http://permaculture-design-course.com
reply
    Bookmark Topic Watch Topic
  • New Topic