• Post Reply Bookmark Topic Watch Topic
  • New Topic
permaculture forums growies critters building homesteading energy monies kitchen purity ungarbage community wilderness fiber arts art permaculture artisans regional education skip experiences global resources cider press projects digital market permies.com pie forums private forums all forums
this forum made possible by our volunteer staff, including ...
master stewards:
  • Nancy Reading
  • Carla Burke
  • r ranson
  • John F Dean
  • paul wheaton
  • Pearl Sutton
stewards:
  • Jay Angler
  • Liv Smith
  • Leigh Tate
master gardeners:
  • Christopher Weeks
  • Timothy Norton
gardeners:
  • thomas rubino
  • Jeremy VanGelder
  • Maieshe Ljin

Plumbing Badge Oddball thread

BB plumbing and hot water - straw badge
 
pollinator
Posts: 104
Location: PNW Steppe climate, not far from the big river.
57
2
homeschooling kids solar wood heat homestead
  • Mark post as helpful
  • send pies
    Number of slices to send:
    Optional 'thank-you' note:
  • Quote
  • Report post to moderator
Submission flagged incomplete
Hey PEP-folks,
We have a lot of kids, and our house lacks a mudroom. Thus, a back-porch utility sink makes a lot of sense (to me anyway). The kids are no longer allowed to come in muddy... now we'll see if they remember!

This is tapped into the lines to & from my rooftop solar water heater, and I also added a bypass loop to access the planned gas water heater to replace the electric one in the pantry. This would both reduce our electric use and open up more pantry space, both good things. The gas HWH will be documented separately when completed. I've included my schematic diagram for reference, if you wonder about the scribbles, it was improved by a small person.

The sink is just for muddy water (though the kids have chia pets sprouting in it right now), so I did a very simple graywater drain to the pine tree, which is on the west side of the house, and which I want to grow for shade. There will also be a diversion course for a citrus tree, but I need to build up the berm for that. Because the drain is air-to-air and not tapping a sewer, I dispensed with the usual p-trap - it would just silt in anyhow, and I have no reason to seal the drain.

The plumbing is all copper, because it is exposed outdoors. I dearly love PEX-A, but only in concealed spaces. Thus, way too many fittings were required to clear the electrical box which services the rooftop solar heater. UnPro-tip: enough 45deg joints, and you have all the degrees-of-freedom in the world! And MAPP gas is the way to go for piping-hot pipe fittings.

Further, I did it all in 3/4in copper, since it's tapped off a line that does the whole house, thus the "angle stops" are just ball valves with a compression fitting on the outlet. It works great, and it's been up and running since Saturday.

Total time required, including assembling the sink (bought from Home Depot, here: https://www.homedepot.com/p/MUSTEE-46-in-x-34-in-Plastic-Laundry-Tub-24C/202041465), I estimate at 8hrs. It was spread across a couple weekends, but there was a good bit of hot work against the house, which requires a deal of care and heat shielding.

Anyway, thanks for following along, and I think this belongs in Oddball, as I did not see "Install a utility sink" in any of the regular plumbing BBs, but please correct me if I am wrong!

Happy homesteading!
Mark
installSiteDrain.jpg
[Thumbnail for installSiteDrain.jpg]
madeCouple.jpg
[Thumbnail for madeCouple.jpg]
pipesToSolar.jpg
[Thumbnail for pipesToSolar.jpg]
bypassGasHWH.jpg
[Thumbnail for bypassGasHWH.jpg]
copperWork.jpg
[Thumbnail for copperWork.jpg]
aNiceSolder.jpg
[Thumbnail for aNiceSolder.jpg]
tooMany45s.jpg
[Thumbnail for tooMany45s.jpg]
lotsOfJoints.jpg
[Thumbnail for lotsOfJoints.jpg]
ballValveStops.jpg
[Thumbnail for ballValveStops.jpg]
water.jpg
[Thumbnail for water.jpg]
pineTreeRecipient.jpg
[Thumbnail for pineTreeRecipient.jpg]
installedSink.jpg
[Thumbnail for installedSink.jpg]
schematic.jpg
[Thumbnail for schematic.jpg]
Staff note (gir bot) :

Someone flagged this submission as not complete.
BBV price: 1
Note: This took some discussion.  Since there is healthy overlap with other BBs for portions of this job, those portions should be submitted there.  One certifier put together this list for you:  https://permies.com/wiki/144135/pep-plumbing-hot-water/Extend-water-supply-piping-location and https://permies.com/wiki/144009/pep-plumbing-hot-water/Replace-sink-plumbing-straw-sink.

 
Posts: 181
Location: Tacoma WA
28
2
hugelkultur forest garden food preservation fiber arts medical herbs homestead
  • Mark post as helpful
  • send pies
    Number of slices to send:
    Optional 'thank-you' note:
  • Quote
  • Report post to moderator
Submission flagged incomplete

Mike Haasl wrote:Some PEP badges allow for oddball points.  

When submitting something within a badge that allows oddball points (Homesteading, Metalworking, etc), they are based on the time it would take a talented newbie to do the same task.

When you did something that should be in a badge but there isn't a BB for it, post about it in that badge and maybe it will become a BB.  If that badge allows oddball points, you can submit it there, otherwise it has to go into Oddball badge. /


Our water heater (circa 2006) needs replacing. We noticed March 18, but it must have been leaking prior.  Flooded most of my 21yo's room, decorated lazily with a foot of very wet stuff evenly spread around the room.  20'x20'

To receive a grant from the Utilities, I need to upgrade to a vented hybrid heat pump water heater. To do that, I need to move the WH to an exterior wall. Plumber's installation quote was over 6K.  I could save 1K by removing the old shower myself.

21yo did this:
1. Shut off breaker to water heater and anything other circuits in the project area.
2. Save your stuff, kiddo.
3. Soak up the water, put wet fabric thru the laundry, and repeat often! almost 4 weeks now.

Here's where I started:
4. Shut off whole house water supply
5. Score drywall with knife into smaller pieces
6. Peel back drywall to expose piping so you can avoid problems. Remove carefully.
7. Unscrew the handles and shower head.
8. Unhook the copper supply lines from the shower, screw cap the lines near the ceiling.
9. Unscrew shower from wood supports and slice any caulking. Remove carefully.
10. Check area for sharp pokies, nails, and general clean up.
Took me a total of 5 hrs with this broken body.
My 21yo was tasked with tote 'n haul, which took them under 30mins.

Professionals will take care of the WH.

I have submitted all the paperwork and pictures and we are awaiting the final decision on the $6,000 Utility grant for the low-income. senior, disabled. Patiently waiting....

Staff note (gir bot) :

Someone flagged this submission as not complete.
BBV price: 1
Note: Not sure what you did without some pictures to show before/during/after

 
Jennifer Markestad
Posts: 181
Location: Tacoma WA
28
2
hugelkultur forest garden food preservation fiber arts medical herbs homestead
  • Mark post as helpful
  • send pies
    Number of slices to send:
    Optional 'thank-you' note:
  • Quote
  • Report post to moderator
Approved submission

Mike Haasl wrote:Some PEP badges allow for oddball points.  This was introduced in this thread.  When submitting something in the official Oddball badge, you get points based on the time it would take a professional to do the same task if they have a bit of luck.  When submitting something within a badge that allows oddball points (Homesteading, Metalworking, etc), they are based on the time it would take a talented newbie to do the same task.


PEP - Plumbing - Straw - Oddball

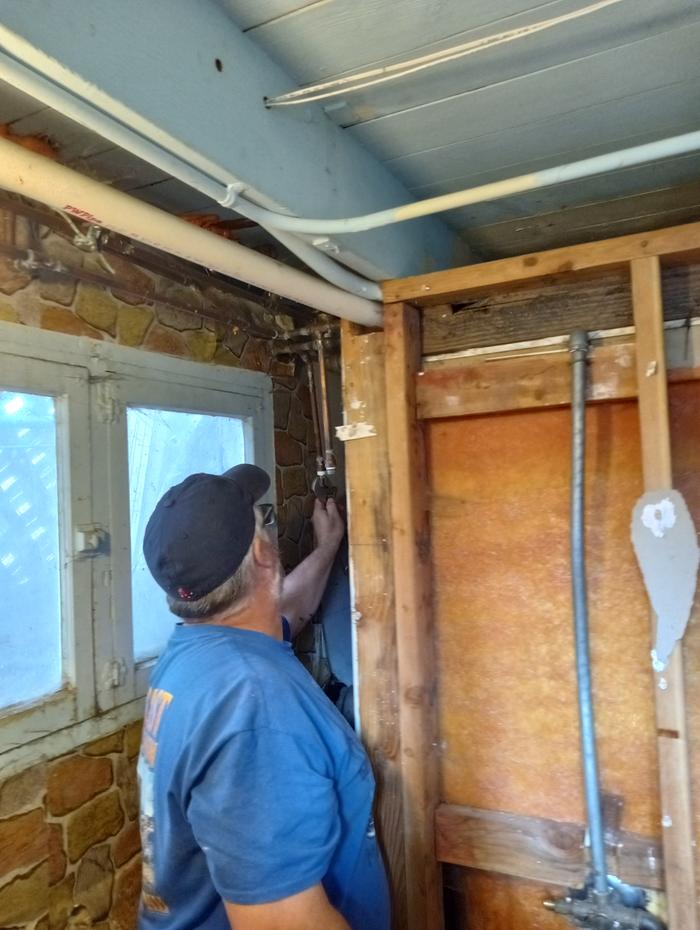
Our water heater (circa 2006) needs replacing. Carlin (they) noticed the squishy floor, March 18, but it must have been leaking prior.  Flooded most of  their room, decorated lazily with a foot of very wet stuff evenly spread around the room.  I got a plumber's quote install a new water heater in the shower corner. I saved 1K by removing theshower myself.  Our friend Scott was my guide. I didn't find any BB's for removing a shower. The scariest part of this project was the water pipes, so I'm putting it under plumbing. It's a no-brainer project for some, but I haven't done any plumbing other than put a new washer in a faucet.

21yo did this:
Shut off circuit breaker to water heater and any other circuits in the project area. Spent several days sorting into Keep, Rescue, Give, Landfill. Their clothes soaked up a lot of water, laundry for days!  (cleanest I've seen their room :)

What I did:
~ Shut off the whole house water supply. Turn the red lever on the ceiling of the root cellar.
~ Use a box knife to score drywall into smaller pieces. Rip off the drywall, paying attention to screws into the framing.
~ Standing inside the shower, use a flat head to remove the panel on the faucet, then use a phillips to remove the screw from the handle.
~ Unscrew shower head, remove.
~ Back outside the shower unscrew the copper supply lines from the shower controls.
~ Unscrew the C clamps holding the galvanized pipe to the shower.
~ Trace the supply lines to where they T off from the main pipes. Unscrew the supply lines, apply plumbers tape, then add screw caps to the lines near the ceiling. (Scott reached this for me)
~ Remove screws holding the shower liner to the wooden frame, remove any caulking, remove framing, and remove the shower liner.
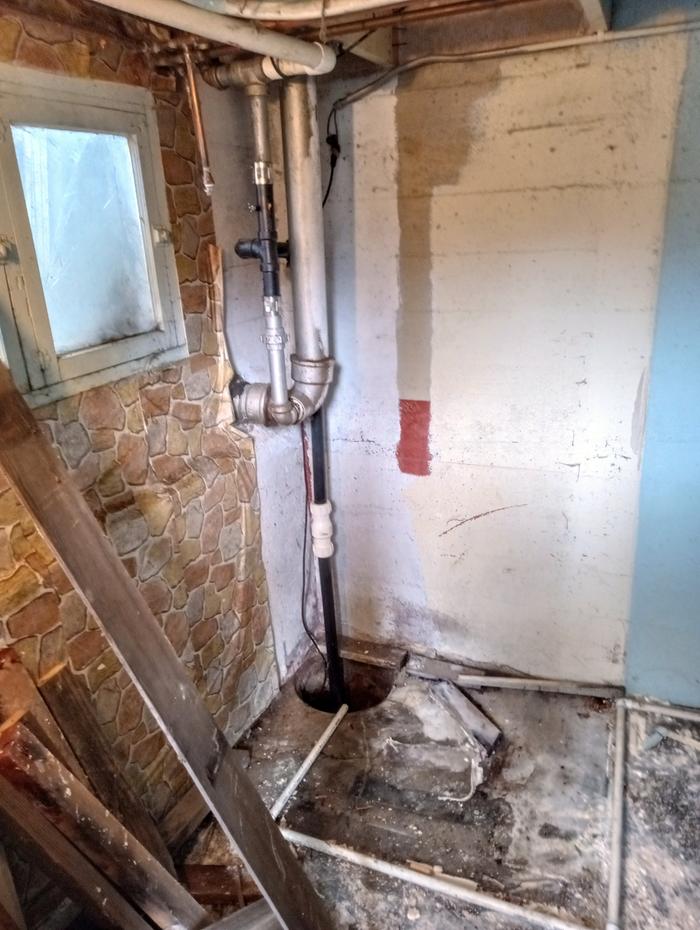
~ There was no drain pipe hooked up. Water fell to the cement floor and gravity took it to the sump pump. Otherwise, I would have had to cap off the drain pipe.
=  Took me a total of 5 hrs with this broken body.


Saved the shower liner and plumbing to be reused in an outdoor solar shower.
before-any-demo-shower-is-on-the-far-wall.jpg
[Thumbnail for before-any-demo-shower-is-on-the-far-wall.jpg]
Before plumbing work, just turned off the whole house water
plaster-board-removed-one-supply-line-is-removed.jpg
[Thumbnail for plaster-board-removed-one-supply-line-is-removed.jpg]
Unscrew the fittings from supply lines to shower controls
Scott-caps-the-pipes-I-couldn-t-reach-while-I-remove-the-shower-head-and-knobs.jpg
Almost done. Removing the pipes on the shower wasn't hard at all.
I unscrewed the mixing faucet and the shower head from the inside. Then removed the galvanized pipe from the outside. I couldn't reach the copper supply pipes near the ceiling, Scott did that.
shower-removed.jpg
It needs paint but there is so much more space with the shower removed.
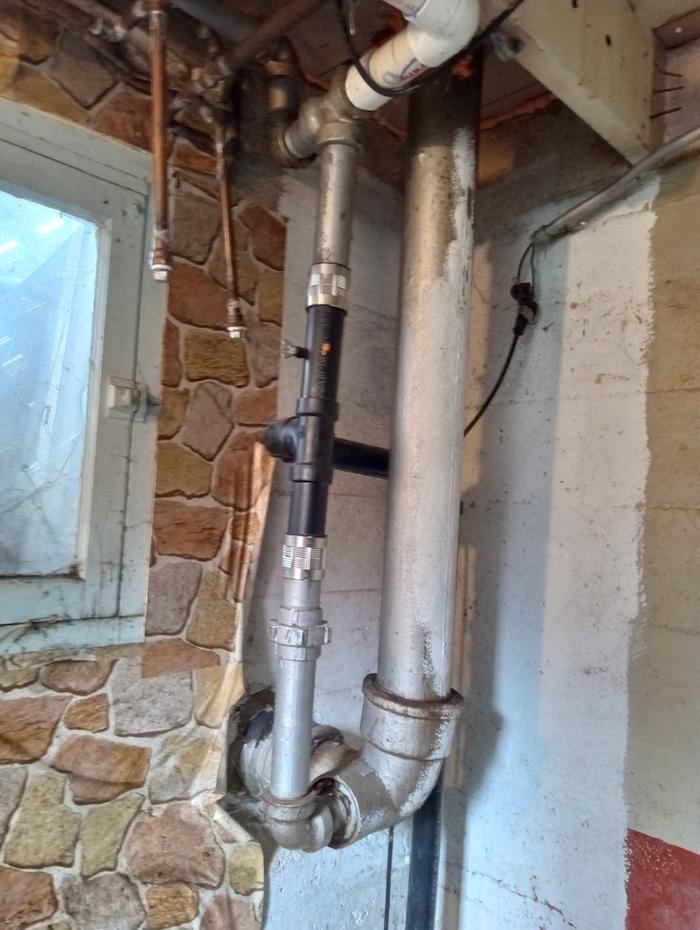
Here you can see the supply pipes near the ceiling. The shower wasn't connected to a drain, it just followed the slope of the floor and into the sump.
demo-complete-and-ready-for-water-heater.jpg
The white pvc on the floor is the drain from the water heater. It went around the shower.
The white pvc on the floor is the drain from the water heater pan. It went around the shower. Now, after being kicked and shoved, water flows from the water heater pan to the sump.
Staff note (gir bot) :

Someone flagged this submission as not complete.
BBV price: 2
Note: To get points for this, you need to show what the plumbing looked like before you started, ideally the work in progress, and the plumbing work you completed.  Demolition, cleaning and gaining access doesn't count towards "Plumbing".  Please submit supporting photos of the plumbing work to get considered.  

Staff note (gir bot) :

Someone approved this submission.
Note: Approved for 1 plumbing oddball point

 
gardener
Posts: 1569
Location: Washington State
985
6
forest garden trees rabbit earthworks composting toilet fiber arts sheep wood heat woodworking rocket stoves homestead
  • Mark post as helpful
  • send pies
    Number of slices to send:
    Optional 'thank-you' note:
  • Quote
  • Report post to moderator
Approved submission
Here is my submission for the Plumbing & Hot Water Aspect - Oddball Points BB.

The diverter in my bathtub/shower spout has been failing for six months and I tried to dismantle the diverter and replace just the failing diverter - maybe even just an o-ring.  However, nothing is ever so simple.  I could not unscrew the diverter mechanism so I purchased a new spout/diverter combo.  I spent more time selecting and acquiring the parts than replacing them.  Now, I can send water uphill (to the shower head) in an instant instead of monkeying with the failing diverter.
1.jpg
before: failed diverter - does not divert water but lets it run past the mechanism
2.jpg
new spout/diverter combo next to old spout/diverter
3.jpg
no spout - about to install new unit
4.jpg
new spout installed and it works great
Staff note (gir bot) :

Someone approved this submission.
Note: Certified for 1/2 plumbing oddball point

 
Proudly marching to the beat of a different kettle of fish... while reading this tiny ad
A rocket mass heater heats your home with one tenth the wood of a conventional wood stove
http://woodheat.net
reply
    Bookmark Topic Watch Topic
  • New Topic