• Post Reply Bookmark Topic Watch Topic
  • New Topic
permaculture forums growies critters building homesteading energy monies kitchen purity ungarbage community wilderness fiber arts art permaculture artisans regional education skip experiences global resources cider press projects digital market permies.com pie forums private forums all forums
this forum made possible by our volunteer staff, including ...
master stewards:
  • Carla Burke
  • Nancy Reading
  • r ranson
  • John F Dean
  • Pearl Sutton
  • paul wheaton
stewards:
  • Jay Angler
  • Anne Miller
  • Nicole Alderman
master gardeners:
  • Christopher Weeks
gardeners:
  • Maieshe Ljin
  • Benjamin Dinkel
  • Jeremy VanGelder

!!!! SEPP to Boot: Stephen's Experience (BEL)

 
master pollinator
Posts: 1387
Location: Wheaton Labs, Montana, USA
2730
9
home care trees books wofati food preservation bike bee building writing seed
  • Likes 11
  • Mark post as helpful
  • send pies
    Number of slices to send:
    Optional 'thank-you' note:
  • Quote
  • Report post to moderator
BEL #767

We're back into repairing the wing walls of Allerton Abbey. Our current challenge is in removing something that was installed with the idea that it never would be removed, ever. Some of the ways we've approached this include using a "saws-all" to cut a post into sections, using our smartphone cameras to look behind things that are out of reach or deep in darkness, and prying rotten posts into pieces with claw hammers and whatever metal bits we have on hand.

It's a challenge, and we're learning. I feel like this pulls us away from my personal big three goals of the year, while fulfilling Paul's. Meanwhile, the trouble-shooting and problem-solving techniques we're practicing now can be useful to us in the future, when we're back on track. That's sometimes how progress happens.


Speaking of which, here's the team - JP (left) and Seth - rebuilding some truly messed-up junkpole fence sections. I appreciate these guys and their cheerful, uplifting approach.


We also started planting things in the GAMCOD 2025 plot this week. These pumpkin seeds are our "legacy" breed, which we grew and harvested from last year's GAMCOD plot. I'm curious to see how these seeds will do. I want to plant them all over the place, including on the CornScoop up at the Lab. They'll serve as the squash in our "three sisters" system.

I want us to grow more and better pumpkins this year, and then eat more and better soup and pasta. These just might help.


Finally: thanks to Seth for fixing this sign. The team has been chipping away at some "housekeeping" tasks like this, which will make our place that much nicer for guests, visitors, and future Boots.


This has been a good week. "Don't wish it were easier. Wish you were better." This has been resonating in my mind over and over this week.

That's all for now. Thanks for reading, and enjoy your day...!
 
Stephen B. Thomas
master pollinator
Posts: 1387
Location: Wheaton Labs, Montana, USA
2730
9
home care trees books wofati food preservation bike bee building writing seed
  • Likes 8
  • Mark post as helpful
  • send pies
    Number of slices to send:
    Optional 'thank-you' note:
  • Quote
  • Report post to moderator
BEL #768

Here's the latest Wheaton Labs GAMCOD update. We had our first day of planting...!


That's all for now. Thanks for watching, and enjoy...!
 
gardener
Posts: 446
Location: Southern Manitoba...bald(ish) prairie, zone 3ish
216
transportation hugelkultur monies forest garden urban books food preservation cooking writing woodworking
  • Likes 6
  • Mark post as helpful
  • send pies
    Number of slices to send:
    Optional 'thank-you' note:
  • Quote
  • Report post to moderator
I'm caught up...at least temporarily.  Watching some of the videos on YouTube, they suggested them to me out of order, which led to some confusion.

The leggy nature of some of the indoor starts is usually attributed to insufficient light.  For the future, you may want to look how you may be able to get them into a sunnier window...if I recall where you had them was east facing.  Without supplemental light (I can hear Paul's rant already...), I think you'd either want a southern exposure or the ability to move them to a west window for the afternoon.

I've never attempted to start beans early.  They're usually pretty reliable for us to start outside, although I do pay attention to the season length required for some of the longer season dry beans.  Beans are a decent part of this year's plan - considering the dirt may be low in the rhizobium bacteria they interact with to fix nitrogen, they may not do very well, but if the plants do OK, we'll be pumping nitrogen from the atmosphere into the hugel as part of the soil-building process.

I wonder how your pumpkins from saved seed will turn out.  You may have a cross of the two varieties you had on last year's hugel.

I love that you were able to put this years GAMCOD bed so close to the 2024 version - that will allow for some great contrast and comparisons.  I went narrower with my hugel build so it's about 3.5' in height, but I still get about a 1.5 time multiplier for available space, so around the 300 sf range of plantable area.  That said, we do have wood pretty close to the surface, so we have to be careful about what we plant and where.  

On another note, while it may not be the lowest-cost option, you may want to look at Henschel Hats for a replacement.  While not as flashy as your high-visibility current bucket, they have a variety of styles with wide brims and, since some may care, they're American-made.
 
Stephen B. Thomas
master pollinator
Posts: 1387
Location: Wheaton Labs, Montana, USA
2730
9
home care trees books wofati food preservation bike bee building writing seed
  • Likes 12
  • Mark post as helpful
  • send pies
    Number of slices to send:
    Optional 'thank-you' note:
  • Quote
  • Report post to moderator
BEL #769

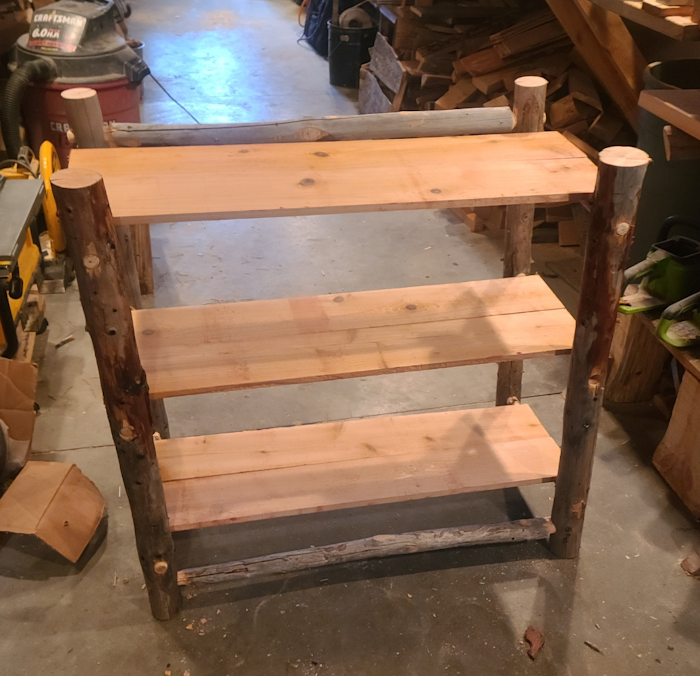
I completed Bookshelf #2 today: roundwood scraps and cedar planks, and with no metal fasteners. I'm definitely pleased with how things turned out.

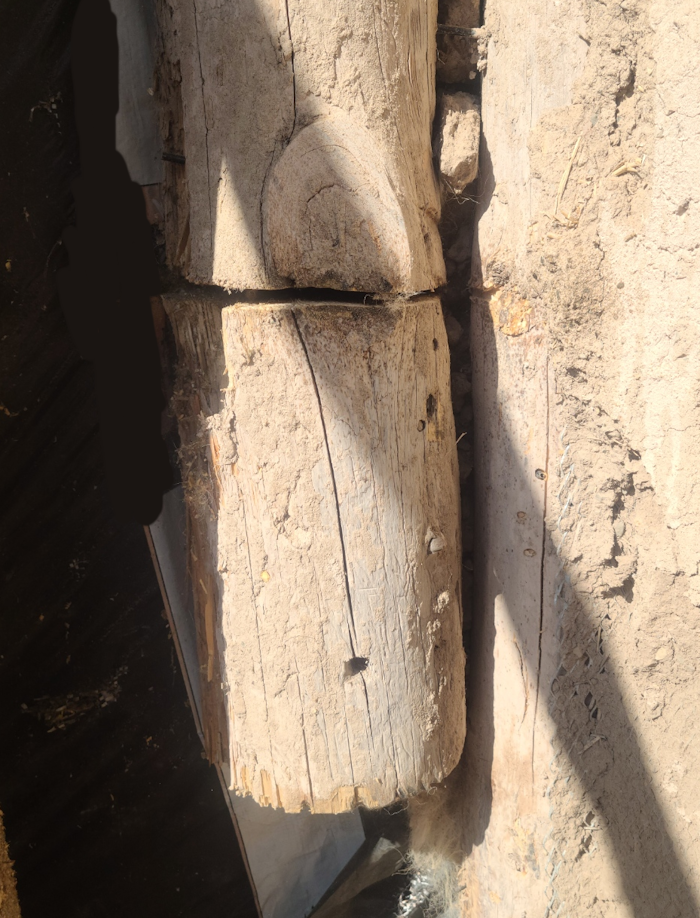
This mortise snapped as I was hammering the peg into place with a rubber mallet. It was a setback, though not a frustrating one. On the one hand I'm using junk pole scraps. On the other hand, I'm using junk pole scraps. The good news is that these are relatively easy to replace, though more fragile than a quality piece of wood. So I cut out another 3-foot section (this one with a slightly-larger diameter), drilled-out the mortises as best I could, and tried again.


I made sure to chamfer the ends of the tenons with a rasp (shaving down the exact "corners" so they'd have a more-forgiving connection point), and thinned each of the tenons overall so they would have a little wiggle room.

The final fitting was challenging, and took patience. The shelf support pegs were pointing in all sorts of odd directions. I worked on one half first, supporting the other side of the shelf on a stool. After slightly-hammering in the tenons for one side of the shelf with a mallet, I slid the other three pegs in place and hammered them in just enough so they would stay.

I worked from one corner to the opposite, similar to when you're tightening lug nuts onto a tire rim of an automobile. Gradually I had the four corners nice and snug, with a little bit of tenon sticking out the other side of the mortised support leg. Though I thought it was wobbly and fragile before, now the entire frame felt as tight (and perhaps full of tension) as a bowstring.


I'm taking this up to the tent this evening. It'll be a nice (and useful) addition, for sure.


Things to research for Bookshelf #3:
- how to calculate and scribe proper right angles
- how to place and drill holes in-line with the end of roundwood pegs.

Always remember:
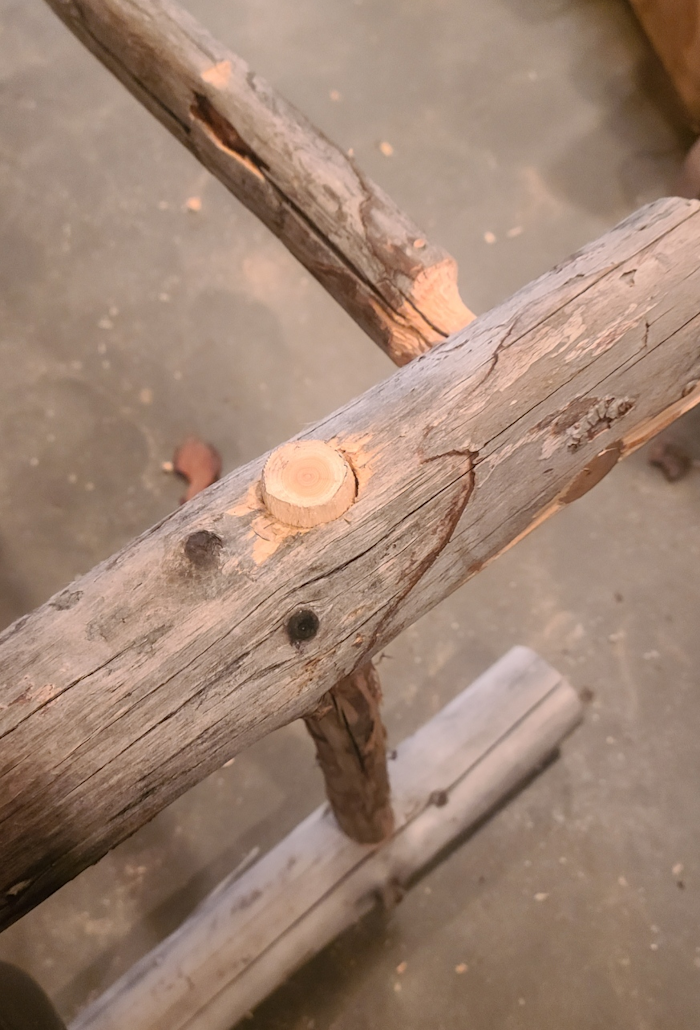
- Drill mortises all the way through the posts, and don't bother using dowel rods as your tenons. Just use the support peg itself as the tenon, trimming the ends down with the tenon-maker (again: thanks, Amy!)
- Work the tenon-maker slowly, and don't go full-power with the drill. It's easy to make "crooked" tenons if you're not careful. It pulls forward on its own.
- Measure the mortise-drill-marks for the shelf supports and frame supports from exclusively one end or the other. For this project, I measured all distances from the bottom/"foot" of the shelf legs, so all measurements were consistent.
- Roundwood pieces are curved, even slightly, and so may not have an exact connection. Stretching, pushing, and pulling the frame can help, but be gentle with the hammer.
- If you need to extract a tenon from a mortise, hit it with a short section of dowel from the opposite side. Do not use the "shinto" rasp for this, even if it's just so darn convenient, because you will likely damage the tool.
- Use a rasp to reduce the tenons just slightly-smaller than their original diameter, to aid in creating a secure, snug fit.
 
pioneer
Posts: 908
Location: Inter Michigan-Superior Woodland Forest
145
5
transportation gear foraging trees food preservation bike building solar writing woodworking wood heat
  • Likes 1
  • Mark post as helpful
  • send pies
    Number of slices to send:
    Optional 'thank-you' note:
  • Quote
  • Report post to moderator

Derek Thille wrote:On another note, while it may not be the lowest-cost option, you may want to look at Henschel Hats for a replacement.  While not as flashy as your high-visibility current bucket, they have a variety of styles with wide brims and, since some may care, they're American-made.


Stephen getting a fashion fedora would be like Jason Newsted cutting his hair...
gift
 
Rocket Mass Heater Plans: Annex 6" L-shaped Bench by Ernie and Erica
will be released to subscribers in: soon!
reply
    Bookmark Topic Watch Topic
  • New Topic