

|

|
|
|
|

|

|

|

|

|
 8
8


 3
3


Dave's SKIP BB's / Welcome to Permies! / Permaculture Resources / Dave's Boot Adventures & Longview Projects

Skill verified by gir bot")

Skill verified by Mike Haasl")

Skill verified by Mike Haasl")

Skill verified by Nicole Alderman")

Skill verified by Nicole Alderman")
I certify this BB complete!


 2
2


.jpg "Filename: Showing-measurement-(-really-hard-to-do-one-handed).jpg
Description: Showing measurement ( really hard to do one handed)")

It is a privilege to live, work and play in the traditional territory of the Salish People.
Now drop and give me 52... ~ Come Join the permies Shoecamp! ~ All about Permies, including Tutorials ---
Twenty bucks off the homesteading bundle for the next 72 hours!

Skill verified by Mike Haasl")
I certify this BB complete!
2


My PEP Badge Tracker - An easier way to track your PEP Badge Progress. | Wait, wait, wait; What is PEP? | How Permies.com works.

Skill verified by gir bot")

Skill verified by Mike Haasl")

Skill verified by Mike Haasl")

Skill verified by Mike Haasl")

Skill verified by Mike Haasl")

Skill verified by Mike Haasl")

Skill verified by Jeremy VanGelder")

Skill verified by Christopher Weeks")
I certify this BB complete!


 9
9


Skill verified by Mike Barkley")
Mike Haasl approved this submission.
Note: Awesome job!
3


.:GOAL - Work daily to learn more about survival and self-reliance:.

Skill verified by gir bot")
Mike Haasl approved this submission.
3


"All we have to decide is what to do with the time that is given to us."
Mike Haasl approved this submission.
4


Skill verified by Mike Haasl")

Skill verified by Mike Haasl")
Mike Haasl approved this submission.
4

![[Thumbnail for Toolbox.png]](/t/124803/a/152375/Toolbox.png "Filename: Toolbox.png
Description:")
![[Thumbnail for Over-the-shoulder.jpg]](/t/124803/a/152376/Over-the-shoulder.jpg "Filename: Over-the-shoulder.jpg
Description:")

Skill verified by Opalyn Rose")
Mike Haasl approved this submission.
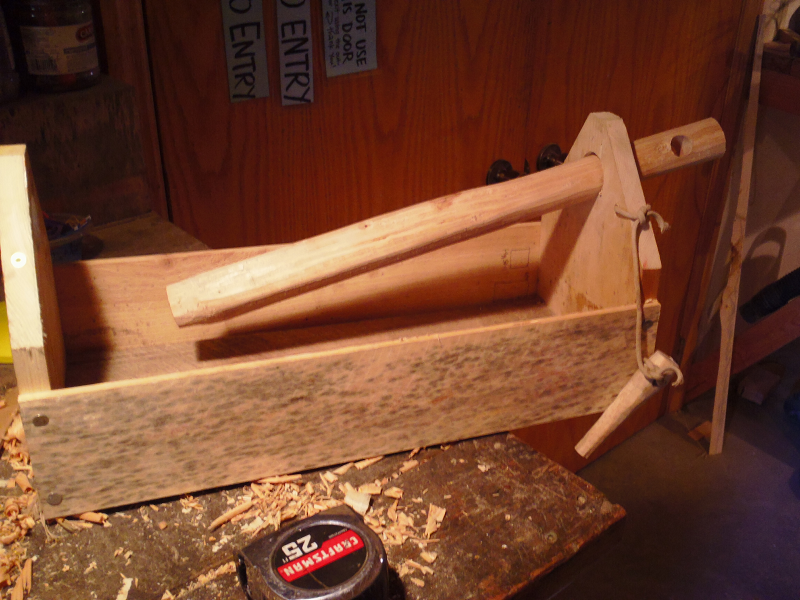
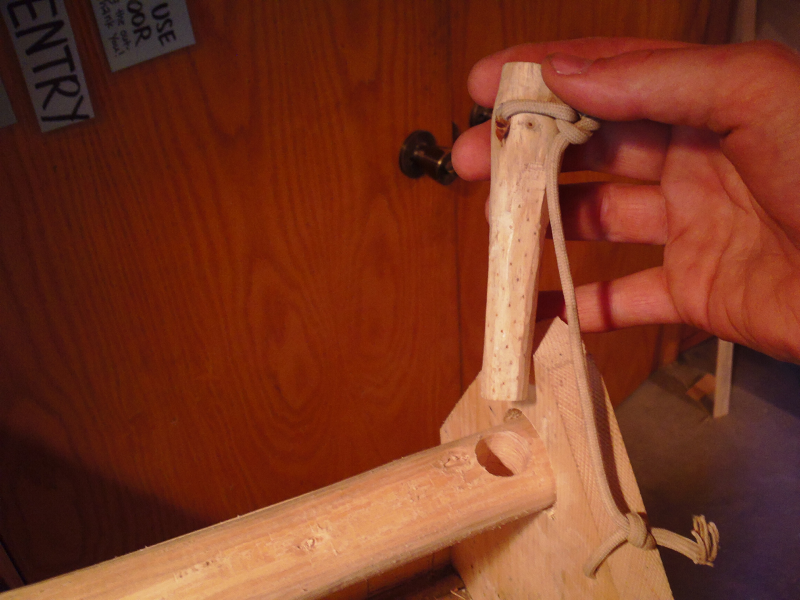
Note: One solution to your rope attachment problem would be to drill a hole through the vertical board to pass the rope through. The knot in the rope would keep it from pulling through
3
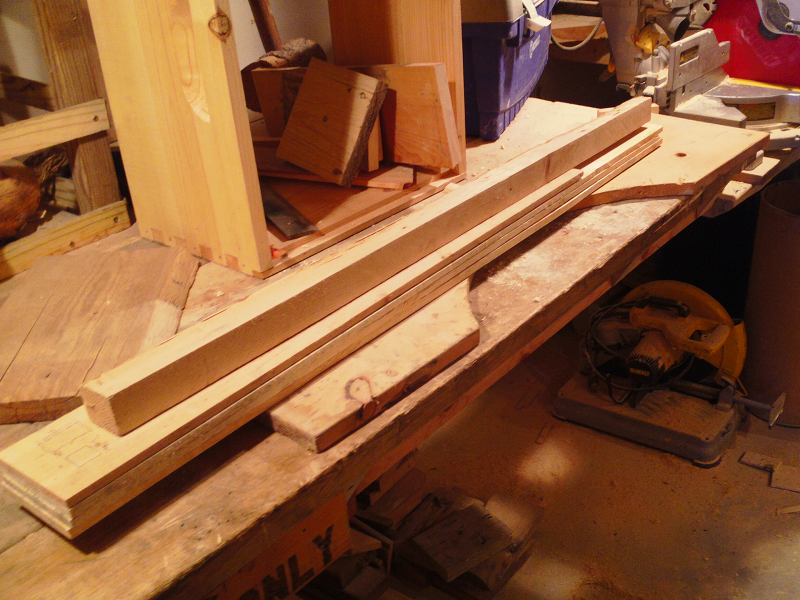
To complete this BB, the minimum requirements are:
- At least 16" long
- A carrying handle
- No paint, stain or oil
To document your completion of the BB, provide pics or video (<2 min) of the following:
- Wood you're starting with
- Construction partially underway
- Finished toolbox


Cargo bikes are cool

Skill verified by gir bot")

Skill verified by Opalyn Rose")

Skill verified by Mike Barkley")

Skill verified by Mike Haasl")
Mike Barkley approved this submission.
4


Mike Barkley approved this submission.
3


“There are no words to express the abyss between isolation and having one ally. It may be conceded to the mathematician that four is twice two. But two is not twice one; two is two thousand times one.”
― G. K. Chesterton

Skill verified by Mike Haasl")

Skill verified by Opalyn Rose")
L. Johnson approved this submission.
Note: I hereby certify this badge bit complete.
It looks like you used one screw to keep each side of the handle in place. You may notice over time that the handle starts to spin in place. Another screw, or a more advanced technique like a through mortise will keep that from happening.
Looks good though!
1
“There are no words to express the abyss between isolation and having one ally. It may be conceded to the mathematician that four is twice two. But two is not twice one; two is two thousand times one.”
― G. K. Chesterton
3


Check out the plans to build your own charka-style spinning wheel from bicycle parts
Explore the intersection of permaculture, community, and the cycle of life at Herland Forest Natural Burial Cemetery and the Windward Education and Research Center

Skill verified by Nicole Alderman")

Skill verified by Mike Haasl")

Skill verified by Carla Burke")

Skill verified by Mike Haasl")

Skill verified by Nicole Alderman")

Skill verified by Mike Haasl")

Skill verified by Nicole Alderman")
L. Johnson approved this submission.
Note: I hereby certify this badge bit complete.
2


I'm writing about my experience with SKIP, you can read it here: https://skipthejourney.wordpress.com/

Skill verified by gir bot")
George Yacus approved this submission.
3

"We carry a new world here, in our hearts..." --Buenaventura Durruti
"Don't wish it were easier. Instead, wish you were better." --Jim Rohn
Mike Barkley approved this submission.
3

![[Thumbnail for toolbox-1.png]](/t/124803/a/191742/toolbox-1.png "Filename: toolbox-1.png
Description:")
![[Thumbnail for toolbox-2.jpeg]](/t/124803/a/191743/toolbox-2.jpeg "Filename: toolbox-2.jpeg
Description:")
![[Thumbnail for toolbox-3.jpg]](/t/124803/a/191744/toolbox-3.jpg "Filename: toolbox-3.jpg
Description:")
![[Thumbnail for toolbox-4.jpg]](/t/124803/a/191745/toolbox-4.jpg "Filename: toolbox-4.jpg
Description:")
Mike Haasl approved this submission.
1


![[Thumbnail for centerfold.jpg]](/t/124803/a/212095/centerfold.jpg "Filename: centerfold.jpg
Description:")
"How do you balance production with perfection?"
For more creations and tom foolery come visit at https://www.instagram.com/wizard.mountainman/
Someone approved this submission.
1
![[Thumbnail for 20230912_122151.jpg]](/t/124803/a/221912/20230912_122151.jpg "Filename: 20230912_122151.jpg
Description:")
![[Thumbnail for 20230914_164953.jpg]](/t/124803/a/221913/20230914_164953.jpg "Filename: 20230914_164953.jpg
Description:")
![[Thumbnail for 20230914_171450.jpg]](/t/124803/a/221914/20230914_171450.jpg "Filename: 20230914_171450.jpg
Description:")
![[Thumbnail for 20230914_171556.jpg]](/t/124803/a/221915/20230914_171556.jpg "Filename: 20230914_171556.jpg
Description:")
Gunnar Gebhard approved this submission.
Note: A fine toolbox indeed.
1
![[Thumbnail for 1-starting-wood.jpg]](/t/124803/a/224686/1-starting-wood.jpg "Filename: 1-starting-wood.jpg
Description:")
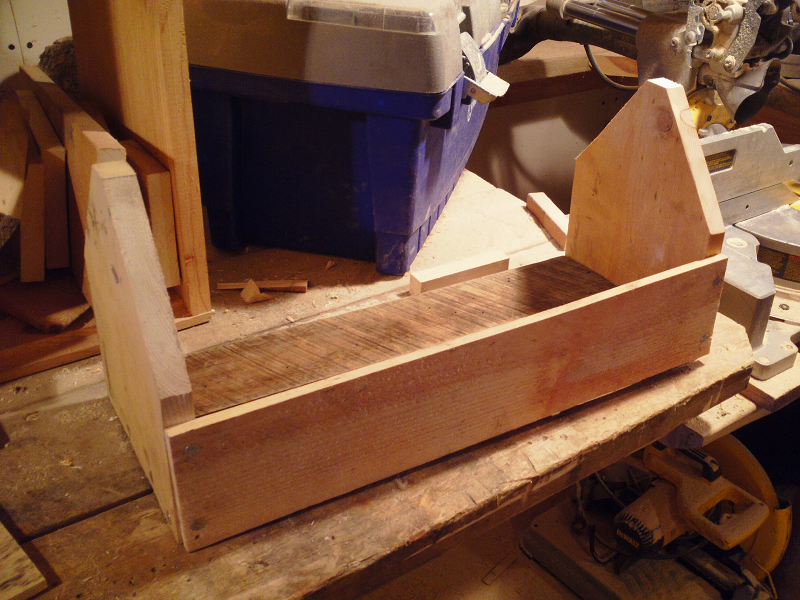
![[Thumbnail for 2-short-sides-on.jpg]](/t/124803/a/224687/2-short-sides-on.jpg "Filename: 2-short-sides-on.jpg
Description:")
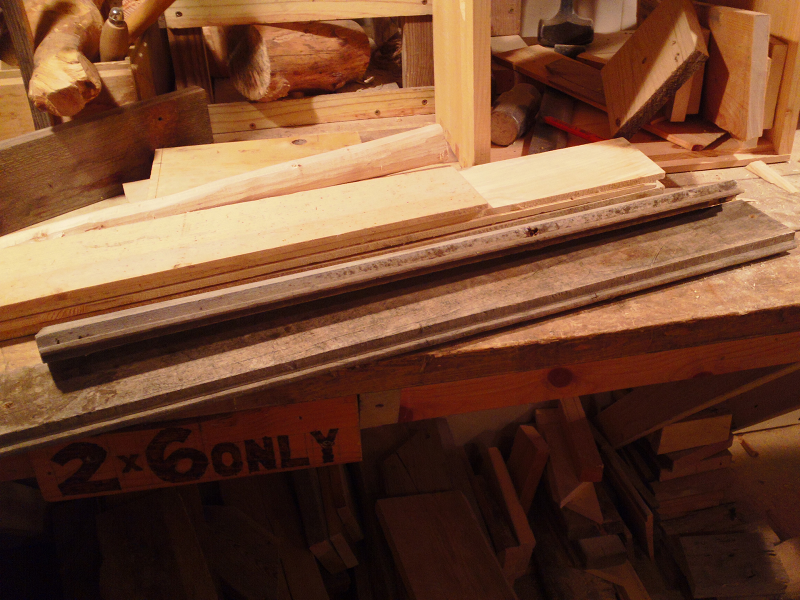
![[Thumbnail for 3-long-sides-cut.jpg]](/t/124803/a/224688/3-long-sides-cut.jpg "Filename: 3-long-sides-cut.jpg
Description:")
![[Thumbnail for 4-long-sides-on.jpg]](/t/124803/a/224689/4-long-sides-on.jpg "Filename: 4-long-sides-on.jpg
Description:")
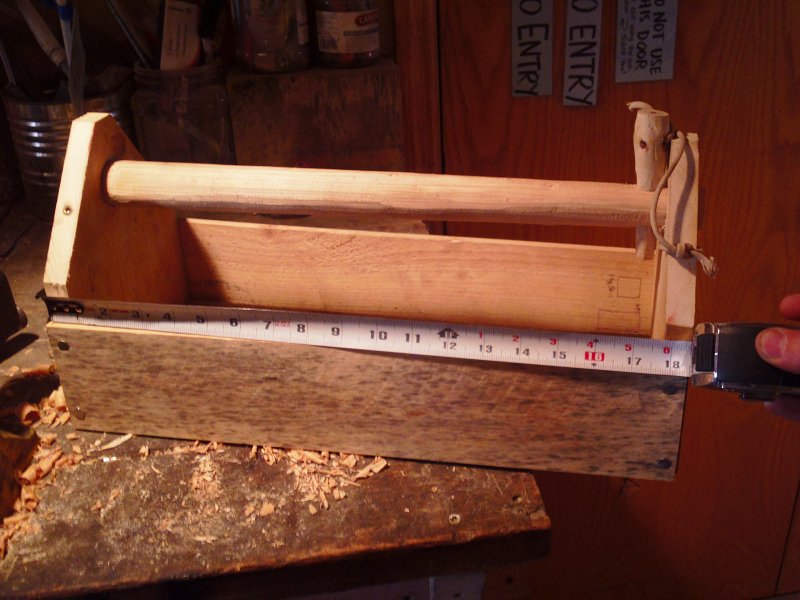
![[Thumbnail for 5-handle-on.jpg]](/t/124803/a/224690/5-handle-on.jpg "Filename: 5-handle-on.jpg
Description:")
![[Thumbnail for 6-length.jpg]](/t/124803/a/224691/6-length.jpg "Filename: 6-length.jpg
Description:")
![[Thumbnail for 7-more-length.jpg]](/t/124803/a/224692/7-more-length.jpg "Filename: 7-more-length.jpg
Description:")
![[Thumbnail for 8-working.jpg]](/t/124803/a/224693/8-working.jpg "Filename: 8-working.jpg
Description:")
Gunnar Gebhard approved this submission.
Note: Good job, you may find that some issues arise with the handle holes being drilled so close to the end of that board. There isn't much material to hold it. Don't load it up too heavy and it should be fine.
1
Passionate advocate for living at a human scale and pace.
Check in on me at Willow Acre: https://permies.substack.com
Help me grow the permaculture presence in Indiana https://permies.com/t/243107
Concise Guide to Permies' Publishing Standards: https://permies.com/wiki/220744
Timothy Norton approved this submission.
Note: I really like the video! Great job.


"The winter will ask what we did all summer" - Henry David Thoreau

Skill verified by Alexandra Malecki")
Jim Garlits approved this submission.
Note: Nice use of available wood for the handle.


bit by bit, I'm gonna get my bricks out in the sticks / bit by bit, I'm gonna build my house in the wildest thickets
Cheryl Loomans approved this submission.
Note: I hearby certify this BB as complete


If I'm not taking my time, who is?
George Yacus approved this submission.
Note: Sturdy and strong as the hands that built it! Good work!


George Yacus approved this submission.
Note: Way to go!


|
if you are good, then when you die, you will get seasons 2-10 of firefly - tiny ad
Contemplate spending the next 20 years puttering in permaculture projects
https://wheaton-labs.com/bootcamp
|


