• Post Reply Bookmark Topic Watch Topic
  • New Topic
permaculture forums growies critters building homesteading energy monies kitchen purity ungarbage community wilderness fiber arts art permaculture artisans regional education skip experiences global resources cider press projects digital market permies.com pie forums private forums all forums
this forum made possible by our volunteer staff, including ...
master stewards:
  • Nancy Reading
  • Carla Burke
  • r ranson
  • John F Dean
  • paul wheaton
  • Pearl Sutton
stewards:
  • Jay Angler
  • Liv Smith
  • Leigh Tate
master gardeners:
  • Christopher Weeks
  • Timothy Norton
gardeners:
  • thomas rubino
  • Jeremy VanGelder
  • Maieshe Ljin

Worm Castings Quality verses Quantity

 
gardener
Posts: 1744
Location: N. California
811
2
hugelkultur kids cat dog fungi trees books chicken cooking medical herbs ungarbage
  • Likes 3
  • Mark post as helpful
  • send pies
    Number of slices to send:
    Optional 'thank-you' note:
  • Quote
  • Report post to moderator
I started my worm bin a year ago.  From the start I was determined to produce quality worm castings.  I used aged wood chips, and organic compost, organic chicken manure, and coco coir.  I started out feeding once a week, but soon discovered that was to often, so mainly I would check the bin once a week and add food scraps when needed.  As I have done more research over the year I believe I kept the bedding a little dryer than was optimum for the worms, but not dry enough to do harm.  I harvested my worm castings about 8 months after I started the bin.  I think the results were amazing.  Black gold.  
I pointed out to another permies poster that he didn't know what the quality of his worm castings are unless he had them tested.  It got me thinking about my worm castings, I don't know my quality ether.  I hope they are amazing, but with out testing who knows.  It made me wonder if I was cutting my nose off to spite my face.  8 months to get a 1/3 of a 50lb feed bag of worm castings doesn't go very far.  Even if it is superior castings, if there isn't enough, what is the point?
When I took the worm castings I filled the bin with the same stuff my first bin was full of, and that's 2+ months in.  I had separated 50+ worms in a bucket, to give a friend.  The friend changed her mind, so rather then put the worms back I started a second bin.  This bin has a bunch of shredded cardboard, and paper, with some compost.   I doubt at I will have usable castings in 2 months like I understand is possible, because there aren't a lot of worms in this bin, but I hope I will get the worm castings quicker then 8 months, and my worms will increase in number.  Maybe this will give me the best of both worlds.  The funny thing is the first bin may take longer, and hopefully produce better quality castings, the second bin is so much more work.  An entire evening and a large blister on my finger will attest for that. (I don't have a paper shredder)

On a side note I wonder how you know if you have a healthy worm population?  I didn't think I had that many worms after the winter, but when I decided to separate at least 50 for my friend, it wasn't hard at all. It only took a couple of scoops from the bin to net 50+ worms.  (I started out last May with 500 red wigglers from Uncle Jim's worm farm.)  Besides that the bin doesn't smell, the food you put in the bin disappears, and you see worm, how do you know if they are healthy?  I have more worms then I thought, but I don't have tons of worms like you see in the video's posted on the internet. Where they put there had in the bin and scoop out a handful of worms.  It's hard to tell.  You can't observe them the way you might other animals (for lack of a better word)  They don't like light, so disappear when you open the bin.  I understand they don't like to have you rooting around in there bedding, so I wonder how do we know.

When I separated the worms for my friend I put the worms in a bucket like thing I got from the dollar store the bottom was about 6" across and the top was about 12" across.  It was about 12" high.  I didn't put holes for air or drainage at the bottom.  I slid a box that kind of fit over the top so it would be dark, but still get air. The bedding was some 1/2 finished compost, and a few 2 year old wood chips.  I didn't worry about this crummy home because I thought the worms would only be in it a couple of days.  It ended up being 2 months before I realized the friend had changed her mind.  The funny thing is the worms in this crummy tub where huge compared to the worms in my bin, and if I'm not mistaken there were a lot of worm eggs.  So in this cramped little tub where the top was often dry, and the bottom seemed to wet, and the only air was the gaps where the box didn't touch the tub.  I fed them the same as my other bin, veggies and some times ground egg shell, and some times spent tea.  I did add cornmeal every time.  Uncle Jim said that is there favorite, but I also gave it to my worms in the original bin.  The worms in the tub seems quite a bit larger, and seemed to be producing more eggs.  I was actually worried about them dying in there, but seem to be better off then my "good bin"  It makes me wonder was it just the close proximity, or is something wrong with my bin.  It's very strange.  It is going to get way to hot for worms to be in that small container, but maybe in the fall I will try it again.  Maybe I have accidentally discovered a way to breed more worms.  You just never know.  Thanks.
 
pollinator
Posts: 701
Location: Sierra Nevada Foothills, Zone 7b
154
dog forest garden fish fungi trees hunting books food preservation building wood heat homestead
  • Likes 2
  • Mark post as helpful
  • send pies
    Number of slices to send:
    Optional 'thank-you' note:
  • Quote
  • Report post to moderator
I am very interested to read some replies here. My worm bin is also a year old and I am less than thrilled with it's performance.

An interesting thing happened that seems similar to your bucket, Jen. When I harvested castings before the winter I didn't really sift them so it was more of a 1/3 castings 1/3 compost 1/3 pre-compost kind of deal. Anyways the worms that snuck into the bin where I stored all this in my garage are noticably bigger, the population is denser and there are many babies and cocoons in there.
 
pollinator
Posts: 417
124
2
dog trees books bee medical herbs
  • Likes 4
  • Mark post as helpful
  • send pies
    Number of slices to send:
    Optional 'thank-you' note:
  • Quote
  • Report post to moderator
I got my worm "bin" going quite by accident. I ordered some worm castings from a farmer and it came with 2 live worms in it that were accidentally overlooked by him. At first I was rather annoyed because it was November and I had no place to put the poor worms. We live in zone 7 and do get below freezing temps as well as snow. I didn't want to just put them in the earth since red wigglers are not the same as earthworms and need a certain amount of warmth, don't really like to dig down deep, and have, all around, different lifestyles.
Anyway, I decided that the best I could do for them was to put them in my outside compost pile which is a 4 x 4 ft. wooden box with some slits in the sides. I apologized to them because it wasn't ideal, and since it was going to be winter soon. I put them both under the first few inches of compost and wished them well. I must admit that I then forgot about them because I assumed they were going to die in the winter cold. About 6 months later a plant was growing out of my compost pile that I wasn't able to identify, so I decided to dig a bit deeper to see what kind of pit or seed it came from. To my huge surprise I found 100s of worms! The compost pile was teeming with beautiful red wigglers, happy as could be. I was shocked, and also very excited. That was about 4 1/2 years ago and I now just keep them in mind and don't add things like lemon or orange peels, onions, garlic, etc. I started a 2nd compost pile that I can put into whatever I like, without needing to think about possibly hurting the worms. As a whole, I do nothing else for the worms except add egg shells and some ground oyster shells. I read that worms need those type of things to help them digest. Then all that calcium becomes a part of the castings which is wonderful for the plants. Win, win! I then add some castings to my bi-annual soil amendments and sell the rest of what I harvest at our local farmers market along with my other offerings. Oh, and I also add some cardboard pieces every couple of months in which they like to lay their eggs.
At this point, the worms are in huge numbers. If I dig down just 3 or 4 inches, I see hundreds and hundreds of worms all tangled together. I feed them large amounts of organic produce scraps that I get from our local health food store; the bin/compost pile hardly gets higher because the worms are breaking it all down so quickly, turning it all into beautiful black soil addition.
So I wouldn't overthink the worms too much. Put them outside in your compost pile and they know what to do. I have a tarp over half of mine so they can always go where it's wetter or drier, whatever they need. They are very happy little campers, and I am very happy to have them as part of our tiny homestead.
 
Jen Fulkerson
gardener
Posts: 1744
Location: N. California
811
2
hugelkultur kids cat dog fungi trees books chicken cooking medical herbs ungarbage
  • Likes 3
  • Mark post as helpful
  • send pies
    Number of slices to send:
    Optional 'thank-you' note:
  • Quote
  • Report post to moderator
Annie I guess nature versus nurture wins this round.  Way to go.  I love that you apologized to the worms, it made me smile.
 
gardener
Posts: 6814
Location: Arkansas - Zone 7B/8A stoney, sandy loam soil pH 6.5
1647
hugelkultur dog forest garden duck fish fungi hunting books chicken writing homestead
  • Likes 5
  • Mark post as helpful
  • send pies
    Number of slices to send:
    Optional 'thank-you' note:
  • Quote
  • Report post to moderator
Worms are good at moving to ideal conditions in the "wild". Problems come from our desire for their product causing us to create artificial living quarters and enviroment. With "worm farms" we must monitor moisture level, temperature and food supply. Records are needed to know how you are doing and success over the long term. Castings quality is mostly from a variety of food offerings instead of a limited diet.

Redhawk
(Bacteria are the real gold of the castings)
 
Posts: 37
5
  • Likes 4
  • Mark post as helpful
  • send pies
    Number of slices to send:
    Optional 'thank-you' note:
  • Quote
  • Report post to moderator
Hi everyone
I am trying out a purpose made hot compost bin at the moment. I use it primarily for kitchen waste including ground up eggshells, citrus, some cooked waste, plus shredded paper and woodchip to keep it drier. It ran at 20C all through the winter, and is now regularly reaching 35-40C. There is a lot of leachate which I drain off every few days, and I took out some compost from the base the other day to plant out my tomatoes. This bin is full of worms, so many they drain out in the leachate! I can swear that I havent knowingly added any worms so amazed at where they have come from. Possibly the wood chip which has been decomposing for about a year? The end product looks amazingly rich so I cut it with some mushroom compost and spent stuff from last years pots. If it is too rich will it be detrimental to the tomatoes? They are growing down into soil underneath, it was only like a  thin mulch around them.
Thanks
 
Jen Fulkerson
gardener
Posts: 1744
Location: N. California
811
2
hugelkultur kids cat dog fungi trees books chicken cooking medical herbs ungarbage
  • Likes 1
  • Mark post as helpful
  • send pies
    Number of slices to send:
    Optional 'thank-you' note:
  • Quote
  • Report post to moderator
Chris that is one of the reasons a lot of us are crazy for worm castings.  They wont burn your plants, your tomatoes will love it.
 
pollinator
Posts: 867
218
  • Likes 1
  • Mark post as helpful
  • send pies
    Number of slices to send:
    Optional 'thank-you' note:
  • Quote
  • Report post to moderator
I am another who got sick and tired of all the fussing and worrying about a worm bin just to have it deliver pretty 'meh' results at the end of the day. I had fully abandoned the keeping of worms until about a year ago a friend who was moving long distance gifted me his 'worm factory'. It's simply a large (24ish gallons?) heavy duty trash can with 1/8th in. holes drilled all over it. I removed most of the stuff that was in there when I acquired it and spread them around and then started refilling it with partially composted compost. Topped it up every now and again with yard waste and a little more compost until the bin was completely full. Now I am finally running up against a wall where all of my compost bins are full and I need to move some through the cycle and harvest out something usable as i put younger product into the stream and so I am going to empty this worm factory by dumping it all out and collecting the bottom 1/2-2/3 of what will hopefully be castings galore. They have been in there for about a year at this point and once you remove the little layer of mulch that i throw on there everytime I mow our little patch of grass it is absolutely full of owrms and eggs. I'll try to remember to get and post pictures and if it works it is my new favorite technique for keeping worms
 
Posts: 672
Location: Northern Maine, USA (zone 3b-4a)
81
  • Likes 1
  • Mark post as helpful
  • send pies
    Number of slices to send:
    Optional 'thank-you' note:
  • Quote
  • Report post to moderator
my worm bins are 5 yrs. old and thrive on neglect. i often forget to feed them and they survive on the thick layer of newspaper and cardboard i put on top and add to daily. i harvest 60lbs. of castings once a summer from 2 med. totes. started off with 50 worms in each tote now i have thousands and thats using some for fishing and giving some away. they have been problem free from the beginning for me. I've used chic bedding cardboard newspaper and coir for their start bedding and add more as they eat it down. don't let it get too wet or compacted before you add more . they like a light fluffy bedding that moderately moist but never wet.
 
gardener
Posts: 1774
Location: Los Angeles, CA
562
hugelkultur forest garden books urban chicken food preservation
  • Likes 4
  • Mark post as helpful
  • send pies
    Number of slices to send:
    Optional 'thank-you' note:
  • Quote
  • Report post to moderator
In terms of the original question, quality vs. quantity, I'm not sure what bad quality castings would be.  Once the worm has digested and pooped-out that organic matter, it's all good -- yes?  I suppose you could make the argument (and make it convincingly, in my opinion) that the quality of the food that your worms are getting would determine the quality of the castings, but how much better would perfectly fed worm casting be, over castings that came from sub-optimal feed stock?  10%?  Maybe 20%?  

But if I'm producing 200% (double) the amount of castings, even if they are 20% inferior to the highest possible quality castings I might make, I'd think "who cares -- I've got buckets MORE of the pretty good stuff, rather than half as much of the perfect stuff."  

Did that make sense?

The magic happens in the worm's digestive track.  Inside each worm is a microbial biome unique to anything else in nature.  Like finished compost, the primary value their castings is found in these microbes.  They'll take a leaf or some other biomass, eat it, and poop those micro-laden castings down into the soil profile, again and again and again.  In addition to the microbes, their castings are rich in enzymes and waxes.  So, again, even if their castings might be slightly better if I fed the worms a perfect diet, in the end, my primary concern is quantity -- more is better.

I really appreciate the wisdom that everyone is sharing in this thread.  Thank you all.
 
pollinator
Posts: 981
Location: New Brunswick, Canada
244
duck tiny house chicken composting toilet homestead
  • Likes 1
  • Mark post as helpful
  • send pies
    Number of slices to send:
    Optional 'thank-you' note:
  • Quote
  • Report post to moderator
I like to use cardboard that I've (unfortunately) ripped by hand into 2-3" squares.  I use that as a bedding base and add as many different things as I can.  I got 1000ish worms about 7 weeks ago and split them into two bins with cardboard, rabbit poop and straw, kitchen scraps, coffee grounds, peat, tea bags, lime, DE and eggshells.  I then started another bin with just a handfull of worms and put it outside.  One bin was initially covered (no air holes) and the humidity drove them up the walls.  I removed the cover and they were fine.

I pretty much neglect them now.  I add stuff to the top of the bins, mostly the fouled feed from my brooders.  Worms love that.  I've been through -20C temps since then and my cabin wasn't heated.  I've also hit 35C lately with my heat lamps and the heat wave.  They're all just chugging away fine.  They all survived the low temps, even the one outside.  Over the last 2 weeks one of the bins, the one with more worms, has really started to reduce the volume in the bin.  The other main one is starting to do that.  Like Steve, my worms do best when I don't interfere.  They do seem to like it moist to wet, though.

I think that the mixture I use for bedding and food gives me an excellent finished product.  I've had great results with a poorer diet, so I think this will be even better.  Maybe only 10 to 20% like Marco says, because I think it's all good too, but I have some high need plants and I'm looking for the best I can get.  I've given them a bin of chicken manure in coarse shavings and they churned it into great vermicompost.  Took a while, but I don't think what you use matters as much as just having them and using what you have.  

My biggest issue with worms is that I'm always deciding who to give the scraps to, the chickens or worms.
 
Jen Fulkerson
gardener
Posts: 1744
Location: N. California
811
2
hugelkultur kids cat dog fungi trees books chicken cooking medical herbs ungarbage
  • Likes 1
  • Mark post as helpful
  • send pies
    Number of slices to send:
    Optional 'thank-you' note:
  • Quote
  • Report post to moderator
I do notice a huge difference already.  The bin with the cardboard already has noticeable worm castings.  The process seems to be going much faster with the cardboard and paper, which makes sense, it's easier to brake down cardboard then wood. (my own kind of duh moment)  Any way I look forward to getting usable castings much sooner.  
On the other hand It seems like my wood chip bin is processing a little faster then last year.  I think I was keeping the bin to dry.  Maybe I misinterpreted it but I thought you wanted it so if you squeezed the bedding tight in your hand you would get a few drops of liquid.  I am finding at least it seems like my worms seem to be doing better with a wetter bedding.  Not soupy, but more wet then a wrong out sponge.   Like the rest of life it is a learning process.
 
pollinator
Posts: 990
270
5
tiny house food preservation cooking rocket stoves homestead
  • Likes 2
  • Mark post as helpful
  • send pies
    Number of slices to send:
    Optional 'thank-you' note:
  • Quote
  • Report post to moderator
RE: quality...

The quality of worm castings is determined by what you want to do with them.

For me, quality is determined by how well the target plants that i wish to feed do with the finished castings.

I am a firm believer in the principle,  garbage in, garbage out.     So I have continued to increased the quality of inputs as you have described, I got rid of GMO
food,   cardboard that have printing on them,  and I started growing my own plants to feed the worms.

My choice of plants is comfrey and bananas plant.      From my experience worms adore both comfrey and bananas and both of these plants work to
help bacteria to grow and keep both worms and plants happy.

Past this point I looking at leaves that make plants grow,    I am using leaves from my bamboo tree as plants grow like crazy from nothing but bamboo leaves that are composted and
fodder crops like Bolivian sunflower plant.

I have been considering alternating layers of dead bamboo leaves with fresh cut up fodder leaves.

The more I make the worms happy, the greater the production levels of plants in my experience.


Mart
 
Jen Fulkerson
gardener
Posts: 1744
Location: N. California
811
2
hugelkultur kids cat dog fungi trees books chicken cooking medical herbs ungarbage
  • Likes 2
  • Mark post as helpful
  • send pies
    Number of slices to send:
    Optional 'thank-you' note:
  • Quote
  • Report post to moderator
A need to harvest the worm castings in my cardboard bedding bin. It is ready.  The wood chips bin is very close.  I think my slow results last year where more to do with not keeping the bedding moist enough, rather than what the bedding was.  The worms are braking down the wood chips much faster this year.  It looks close enough I will probably harvest the castings in this bin soon.  I can always put the wood chips that are too big back with the worms.
My conclusion at least so far is to use what I have at hand for bedding, keep it nice and moist, feed them when needed, and let the worm do what they do.
 
Posts: 13
Location: Inner Sydney, Austalia
  • Likes 1
  • Mark post as helpful
  • send pies
    Number of slices to send:
    Optional 'thank-you' note:
  • Quote
  • Report post to moderator

Bryant RedHawk wrote:Worms are good at moving to ideal conditions in the "wild". Problems come from our desire for their product causing us to create artificial living quarters and enviroment. With "worm farms" we must monitor moisture level, temperature and food supply. Records are needed to know how you are doing and success over the long term. Castings quality is mostly from a variety of food offerings instead of a limited diet.

Redhawk
(Bacteria are the real gold of the castings)


I'd love to know whether I'm missing something in the following train of thought.

1. it's the rotting food we want contained, not necessarily the worms
2. worm tunnels (where they come to snack, but can come and go freely) work well, as long as there is a large surface area for feeding).
3. dumping a whole finished worm farm tray onto (shaded) ground would see worms burrow away from light, into the soil, leaving a pile of castings that could be (mostly) scooped up
4. providing fresh bedding and tasty worm food in the (otherwise empty) tray, adjacent to this pile, would tempt (most of) them back into the tray when conditions suited them (e.g. sun had set, and ground temperature had cooled).

This seems a low input way to "harvest" castings, break up the soil, and keep it all going.  If it works.  
I'd love thoughts on why it might not work, before I risk my worms.
 
Jen Fulkerson
gardener
Posts: 1744
Location: N. California
811
2
hugelkultur kids cat dog fungi trees books chicken cooking medical herbs ungarbage
  • Mark post as helpful
  • send pies
    Number of slices to send:
    Optional 'thank-you' note:
  • Quote
  • Report post to moderator
Mary it sounds interesting.  If you give it a try please share your process and results. Thanks 😊
 
Bryant RedHawk
gardener
Posts: 6814
Location: Arkansas - Zone 7B/8A stoney, sandy loam soil pH 6.5
1647
hugelkultur dog forest garden duck fish fungi hunting books chicken writing homestead
  • Likes 1
  • Mark post as helpful
  • send pies
    Number of slices to send:
    Optional 'thank-you' note:
  • Quote
  • Report post to moderator

Mary Gallos wrote:

Bryant RedHawk wrote:Worms are good at moving to ideal conditions in the "wild". Problems come from our desire for their product causing us to create artificial living quarters and enviroment. With "worm farms" we must monitor moisture level, temperature and food supply. Records are needed to know how you are doing and success over the long term. Castings quality is mostly from a variety of food offerings instead of a limited diet.

Redhawk
(Bacteria are the real gold of the castings)


I'd love to know whether I'm missing something in the following train of thought.

1. it's the rotting food we want contained, not necessarily the worms
2. worm tunnels (where they come to snack, but can come and go freely) work well, as long as there is a large surface area for feeding).
3. dumping a whole finished worm farm tray onto (shaded) ground would see worms burrow away from light, into the soil, leaving a pile of castings that could be (mostly) scooped up
4. providing fresh bedding and tasty worm food in the (otherwise empty) tray, adjacent to this pile, would tempt (most of) them back into the tray when conditions suited them (e.g. sun had set, and ground temperature had cooled).

This seems a low input way to "harvest" castings, break up the soil, and keep it all going.  If it works.  
I'd love thoughts on why it might not work, before I risk my worms.


Great idea Mary, my only concern would be where the castings might be left behind by those traveling worms. The "composting" worms are the red wiggler variety who live in the top 18" of soil since they actually eat food stuffs, un like the earth worms who prefer bacteria. So a trial is the only way to find out if your marvelous idea works as you think it would.    (I have moved to  "nature's" way leaving scraps on the surface but covered with leaves for my plentiful worm population.)

Redhawk
 
pollinator
Posts: 875
Location: Kansas
231
forest garden fungi bee medical herbs writing greening the desert
  • Likes 2
  • Mark post as helpful
  • send pies
    Number of slices to send:
    Optional 'thank-you' note:
  • Quote
  • Report post to moderator
I got my worms last summer. After more than 6 months of adding stuff to the bin the level hadn't increased appreciably but there were a lot more worms. I had them in my greenhouse so I just dug a couple of holes, filled them with scraps and dumped the bin, covering it with a piece of weed barrier. So far they seem to be happily eating. Hopefully they can increase the quality of the soil in there, over time, and I won't have to babysit them. My approach to most things can best be described as casual neglect.
 
Jen Fulkerson
gardener
Posts: 1744
Location: N. California
811
2
hugelkultur kids cat dog fungi trees books chicken cooking medical herbs ungarbage
  • Likes 2
  • Mark post as helpful
  • send pies
    Number of slices to send:
    Optional 'thank-you' note:
  • Quote
  • Report post to moderator
Sometime during this journey I bought a paper shredder.  I didn't want to spend to much, but got the one that would shred the most paper that I felt I could afford. It's been quite a while ago, so I don't remember, I think it was a 15 sheet shredder.  My son's order to much from Amazon, and when COVID hit, I too ordered a bunch.  The shredder takes care of the boxes (except the big ones I use to suppress weeds). It makes it so easy to use for the worms. I soak the shredded cardboard in water for a while. I fill up the bin, adding some soil I dig up in the chicken coop a small amount of wood chips, mostly to help with compaction.  Add food scraps when I think about it, which isn't very often. Top it off with a sheet of Coco coir and magic happens.  
I'm totally convinced this is way better than the wood chips.  
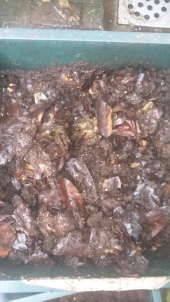
I haven't checked on my bin in a while, and it's been very hot.  I had a feeling of dread when I notice the bin isn't in the shade at that time ( I thought it was shaded all day). I open the lid pull back the coco coir and the top layer of cardboard is dry, not good. Pull it back and under about 1" of cardboard is beautiful worm castings. I harvested worm castings from this bin only a month ago. I think I need to harvest again. I have only added food scraps a couple of times.  But not only have the worms processed the cardboard, there's lots of healthy worms.  
I wanted to post this because I'm so happy and amazed with the results I'm getting.  I'm so happy I did because I reread the post. I love Mary's idea, and I'm going to build a box the same size as my bin with hardwire cloth on the bottom. I will put new shredded cardboard + in the bin with a bunch of food scraps. I will put the box on top and dump the contents into the box.  If Mary's idea works ( I'm pretty sure it will) in a matter of days the worms should make there way into the new bed leaving behind the worm castings with no time or work on my part.  Making this process even easier.  Thanks Mary.
IMG20220827103350.jpg
[Thumbnail for IMG20220827103350.jpg]
 
Hang a left on main. Then read this tiny ad:
Freaky Cheap Heat - 2 hour movie - HD streaming
https://permies.com/wiki/238453/Freaky-Cheap-Heat-hour-movie
reply
    Bookmark Topic Watch Topic
  • New Topic