gift
The Humble Soapnut - A Guide to the Laundry Detergent that Grows on Trees ebook by Kathryn Ossing
will be released to subscribers in: soon!
  • Post Reply Bookmark Topic Watch Topic
  • New Topic
permaculture forums growies critters building homesteading energy monies kitchen purity ungarbage community wilderness fiber arts art permaculture artisans regional education skip experiences global resources cider press projects digital market permies.com pie forums private forums all forums
this forum made possible by our volunteer staff, including ...
master stewards:
  • Nancy Reading
  • Carla Burke
  • r ranson
  • John F Dean
  • paul wheaton
  • Pearl Sutton
stewards:
  • Jay Angler
  • Liv Smith
  • Leigh Tate
master gardeners:
  • Christopher Weeks
  • Timothy Norton
gardeners:
  • thomas rubino
  • Jeremy VanGelder
  • Maieshe Ljin

Yoghurt from raw milk?

 
gardener
Posts: 653
Location: Poland
332
forest garden tiny house books cooking fiber arts ungarbage
  • Likes 3
  • Mark post as helpful
  • send pies
    Number of slices to send:
    Optional 'thank-you' note:
  • Quote
  • Report post to moderator
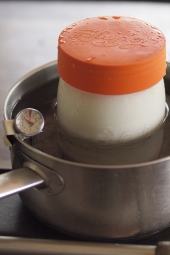
So I got this yoghurt maker as a Christmas gift... I haven't opened it, because I thought it will only work with raw milk. I finally got the raw milk, opened the yoghurt maker, and the instruction manual says, that if I'm using raw milk, I should cook it first... to get rid of "bad bacteria". Then I can add "good bacteria" from another yoghurt, or a starter.
I'm thinking to try with the raw milk without cooking it...
Do I always need to add bacteria from another yoghurt?
Also, the instruction says that I can't keep "reusing" the bacteria from the homemade yoghurts, because they will become weak over time. Why?
And can I use the yoghurt maker for anything else?
yoghurtmaker.jpg
[Thumbnail for yoghurtmaker.jpg]
 
pollinator
Posts: 1234
Location: Chicago
422
dog forest garden fish foraging urban cooking food preservation bike
  • Likes 6
  • Mark post as helpful
  • send pies
    Number of slices to send:
    Optional 'thank-you' note:
  • Quote
  • Report post to moderator
Yogurt is usually made with cooked milk.  Only a few types of bacteria make yogurt, and they like very warm temperatures to start. Also, you kill off less desirable bacteria so the yogurt bacteria predominate.

You can reuse yogurt as a starter, but like they say, it gets lower quality over time.
 
gardener & author
Posts: 3089
Location: Tasmania
1845
7
homeschooling goat forest garden fungi foraging trees cooking food preservation pig wood heat homestead
  • Likes 4
  • Mark post as helpful
  • send pies
    Number of slices to send:
    Optional 'thank-you' note:
  • Quote
  • Report post to moderator
For reusing yoghurt as a starter, often it is stronger when the yoghurt has been freshly made, and goes weaker as the yoghurt sits, so there is more "it depends" about the strength of the culture.

Another reason why this might be said is for safety reasons, in case someone reuses yoghurt that is contaminated with some unwanted bacteria.

I kept viili going for a long time by reusing it, I wonder if other heirloom strains of yoghurt are also more resilient than the commercial stains and can be kept in the same way. I've found heirloom starters on eBay, and Cultures For Health also sell them.

With raw milk, there is more variety in the results of your yoghurt, sometimes it is great, other times it can get off-flavours or an unwanted texture. Yoghurt from heated milk also tends to get thicker than raw milk yoghurt.
 
Flora Eerschay
gardener
Posts: 653
Location: Poland
332
forest garden tiny house books cooking fiber arts ungarbage
  • Likes 2
  • Mark post as helpful
  • send pies
    Number of slices to send:
    Optional 'thank-you' note:
  • Quote
  • Report post to moderator
Thanks! I thought that yoghurt can only be made from raw milk, but I guess it was some other milk product...
 
Posts: 18
3
  • Likes 2
  • Mark post as helpful
  • send pies
    Number of slices to send:
    Optional 'thank-you' note:
  • Quote
  • Report post to moderator
I have never tried a yogurt maker but I have tried many many ways of making yogurt. And I have made many many gallons of yogurt. I have used raw milk but it is expensive where I am. But I do use full fat milk always.
You heat the milk to 180 degrees supposedly because it does something to the proteins ( called caseins) allowing them to bind with....  blah, blah blah. And It kills any bad bacteria that may be present in the milk.
The trick is to cool the milk down BEFORE ( very important) adding your culture, to 110 degrees. Once you add the culture it is important to keep the milk in the 110ish degree range. I start my yogurt with 1/4 cup or so of store bought PLAIN yogurt. You can even buy the small cups and just scoop the plain yogurt off the top without getting any of the fruit underneath in it. But you have to look on the container and it has to say " active live culture". Once you add the culture it's a waiting game. The longer you wait the tangier it is. I find eight hours is perfect for me but it will depend on the culturing temperature.
I save the last 1/4 cup to start my next batch. Trust me, I'm no expert so I have no idea if my cultures get weaker after several batches but I figure that if my saved yogurt turns my milk thick like yogurt that there must still be some good bacteria in it. I don't know. Maybe someone smarter than me can answer that one.
At the end of that time you will have a very thin yogurt as it will still have all of the whey in it. This whey can be strained out to your desired yogurt thickness. I use to use a tea towel that I put in a colander over a bowl. But that is a messy pain in the rump. I now use a euro cuisine yogurt strainer I got off Amazon. If you are a home yogurt maker you will love that strainer.
 Anyways, After all my years of making yogurt the hands down, easiest, largest quantity at one time yogurt maker is my Ninja Foodi. It has literally changed my yogurt making life. I have the push button model ( not the one with the dial on front) and if I push the "slow cooker" button twice it says "YGRT". It tells you everything you have to do. Boil, Cool, add and stir etc etc. It maintains the perfect temp for the time you set it for. Like I said, 8 hrs is perfect for me. Boil with the lid off. Use the pressure lid with the vent in the "open" position for the long culturing process.
 No matter how you make it I recommend you get the Euro strainer and strain the yogurt overnight in your fridge. At that point you will have very thick Greek type yogurt. BUT, you have all of that lovely whey that has dripped to the bottom bowl. Now you can stir that back in , in small amounts, till you get it just the way you like it. And don't throw that whey away. It's good for you. I drink it sometimes. Tangy and refreshing. I feed it (small amt) to houseplants. Put it in your dogs water. There are lots of things you can do with it. Just look online. If I don't use it I dump it on my compost pile.
 When its time to eat it I add my homemade granola, maybe some fruit if I have it, honey or REAL maple syrup and a little splash of vanilla flavoring ( not extract). It is sooooo good.
 Sometimes I find that mine has little tiny lumps of milk protein (?) that for lack of a better description I call sandy. But it is still amazing. I'm experimenting but I'm thinking that those "sandy" bits are what has stuck to the bottom of the pot and I was scraping them off and back into the milk when I was stirring the culture in. My last batch was very creamy.
 I know this may sound complicated but I can assure you it is not.
As a recap:
1- heat milk to 180
2-cool to 110
3- add culture
4- maintain 110 (ish)  degrees for your desired culturing time. Remember, the longer you go the tangier it is.
5-strain in fridge overnight
6-Add whey back in to your desired thickness
7-enjoy
8-Remember to save the last 1/4 cup, if you have the willpower, to start your next batch.
Good luck. you won't be sorry you decided to make your own homemade yogurt that YOU control what goes in it !!
 
pollinator
Posts: 241
65
  • Mark post as helpful
  • send pies
    Number of slices to send:
    Optional 'thank-you' note:
  • Quote
  • Report post to moderator
Similar to above
We use milk from the store.  Heat slowly to 200.F
Pour into large bowl
Cool bowl in the sink with cool water to 110.F
Add 2-3 tablespoons of greek yogurt with live cultures ( only on the first batch).
Line a cooler with blankets and towels and place bowl in there for 8 hrs.. In winter add a gallon jug of hot water to cooler to keep it warm.
Now it is usually thick, sometimes needs another hour or two. Makes around 3 1/2 qts.
Now you can sweeten it with honey or throw some berries in there etc..
Save some for the next batch.
The longer it's in the fridge, the thicker it will get.
 Now you can strain out the whey, good for making bread etc
Pour yogurt into cheese cloth and tie off.  Suspend it over a bowl in fridge keeping it above whey. After 24 hrs or so open cloth and lightly salt it for very good cream cheese after curing a few days in the fridge.  Great for cheesecakes and stuff.
 If I was using fresh milk I would probably churn out the butter fat and use it as well.  A gallon of milk makes a lot of good stuff.

 
Posts: 1
  • Mark post as helpful
  • send pies
    Number of slices to send:
    Optional 'thank-you' note:
  • Quote
  • Report post to moderator
Hi Kate,
I have the backyard dairy goat book and just wanted to confirm something with you.  In the yoghurt section where you are talking about making viili, you are using raw milk and not pasteurizing and using the non pasteurized product to make the next batch.

In everything I read online, it seems like it is recommended to pasteurize to make the starter.  Are you successful not ever pasteurizing and just propagating forward from the previous batch?

Anyone else have any experience/opinion?

Thanks,
Maria  
 
steward
Posts: 1897
Location: Coastal Salish Sea area, British Columbia
1057
2
books chicken food preservation pig bike solar wood heat rocket stoves homestead ungarbage
  • Likes 4
  • Mark post as helpful
  • send pies
    Number of slices to send:
    Optional 'thank-you' note:
  • Quote
  • Report post to moderator

Maria Loper wrote:Hi Kate,
I have the backyard dairy goat book and just wanted to confirm something with you.  In the yoghurt section where you are talking about making viili, you are using raw milk and not pasteurizing and using the non pasteurized product to make the next batch.

In everything I read online, it seems like it is recommended to pasteurize to make the starter.  Are you successful not ever pasteurizing and just propagating forward from the previous batch?

Anyone else have any experience/opinion?

Thanks,
Maria  


I have never pasturized my goat milk. I make whole buttermilk with it. i put about 1/2 cup of previous buttermilk into 1 quart of milk. keep it at room temperature for 2 days in the winter and 1 day in the summer. than in the fridge for however long until i drink it. sometimes it is 10 days.

I have kept a buttermilk culture going for 2 years! same strain from a bottle of organic buttermilk from the store 2 years prior.
 
pollinator
Posts: 369
Location: Appalachian Mountains
177
  • Likes 4
  • Mark post as helpful
  • send pies
    Number of slices to send:
    Optional 'thank-you' note:
  • Quote
  • Report post to moderator

Maria Loper wrote:Hi Kate,
I have the backyard dairy goat book and just wanted to confirm something with you.  In the yoghurt section where you are talking about making viili, you are using raw milk and not pasteurizing and using the non pasteurized product to make the next batch.

In everything I read online, it seems like it is recommended to pasteurize to make the starter.  Are you successful not ever pasteurizing and just propagating forward from the previous batch?

Anyone else have any experience/opinion?

Thanks,
Maria  


Maria,
  I once accidentally left raw goat milk sitting in the barn cabinet when I was milking.  That was in South Georgia in 100 degree  had made perfect yogurt.  Raw milk from healthy animals has natural probiotics in it, and is anti-bacterial for the harmful stuff.  
 
gardener
Posts: 2191
Location: Central Maine (Zone 5a)
897
homeschooling kids trees chicken food preservation building woodworking homestead
  • Mark post as helpful
  • send pies
    Number of slices to send:
    Optional 'thank-you' note:
  • Quote
  • Report post to moderator
I remember seeing the Rhodes family making yogurt with their dehydrator, but I can't find the video now. Anyone remember seeing that?
 
Posts: 58
Location: Zone 7b Virginia River Valley
16
2
forest garden urban fiber arts
  • Mark post as helpful
  • send pies
    Number of slices to send:
    Optional 'thank-you' note:
  • Quote
  • Report post to moderator

Chuck Shaw wrote:I have never tried a yogurt maker but I have tried many many ways of making yogurt. And I have made many many gallons of yogurt. I have used raw milk but it is expensive where I am. But I do use full fat milk always.
You heat the milk to 180 degrees supposedly because it does something to the proteins ( called caseins) allowing them to bind with....  blah, blah blah. And It kills any bad bacteria that may be present in the milk.
The trick is to cool the milk down BEFORE ( very important) adding your culture, to 110 degrees. Once you add the culture it is important to keep the milk in the 110ish degree range. I start my yogurt with 1/4 cup or so of store bought PLAIN yogurt. You can even buy the small cups and just scoop the plain yogurt off the top without getting any of the fruit underneath in it. But you have to look on the container and it has to say " active live culture". Once you add the culture it's a waiting game. The longer you wait the tangier it is. I find eight hours is perfect for me but it will depend on the culturing temperature.
I save the last 1/4 cup to start my next batch. Trust me, I'm no expert so I have no idea if my cultures get weaker after several batches but I figure that if my saved yogurt turns my milk thick like yogurt that there must still be some good bacteria in it. I don't know. Maybe someone smarter than me can answer that one.
At the end of that time you will have a very thin yogurt as it will still have all of the whey in it. This whey can be strained out to your desired yogurt thickness. I use to use a tea towel that I put in a colander over a bowl. But that is a messy pain in the rump. I now use a euro cuisine yogurt strainer I got off Amazon. If you are a home yogurt maker you will love that strainer.
 Anyways, After all my years of making yogurt the hands down, easiest, largest quantity at one time yogurt maker is my Ninja Foodi. It has literally changed my yogurt making life. I have the push button model ( not the one with the dial on front) and if I push the "slow cooker" button twice it says "YGRT". It tells you everything you have to do. Boil, Cool, add and stir etc etc. It maintains the perfect temp for the time you set it for. Like I said, 8 hrs is perfect for me. Boil with the lid off. Use the pressure lid with the vent in the "open" position for the long culturing process.
 No matter how you make it I recommend you get the Euro strainer and strain the yogurt overnight in your fridge. At that point you will have very thick Greek type yogurt. BUT, you have all of that lovely whey that has dripped to the bottom bowl. Now you can stir that back in , in small amounts, till you get it just the way you like it. And don't throw that whey away. It's good for you. I drink it sometimes. Tangy and refreshing. I feed it (small amt) to houseplants. Put it in your dogs water. There are lots of things you can do with it. Just look online. If I don't use it I dump it on my compost pile.
 When its time to eat it I add my homemade granola, maybe some fruit if I have it, honey or REAL maple syrup and a little splash of vanilla flavoring ( not extract). It is sooooo good.
 Sometimes I find that mine has little tiny lumps of milk protein (?) that for lack of a better description I call sandy. But it is still amazing. I'm experimenting but I'm thinking that those "sandy" bits are what has stuck to the bottom of the pot and I was scraping them off and back into the milk when I was stirring the culture in. My last batch was very creamy.
 I know this may sound complicated but I can assure you it is not.
As a recap:
1- heat milk to 180
2-cool to 110
3- add culture
4- maintain 110 (ish)  degrees for your desired culturing time. Remember, the longer you go the tangier it is.
5-strain in fridge overnight
6-Add whey back in to your desired thickness
7-enjoy
8-Remember to save the last 1/4 cup, if you have the willpower, to start your next batch.
Good luck. you won't be sorry you decided to make your own homemade yogurt that YOU control what goes in it !!


I make my own yogurt all the time and I am definitely going to look into the Eurocuisine strainer! That's the worst part of the process, the mess of trying to strain the yogurt. I like mine very thick, almost labneh.

The best thing I ever bought for yogurt was an InstantPot with a yogurt setting. Makes things so much easier! But I needed to purchase several silicone rings because if I use the InstantPot to make soup, it leaves a smell that can infect the yogurt.

I also suggest saving some of the whey to mix in along with the yogurt when you make your next batch as some of the good bacteria is still in it!
 
Oh, sure, you could do that. Or you could eat some pie. While reading this tiny ad:
12 DVDs bundle
https://permies.com/wiki/269050/DVDs-bundle
reply
    Bookmark Topic Watch Topic
  • New Topic