• Post Reply Bookmark Topic Watch Topic
  • New Topic
permaculture forums growies critters building homesteading energy monies kitchen purity ungarbage community wilderness fiber arts art permaculture artisans regional education skip experiences global resources cider press projects digital market permies.com pie forums private forums all forums
this forum made possible by our volunteer staff, including ...
master stewards:
  • Nancy Reading
  • Carla Burke
  • r ranson
  • John F Dean
  • paul wheaton
  • Pearl Sutton
stewards:
  • Jay Angler
  • Liv Smith
  • Leigh Tate
master gardeners:
  • Christopher Weeks
  • Timothy Norton
gardeners:
  • thomas rubino
  • Jeremy VanGelder
  • Maieshe Ljin

Emergency quick and small batchbox for the 400 sq ft wofati (0.7)

 
Matt Walker
pollinator
Posts: 324
Location: North Olympic Peninsula
92
  • Mark post as helpful
  • send pies
    Number of slices to send:
    Optional 'thank-you' note:
  • Quote
  • Report post to moderator
Okay guys, here's my opinions on the whole thing, hopefully there will be something in here that will help you sort this out......

Remember please, opinions coming:

So, a good system is one where we keep most of the heat in the space. When we do that, we are pulling out a lot of heat from the exhaust, heat that would, in a normal wood stove, be used to drive the draft. Rocket Mass Heaters are typically running right on the ragged edge of what works. I like to say, when folks build a new one and it's wet and cold and being difficult, that a system that runs well when it's cold will waste a lot of heat when it's warm, and a system that is keeping a lot of heat in the space and is very efficient will be a bear to start when cold. So, a good system usually needs a good hand holding to get going, but once it's warm and the mass is heated up, it can keep itself primed and running well. See Erica's post about RMH in Texas for more thoughts on this.

So, to simplify, if you guys are going to be starting from essentially cold every time, you will want to optimize the stove for that sort of use. A bypass can be used for this, although it's not ideal in Paul's opinion from what I remember, but I think it's an acceptable solution. Ideally, to my mind, you would have a mass that is isolated from major cold sinks, and you'd get it warm and keep it warm all winter. You might fight with it the first lighting of the year, when outside temps aren't that cold and you don't have a large delta T from inside to outside, but once warm it should just get easier and easier to start. Take my mass as an example; when the stove has been out for 12 hours or more, I still have 100°F in the stack at the end of the system. If it's 40°F outside, I have an acceptable Delta T to help drive the system. If my mass were still only 40° or 50°F, I'd be struggling. It is compounded by Peter's excellent dew point/chimney stall explanation. Right now, I imagine you have high humidity outdoors compared to the times it was running well. Add to that you are away from the heater for 12 hours while the ground cools the buried flue, and you have problems.

Mike, the exposed flue run to the chimney made things better, but believe it or not exposed flue sheds heat fast enough to still have your exhaust too cool. If you do that again, wrap that thing if you are having problems, to insulate and keep some heat for draft at the end.

My recommendation would be to lift that buried run and build a regular mass to heat, that is insulated from the floor. Once it was warm, it should coast for 24 hours no problem if need be, and still be easy to start. You can probably do some other stuff to make it work, but I think you'll find ease of startup and reliability in all conditions are important features in something you are relying on to keep you warm. Worth a few trade offs, in my opinion.

Good luck friends!
 
Satamax Antone
gardener
Posts: 3471
Location: Southern alps, on the French side of the french /italian border 5000ft elevation
194
  • Mark post as helpful
  • send pies
    Number of slices to send:
    Optional 'thank-you' note:
  • Quote
  • Report post to moderator
So my dear Mike,

Where is this cleanout?

https://www.youtube.com/watch?v=zgs-rHZSUDs&feature=player_embedded#t=122

At the bottom of the vertical flue seen bellow?


If yes, you have an easy way of priming. Open that cleanout cap, start a little newspaper fire in the horizontal pipe following it. That should warm your vertical flue enough.

Mind you, i would insulate that vertical pipe, either with cob or batt insulation, i think you're on the verge of having too long a system, and that exposed, radiating pipe isn't helping. Plus, i'm affraid you might not have enough insulation on that front wall. So it's cooling even more. I vaguely followed that wofati building, and iirc, there's no insulation in the front at all. The building, not being much hotter than the outsides, it doesn't produce much stack effect, so the colder it is inside, the harder it is to get started. Even more if there's a drafty front wall. The temperature differential having more than one way to excape, that robs draft from the chimney stack.

If i may say. Try to find yourself a bunch of small strawbales, and stack thoses on the front, using some planks to keep the openings clear. And you'll remove theses in spring.

Hth.
 
paul wheaton
author and steward
Posts: 52415
Location: missoula, montana (zone 4)
hugelkultur trees chicken wofati bee woodworking
  • Likes 1
  • Mark post as helpful
  • send pies
    Number of slices to send:
    Optional 'thank-you' note:
  • Quote
  • Report post to moderator
I forked over my fancy pants laser thermometer and suggested they select five or six points and measure the heat from those points every minute during a burn. The moment it starts to smoke back, activate the shop vac at the outside.


I think that once the inside of the wofati is raised to 20 degrees warmer than outside, the whole system will work fine.

If this is true, then much like Matt's suggestion - I think a bypass is in order. But rather than an above-ground bypass, I think it would be better to have something is insulated and underground. So a fire will run for, say, 10 or 15 minutes in bypass mode and heat the room and heat the vertical exhaust. Once the exhaust is primed, the bypass can be closed and the mass can start to be heated. The room will continue to heat, which will continue to warm the vertical exhaust to temperatures warmer than the outdoors.


Matt Walker
pollinator
Posts: 324
Location: North Olympic Peninsula
92
  • Mark post as helpful
  • send pies
    Number of slices to send:
    Optional 'thank-you' note:
  • Quote
  • Report post to moderator
I agree Paul, I know you have a good handle on the factors involved here. Peter's dew point/chimney stall is the over riding issue here. The how/why it happens is a function of a lot of factors, and the how to resolve it also can involve a lot of different approaches. Overall though, once you guys get a good handle on when/why it's happening, you'll find ways to solve it.
 
Peter van den Berg
gardener
Posts: 1054
Location: +52° 1' 47.40", +4° 22' 57.80"
447
woodworking rocket stoves wood heat
  • Likes 1
  • Mark post as helpful
  • send pies
    Number of slices to send:
    Optional 'thank-you' note:
  • Quote
  • Report post to moderator
Gents,
You are experiencing either a cold plug or a newspaper plug. Burning lots of newspaper in the last cleanout is asking for a wad of blackened paper in one of the bends collecting lots of water. Sorry Max! And yes, the dew point of the exhaust gases is inside the vertical chimney, effectively causing a cold plug. That's the reason why the heater appears to start at first and smokes back dramatically in 10 to 30 minutes, depending on the delta T, among others.

Before drastic measures are taken: realise yourselves that ground run isn't that different from a long wet cob bench. Once all that is dry, which could take weeks by the way, the system would run without smoking back unless the heat sink as such is too large. Using a shop vac to get the draft going won't solve the moisture problem, by the way. As soon the shop vac stops I expect smokeback commence within about 15 minutes. Unless the bare vertical pipe is getting warm of course.

In short: check the internal and external chimney parts for blockage, heat up that bare vertical stack with a soldering or acetylene torch (carefully of course), when some draft can be felt inside the port in the firebox start a small fire, keep heating the stack for 20 minutes at least until the gases coming out aren't lazy anymore. Keep all the cleanouts closed, otherwise the draft will shortcut for quite a bit. Probably you have to do this every time the heater is started until there's some warmth there the next day.

This is more or less the method I used when starting up the heater in the auditorium for the first time. The outside air happened to be as hot as inside, no draft at all in the whole system. So we'ĺl carefully heated up several feet of the inside stack with a soldering flame until draft could be felt inside the port. There has to be some draft beforehand, otherwise the batch box will fail miserably.
 
Satamax Antone
gardener
Posts: 3471
Location: Southern alps, on the French side of the french /italian border 5000ft elevation
194
  • Mark post as helpful
  • send pies
    Number of slices to send:
    Optional 'thank-you' note:
  • Quote
  • Report post to moderator

Peter van den Berg wrote:Gents,
You are experiencing either a cold plug or a newspaper plug. Burning lots of newspaper in the last cleanout is asking for a wad of blackened paper in one of the bends collecting lots of water. Sorry Max!


Well, you know my usual priming sequence! The old one! I didn't want to advertise this here! There's kids watching And that wouldn't plug the last vertical flue Tho, i would still insulate it!

 
Peter van den Berg
gardener
Posts: 1054
Location: +52° 1' 47.40", +4° 22' 57.80"
447
woodworking rocket stoves wood heat
  • Mark post as helpful
  • send pies
    Number of slices to send:
    Optional 'thank-you' note:
  • Quote
  • Report post to moderator

Satamax Antone wrote:Tho, i would still insulate it!


Me too, me too mon camerade , but preferably not before that big lump of cob is dry.
Now I'm off to sleep, joining the fray again in the morning. Wish I was there!
 
mike jastram
Posts: 89
15
  • Mark post as helpful
  • send pies
    Number of slices to send:
    Optional 'thank-you' note:
  • Quote
  • Report post to moderator
Some data. We tried a burn while heating the vertical flue to aid flow.

Began with 10 min preheat of the pipe while burning paper and cardboard, weed burner on the pipe.

At 18 min on the chart, 3/4 load was added

20 min, smoke began coming out door, barrel, and manifold

26 min, we opened the door and got a bad flameout into the room

28 min, began heating vertical with weedburner again until smoke leakage stopped

41 min, smoke outside is still heavy and brown

45 min, added full load (2" from top and door)

I'd like to call your attention in particular to the extreme differential in the 24" between manifold and floor entry. Tim and i think the low flue temperature there is significant.

Sorry for the poor quality photo.
image.jpg
[Thumbnail for image.jpg]
 
Satamax Antone
gardener
Posts: 3471
Location: Southern alps, on the French side of the french /italian border 5000ft elevation
194
  • Mark post as helpful
  • send pies
    Number of slices to send:
    Optional 'thank-you' note:
  • Quote
  • Report post to moderator
There's definately something wrong. Your barrel temps aren't that high anyway.

But your manifold T and pipe into the floor measurements seem way appart!

I get it, i think! It's acting as a bell! Stratifying gases in the T and down pipe, may be even in the barrel. Imagine something like a siphon. You might have other bottlenecks elswhere, as in the vertical pipe before going through the wall not being insulated.

You're trying to push 25'~26' of horizontal plus ten elbows, let say, they don't account the same, as some are on the vertical, some are 45 etc.

Let's not say 5' per elbow, but just 3'. that's another thirty feet.

You're trying to push 56ft with a six incher batch. with a heatsink of several tons of damp'ish mud, a siphon in between barrel and the rest.

My bad, i didn't look more closely at the sketchup before!


As i've been there and done that before! I know about cold plugs, trying to heat damp loose earth etc! I'm affraid major rework is in order for your safety. Imho.

Get that siphon out! drill a hole, two inches larger than your pipe into the logs, (myself, i would do it with a chainsaw) at the right height, and dig that straight run which is behind back out. connect barrel and that pipe straight, with the T and cap for cleanout, but not facing up!

I do not guarantee that will work. You might have to also insulate that vertical pipe, and may be the straight run between barrel and log wall. I know you guys are not keen on batt insulation, but that is the solution for the vertical. But as long as your "pipe out floor" isn't at 140F°, this rocket won't work!

I did the calc, prety much as Peter does, using two thirds of the circumference of the pipe, if we account for the whole corrected lengh, that's an equivalent of 5.4m², plus 1.8 for the barrel, that's 7.2m² too much for a six incher. Even more for a sub optimal situation.

Get that syphon out! Or do as i have done on my green machine, put an electric fan at the end of the chimney, for startups. I run it usualy 10 to 20 minutes, till the last elbow before my wall restriction is at about 40C°

I know that bad news. But shit happens!
 
Peter van den Berg
gardener
Posts: 1054
Location: +52° 1' 47.40", +4° 22' 57.80"
447
woodworking rocket stoves wood heat
  • Mark post as helpful
  • send pies
    Number of slices to send:
    Optional 'thank-you' note:
  • Quote
  • Report post to moderator

mike jastram wrote:26 min, we opened the door and got a bad flameout into the room.


Oww! That's very dangerous, the whole of firebox, riser and barrel are filled with flammable gases at that moment. Such a flameout could destroy the heater and break the windows of the wofati when the doors are closed.

I'd think Satamax is right, that boomerang and parascope setup is the largest bottleneck in the whole contraption. The idea that the barrel is stratifying when the gas velocity is that low is probably true. In that case the batch box isn't capable of pushing the gases down when the draft is actually non-existant.
 
mike jastram
Posts: 89
15
  • Mark post as helpful
  • send pies
    Number of slices to send:
    Optional 'thank-you' note:
  • Quote
  • Report post to moderator
Peter, max, matt,

I finally had a few minutes to catch up on your last few replies:

Yes, we did try priming the vertical interior stack w paper and yes, it did result in a wet wad of charred paper. Also it doesn't help with our failure mode now because nothing can burn in the oxygen poor flue gas.

Peter, you correctly predicted that smokeback resumes about 15min after we turn off puff the magic vacuum. However, I've found in the last two days that I can cheat with the vacuum for 2min whenever it smokes, and I'll need to do that maybe three times before the system is warm enough to run the rest of the day.

I'm currently trying my best to dry the mass by keeping heat constantly. I don't feel very optimistic about this since the flue gas seems to enter the mass at about 60deg f.

We have orders from the big stink to reinsulate the walls so we're working on that next. The theory is that it will address the competing thermosiphon through the leaky walls.
 
Satamax Antone
gardener
Posts: 3471
Location: Southern alps, on the French side of the french /italian border 5000ft elevation
194
  • Mark post as helpful
  • send pies
    Number of slices to send:
    Optional 'thank-you' note:
  • Quote
  • Report post to moderator
Mike, on my green machine in my basement workshop, (old euro mews, vaulted, with 3ft thick walls, and underground, way less than optimal flue)

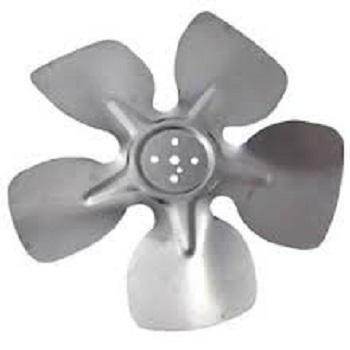
I ended using something like this,


From papst, with an IP66 motor, about 60 ish watts. Gathered from a fridge.

20 minutes of sucking with the fan, (it's at the very end of the chimney)

And the thing doesn't stall anymore!

Then i stop the fan, when the last insude elbow is barely touchable.
 
Peter van den Berg
gardener
Posts: 1054
Location: +52° 1' 47.40", +4° 22' 57.80"
447
woodworking rocket stoves wood heat
  • Mark post as helpful
  • send pies
    Number of slices to send:
    Optional 'thank-you' note:
  • Quote
  • Report post to moderator

mike jastram wrote:I'm currently trying my best to dry the mass by keeping heat constantly. I don't feel very optimistic about this since the flue gas seems to enter the mass at about 60deg f.


Mike,
This is not good, the batch box is still barely able to push the gases down the periscope and through the boomerang. However, the temperature of the vertical stack is much more interesting, I quess it's about the same as outside?
When it is, it's a small miracle that it runs at all.
 
mike jastram
Posts: 89
15
  • Mark post as helpful
  • send pies
    Number of slices to send:
    Optional 'thank-you' note:
  • Quote
  • Report post to moderator
Max, that's about what I'm figuring I'm going to do to make this thing liveable. Unfortunately I am only paul's tenant so he'll have to approve it but I think it's a relatively sensible way to make the system liveable until and if it starts running better.

Peter, I agree. I believe the vertical stack was hovering around 65 f or higher, compared to 55 f ambient indoors. Unfortunately I wasn't paying attention while we burned all day yesterday what the temps were. Oddly we don't usually get smokeback failure even when the room warms.

Thanks again for the help. We're going to be away from the system for the next two weeks so I'll update upon our return.
 
Satamax Antone
gardener
Posts: 3471
Location: Southern alps, on the French side of the french /italian border 5000ft elevation
194
  • Mark post as helpful
  • send pies
    Number of slices to send:
    Optional 'thank-you' note:
  • Quote
  • Report post to moderator

mike jastram wrote:Max, that's about what I'm figuring I'm going to do to make this thing liveable. Unfortunately I am only paul's tenant so he'll have to approve it but I think it's a relatively sensible way to make the system liveable until and if it starts running better.

Peter, I agree. I believe the vertical stack was hovering around 65 f or higher, compared to 55 f ambient indoors. Unfortunately I wasn't paying attention while we burned all day yesterday what the temps were. Oddly we don't usually get smokeback failure even when the room warms.

Thanks again for the help. We're going to be away from the system for the next two weeks so I'll update upon our return.


Well, if the room warms, and the place is not too leaky, it also warms the tube, so that keeps the draft alive.

The fan i used was an ebm papst prety much like this one!

http://www.ebay.com.au/itm/FRIDGE-COOL-ROOM-CONDENSER-FAN-MOTOR-WITH-BLADE-EBMPAPST-M4Q045-CA01-01-29-/290722165020
 
paul wheaton
author and steward
Posts: 52415
Location: missoula, montana (zone 4)
hugelkultur trees chicken wofati bee woodworking
  • Mark post as helpful
  • send pies
    Number of slices to send:
    Optional 'thank-you' note:
  • Quote
  • Report post to moderator
I like the idea that we first plug the drafts in the wofati. Once the drafts are plugged, then focus on the rocket mass heater.

If the inside temp is about the same as the outside temp (which would most often be the case with so many drafts) then the rocket mass heater will continue to have a cold plug.

If the draft problem can be corrected and then a person attempting to start the fire will be in a room that is 30 degrees warmer than outside, then I suspect there will be no problem.

So:

step 1: fix drafts

step 2: re-test rocket mass heater


Peter van den Berg
gardener
Posts: 1054
Location: +52° 1' 47.40", +4° 22' 57.80"
447
woodworking rocket stoves wood heat
  • Mark post as helpful
  • send pies
    Number of slices to send:
    Optional 'thank-you' note:
  • Quote
  • Report post to moderator
Of course it's best to fix the unintentional drafts first. By means of insulating the walls or just stuffing the crevices between the beams. The heater has to have air to run so there should be a vent somewhere which can be opened when the heater is running.

Whether or not this will fix the heater's problems I don't know. Drying the mass out and see if that's enough to let the thing work properly would be the next step. It's a fascinating project nevertheless, I can imagine quite some people want to know what the results are of such a relative unknown concept.
 
Satamax Antone
gardener
Posts: 3471
Location: Southern alps, on the French side of the french /italian border 5000ft elevation
194
  • Likes 1
  • Mark post as helpful
  • send pies
    Number of slices to send:
    Optional 'thank-you' note:
  • Quote
  • Report post to moderator
As the builder of the crapiest batch box so far, i think i can open my big gob. And i'm under the impression that that tube going under the log wall and into the floor behind; is the culprit of the problems in this build.

That's just my gut feeling.
 
Len Ovens
pollinator
Posts: 1481
Location: Vancouver Island
60
  • Mark post as helpful
  • send pies
    Number of slices to send:
    Optional 'thank-you' note:
  • Quote
  • Report post to moderator
Your going to love this one...

Maybe the flue is too big. I am talking about the vertical part for final exhaust. I know this seems counter intuitive, but the flue gas will be running about 1/4 the speed it was going into the riser assuming the the riser is similar CSA to the exhaust flue. This will allow it to sit and cool (even more). By that time the flue gas temperature will be low enough that the flue gas is only 1/4 the size, so even lowering the flue size to 1/2 CSA should not be a problem. I have gone from a 6 inch system to 4 inch flue with no smoke back.... not batch though, standard J feed (sort of, with extra air feed after primary burn part way down tunnel). In my case, I used 6inch diam. for feed, tunnel, riser and barrel exit for constant CSA. Then I narrowed to 5 inch diam. through the heat sink (bell type) and exited to flue as 4 inch.

I think a smaller flue will warm up quicker and draw.

Disclaimer: I have only made one unit, so not a lot of experience


On a different note: I was wondering if it would be possible (or make sense) to take the octagonal form before putting the screws but with the hose clamps on and twisting it for a pseudo spiral effect. Would it have to spiral a different direction for northern/southern hemisphere? No I am not suggesting this be tried in this project. I am asking those who know wood working better than I... would it have to be thinner wood? Steamed? Would it work at all?
 
Rick Edwards
Posts: 182
15
  • Mark post as helpful
  • send pies
    Number of slices to send:
    Optional 'thank-you' note:
  • Quote
  • Report post to moderator
Spirals keep coming up. The problem is that there is a double rams horn. So the spiral would have an effect on one horn and an opposite effect on the other horn. Presuming one of those would be beneficial and the other would be detrimental. The other thing is that these systems designed properly run so efficient that it seems like a lot of work for cleverness and not much else. In this case I think less is more.
 
Len Ovens
pollinator
Posts: 1481
Location: Vancouver Island
60
  • Mark post as helpful
  • send pies
    Number of slices to send:
    Optional 'thank-you' note:
  • Quote
  • Report post to moderator

Rick Edwards wrote:Spirals keep coming up. The other thing is that these systems designed properly run so efficient that it seems like a lot of work for cleverness and not much else. In this case I think less is more.


I can go with that. I like the whole batch thing. I think the biggest thing with the RMH was having to babysit the feed.

It looks like this one has been run with a bottom up burn rather than top down. I am guessing that because the exhaust is at the back of the fire box this doesn't matter so much. Has a back to front burn been tried over mid firing or front firing? Top down has been found to give cleaner burning when the riser is on top of the firebox, especially the first 5 to 20 minutes. But with the rocket, the secondary burn probably happens sooner due to smaller CSA and taller riser. By back to front I mean starting a smaller fire right at the back of the firebox and adding fuel in front and letting the fire burn forward towards the loading door at it's own pace.
 
Rick Edwards
Posts: 182
15
  • Mark post as helpful
  • send pies
    Number of slices to send:
    Optional 'thank-you' note:
  • Quote
  • Report post to moderator
Your last sentence is how the batches are started cold. And it does exactly that.

But the BatchBoxes are designed to have all of the batch burning at once. When cold this isn't as much the case, but when warm about 5-10 after loading, the whole thing is engulfed and burning everywhere simultaneously rushing towards the slot.
 
Peter van den Berg
gardener
Posts: 1054
Location: +52° 1' 47.40", +4° 22' 57.80"
447
woodworking rocket stoves wood heat
  • Mark post as helpful
  • send pies
    Number of slices to send:
    Optional 'thank-you' note:
  • Quote
  • Report post to moderator
@Len,
The method to light a small fire in front of the port and stack fuel on top and behind is the best. I've tried literally everything, top down at the back, midway, front. Also bottom up, midway up and front up. And some far-fetched others I could think of, like side lighting in a half full firebox and topping up after that. In conclusion, what I like to call the recommended method proved to be the cleanest according to the Testo 330, again and again.

The reason behind all this is probably the fact that the flame low in the riser is started the soonest this way. In fact, it's a firebox coupled to a very efficient afterburner, which is very sensitive to something alien inside the port.
 
Rick Edwards
Posts: 182
15
  • Likes 1
  • Mark post as helpful
  • send pies
    Number of slices to send:
    Optional 'thank-you' note:
  • Quote
  • Report post to moderator
The insulated tee for external chimney and it's 15° elbow.

The critter arrester.

Stainless sheet for the homemade chimney cap.
KIMG0853.jpg
[Thumbnail for KIMG0853.jpg]
KIMG0852.jpg
[Thumbnail for KIMG0852.jpg]
KIMG0851.jpg
[Thumbnail for KIMG0851.jpg]
 
Rick Edwards
Posts: 182
15
  • Mark post as helpful
  • send pies
    Number of slices to send:
    Optional 'thank-you' note:
  • Quote
  • Report post to moderator
Chimney cap fabrication
KIMG0855.jpg
[Thumbnail for KIMG0855.jpg]
KIMG0856.jpg
[Thumbnail for KIMG0856.jpg]
KIMG0857.jpg
[Thumbnail for KIMG0857.jpg]
 
Rick Edwards
Posts: 182
15
  • Mark post as helpful
  • send pies
    Number of slices to send:
    Optional 'thank-you' note:
  • Quote
  • Report post to moderator
More fabrication
KIMG0859.jpg
[Thumbnail for KIMG0859.jpg]
KIMG0861.jpg
[Thumbnail for KIMG0861.jpg]
KIMG0864.jpg
[Thumbnail for KIMG0864.jpg]
 
Rick Edwards
Posts: 182
15
  • Mark post as helpful
  • send pies
    Number of slices to send:
    Optional 'thank-you' note:
  • Quote
  • Report post to moderator
Chimney cap final
KIMG0865.jpg
[Thumbnail for KIMG0865.jpg]
KIMG0867.jpg
[Thumbnail for KIMG0867.jpg]
KIMG0877.jpg
[Thumbnail for KIMG0877.jpg]
 
Hans Quistorff
gardener
Posts: 1908
Location: Longbranch, WA Mild wet winter dry climate change now hot summer
464
3
goat tiny house rabbit wofati chicken solar
  • Mark post as helpful
  • send pies
    Number of slices to send:
    Optional 'thank-you' note:
  • Quote
  • Report post to moderator
This stile has worked well for me in decreasing down drafting. I have had one problem with it which may not be a problem with the rocket stove. Creosote can condense on the underside of it and then with moisture freezing and thawing come off as one sheet and fall on the opening blocking it.
 
Erica Wisner
gardener
Posts: 1292
Location: Okanogan Highlands, Washington
397
4
hugelkultur cat dog books food preservation
  • Mark post as helpful
  • send pies
    Number of slices to send:
    Optional 'thank-you' note:
  • Quote
  • Report post to moderator

Matt Walker wrote:Sorry, my first sentence should have said "Two barrels is all that a 6" will drive" with regards to the radiating surface, so as not to cool the exhaust to the point of stalling. Still might be close, but you will have a good chimney so it should work.


The wofati design almost never allows for a good chimney. Rick has worked on two now that were as good as practical, given the restriction that we are not allowed to go through the roof, and there is a deep eave with a 4' or taller facade before you get above the roof/soil surface.

The cold-plug potential for over 12 feet of exposed chimney, half of it at more than 45 degrees from vertical, means any supplemental heater installed in a wofati needs some extra draft, or bells and whistles, to give the operator options in case of a cold start. (The large thermal mass of these structures will help once warm, but create problems until that point. And there have been some gaps in occupancy for various structures.)

Peter van den Berg wrote:

Rick Edwards wrote:After the second barrel, can the exhaust go up to 8" if we have more of that laying around?
Peter. Thanks for the plans, most excellent.


Yes. Chimneys can be larger diameters as the heater, not smaller.
You're welcome, I do sincerely hope it will solve the heating problem.


Peter van den Berg wrote:

Jay C. White Cloud wrote:A chimney within a wood burn system for a given combustion shaber for a given run of horizontal, and Up down radiant passages should fall within certain parameters depending on multiple factors of location, elevation location of build, and general design of system...These chimneys are meant to match the system...definitely not undersized, yet too large will also cause inefficiencies, and/or failures.


Agree. In these specific circumstances I'd think it will work.


We have seen problems in hooking a 6" system (J-type) up to 8" channels. The exhaust tends to become cooler and more sluggish, and may not properly draft out the chimney. I can't be certain if that's the only problem, as many systems with this type of random change will also have several other weird improvisations that could be equally the culprit.
While I would not be surprised if Peter's original design suggestion here would have worked (a single barrel-bell type heat extractor hooked to a simple vertical 8" chimney),
the design that got made was a convoluted path of 8" channels through a huge amount of earthen thermal mass, at about the maximum theoretical length for an 8" J-type firebox.
The convolutions include a vertical drop in 8" channel immediately after the exit from the single barrel.

Matt Walker wrote:Well Peter, you touched on most of my concerns. Insulating all around the flue would go a long way towards alleviating most of my concern, which is that the giant heat sink of the ground around three sides of the flue is going to keep that flue too cool to work well. Condensation and chimney stall will be constant instead of a seasonal hump to get over by warming the mass. Less surface to radiate into the space is another issue. It may work, but I'd be surprised if it isn't a constant battle.


Due to the wofati exhaust and high thermal mass, this is a good thing to keep in mind for any future heaters.
Cold-start problems / the stove running backwards have been reported by the new couple moving in, and it's been a struggle to get to the point where the whole building is warm enough to help a little with draft. Condensation is still huge - icicles on the chimney joints - and is likely to remain a concern with this and other wofati heaters (heaters with a long, not-entirely-vertical chimney exposed to outdoor cold air).

General design warnings that I feel were missed somewhere in building this project, due to many hands / coming from different directions toward a new experiment:
- Don't cob in the barrel. All functional elements of any appliance or building should be as accessible as possible, especially in the experimental stages, to allow for re-checks and repairs. In masonry heaters, there are rules of thumb (and sometimes codes) that require the heater to be separate from load-bearing walls, and from its own chimney, to facilitate independent repairs of either.

- Down-and-up channels are much more problematic than horizontal ones, and they are different from bells. I think Peter said somewhere a bell is at least 4x the channel size, so there is real stratification without turbulent restrictions.

- Formulae that are worked out for one system (like the approx. max. length and turns of 8" duct on an 8" J-type system, or the approx. surface area required for a bell-type heat extractor on a 6" batch box system) should not be trusted with another system, even if they appear to agree. This pipe layout theoretically follows both Peter's and Ernie's and my formulae, yet is having big problems at current ambient temperatures.

- Adding more mass to a system does not always make it work better. And it makes it more work to take apart in case of problems.

- Each element of the system has a draft function. Know it. If an element must be changed outside the range of proven past success, look for ways to make a compensating change elsewhere.
Each element either adds draft (hot things that go up, cold things that flow down), adds drag (more surface area, sharp turns, textured surfaces), or creates a risk of negative draft (hot things that must be forced downward, cooling things that must be forced upward). The working parts of the system have to balance the load (drag, heat loss, and anti-draft), and be significantly stronger. Engines pulling train cars come to mind - your climate and usage variables represent slopes, and some conditions call for more engines or less freight.
It's important to keep in mind the function of each element under a range of temperature conditions.
Consider what they do for the system both under optimal conditions (warm stove and cold weather), and under bad conditions (cold building, cold chimney, cold stove, exactly the wrong wind direction.
If you will want to heat under those bad conditions (including heating a too-cool house on a warm day), you need a lot more emphasis on the power-ups and a lot less length and surface area and turns to impose drag.

- A bypass which allows a shorter path, chimney pre-heating, and an escape option when the stove just can't push through its entire planned mass, is a longstanding and effective method from masonry heaters.
- Other cold-start options include keeping the chimney right near the barrel for self-priming near the start of the fire without any exhaust bypass as such.
- Even if a bypass does not go straight to a chimney, a shorter path instead of committing to the longer run all the time can be valuable.

The "boomerang" down-and-up seems like the most problematic decision for this particular system, and while I can see all the reasons that led up to it, the reasons may also be part of the problem.

I would really like to see wofati heaters (and anywhere you're considering a through-wall exhaust) only installed on the wall through which their exhaust will be ported.
No big horizontal spans through the ceiling, no convoluted horizontal runs through the floor.
Going without a proper, vertical chimney is not an option for batch boxes, nor for large, tall buildings that can structurally act as a wind scoop from multiple directions depending on the weather.

Those are my initial thoughts so far on seeing this system.

We all think that the cold start sluggishness will improve dramatically as the building is occupied, heated, and more of the air leaks and drafts are sealed.

Once those are resolved, we'll see how the rest of it works.

I'm recording these thoughts here for general reference, and in case there is a repeat of someone moving into this structure while it's this cold. (-9 F several times this week.)
I imagine the situation will have several more patches and changes before all's said and done.

Maybe Matt or Peter will have suggestions for a quick fix. Maybe they already made them (I'm afraid I am only up to page 2 so far).

From just looking at the site itself, Ernie was leaning toward a bypass from the cap before the boomerang starts, directly to the exit chimney, to allow heating up the space and drying out the chimney before attempting to heat the floor.

- I would also routinely check any trap-like areas to remove condensation until the whole floor is quite warm. There's a possibility that enough water could build up in the floor to actually block the pipes.

- We have a document that is a fill-in-the-blanks owner manual for rocket stoves, on our Scubbly store.
I think this thread is the current nearest equivalent that exists for this stove. Since I know what I'm reading and I haven't made it through the whole thing in 2 days, I would suggest making a condensed summary that can be passed on to new occupants.
The manual could be a binder with
- the diagrams shown here, or a basic drawing with instructions for how to find the diagrams here,
- operating and maintenance basics (such as how and where to clean out ash, the normal and maximum fuel loads, and the importance of not blocking the air intake and port),
- performance log and troubleshooting, like cold-start hints (where to clean out accumulated moisture, where to apply extra heat to help kick-start the system draft, weather or other conditions that didn't work out).

All these will be best indicated by people who have worked on and lived with the stove. If nobody involved likes binders, then never mind.

-Erica
 
ronald bush
Posts: 140
1
  • Mark post as helpful
  • send pies
    Number of slices to send:
    Optional 'thank-you' note:
  • Quote
  • Report post to moderator
would a couple candles in the chimney be enough heat to start it off? or maybe even a light bulb? very interesting thread!
 
Peter van den Berg
gardener
Posts: 1054
Location: +52° 1' 47.40", +4° 22' 57.80"
447
woodworking rocket stoves wood heat
  • Mark post as helpful
  • send pies
    Number of slices to send:
    Optional 'thank-you' note:
  • Quote
  • Report post to moderator

Erica Wisner wrote:From just looking at the site itself, Ernie was leaning toward a bypass from the cap before the boomerang starts, directly to the exit chimney, to allow heating up the space and drying out the chimney before attempting to heat the floor.


Ernie is good at hitting the nail on its head, I like that. I literally would need la rung ladder to see things from his point of view . The bypass pipe could be even a 6", it would be sufficient for the batch box. Once the air speed is up to a decent level the thing should go like ehrmm... a rocket?
And yes you are right Erica, I'm inclined to think my original suggestion to use two barrels and from there directly to outdoors would have worked right from the start, but as a massless heater regrettably. In my old workshop I've used a three barrel tower coupled to a good chimney and it showed only some recalcitrant behaviour during drying out only. So two barrels and the sub-ideal stack could be the solution.
 
Arlyn Gale
Posts: 26
Location: Colorado Front Range (7000')
  • Likes 1
  • Mark post as helpful
  • send pies
    Number of slices to send:
    Optional 'thank-you' note:
  • Quote
  • Report post to moderator
'New here but I've been reading obsessively, including my favorite Christmas present - "RMH, 3rd ed."

+1 on the "that tube going under the log wall and into the floor behind; is the culprit of the problems in this build." (Satamax)


Reviewing the project ( and devouring the process/pics/comments, as I'm about to undertake my own first build), it appears that the only way to cure the inevitable "indigestion" that this build will frequently have is to set the RMH deeper into the ground. Otherwise there will be an almost never-ending battle to "force" the warm air (further) down through the "cold sink" created prior to the thermal mass. A "barrier" against downward flowing heat capability of the RMH system has obviously been approached with this design.

As is, the low entry point/cold plug prior to the mass storage appears to be behaving like a "retro-rocket" with enough reverse flow to stall the system. I haven't (yet) seen data on the various pressures and flow capabilities of RMH's, and they would no doubt be as widely varied as the many different kinds of builds. Nevertheless, an RMH must have some theoretical limit as to how far down it can practically force hot/heated air and you have apparently come quite close to that limit.

Setting the RMH deeper will obviously be no easy task. It appears that your RMH is set on soil, and at least you wouldn't have to rip up a concrete slab. 'More digging than I'd want to do, and not suggested lightly. Otherwise finding the way to put an adequate booster on the rocket, every time it is cold started, becomes the quest. Treat the symptoms, or cure the illness - 'Best of luck in either case.

So sorry to read of your troubles - thanks for the many pictures and vid's of your build. I had high hopes of reading of yet another ( & very current) RMH success story. I am only less disappointed than you must obviously be after so much effort. Some decades ago I almost opted for an energy sciences degree, and hope that my observations and experiences may be of some help. 'Looking forward to finding the cure with you, or at least an adequate treatment.

Regards, Arlyn
 
Rick Edwards
Posts: 182
15
  • Mark post as helpful
  • send pies
    Number of slices to send:
    Optional 'thank-you' note:
  • Quote
  • Report post to moderator
The two stainless straps cut out of a sheet that support the tee and vertical sections weight.

The stainless all-thread standoff using copper plated ceiling plates and stainless 11" hose clamps to stabilize the vertical section.
(In the Midwest every plumbing supply and big box store sells these. In Montana nobody had heard of them and we had to order them online)

Top view
KIMG0869.jpg
[Thumbnail for KIMG0869.jpg]
KIMG0868.jpg
[Thumbnail for KIMG0868.jpg]
KIMG0875.jpg
[Thumbnail for KIMG0875.jpg]
 
Satamax Antone
gardener
Posts: 3471
Location: Southern alps, on the French side of the french /italian border 5000ft elevation
194
  • Mark post as helpful
  • send pies
    Number of slices to send:
    Optional 'thank-you' note:
  • Quote
  • Report post to moderator
Has it improved things?
 
Rick Edwards
Posts: 182
15
  • Mark post as helpful
  • send pies
    Number of slices to send:
    Optional 'thank-you' note:
  • Quote
  • Report post to moderator
Sorry, I should have mentioned that this was done prior to problems. Just got back logged on posting the final pics.

Things do seem to be running better with more frequent burns and maybe the cobbing around stove and pipe along with draft reduction.
 
jesse markowitz
Posts: 151
Location: Hudson Valley, NY
15
  • Mark post as helpful
  • send pies
    Number of slices to send:
    Optional 'thank-you' note:
  • Quote
  • Report post to moderator
Good news from .7!

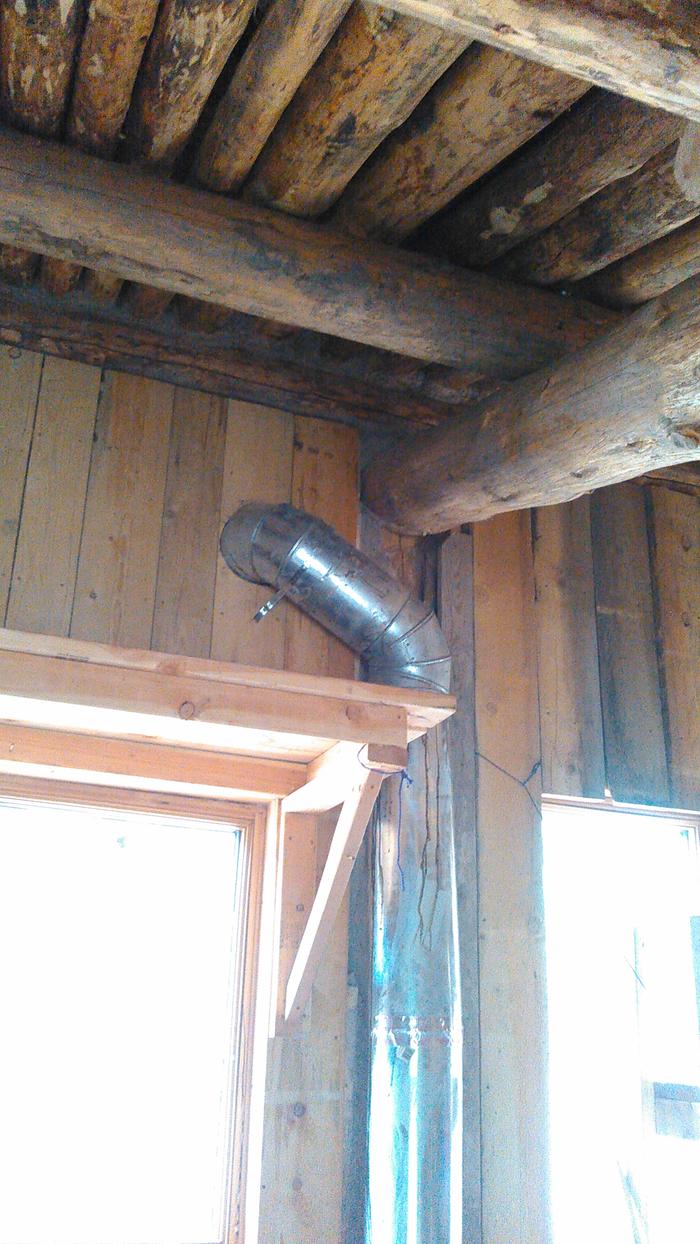
The batchbox is working great. I've been lighting fires in it for a little over a week now. At first, there were some smokeback problems, but after a couple of days of babying the fire, as well as heating up the vertical stove pipe inside the house with a torch AND insulating it with blankets, the floor is getting warm! The first part of the run, which comes before the sharp corner is very warm. The diagonal run is still pretty cool, however there is a discernible difference in temperature between it and the surrounding ground. We're keeping the whole house as warm as possible for the next couple of days for another test, so I'm assuming that the diagonal will also warm up within a week or so.

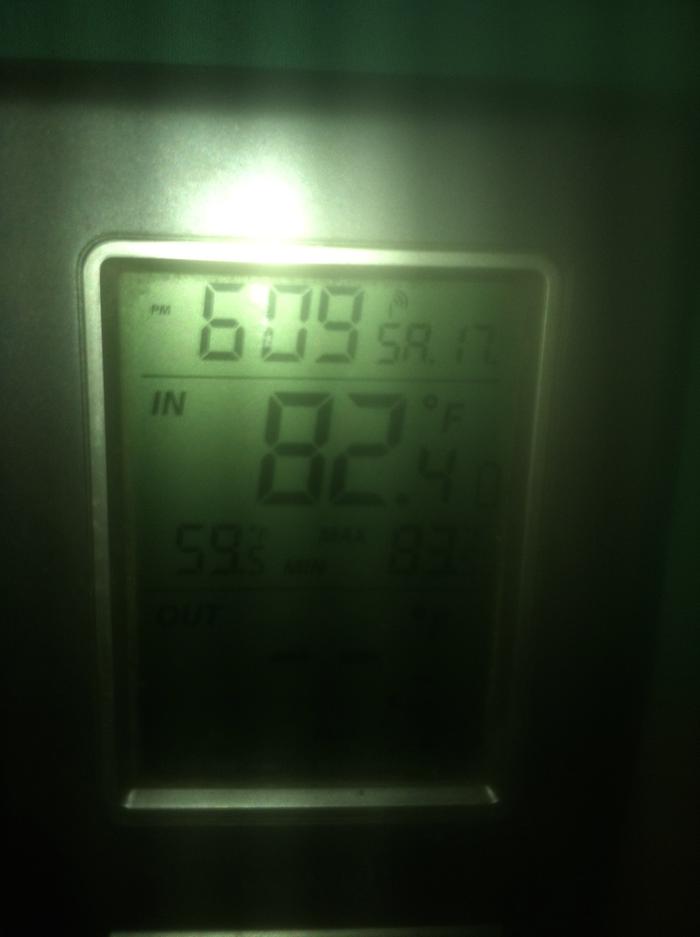
As previously mentioned, we are trying to see how hot we can get the wofati for a couple of days, so we got it as hot as 82.4 today in there. This is solely from heat made by the batchbox. Here's a picture I took off of my phone as proof, however the camera is broken so there's a weird glare:


Hooray for radiant floor heating!
 
it's a teeny, tiny, wafer thin ad:
Rocket Mass Heater Jamboree And Updates
https://permies.com/t/170234/Rocket-Mass-Heater-Jamboree-Updates
reply
    Bookmark Topic Watch Topic
  • New Topic