|

|
|
|
|

|

|

|

|

|


 15
15


How Permies works: https://permies.com/wiki/34193/permies-works-links-threads
My projects on Skye: The tree field, Growing and landracing, perennial polycultures, "Don't dream it - be it! "
6
8
William Bronson wrote:
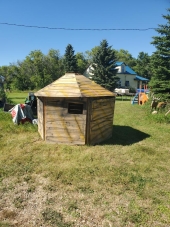
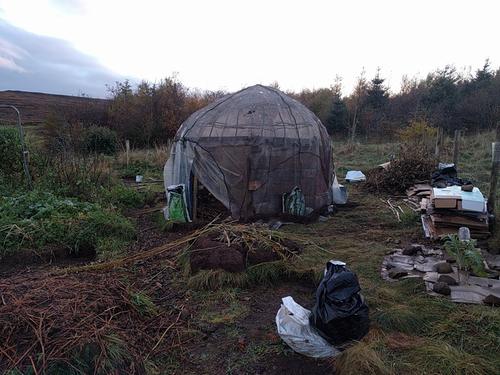
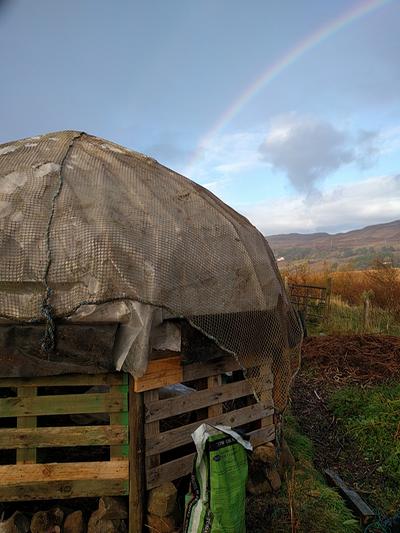
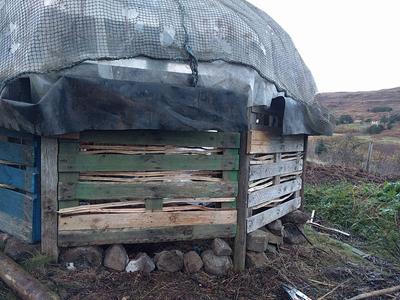
It seems likely that your hut will be between 8.75 and 10.5 feet across, which seems small for a shed to work in, but fine as a place to hide out from the rain.
If it is big enough across, I would want 4 more posts, one at each corner.
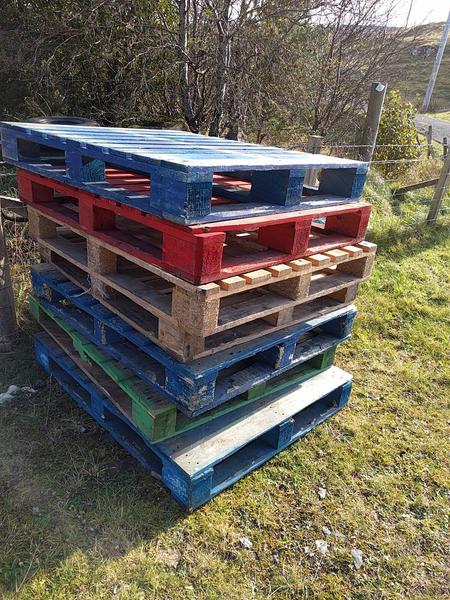
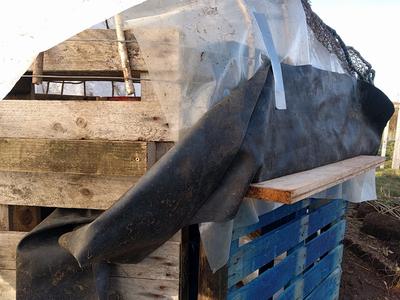
Blocks or bricks to keep the pallets up off of the soil could be very important, the "wood" blocks between the top and bottom of these pallets are very susceptible to water damage.
I would also want a higher, more domed roof, and maybe a center post, just to avoid the extra digging.
If I were in your position I would be hard pressed to not try for a living structure, with willow poles going all the way from the roof to the soil.
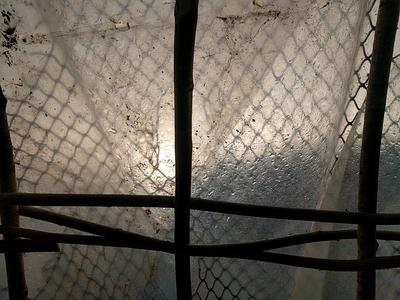
The used netting across the exterior would be perfect for climbing vines
How Permies works: https://permies.com/wiki/34193/permies-works-links-threads
My projects on Skye: The tree field, Growing and landracing, perennial polycultures, "Don't dream it - be it! "
10


How Permies works: https://permies.com/wiki/34193/permies-works-links-threads
My projects on Skye: The tree field, Growing and landracing, perennial polycultures, "Don't dream it - be it! "
7


How Permies works: https://permies.com/wiki/34193/permies-works-links-threads
My projects on Skye: The tree field, Growing and landracing, perennial polycultures, "Don't dream it - be it! "
5
Do you have a surplus of good sized rocks? You could pile rocks up the out side, as that would help keep the water off the wood there, particularly if your roof design doesn't include any overhang?a rope or strap around the pallets and posts towards the bottom might be a good idea.
Visit Redhawk's soil series: https://permies.com/wiki/redhawk-soil
How permies.com works: https://permies.com/wiki/34193/permies-works-links-threads

Skill verified by Nicole Alderman")

Skill verified by Mike Haasl") 4
4
Jay Angler wrote: Do you have a surplus of good sized rocks? You could pile rocks up the out side, as that would help keep the water off the wood there, particularly if your roof design doesn't include any overhang?
How Permies works: https://permies.com/wiki/34193/permies-works-links-threads
My projects on Skye: The tree field, Growing and landracing, perennial polycultures, "Don't dream it - be it! "


 8
9
9
8
9
9
Visit Redhawk's soil series: https://permies.com/wiki/redhawk-soil
How permies.com works: https://permies.com/wiki/34193/permies-works-links-threads
6
5
How Permies works: https://permies.com/wiki/34193/permies-works-links-threads
My projects on Skye: The tree field, Growing and landracing, perennial polycultures, "Don't dream it - be it! "
6
8
7
Water is darn heavy stuff. When it gets a chance to pool, it stretches the material, which then makes it more prone to pool and harder to fix. We occasionally get wet snow, and then it rains on the wet snow which makes it supper heavy and things collapse under the weight.William Bronson wrote:I think it could save you from needing to create super taunt layer of plastic, because it will support the plastic and prevent pooling of water.
Water pooling is what has ultimately killed most of the tarp roofed structures I've built.
Visit Redhawk's soil series: https://permies.com/wiki/redhawk-soil
How permies.com works: https://permies.com/wiki/34193/permies-works-links-threads
7
2
craig howard wrote: I built a smaller octoshed,..
and used a satellite dish for the roof.
I do have a 10ft dish though. Perched on top of an 8ft tree stump like a mushroom.
So they do make them and were using them that big during the early yard satellite days.
How Permies works: https://permies.com/wiki/34193/permies-works-links-threads
My projects on Skye: The tree field, Growing and landracing, perennial polycultures, "Don't dream it - be it! "
7
Jay Angler wrote: We occasionally get wet snow, and then it rains on the wet snow which makes it supper heavy and things collapse under the weight.
Jay wrote:So I double what William is saying. I'd use lots of ribs - even if they're light material - in between the main support ribs to make sure that water runs off. "Vertical" is much better than "horizontal", because anything in the horizontal direction tends to act like a bit of a dam.
How Permies works: https://permies.com/wiki/34193/permies-works-links-threads
My projects on Skye: The tree field, Growing and landracing, perennial polycultures, "Don't dream it - be it! "
15


How Permies works: https://permies.com/wiki/34193/permies-works-links-threads
My projects on Skye: The tree field, Growing and landracing, perennial polycultures, "Don't dream it - be it! "
14


How Permies works: https://permies.com/wiki/34193/permies-works-links-threads
My projects on Skye: The tree field, Growing and landracing, perennial polycultures, "Don't dream it - be it! "
8
Visit Redhawk's soil series: https://permies.com/wiki/redhawk-soil
How permies.com works: https://permies.com/wiki/34193/permies-works-links-threads
10
Jay Angler wrote:
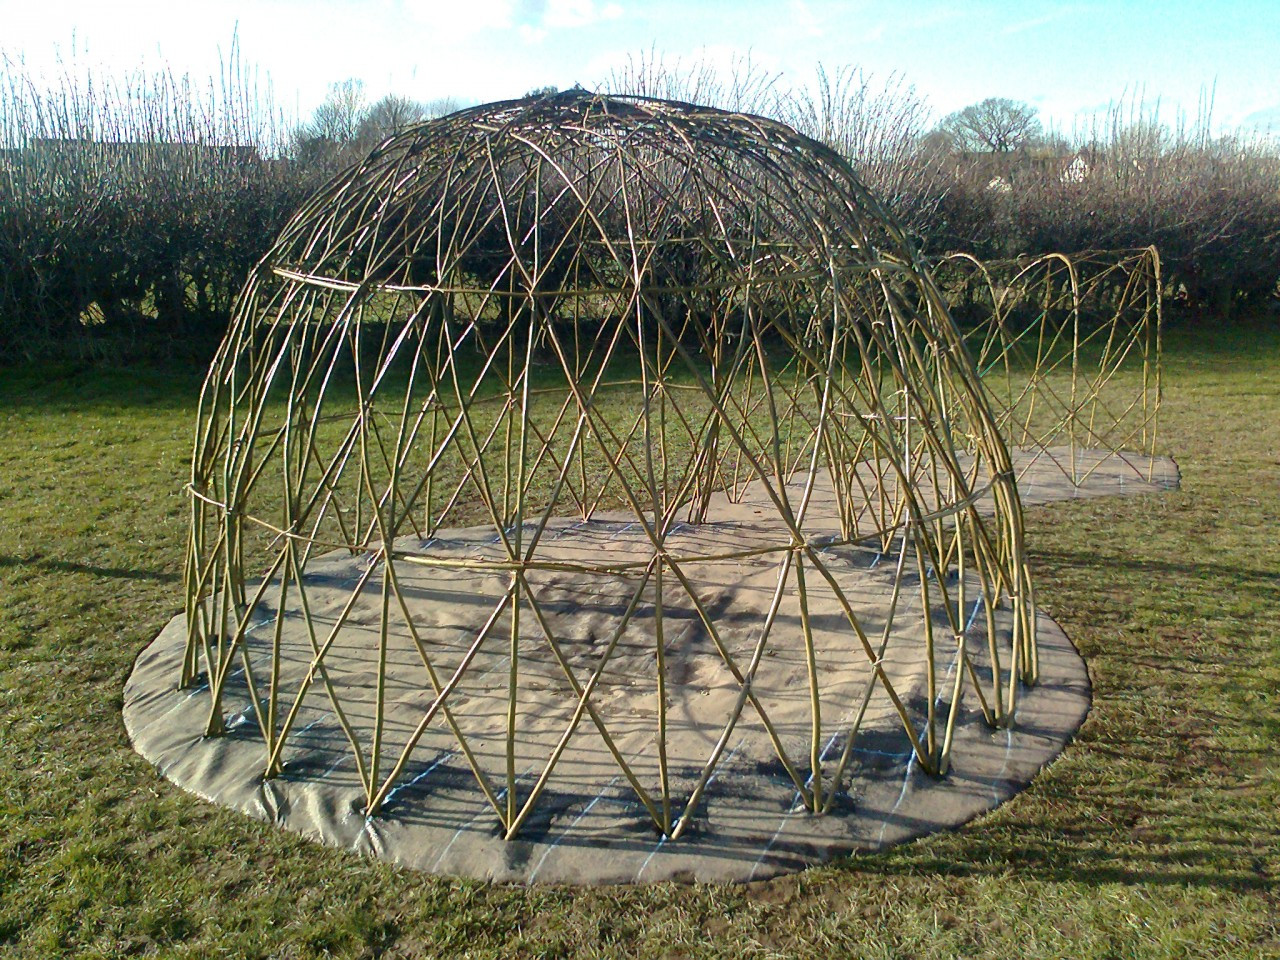
Nancy, what is your plan for the very top center?
What's the approximate diameter of the top ring?
Looking at the shape and angles of your dome, I suspect the only place you're in danger of having water pool and get heavy would be that opening in the center top.
How Permies works: https://permies.com/wiki/34193/permies-works-links-threads
My projects on Skye: The tree field, Growing and landracing, perennial polycultures, "Don't dream it - be it! "
12

How Permies works: https://permies.com/wiki/34193/permies-works-links-threads
My projects on Skye: The tree field, Growing and landracing, perennial polycultures, "Don't dream it - be it! "
5
"The only thing...more expensive than education is ignorance."~Ben Franklin. "We can easily forgive a child who is afraid of the dark; the real tragedy of life is when men are afraid of the light." ~ Plato
8
Visit Redhawk's soil series: https://permies.com/wiki/redhawk-soil
How permies.com works: https://permies.com/wiki/34193/permies-works-links-threads
9
How Permies works: https://permies.com/wiki/34193/permies-works-links-threads
My projects on Skye: The tree field, Growing and landracing, perennial polycultures, "Don't dream it - be it! "
7

How Permies works: https://permies.com/wiki/34193/permies-works-links-threads
My projects on Skye: The tree field, Growing and landracing, perennial polycultures, "Don't dream it - be it! "


 7
7

'What we do now echoes in eternity.' Marcus Aurelius
How Permies Works Dr. Redhawk's Epic Soil Series
10
How Permies works: https://permies.com/wiki/34193/permies-works-links-threads
My projects on Skye: The tree field, Growing and landracing, perennial polycultures, "Don't dream it - be it! "
3
I'm only 65! That's not to old to learn to be a permie, right?
4
6


How Permies works: https://permies.com/wiki/34193/permies-works-links-threads
My projects on Skye: The tree field, Growing and landracing, perennial polycultures, "Don't dream it - be it! "
5
6
How Permies works: https://permies.com/wiki/34193/permies-works-links-threads
My projects on Skye: The tree field, Growing and landracing, perennial polycultures, "Don't dream it - be it! "
9

How Permies works: https://permies.com/wiki/34193/permies-works-links-threads
My projects on Skye: The tree field, Growing and landracing, perennial polycultures, "Don't dream it - be it! "
 7
7
Changing one thing, no matter how tiny, is still change
6
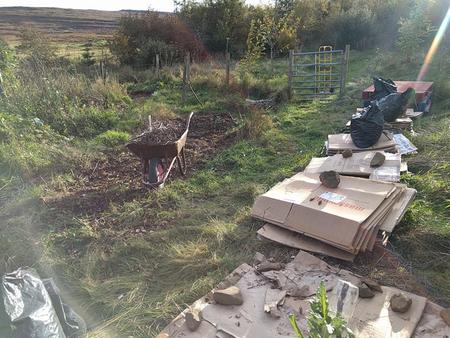
 - actually lasting better than I'd perhaps thought it might. I managed to clear out the cardboard that accumulated in there, but have still been mainly using it as a dumping area (and pee-shed for privacy as my plot is overlooked). The step at the doorway is annoying, but that was a product of my site. If you want to collect water then it is worth thinking about the guttering slopes and so on, as mine isn't very effective; some of my buckets catch more water than others, but that was because they were a bit of an afterthought.
How Permies works: https://permies.com/wiki/34193/permies-works-links-threads
My projects on Skye: The tree field, Growing and landracing, perennial polycultures, "Don't dream it - be it! "
8
Changing one thing, no matter how tiny, is still change
7
Sarah Joubert wrote:it gives me plenty of time to come up with and discard ideas.
How Permies works: https://permies.com/wiki/34193/permies-works-links-threads
My projects on Skye: The tree field, Growing and landracing, perennial polycultures, "Don't dream it - be it! "

|
This tiny ad is naturally water proof
Homesteading and Permaculture Bundle - More than 35 Things
https://permies.com/w/235626/Homesteading-Permaculture-Bundle
|