|

|

|

|

|

|
|
|
|
|
|
|
|

|

|

|

|

|


 9
9


Proudly presenting RocketMassHeaters.com
A good starting point to all RMH research
How Permies.com works
7
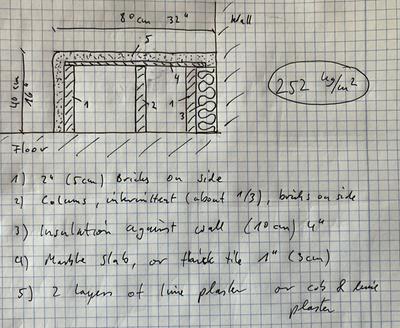
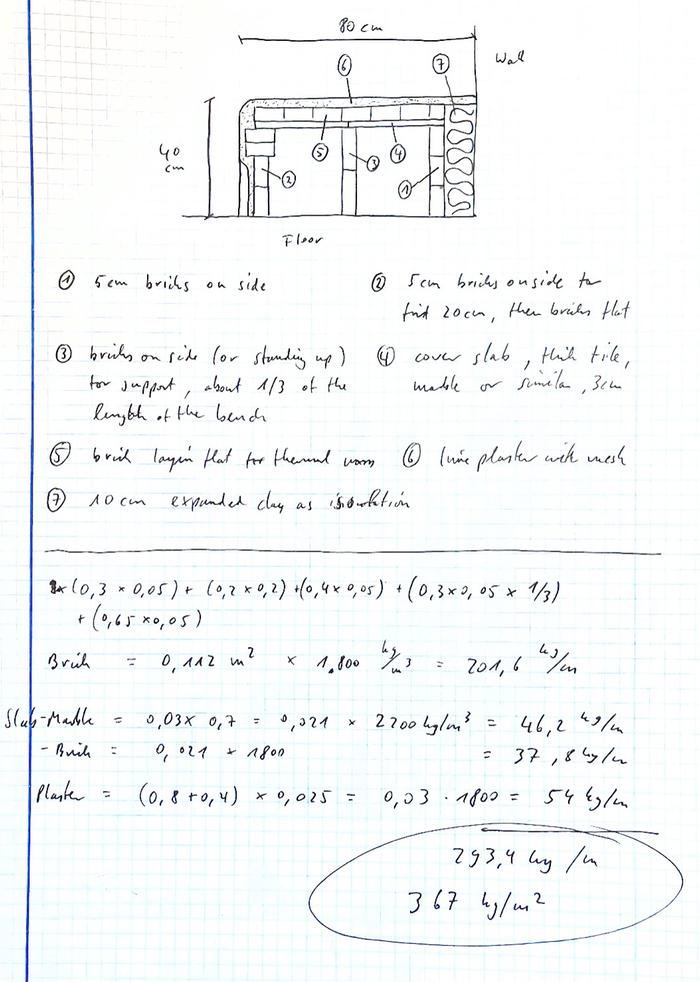
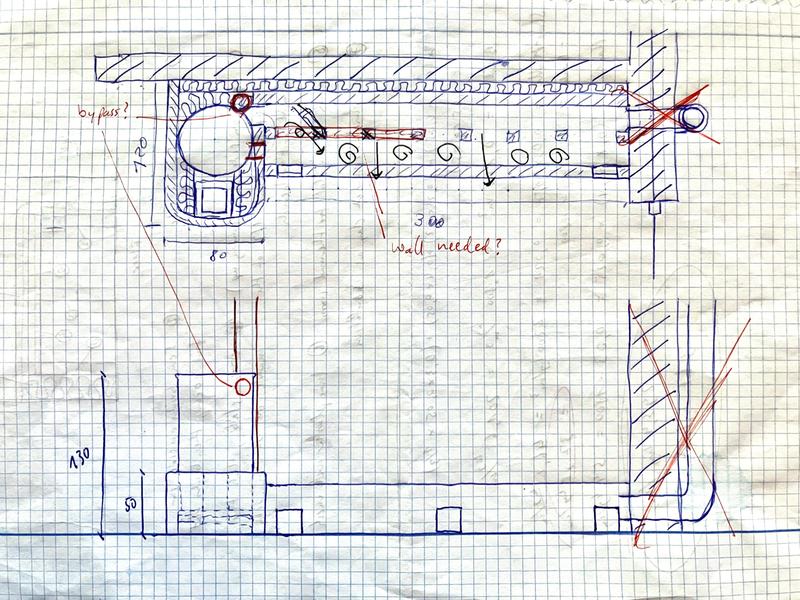
Benjamin Dinkel wrote:The bench would then need to be covered by some kind of slab that could span almost 30". I calculated with a thickness of maximum 3,5" including mortar and plaster to stay within the weight limit.
How permies.com works
What is a Mother Tree ?

Skill verified by gir bot") 7
7
Proudly presenting RocketMassHeaters.com
A good starting point to all RMH research
How Permies.com works
7
Benjamin Dinkel wrote:
I can probably find some pre made concrete elements that fit my needs. Are concrete slabs an option?
Are there other good options that I'm not seeing?
Can metal profiles and heavy tiles be used too?
Proudly presenting RocketMassHeaters.com
A good starting point to all RMH research
How Permies.com works
6
6
Proudly presenting RocketMassHeaters.com
A good starting point to all RMH research
How Permies.com works
6
6
Proudly presenting RocketMassHeaters.com
A good starting point to all RMH research
How Permies.com works
7
7
Proudly presenting RocketMassHeaters.com
A good starting point to all RMH research
How Permies.com works
8
![[Thumbnail for HeatingBenchColumns.jpg]](/t/281004/a/269066/HeatingBenchColumns.jpg "Filename: HeatingBenchColumns.jpg
Description:") 6
6

Proudly presenting RocketMassHeaters.com
A good starting point to all RMH research
How Permies.com works
6
7
7
7
Proudly presenting RocketMassHeaters.com
A good starting point to all RMH research
How Permies.com works
6
Proudly presenting RocketMassHeaters.com
A good starting point to all RMH research
How Permies.com works
9
Proudly presenting RocketMassHeaters.com
A good starting point to all RMH research
How Permies.com works

 7
7
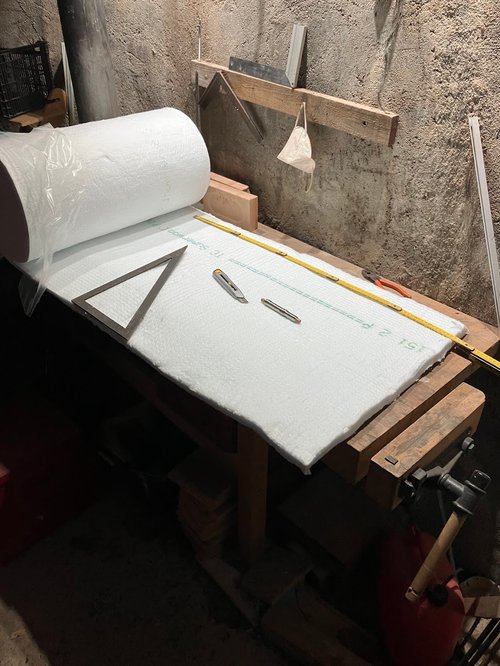
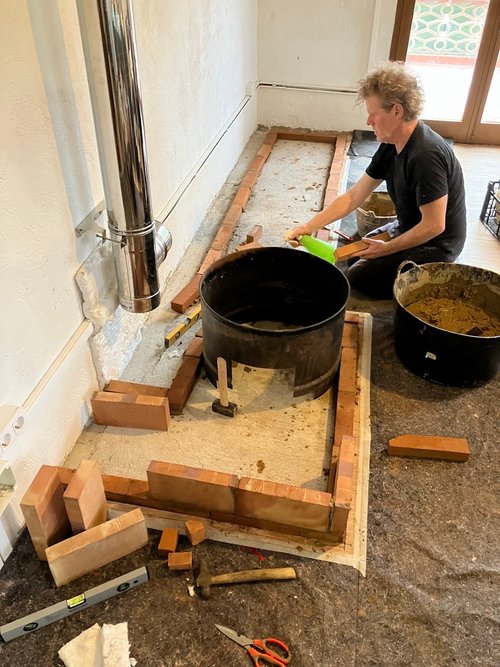
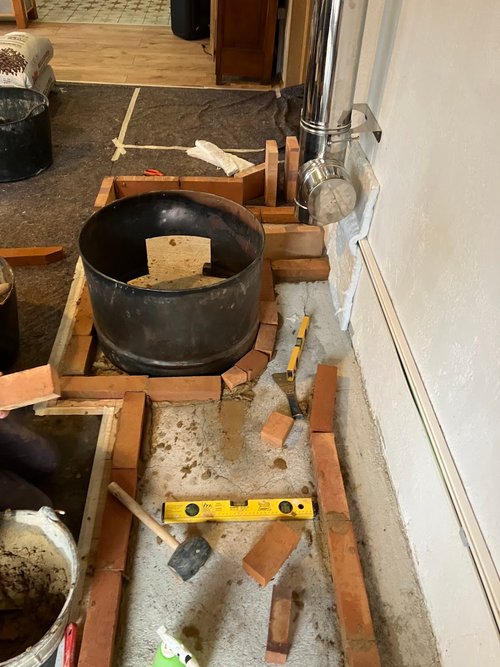
![[Thumbnail for 20241015_125214.jpg]](/t/281004/a/271115/20241015_125214.jpg "Filename: 20241015_125214.jpg
Description:")
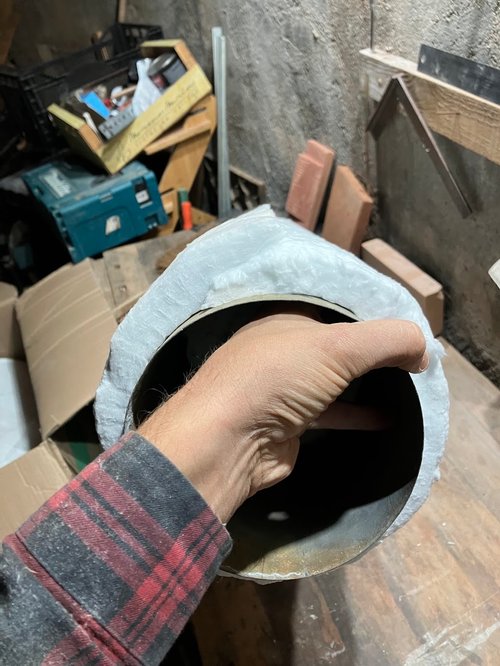
![[Thumbnail for 20241015_125219.jpg]](/t/281004/a/271116/20241015_125219.jpg "Filename: 20241015_125219.jpg
Description:")
For all your Montana Masonry Heater parts (also known as) Rocket Mass heater parts.
Visit me at
dragontechrmh.com Once you go brick you will never go back!
6
Proudly presenting RocketMassHeaters.com
A good starting point to all RMH research
How Permies.com works
8
For all your Montana Masonry Heater parts (also known as) Rocket Mass heater parts.
Visit me at
dragontechrmh.com Once you go brick you will never go back!
10


Proudly presenting RocketMassHeaters.com
A good starting point to all RMH research
How Permies.com works
10
For all your Montana Masonry Heater parts (also known as) Rocket Mass heater parts.
Visit me at
dragontechrmh.com Once you go brick you will never go back!
7
regards, Peter
9
Proudly presenting RocketMassHeaters.com
A good starting point to all RMH research
How Permies.com works
8
![[Thumbnail for 8CB5AF58-A980-4413-BED8-3F53739BB4DF.jpeg]](/t/281004/a/278043/8CB5AF58-A980-4413-BED8-3F53739BB4DF.jpeg "Filename: 8CB5AF58-A980-4413-BED8-3F53739BB4DF.jpeg
Description:")
Proudly presenting RocketMassHeaters.com
A good starting point to all RMH research
How Permies.com works
5
For all your Montana Masonry Heater parts (also known as) Rocket Mass heater parts.
Visit me at
dragontechrmh.com Once you go brick you will never go back!
12


Proudly presenting RocketMassHeaters.com
A good starting point to all RMH research
How Permies.com works
6
For all your Montana Masonry Heater parts (also known as) Rocket Mass heater parts.
Visit me at
dragontechrmh.com Once you go brick you will never go back!


 6
6
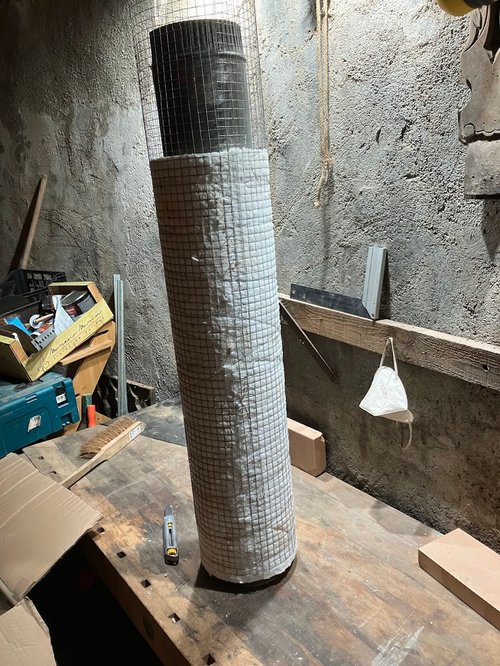
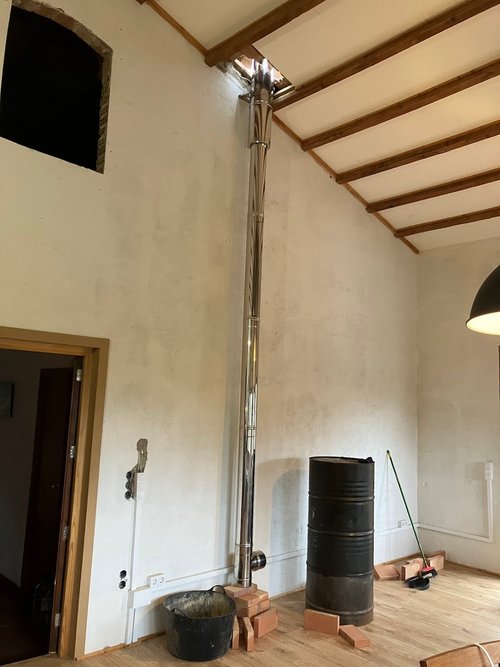
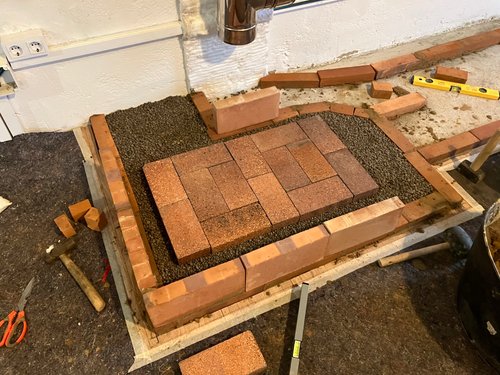
Benjamin Dinkel wrote:As of yesterday the first Rocket Mass Heater designed and built by me is functional!
I’m very pleased with it. Jumped right to life despite being cold and wet.
The finishing plaster will be installed today and tomorrow.
I’ll update this thread with a documentation of the building process once I’m home and with a working PC.
Become extra-civilized!
11
 )
)
Proudly presenting RocketMassHeaters.com
A good starting point to all RMH research
How Permies.com works
8
Proudly presenting RocketMassHeaters.com
A good starting point to all RMH research
How Permies.com works
5
Become extra-civilized!
7
Proudly presenting RocketMassHeaters.com
A good starting point to all RMH research
How Permies.com works
9
Coydon Wallham wrote:
Is the bypass not connected yet?
Proudly presenting RocketMassHeaters.com
A good starting point to all RMH research
How Permies.com works

|
It is difficult to free fools from the chains they revere - Voltair
hands on gardening and natural building
https://wheaton-labs.com/bootcamp
|